Overview
Database Connections allow the integration of external systems and the utilization of new data. Timeouts are used alongside databases to prevent a requested operation from taking an entire database's bandwidth with one large query. If a query takes longer than the input amount of time allowed in the timeout, the operation is cut off, and an error is thrown. Timeouts can be configured on both the connection and step levels. This article will discuss how to create a Database Connection and how to use the Run Query step.
Creating a Database Connection
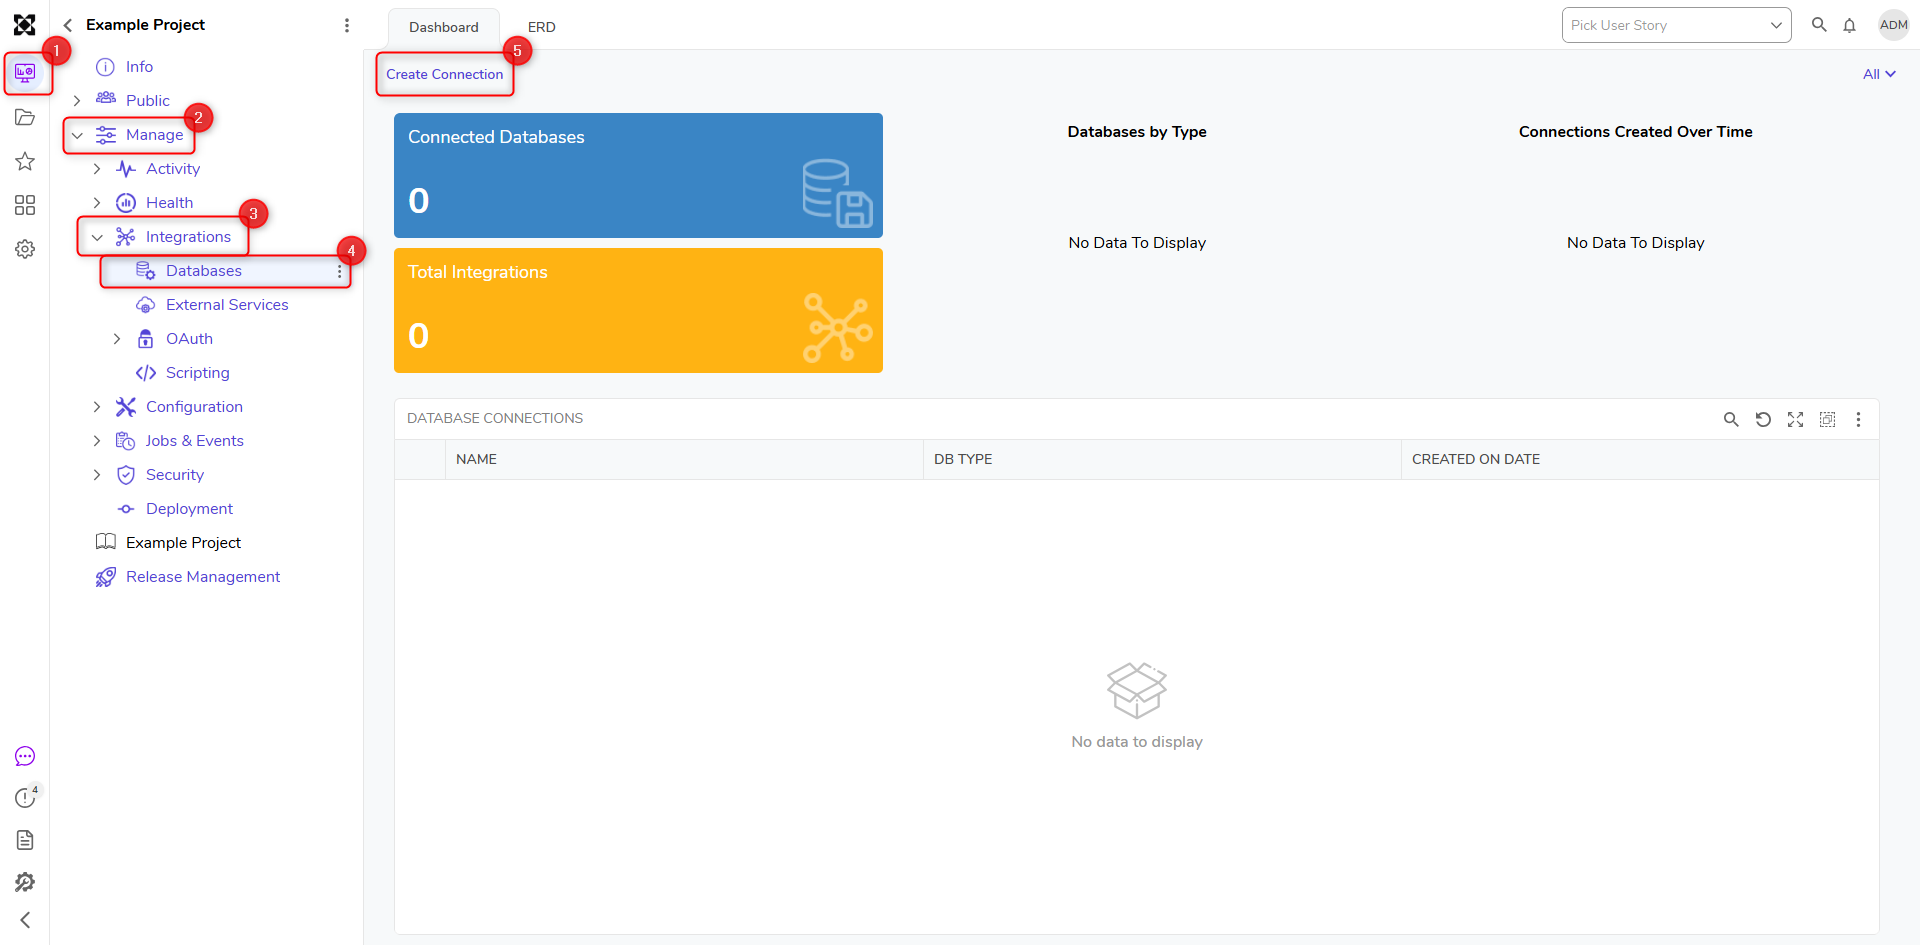
- Navigate to a Designer Folder and select Manage > Integrations > Databases > Create Connection.
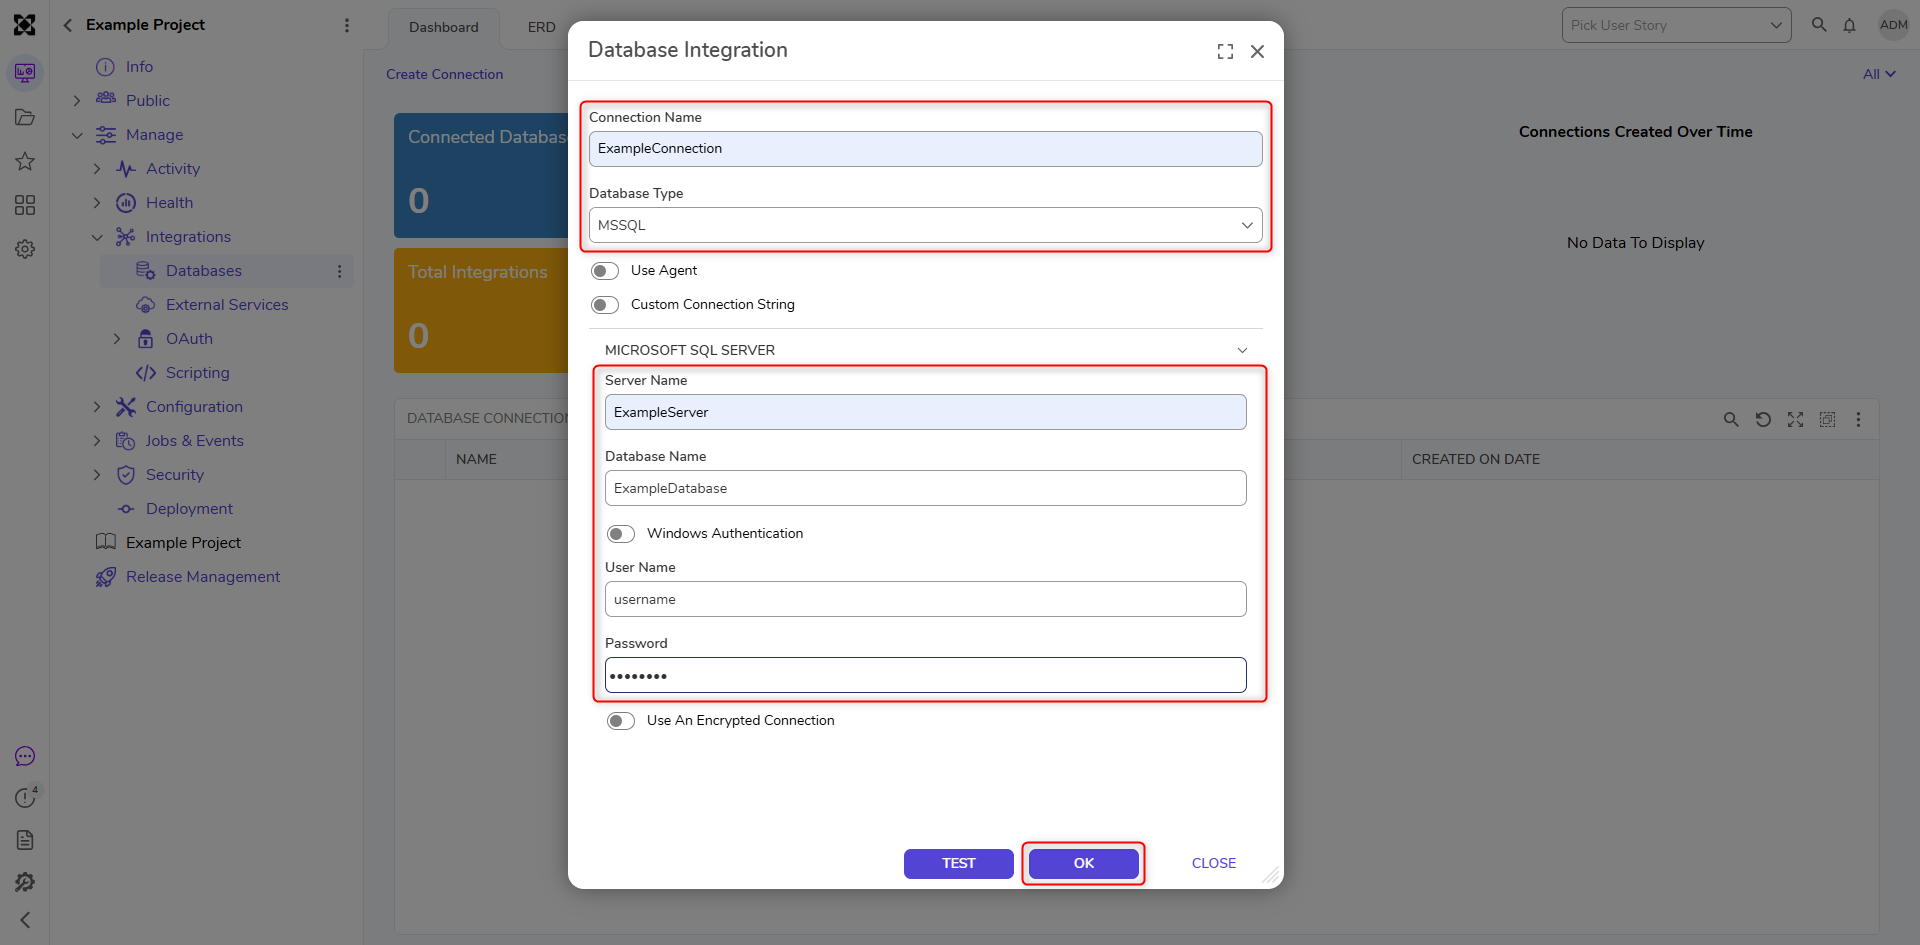
- Give the newly created Connection a Name.
- Provide the Database Type, Server Name, and Database Name.
- Uncheck the Windows Authentication box and enter the User Name and Password.
- Once finished, select TEST, then click OK.
 If the Test fails, double-check the information that was entered.
Setting Up the Query Integration
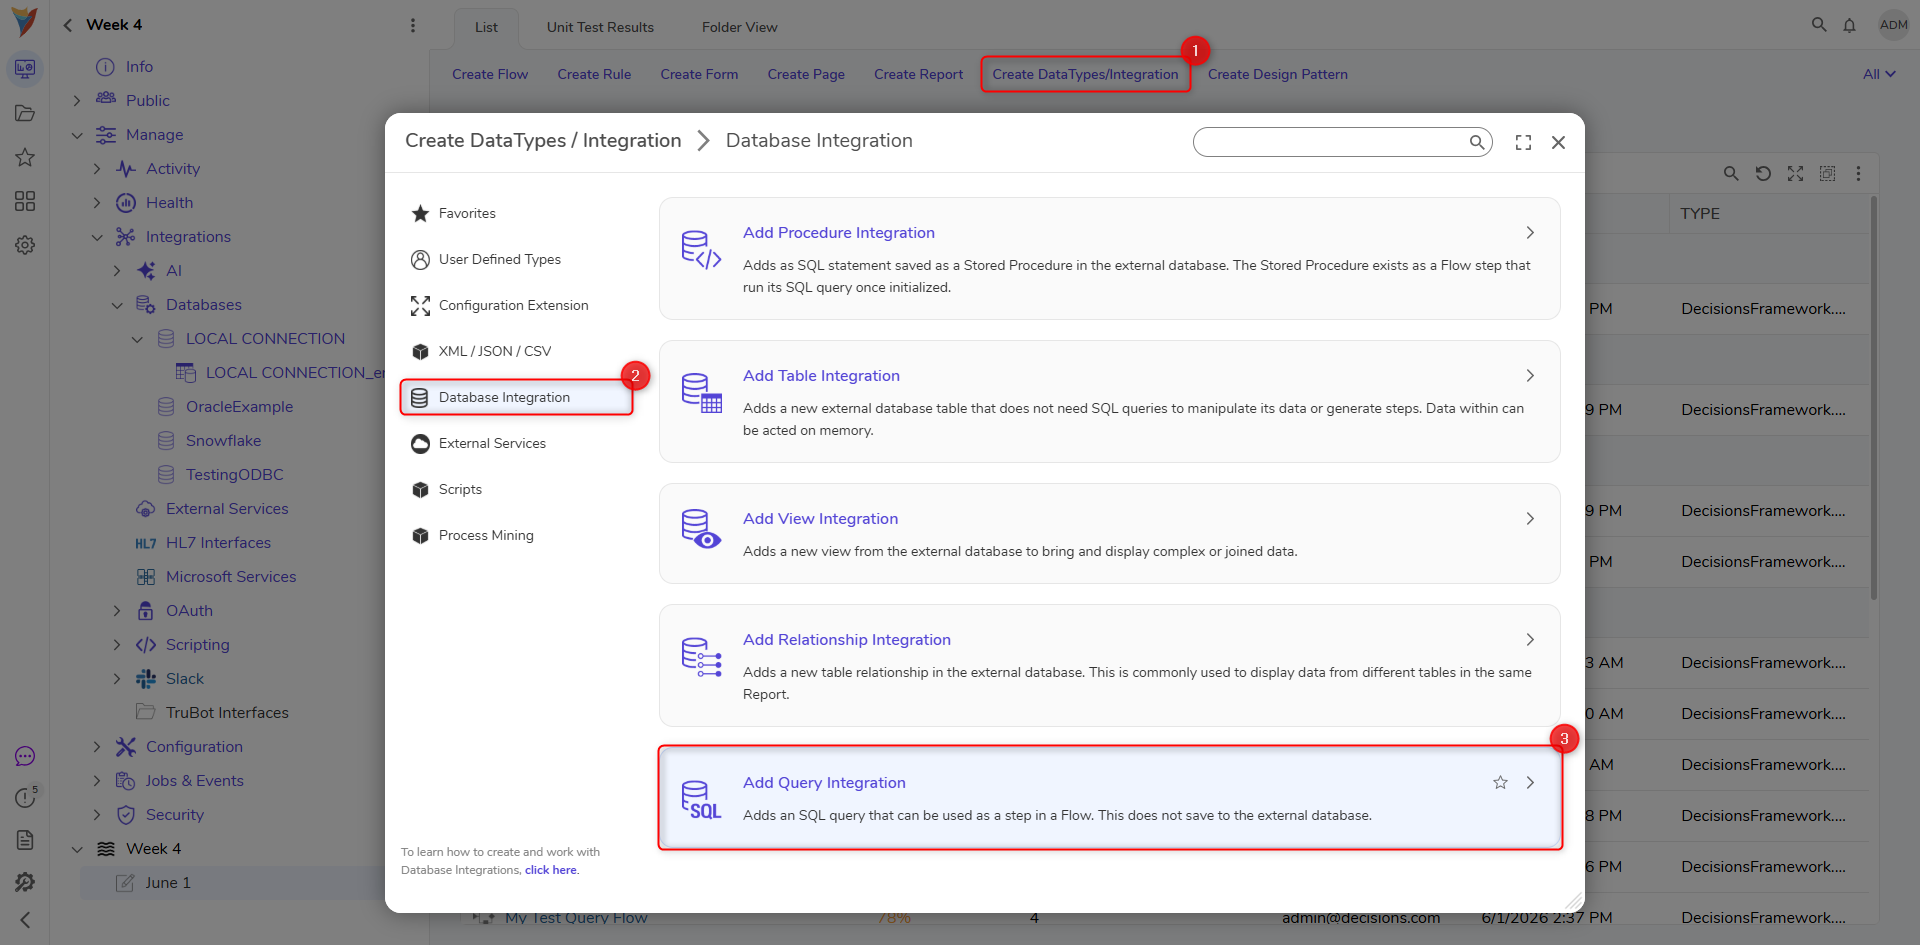
- Navigate to a Designer Folder and select CREATE DATATYPES/INTEGRATION.
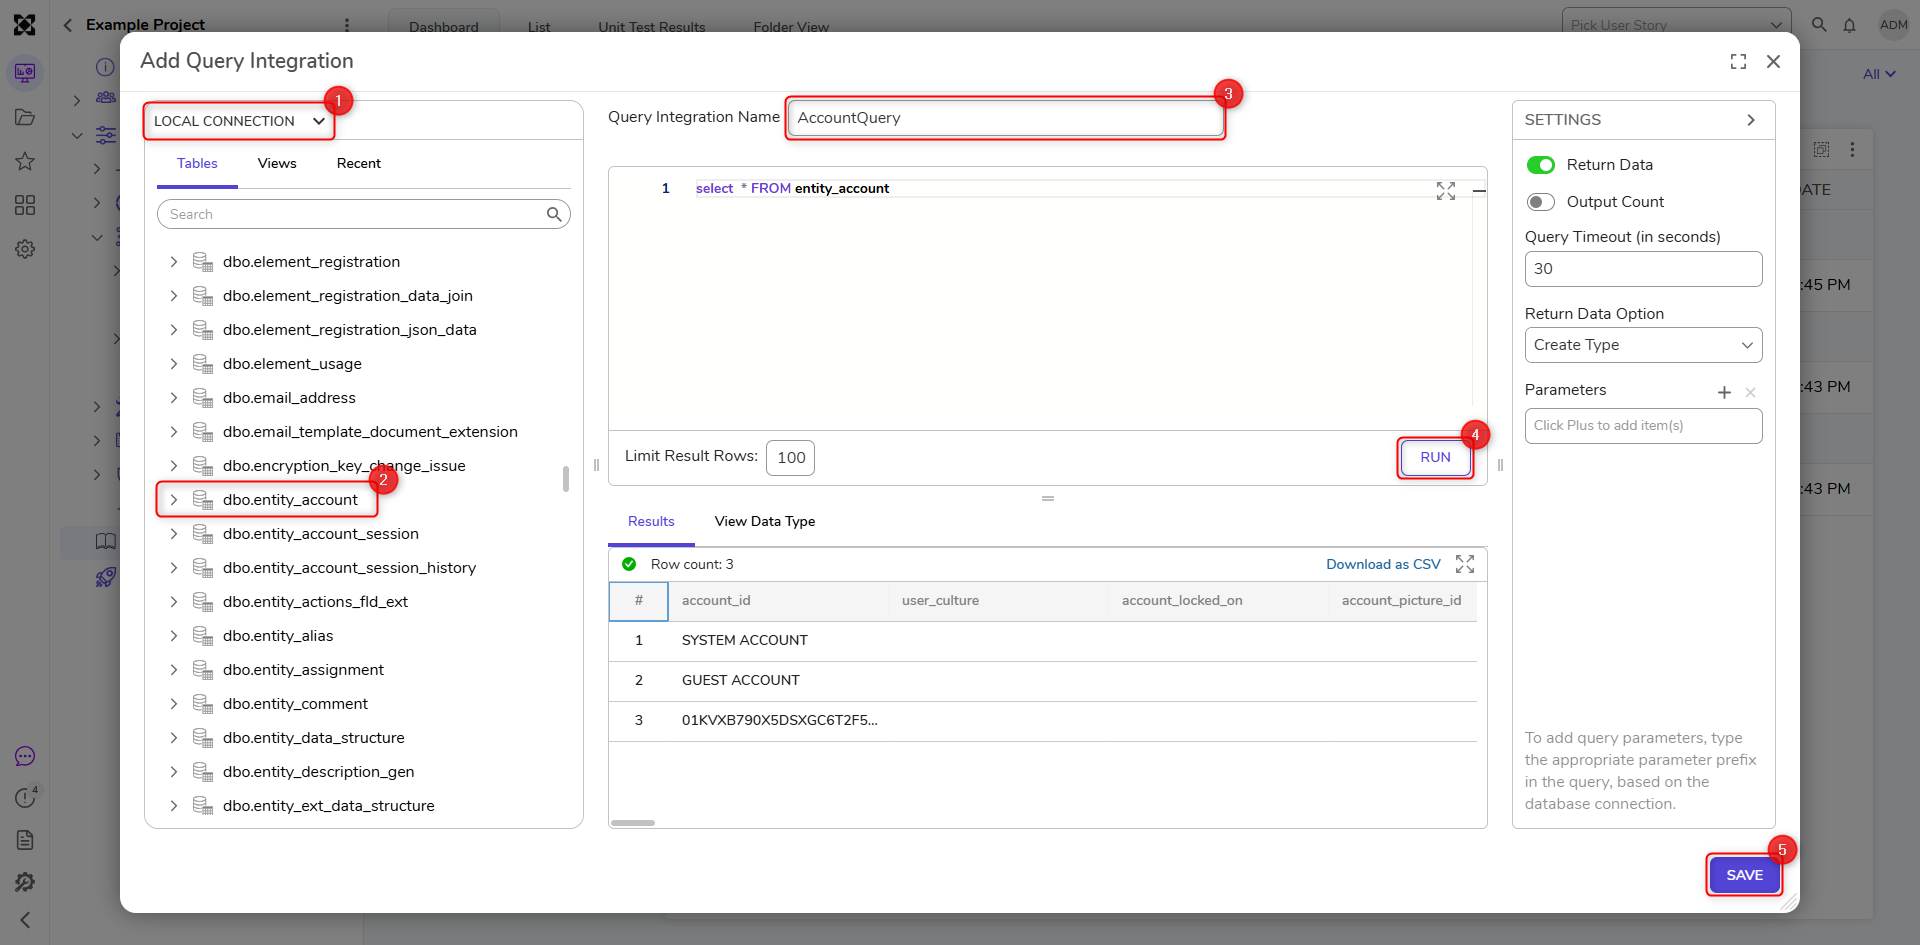
- Click on Database Integration, and select Add Query Integration.
- On the next page, click Select Connection. An existing connection must be selected.
- Select the table to query from.
- Provide a Name for the new query and a Query.
- Select Run before clicking Save to finish creating the Integration.
Using the Run Query Step
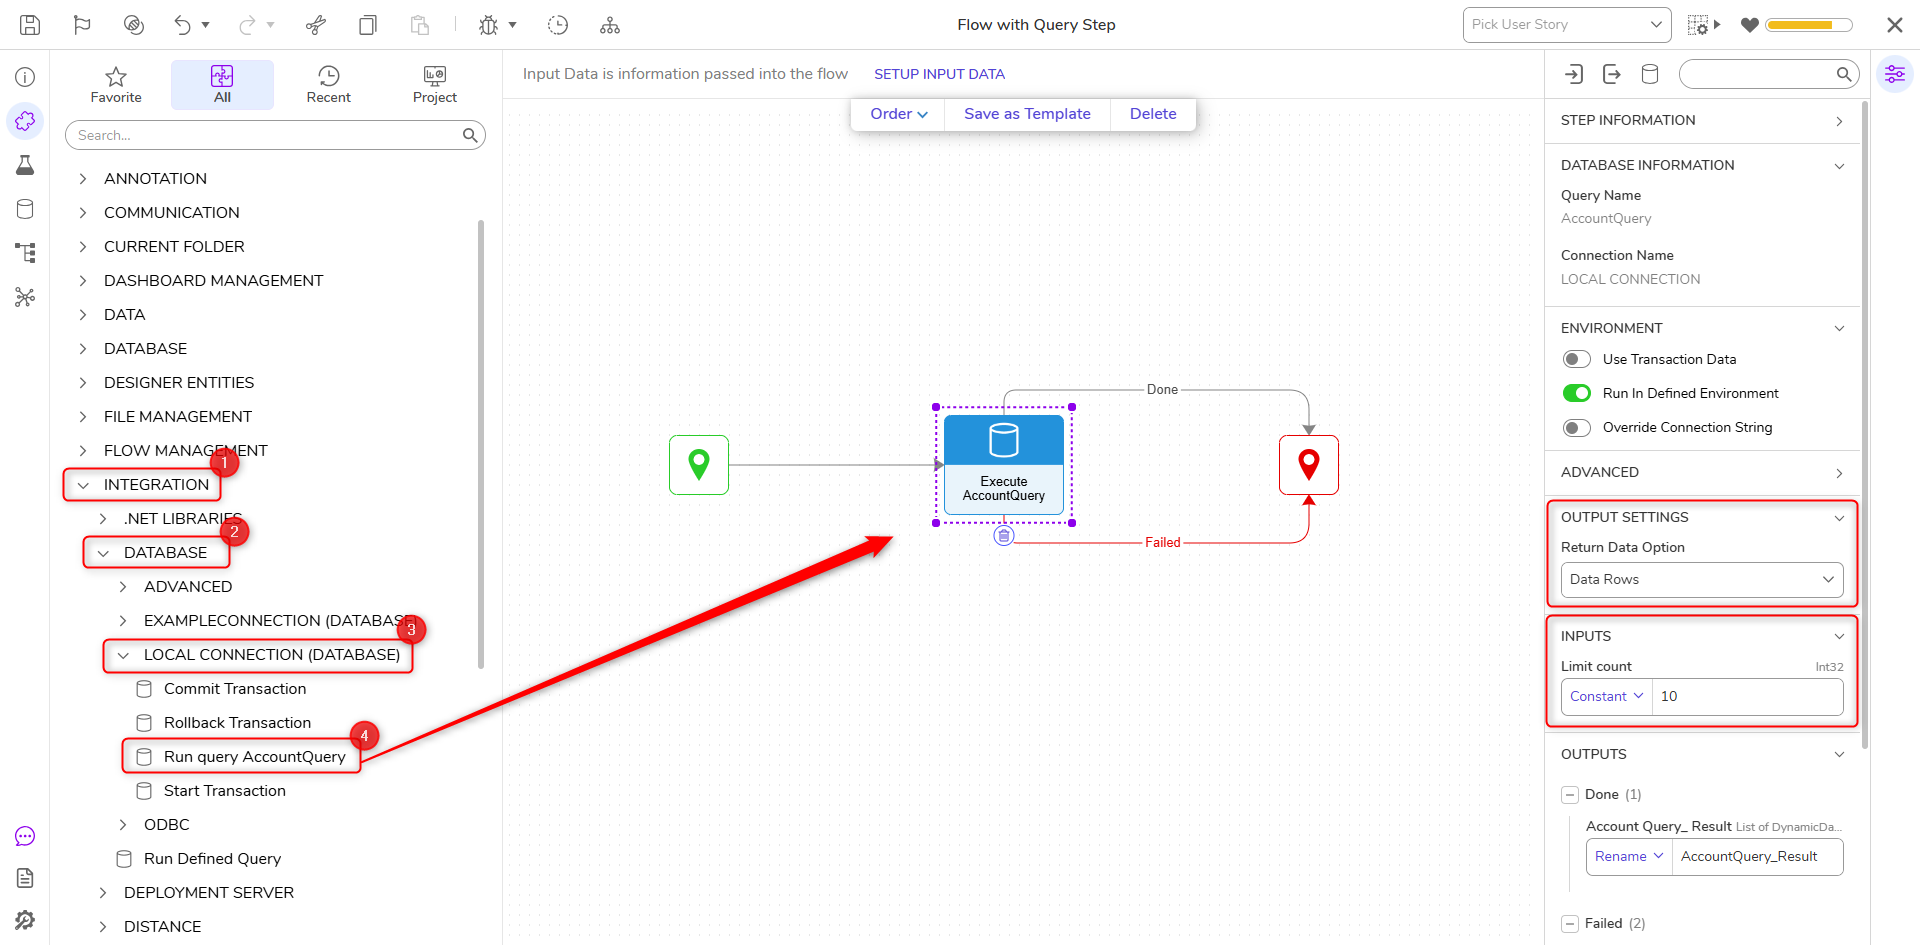
- Create a Flow. In the Flow Designer, navigate to Integration > Database > [the selected database for the Query].
- Click and drag the Run Query step into the Flow. Connect the paths to the Start Step and End Step.
- Select the Run Query step and select the Specify Timeout checkbox in the properties panel under ADVANCED.
This allows a user to specify a different timeout when using the Run Query step to override the timeout used when creating the Database Integration. If the Specify Timeout option is not used or left blank, then the timeout specified in the Connection will be used instead. Query Timeout is in seconds. - Input a desired timeout for the step.
- Under Output Settings in the Run Query step's properties panel, select Data Rows from the Return Data Option drop-down.
- Then, under Inputs, set the Limit Count mapping type to Constant and input "10".
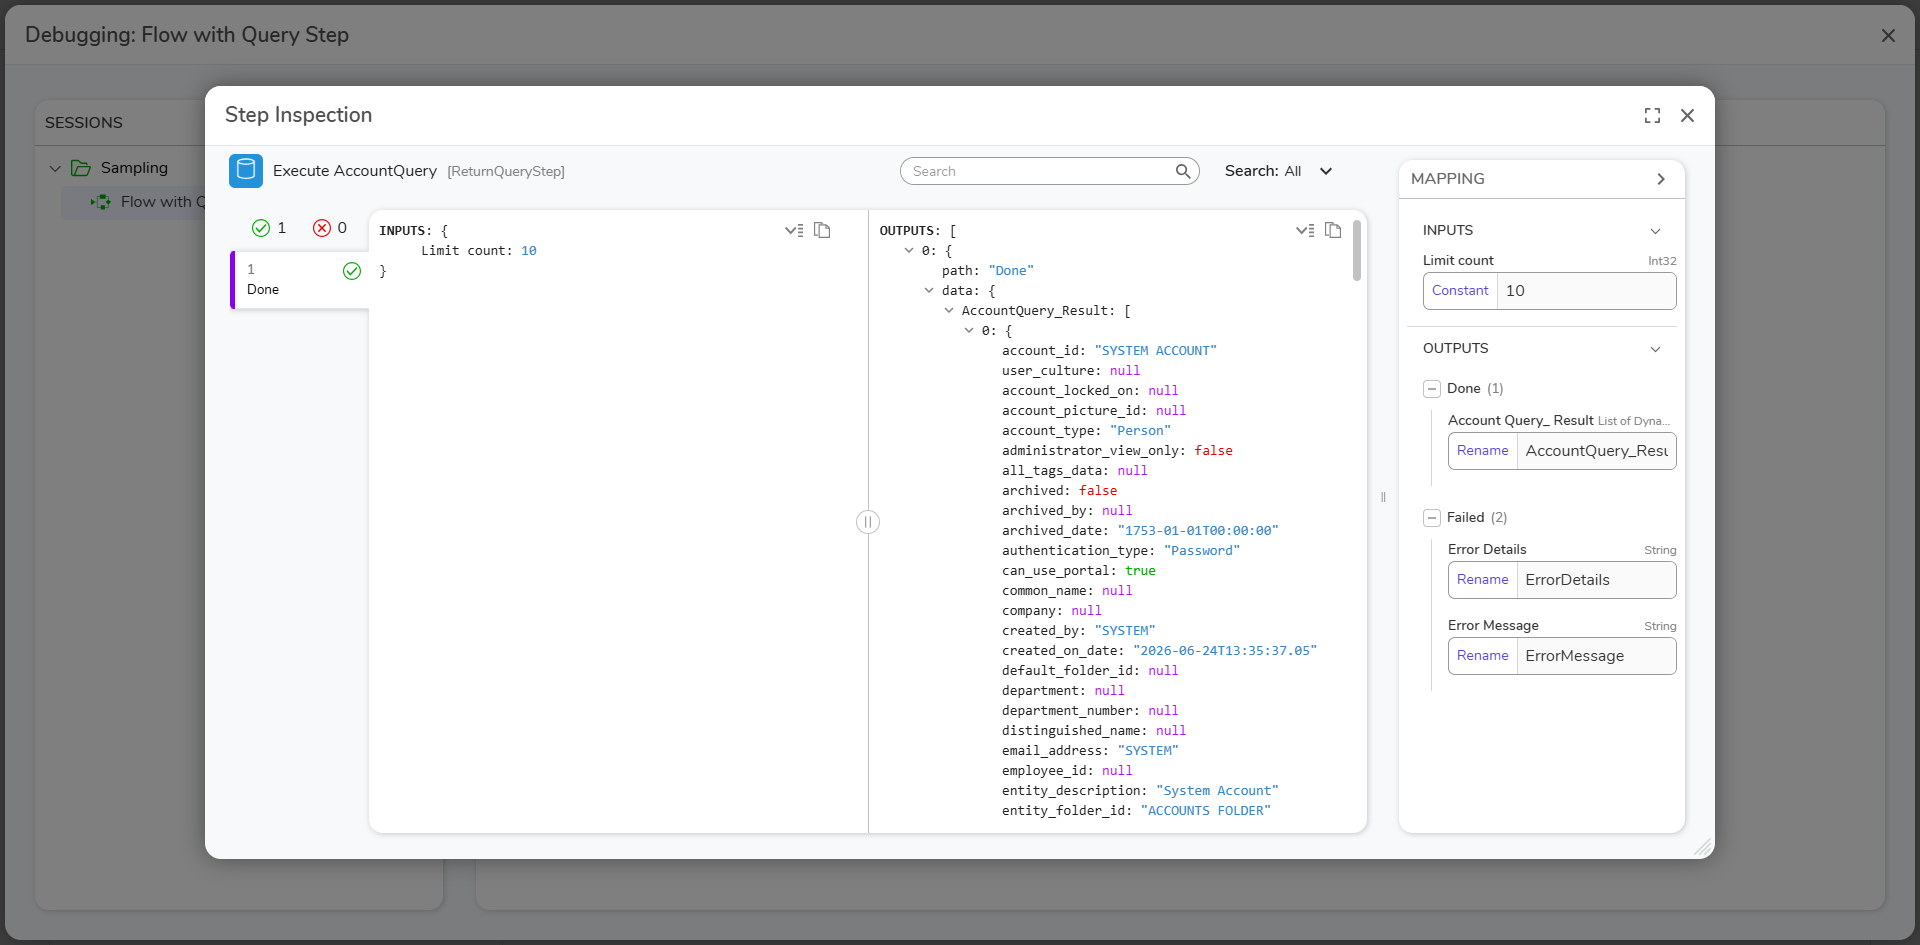
- Select Debug from the Top Action Bar to debug the Flow.
- After the Flow has run, select the Run Query step to view the Input/Output Data.