Overview
A Hierarchical view organizes data or information in a tree-like structure that allows data to be displayed in a collapsible and expandable manner, where each element has a defined relationship with other elements. It represents a parent-child relationship, where each parent can have one or more child elements, and each child has a single parent.
How does the Hierarchy view work?
During design time, the Hierarchy View in the Report allows the user to configure the Parent and Child fields. The parent field represents the column name used to group the data and create the hierarchical structure, while the child field represents the column name that contains the data to be nested under the parent field.
If two or more rows have the same value in the parent field, they get nested as a single parent. Thus, all the rows with the same parent field value are treated as the child of the parent.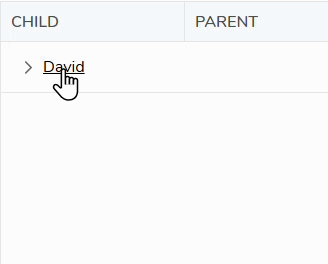
If a child field value matches the parent field values, it will create a new parent node with the same name as the child field value and add it as a child of the original parent node. This process can continue recursively, creating a hierarchical structure with multiple levels.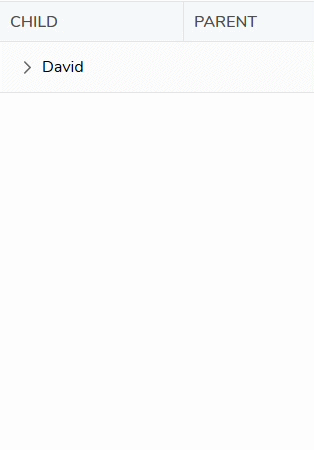
Differences in Standard Table and Hierarchy Table
A standard database table stores data in a tabular format with rows and columns. Each row represents a separate record or entity, and each column represents a specific attribute or field of that record.
On the other hand, a hierarchical table organizes data in a tree-like structure. Each record in a hierarchical table has a hierarchical relationship with other records, where each record has one parent and can have multiple child records. This reflects a strict parent-child relationship.
Example
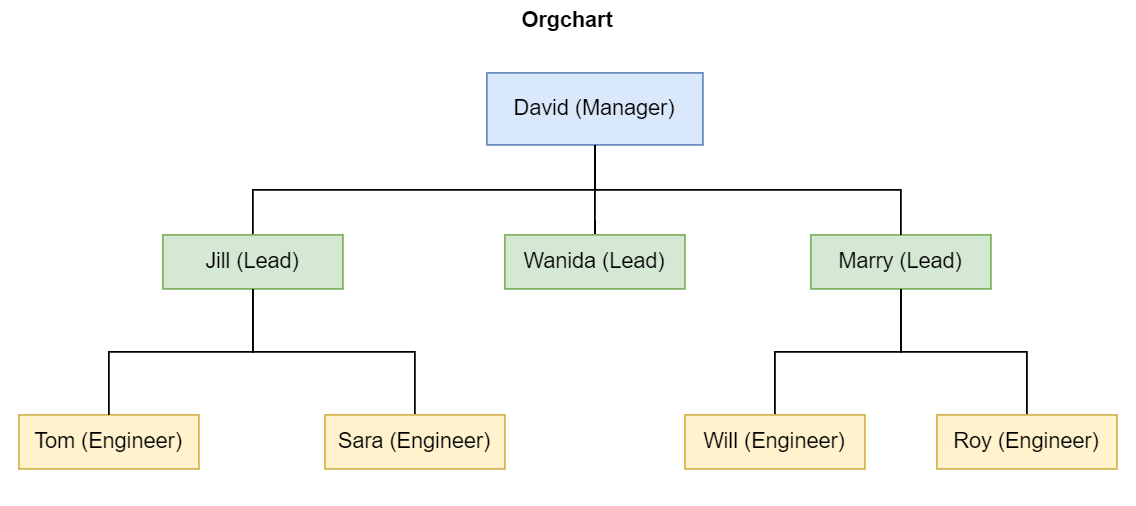
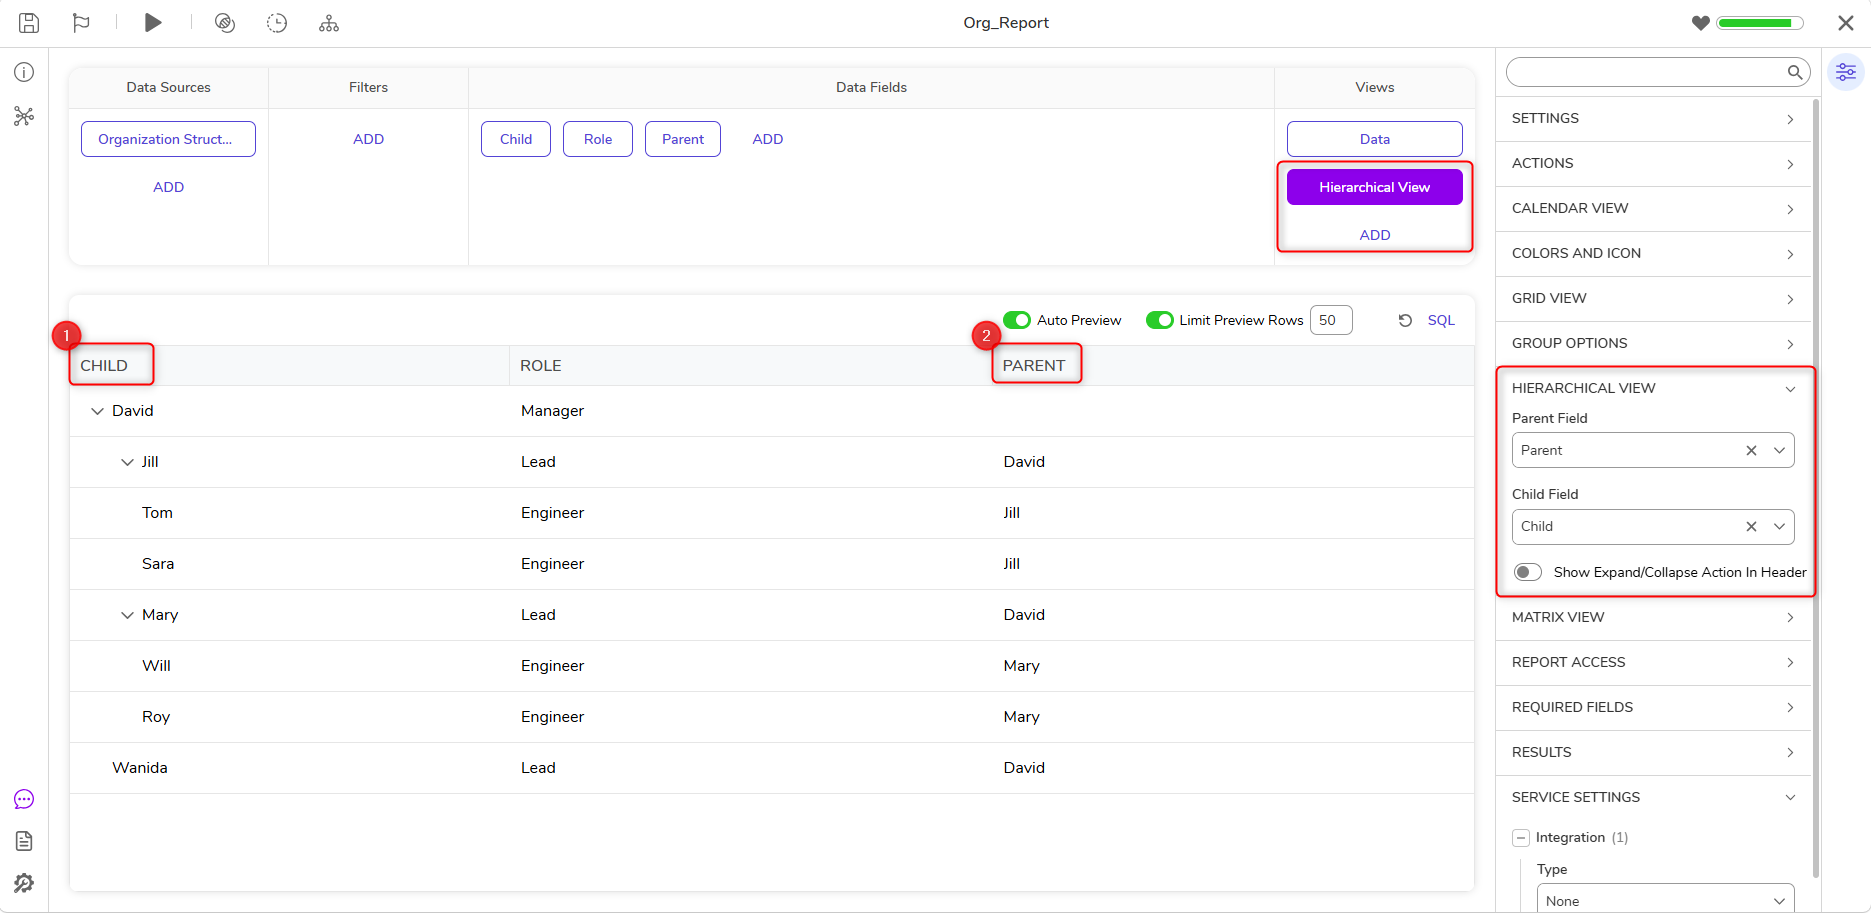
The provided example showcases an organizational chart that will be utilized to create a hierarchical representation based on the roles existing within the organization.
 The following table is used for generating a hierarchical view.
| Child | Role | Parent |
| David | Manager | |
| Jill | Lead | David |
| Tom | Engineer | Jill |
| Sara | Engineer | Jill |
| Mary | Lead | David |
| Will | Engineer | Mary |
| Roy | Engineer | Mary |
| Wanida | Lead | David |
- Generate an Entity Data Structure for the table mentioned above. For more information, refer to Entity Structure CRUD Actions. (Note: Users can use any User Defined Data Structures as per convenience)
- Create a Report and add the newly created Entity Data Source and Data Fields.
- In the Views Column, select 'Add' and choose Hierarchical View.
- When the Hierarchical View is added, navigate to the Properties panel and expand the Hierarchical View section. For the Parent Field, choose Parent in the drop-down menu. For Child Field, select Child.
- Ensure that the Child tab is on the extreme left of the table.
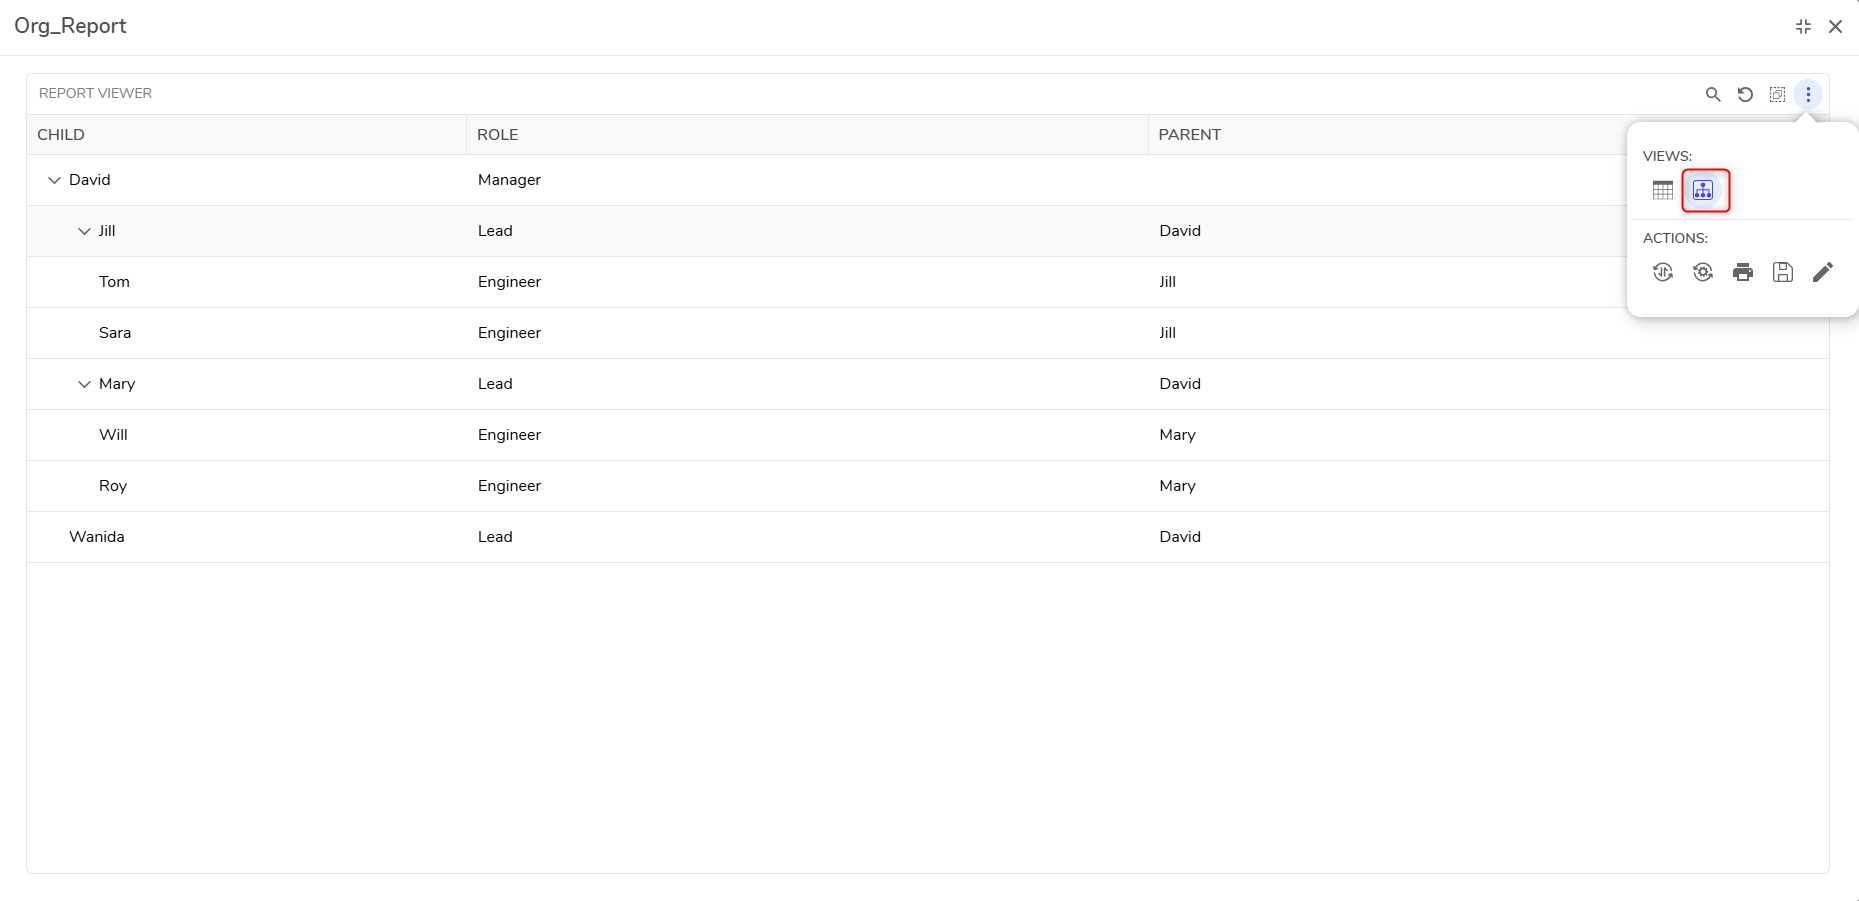
- In the top action panel, select Run Report.
- In the Report, select the Settings icon; under Views, choose the Hierarchical View icon.
- The standard Report gets converted into a hierarchical view. Notice the ability to expand some data rows to display the nested entities.