Processing Lists of Items with the Branch ForEach Step
- 11 Jan 2023
- 2 Minutes to read
- Print
- DarkLight
Processing Lists of Items with the Branch ForEach Step
- Updated on 11 Jan 2023
- 2 Minutes to read
- Print
- DarkLight
Article Summary
Share feedback
Thanks for sharing your feedback!
The Branch ForEach step iterates through every item in an input Collection and passes them to one or more steps. This step is similar to the standard ForEach step, with two key differences:
- It branches the Flow into multiple paths
- The Flows following a Branching ForEach step do not need to complete the loop by forming a return path to the Branching ForEach step. The control of the Flow returns to the Branching ForEach step at the Flow's end automatically.
This can be useful for Parallel Approval processes that involve the iteration and Assignment of multiple pieces of data, i.e., displaying individual retrieved Account data on a Form. The following document demonstrates how to utilize a Branching ForEach step in for such use cases.
This step is meant to be exclusively used with Assigned Forms and is not meant for Batch Processing.
Example
- From a Designer Project, CREATE a new Flow.
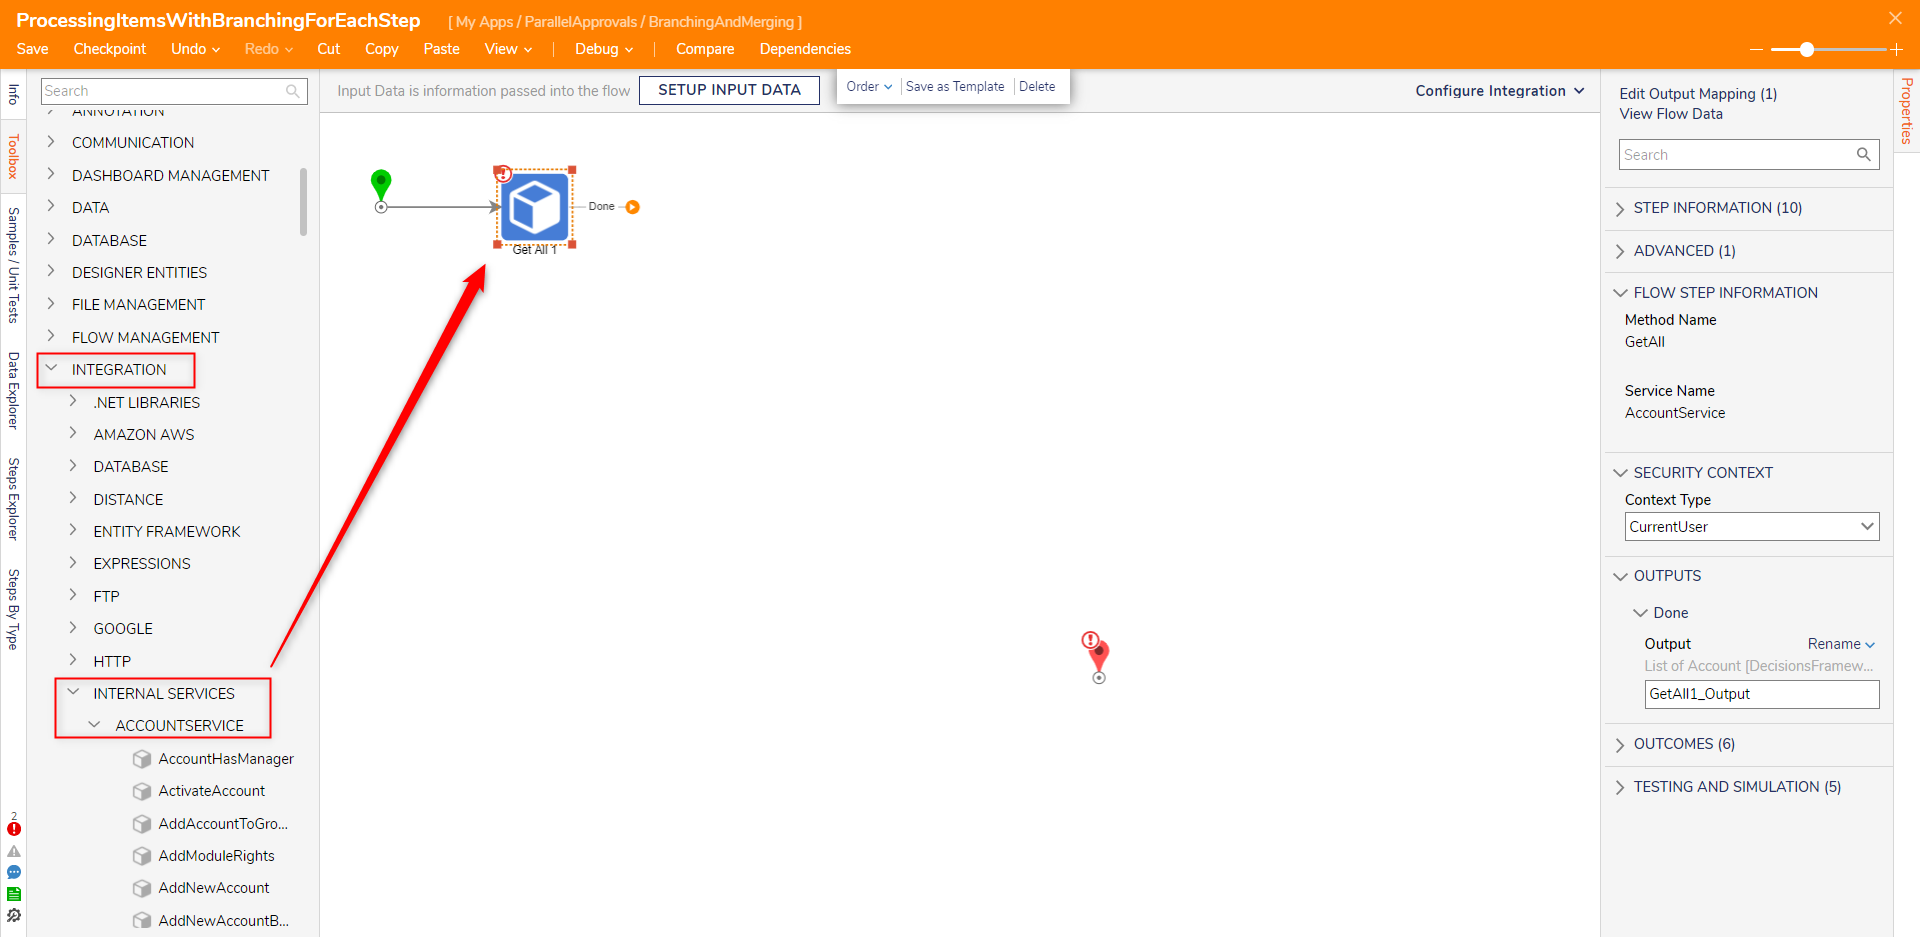
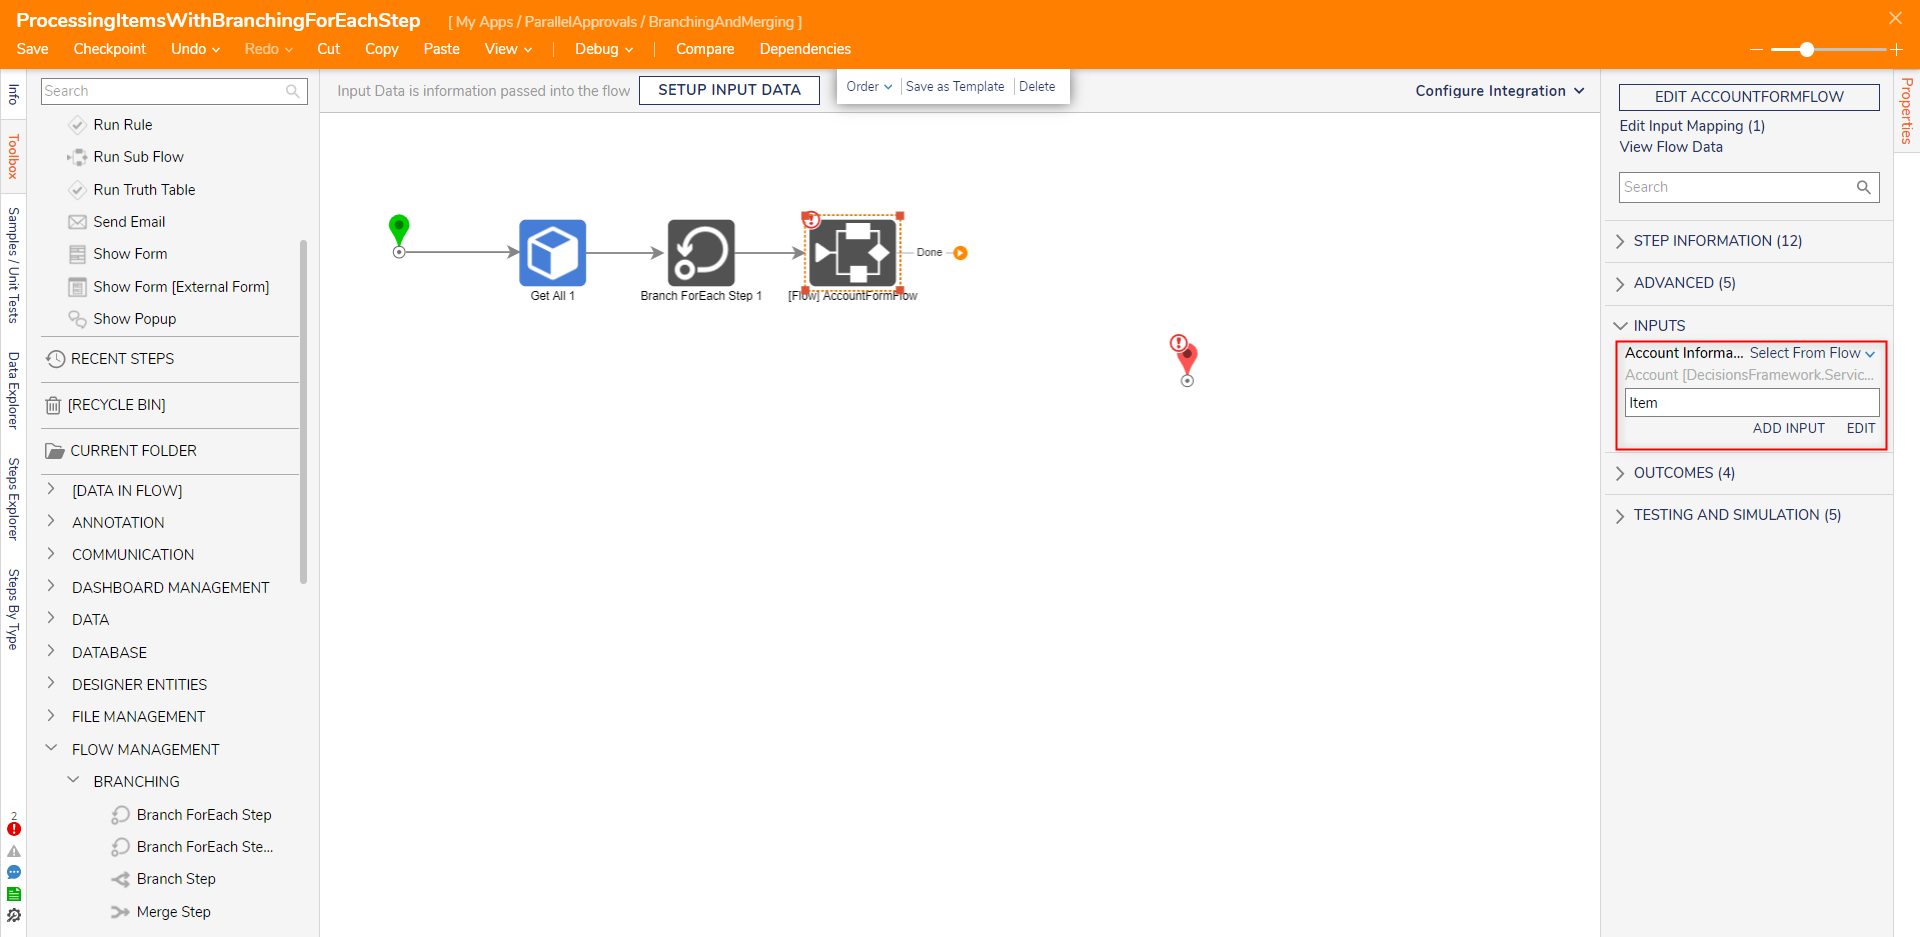
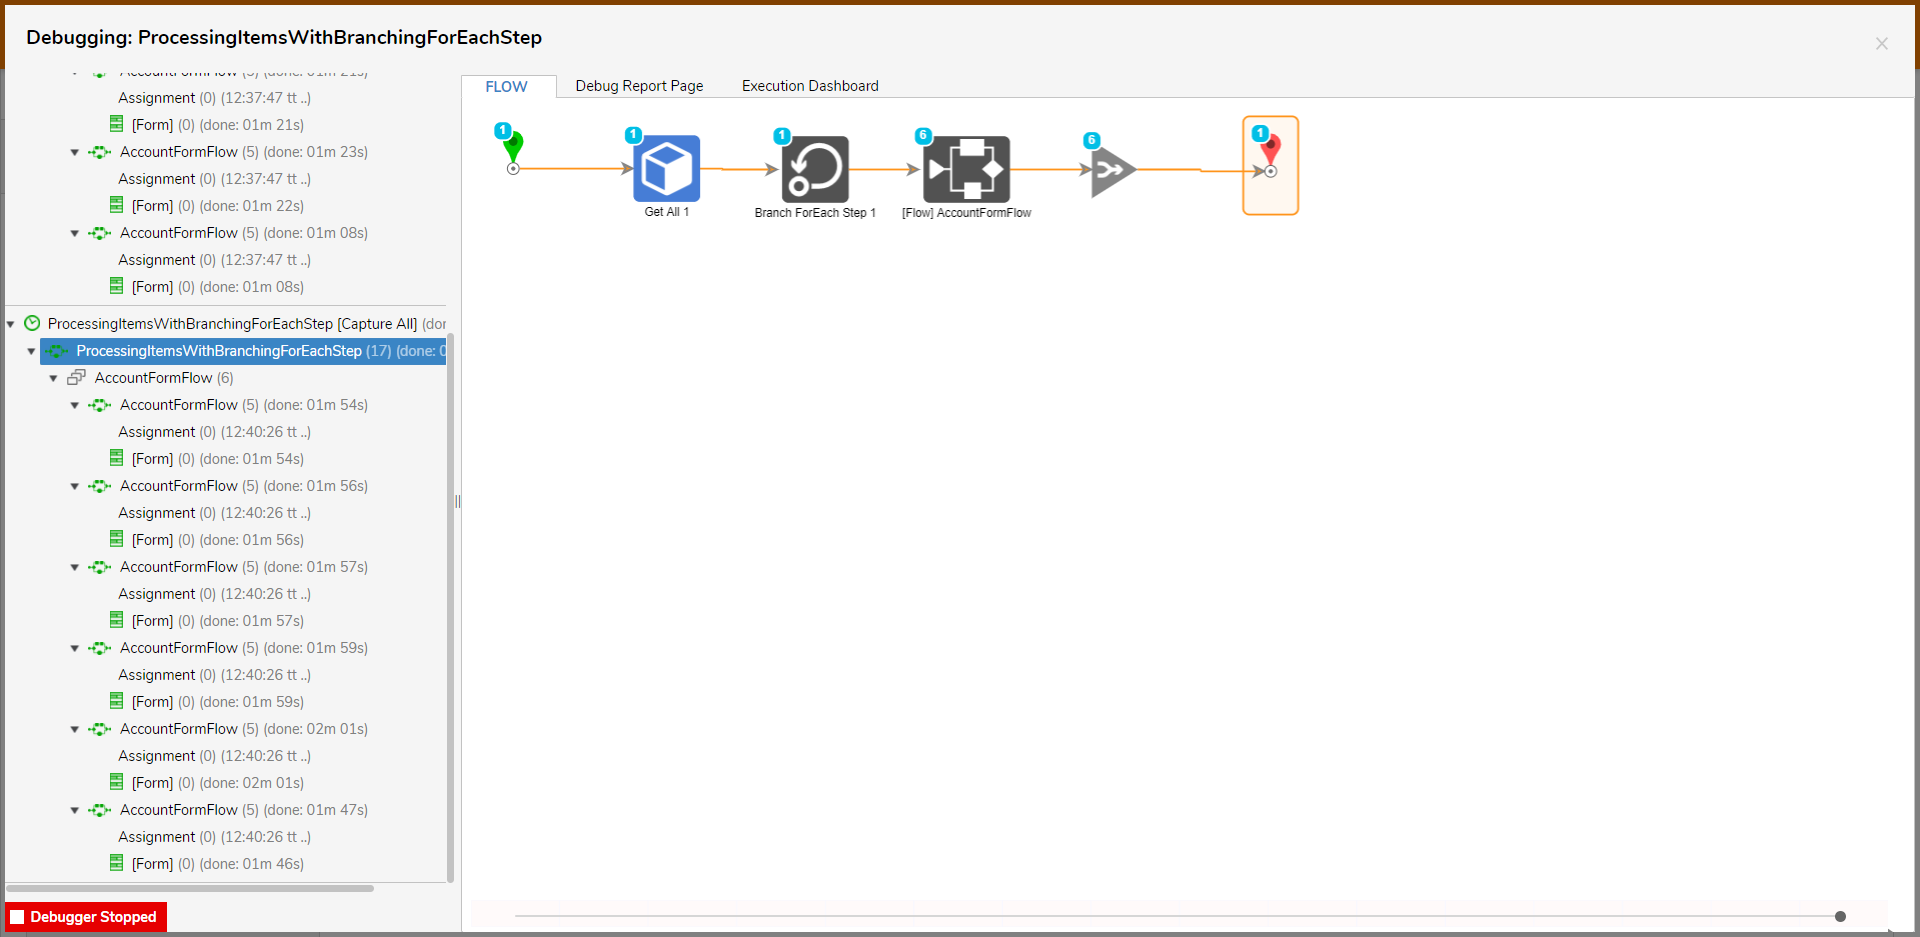
- From the Flow Designer, under Toolbox > INTEGRATION > INTERNAL SERVICES > ACCOUNTSERVICE, attach a Get All step to the Start step.
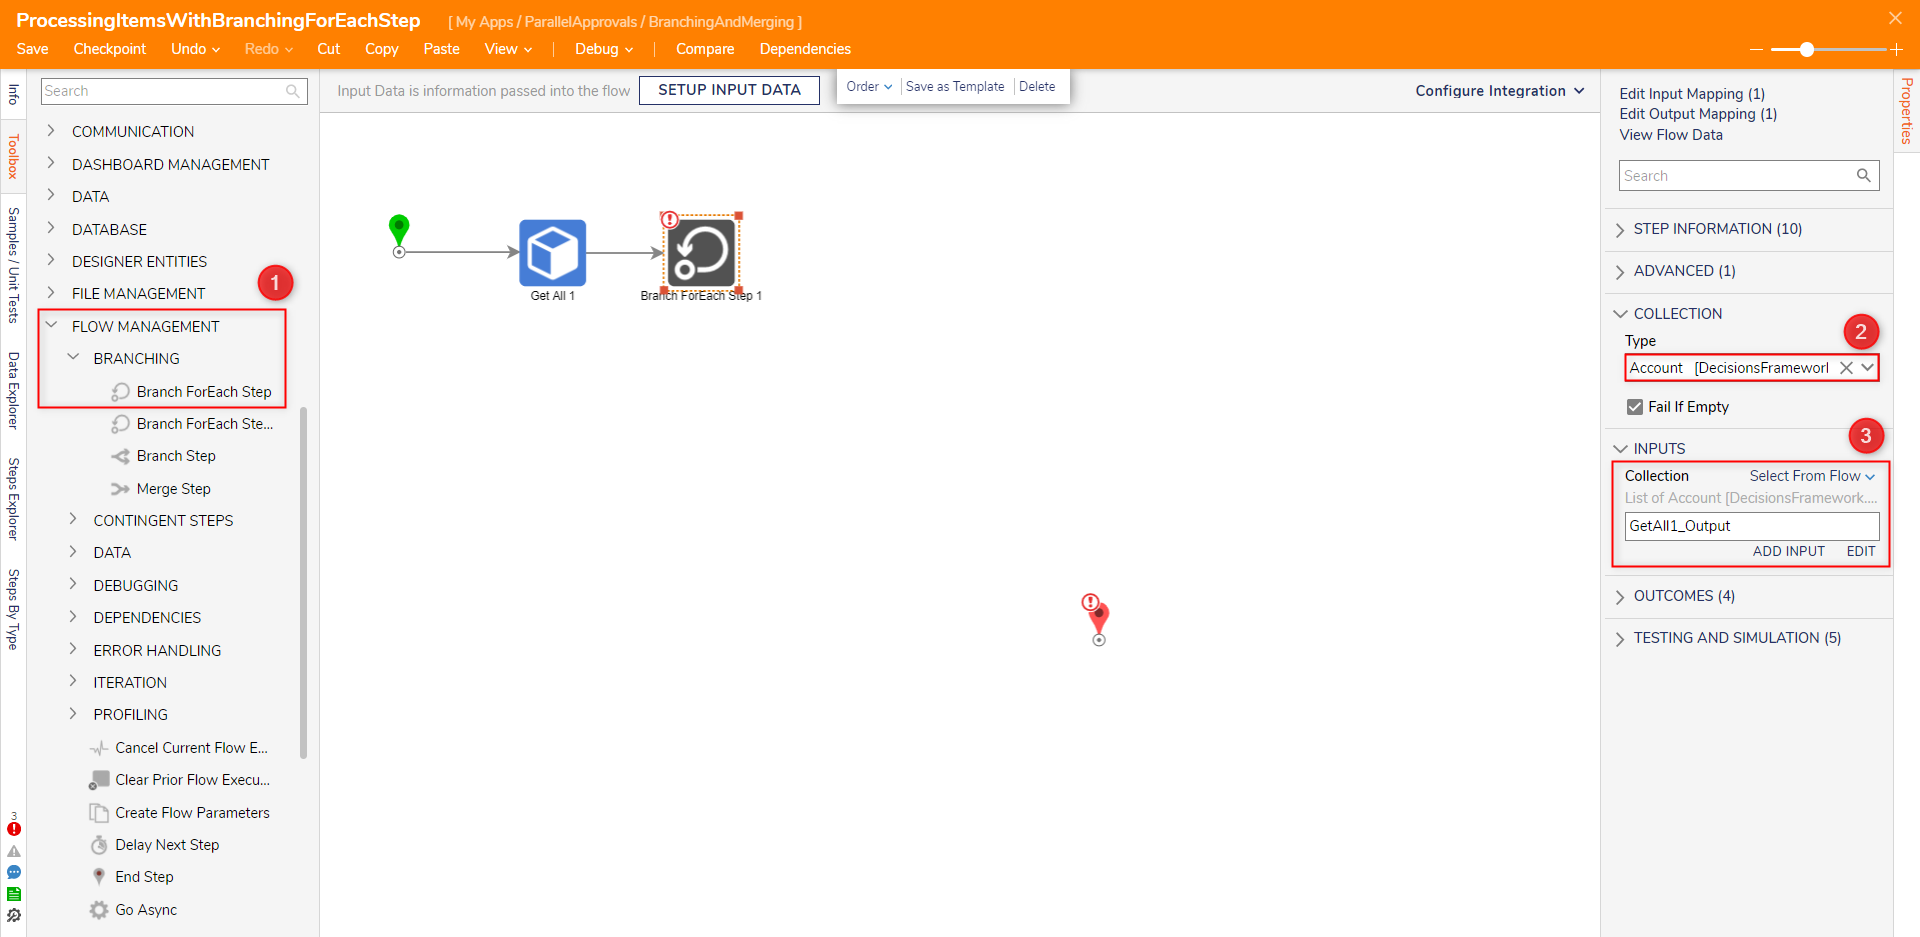
- Under Toolbox > FLOW MANAGEMENT > BRANCHING, attach a Branch ForEach step to the Get All step.
- From the Properties tab of the Branch ForEach step, under COLLECTION > TYPE, select Account. Then, under INPUTS > Collection, map in GetAll1_Output.Unexpected Validation ErrorsUsing a Sub Flow between the Branch ForEach and Merge Step is a required configuration. Failure to utilize one will cause the Flow Designer to throw a Validation Warning. Thus, any Form following a Branch ForEach must not be in-Flow but run via Sub Flow.
- From the FAVORITE STEPS category of the Toolbox tab, attach a Run Sub Flow step after the For Each. Create a new Flow.
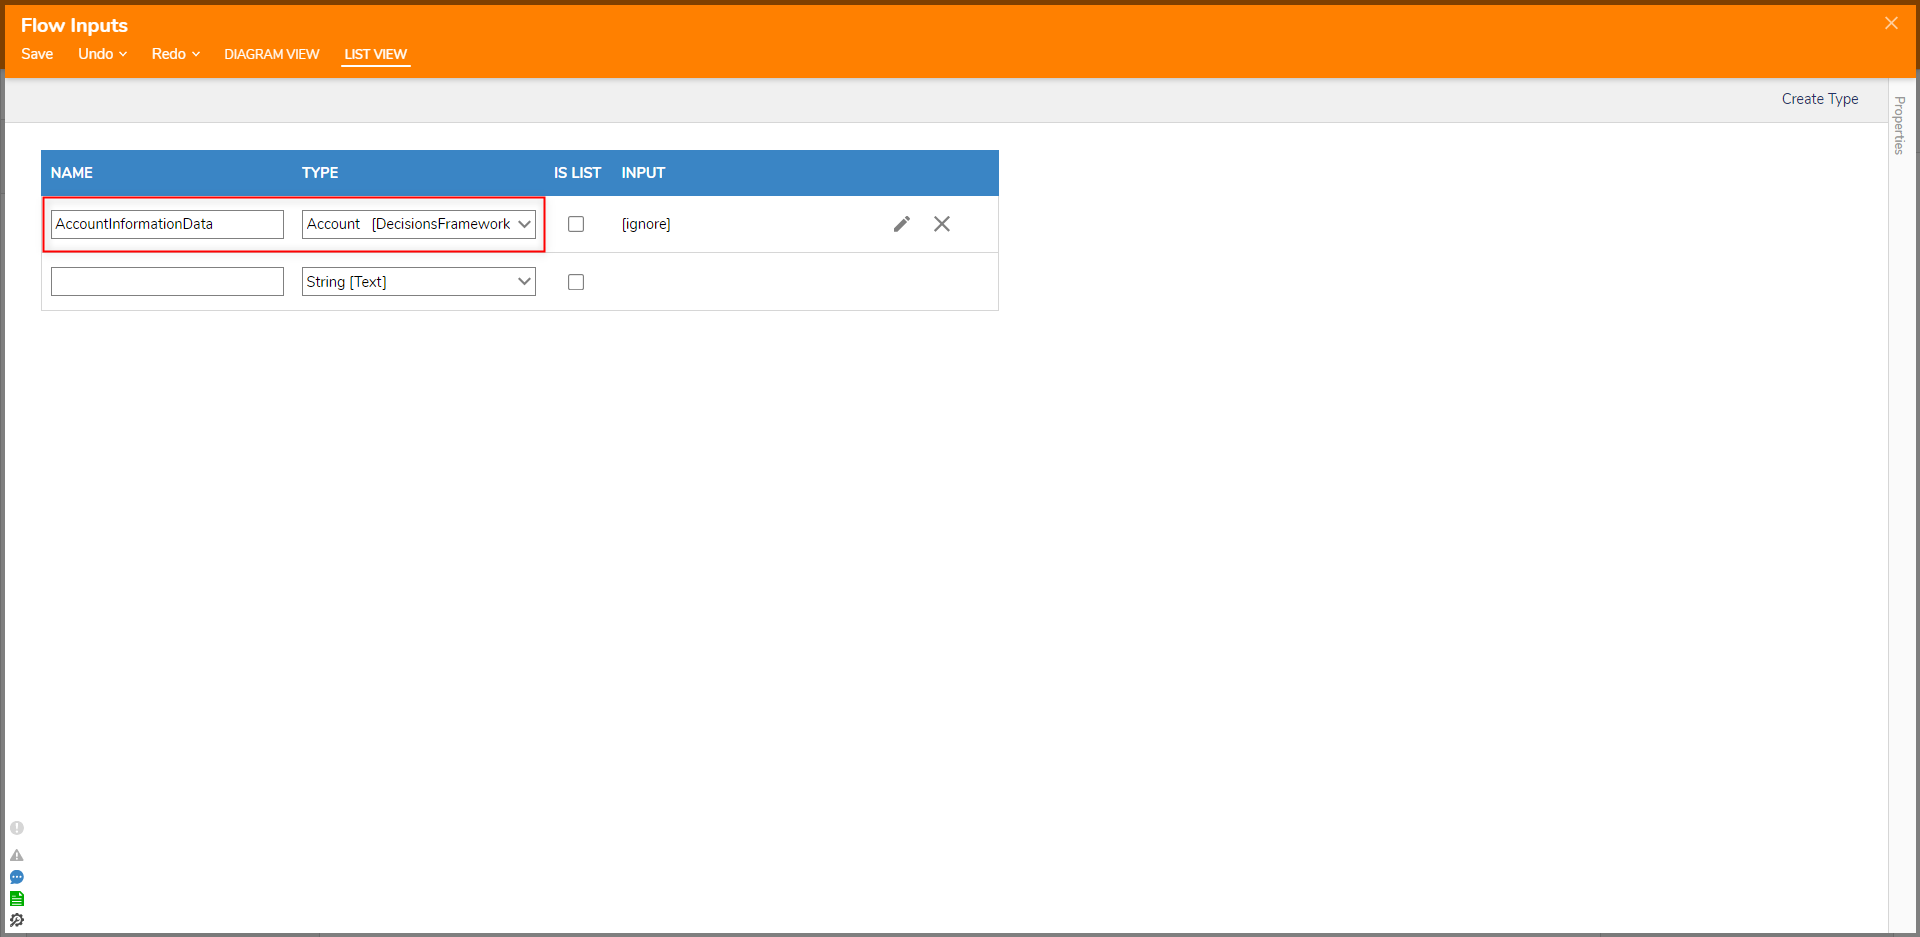
- From the Start step of the new Flow, under FLOW INPUTS > Flow Input Data, select SHOW EDITOR. From the Flow Inputs window, create a new Input by providing a NAME and selecting Account from the TYPE drop-down. Then, Save and close via X to return to the Flow Designer.
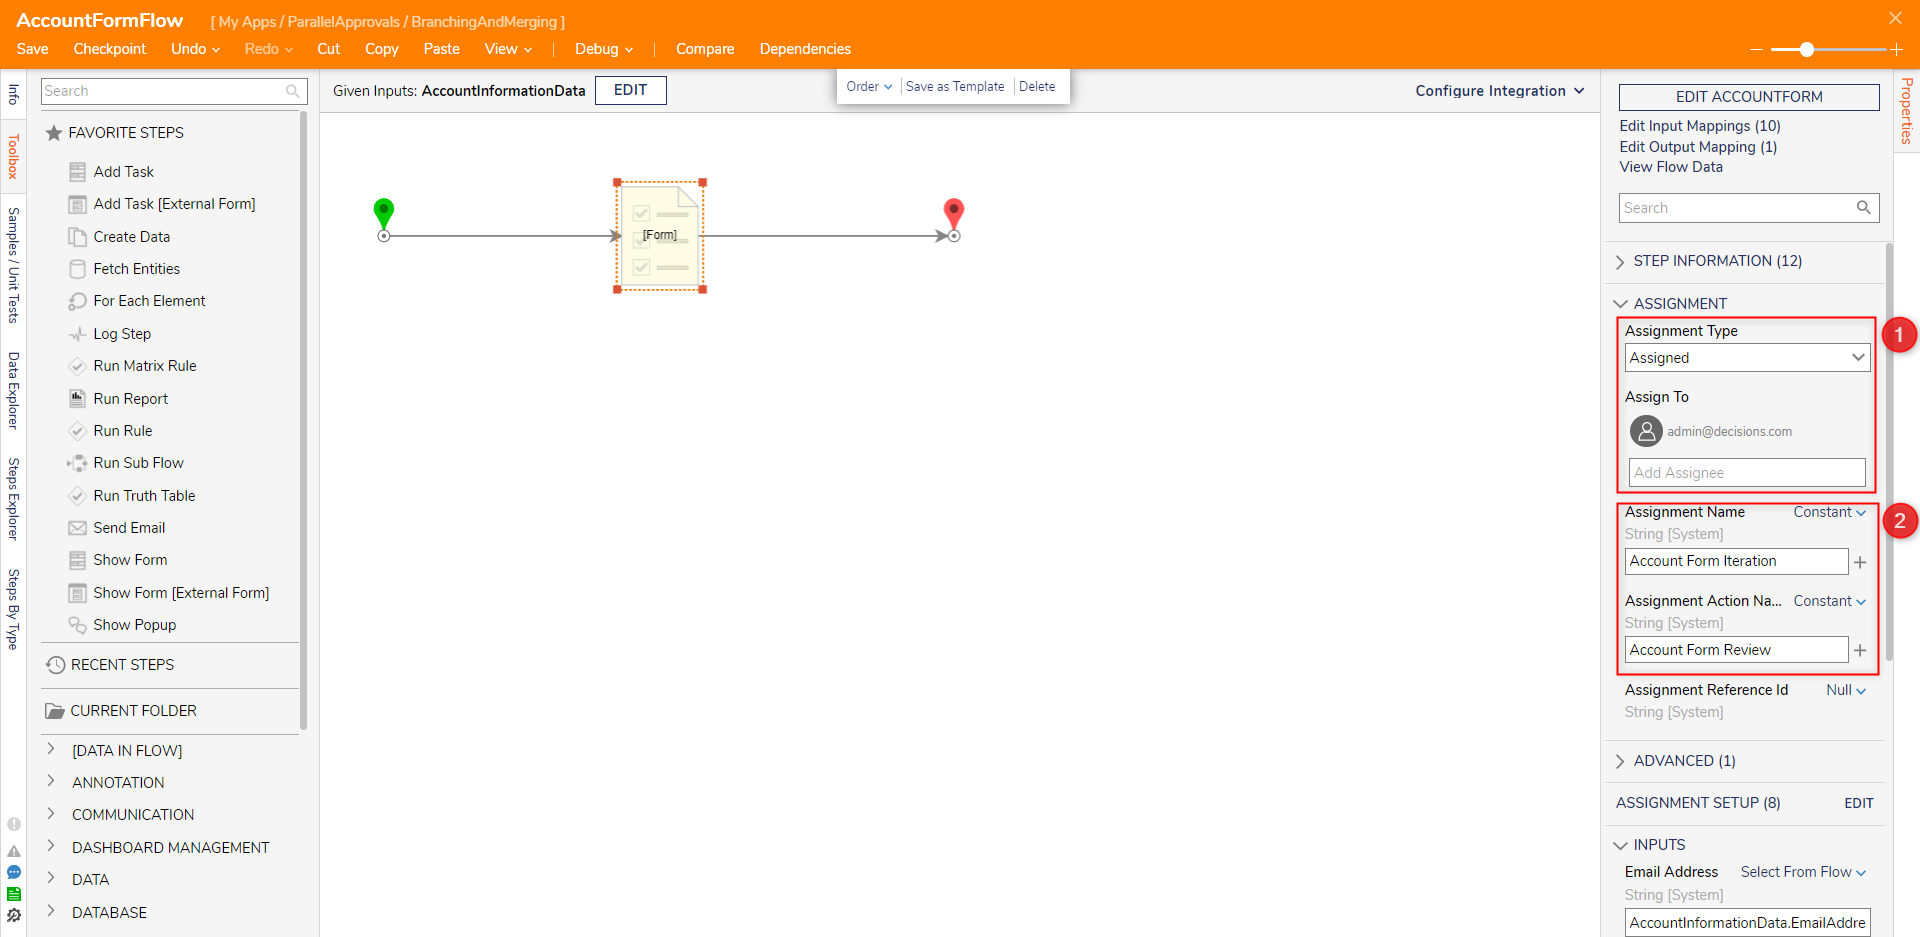
- Back in the Flow Designer, attach a Show Form step to the Start step. From the Properties of the newly added step, create a new Form.
- From the Form Designer, design a Form utilizing a Text Box, Label, and Button. Then, save and close the Form Designer.

- Back in the Flow Designer, from the Form Properties, under INPUTS, map the EmailAddress from the Start step's Input, AccountInformationData.EmailAddress to the Text Box's Input. Then, connect the Outcome Path of the Form to the End step.
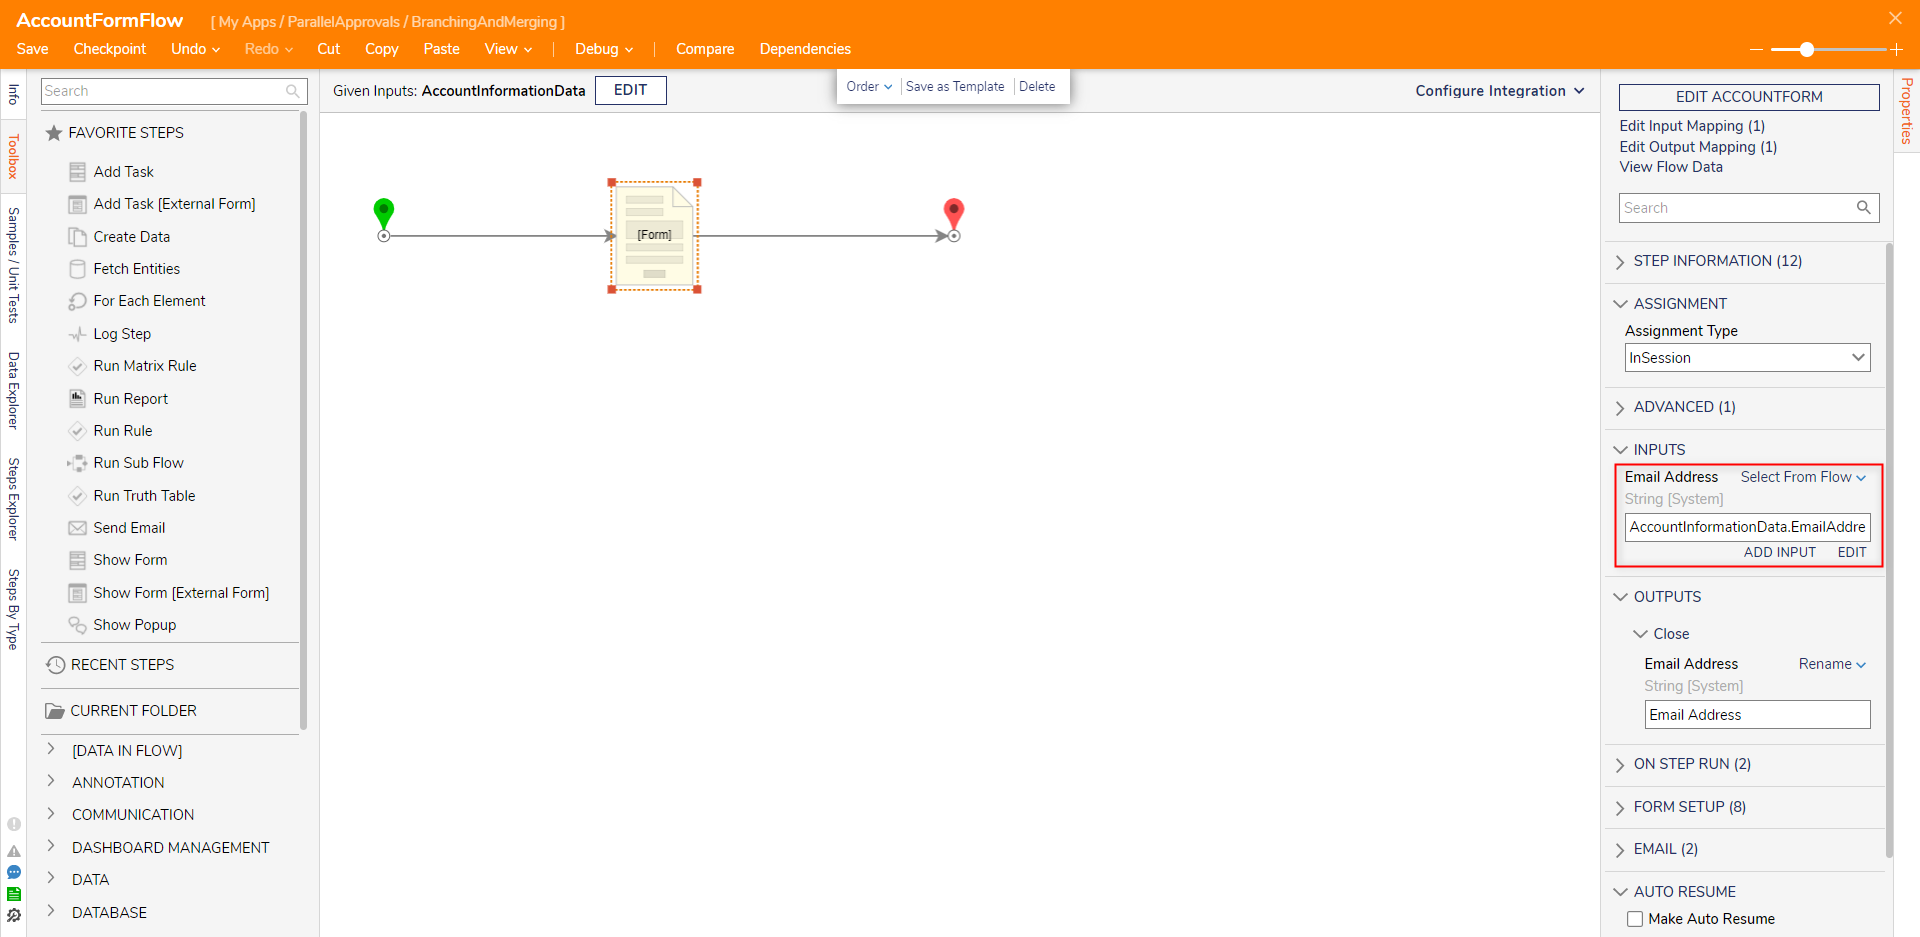
- While still in the Properties of the Show Form step, under ASSIGNMENT > Assignment Type, select Assigned. Then, under Assign To, input the Email Address of the current Account.
- Provide the desired Assignment Name and Assignment Action Name values.
- Save and close the Sub Flow.
- From the Parent Flow, under the Properties tab of the Run Sub Flow step, map the Item to the Input of the Sub Flow.
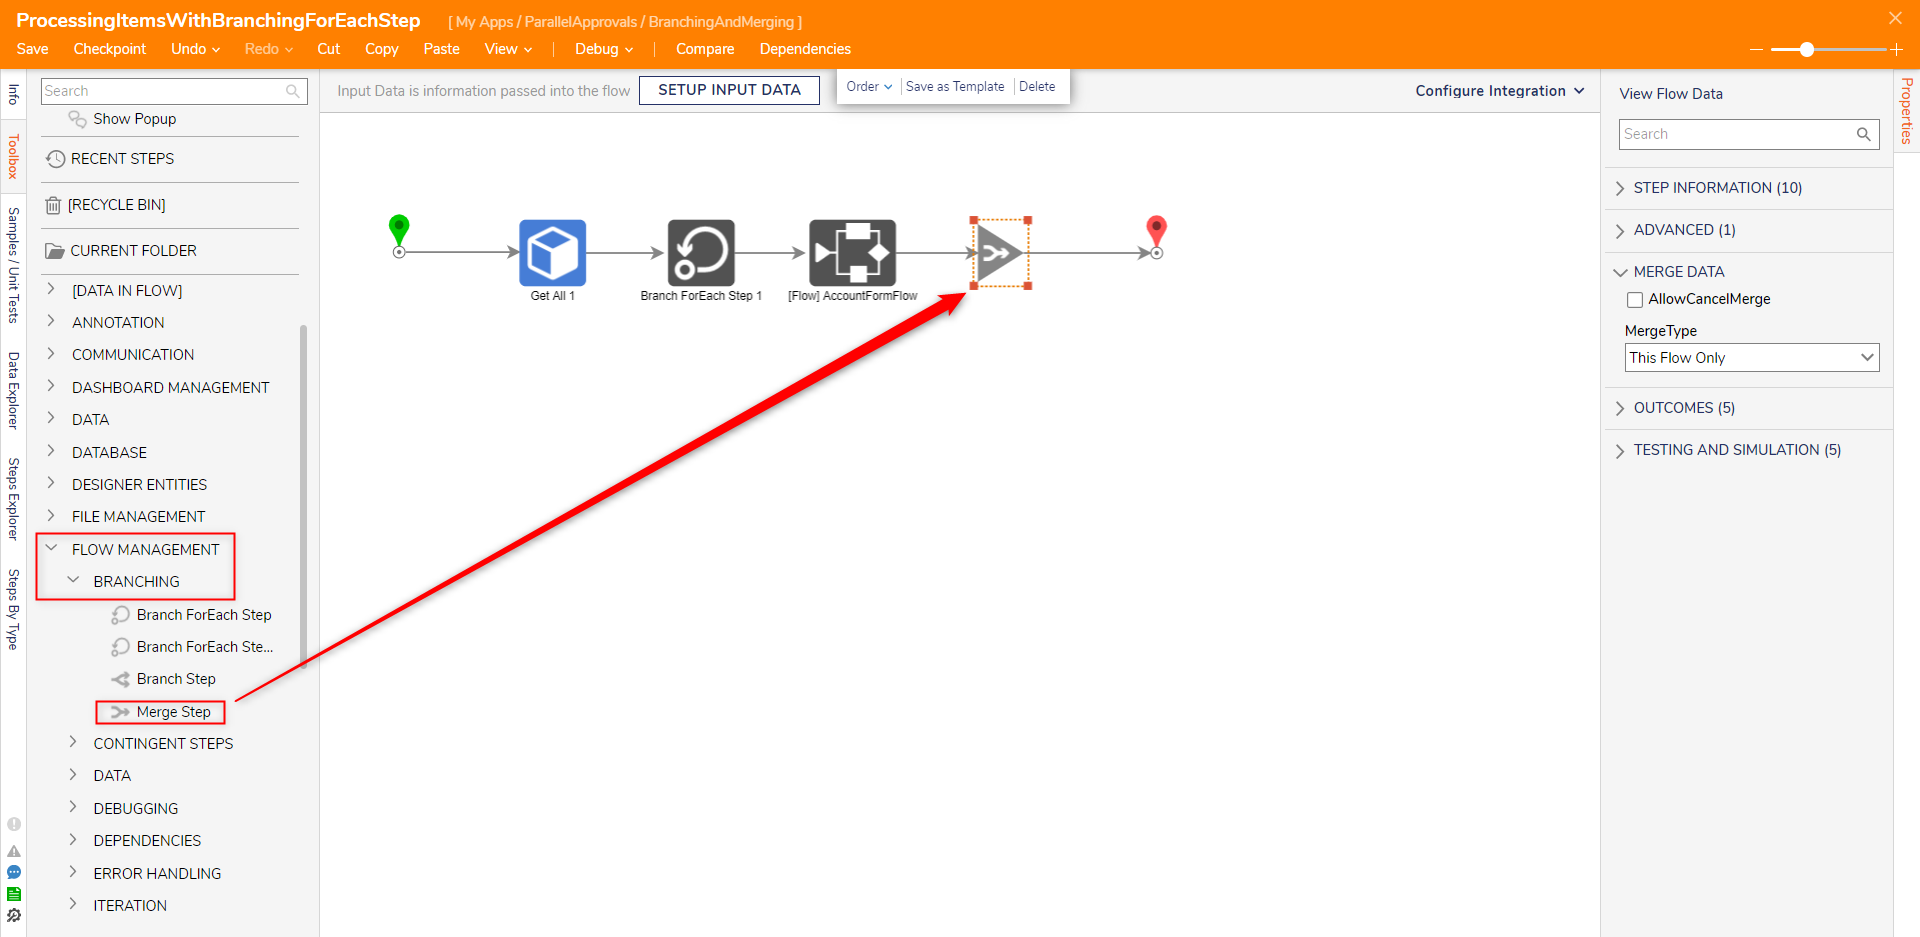
- From Toolbox > FLOW MANAGEMENT > BRANCHING, attach a Merge Step to the Done path of the Run Sub Flow step. Then, connect the Merge Complete path to the End step.


Debug
- From the Flow Designer, select the Debug link from the top Action Bar. Then, click START DEBUGGING.
- Once the Flow runs, complete each Assignment individually by completing each Form via the Button.
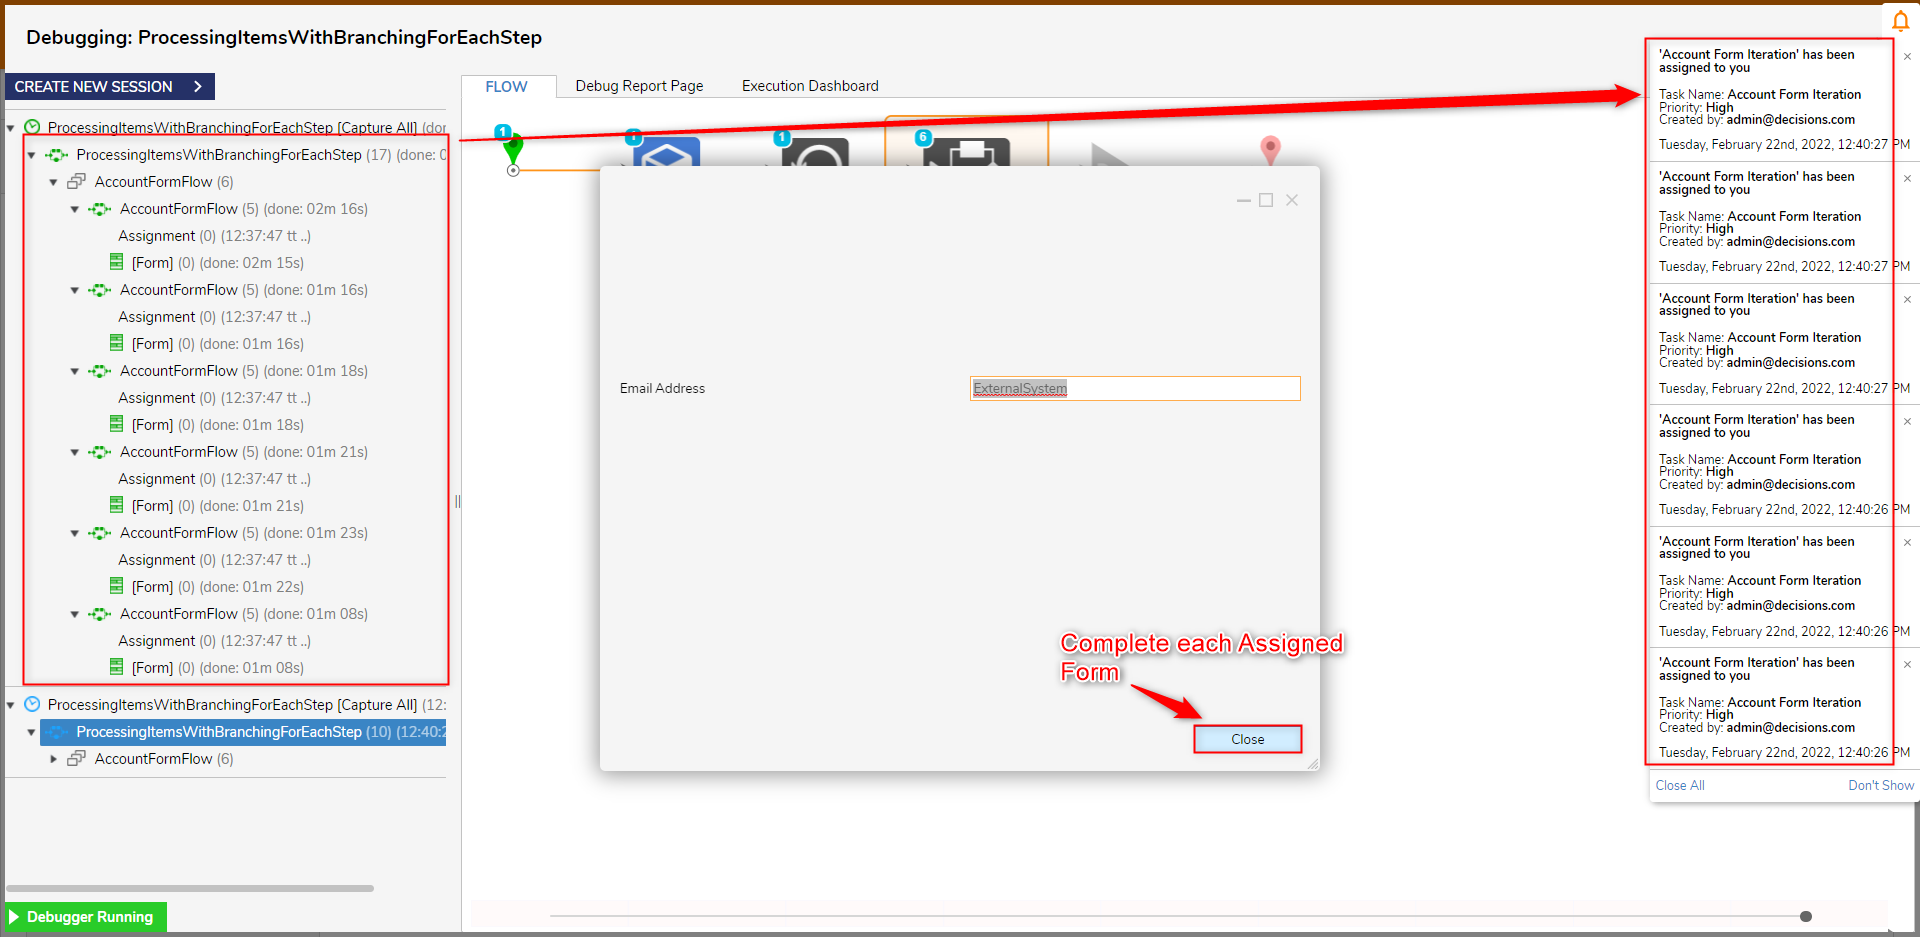
- Once the Forms have been completed, verify the Merge Step has successfully merged the Outputs of the Sub Flow, and subsequently completed the Flow.


Was this article helpful?