Validating Form Data with a Rule
- 21 Aug 2024
- 4 Minutes to read
- Print
- DarkLight
Validating Form Data with a Rule
- Updated on 21 Aug 2024
- 4 Minutes to read
- Print
- DarkLight
Article summary
Did you find this summary helpful?
Thank you for your feedback!
Overview
Validation Rules evaluate a value within a Form control and return a True or False outcome depending on whether the value satisfies the rule’s condition(s). If a Validation Rule returns False, the validation breaks and a custom message is displayed on the Form control.
Form validation rules are found under System > Designers > Catalog > System Defaults > Default Form Validation Rules. Users can also create their own Validation Rules in Designer Folders.
It is highly recommended not to edit the default rules; please contact support@decisions.com if you have any questions.
To learn about Validating Form Data with a Flow, please navigate here.
Example
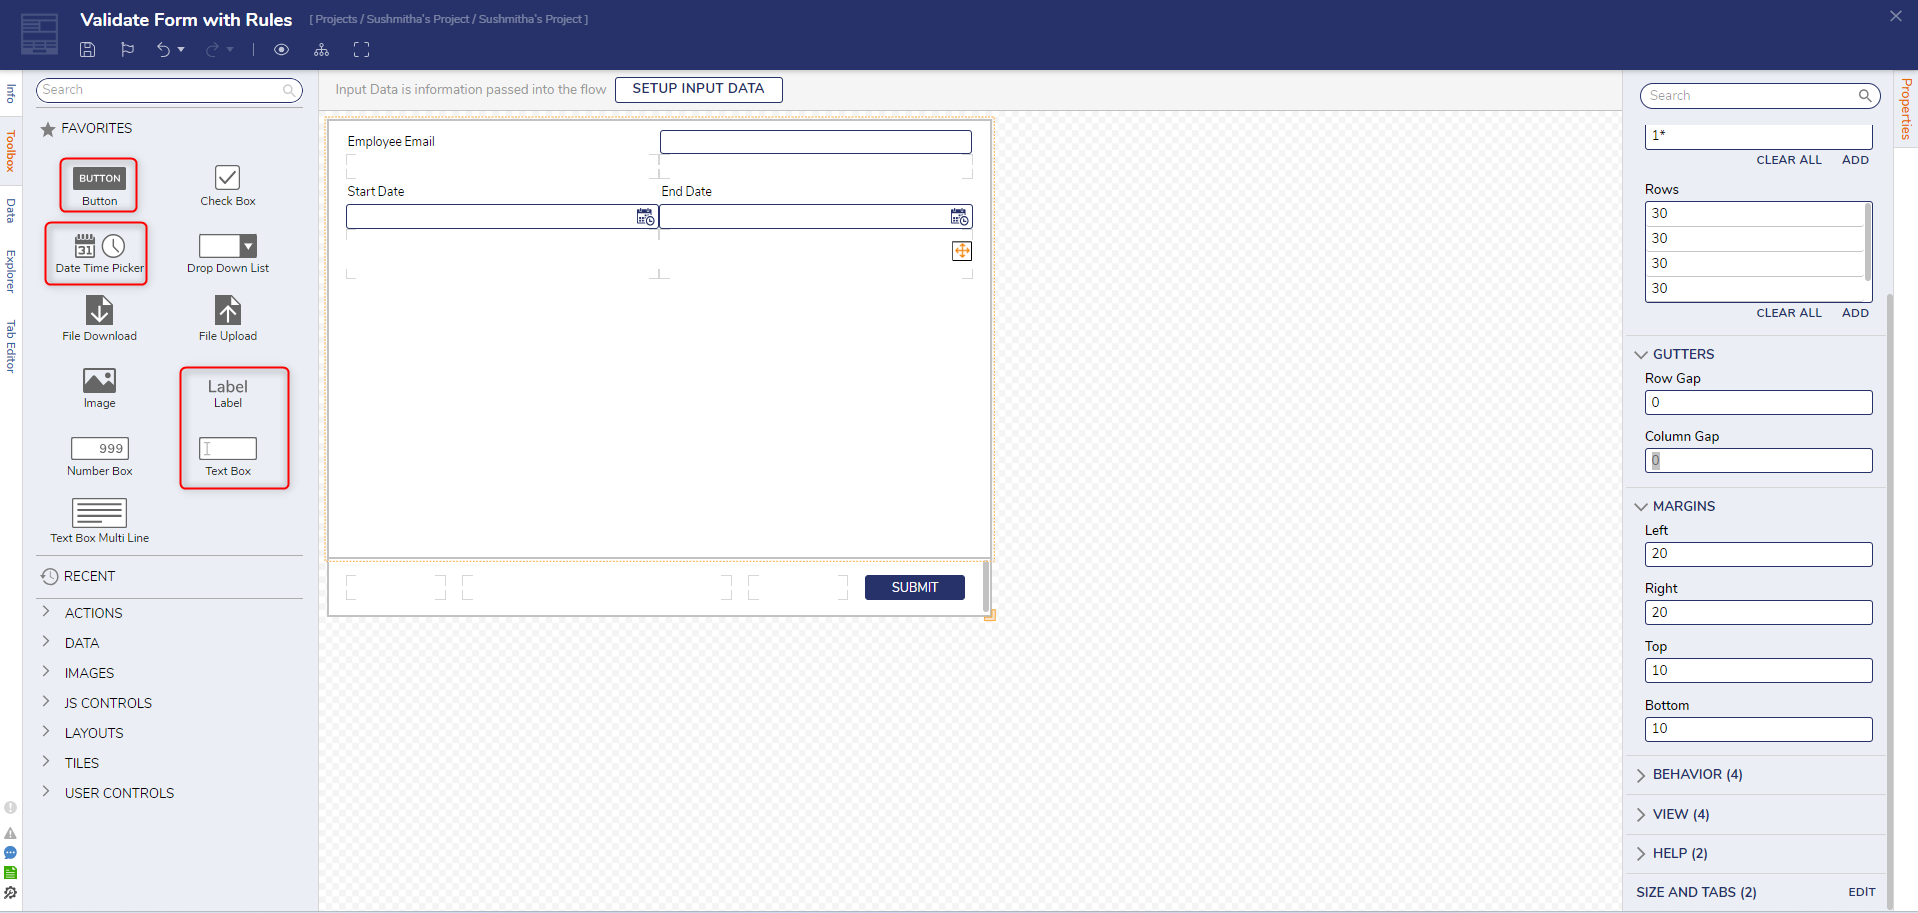
This example illustrates validations rules on an example Employee Leave Request Form.
The Email Address field will only accept valid email addresses. The Start Date field will only accept today or a future date while the End Date field will only accept dates occurring after today.
- In a Designer Folder, create a Flow and open it in the Flow Designer.
- After the Done outcome path of the Start step, add a Show Form step from the Favorite Steps category. Create a new Form.
- Add the following controls to the Form: one Button (Submit), three Labels (Email Address, Start Date, End Date), one Text Box (Email Address Text Box), and two Date Time Pickers (Start Date Picker, End Date Picker).
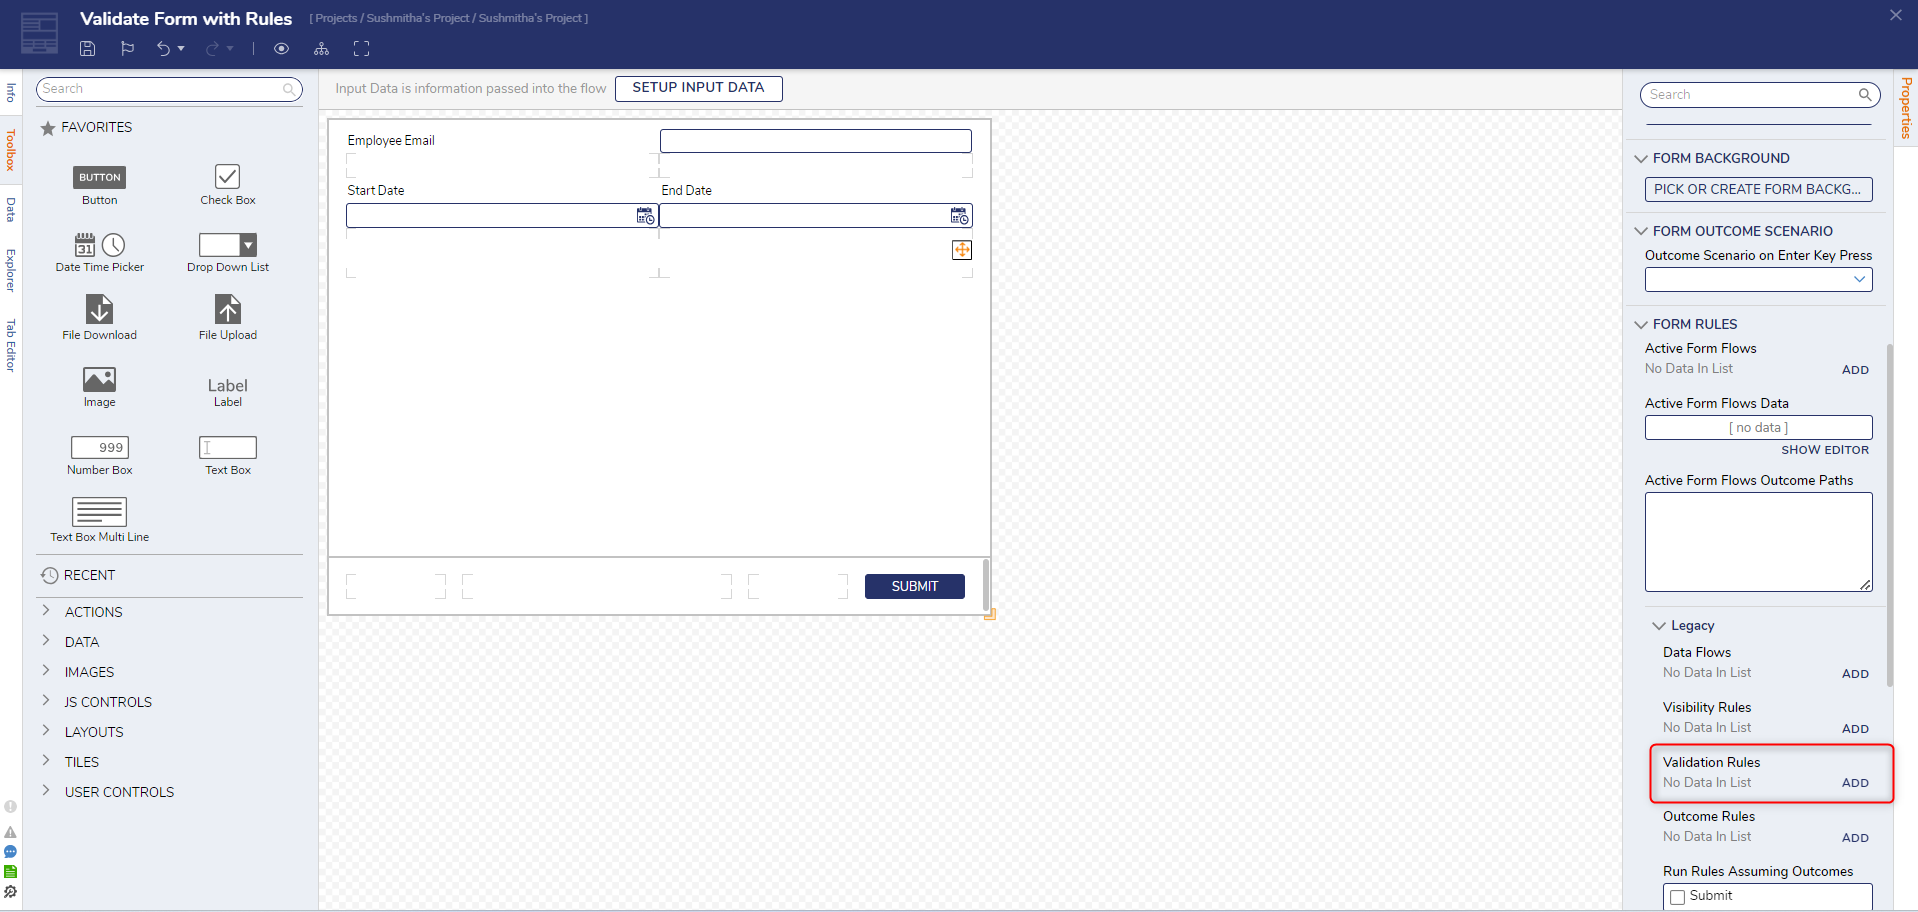
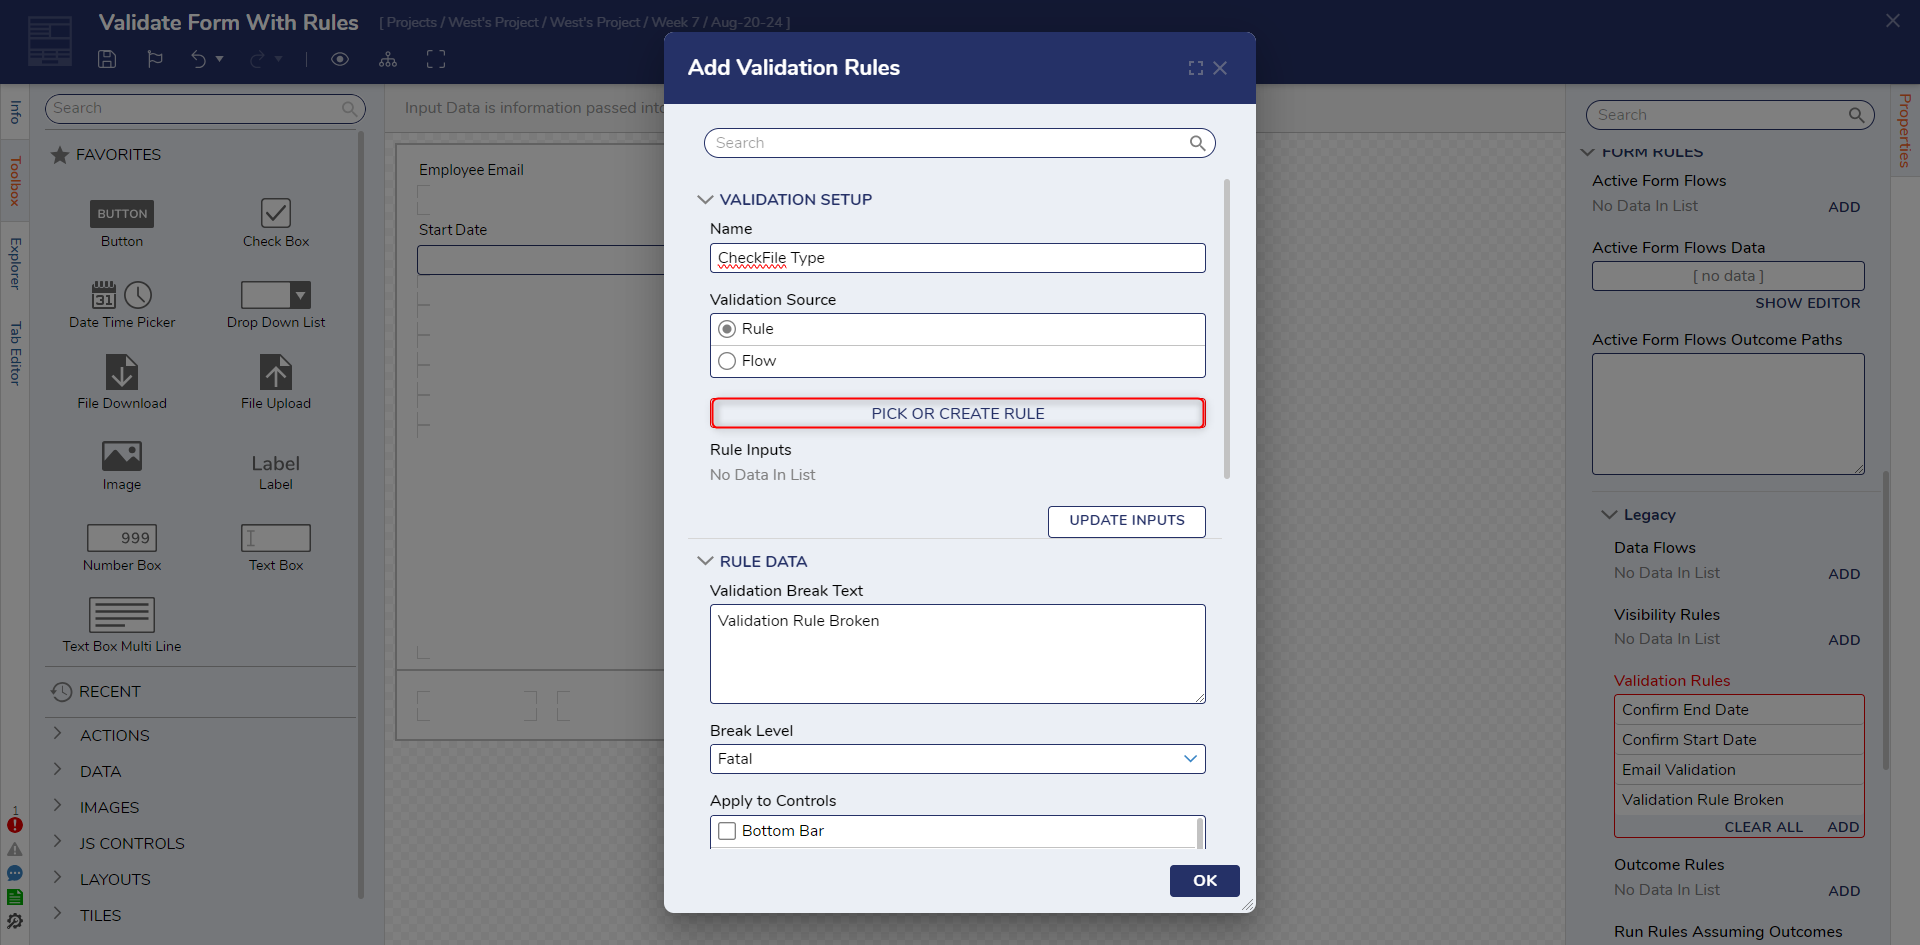
- Under Properties > Form Rules > Legacy, select ADD next to Validation Rules to create a new validation rule.
- In the Add Validation Rules dialog window, name the Rule then select PICK OR CREATE RULE and select the existing preset rule Is Valid Email. Confirm with PICK.
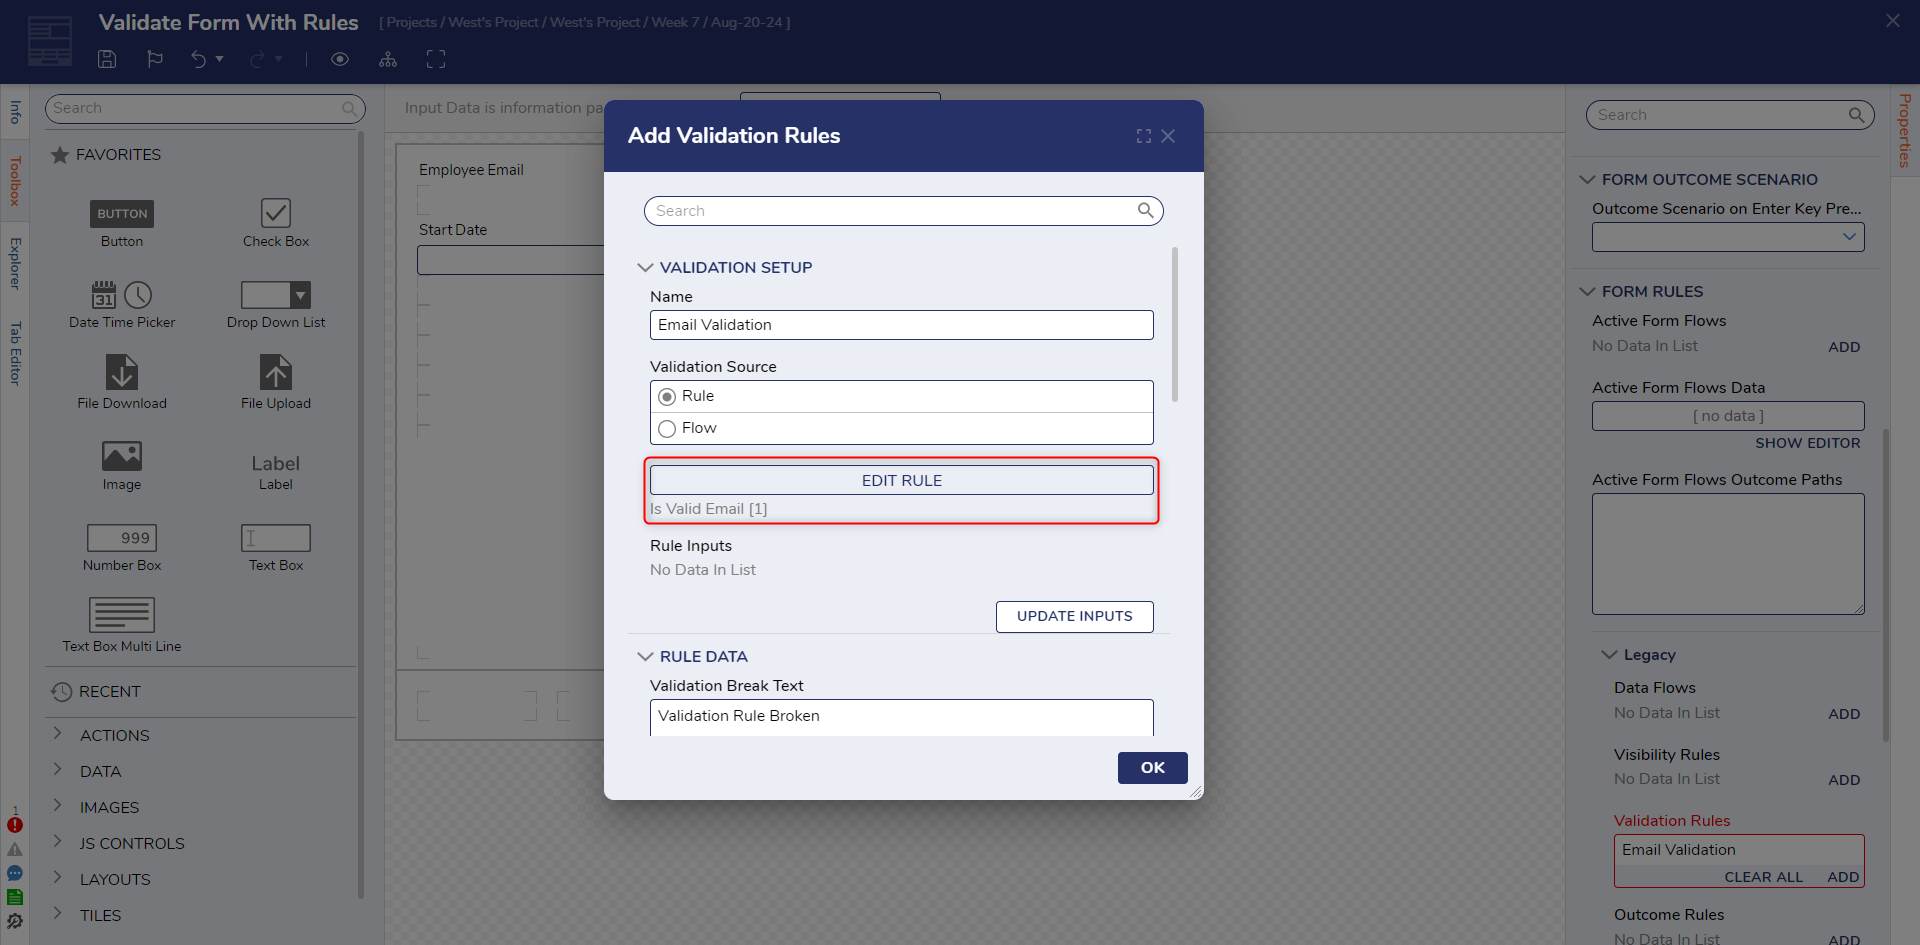
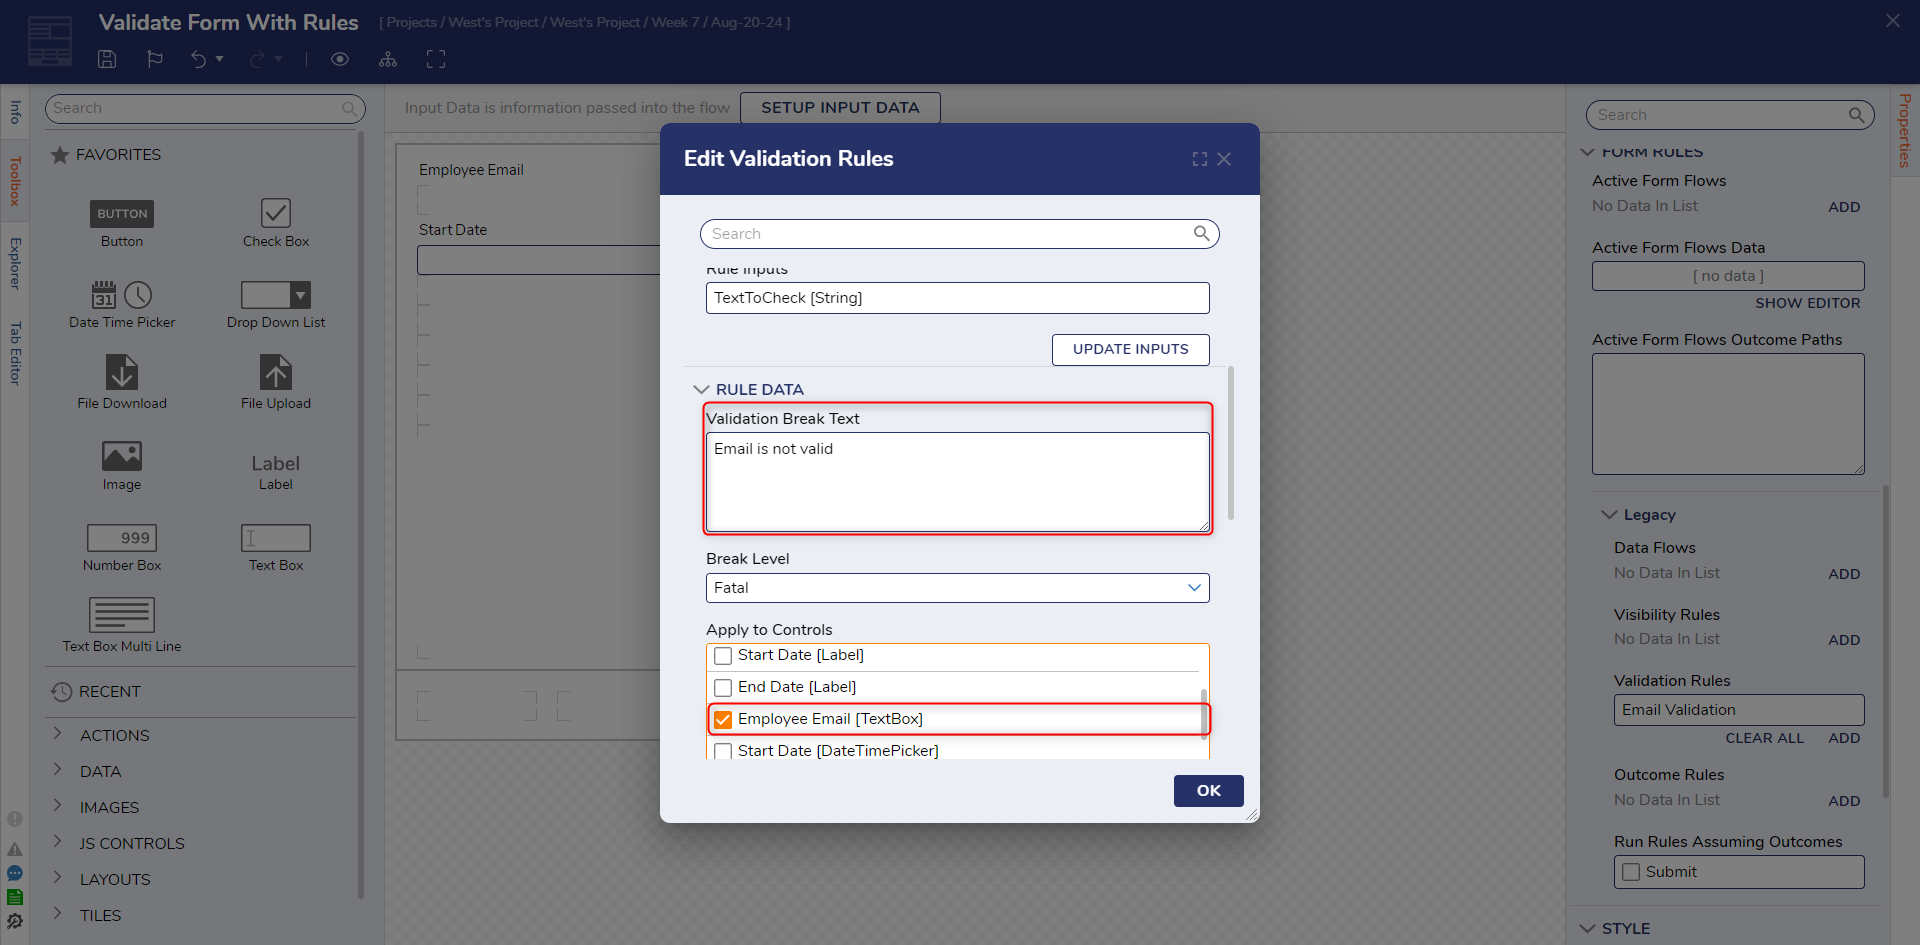
- Back in the Add Validation Rules dialog, under Rule Inputs select UPDATE INPUTS to automatically update the rule's inputs based off the chosen rule's inputs. Once the 'TextToCheck' input appears, select the pencil icon.
- In the Edit Rule Inputs dialog window, change the Input Type to Form Component. For Form Data Name, select the data name of the email: 'Employee Email'. Keep the RunOnValueChanged checkbox to True.
Select OK to confirm.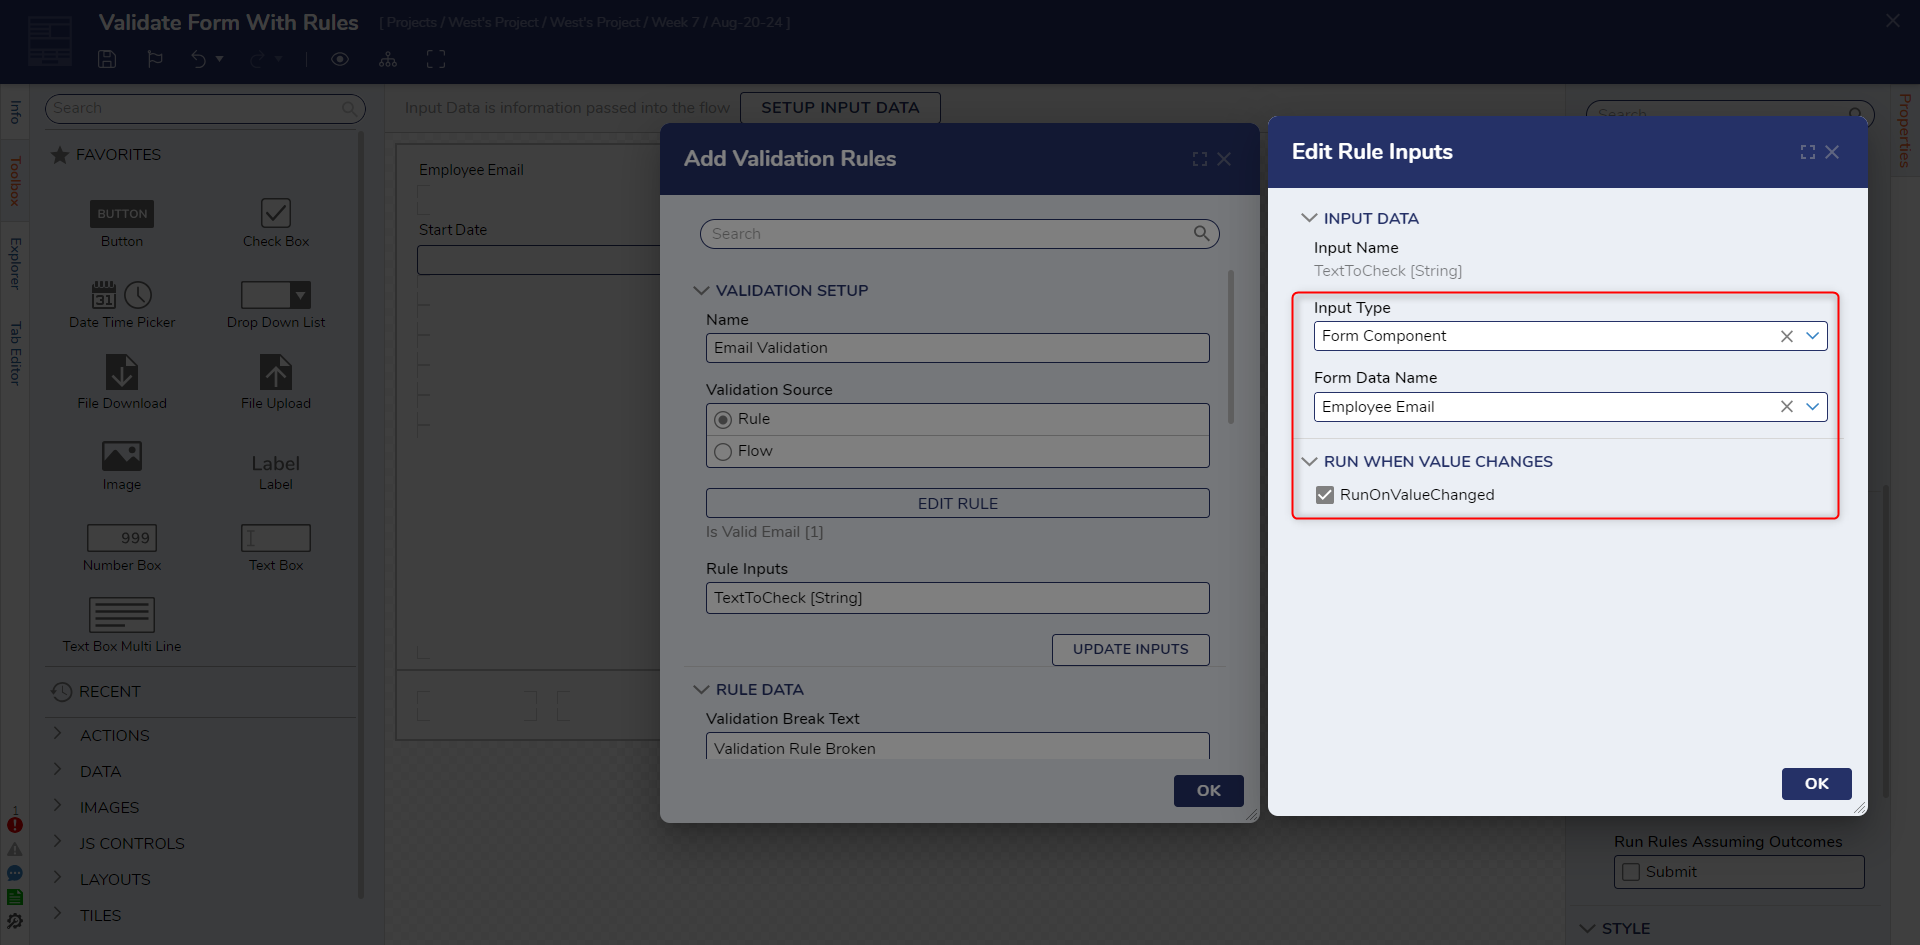
- Back in the Add Validation Rules dialog, under Rule Data > Validation Break Text Box, enter the message displayed if the rule is broken.
- In the Apply To Controls list, select the checkbox next to the form control that the rule will be applied to, "Email Text Box".
- Select OK to save the changes and close this dialog.
- Repeat step 5 to return to the Add Validation Rules window to create two new validations rules. These will check for valid state and end dates respectively.
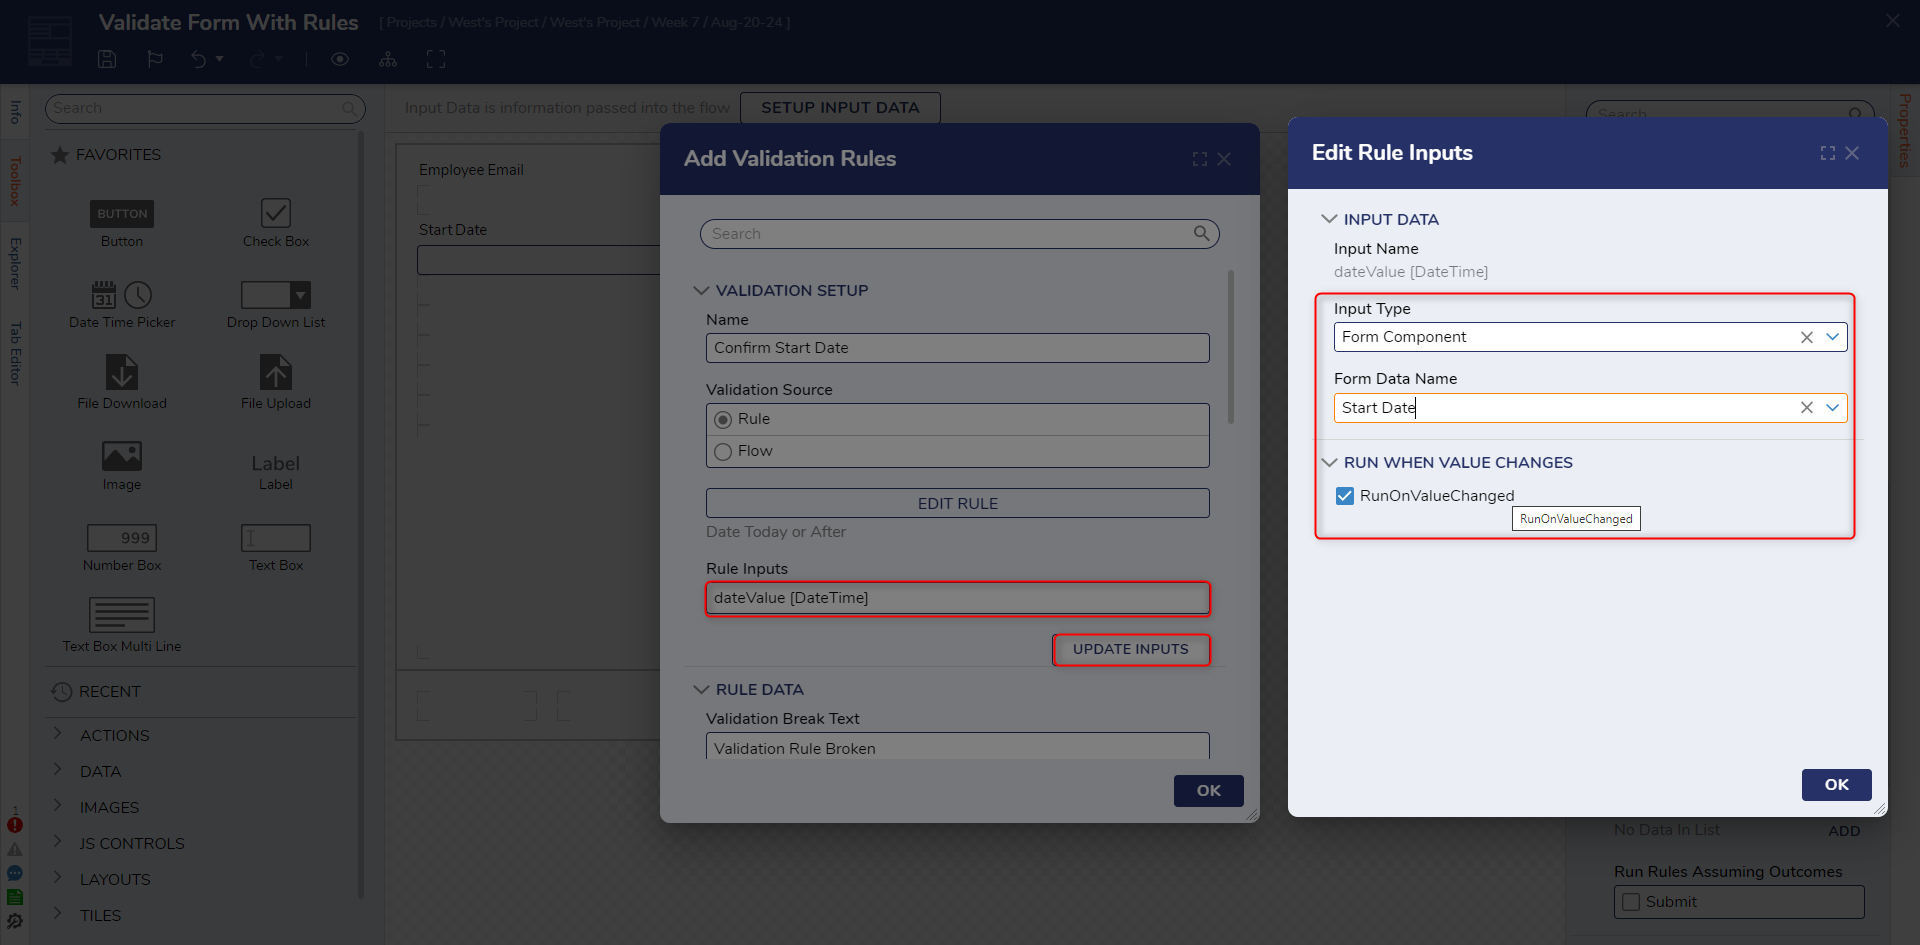
- For the first Start Date validation, give it a relevant name. For the Rule, select the preexisting Date Today or After Rule.
- Select UPDATE INPUTS and edit the 'dateValue' input. Change Input Type to Form Component and Form Data Name to State Date. Select OK to confirm.
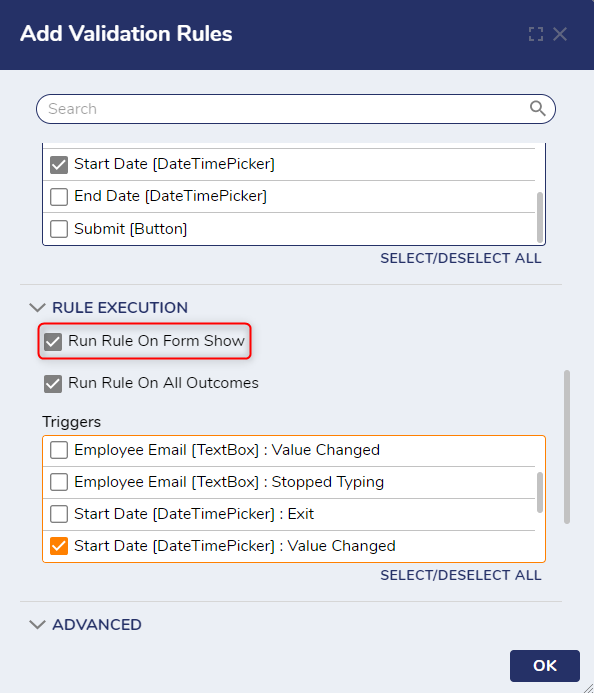
- Under Rule Data, enter the text to appear when the validation error occurs in the Validation Break Text. For Apply To Controls, select the Start Date [DateTimePicker].
- To have this Validation Rule run at start-up, navigate to Rule Execution and set the checkbox next to Run Rule On Form Show. Select OK to save and close.
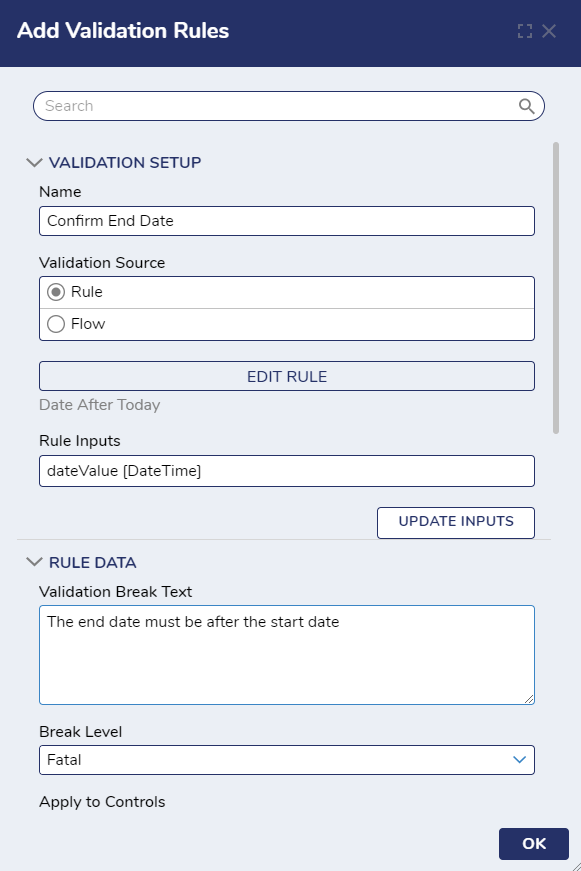
- In the second new End Date validation rule, give it a name and choose Date After Today as the Rule.
- Update the Inputs and configure to the correct Form Component: "End Date Picker". For Apply to Controls, select the End Date [DateTimePicker].
- Give the Validation a break text that will display if this error occurs.
- Navigate to Rule Execution select the checkbox next to Run Rule On Form Show to have this rule run on startup like the Start Date validation. Select OK to save and close.


Debug
- Save and close the Form Designer. In the Flow Designer, be sure all outcome paths are connected. Select Debug in the top action panel.
- When the Form displays the Start Date Picker and End Date Picker automatically show the validation error. When invalid dates are entered, the validation rules check the dates, and the error message displays.
- Enter an email address in an invalid format, and the error message appears.
- When valid information is entered, the rules return true, and users can select Submit.
Validation Rule on a File Upload Control
- Add a "Doctors Note (If Applicable)" Label and a File Upload button to the Form.
- In the Form's Properties, navigate to Properties > Form Rules > Legacy and select ADD next to Validation Rules to create a new validation rule.
- In the Add Validation Rules window, give the rule a name the rule and select PICK OR CREATE RULE to create a new Rule. After naming the Rule, it will open in the Rule Designer.
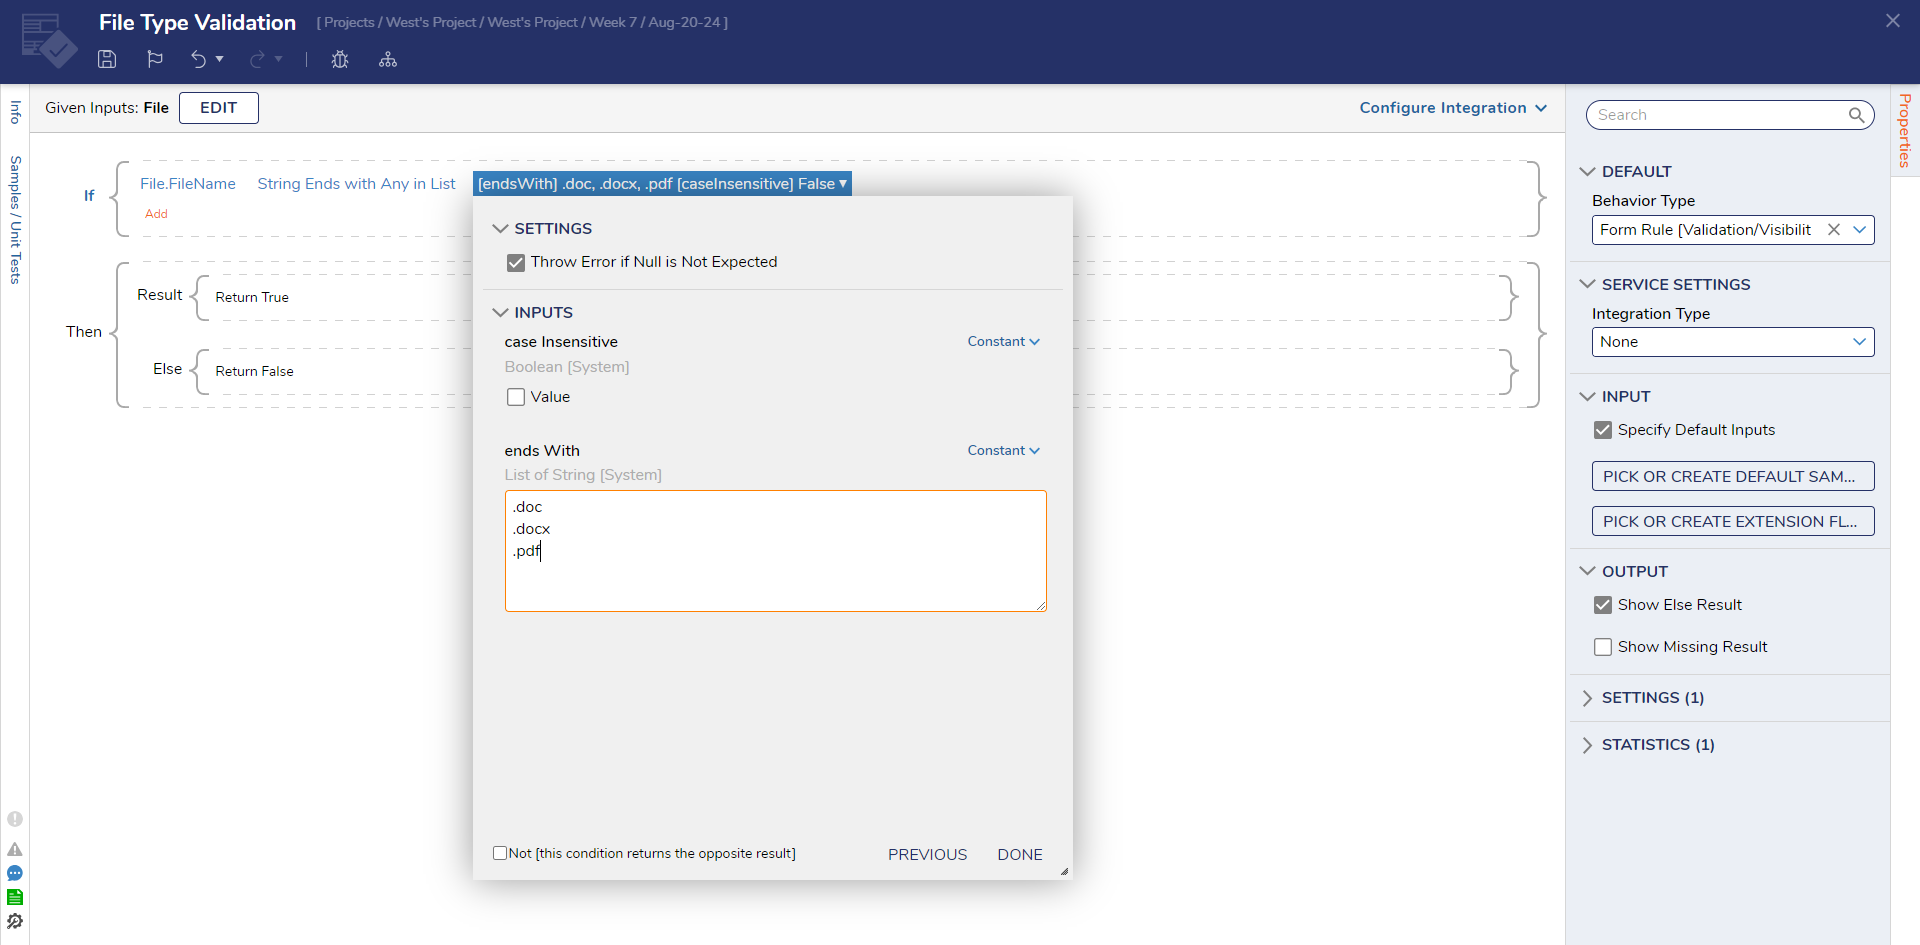
- Select SETUP INPUT DATA and create a field with FileData data type.
- Configure the Validation Rule with the following logic: If File.FileName String Ends with Any in List [endsWith] .doc, .docx, .pdf [caseInsensitive] False. Save and close the Rule Designer.
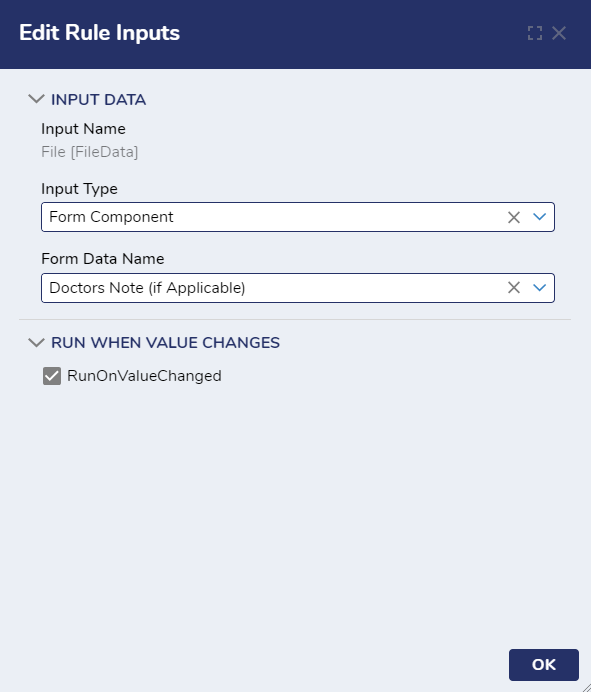
- Back in the Add Validation Rules dialog, under Rule Inputs select Update Inputs. Select Edit [pencil shaped icon].
- Change the Input Type drop-down list to Form Component then choose the name of the File Upload control's data name for the Form Data Name. Select OK.
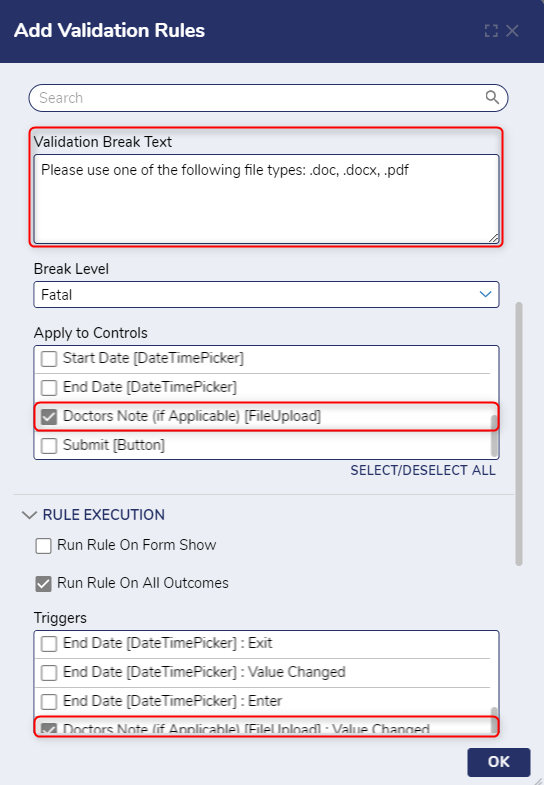
- Back in the Add Validation Rules dialog, under Rule Data > Validation Break Text, enter the message displayed if the rule is broken. For Apply To Controls, select the File Upload control.
- Under Rule Execution > Triggers, select the File Upload trigger for value change.
- Select OK to save the changes and close this dialog.


Debug
- Save and close the Form Designer, select Debug in the top action panel of the Flow Designer.
- Test the File Upload component to see if the Validation Rule is working properly.
For further information on Forms, visit the Decisions Forum.
Was this article helpful?