Overview
Decisions offers several AI Modules that integrate Artificial Intelligence capabilities into the platform. Each AI Module has its purpose, and in the v9.3 Release, the AI Common Module was introduced to handle background efforts for other AI Modules. While Decisions strives to include the most recent AI models available, the rapid pace of industry updates means that not every new model can be included immediately. For Users who need access to newer or custom models, these can be specified manually within the platform.
The AI Common Module provides a foundational functionality, offering necessary tools and interfaces for various AI services, and can be utilized in conjunction with other AI Modules, such as the Open AI Module, which enables Users to utilize OpenAI's ChatGPT integration.
AI Modules provide pre-built Steps, tools, and interfaces for a wide range of AI functionalities, enabling Users to leverage AI in their Workflow.
AI Module Glossary
| Term | Description |
|---|---|
| Chat Completion | This Step enables prompts to be submitted to a large language model (LLM) and will return the response the LLM gives back. Prompts can be added directly or pulled from the Flow. Users can also select the model they want to review the prompt. |
| Get Embeddings for Text | This Step generates embeddings for the given text. Embeddings represent semantic relationships and contextual information about the text, enabling advanced natural language processing. |
| Vector Embedding | A list of numbers that represents unstructured Data so that computers can process the information. |
| Vector Database | A Vector Database is a specialized Database that indexes vector embeddings, maximizing efficiency for retrieval and similarity search. |
Installation and Setup
Navigate to System > Administration > Features to view the available AI Modules. The AI Common Module will be automatically installed when any other AI-related Modules are installed since these Modules depend on the AI Common Module.
For more information on installing Modules and to see a list of our available modules, please visit:
Core Functionality
Although each AI Module has its purpose, the core functionality of AI Modules as a whole involves integrating, managing, and leveraging various artificial intelligence capabilities within the platform to enhance workflows and enable efficient process automation.
We currently offer the following AI Modules, as well as Modules that have AI integrations:
Connecting a Vector Database
Configuring a Vector Database
To set up a Vector Database in Decisions:
- Navigate to Manage > Integrations > Databases.
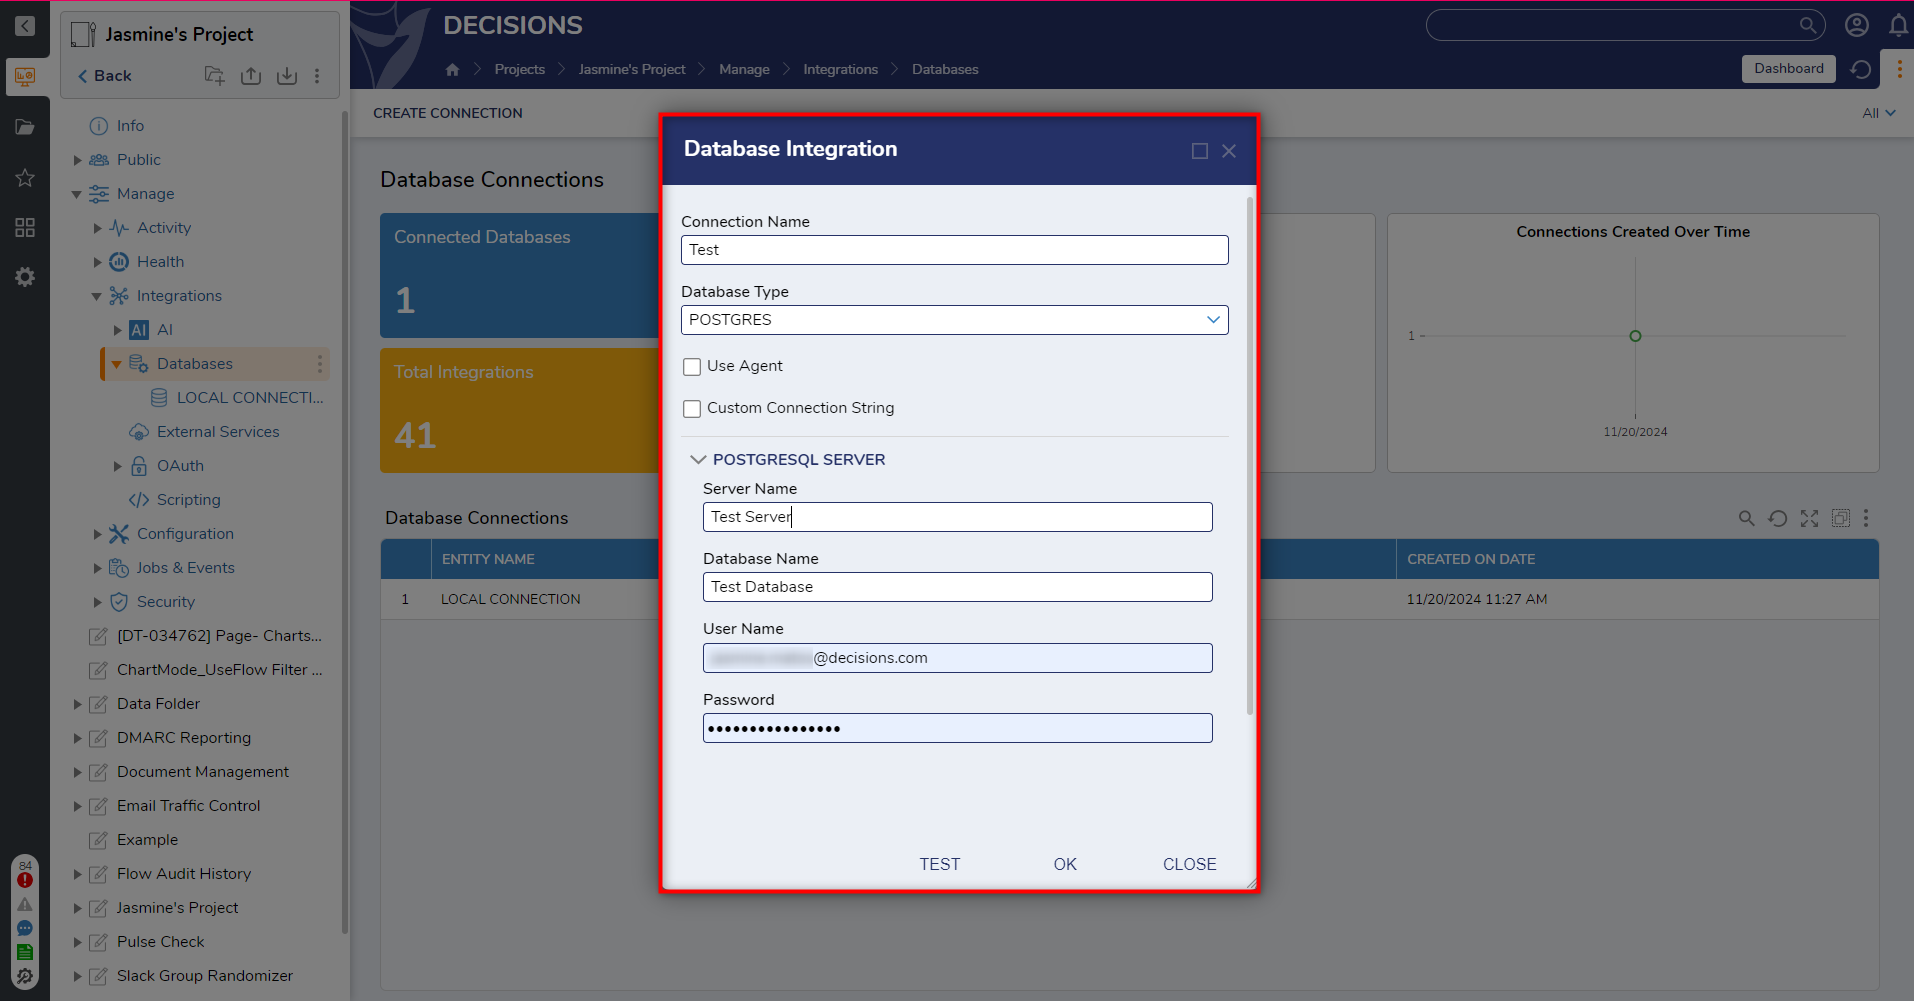
- Select Create Connection, enter a name in the connection, and then select POSTGRES from the Database type dropdown menu.
- From here, under the POSTGRESQL SERVER section, enter details for the Server name, database name, username, and password associated with the external database.
- Users can select Test to confirm the connection or Ok to save the connection.
- Once the connection is saved, a new Folder will appear for the connection under Databases. Make note of the Folder ID for this connection as this corresponds to the Vector Database ID.
 AI Vector Preparation Step Category
The AI Vector Preparation Step categories include a set of Steps designed to efficiently manage Vector Embeddings within a PostgreSQL database integrated with a Decisions Server. These Steps are beneficial for workflows integrating AI features such as natural language processing and similarity-based querying, and enable Users to store, query, and manage Vector data seamlessly.
Vector Preparation Step Glossary
| Term | Definition |
|---|---|
| Ensure Postgres Vector Extension | This Step verifies that the PostgreSQL database associated with the Decisions server is equipped with the required vector extension. This extension enables vector-based storage and querying capabilities. |
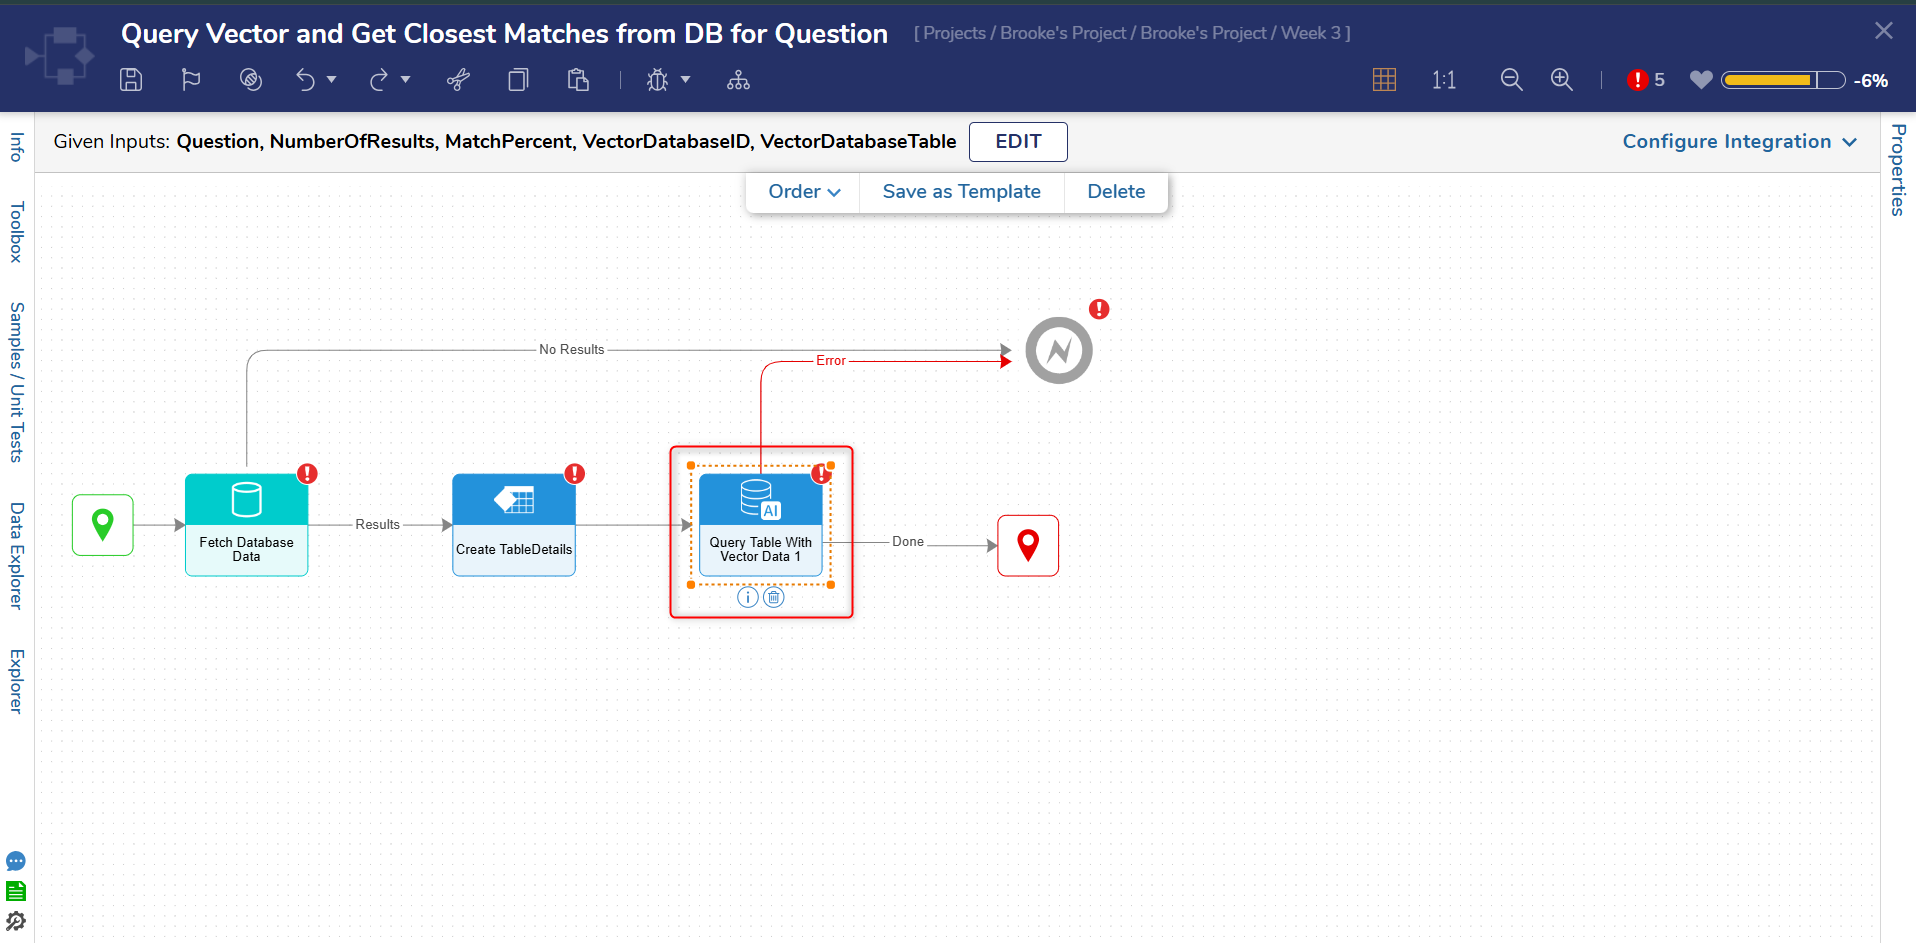
| Query Table with Vector Data | This Step allows Workflows to execute vector-base queries on a PostgreSQL table. Common use cases for this Step include finding similar vector embeddings or to perform similarity searches against a set of stored embeddings. |
| Save Vector Embedding to Postgres | This Step enables workflows to save vector embeddings into a PostgreSQL database table. Common use cases for this Step include searching for the most similar vector embeddings or to perform similarity searches against a set of stored embeddings. |
Use Case: Using an AI Preparation Step with the Auto Complete Questionnaire with AI Accelerator
The below example demonstrates a Flow that queries the Vector Database and retrieves the closest matches for questions used in the Auto Complete Questionnaire Accelerator.
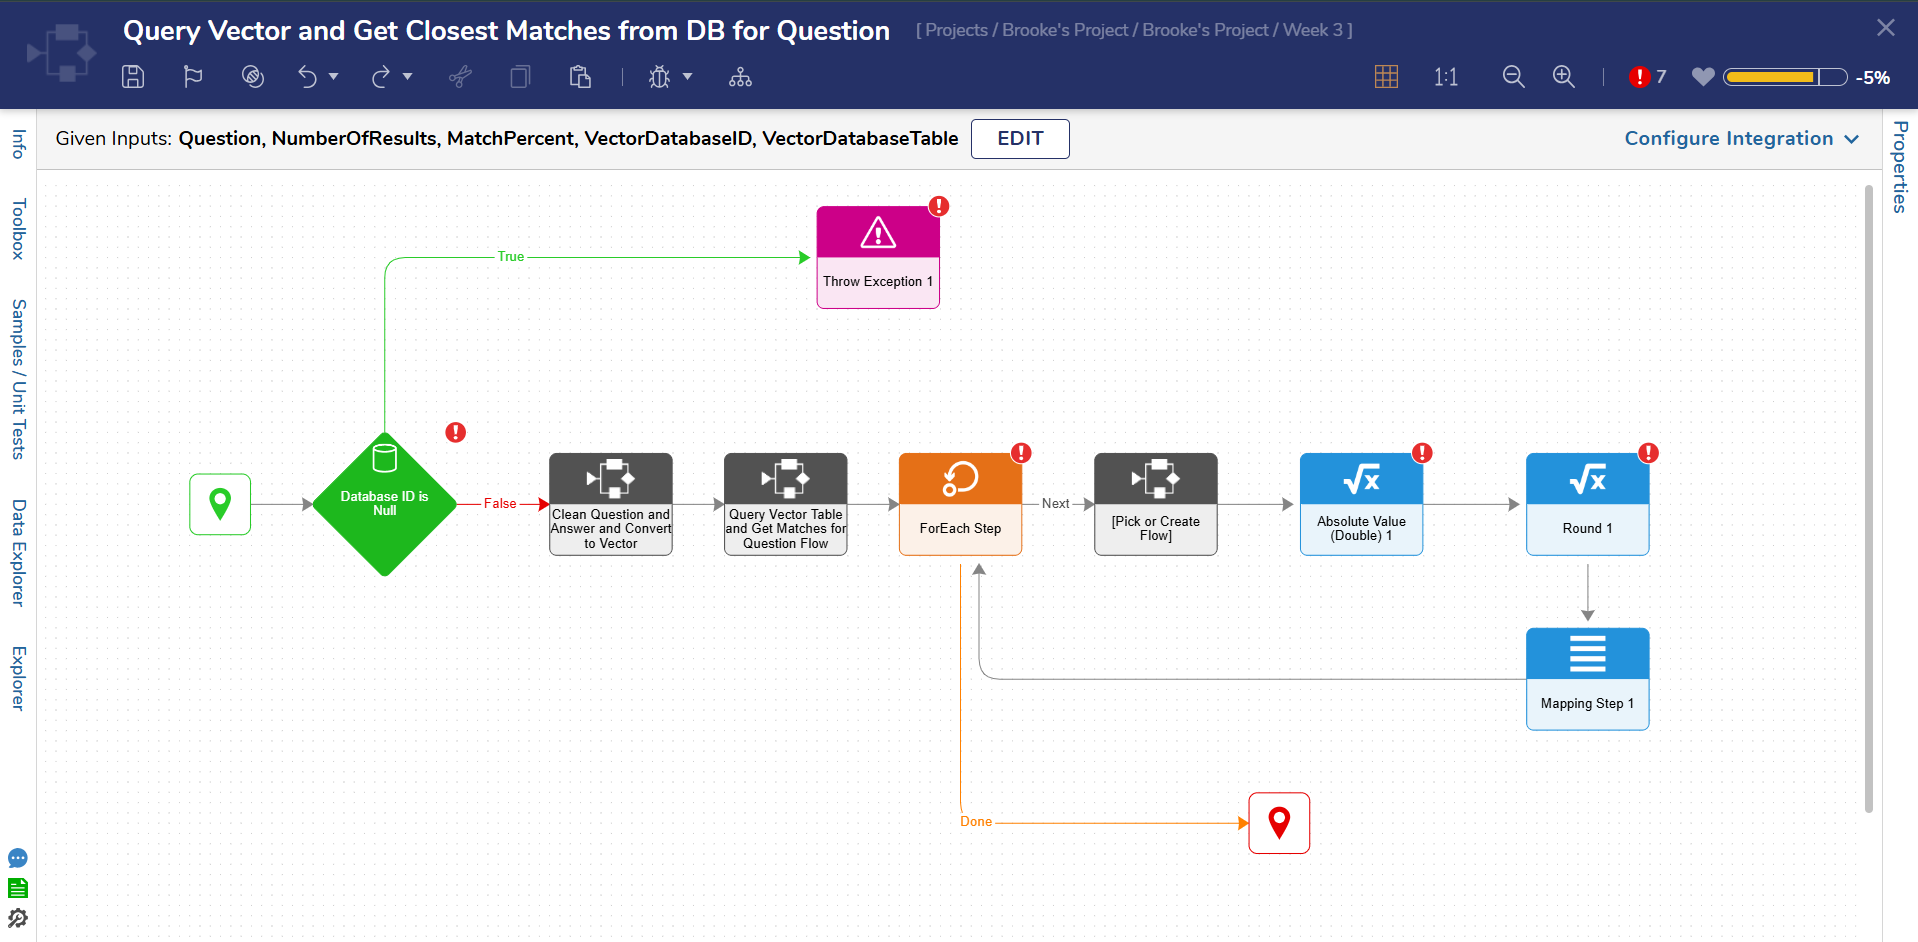 The Query Table with Vector Data Step is used within a Subflow, as exemplified in the below screenshot, to retrieve the closest matches.
Connecting AI Common to Other AI Modules
Adding Modules as a Project Dependency
- Ensure the AI Common Module is installed.
- Install the AI Modules that will be connected to AI Common.
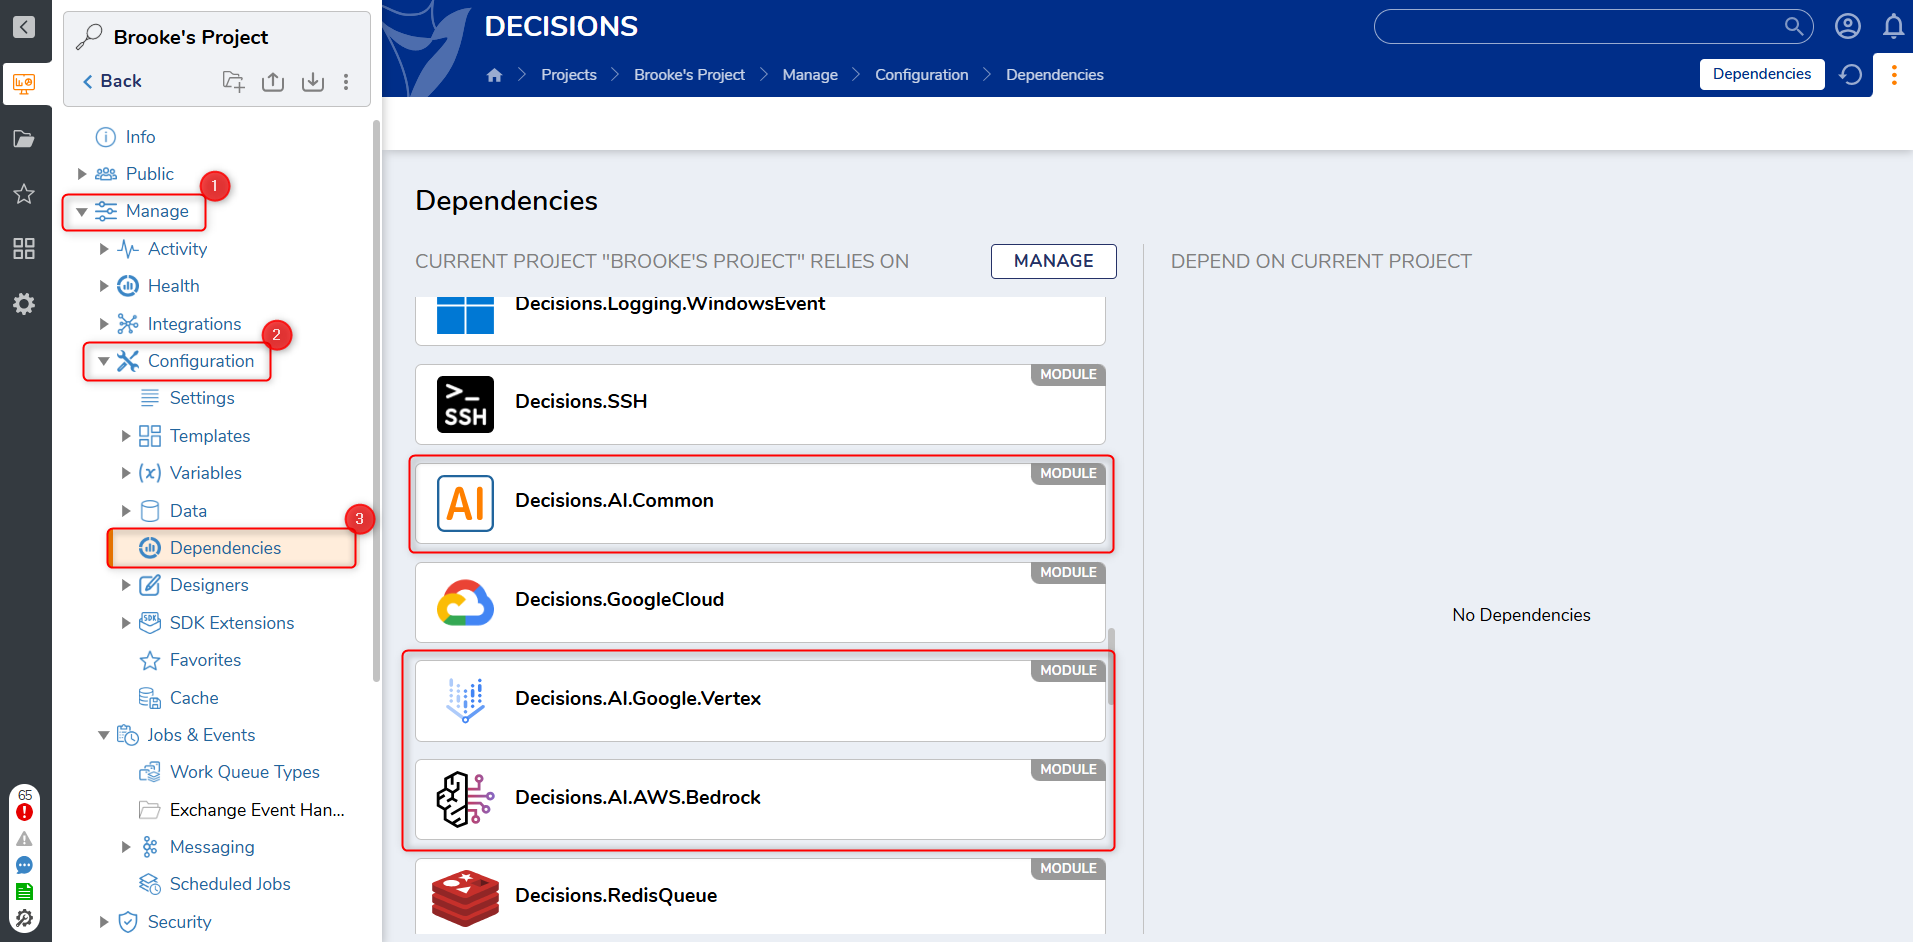
- After both AI Common and the AI Module(s) have been installed, they must be added as a dependency to Projects that will utilize them.
- This can be accomplished by navigating to Manage > Configuration > Dependencies within the desired Project.
Configure AI Defaults
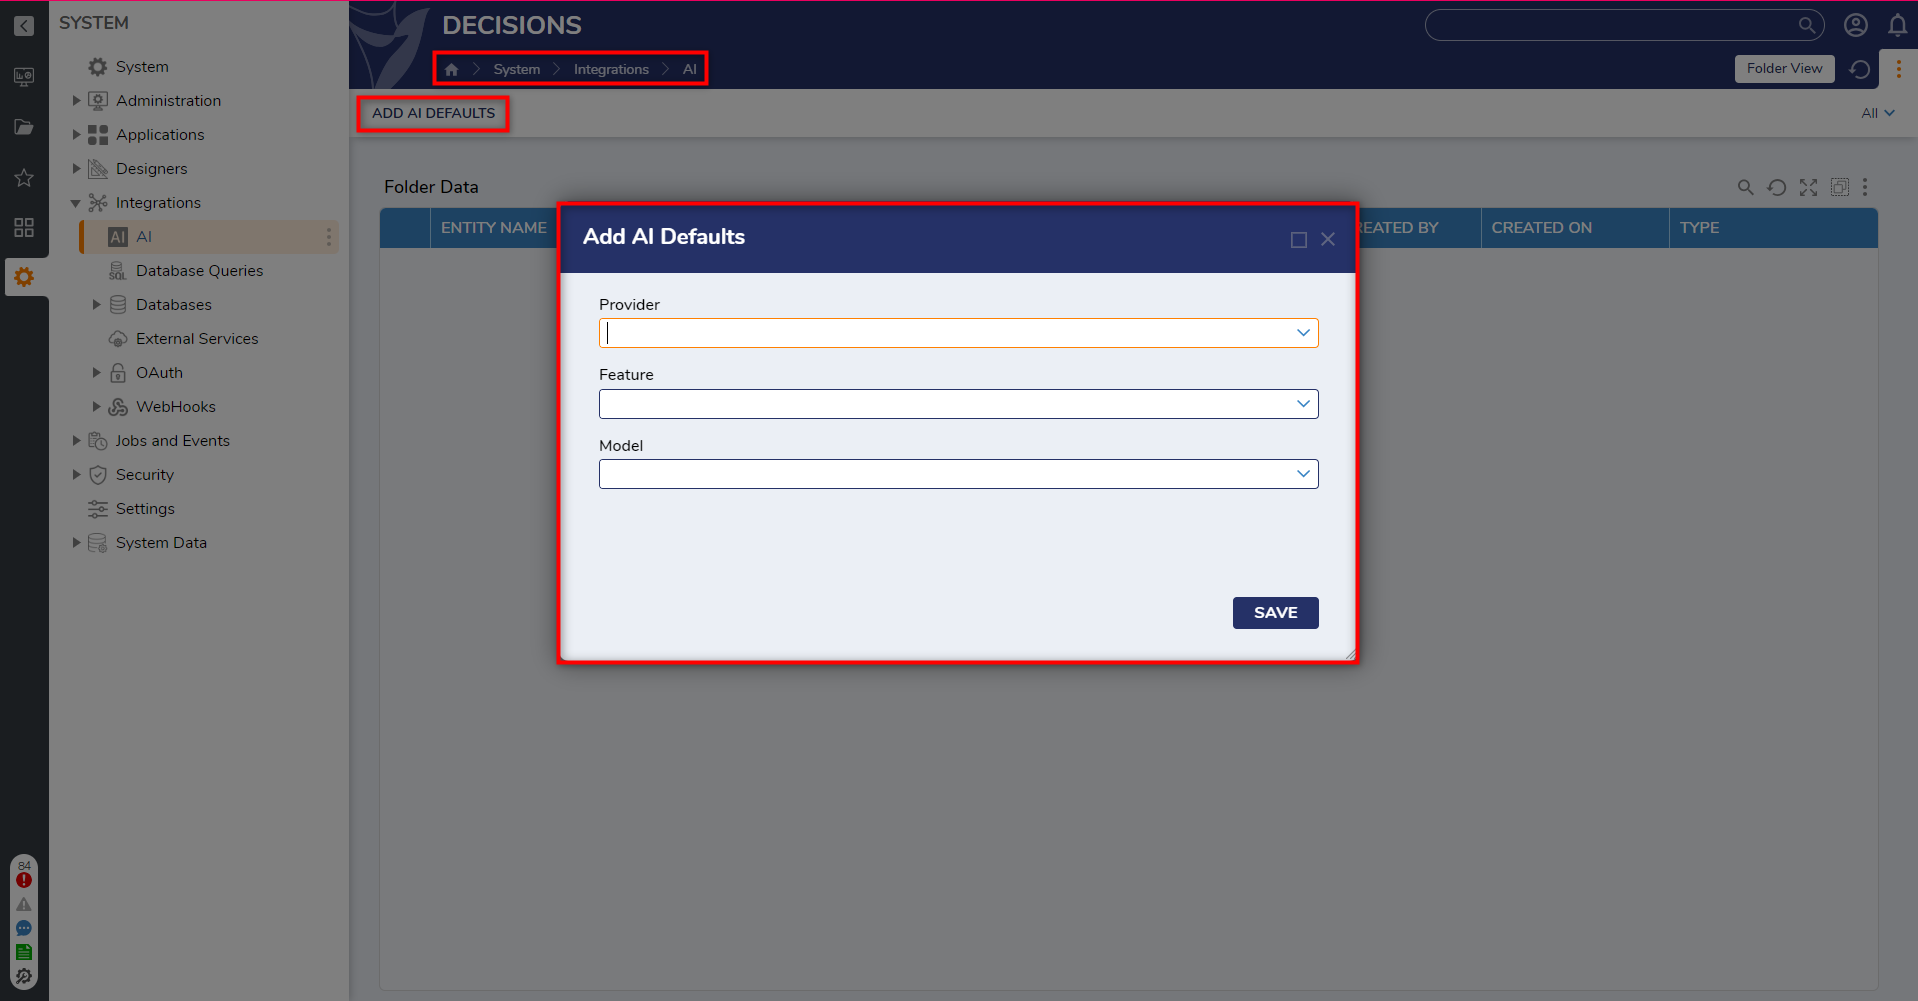
AI Defaults can be configured by navigating to System > Integrations > AI and selecting Add AI Defaults.
- This action allows Users to add and manage different AI vendors and models.
- A model can be selected for use in all chat completion Steps within a process.
- If a change is needed, the default model can be updated, and any changes will be reflected in all AI predictive Steps.
- If a change is needed, the default model can be updated, and any changes will be reflected in all AI predictive Steps.
Using Custom or Unlisted Models
If a desired model does not appear in the Model drop-down either because the list has not been refreshed, the Module does not yet include that model, or the model is vendor-specific, users can still specify the model manually.
To use a custom model value:
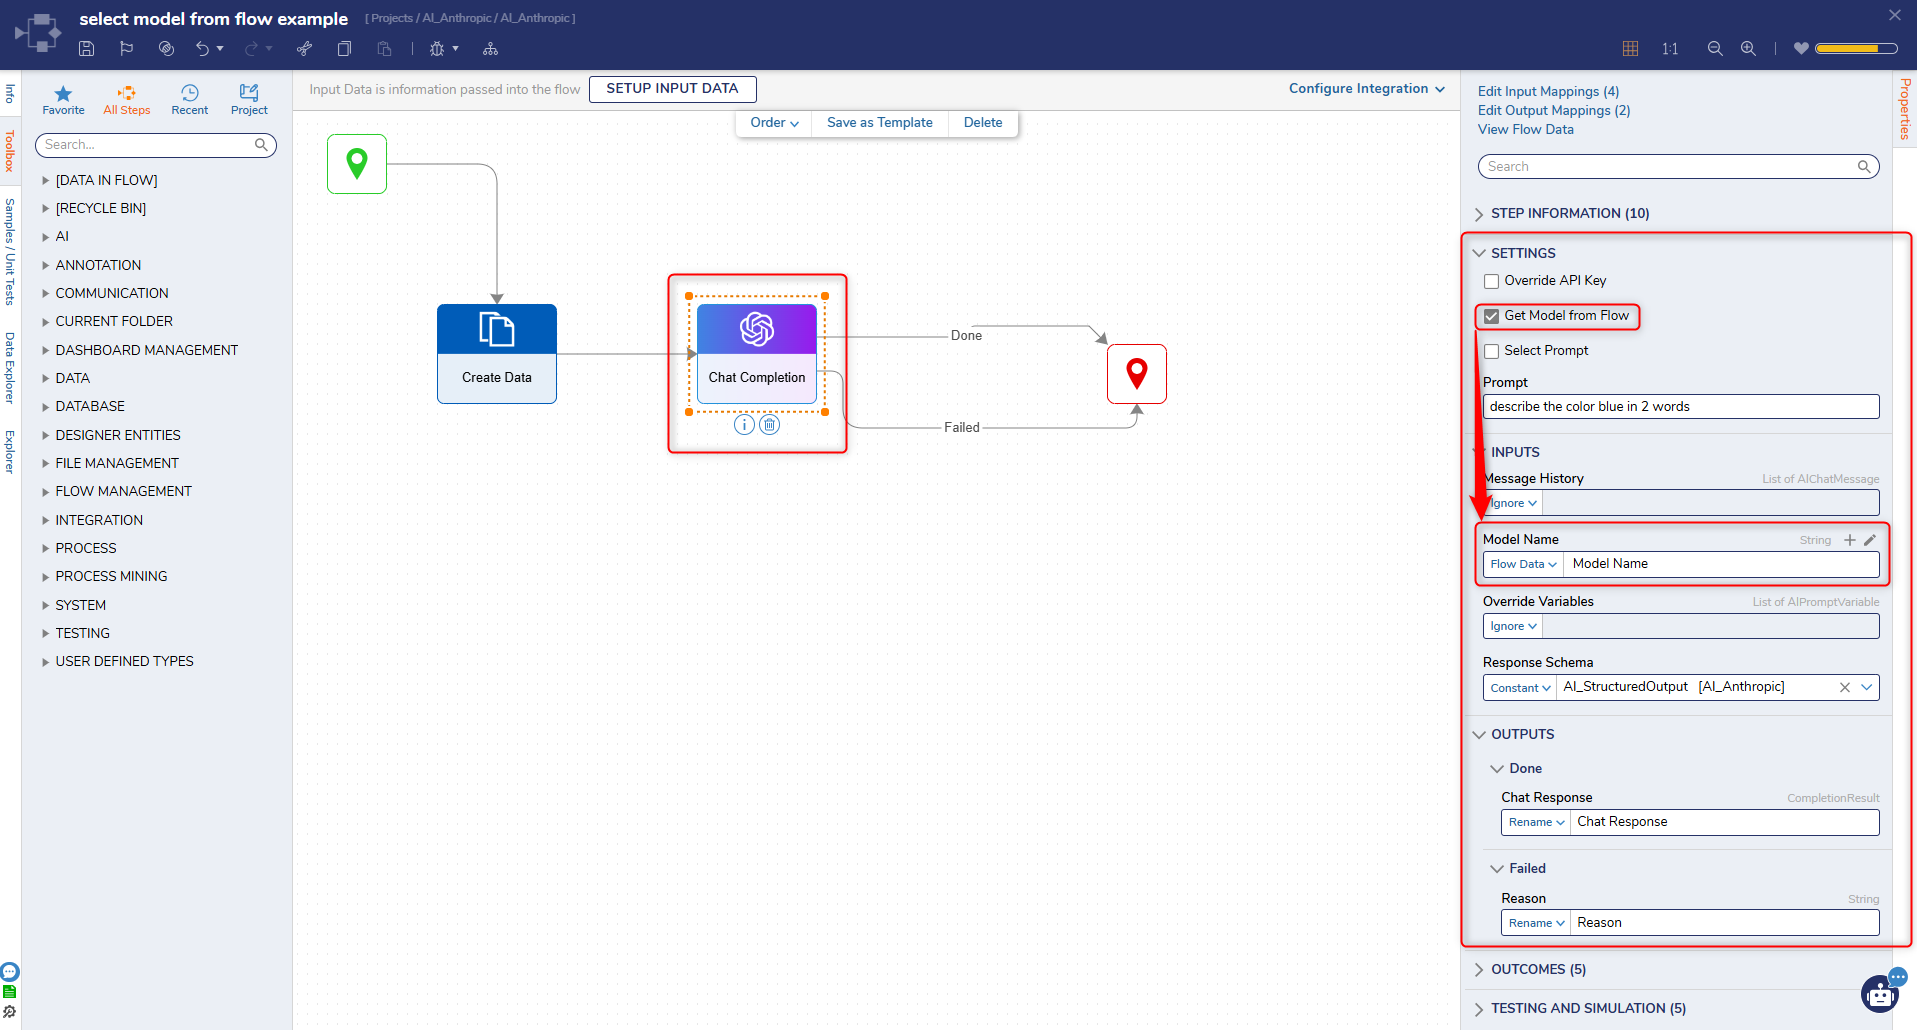
- Select the Chat Completion Step in the Flow.
- Navigate to the Settings section in the Properties panel.
- Enable the option Get Model From Flow.
- This exposes a new input where Users can pass a custom model value:
- As a constant (typed directly on the Step), or
- From the Flow (via a Flow input or variable).
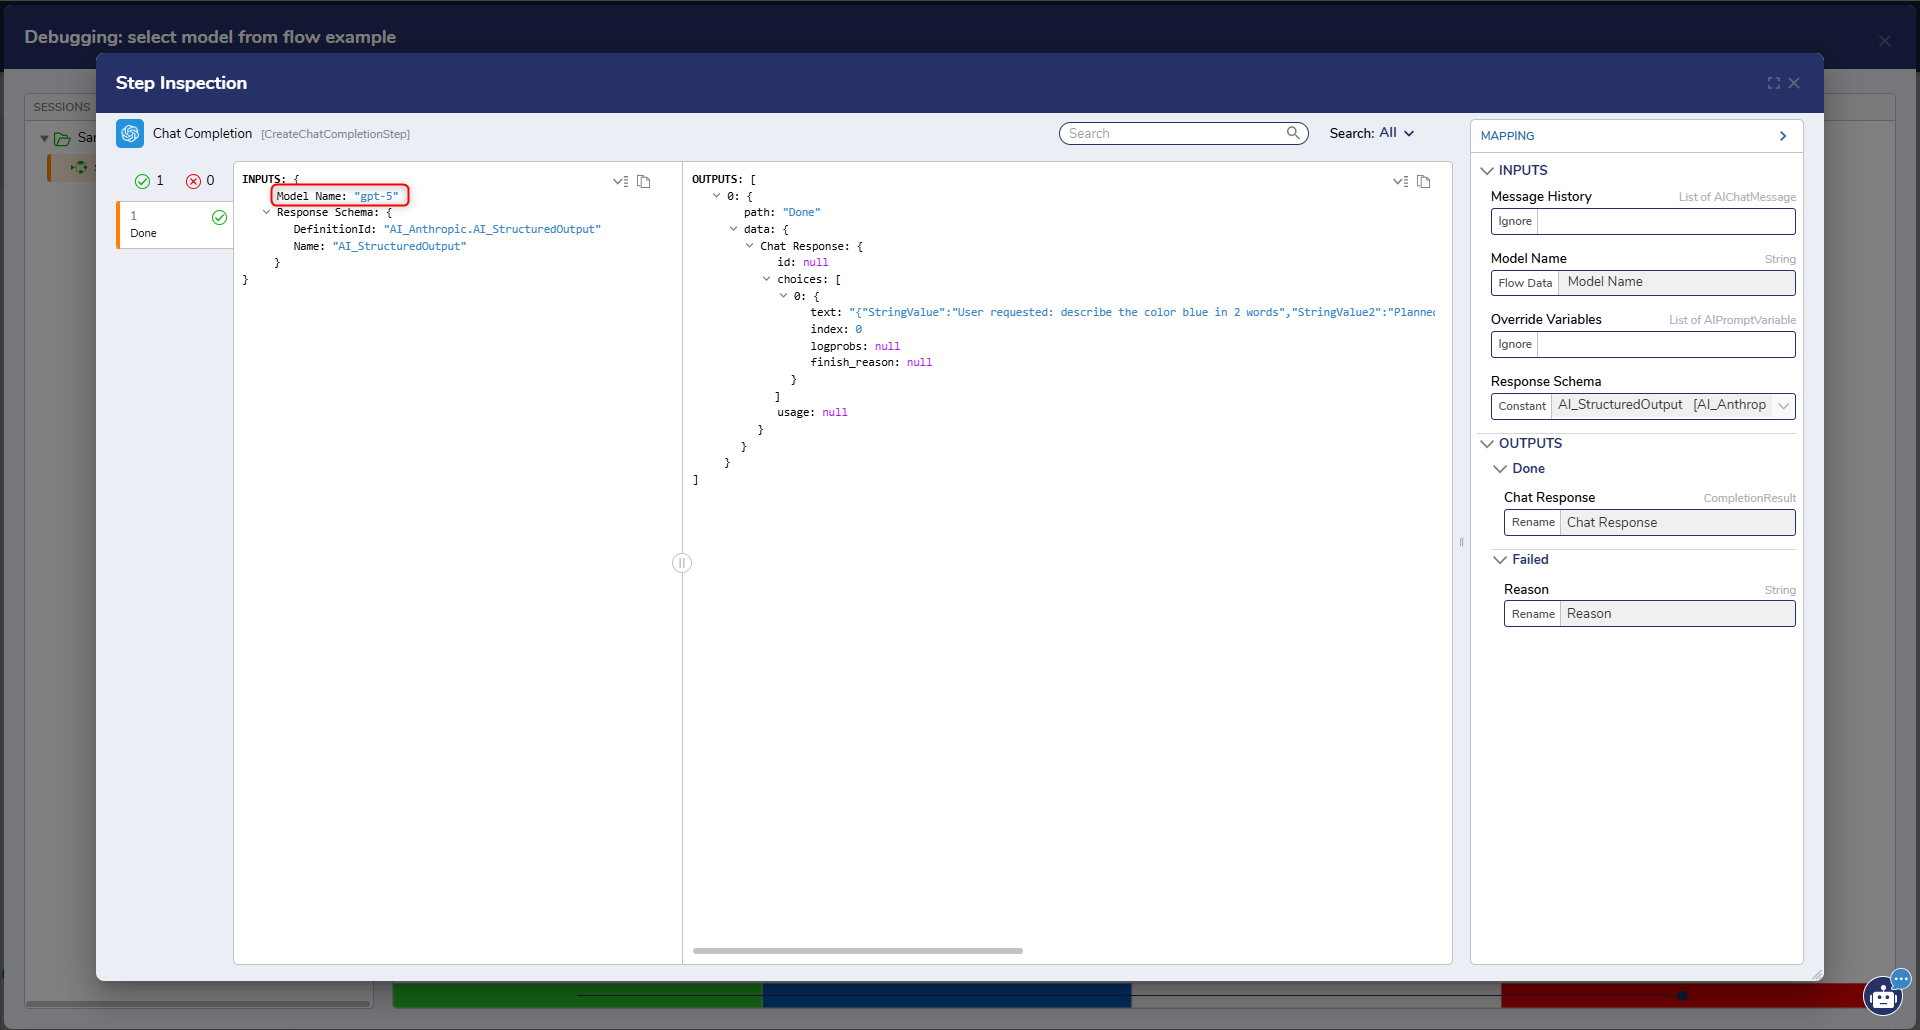
This option ensures that Users can work with newly released models or provider-specific model names without waiting for updated drop-down lists in the Module.
Using Exposed and Module-Specific Steps
Using Exposed Steps:
The AI Common Module exposes Steps that can be located in the toolbox under AI > Common, AI > Text Manipulation, AI > Prompt Management, AI > PostgreSQL, and AI Vector Preparation.
- These Steps enable Users to perform various AI tasks such as retrieving text embeddings and managing vector data in PostgreSQL.
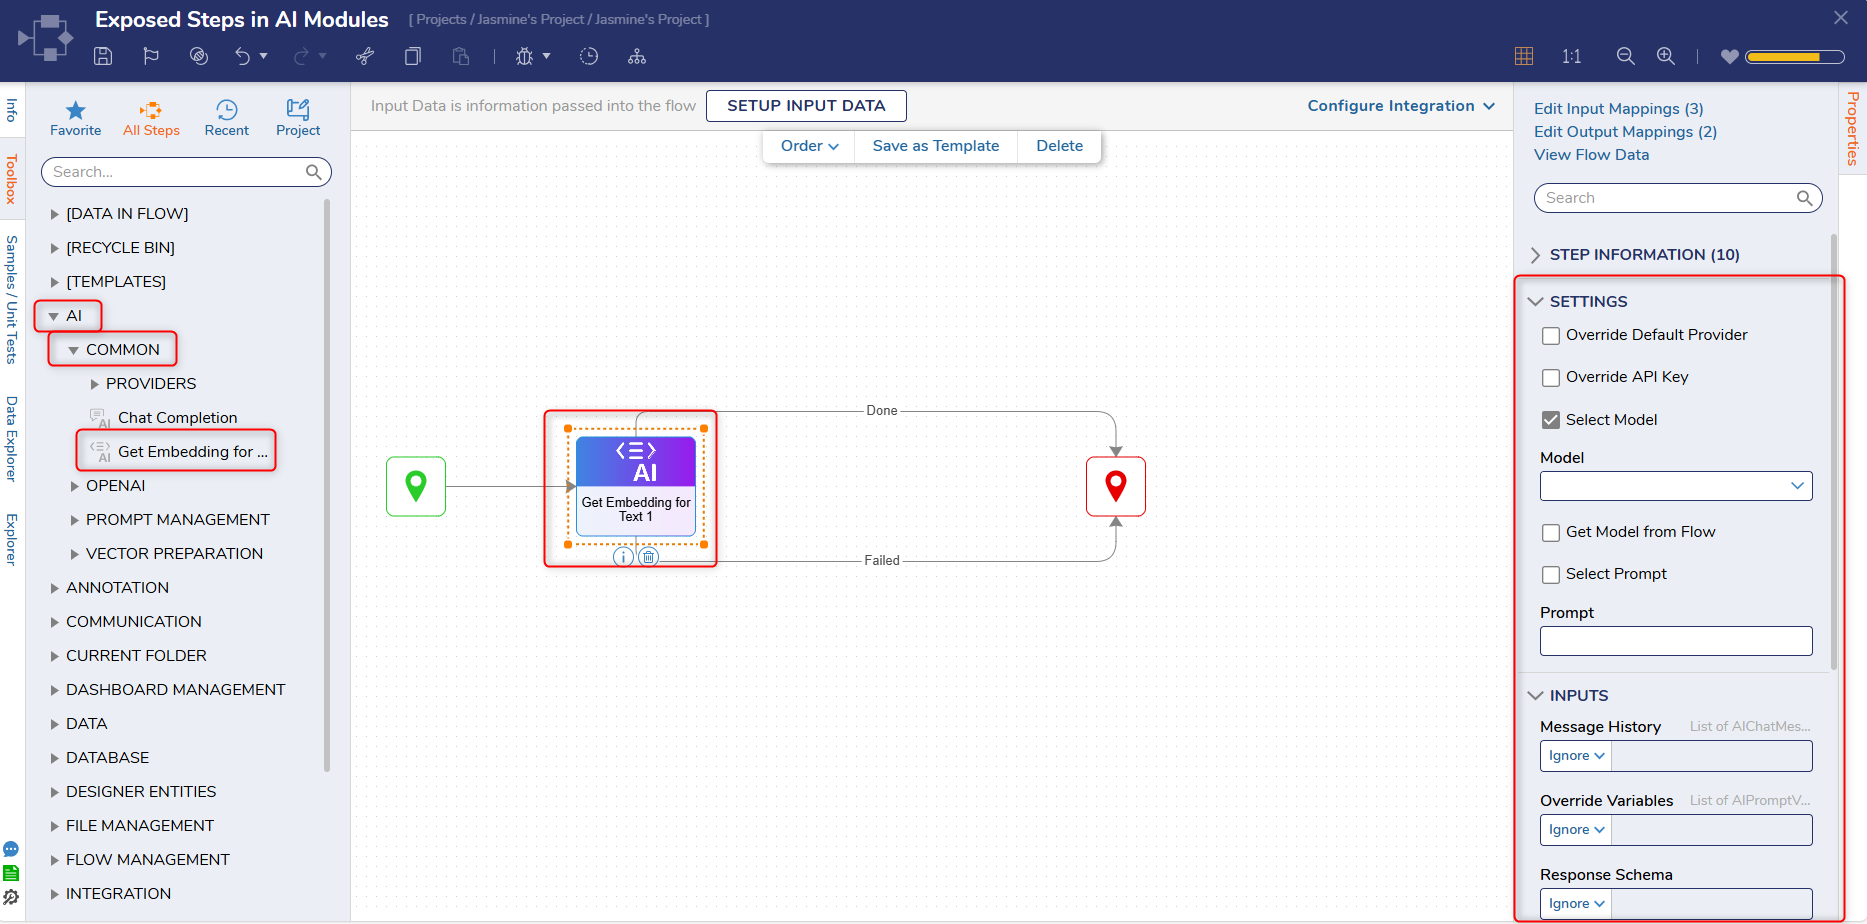
Using Specific Steps:
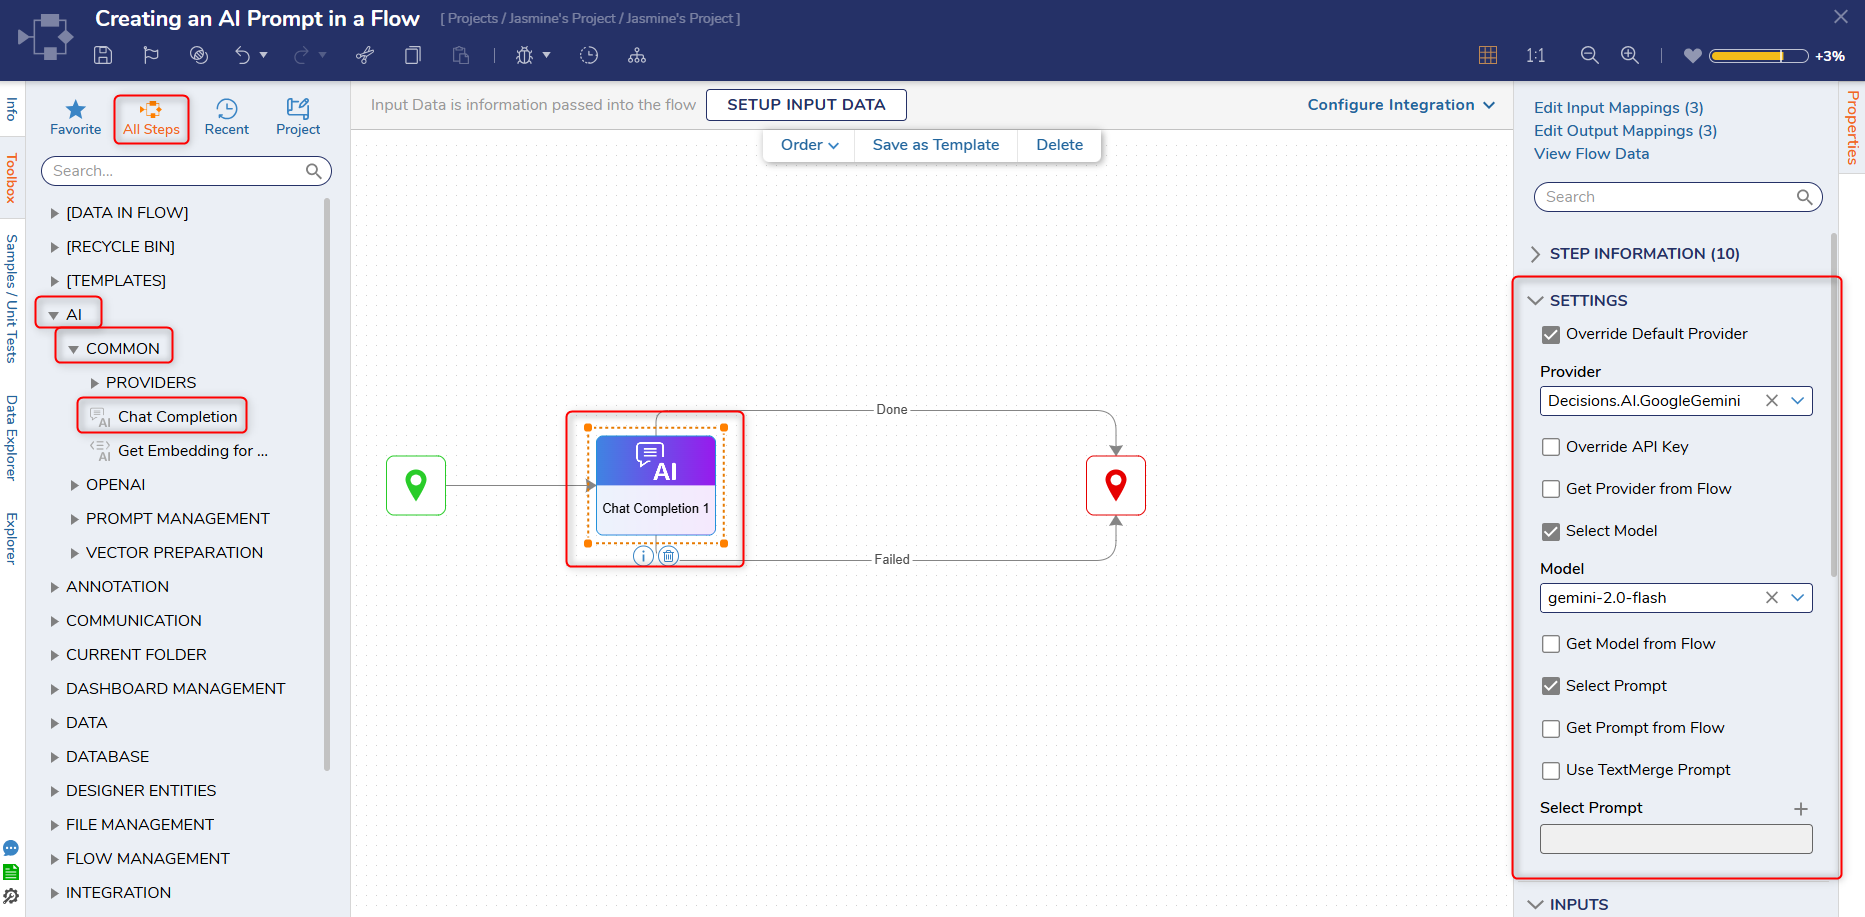
Once the AI Common Module is installed, Users can utilize Steps from the other AI Modules that have been installed, such as the Chat Completion Step in Google Gemini.
- To use a specific Step, navigate to the desired AI Module, then select the corresponding Step.
- Drag the Step onto the workspace and select it to view the Properties Panel.
- Navigate to the Settings section and check the Override Default Provider box.
- Select the desired AI Module from the Provider drop-down menu. In this example, we selected Google Gemini.
- Users can proceed with customizing settings information to utilize the selected Step in the Flow.
Use Case: Using an AI Prompt in a Flow with Google Gemini
- Once the AI Prompt has been created, add a dollar sign symbol to the beginning of every variable. This ensures the variable will be searchable during runtime.
- Once the AI Prompt has been created and saved it can now be used in an existing or new Flow.
- Open a new or existing Flow and navigate to the Toolbox.
- Navigate to AI > AI Common and drag the Chat Completion Step under Providers onto the workspace.
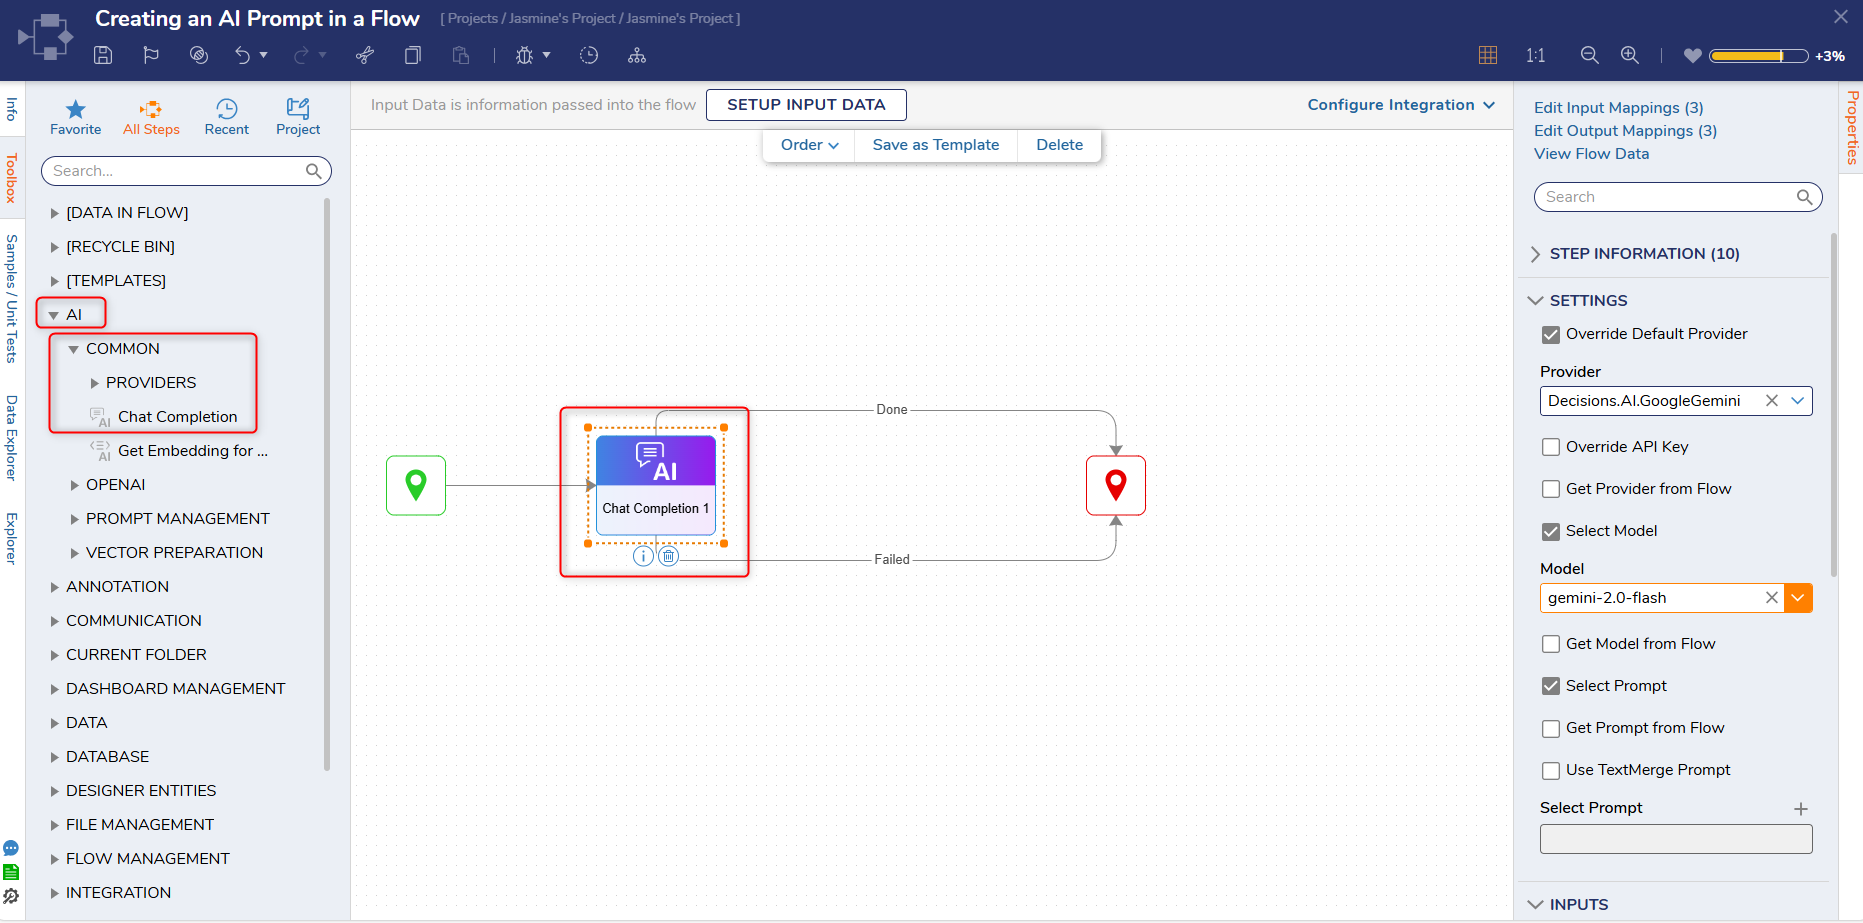
- Select the Chat Completion Step and scroll down the Properties panel to Settings.
- From here, check the Override Default Provider box, select the desired Model, and check the Select Prompt Box.
- This action will populate a Select Prompt box. Select the plus icon and navigate to the AI Prompts Folder to select the created AI Prompt.
- Select Pick to save the prompt into the Flow.
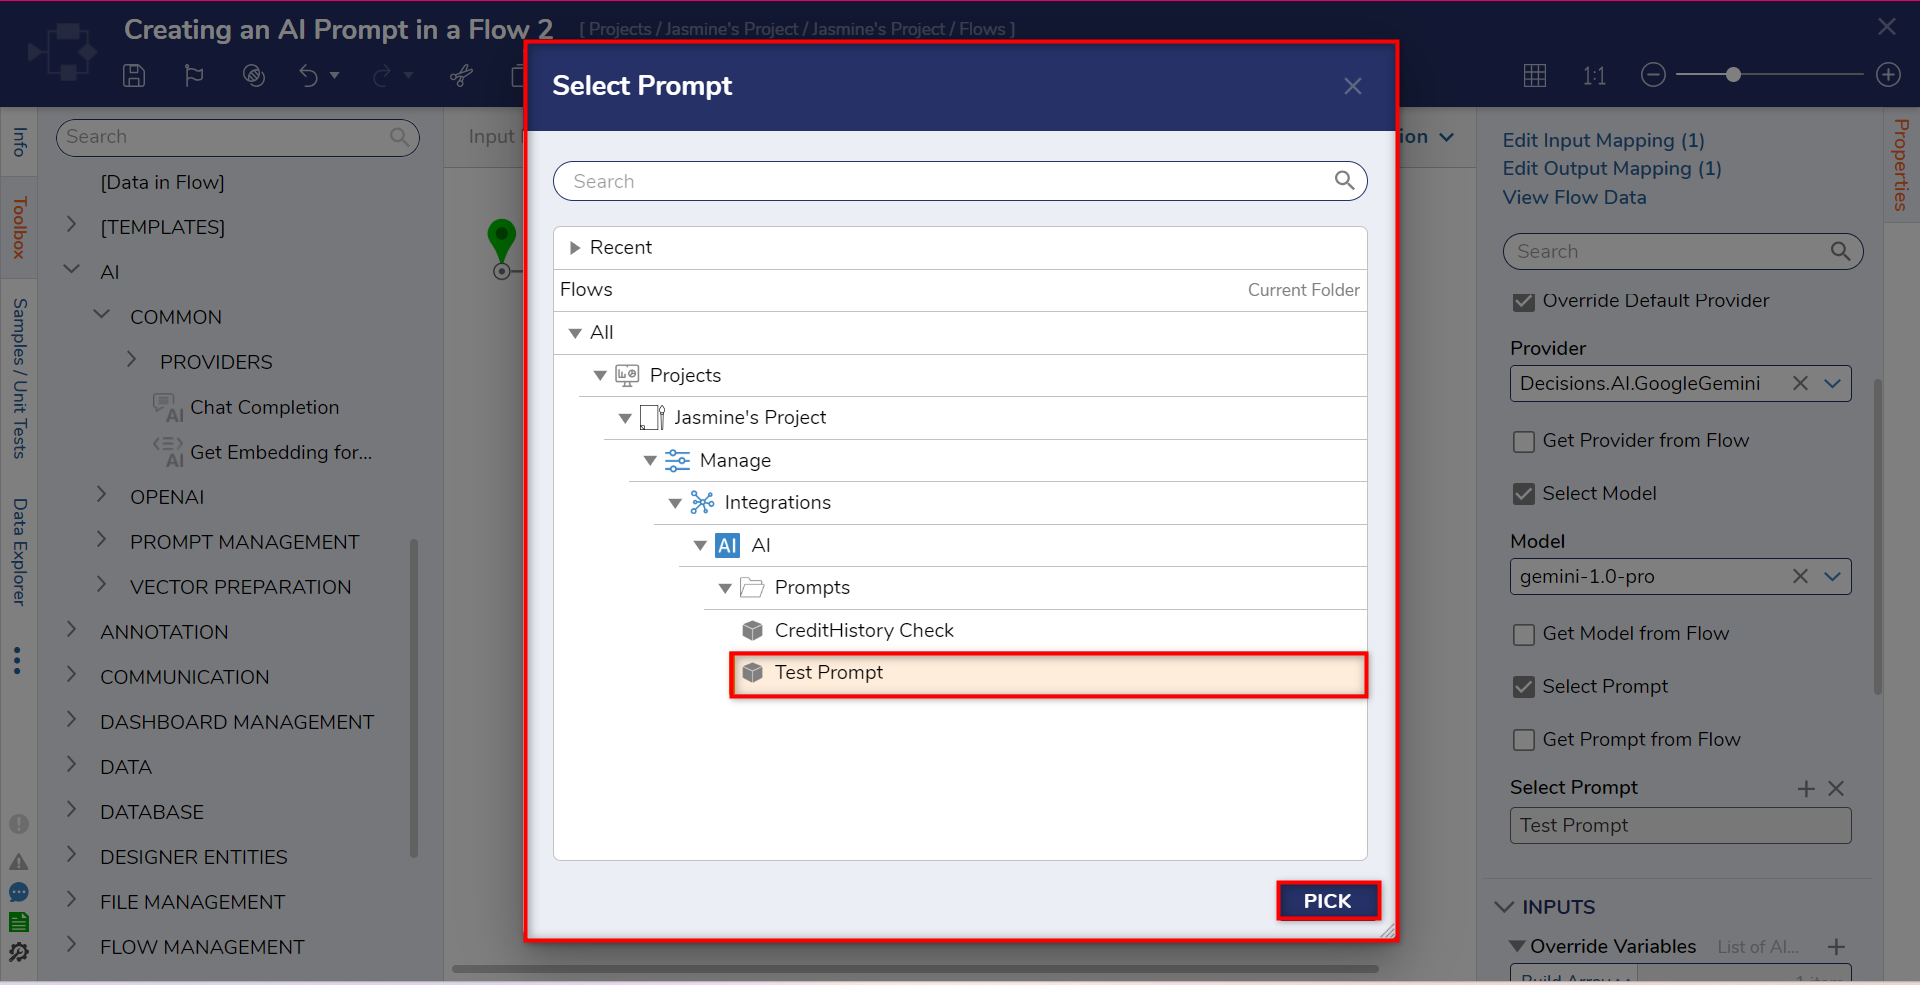
- Once the Prompt has been saved, navigate to the Inputs section.
- Select Build Array on Override Variables and then select Build Data on Item 0.
- In the Find field, enter the name of the variable defined earlier in the created prompt.
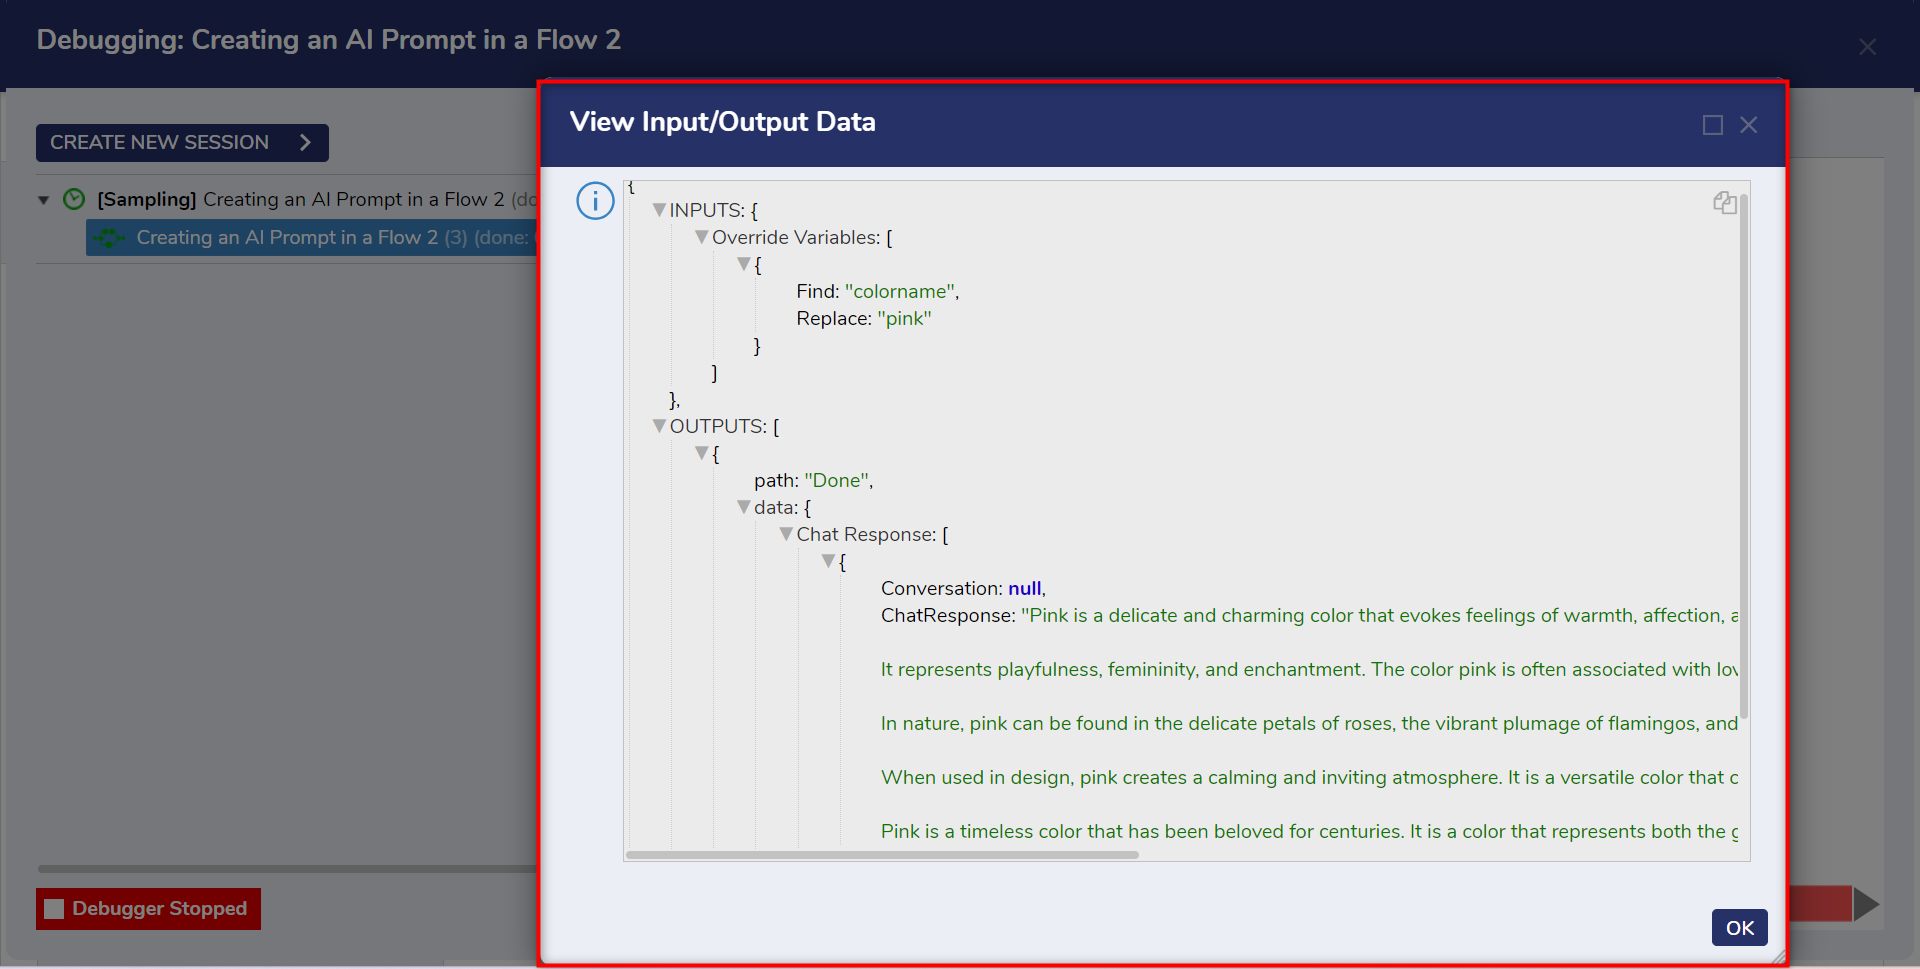
- In the Replace field, enter the name of the item that will replace the variable. In this example, the variable name will be replaced by pink.
- Select Build Array on Override Variables and then select Build Data on Item 0.
- Once this information is saved. Connect the Chat Completion Step to the End Step and select Debug.
- Once the Debugger has been run, the Flow should generate a Chat Response that includes the selected prompt and any designated variables.
