Overview
A POST method is used to send data to a server via API. It also creates subordinate resources, such as a file in a directory. REST Services are a folder that can hold any number of REST methods.
For more information, please visit the following article on Rest Service Integration.
Example
In this example, a REST Service will be created with the POST method that sends new account data to a server. For confirmation, a Flow will then be created to send a JSON object with a custom Request Body.
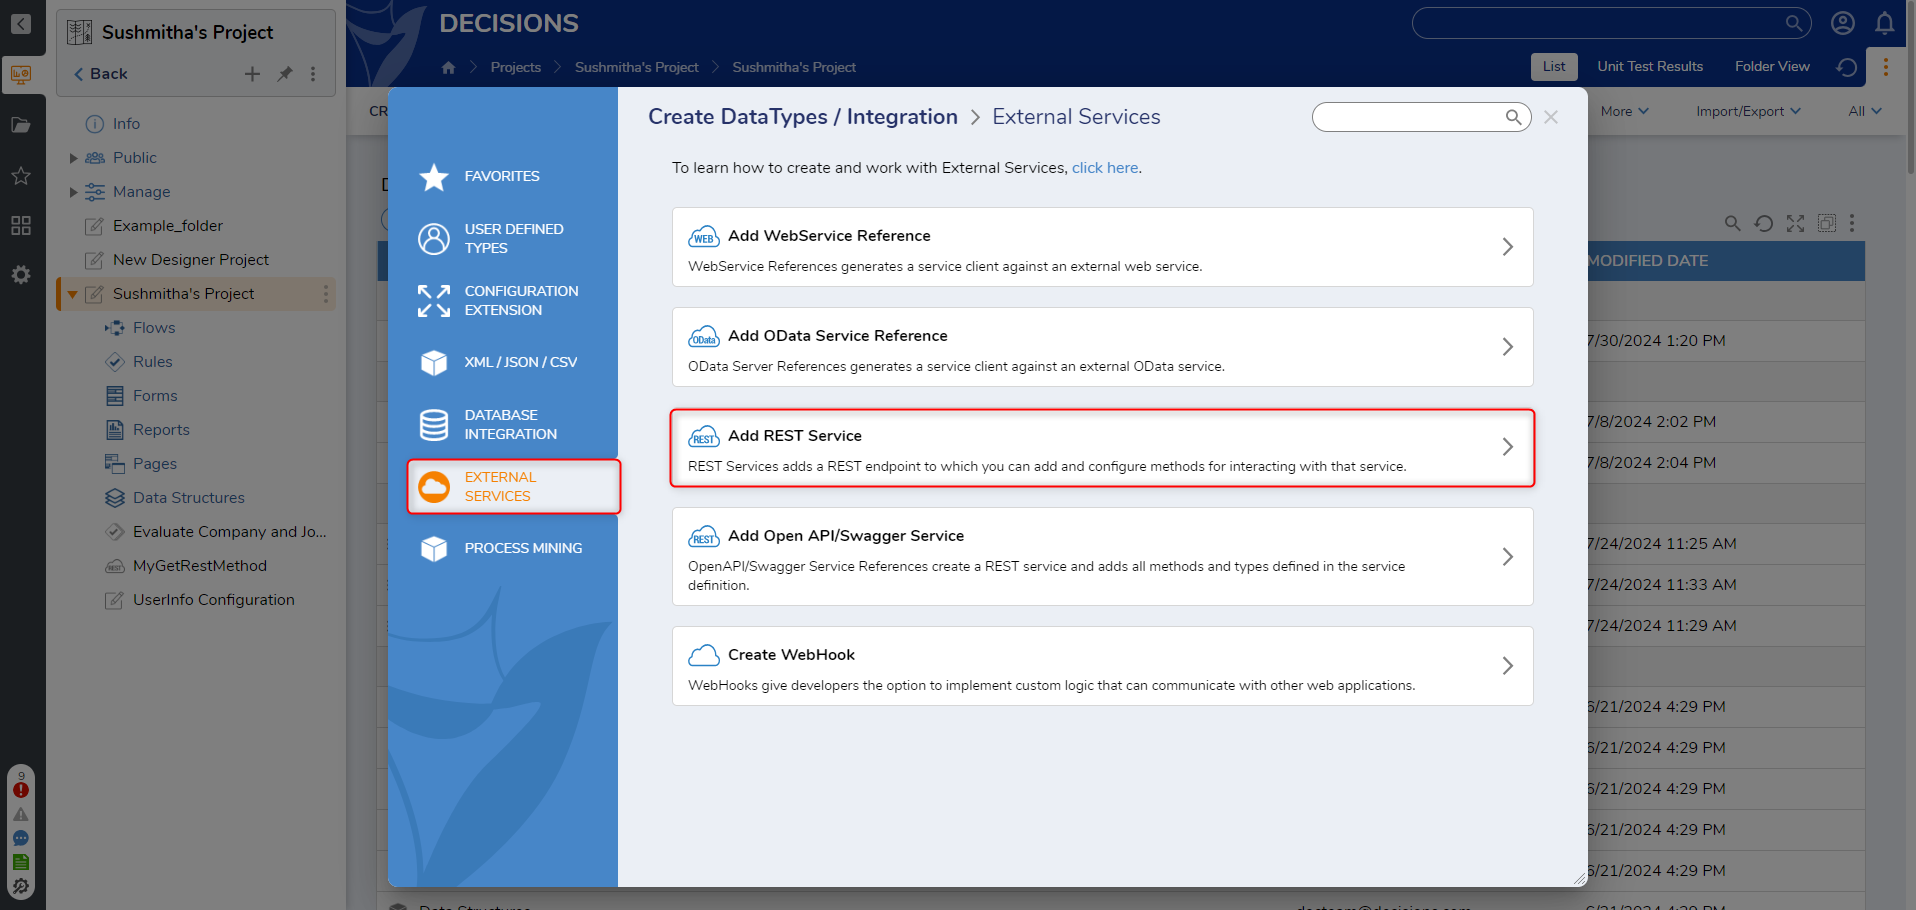
- In a Designer Project, click CREATE DATATYPES/INTEGRATION. Select External Services and click Add REST Service. Creating a REST integration via Add REST Service Integration within the Integrations Folder is possible. It is advised to create the integration within a Designer Folder instead. This allows the user more mobility with the project, should they have to export/import the integration to another instance, and ease access.
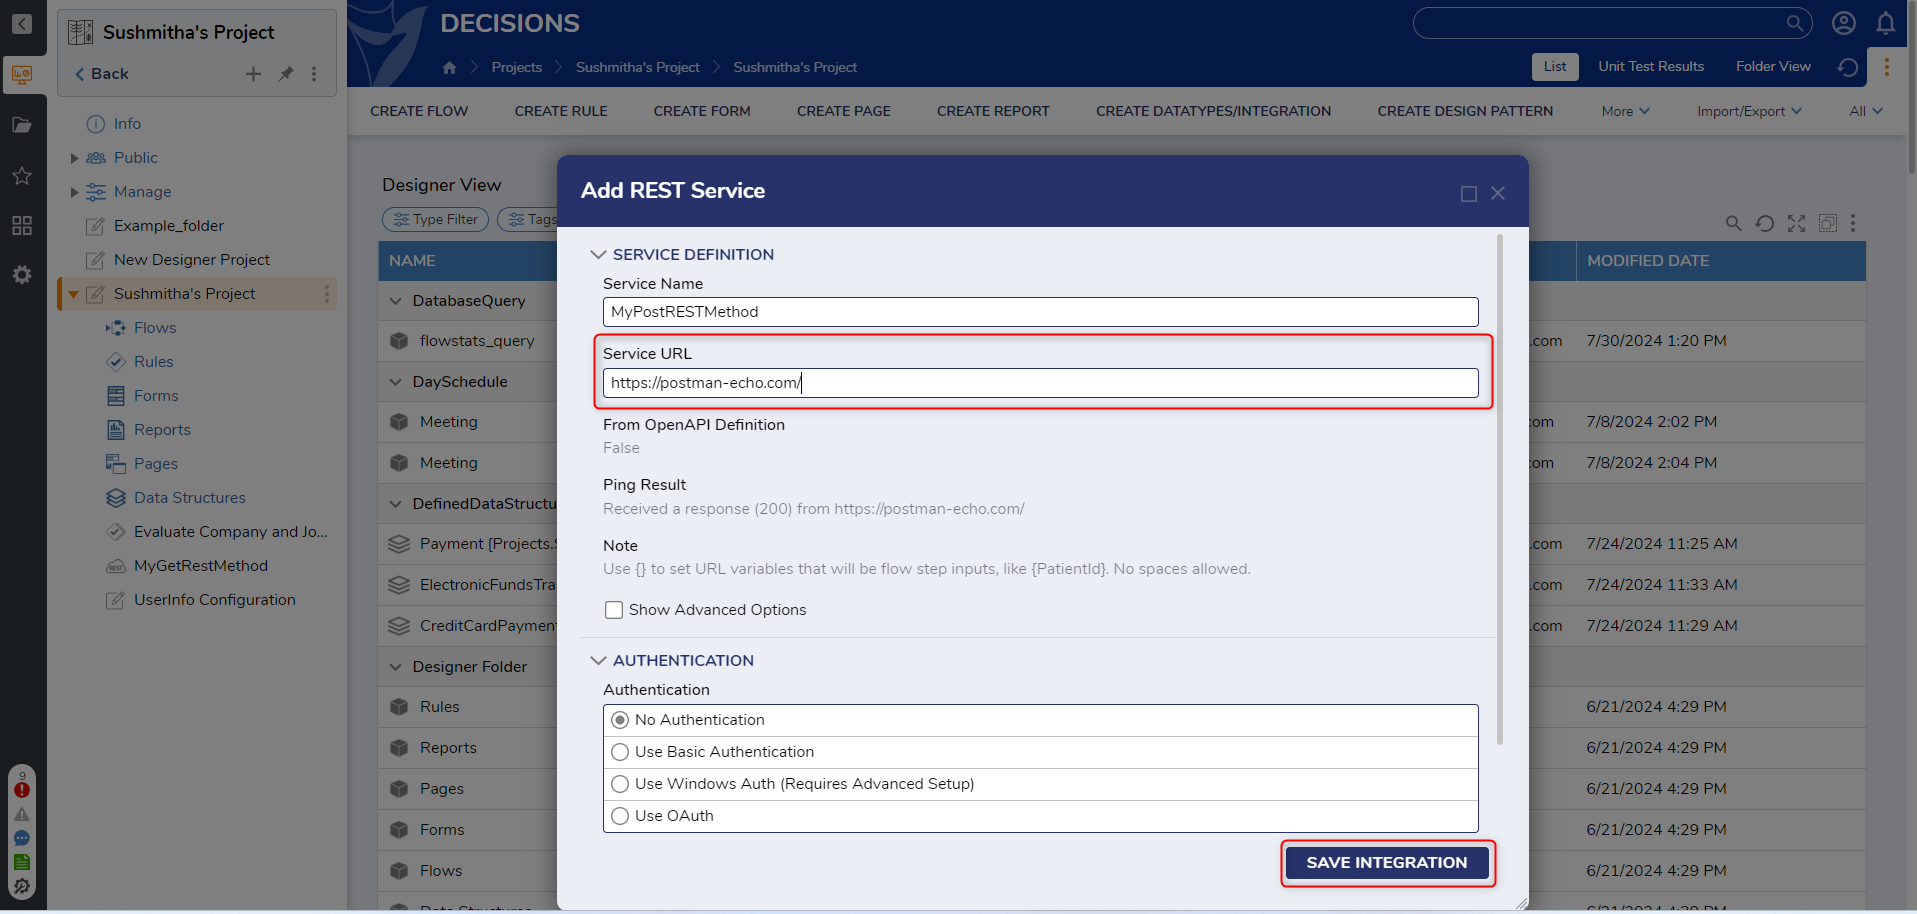
- In the Add REST Service window, define the Service Name and enter "https://postman-echo.com/" for the Service URL. Click SAVE INTEGRATION.When defining the Service URL, make sure the Ping Result is 200 to indicate a successful connection to the Service URL.
- Click within the Rest Service folder and select Add Method to Service.

- In the New REST Service Method, enter a Name for the method and type "post" in the URL (Relative to Base) field. Click the drop-down list for HTTP Method and select POST.
- Select JSON for the Content-Type field and Specify Below (Use {} for variables) for the Request Body Format field.
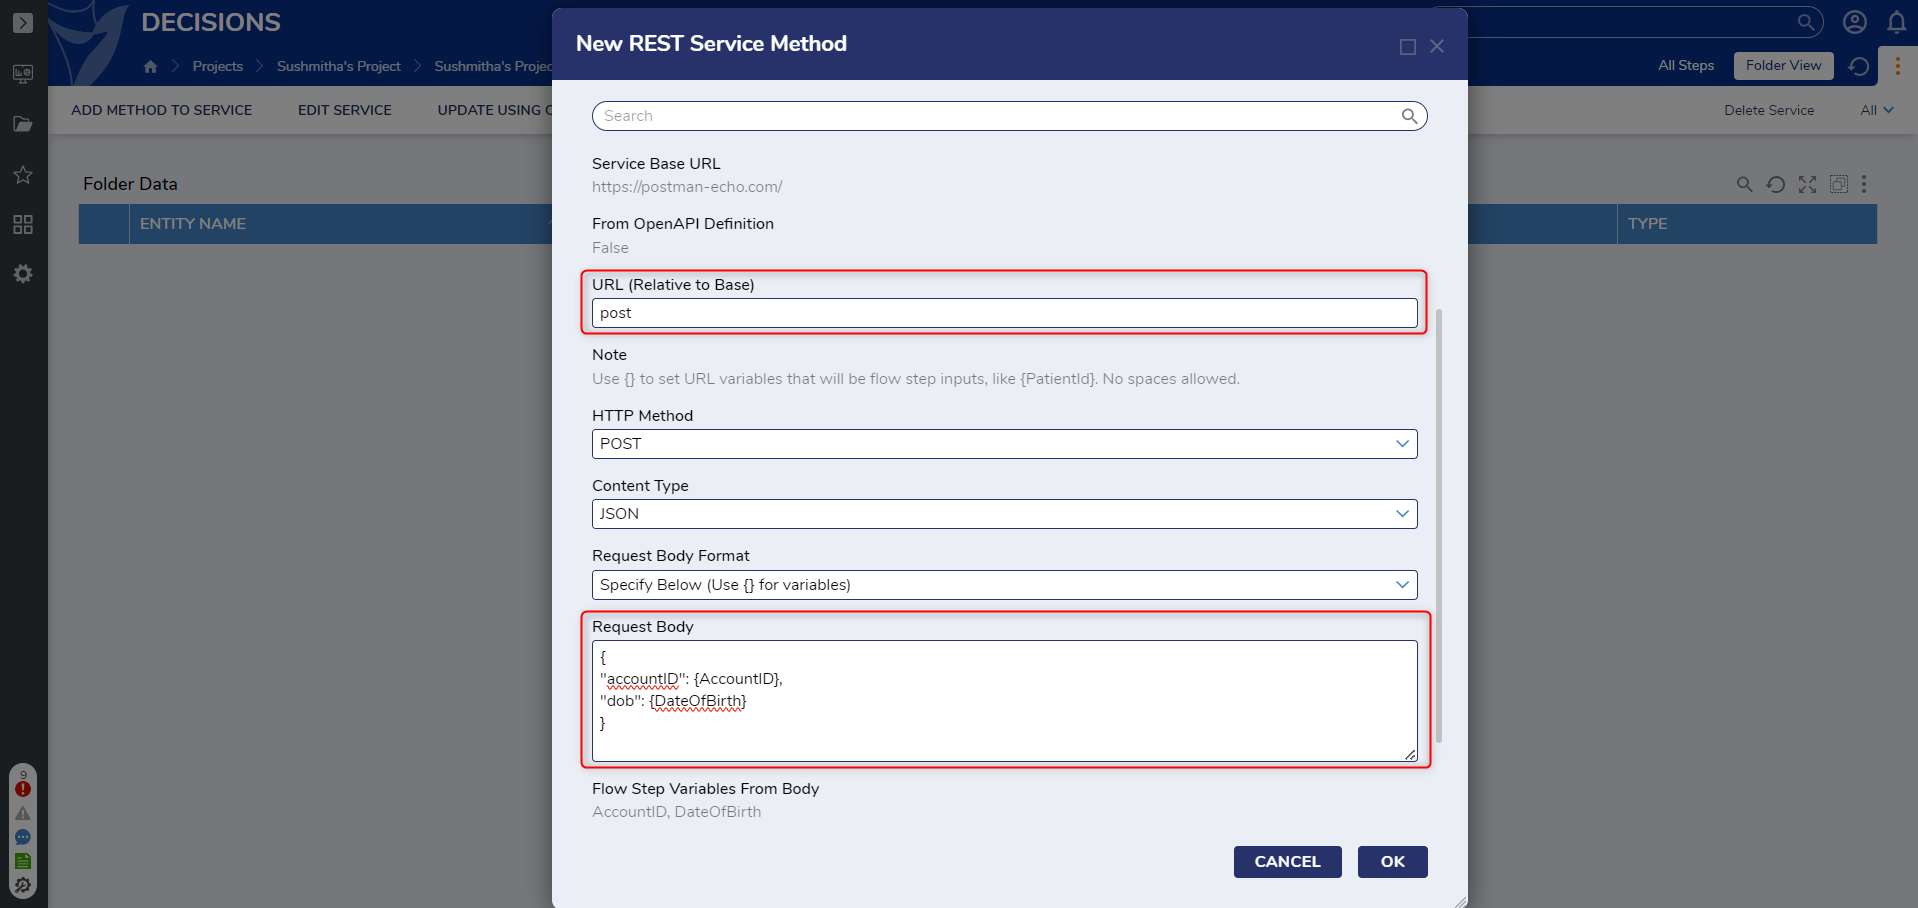
- Copy and paste the following code into the Request Body field. This code will create inputs within the REST service for users to submit account information.
{ "accountID": {AccountID}, "dob": {DateOfBirth} } - Click OK to save and close.
- In the Designer Project, click CREATE FLOW and select Flow. Name the Flow and click CREATE.
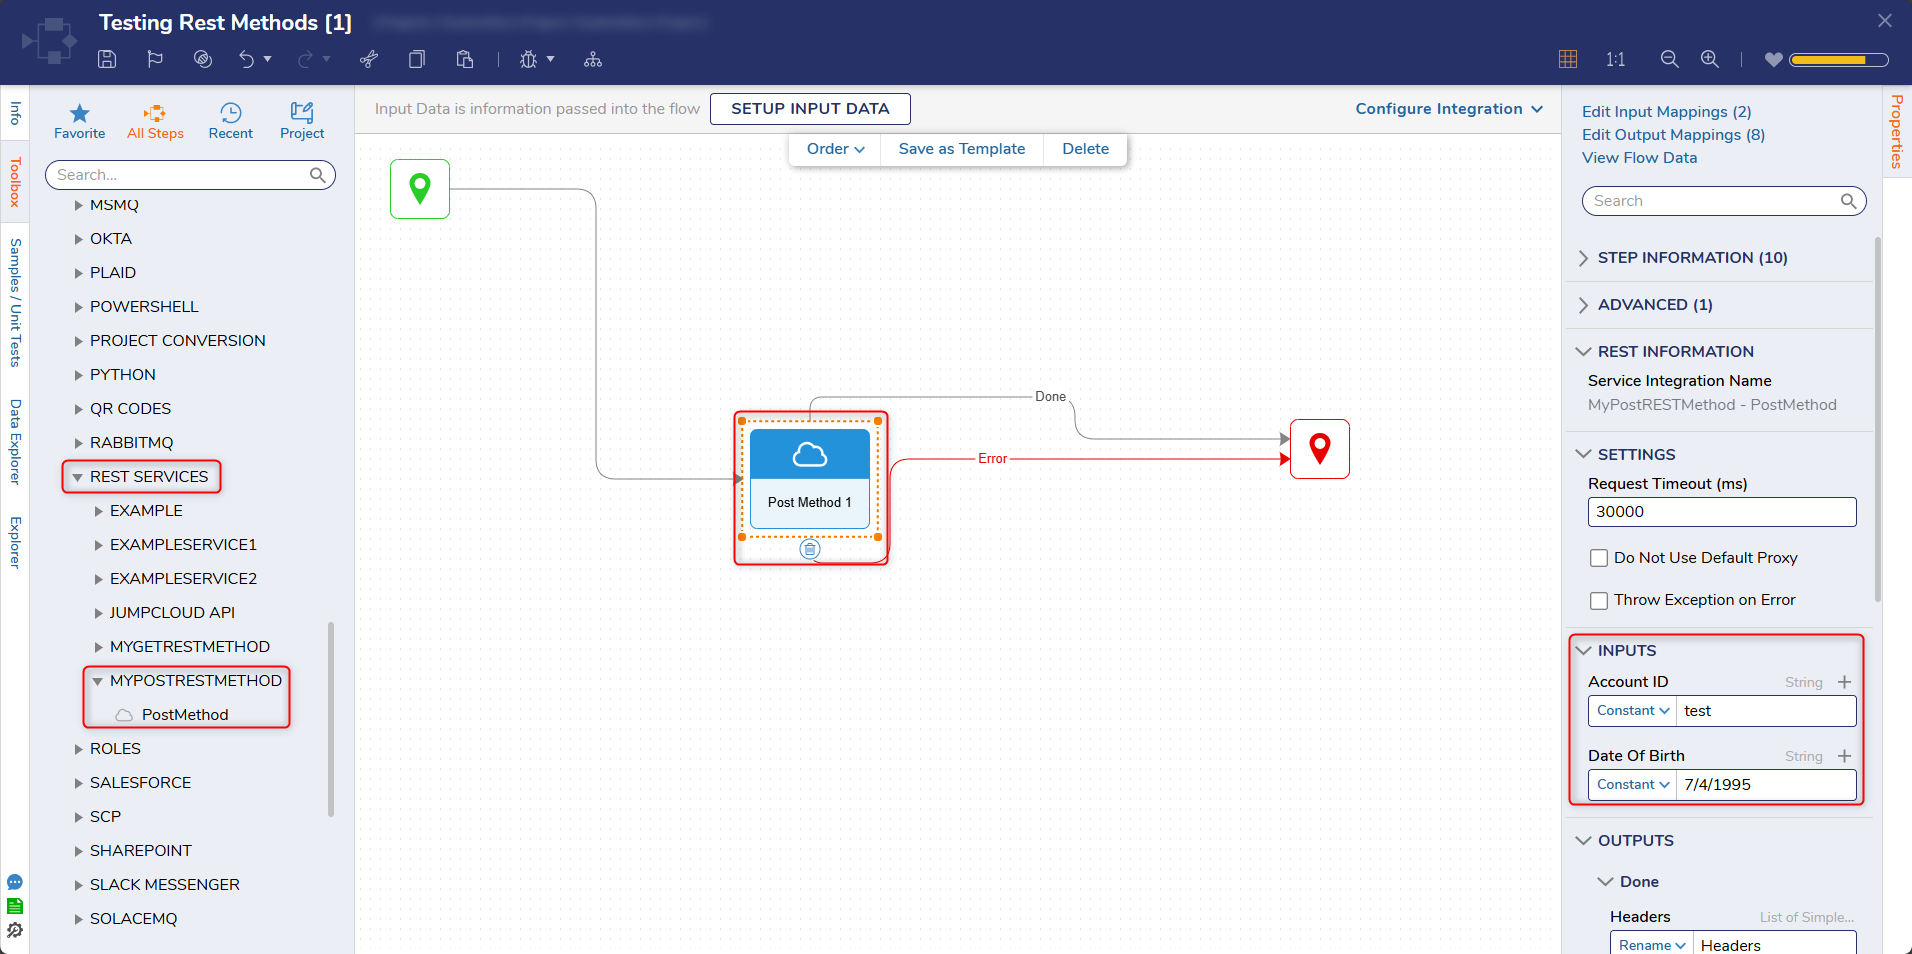
- Navigate to Integrations > REST Services > [REST SERVICE] in the steps toolbox and select the POST method step.
- From the Properties panel for the REST service, set Constant values for the Account ID and Date of Birth fields. Connect the Done and Error paths to the End step. Click Save to save changes to the Flow.
Debug
- Select Debug from the top panel of the Flow Designer. Click START DEBUGGING.
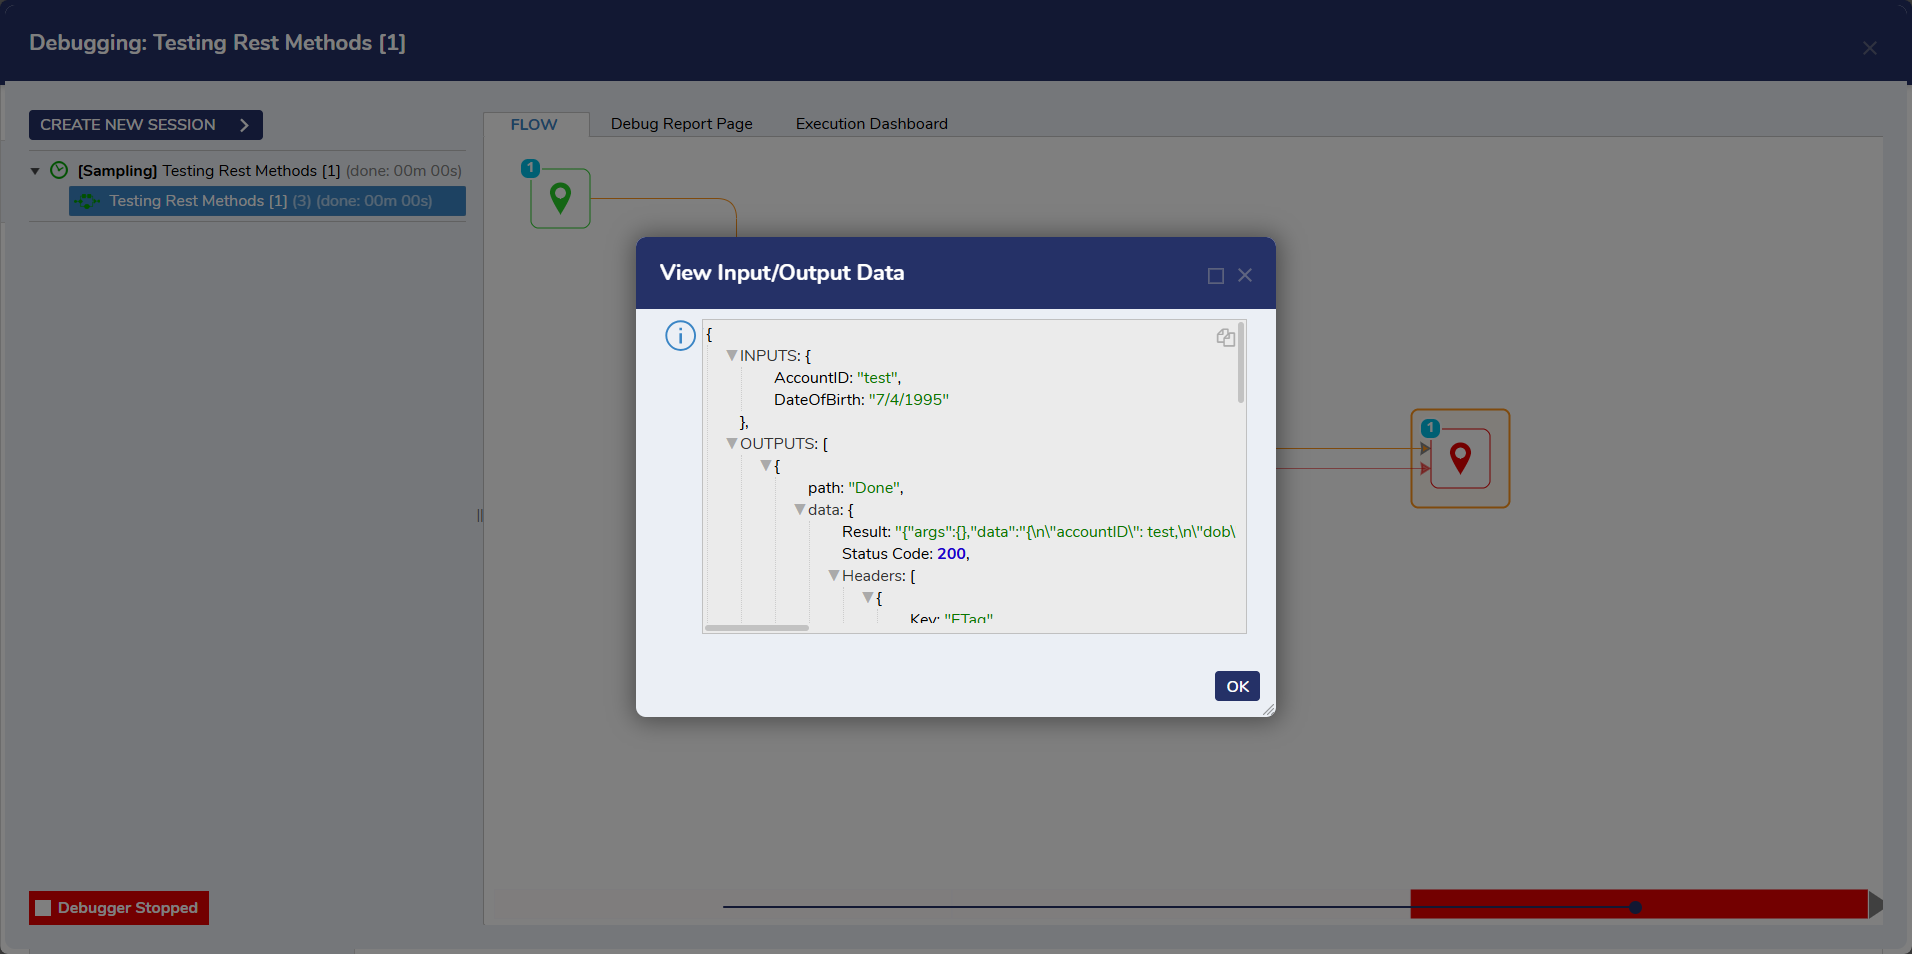
- To view the REST service results, select the REST Service step, select Execution 1, and select View Input/Output Data. If the Flow runs successfully, it will return the expected data return, a Status Code of 200, and the data of the Headers from the POST call.