Overview
The Tree View Form control displays a list of Strings as an expandable tree structure of hierarchical data. The Tree View control then outputs the end-user's selected item.
Common use can involve an inventory management system organized by storage location. Selecting a location expands it to view the stored categories of items that may also be expanded to view the specific items of that category in storage.
Example
- In a Designer Folder, create a new Flow. It will automatically open in the Flow Designer.
- In the Flow Designer, add a Show Form step after the Start step. Select PICK OR CREATE FORM in its Properties to create a new Form. It will automatically open in the Form Designer.
- In the Toolbox panel, expand the Data category to drag and drop the Tree View control onto the Form.
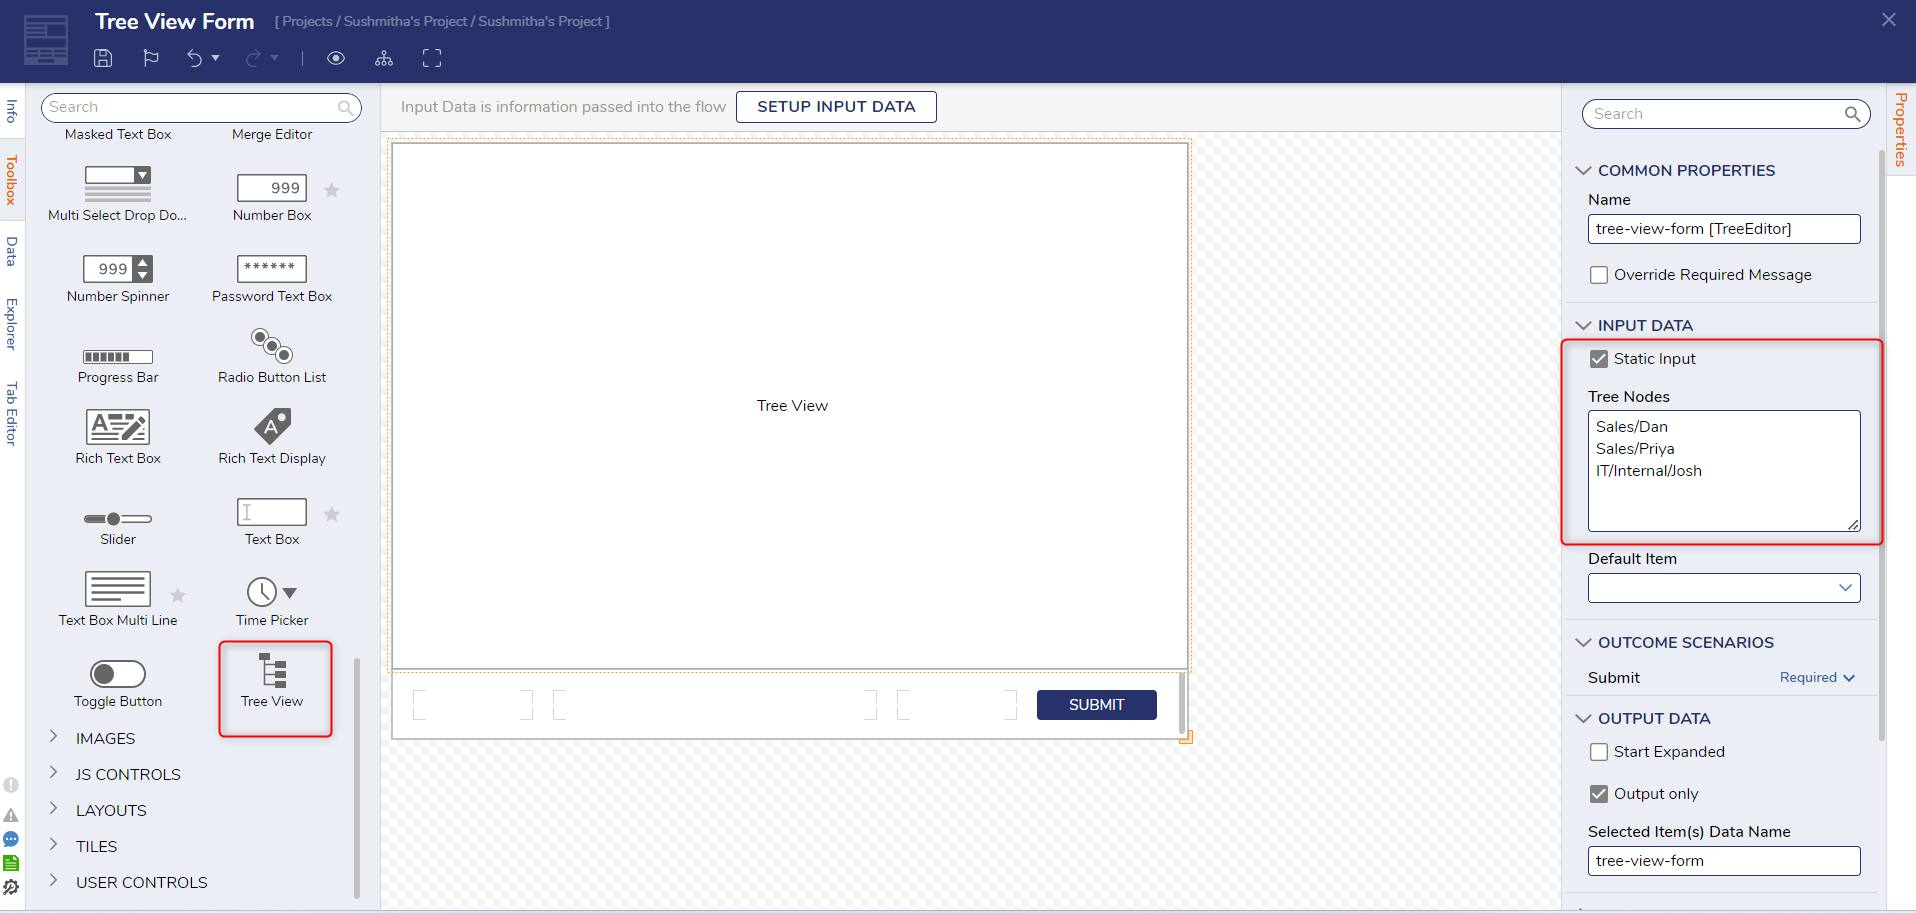
- With the Tree View selected, navigate to the Properties pane and enable the Static Input Checkbox. Add tree nodes with a forward slash (/) as the separator between the parent and child node in the new Tree Nodes setting. A Default Item may be designated by selecting an item from the drop-down list under the Default Item section.
- Save and exit the Form Designer.
- Connect the Show Form step to the End step. Save the Flow.
Debug
- In the Flow Designer, select Debug in the top action panel. Select START DEBUGGING.
- The Form displays the tree view, and each parent node can be expanded to show the child nodes. Select a child node and select Submit. The selection will be available to use throughout the Flow.
For further information on Forms, visit the Decisions Forum.