Repository Action Flows
- 01 Aug 2024
- 2 Minutes to read
- Print
- DarkLight
Repository Action Flows
- Updated on 01 Aug 2024
- 2 Minutes to read
- Print
- DarkLight
Article summary
Did you find this summary helpful?
Thank you for your feedback!
Overview
A Repository Action Flow is a Flow built with the intent of performing a specific action either Before or After the Project Creation or Project Checkin. Repository Action Flows can be accessed from a Decisions Repository environment by:
- Navigating to System > Administration > Repository Actions Flows.
- Expanding the FLOW option from the top Action Bar and selecting which type of Action Flow to create.
This will not trigger the normal Create Flow window, this button will go directly to a Flow Designer where the actual logic for the selected type must be created.

Action Flow Types
Before Project Creation Flow
This Flow executes before a Project is created on the Repository and contains two Endpoints (End steps); Allowed and Not Allowed. With two separate End steps, two different paths of Flow logic can be created to assure that the appropriate criteria are met before the project can be created. This Flow only allows steps that are synchronous with the Flow, meaning elements like Tasks, Forms, and Assignments cannot be used.
After Project Creation Flow
This Flow executes after a Project is created on the Repository and contains just one End step.This Flow logic can be built to perform Flow functions for Repository Actions, which include the use of synchronous and asynchronous Flow steps.
Before Checkin Flow
This Flow executes before a Project is Checkedin to the Repository and contains two Endpoints (End steps); Allowed and Not Allowed. With two separate End steps, two different paths of Flow logic can be created to assure that the appropriate criteria are met before the Project can be checked into the Repository. This Flow only allows steps that are synchronous with the Flow, meaning elements like Tasks, Forms, and Assignments cannot be used.
After Checkin Flow
This Flow executes after a Project is checked into the Repository and contains just one End step. This Flow logic can be built to perform Flow functions for Repository Actions, which include the use of synchronous and asynchronous Flow steps.
Example
Once an Action Flow is selected in the Designer Repository Settings, it will be available for all Projects associated with the Repository.
Since these Flows are specific to the Repository, they automatically contain Branch Name and Project Name as Flow Data. This can be accessed from the Data Explorer tab in the Flow Designer or by using the Select From Flow input mapping type when defining an Input value.
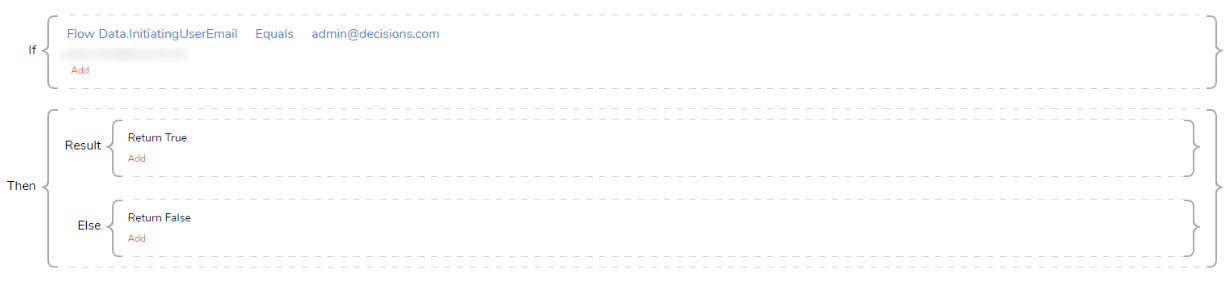
This is an example of a basic Before Checkin Action Flow use case.

Using the provided Flow Data, Rules can be created and implemented into the Flow that can check against the Branch or Project data, which could determine whether the action passes to Allowed or Not Allowed.
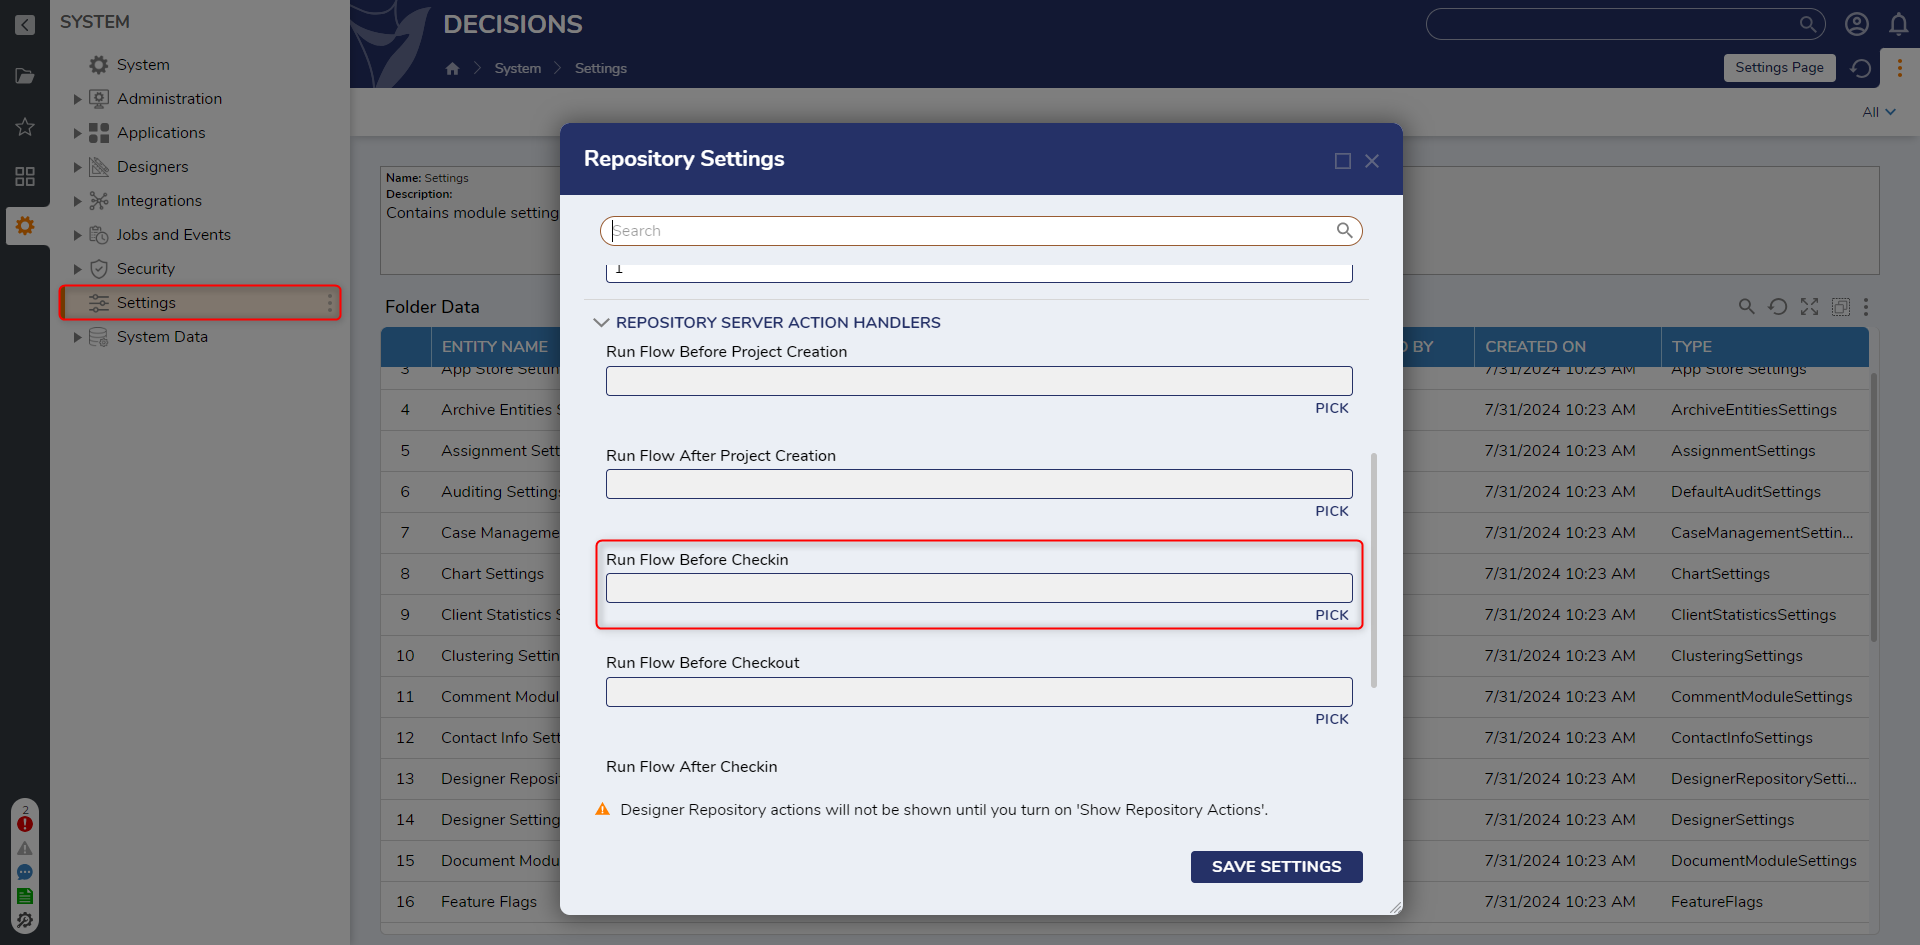
After the Action Flow is created, it must be applied to the Repository environment.
Do so by:
- Navigating to System > Settings > Designer Repository Settings.
- In the Repository Settings window, under Repository Server Action Handlers, click Pick under the desired Action Handler Type.
- PICK the desired Repository Action Flow.
- Click SAVE SETTINGS to save the configuration.The chosen Flow will execute when the corresponding event happens in the Repository.

Was this article helpful?