Overview
Multi-Tenancies now support the ability to integrate Active Directory, as well as its capability to manage domains, Accounts, objects, etc, within their environments.
By doing so, AD Syncs can be performed first on the Control Instance, and then its subsequent Tenants.
Prerequisites
The Active Directory Module must be installed on both the Control and Tenant Instances.
Setup
- After the Active Directory Module has been installed on both the Control and Tenant Instances, from the Control Instance, navigate to System > Settings, and open Active Directory Settings.
- In the resulting window, under Servers, click ADD.
Under PORTAL SETTINGS > Default Groups, click ADD NEW and select the desired Default Group; this selection designates which Group the synced Accounts will be added to.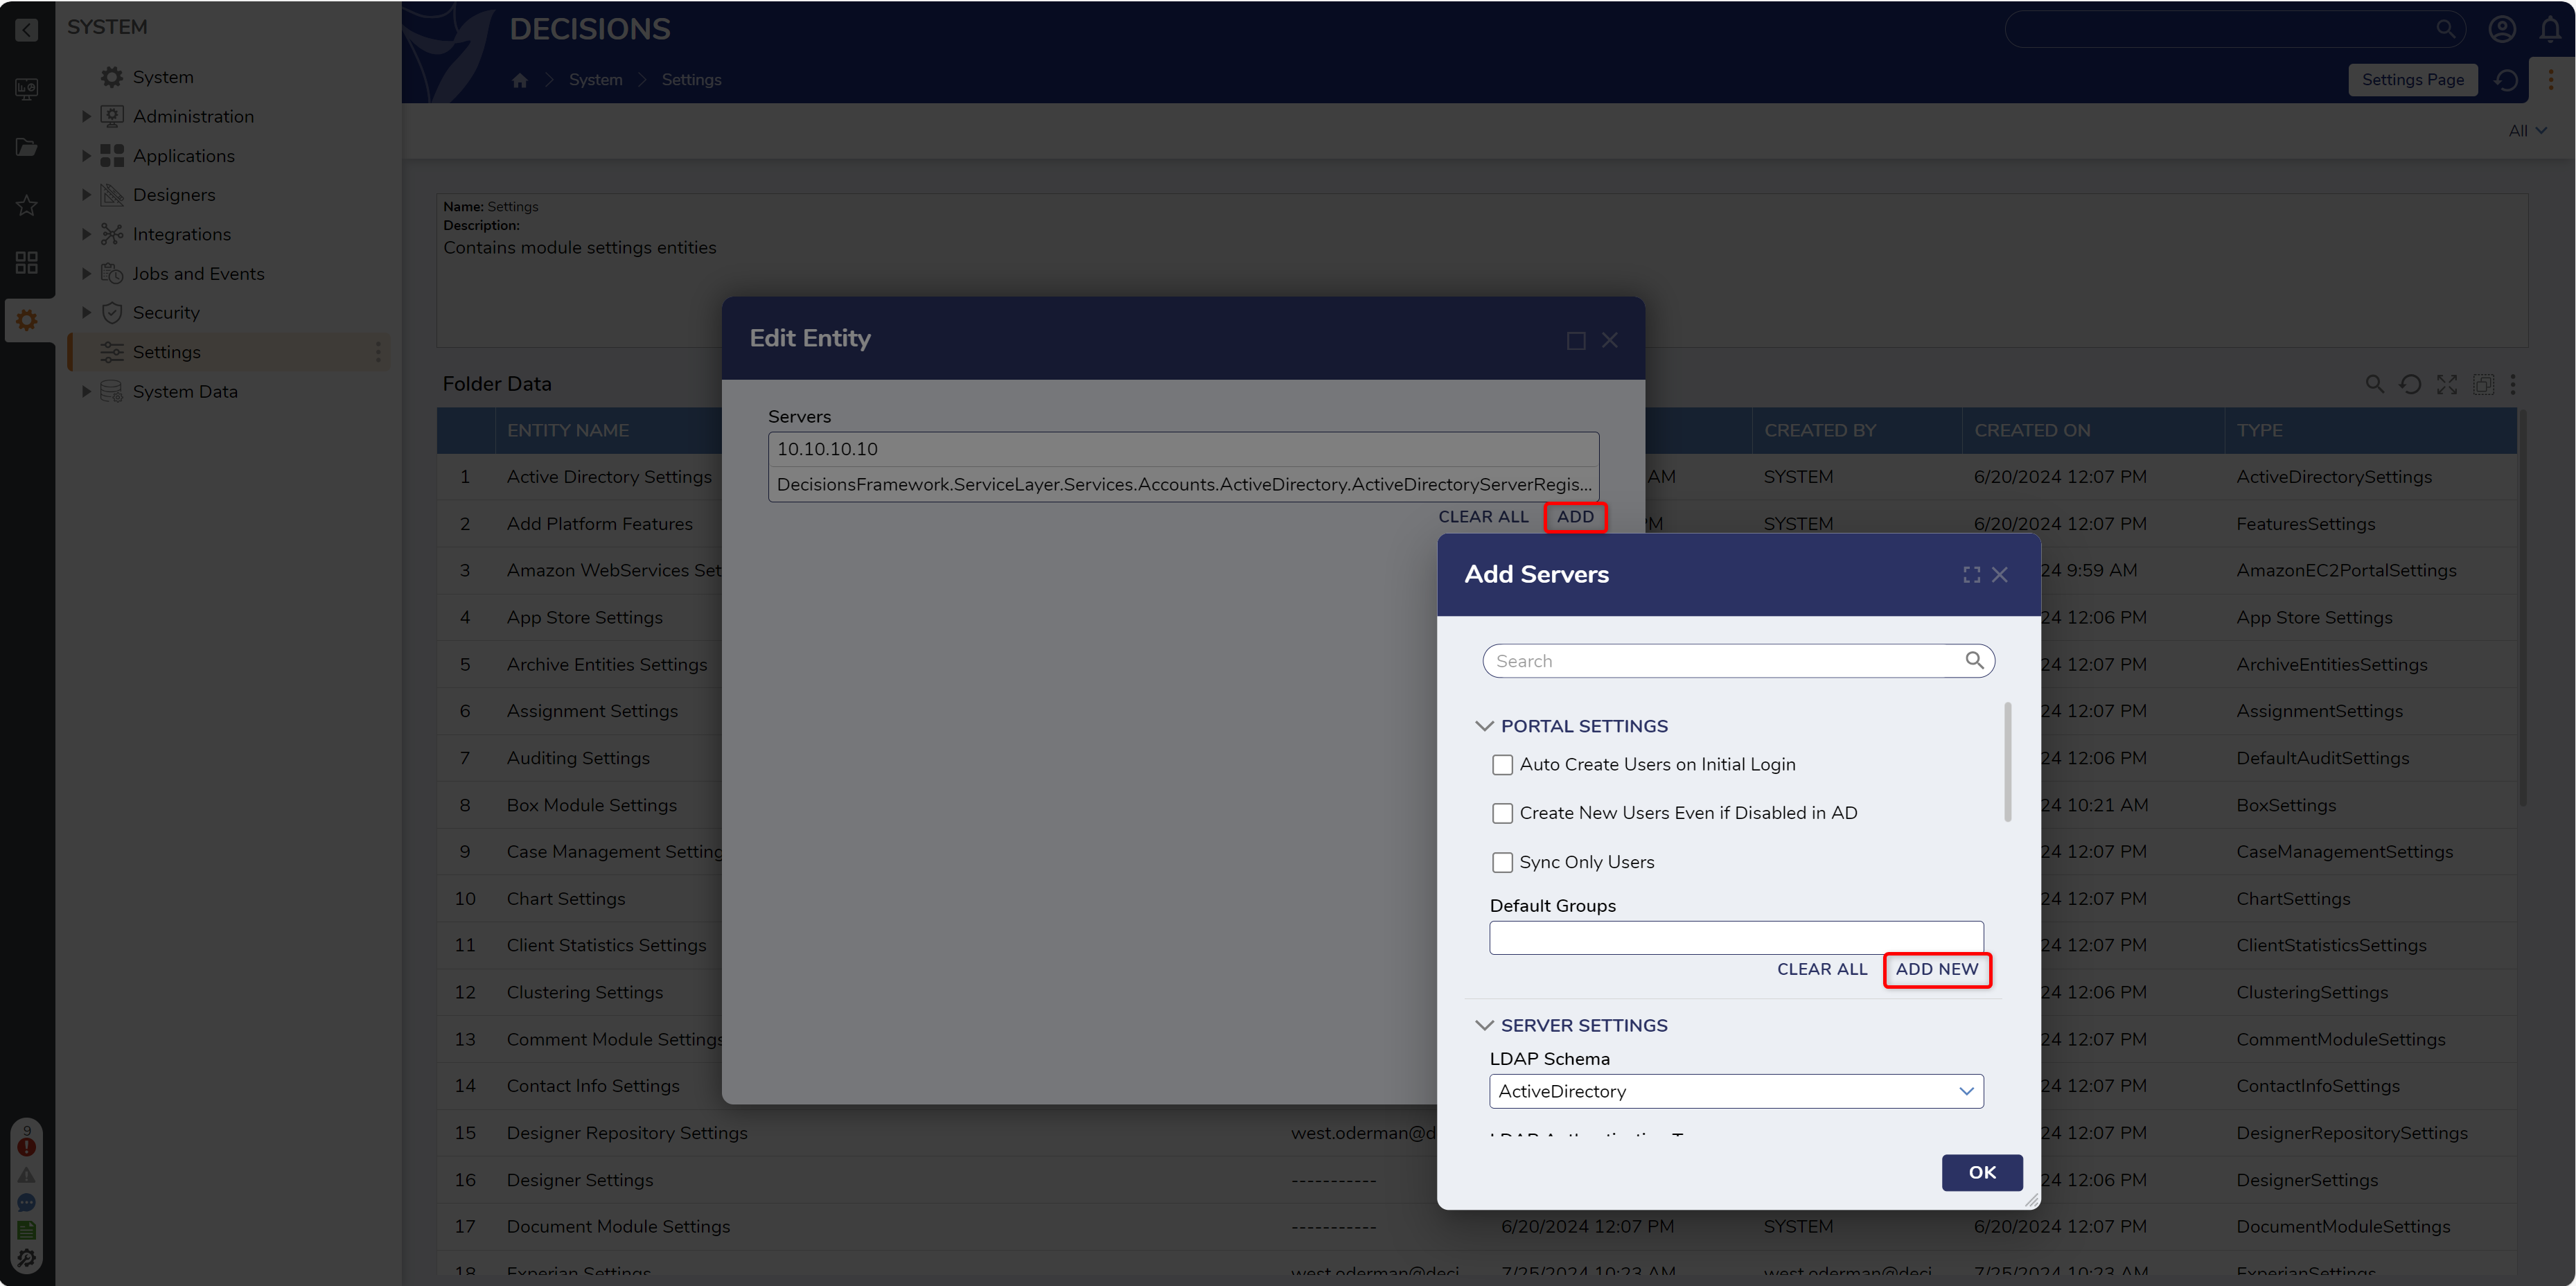
- Under SERVER SETTINGS, configure the settings as follows:
Setting Configuration Domain Name Provide the Domain or IP Address for the AD Server. Domain Login Prefix Provide the required Prefix upon user login. Default Email Domain Provide the default Email Domain for the AD Server. Elevated User Name Provide the User Name for an Account with AD access. Elevated User Password Provide the respective password for the Elevated User Name. 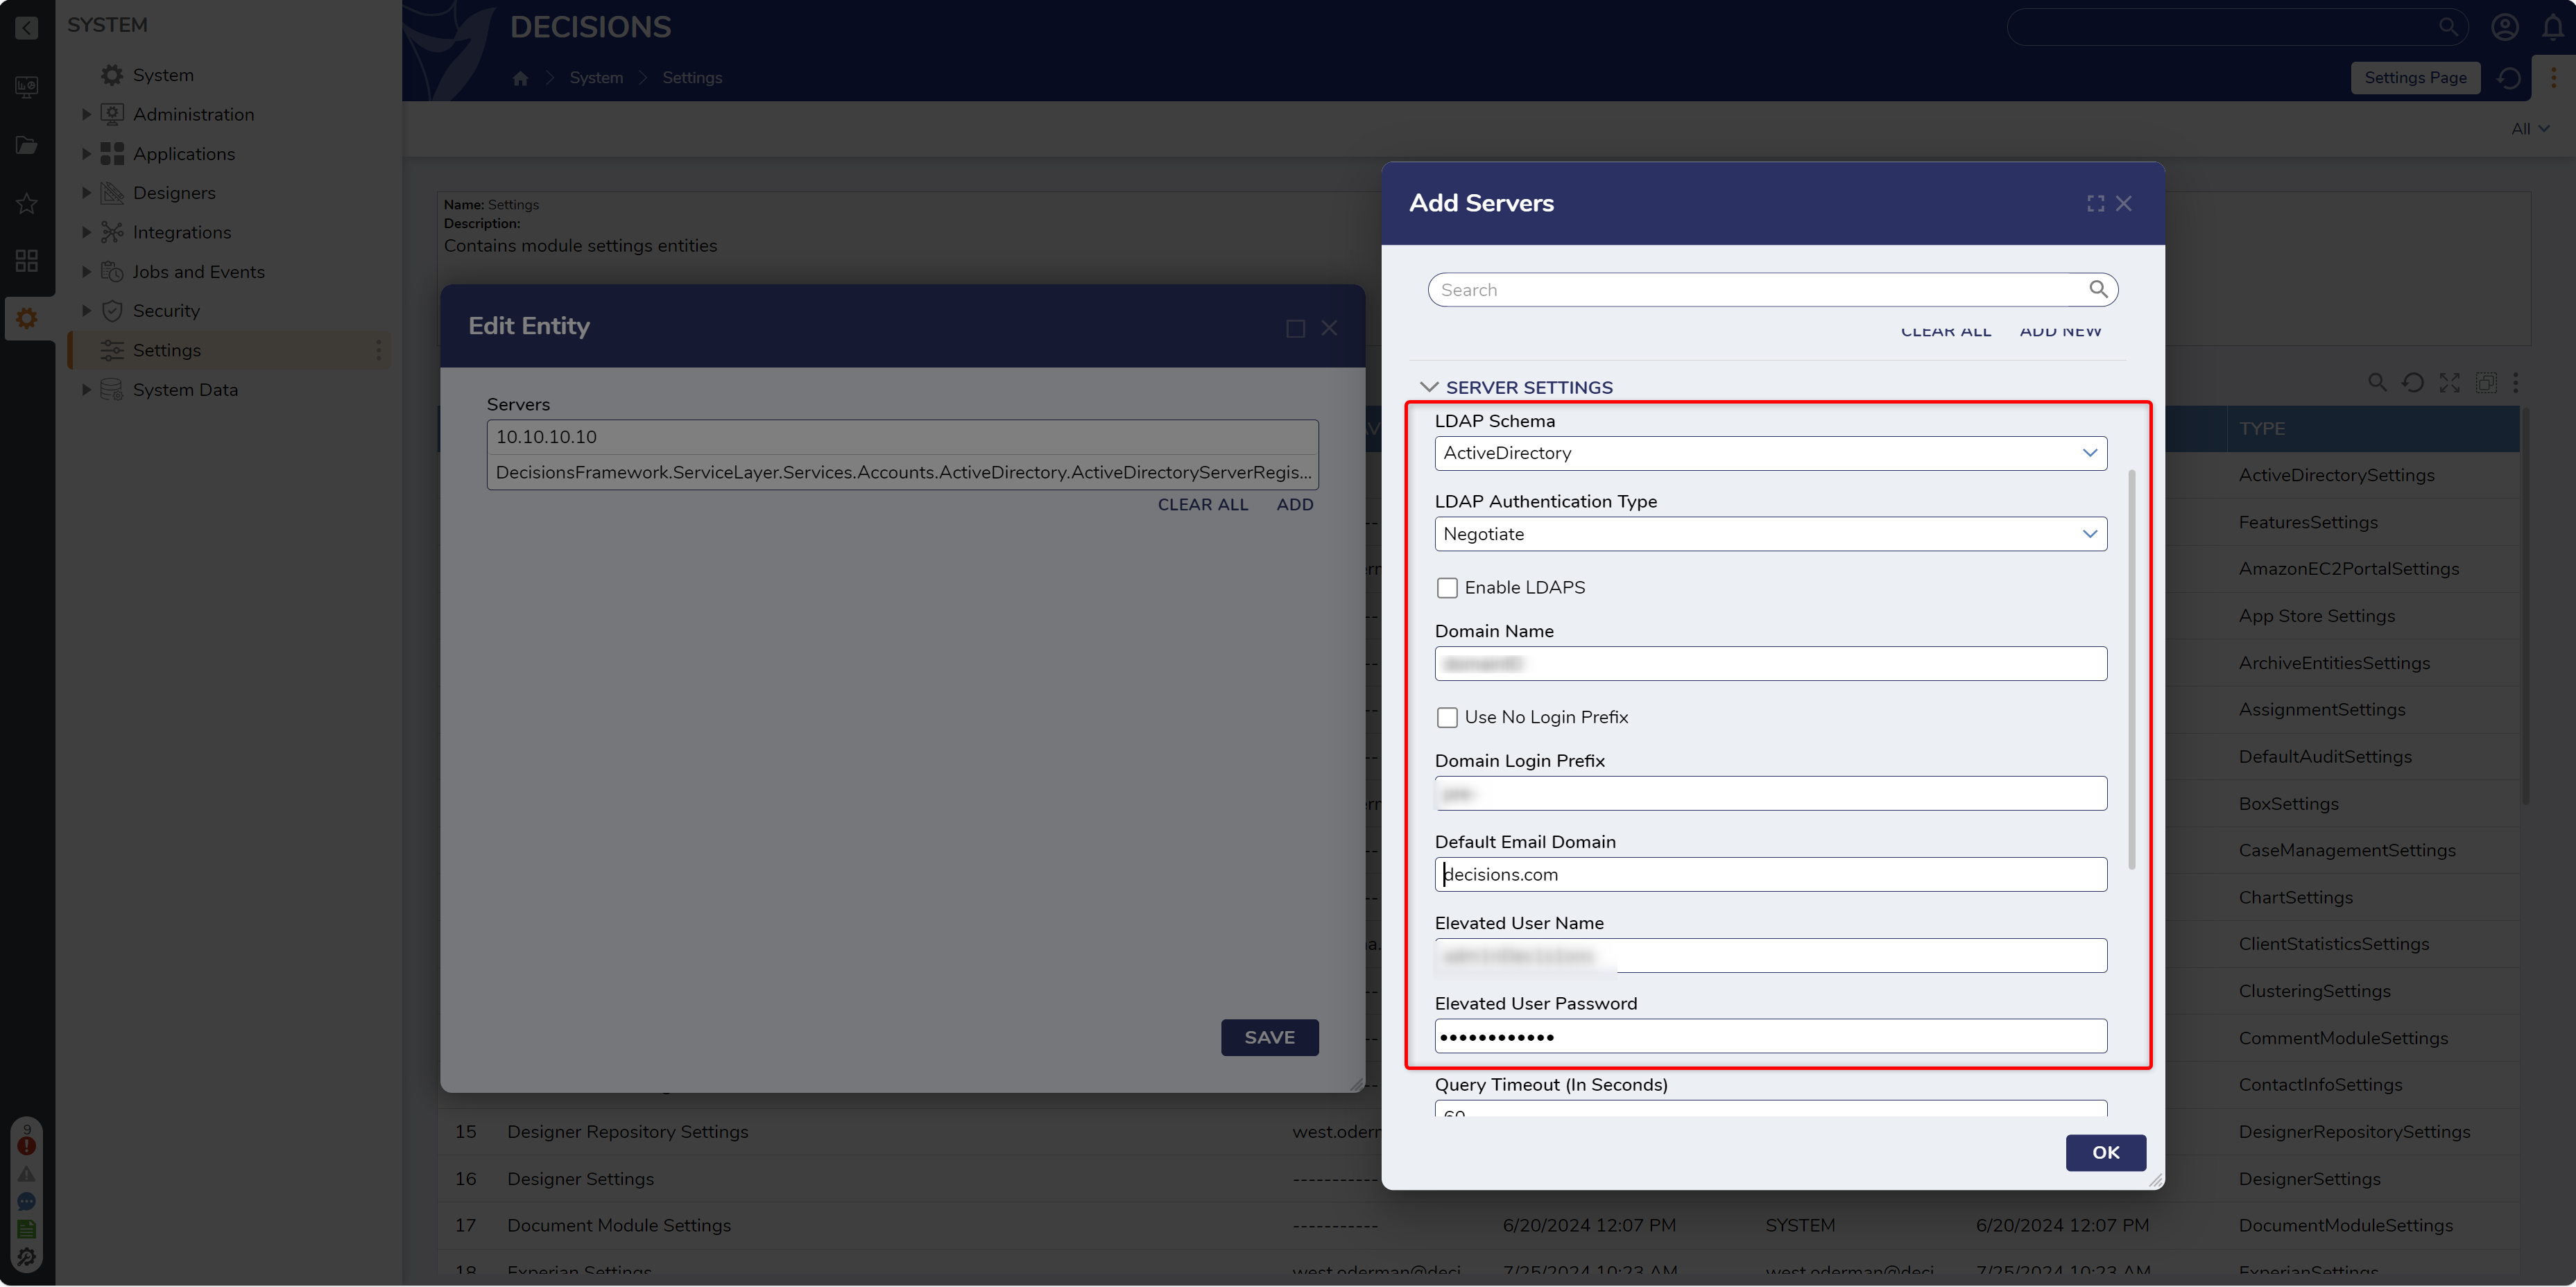
- Under SYNCHRONIZATION SETTINGS > Synchronization Option, select one of the following Synchronization Options; in this example, Selected Groups.
Option Function EntireDomain Syncs users from all Group(s). SelectedOrgUnits Syncs users from the designated Organization Unit(s). SelectedGroups Syncs users from the designated Group(s). - Under Select Groups, click ADD and select the desired Group. This designates which Groups are added in the AD Sync.
Then, enable any desired additional SYNCHRONIZATION SETTINGS (see chart below), then click OK. Repeat steps 1-4 for each additional Tenant Instance.Setting Function Ignore Managers if not in Group Omits Manager Accounts from the Sync if they are not included in one of the selected Groups within the Sync list. Sync Managers for Users Syncs Manager Accounts that have been assigned to Users in each Group in the Sync, Include Users Groups not in Group List Includes additional Groups in the Sync not in the included in the Select Groups list. 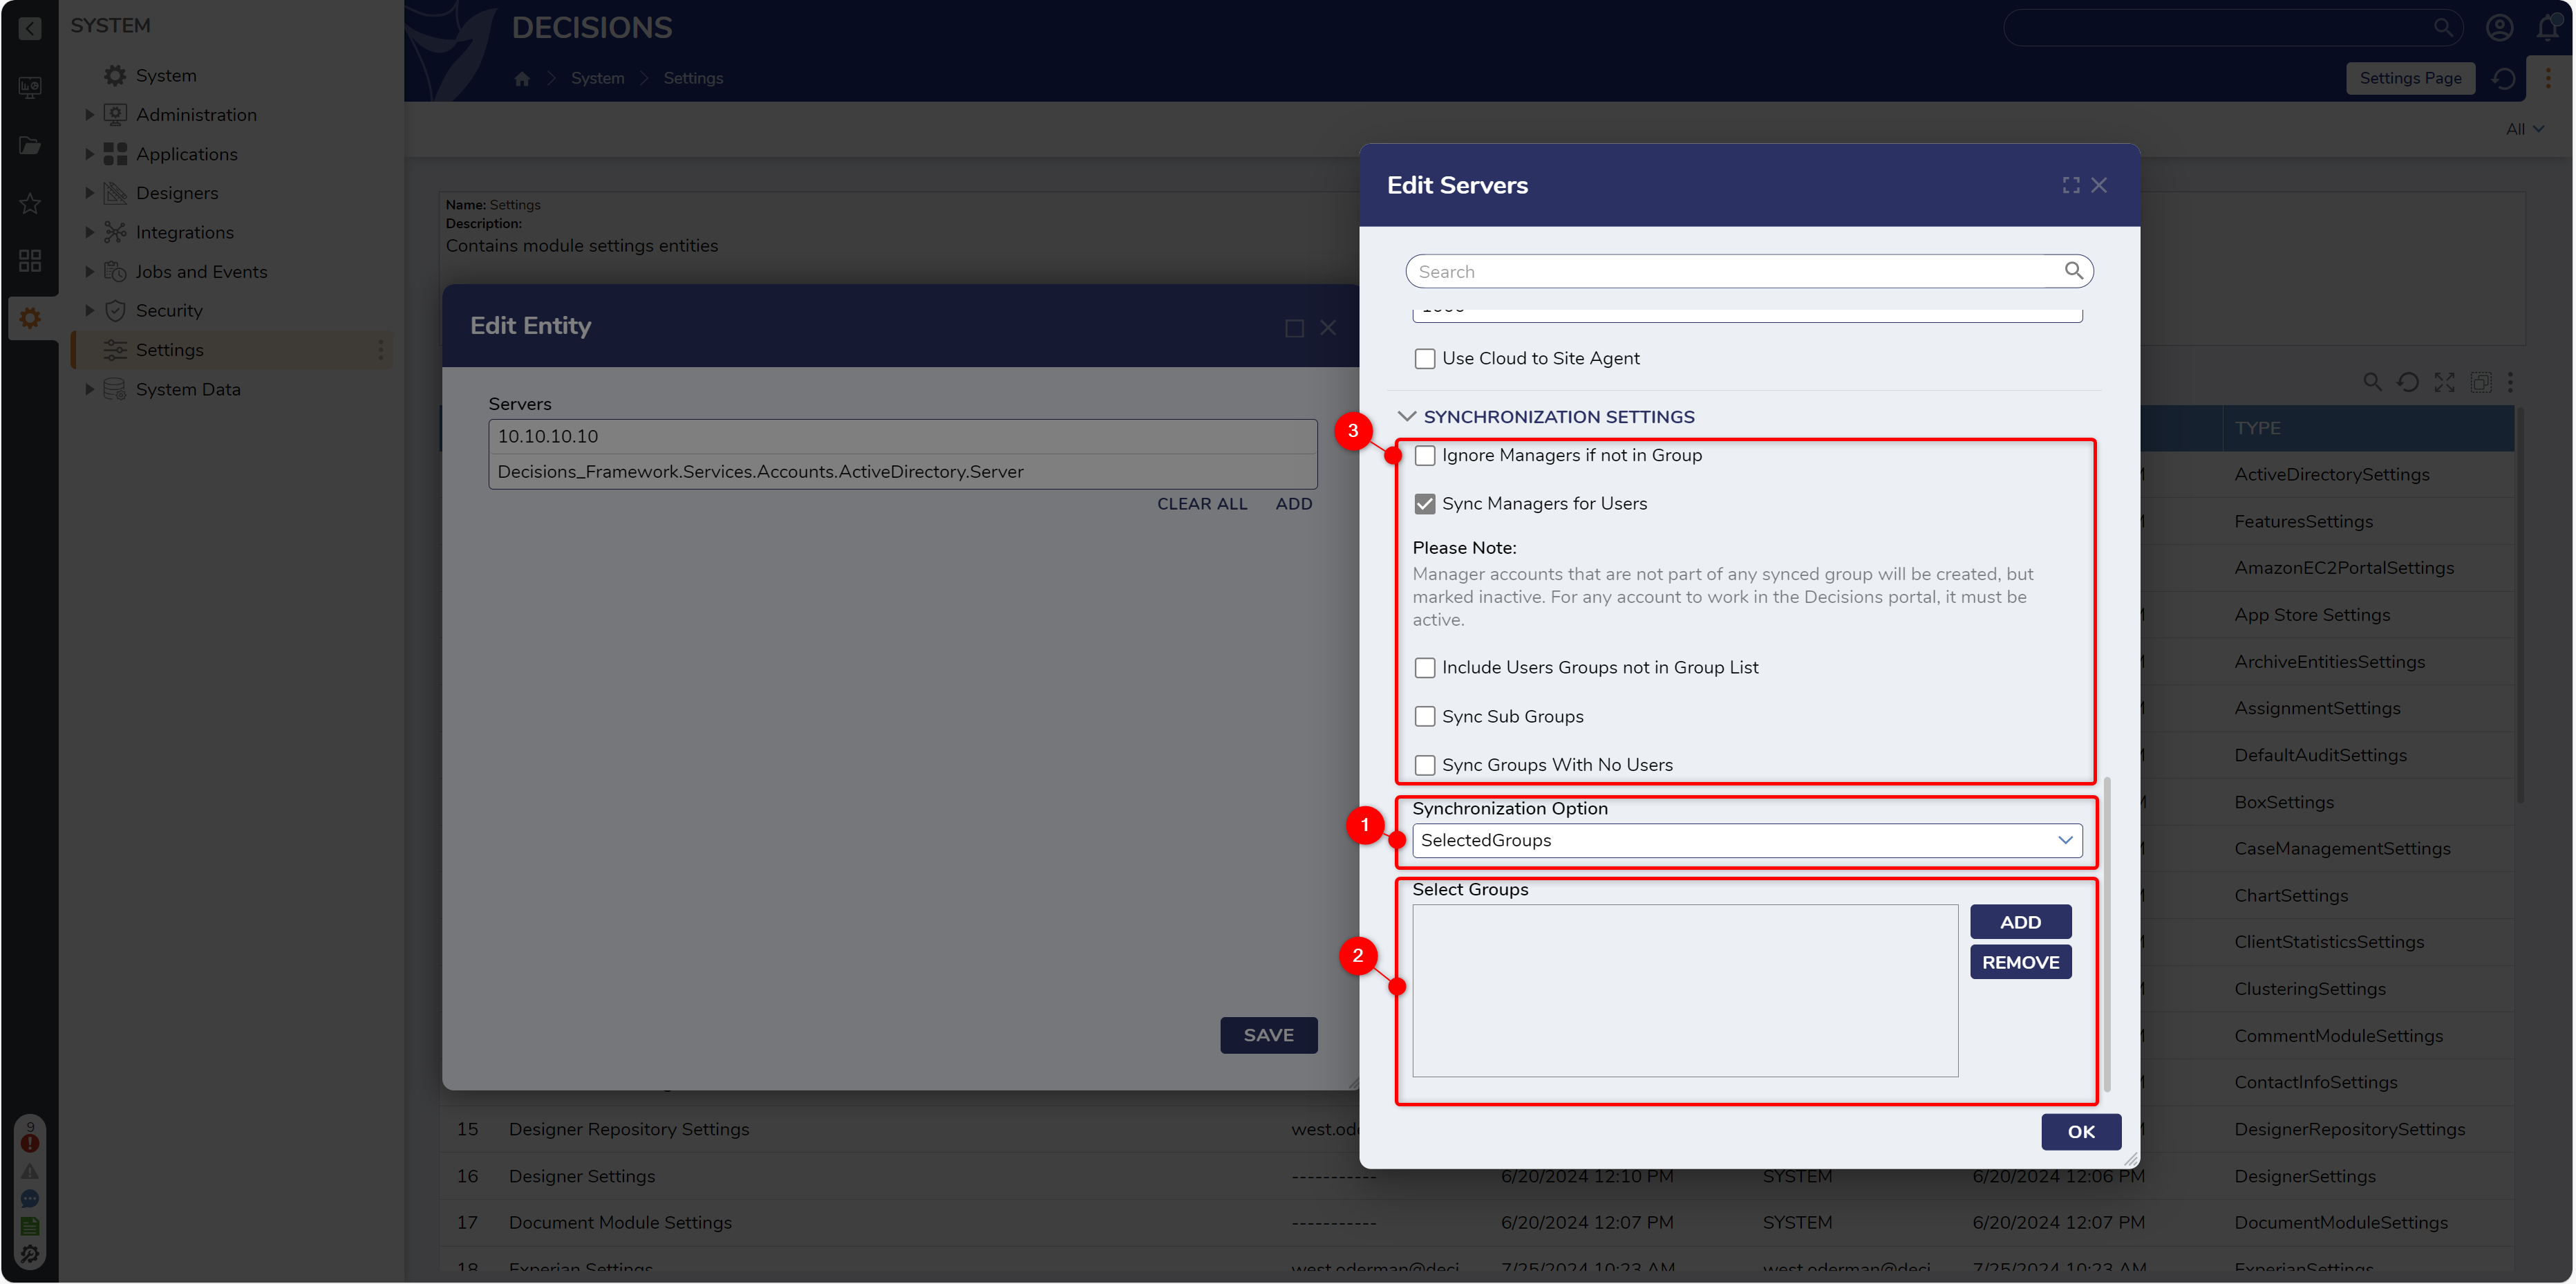
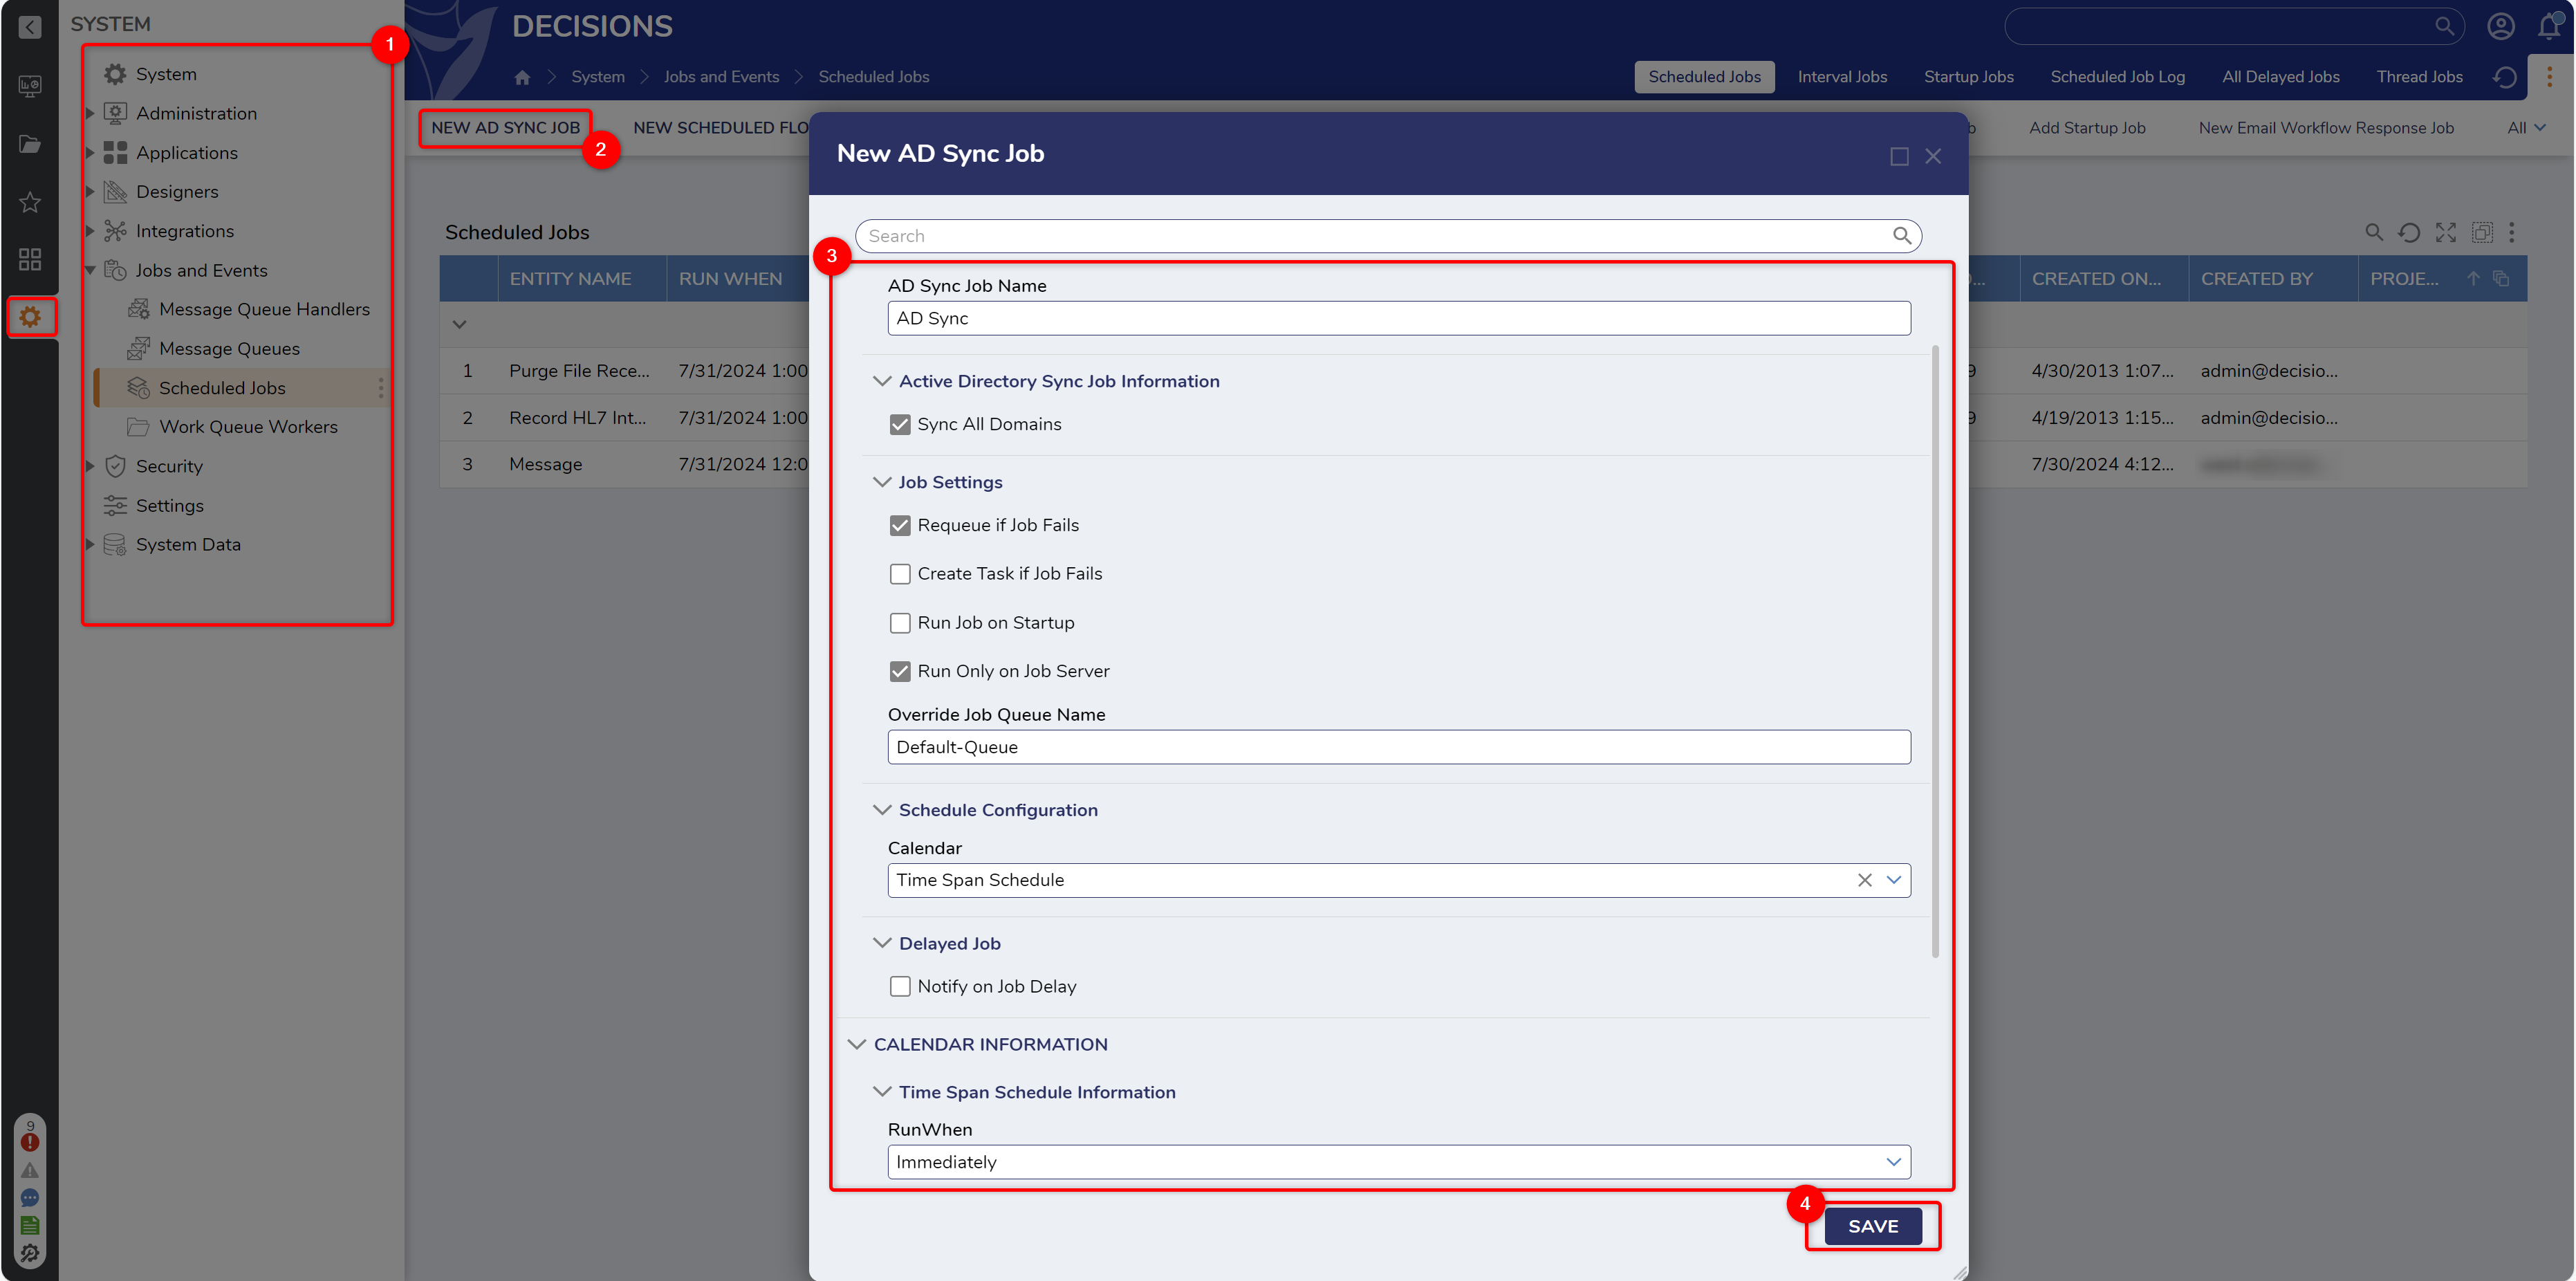
Multi-Tenant AD Sync Job
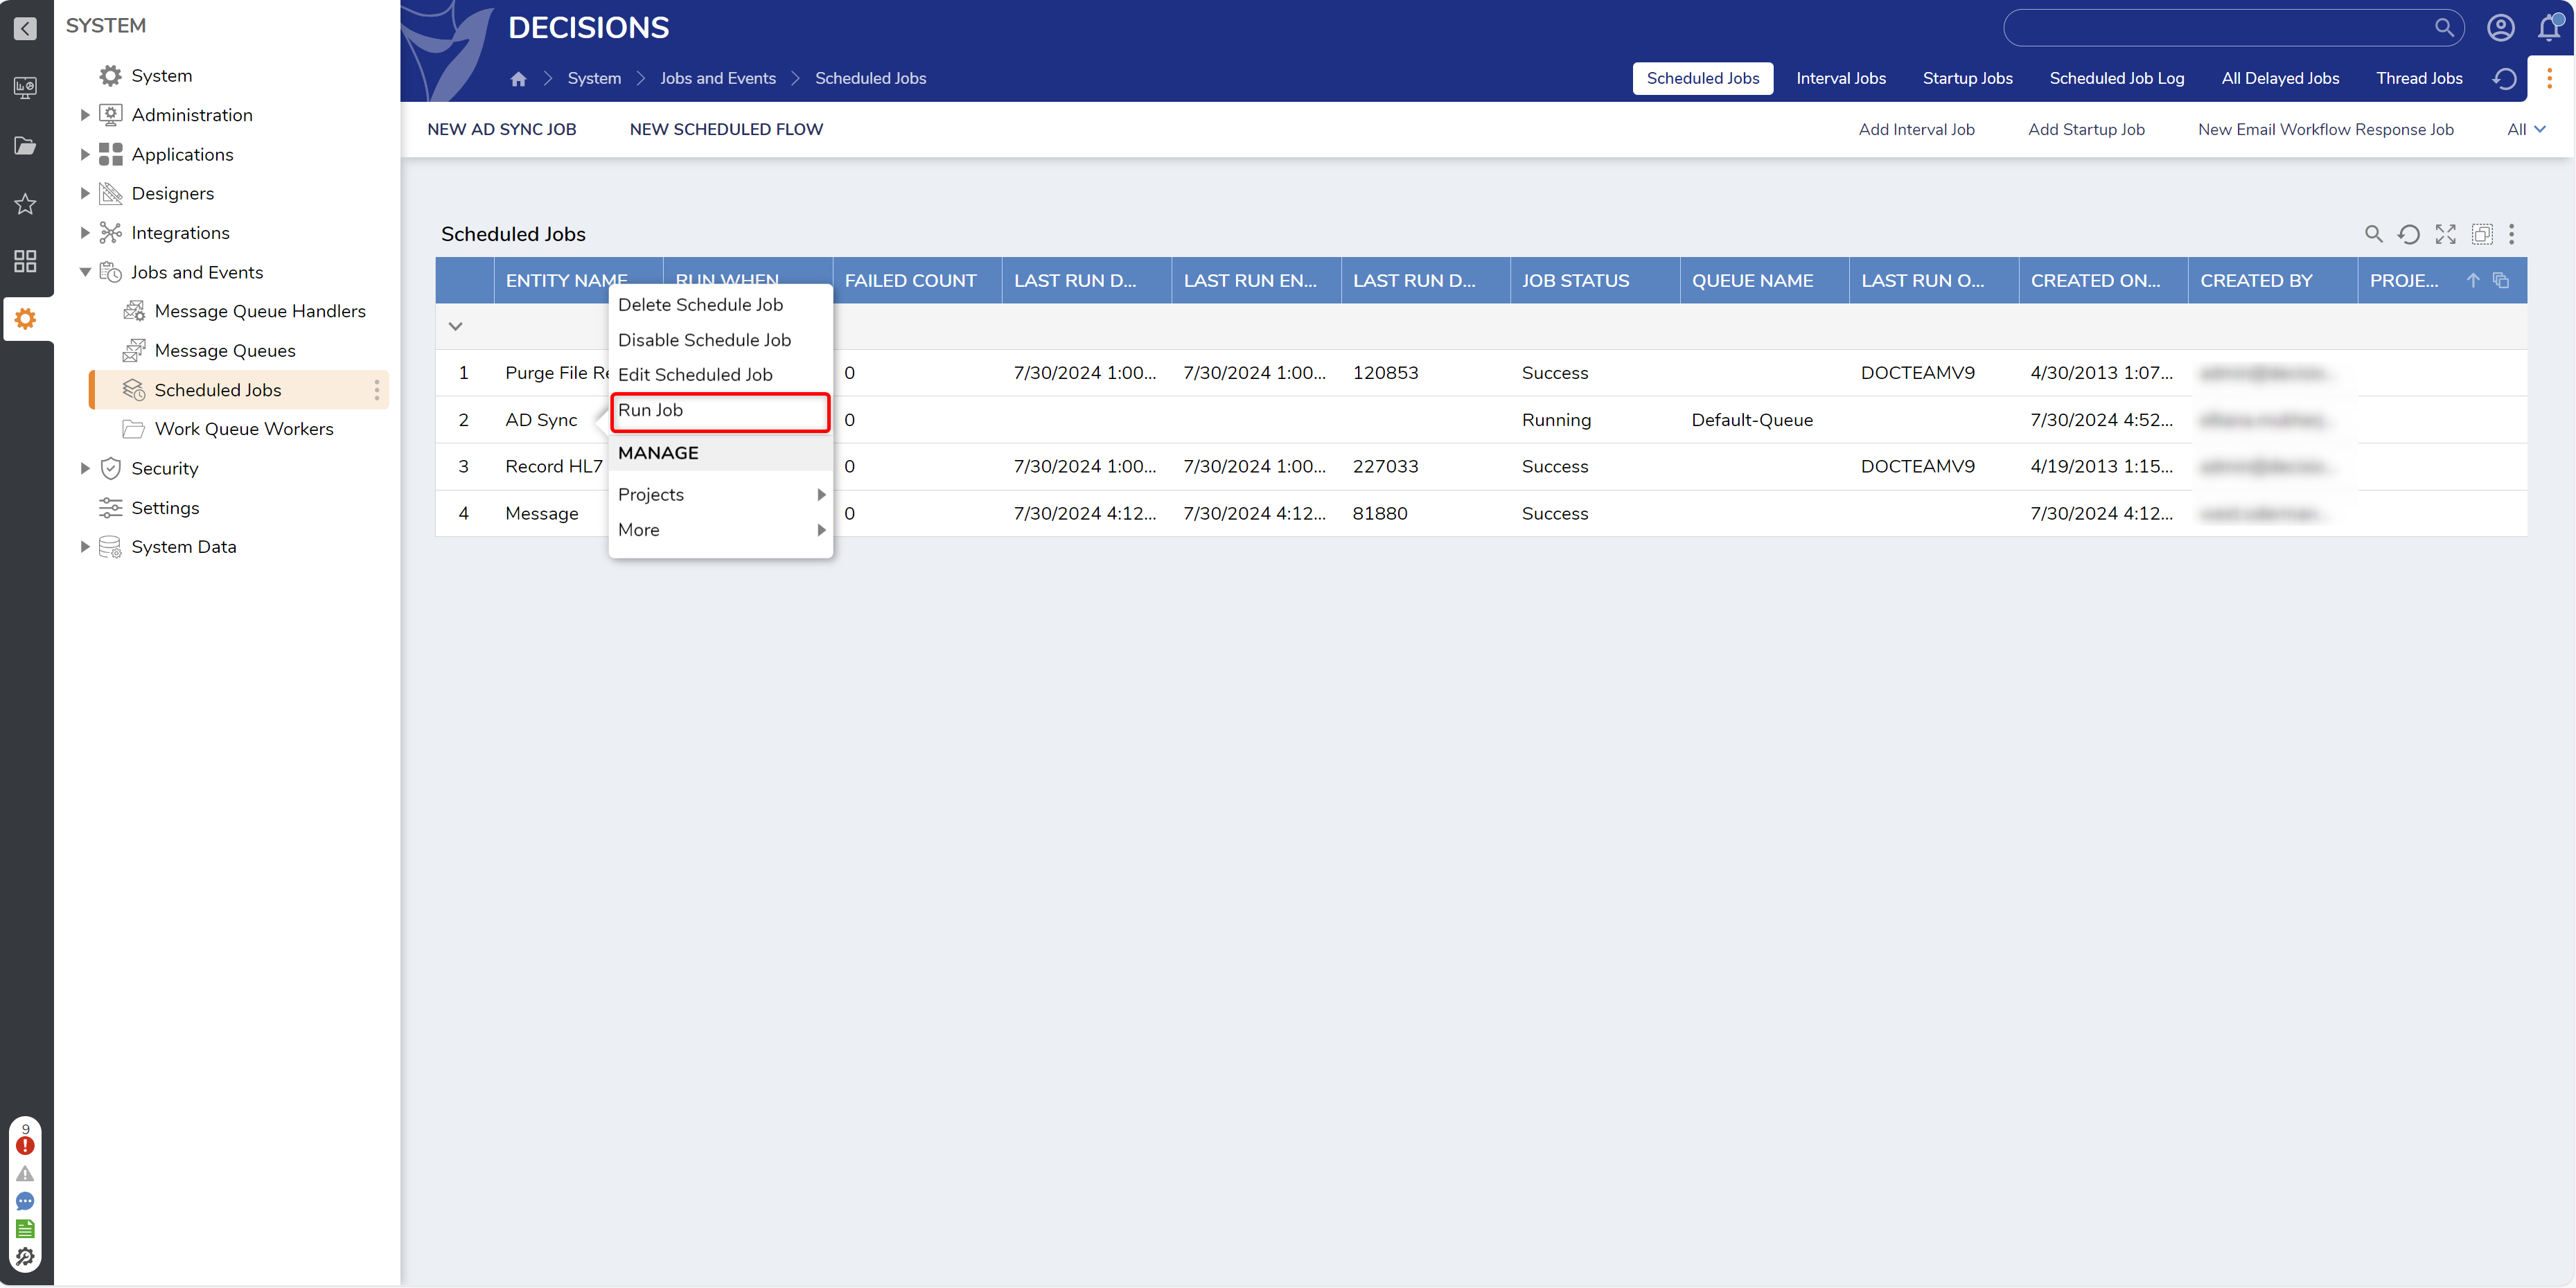
- After installing the Active Directory Module on each Instance in a Multi-Tenancy and establishing proper AD Server Authentication on each one, from the Control Instance, navigate to System > Administration > Jobs and Events > Schedule Jobs.
- From the Global Action Bar, select NEW AD SYNC JOB.
- From the New AD Sync Job window, configure the AD Sync Job by providing the desired Schedule Properties, Info, and Run And Failure settings. Then, click SAVE.
- Right-click the new AD Sync Job, and select Run Job.
After the Job runs successfully, repeat steps 1-4 as needed for each additional Tenant Instance.