Validating Form Data with a Flow
- 16 Aug 2024
- 2 Minutes to read
- Print
- DarkLight
Validating Form Data with a Flow
- Updated on 16 Aug 2024
- 2 Minutes to read
- Print
- DarkLight
Article summary
Did you find this summary helpful?
Thank you for your feedback!
Overview
Validation Rule may choose to build their logic within a Flow rather than as a Rule.
Rules creating with a Flow source extends Flow Validation Rules' capabilities to allow for more advanced validations. After evaluating the inputs, a Validation Flow would return a collection of issues that contain data about which Form control producing errors.
Unlike Rule Validations, Flow Validations cannot be applied to Form Layouts (i.e., a Grid).
Example
- In a Designer Folder, create and name a new Flow. It will automatically open in the Flow Designer.
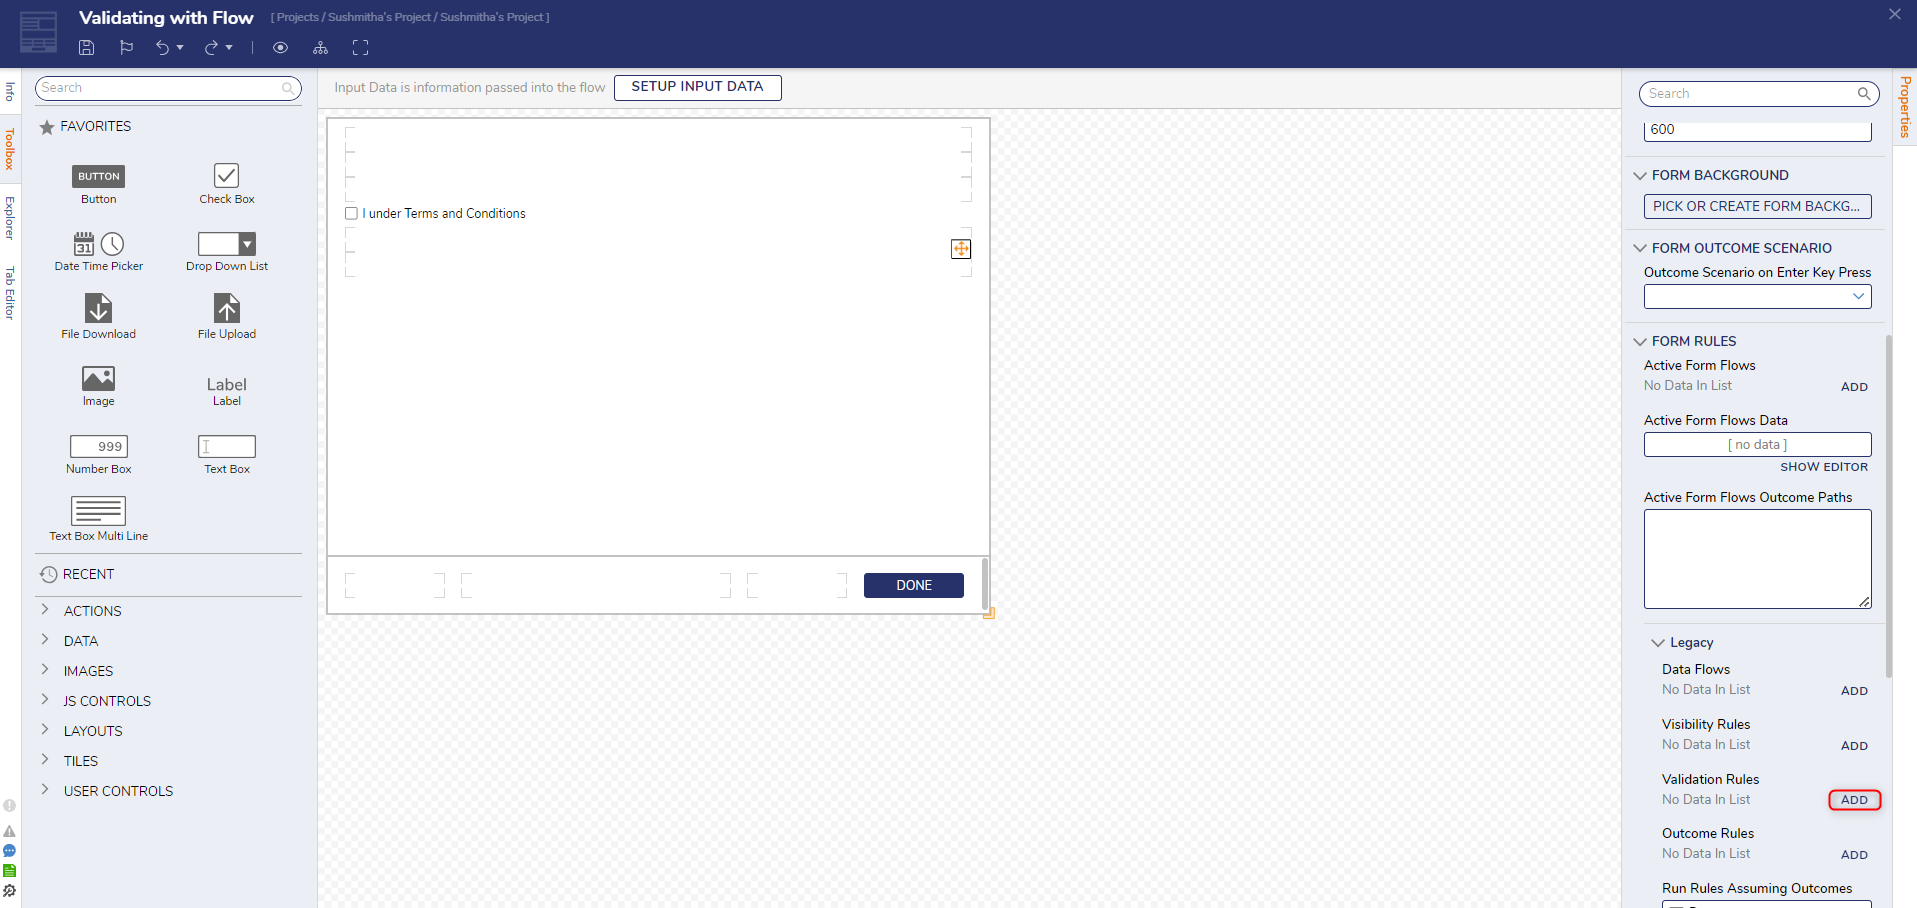
- After the Start step, add a Show Form step from the Favorite Steps category. Create and name a new Form. It will automatically open in the Form Designer.
- Add a Check Box control to the Form named 'I under Terms and Conditions' and a Button named 'Done'.
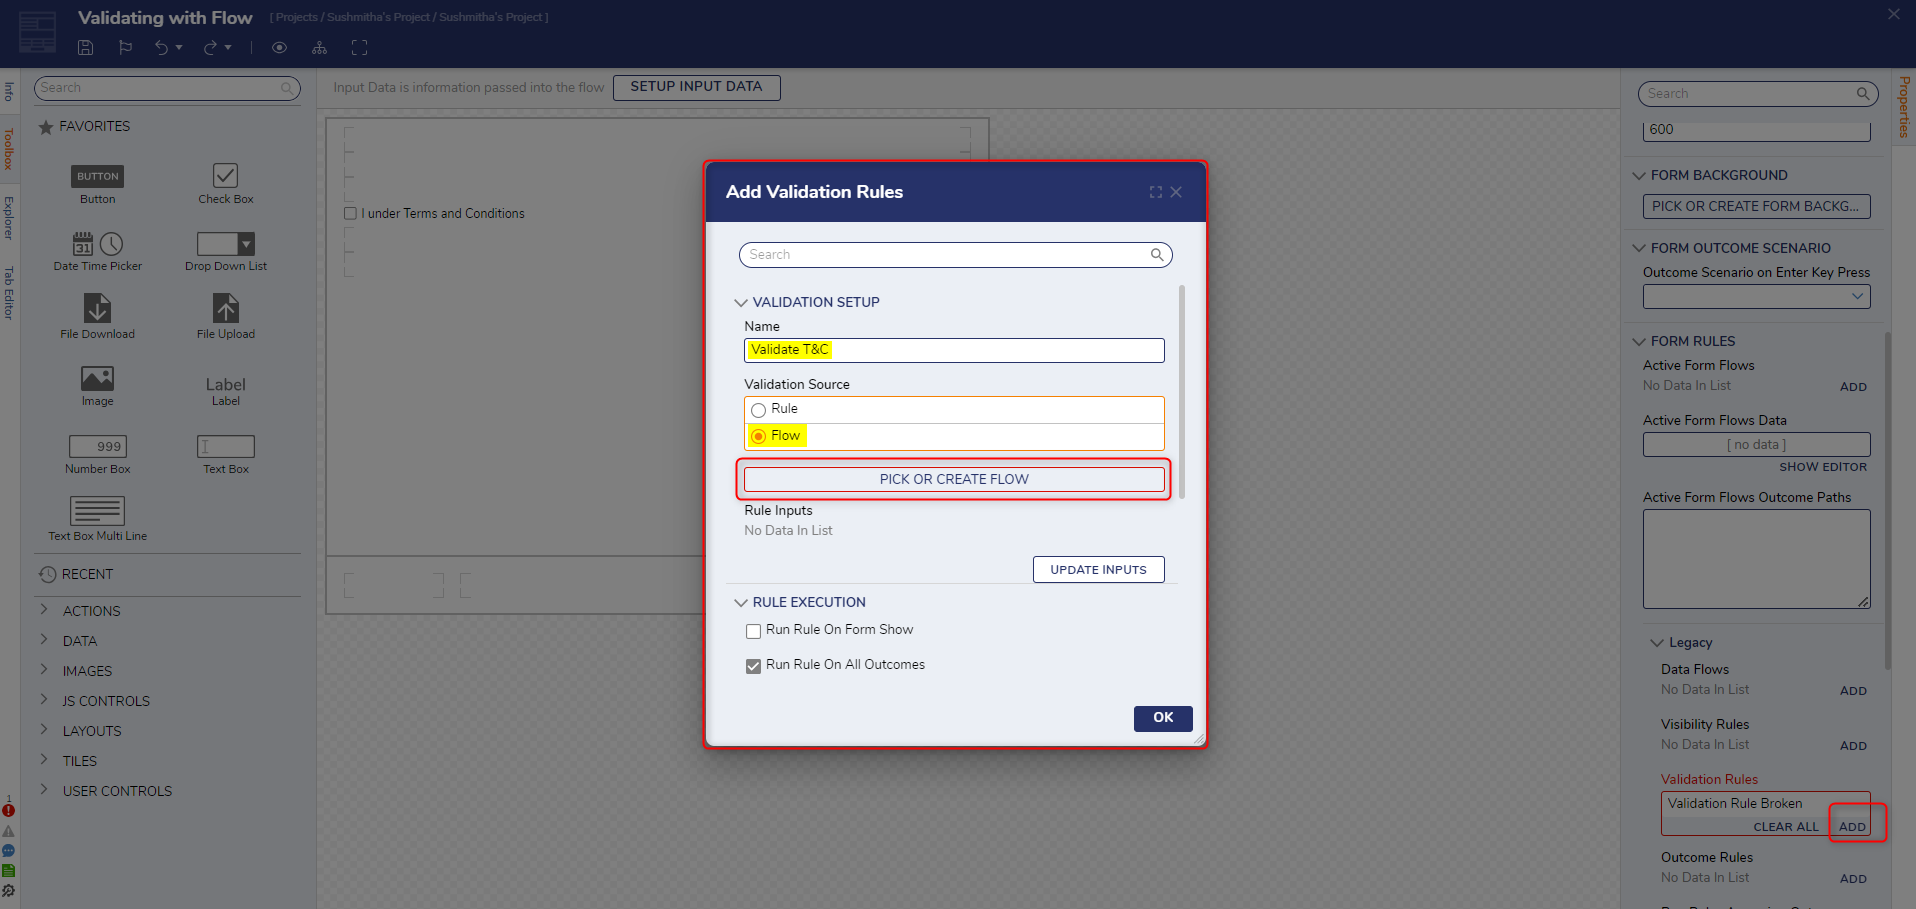
- In the Form's Properties > Form Rules, select ADD next to Validation Rules to create a new validation rule.
- In the Add Validation Rules dialog, name the validation and change the Validation Source to Flow. Select PICK OR CREATE FLOW and create a new Flow.
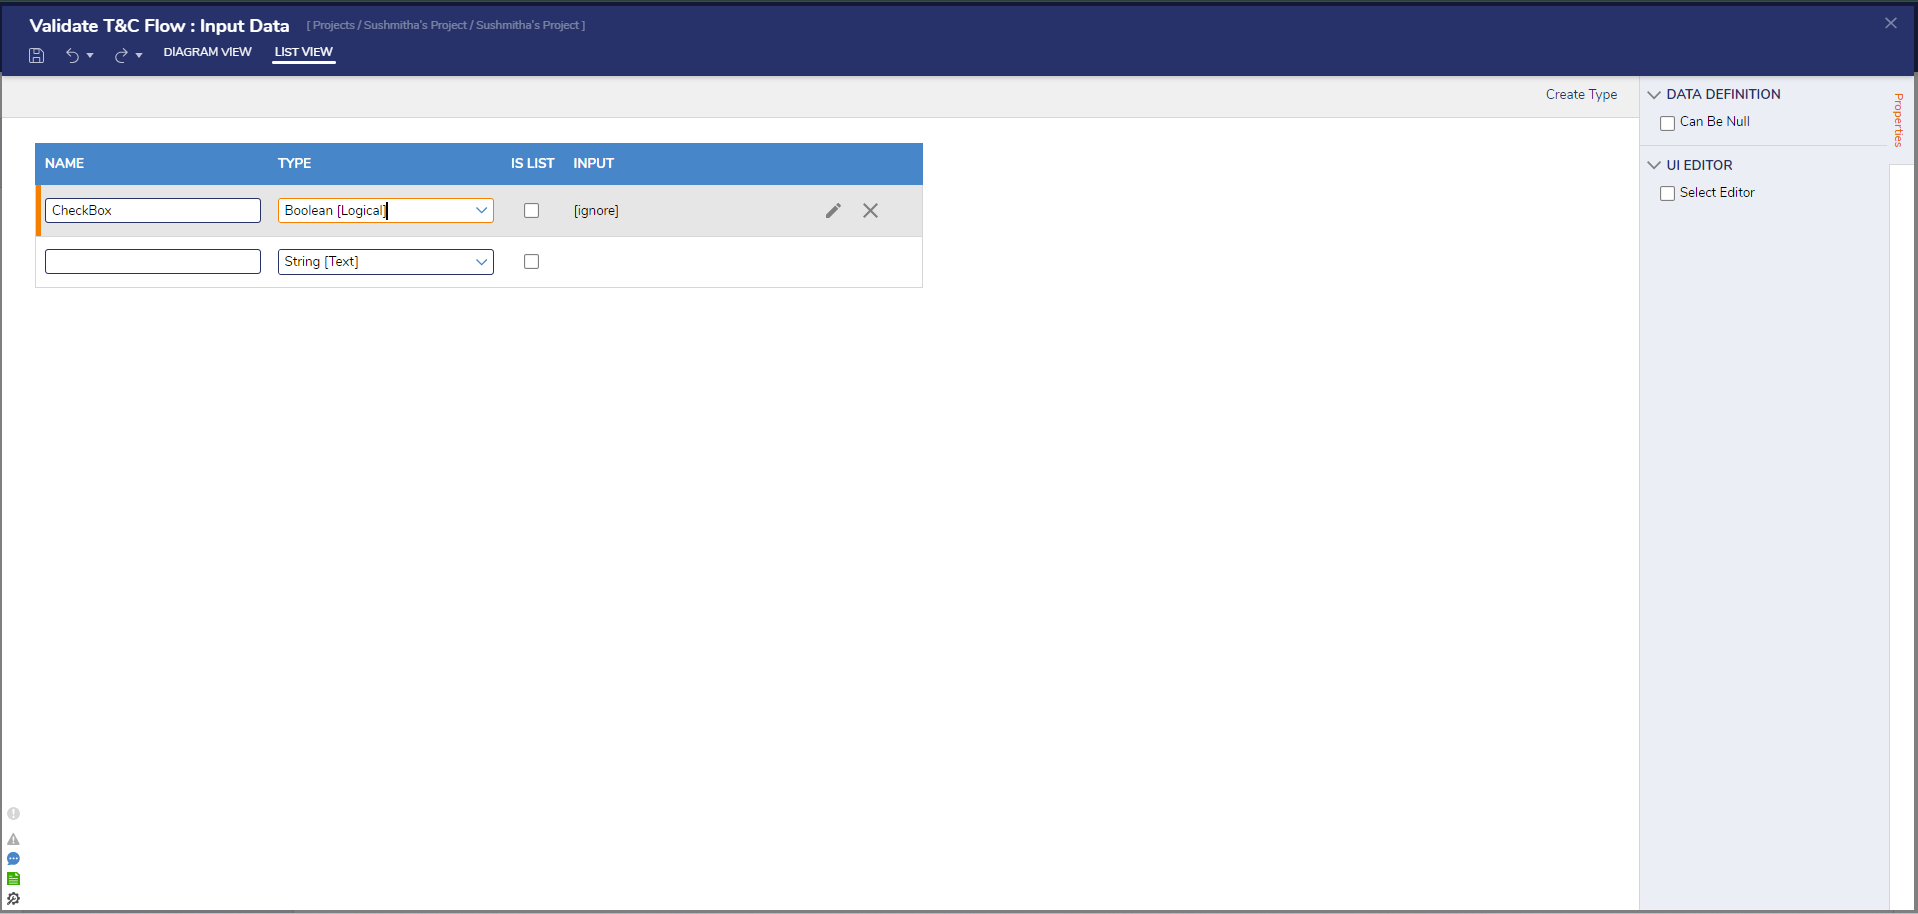
- In the Form Validation Flow, select SETUP INPUT DATA. Type CheckBox as the Name and change the type to Boolean.
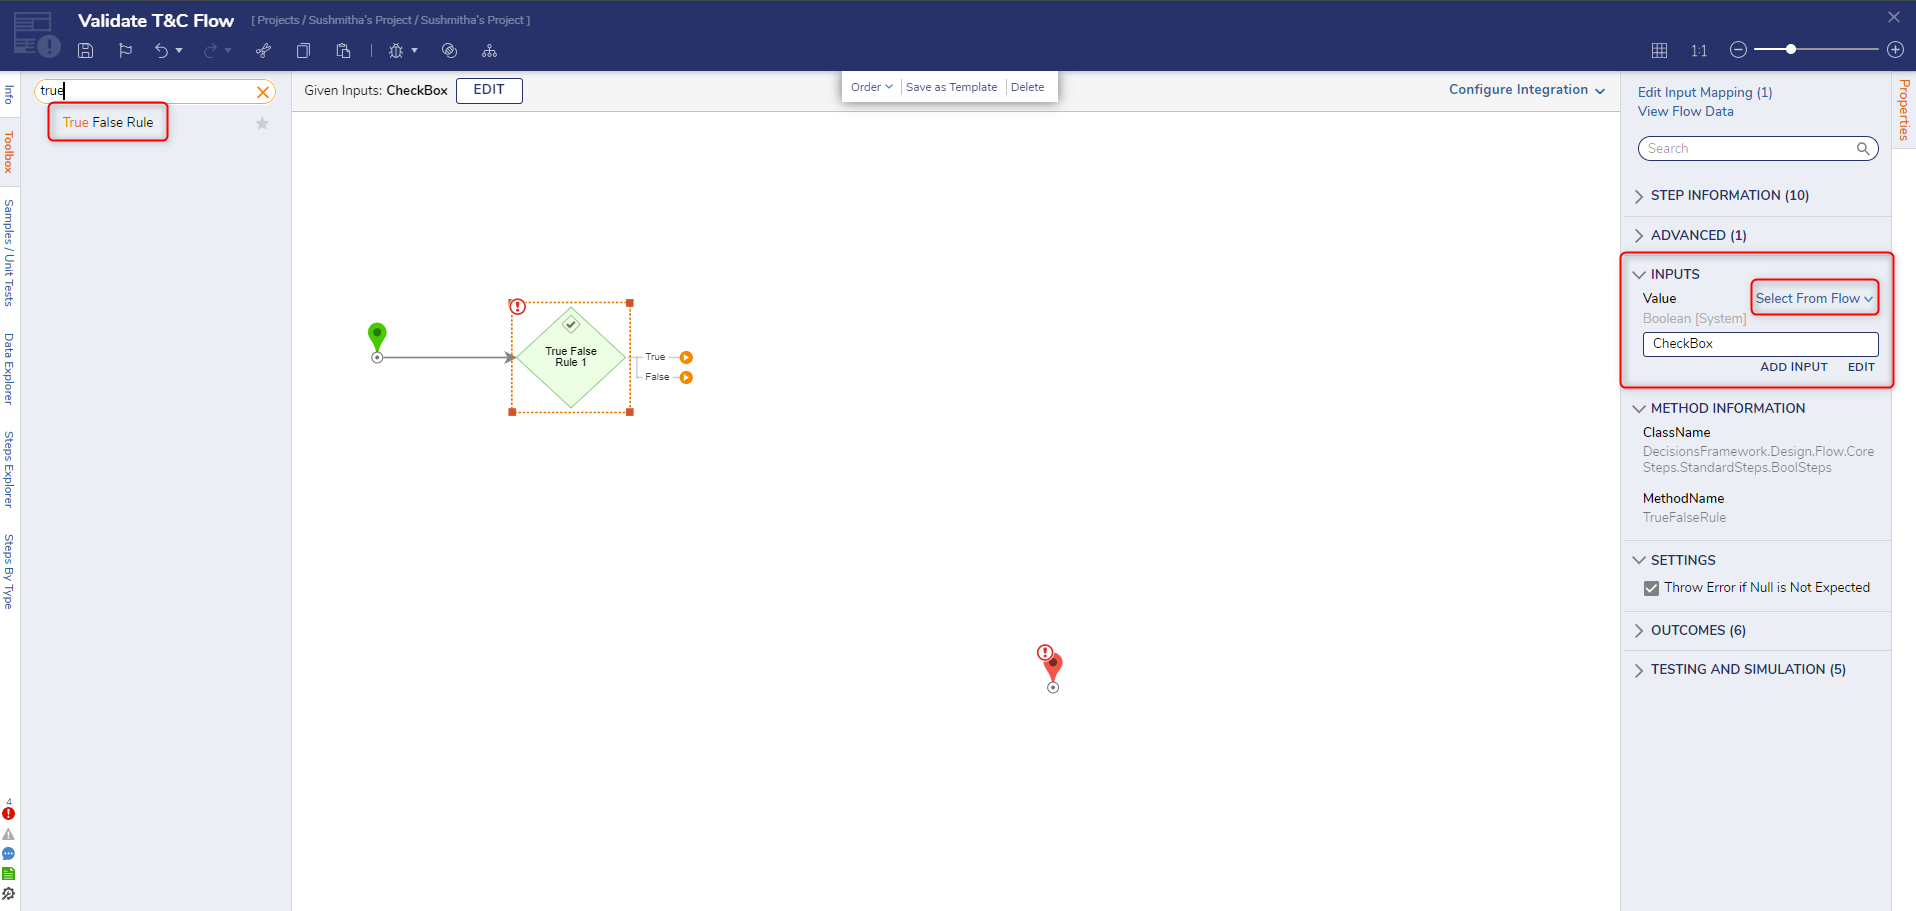
- Add a Value is True step from the Rules > System Defaults > Default Form Validation Rules category.
- With the step selected, navigate to the Properties panel. Under Inputs > Value, select CheckBox from the Flow.
- Connect the True outcome path to the End step.
- On the False outcome path, add a Create Data step. View the Create Data's Properties panel and select SHOW EDITOR.
Type Validation as the Name and search for and select FormValidationIssues as the Type. Select CLOSE to save and close.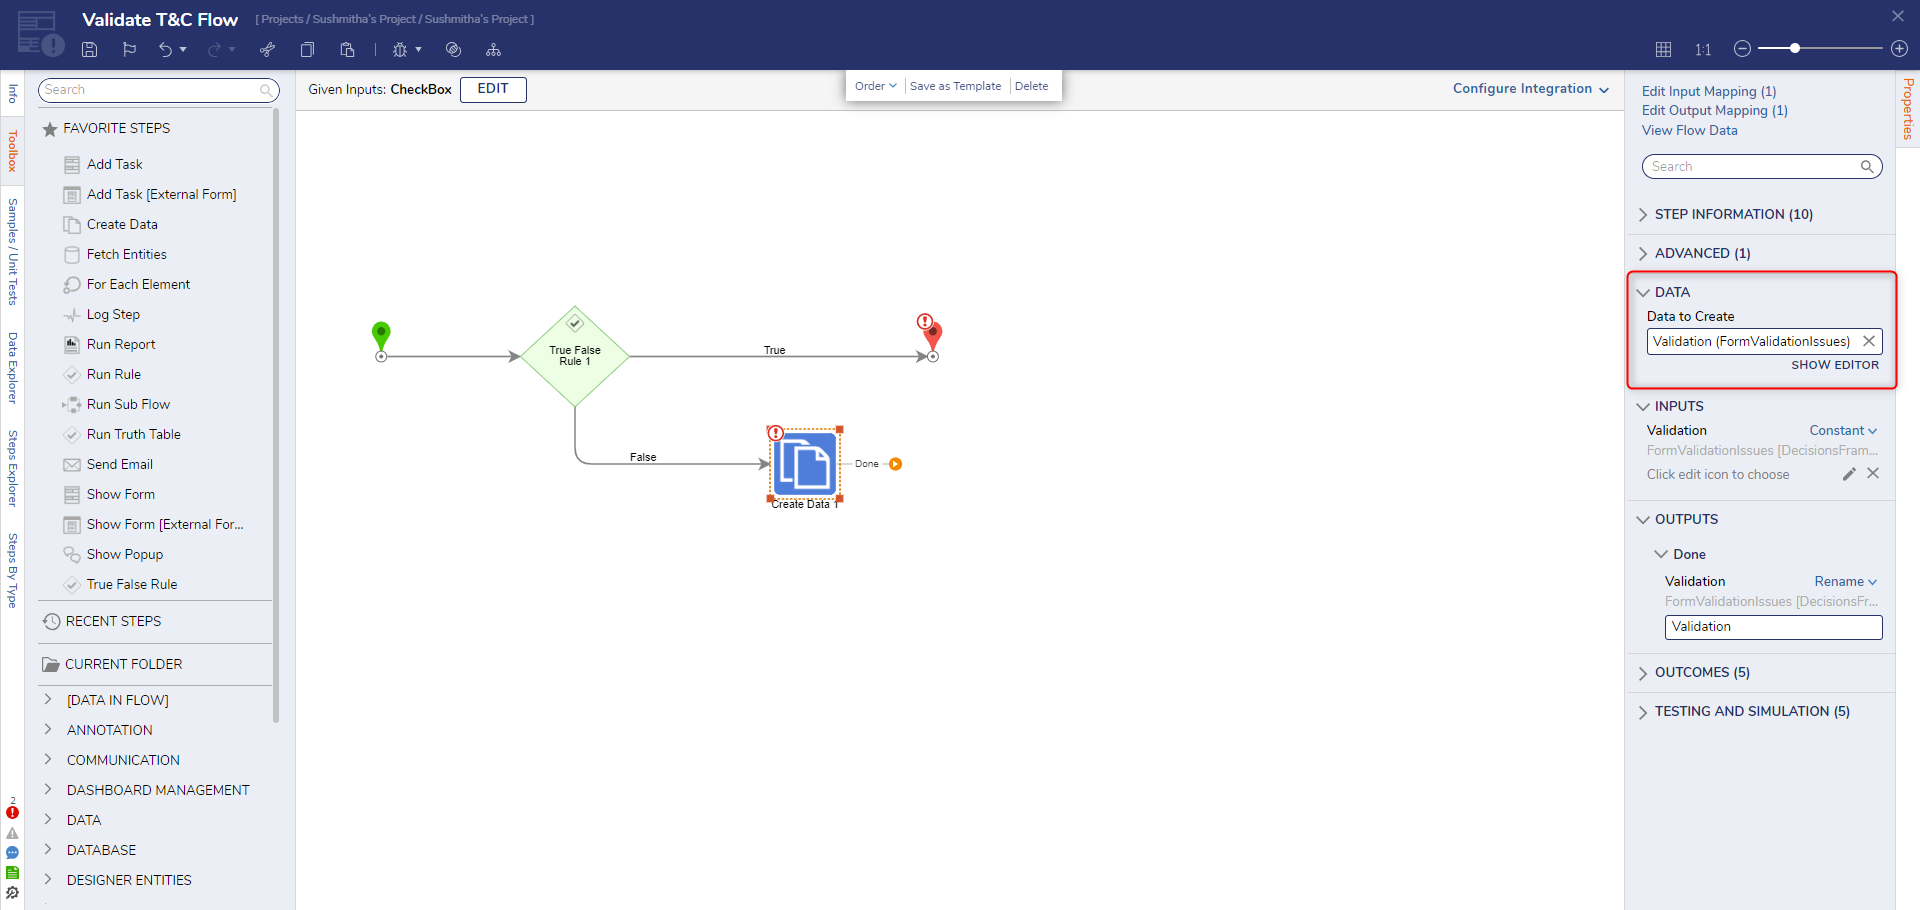
- For the Validation input, change the mapping type to Constant. Select the pencil icon to open the Edit dialog.
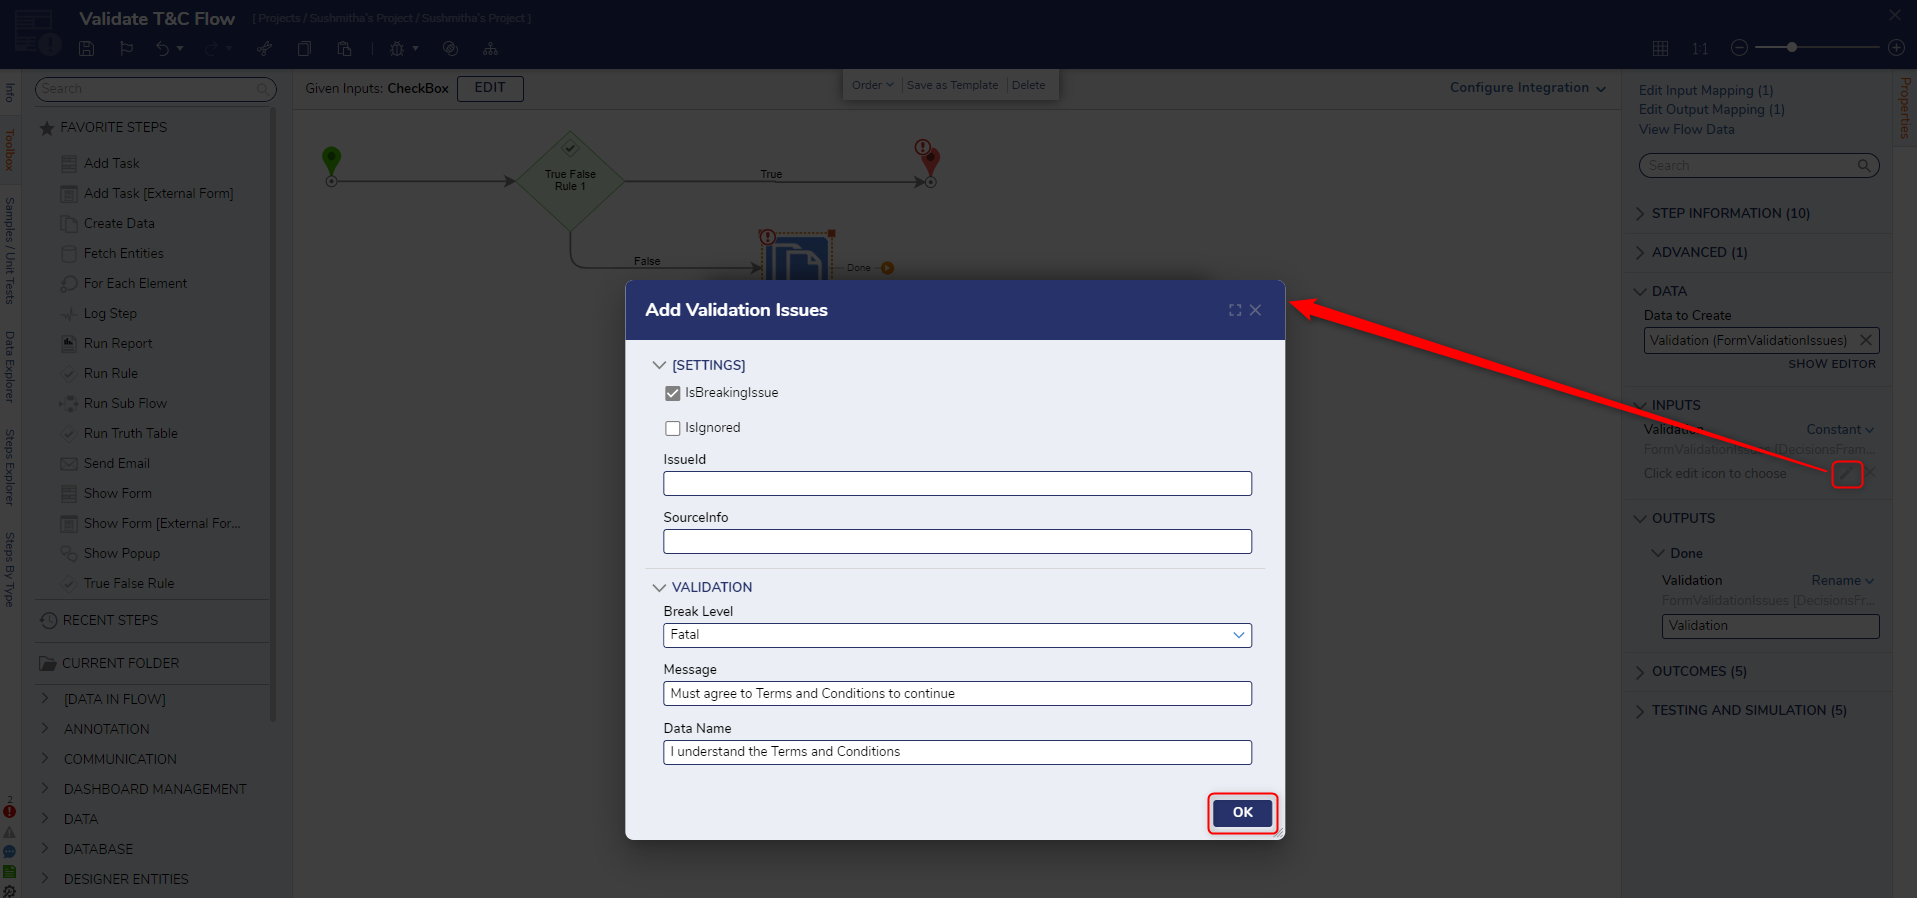
- In the Edit dialog, under Settings, check IsBreakingIssue. Under Validation, set the Break Level to Fatal, type a message, and type the Checkbox control's Data Name. Select OK.
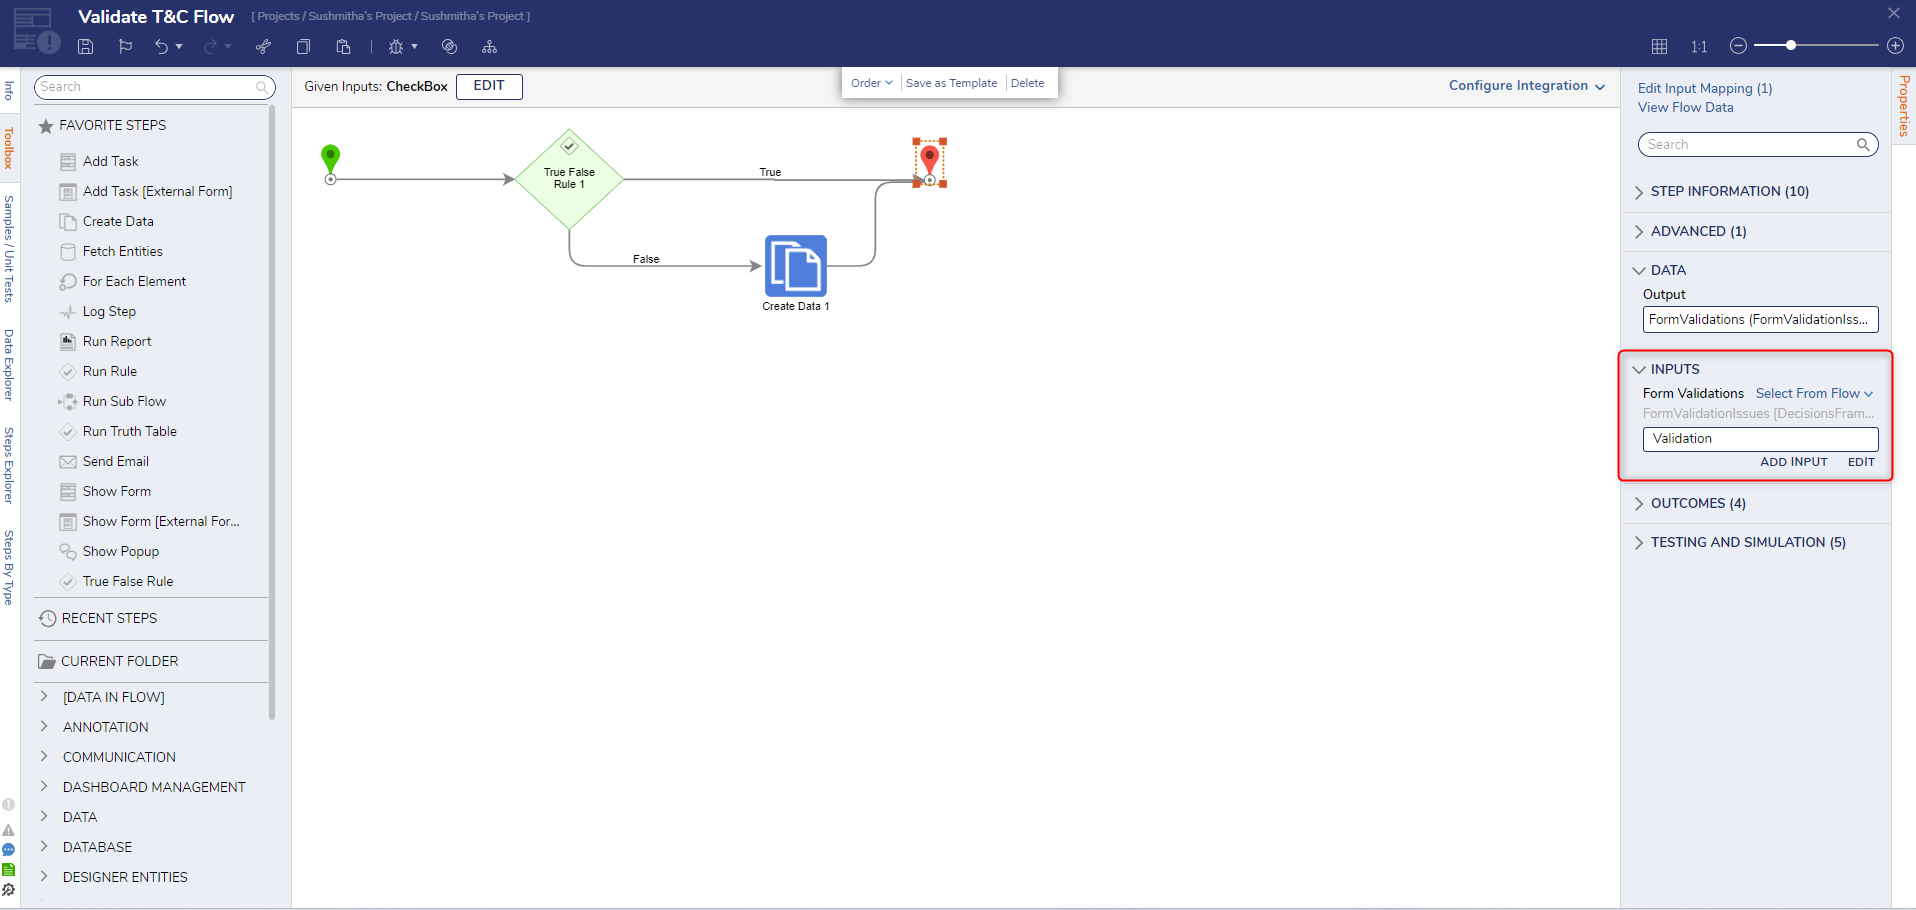
- Connect the Create Data step to the End step. Select the End step. Under Inputs > Form Validations, choose Validation.
- Save and close the Form Validation Flow.
- Back in the Add Validation Rules dialog, select UPDATE INPUTS. Under Rule Inputs, select the pencil icon next to CheckBox.
- In the Edit Rule Inputs dialog, change the Input Type to Form Component. Select Terms and Conditions for the Form Data Name. Set RunOnValueChanged to true. Select OK to confirm.
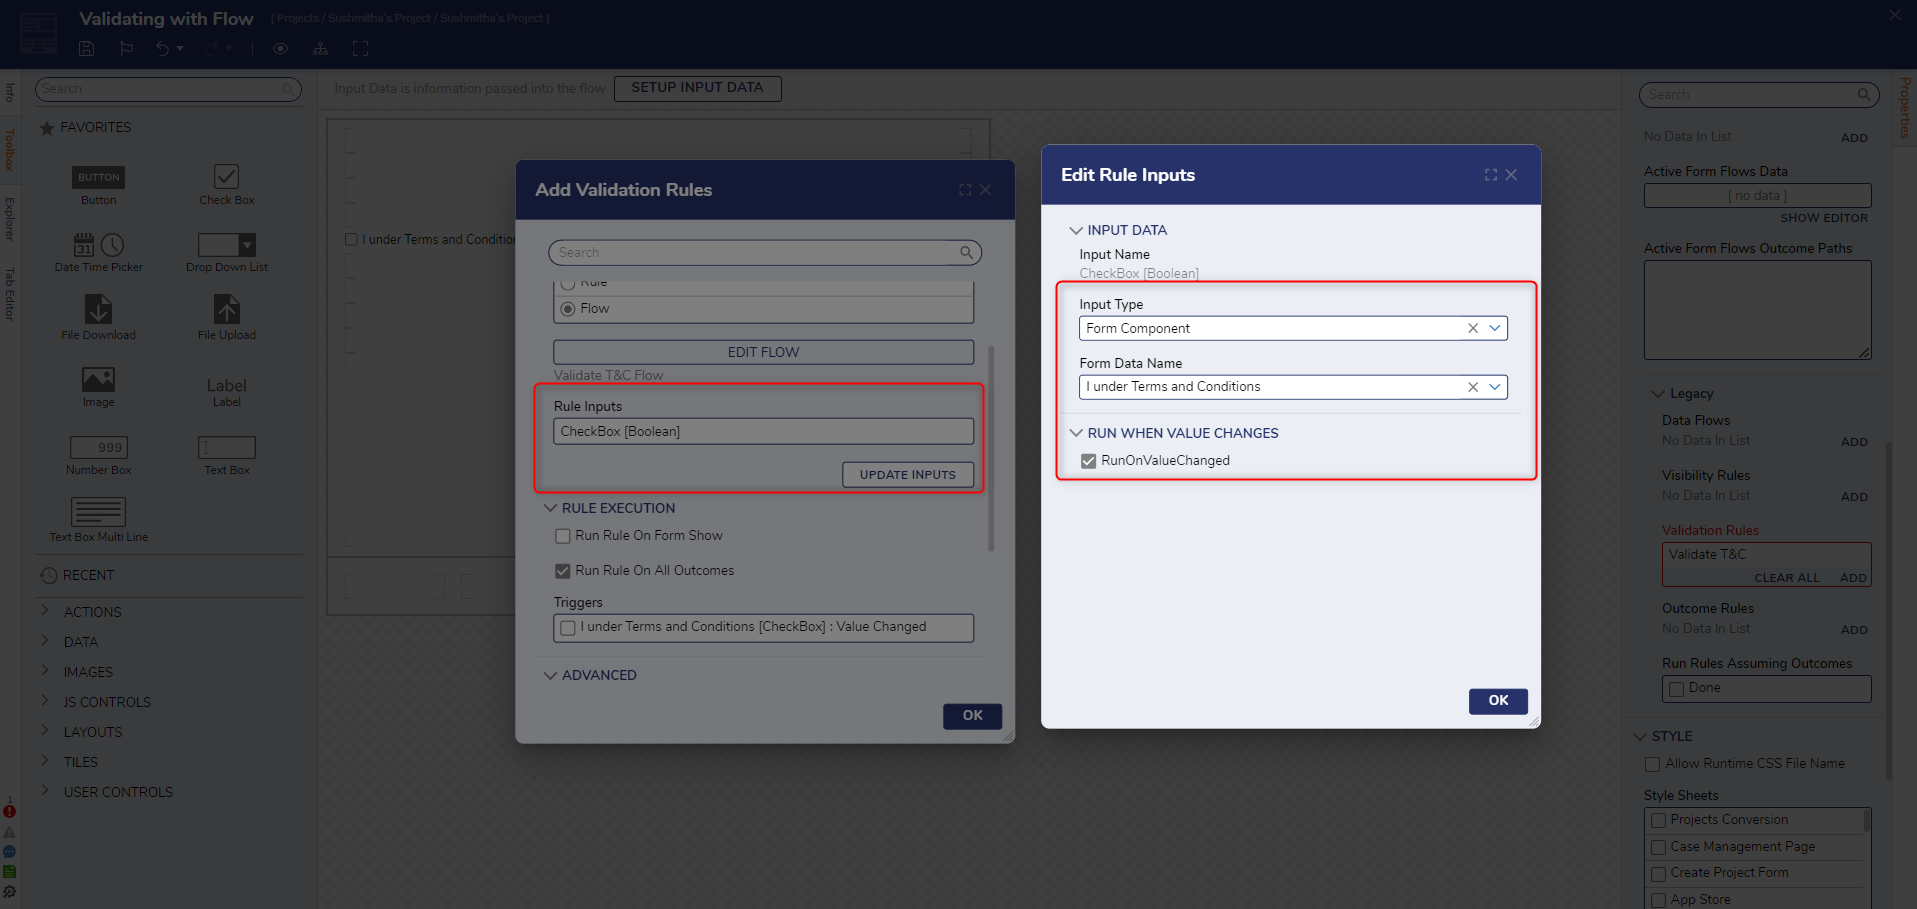
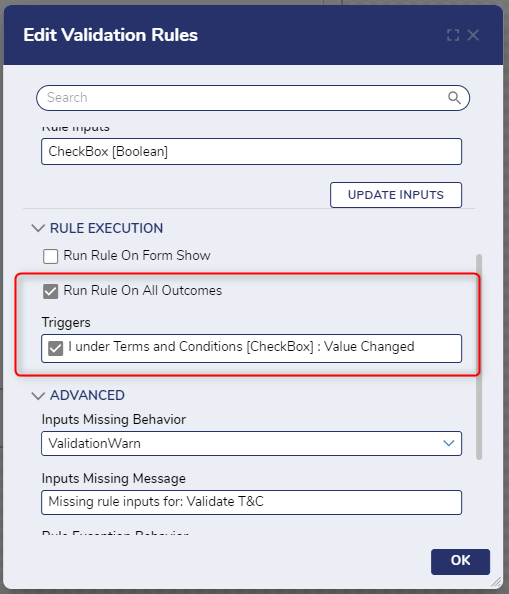
- Back in the Add Validation Rules dialog, under RULE EXECUTION, select Run Rule On All Outcomes. Under Triggers, select the Terms and Conditions Check Box.
- Select OK. Save and close the Form Designer.


Debug
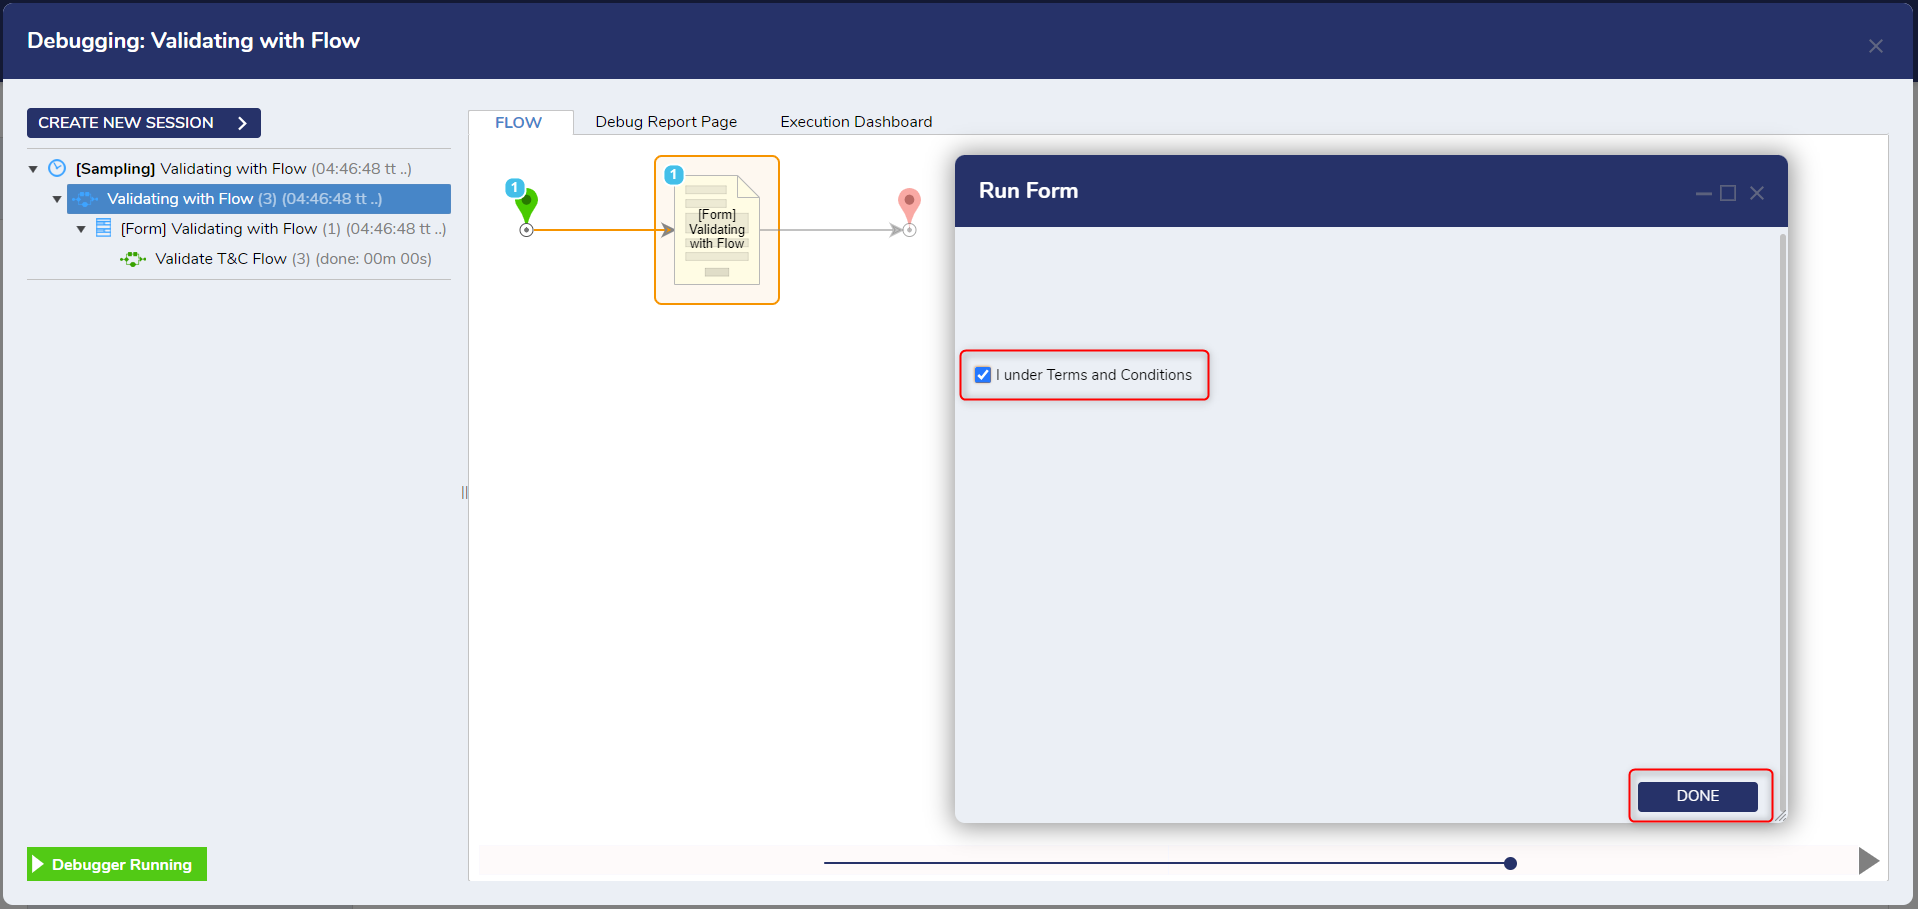
- In the Flow Designer, select Debug in the top action panel. Select START DEBUGGING.
- The Debugger will display the Form. Select the Done button to attempt to close the Form without the Terms and Conditions selected.
- The validation warning and red boxes will show. Set the CheckBox to True and close the Form.

For further information on Forms, visit the Decisions Forum.
Was this article helpful?