Overview
A Workflow is a visual representation of a process that contains a sequence of Steps, similar to BPMN. This can include steps for User interaction, like Forms, and completely automated processes like Scheduled Jobs or API endpoints. Flows built for User interaction and for automated processes are built in the same Flow Designer; this allows Users to learn how to build and apply knowledge to specific tasks instead of learning multiple design languages. The Flow Designer is performant and can execute thousands of steps per second in a production environment. Flows run independently; every executed Flow is unique. For example, two instances of the same Flow started simultaneously will not share the same memory space or variables. Every time a Flow starts, a copy is made, the input data is passed in, and the Workflow Engine begins processing.
The Flow Designer displays a workspace for visual configuration of Steps that receive, manipulate, and move data. Each Flow has a green Start step and at least one red End step. During design time, sample data and unit tests can be configured to assist while debugging the Flow to ensure it works as intended.
The following article reviews many features of Flow Designer.
Flow Designer Features
To access the Flow Designer, Create a Flow in a Designer Project. This Designer has many features to create, configure, debug, and integrate Flows and easily apply Best Practices to ensure the logic is built for peak performance and reusability.
Create
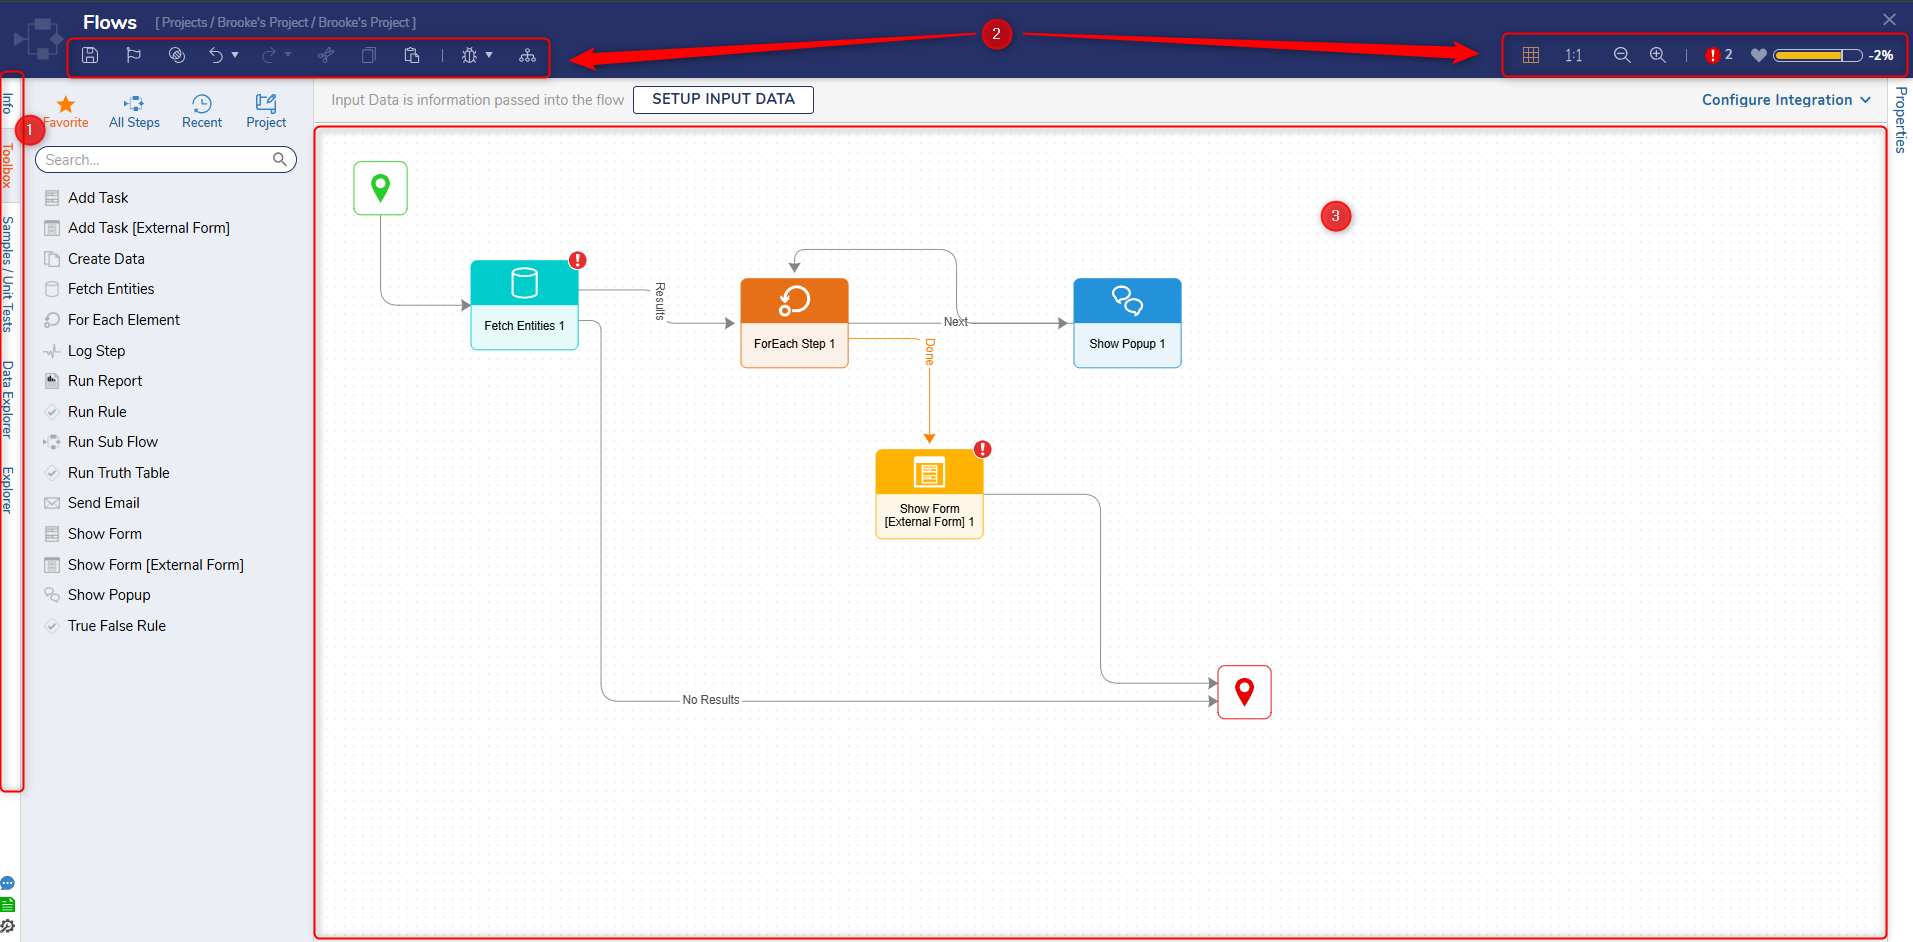
- Side Panel
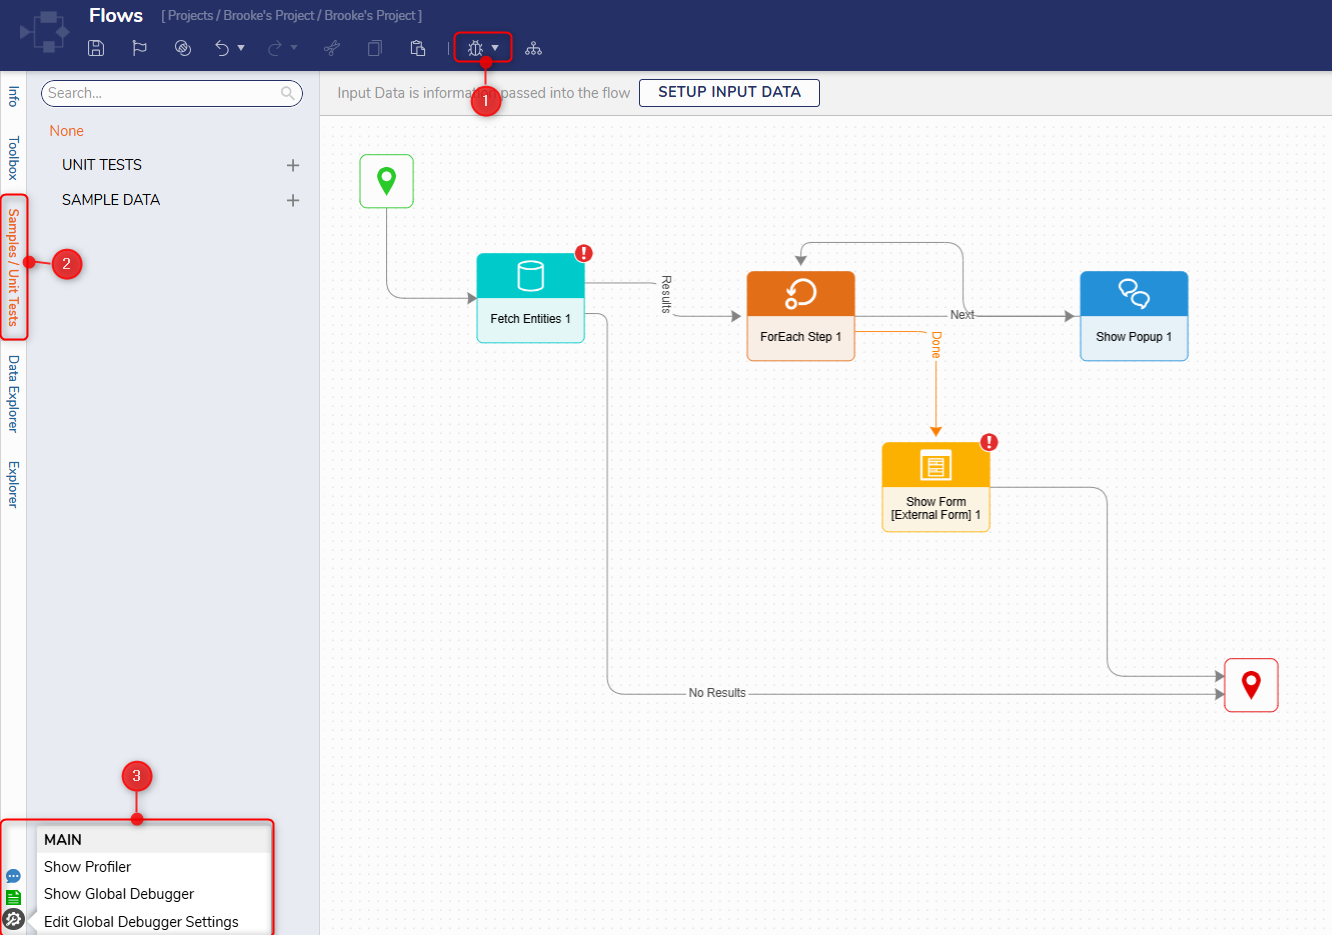
The Flow Designer offers seven tabs on the left-hand side to assist in creating, configuring, and debugging the placed logic. The tab names and functions are listed below.Panel Name Description Info Provides a place to view and update general information about a Flow, such as the Flow Name, Flow ID, Description, Owner, and Tags. Toolbox Library for all steps available for use within the Flow. Steps are used to visualize what the back-end code is accomplishing. Steps are divided into specific categories based on their function. Samples / Unit Test Sample Data and Unit Tests can be defined for testing purposes. Data Explorer Lists all of the data available within the Flow. Step Explorer Lists all of the steps currently in the Flow by name. If there are multiples of the same step, this list will show the steps listed with the same name and a differentiating number. Steps by Type Lists all of the steps currently in the Flow by the type of step it is. For example, if two Create Data steps were used in the Flow, it would list them as ‘Create Data (2), indicating two of them. Selecting the step highlights it with a box in the workspace. Help Center Three icons appear on the left side of the screen in the Studio. These icons provide helpful information about Flow functionality and other resources. - Designer Header
The top action bar is available in all Designers and contains core actions used by the Designers. Furthermore, keyboard shortcuts may be used to operate these actions quickly.
Action Function Save It saves the Flow without closing the Designer. This action includes a window to write notes for the current save if needed. Checkpoint Creates a Backup of the Flow where the checkpoint is saved, then stores it in the history folder. This is useful when making drastic changes that could affect Flow functionality. Undo (CTRL + Z) Reverses the last design change. Redo Reapplies the last design change. Cut(CTRL + X) Copies the selected step with its Properties and removes it from the workspace. Copy (CTRL + C) Copies the selected step with its Properties. Paste (CTRL + V) Pastes any copied steps or templates. View Displays options to reset the zoom level, show grid lines to guide the steps' placement and allow the steps' rotation. Debug Redirects to the Debugger window, which displays options to test Flow logic. Compare Compare different Flow versions that are created on each checkpoint save. Dependencies It shows which elements this Flow depends on and which elements depend on the Flow in a Simple Flow visual view. Integrations This button is not available by default. Instead, the Integration Type must be defined in the Flow properties by navigating to Settings > Service Settings for the Integration actions to appear. Once the type is specified, the Integrations button will appear and, when clicked, will show the integration details for use with REST API calls. -/+ (CTRL + -/+) A toggle for zooming in and out of the workspace in the Flow Designer. Errors Displays validation errors for the current Flow. Warnings Displays validation warnings for the current Flow. Health Details Monitor health score changes as work is being completed, eliminating the need to switch to the Project Health Dashboard. - Workspace
The workspace is an area to drag and drop Steps to build a process visually. This area is blank by default but can be set to show gridlines using the View drop-down in the Top Action Bar. In addition, the workspace automatically includes the Start and End steps specific to the Flow Behavior chosen.
Users can pan in the Flow Designer canvas using Space + Left Mouse Click in v9.12 and later. For more information about panning the canvas and other new features, please refer to: Flow Designer Enhancements.
Configure

- Data Explorer
The Data Explorer tab displays available data to be used as inputs on Steps in a Flow. Flow Data and System Constants are always available within Flows; additional data can be added through the SETUP INPUT DATA button in the configuration bar above the workspace or by adding Flow Input Data on the Start step. Selecting any data within the tab will highlight which steps currently use the data.
- Integrations
Configure the Integration Type to be API Service, User Interface, Webhook, or None. Once a Type is picked, further configuration options become available, a VIEW button to supply additional settings, display information for calls and expected outputs, and test the integration. - Properties Panel
The Flow Settings and Step Properties are located in the Properties panel of the Designer. Flow Settings include configurations for a Flow, such as the Behavior Type, Recursion Policy, Storage Policy, etc.
Note: Starting in v9.10, the Properties Panel will retain its position on the canvas as set by the User throughout their session in the Flow Designer.
Debug
- Debug
Select the Debug button in the Top Action Bar to pull up the Debug window. The Debugger is an interface where the logic built within the Flow Designer can be tested. - Sample/Unit Tests
Sample Data is a set of configured data of one or many types that can be referenced by any Flow and used for mapping. Unit Tests are saved configurations comprised of test values corresponding to the Flow Input Data. - Global Debugger and Profiler
The Global Debugger provides flexibility to troubleshoot Designer Elements. When turned on, it captures real-time processes running in the platform, which assists in troubleshooting processes that can not be debugged efficiently in the Flow Debugger. The Profiler captures data on all step executions, the count of executions, and the time it took to complete the process. This is beneficial to evaluate how to optimize a process better.
Implement
The contents of a Flow can be made available for an End-User to run. Each published Flow will have various elements that can activate it, including scheduled jobs, a Workflow catalog, actions on a Dashboard, and an external system via URL.
Best Practices
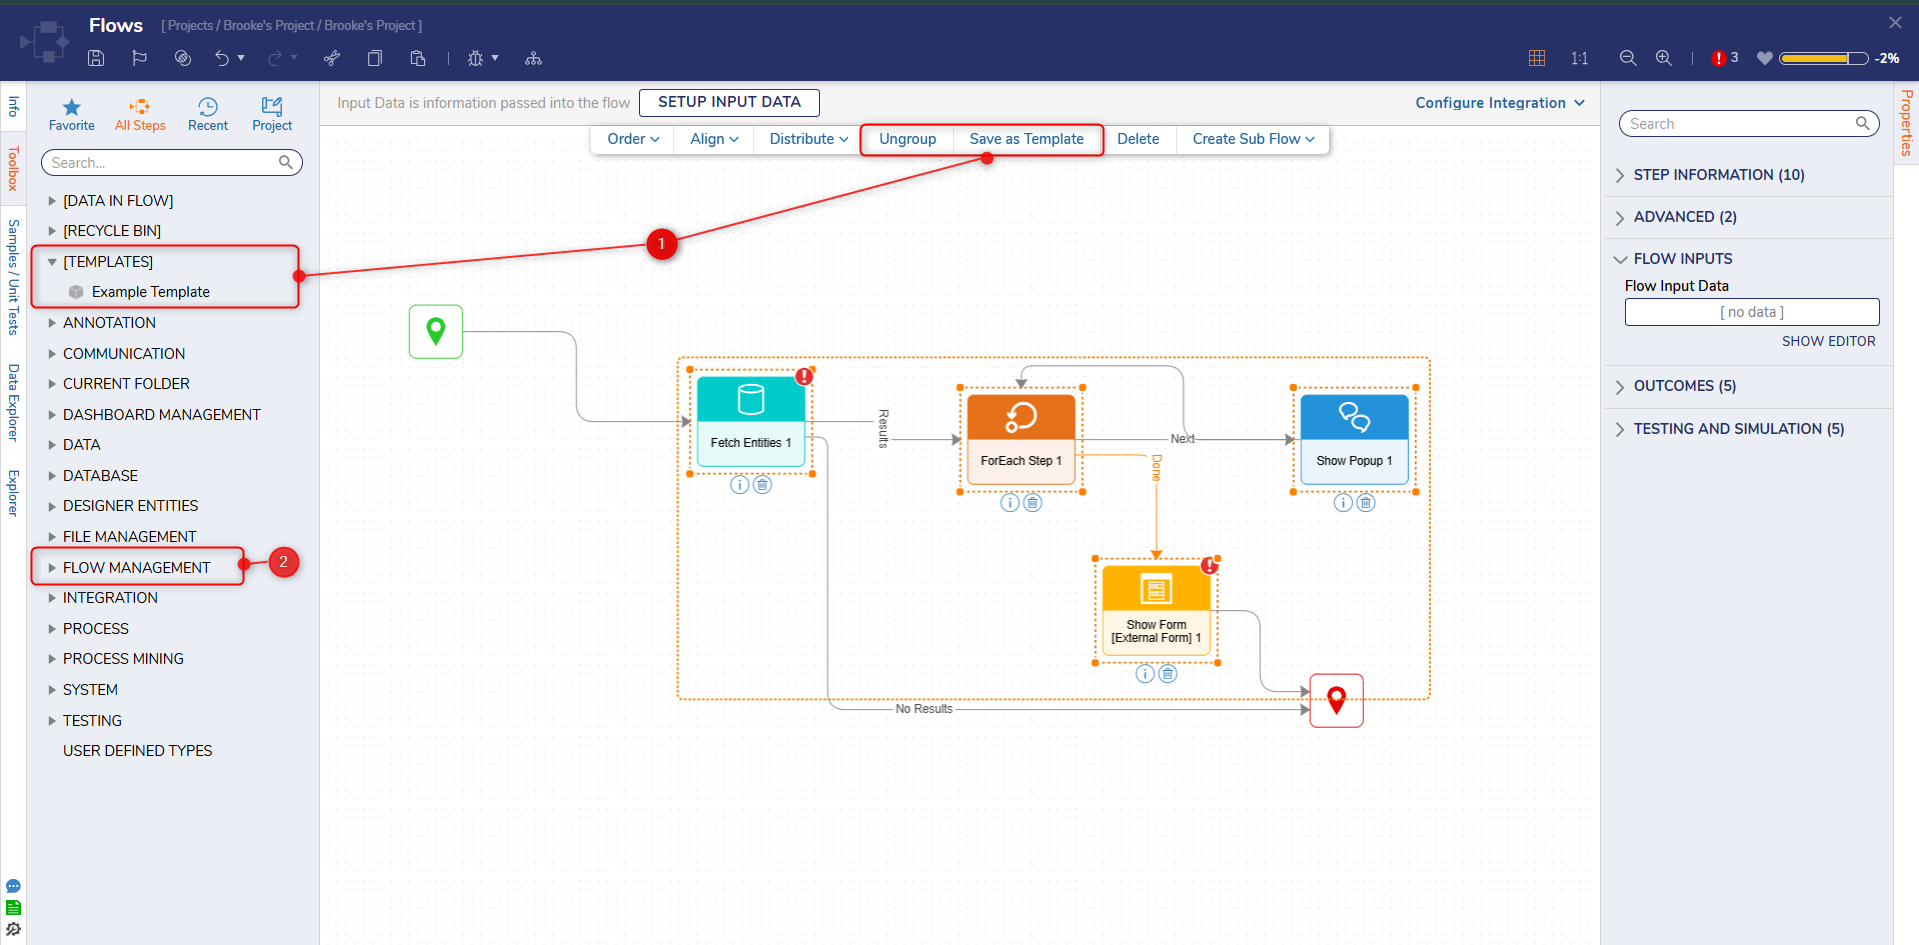
- Flow Templates
Flow logic can be grouped and saved as a template to reuse the logic in other processes. - Flow Management steps
Flow Management steps allow for handling errors, branching and merging, iteration handling, and much more.
Feature Changes
| Description | Version | Release Date | Developer Task |
|---|---|---|---|
| Health details added to Flow Designer | 9.7 | February 2025 | [DT-042479] |
| Property Panel resizing will remain for a session's duration. | 9.10 | May 2025 | [DT-044202] |
| Users can pan in the Flow Designer Canvas using Keyboard + Left/Right Mouse Click. | 9.12 | June 2025 | [DT-044423] |