- 20 Mar 2024
- 1 Minute to read
- Print
- DarkLight
Deploying Containers on Docker
- Updated on 20 Mar 2024
- 1 Minute to read
- Print
- DarkLight
This Document demonstrates how to host a Decisions Container on Docker using a YAML file.
Prerequisite:
Example YAML
Make changes to the configurations in the YAML file below, using the table as a reference guide.
version: "3.2"
services:
  decisions-1:
    container_name: Decisions
    image: "decisionscore/platform:latest"
    ports:
      - "8081:80"
    environment:
      - DECISIONS_DATABASETYPE=MSSQL
      - DECISIONS_DATABASECONNECTSTRING=Data Source=[systemIP];Initial Catalog=11_07;Integrated Security=false;User ID=[user];Password=[password];
      - DECISIONS_PORTALBASEURL=https://decisions.com
	  - DECISIONS_ADMINISTRATOR_EMAIL=email@decisions.com
      - DECISIONS_ADMINISTRATOR_PASSWORD=Roy@123
      - LANG=en_US.UTF-8
      - LANGUAGE=en_US:en
      - LC_ALL=en_US.UTF-8
      - DECISIONS_LICENSECOMPANYID=119eb5-17a8-11e6-xxx-xxxx
      - DECISIONS_LICENSECOMPANYNAME=Decisions
      - DECISIONS_LICENSECONTACTEMAIL=john@email.com
      - DECISIONS_LICENSETYPE=EnterpriseNonProduction
    volumes:
      - ./filestorage:/opt/decisions/data
Variable | Description |
|---|---|
container_name | The container will be created in Docker with this name. |
image | Users can select the desired version of Decisions to be pulled from the Docker Repository. Container images of version 8.0 and above have been published to Docker Hub and are publicly available. |
ports | By default, the container runs on port 80. Users can change the port if required. |
environment | Refer to the Decisions Environment Variables article to modify all the environment variables. |
volumes | The default file storage location of the Decisions container is at |
Deploying YAML
Save the updated YAML file to a location of your choice and name the file as
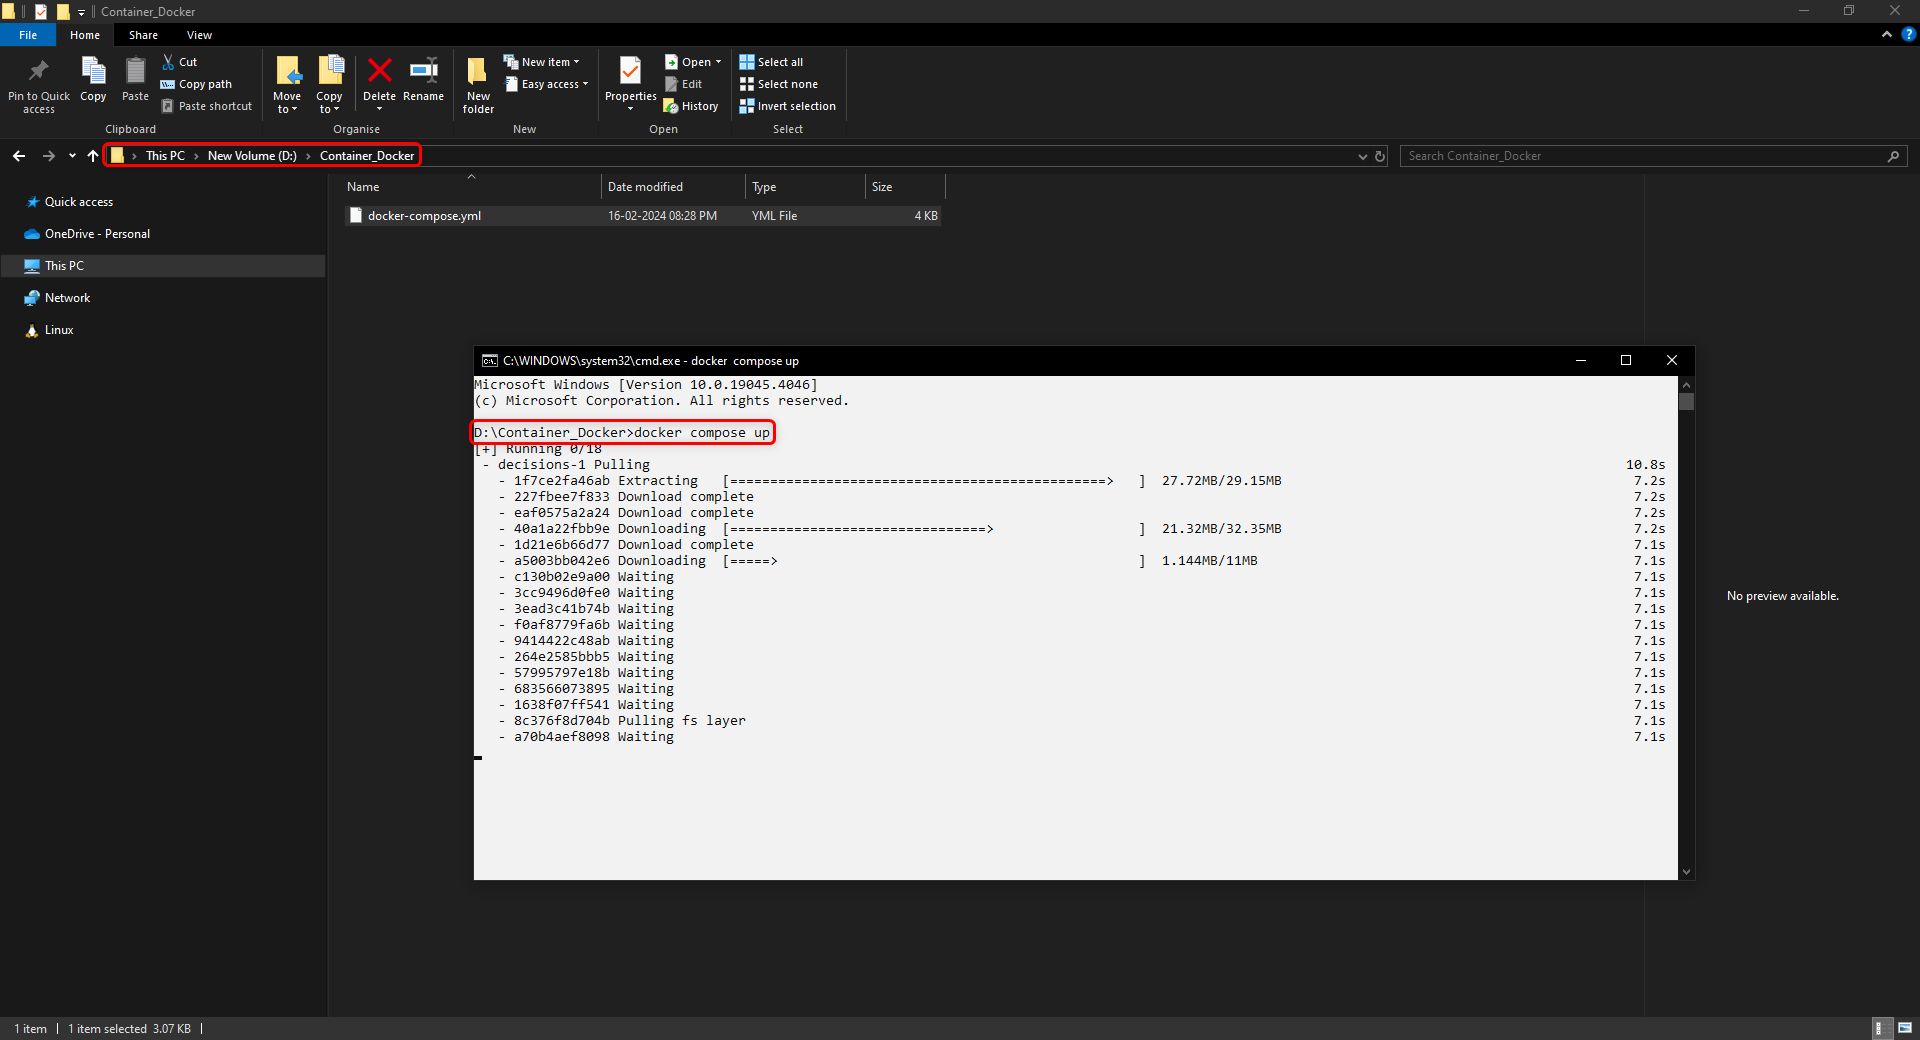
docker-compose.yml.Open the Command Prompt as administrator and navigate to the file location where the YAML file is located.
Run the command
docker compose up. The image will get pulled, and the container will get hosted. Hosting the container may take some time, depending on the system configuration.
The container will be ready and hosted after the status:
Application started. Press Ctrl+C to shut down.Navigate to the browser and hit the URL:
http://localhost:8082Your Decisions login window will appear.
Login with the admin credentials given in the YAML file.


