Overview
The Amazon Web Services (AWS) module allows users to integrate with AWS Simple Queue Service (SQS). SQS is an AWS service that provides fully managed message queueing and access to two queue types, one focusing on maximum throughput and the FIFO format.
The module provides tools to connect, send and post messages to an SQS queue. In addition, connections to an SQS queue can be defined with temporary credentials provided by Amazon, limiting Decisions access.
Prerequisites
- Installation of the AWS module.
- An active AWS account, with an Access Key defined as the queue owner if temporary credentials are not used.
- If using temporary credentials, an Amazon IAM Role with access to the queue will need to be created.
- AN SQS Queue configured in AWS.
Adding an SQS Queue
The following section covers the setup and configuration of a broker/message queue and is intended to serve as an example resource to integrate with Decisions. The example highlights the values needed to connect a message queue to Decisions and is meant for informational and troubleshooting purposes.
Please refer to the product's official documentation for a more in-depth and detailed guide on configuring a message queue for use in production environments.
AWS Configuration
When establishing a connection between an AWS SQS Queue and Decisions, an SQS queue will need to be set up and configured within AWS. Below is an example of how to configure an SQS queue within AWS.
- Within the AWS Console, search for AWS Simple Queue Service.
- Select the Create Queue Action.

- A new page will open to define the settings for the queue. These settings are divided into sections: Details, Configuration, Encryption, Access Policy, Redrive Allow Policy, Dead-letter Queue, and Tags.
- Within the Details section, set the Type for the queue and provide a Name. The Type defines how the queue will receive and deliver messages. For this example purpose, Standard was used.
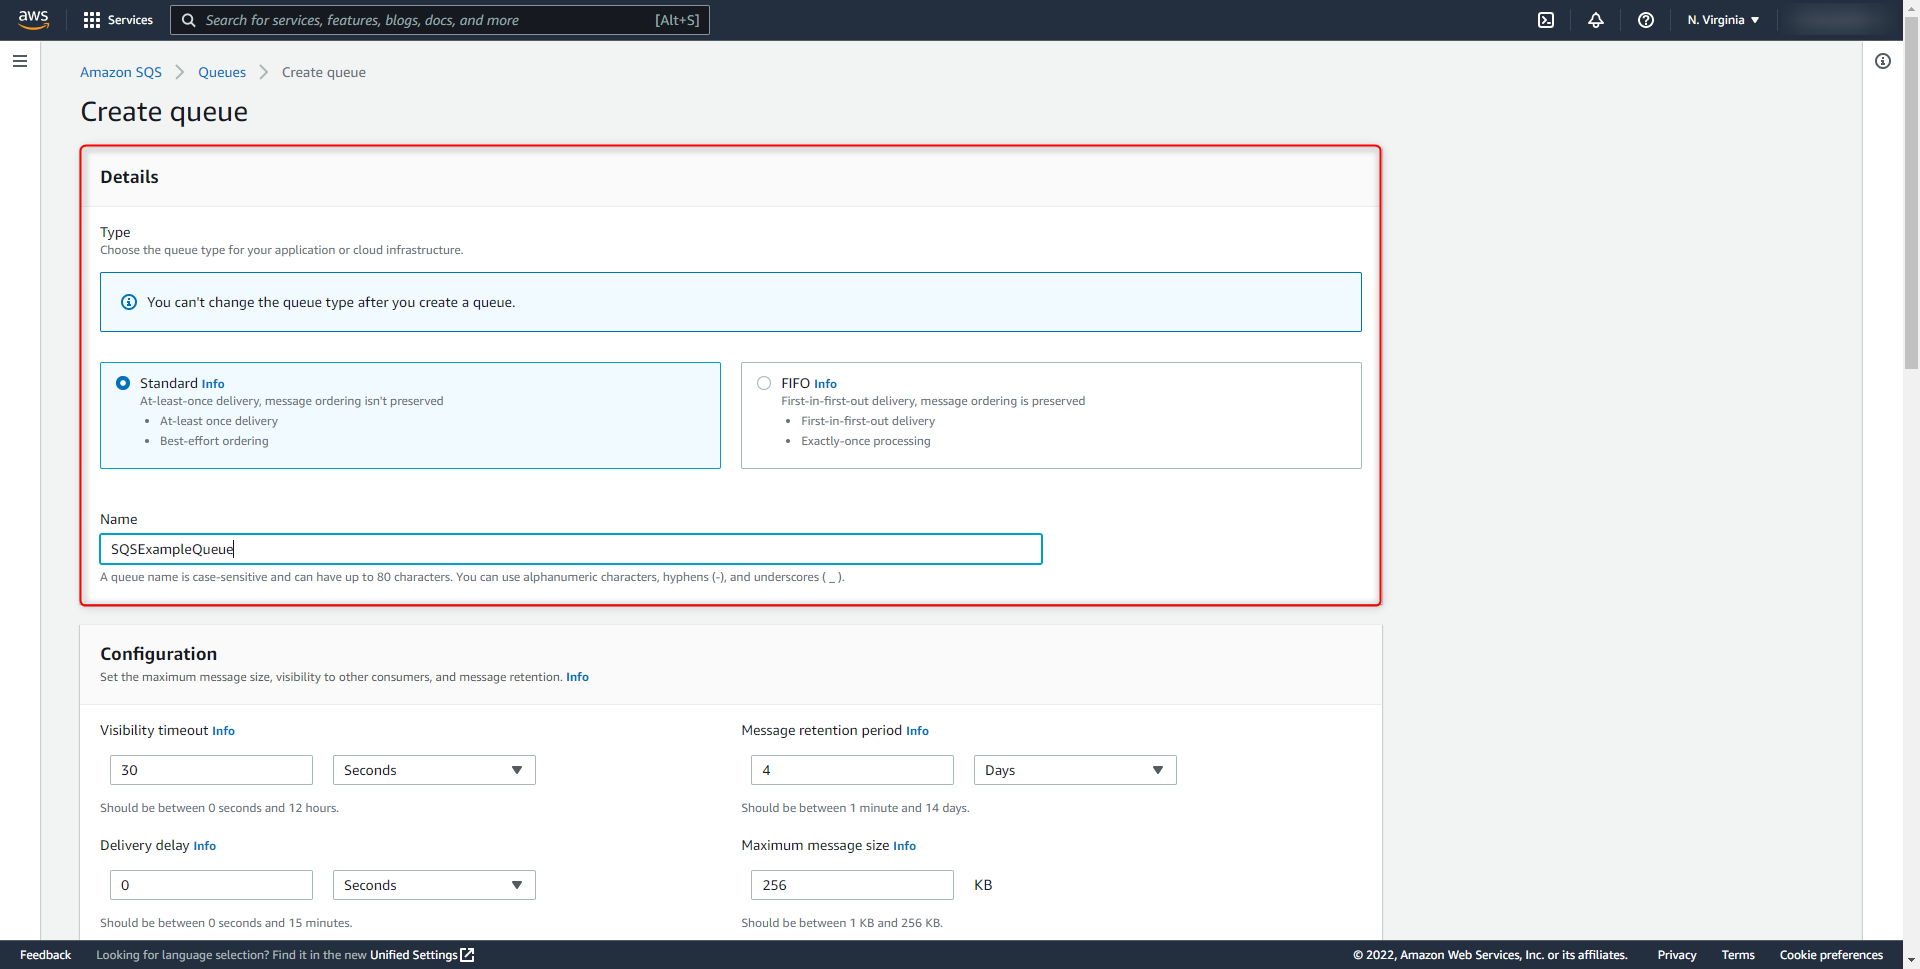
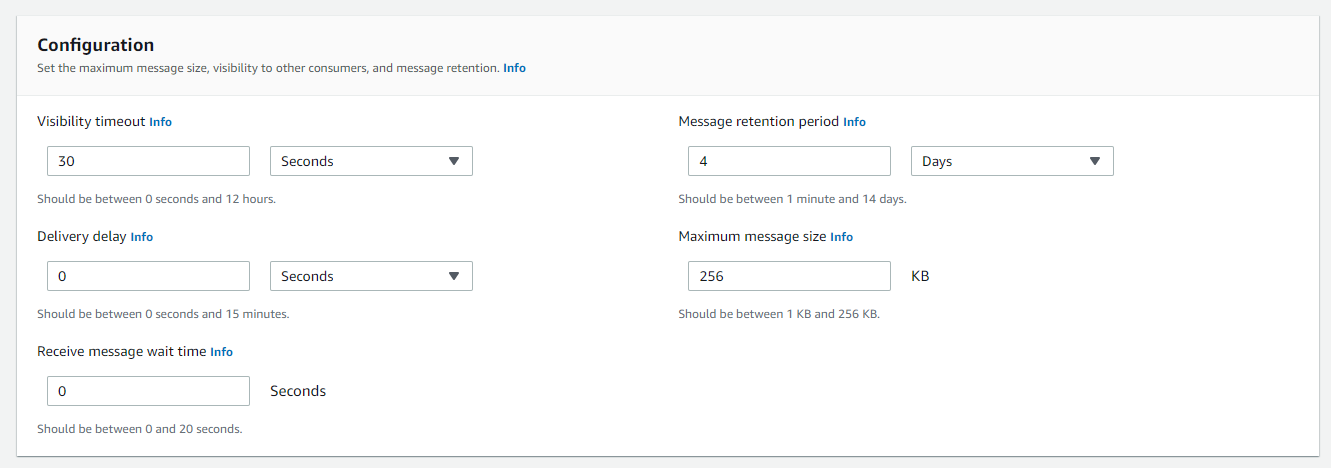
- Under Configuration, these values can be set to default values. These settings are used to customize how the queue will process messages.
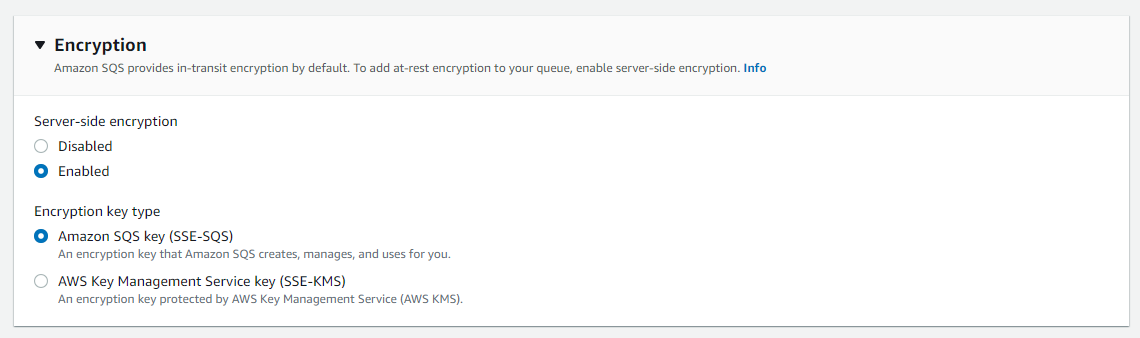
- The Encryption section allows the queue to have all messages encrypted after receiving. If enabled, the body for all received messages will be encrypted, and messages will only be decrypted when sent to an authorized consumer. The Encryption key type defines how the messages will be encrypted.
- The Access Policy defines who has access to the queue. By default, only the queue owner/creator can send and receive from the queue. The queue owner is the currently active AWS account creating the queue.
However, specific IAM users, roles, and AWS accounts can be used instead. Below is an example configuration using default settings.
- Redrive Allow Policy is an optional setting that allows the queue to be utilized as a dead-letter queue for another message queue. This setting can be left as disabled/default.

- Dead-letter Queue is an optional setting that defines another queue to receive messages that the queue cannot send. If this setting is enabled, another queue can be used to receive any messages that cannot be delivered.

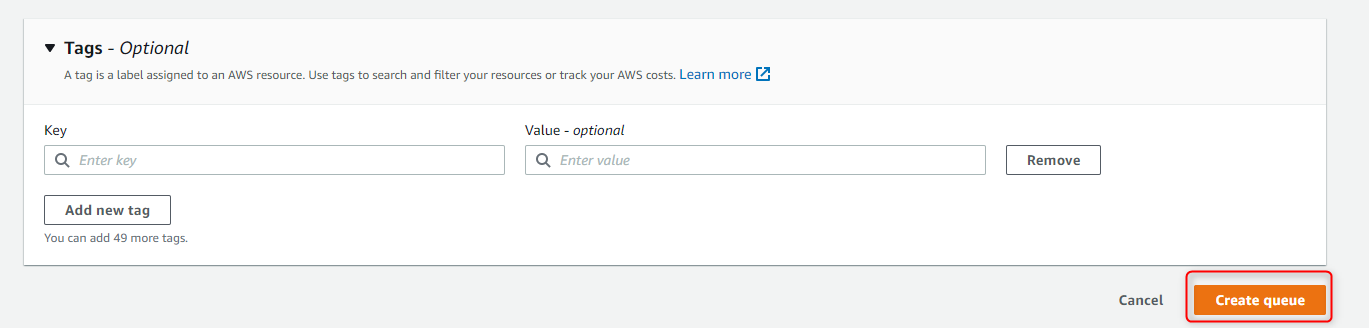
- Tags are an optional setting used to identify and track the queue as a resource within AWS.
- Once all settings have been defined, select Create queue to finalize the queue creation.
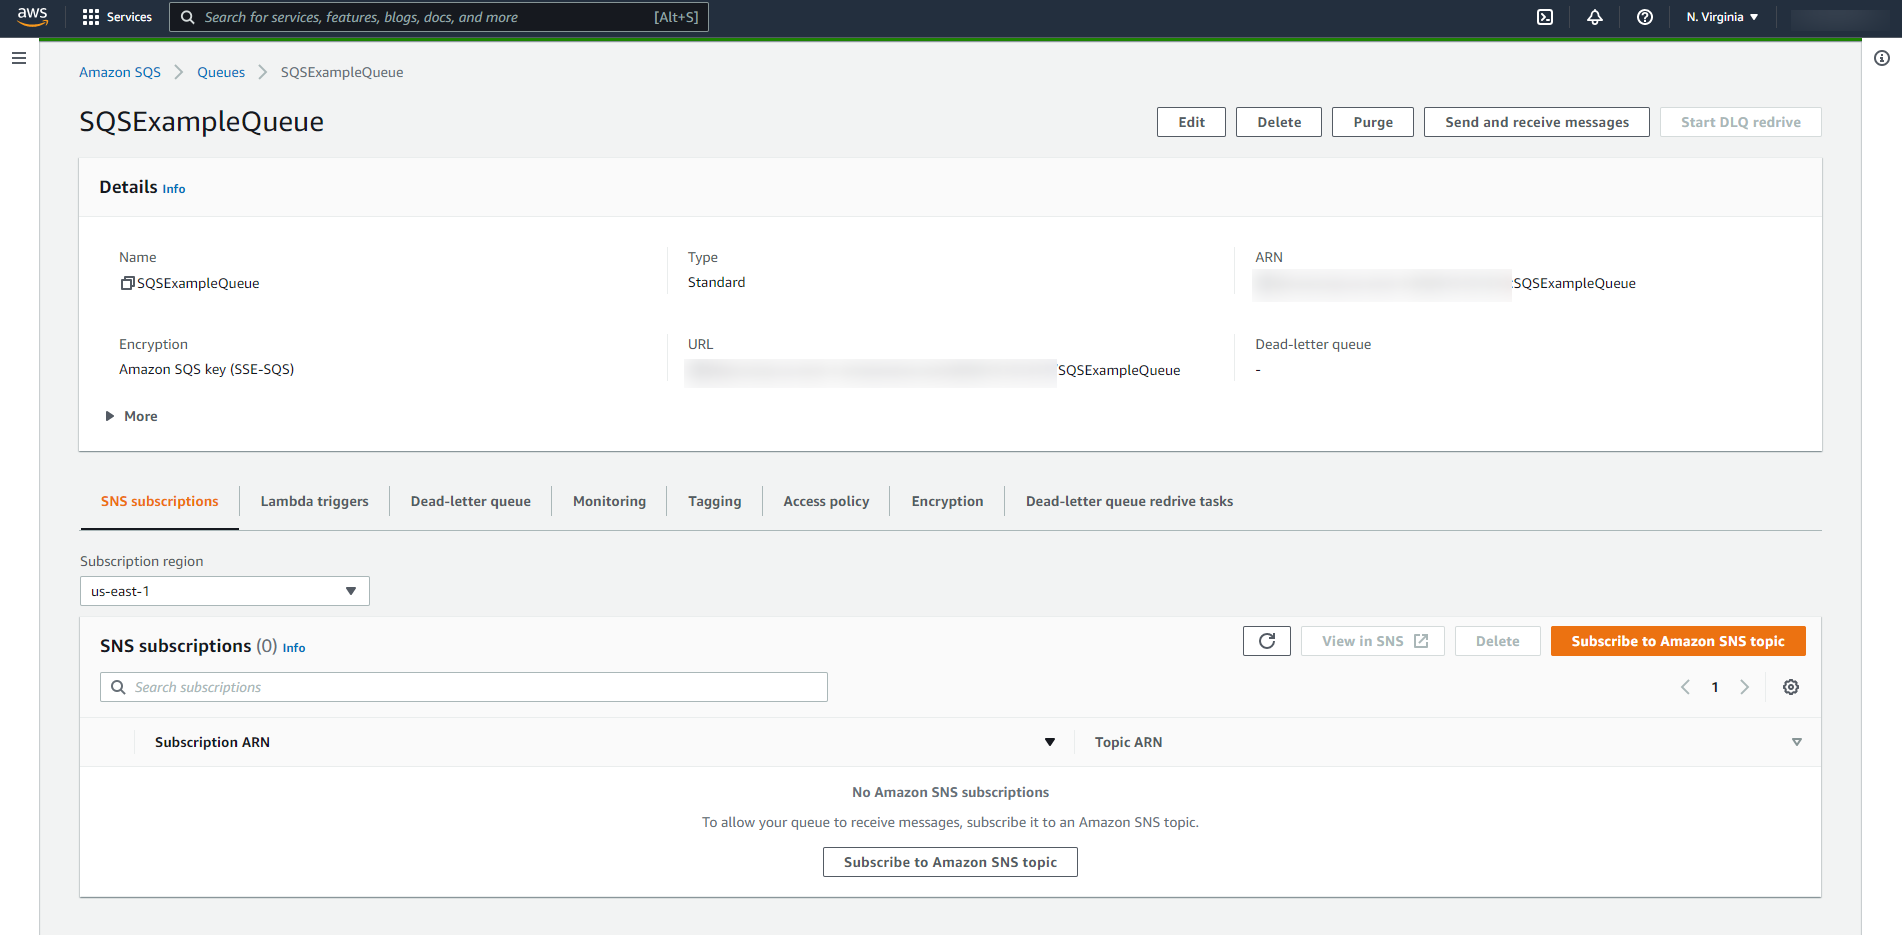
- The Details page for the queue will display.
Decisions Configuration
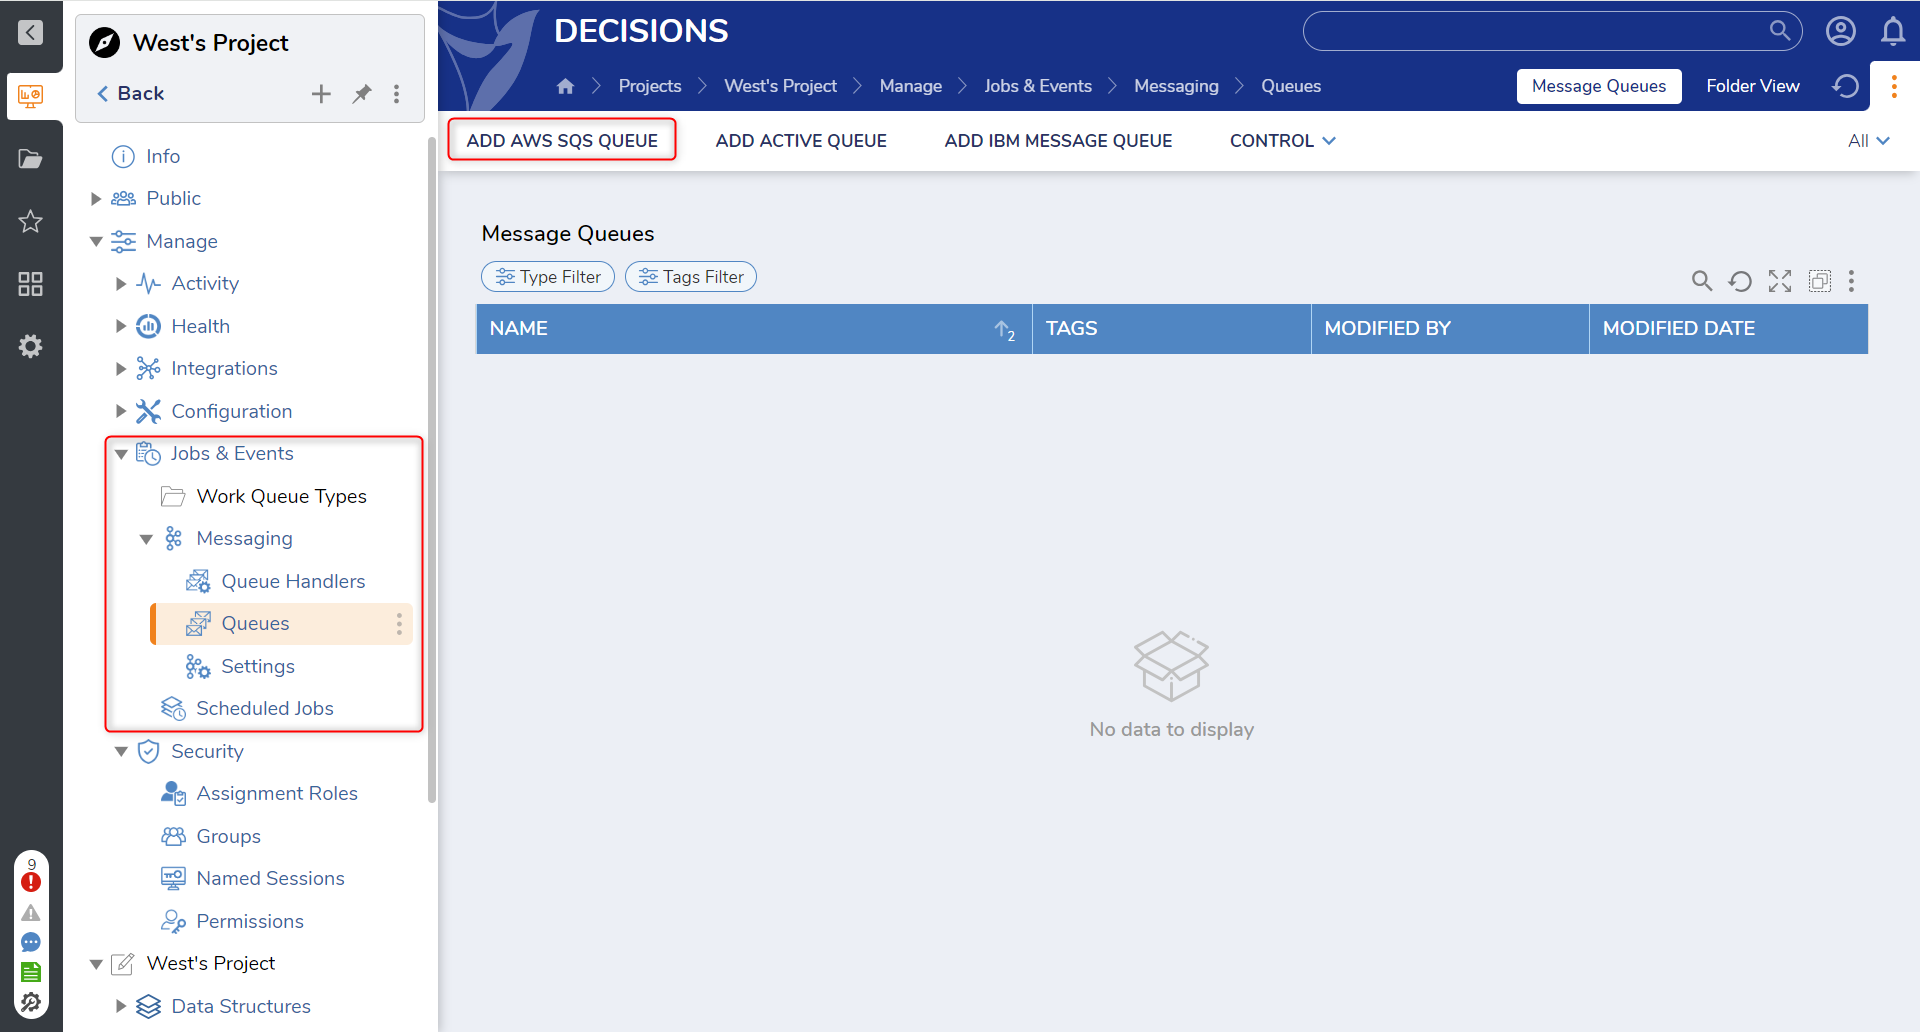
Unlike other message queues, connections to an SQS queue are configured under Amazon Webservices Settings instead of under Jobs and Events > Message Queues. Multiple queues can be connected to from a single Decisions instance. To add a Queue:
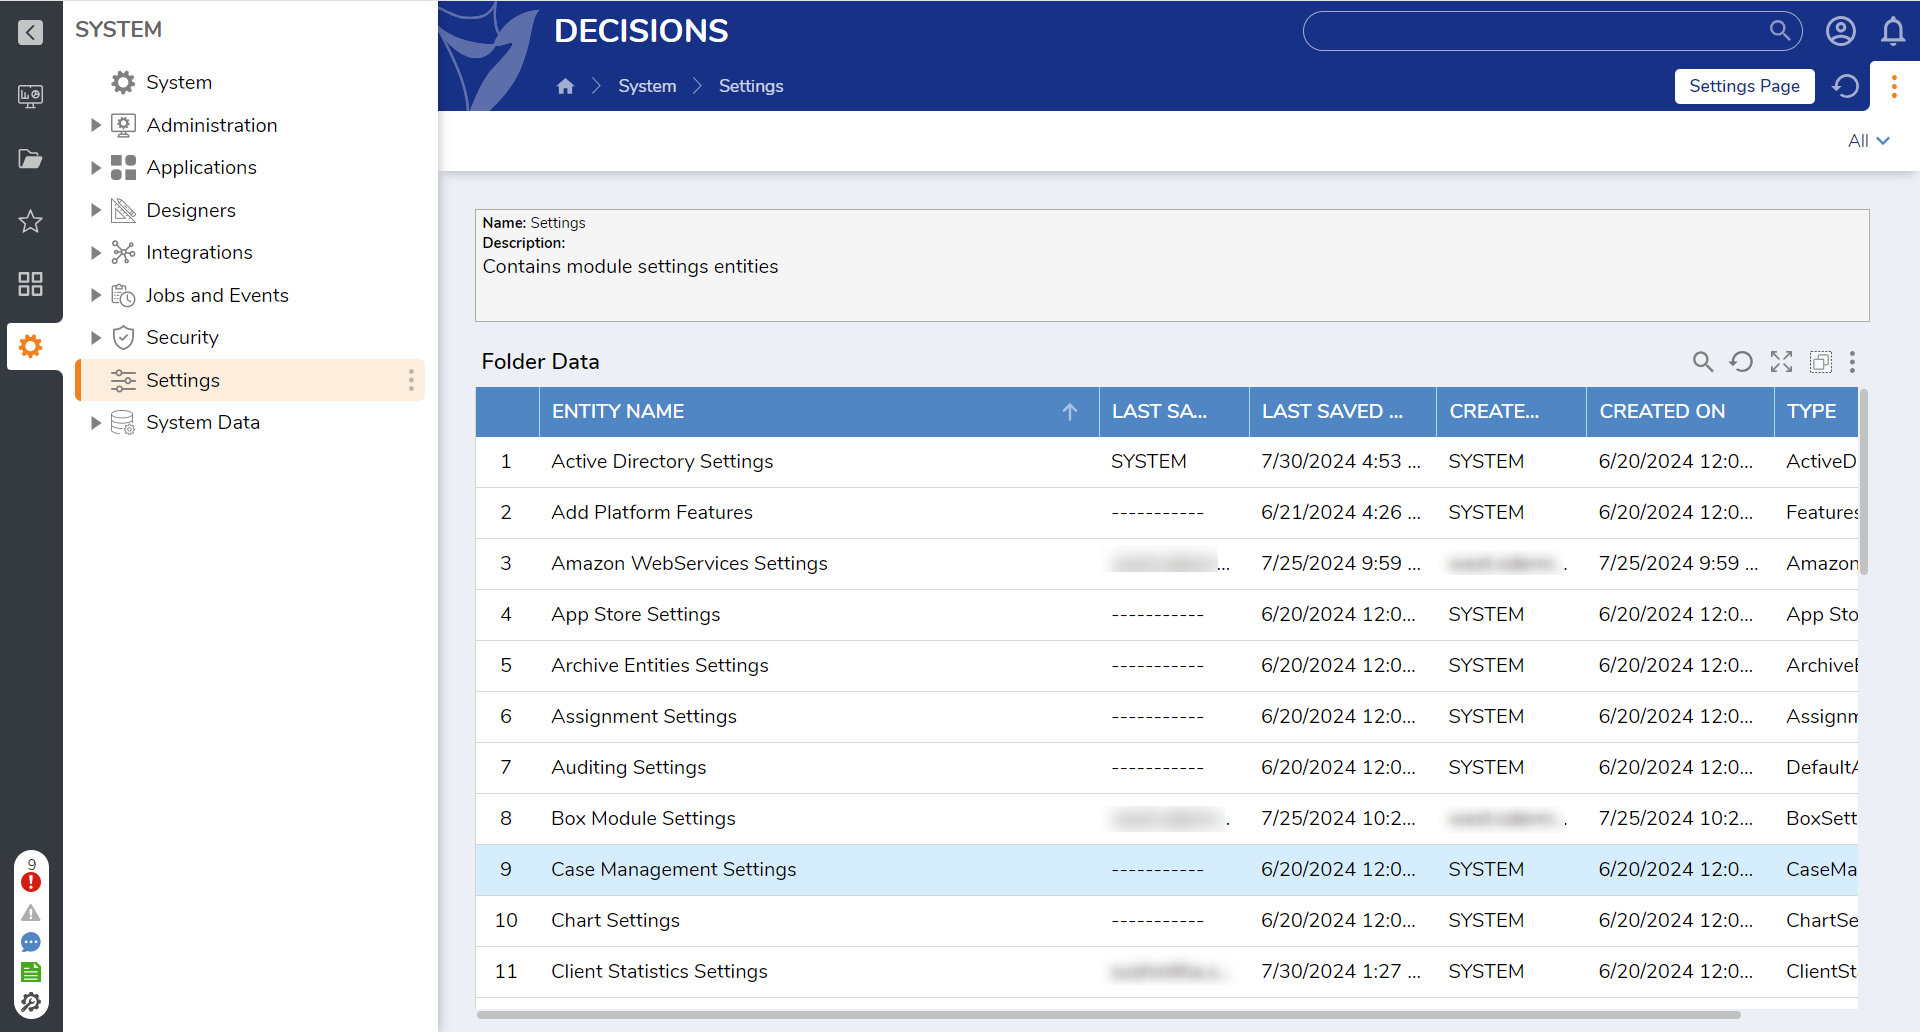
- In the Decision Studio, navigate to System > Settings. Right-click Amazon WebServices Settings and select Edit.
- A popup should appear labeled Edit Amazon EC 2 Portal Settings. Under the SQS section, select the Use SQS option. Click ADD under SQS Queues.
- On the Add SQS Queues window, the settings for the SQS queue can be defined. Settings such as Queue URL and Queue Region can be located on the Details page for the Queue in AWS
By default, messages sent to an SQS queue will be encoded in Base64 format. To allow messages to be interpreted as a plain String, uncheck both Send/Read String Messages as Base64. 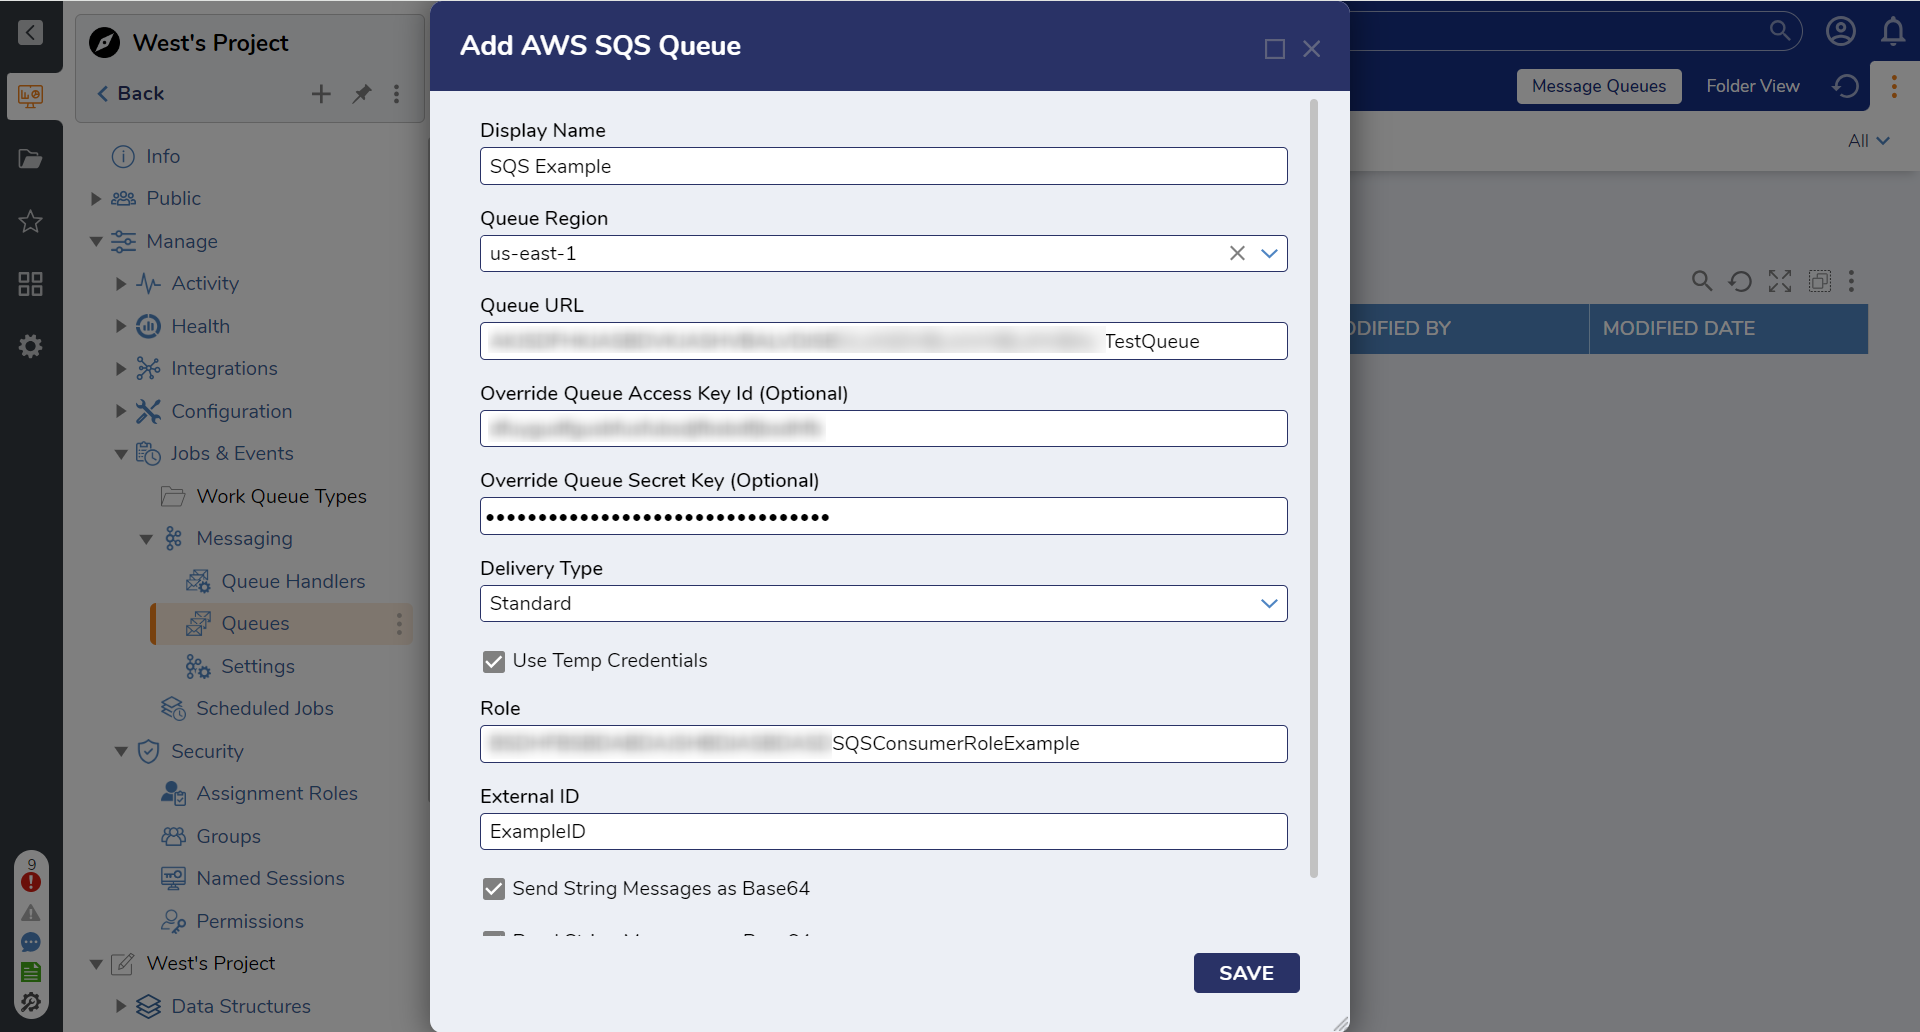
| Setting | Description |
|---|---|
| Display Name | The name of the Queue as it will appear in Decisions. |
| Queue Region | The AWS Region was defined when the SQS queue was created in AWS. |
| Queue URL | The full URL is used to access the queue. This can be found under the URL section on the Details page for the Queue. |
| Queue Access Key ID | An Access Key for the root user account. This provides authorization to access the queue to send and receive messages. |
| Queue Secret Key | The Secret Key is associated with an Access Key ID. |
| Delivery Type | Choose between Standard or First-In-First-Out (FIFO) delivery types. Standard Queues guarantee that a message is delivered at least once, and duplicates can be introduced into the queue. FIFO Queues ensure a message is delivered exactly once and remains available until the consumer processes and deletes it; duplicates are not introduced into the queue. |
| Use Temp Credentials | If enabled, allows temporary credentials provided by an IAM Role to be defined and used to access the queue. The IAM Role will be defined in Decisions under the Role section. |
| Role | This will be the IAM Role Decisions will utilize to connect to the line. The full ARN or Amazon Resource Name will need to be added to the queue. |
| External ID | A specialized identifier must match the value defined when creating the IAM Role to provide authorization to the queue. |
| Send String Messages as Base64 | If enabled, String messages sent to the SQS Queue will be encoded in Base64 format. |
| Read String Messages as Base 64 | If enabled, ensures that String messages that the SQS Queue receives will be encoded in Base64 format. |
Click SAVE. Any Step or Flow, such as a Message Handler Flow, will be able to select the configured Queue in Decisions based on the Display Name.
Locating setting values from AWS
The following section details where to locate the certain values needed to configure a connection to the queue with Decisions.
Queue Region and Queue URL
To locate the Queue Region and Queue URL, users must visit the Details page for the Queue.
- Search for SQS and select the Simple Queue Service in the AWS web console.
- Select the Queue from the list. The details for the queue will be displayed.
From here, the Queue Region and Queue URL can both be found on the Details page. For the Queue URL, the entire URL can be copied and added to the field. The Queue Region can be seen as part of the ARN, for example, us-east-1.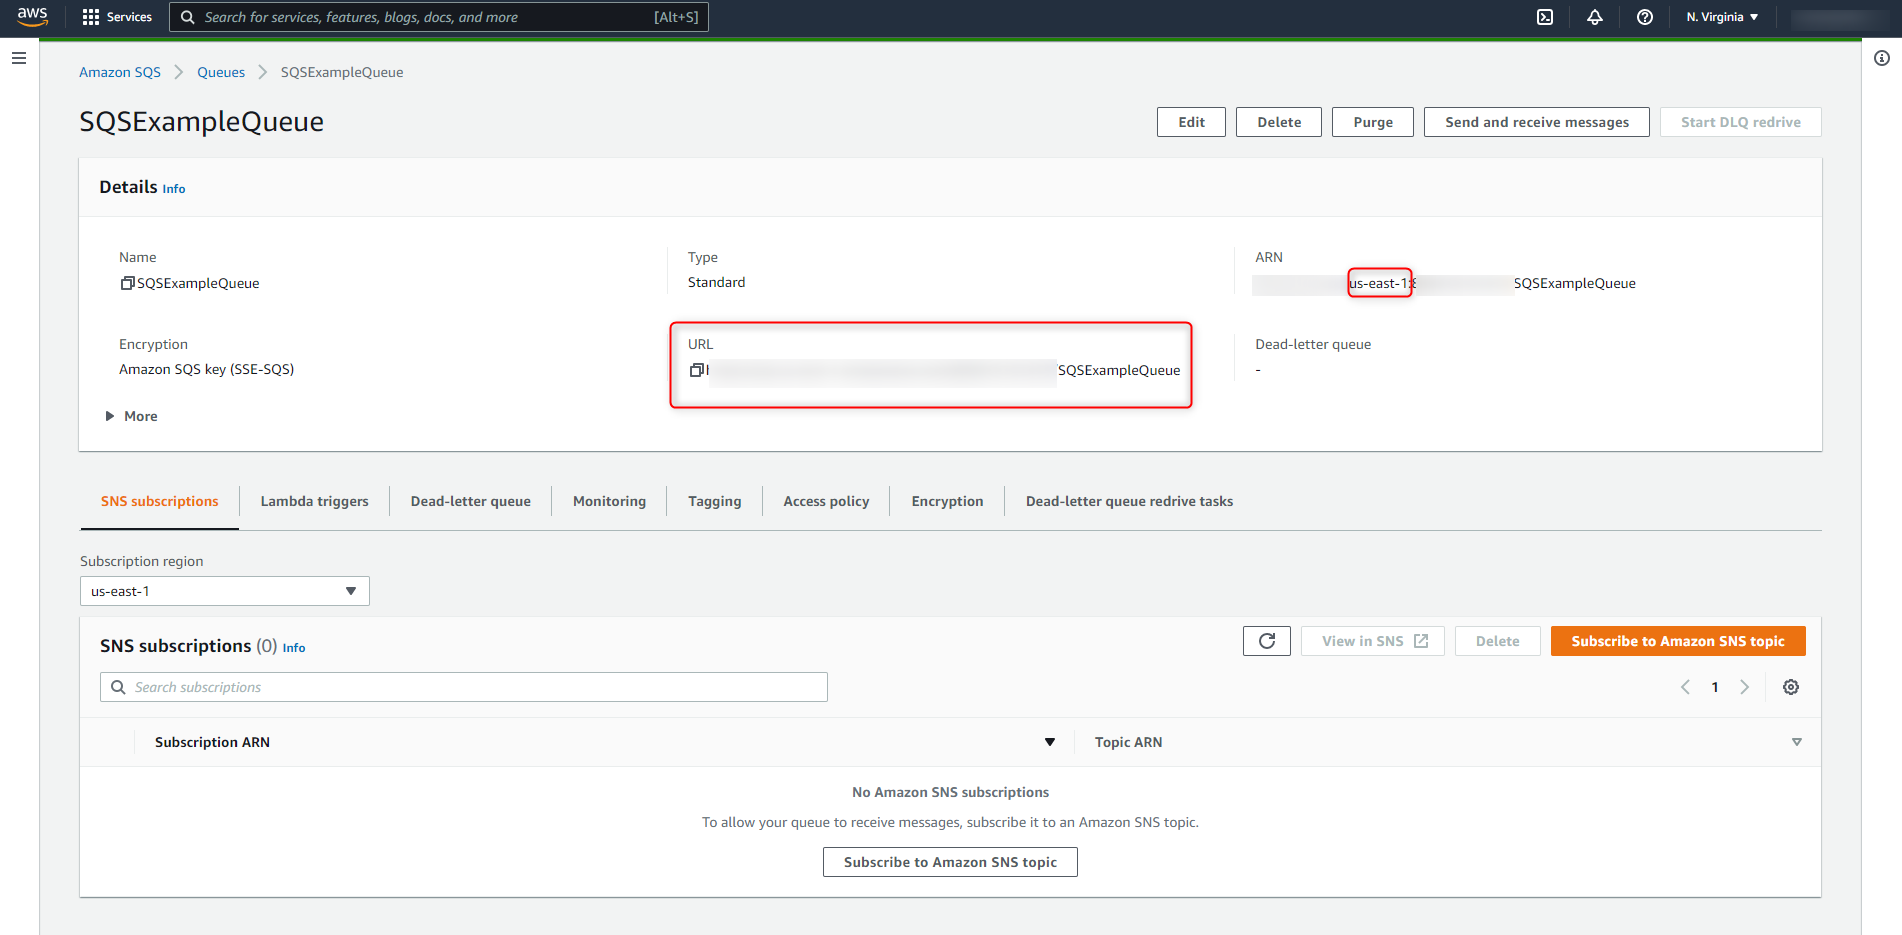
Queue Access Key ID and Queue Secret Key
These values are the access and secret key for the account used to establish the connection between Decisions and the queue.
Due to the secret key being permanently hidden after being created, users must either create a new Access Key for the owner account of the queue or have a saved copy for an existing key pair. If the secret key is lost, a new key must be created for the connecting account.
To create a new Access Key:
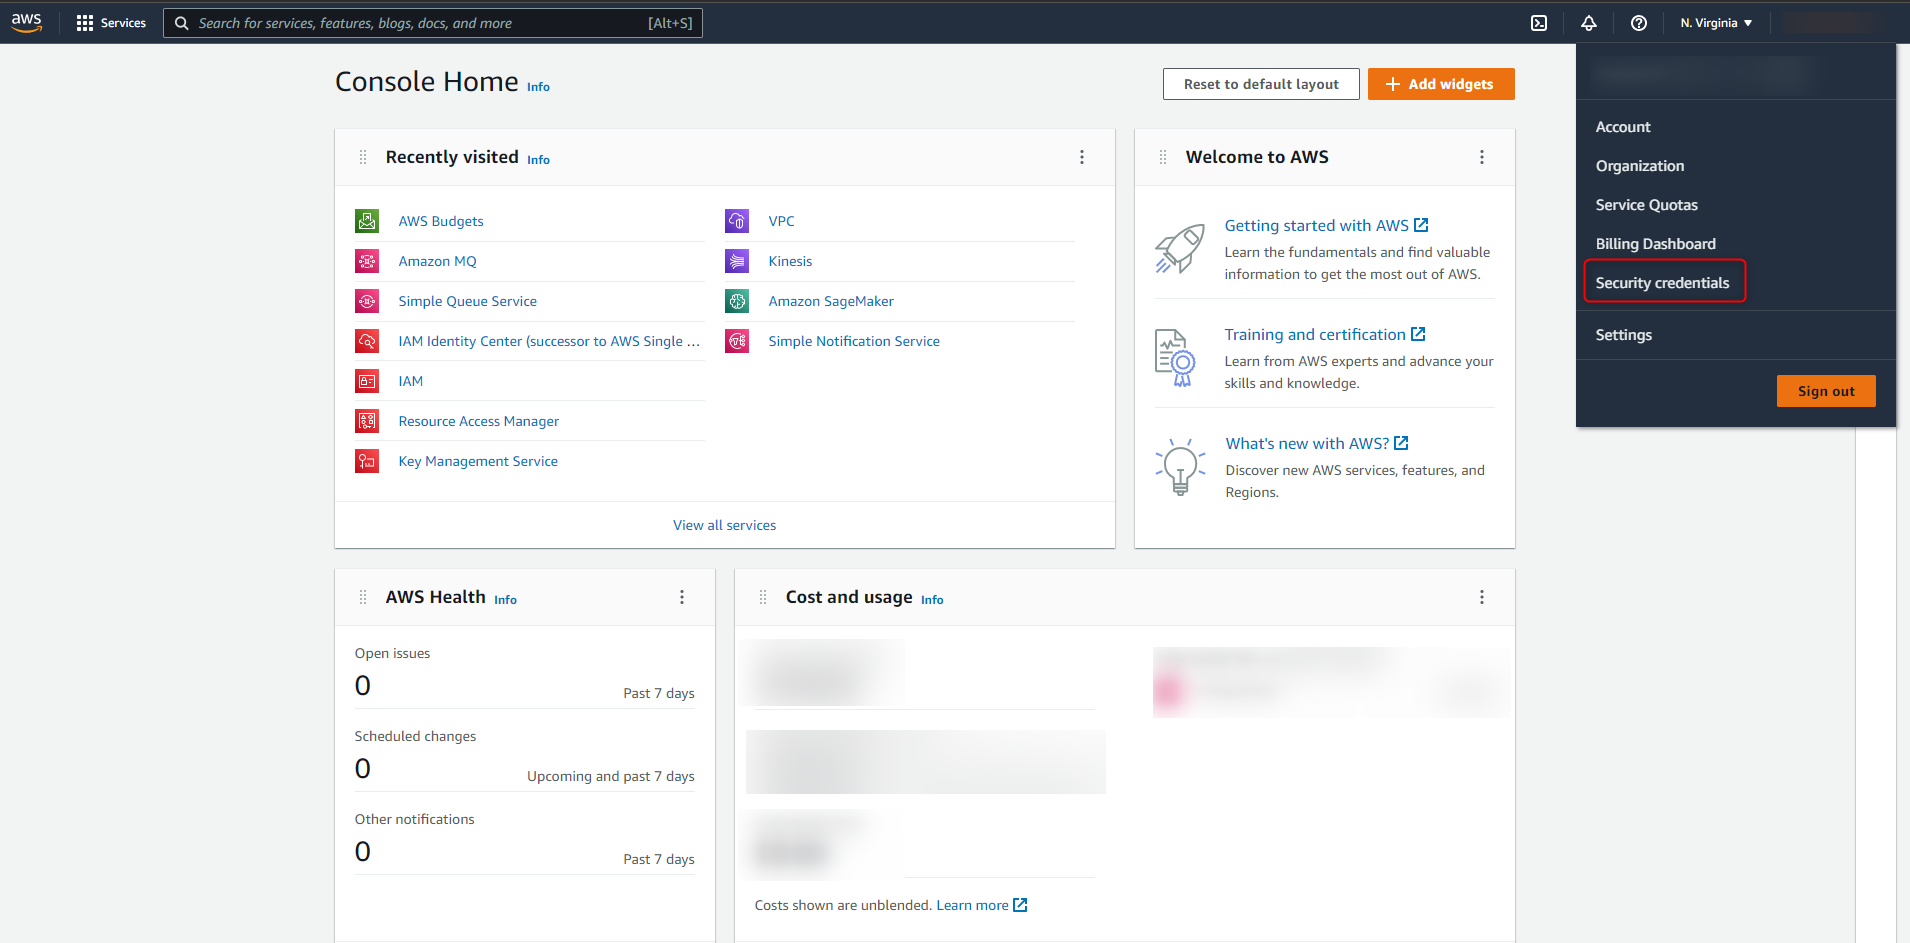
- Navigate to the security credentials page. The page can be accessed by clicking on your profile and selecting Security Credentials from the dropdown.
- From this page, expand the Access Keys header
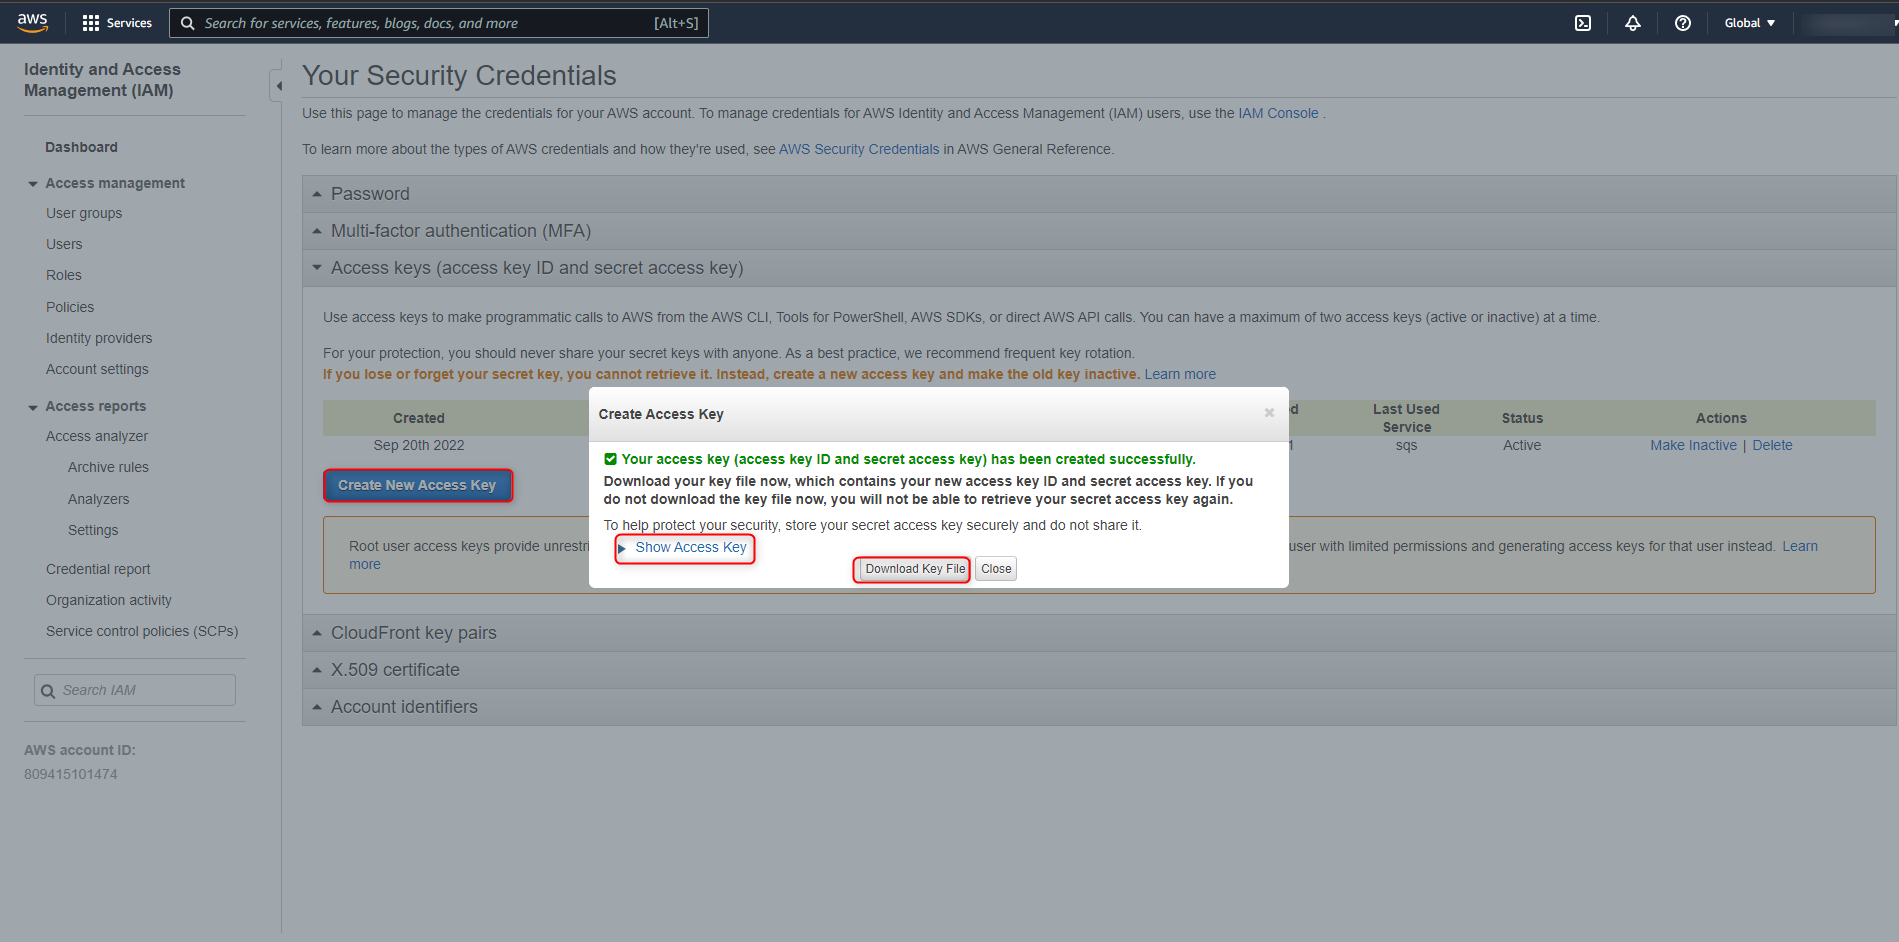
- Select Create Access Key. A new access and secret key pair will be generated. To view the key, select Show Access Key. In order to view the secret key again, ensure that the key file is downloaded and stored in a secure location.
Role and External ID
The Role and External ID fields are needed only if Use Temp Credentials is checked in Decisions and if the queue can only be accessed through these credentials. The Role field requires the full ARN to be added. To locate the Role's full ARN and External ID:
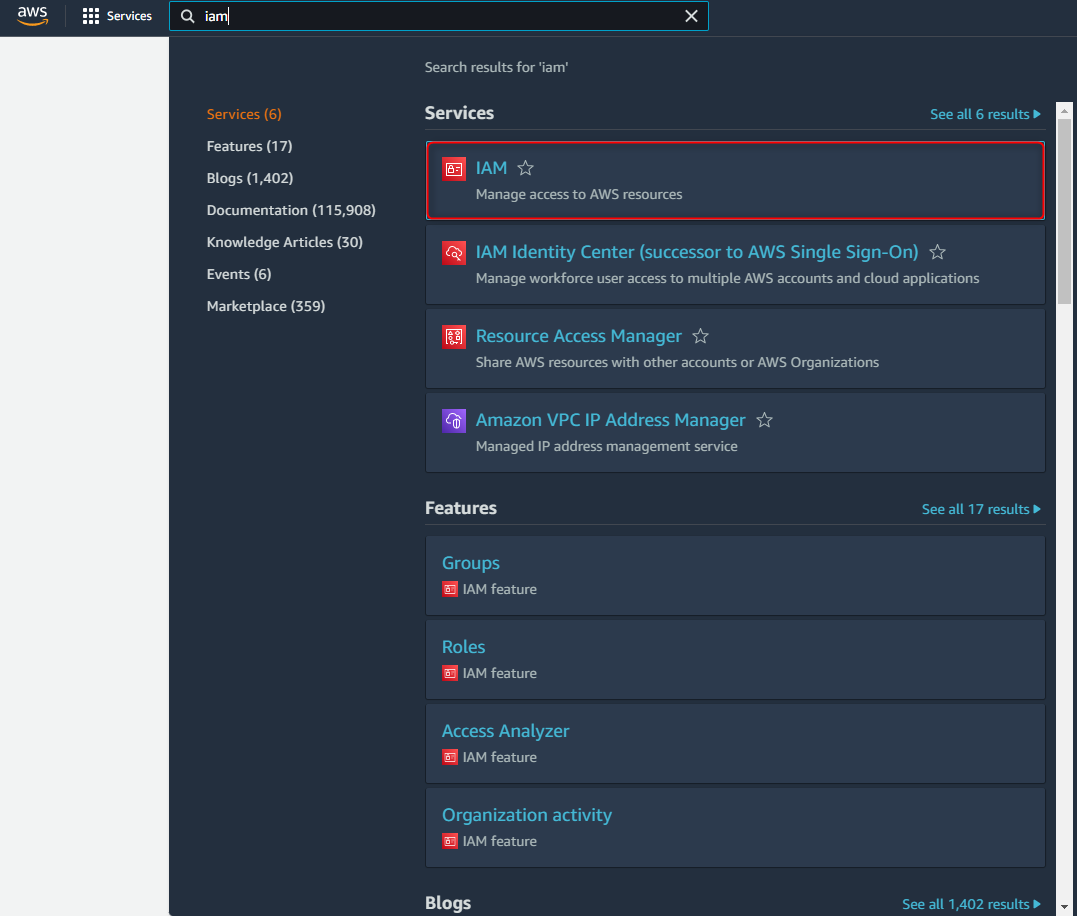
- In the AWS Console, navigate to Identity and Access Management dashboard.
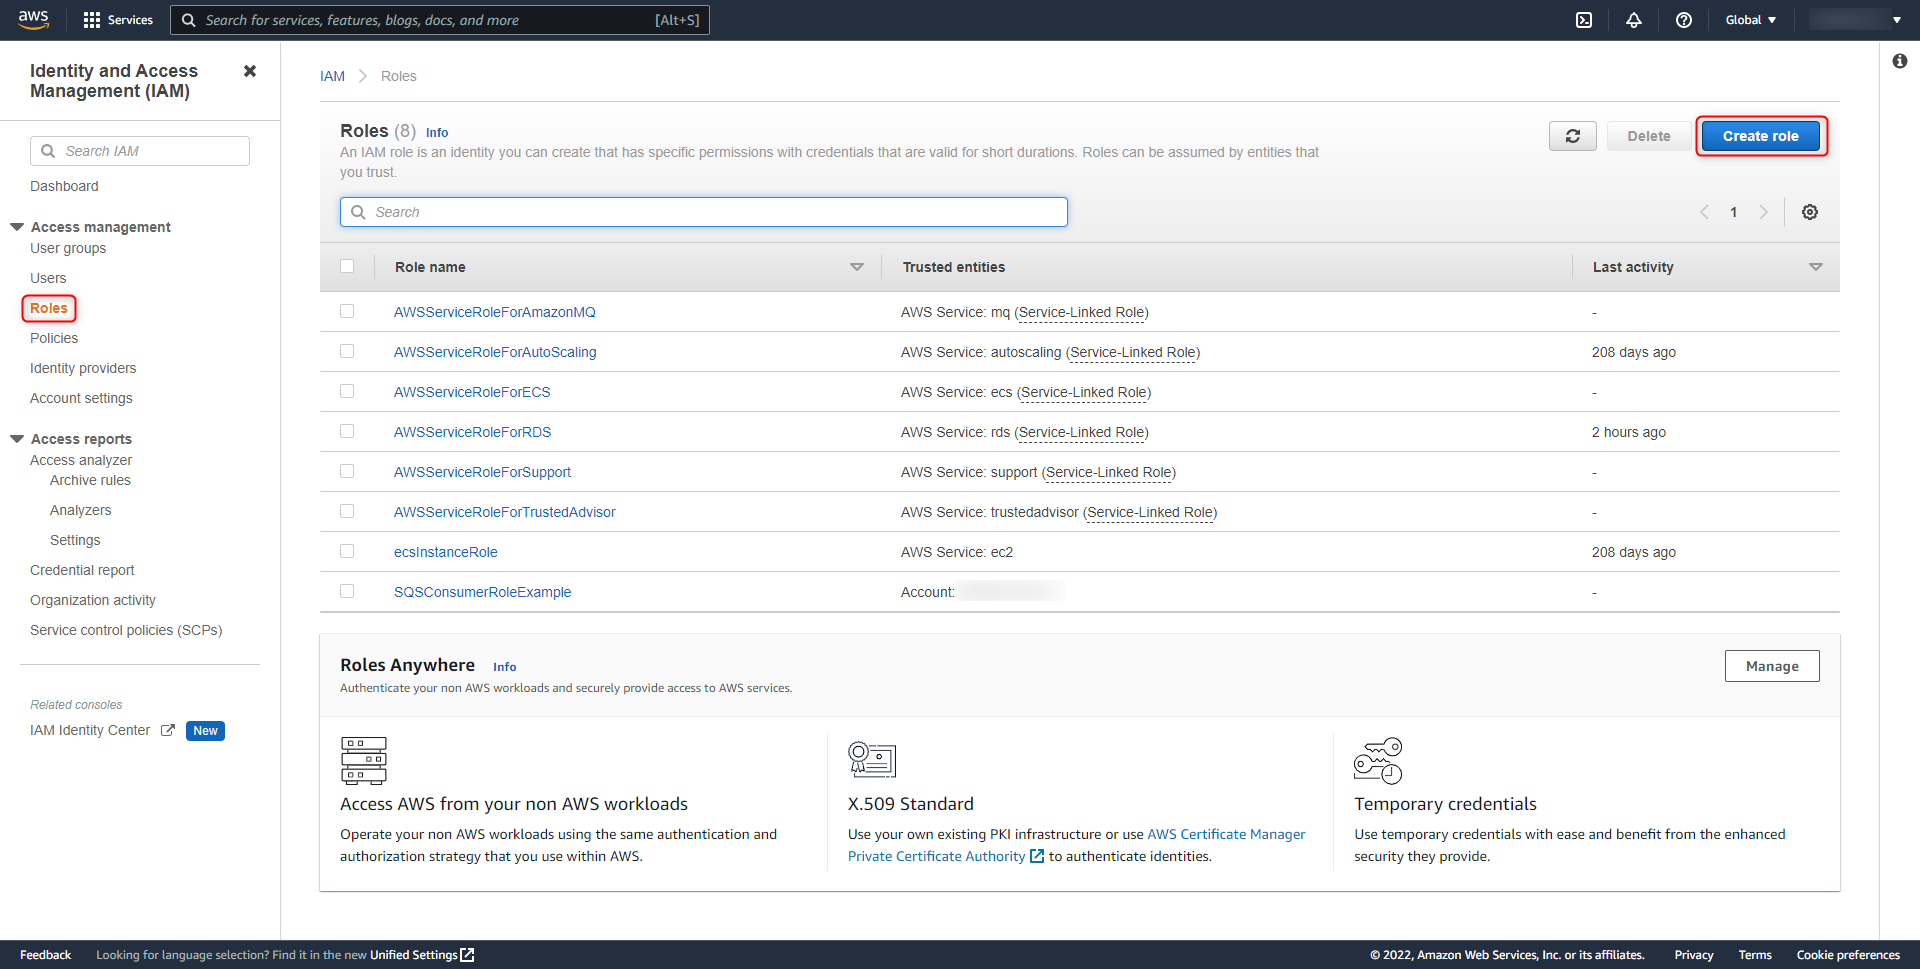
- From this dashboard, on the left hand side, select the Roles category.
- Search for and select the defined Role.
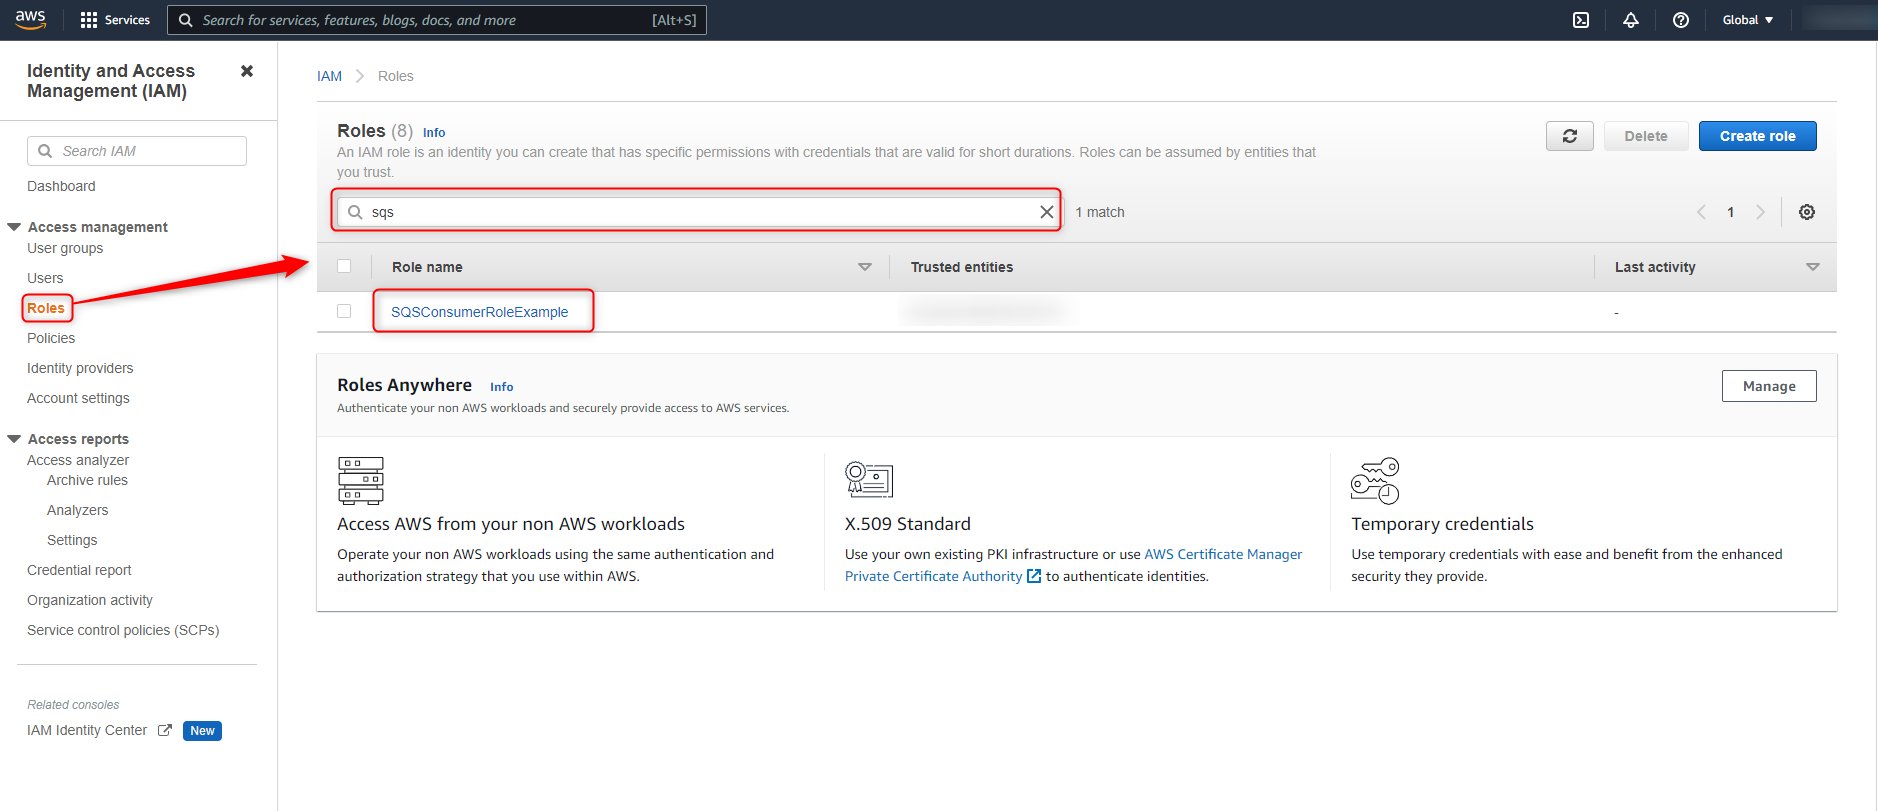
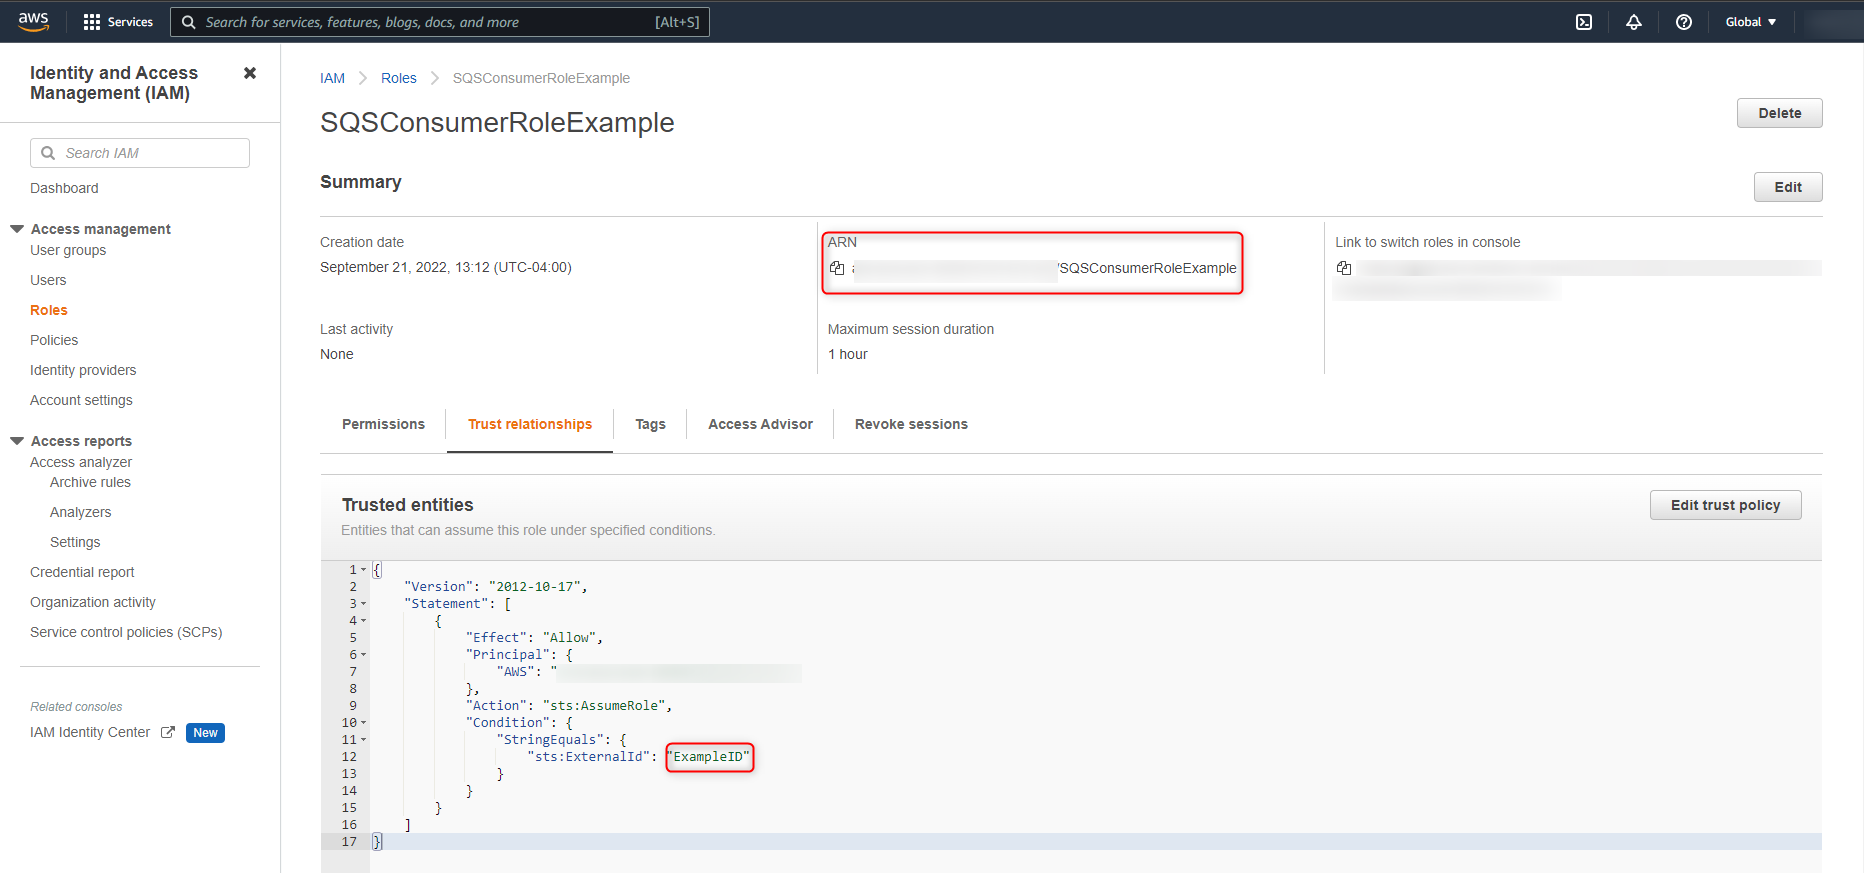
- The page will refresh and display a summary of the Role. The ARN for the role can be copied from here.
- The External ID can be found under the Trust Relationships tab.
Configuring a connection using temporary credentials
Creating an IAM Role
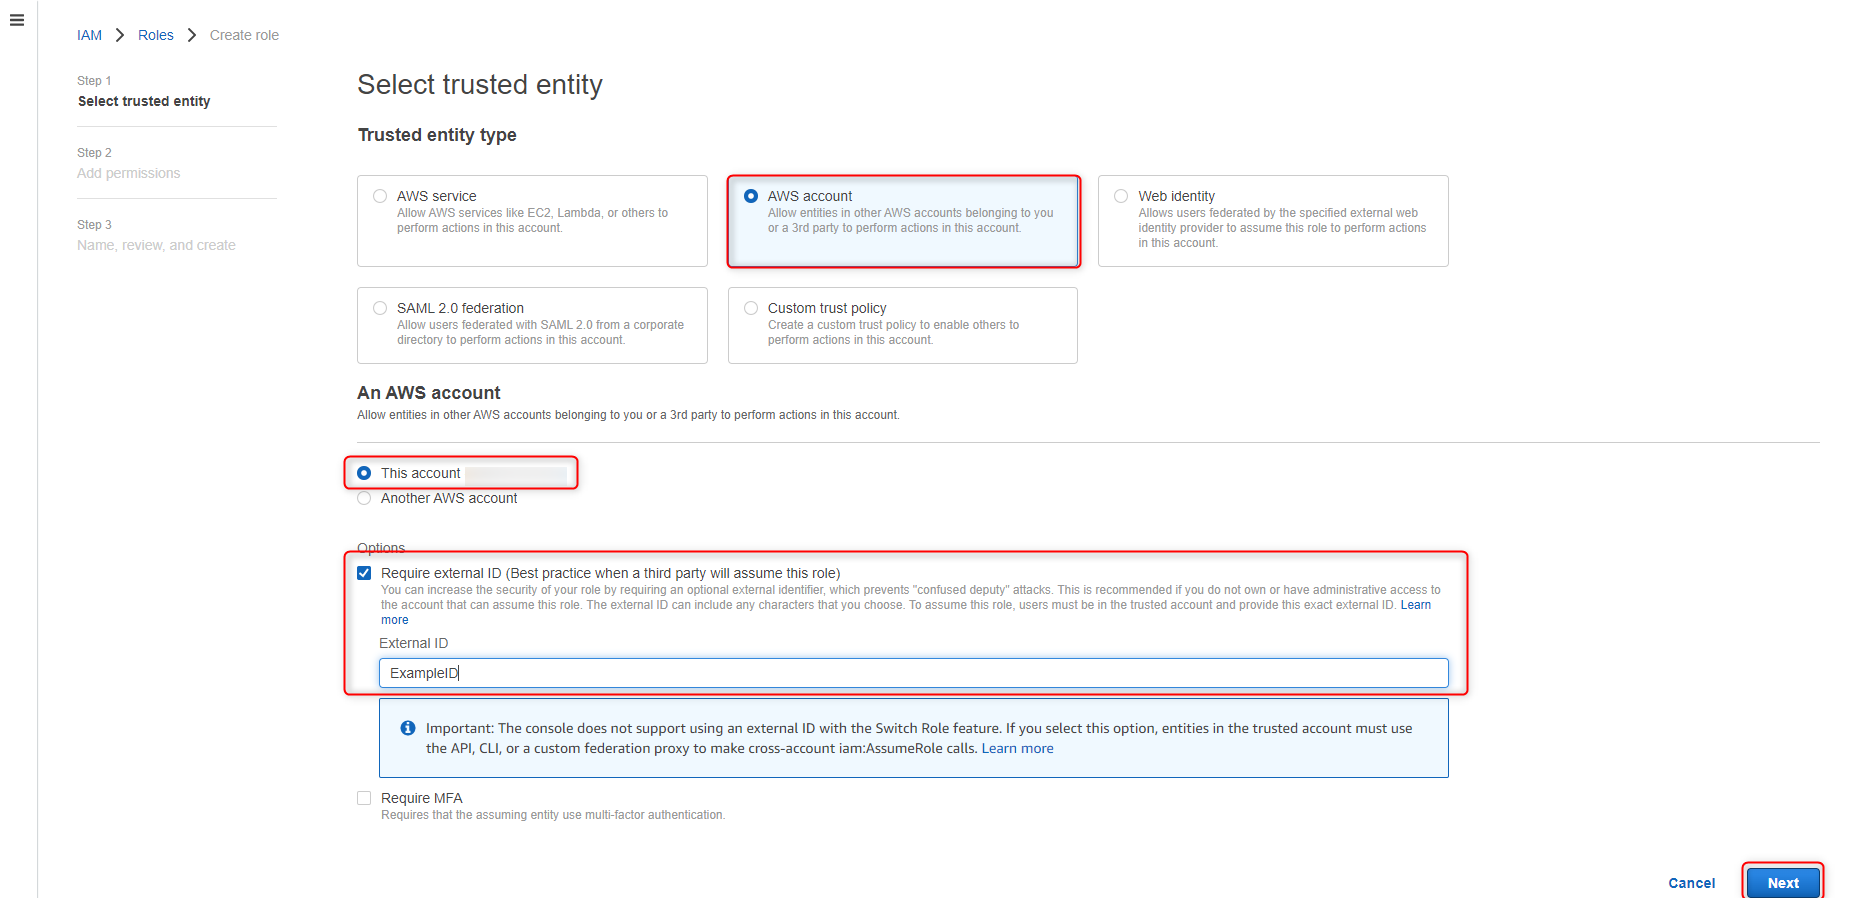
- To create a new role in AWS, navigate to Identity and Access Management dashboard.
- Select Roles, then select Create Role.
- Select AWS Account, and choose This account. This option will allow the role to act as the selected account when performing any actions.
- Under Options, check Require external ID.
- Define a value for the ID, then click Next.
- On the Add Permissions page, search for SQS, then select AmazonSQSFullAccess. This will provide the role with full access to the SQS queue.
- Once the permission is selected, click Next.
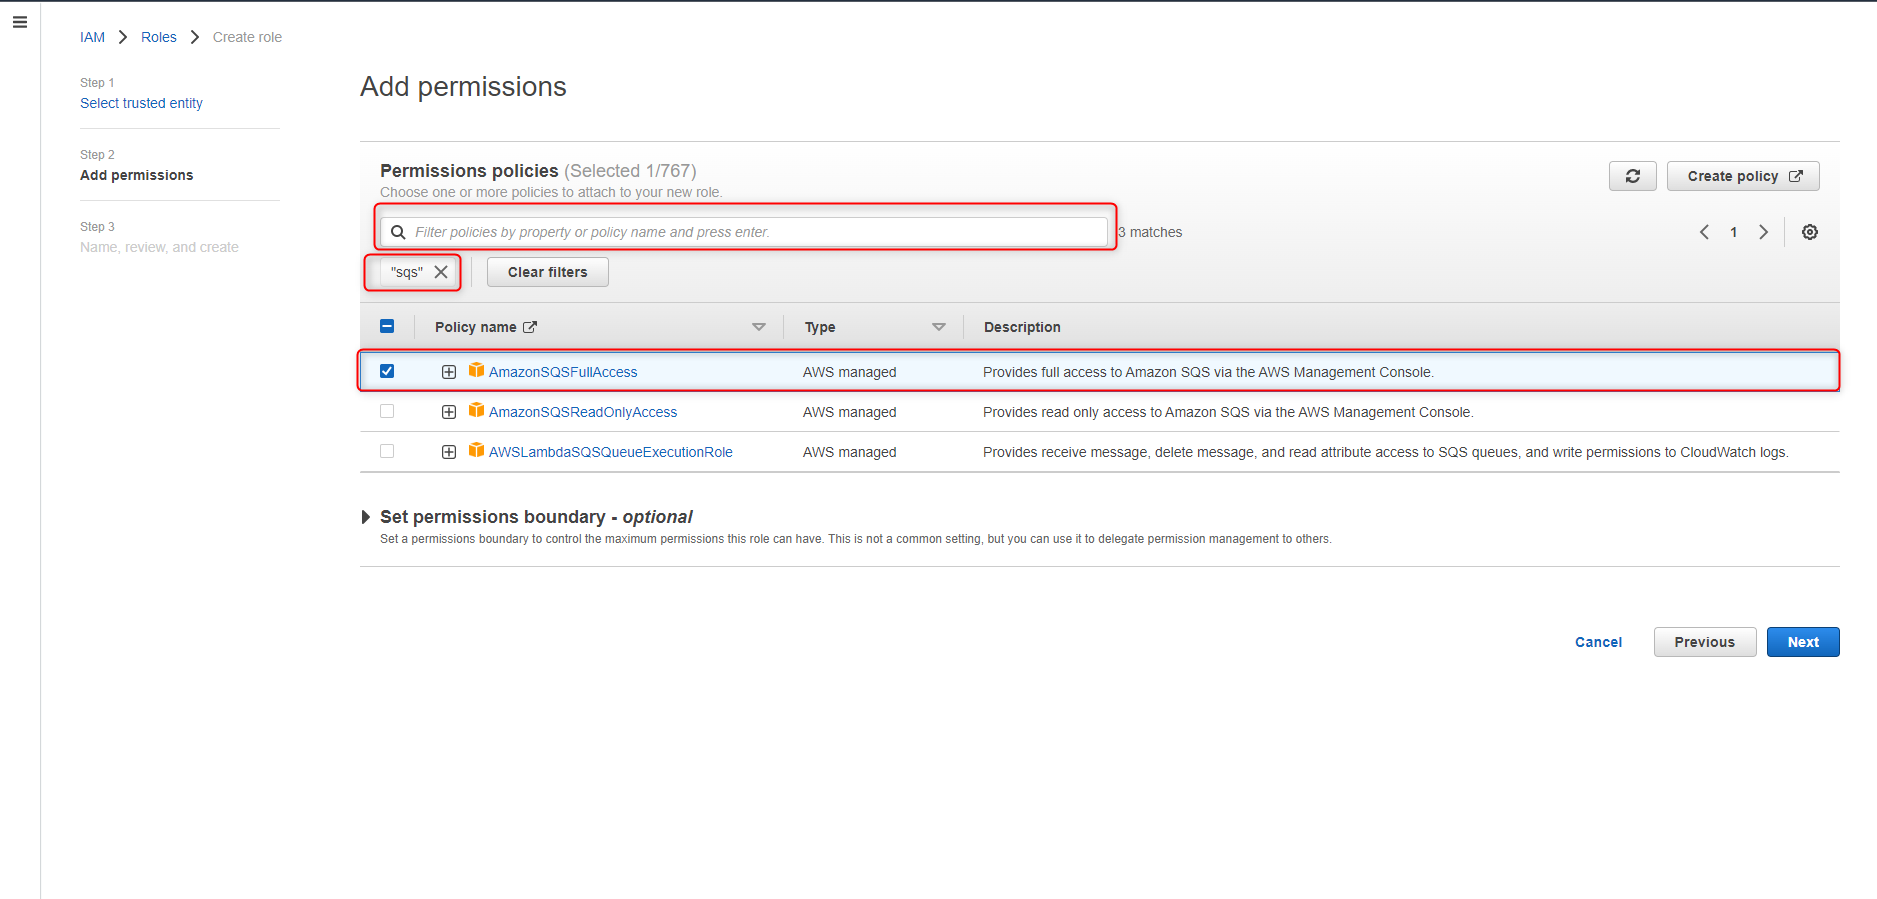
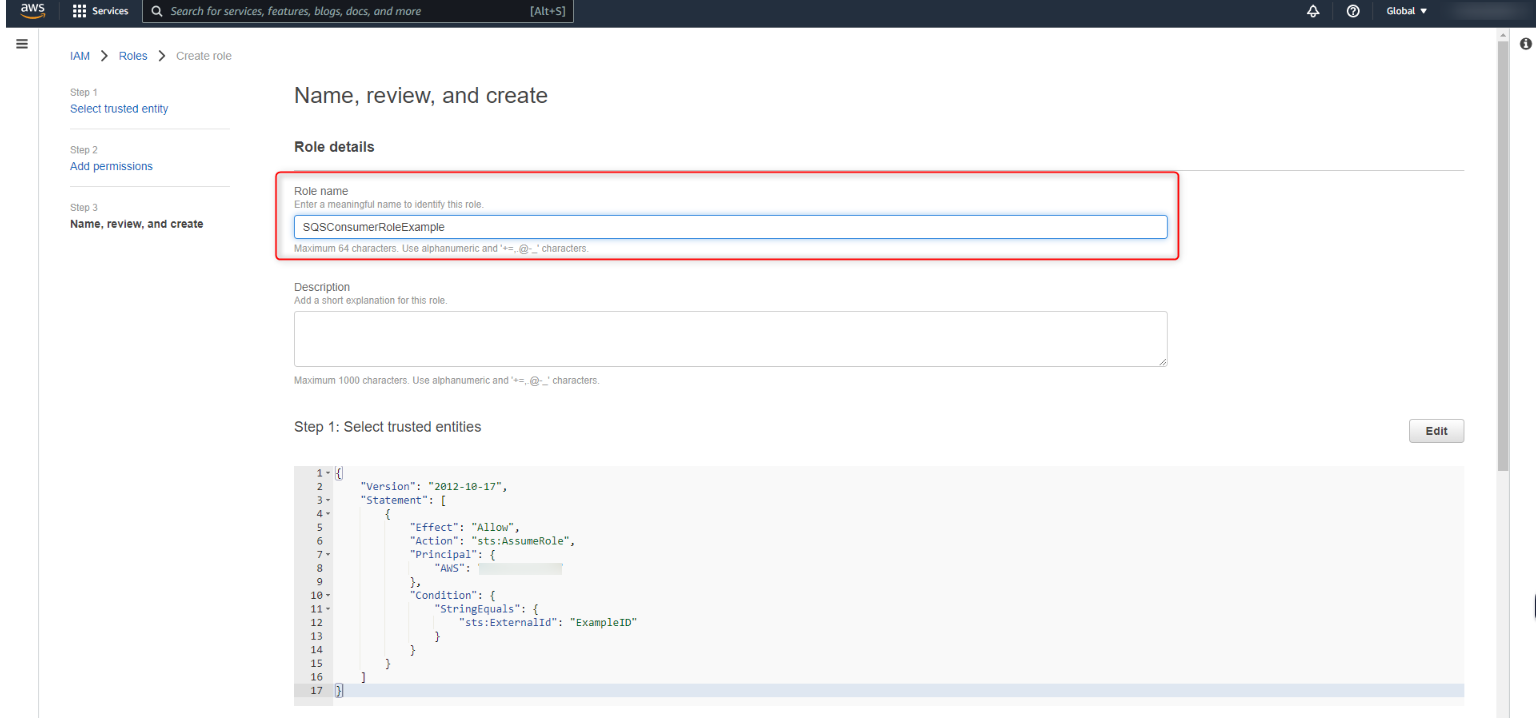
- Provide a Name for the Role.
- Verify that the permissions are correct and select Create role.
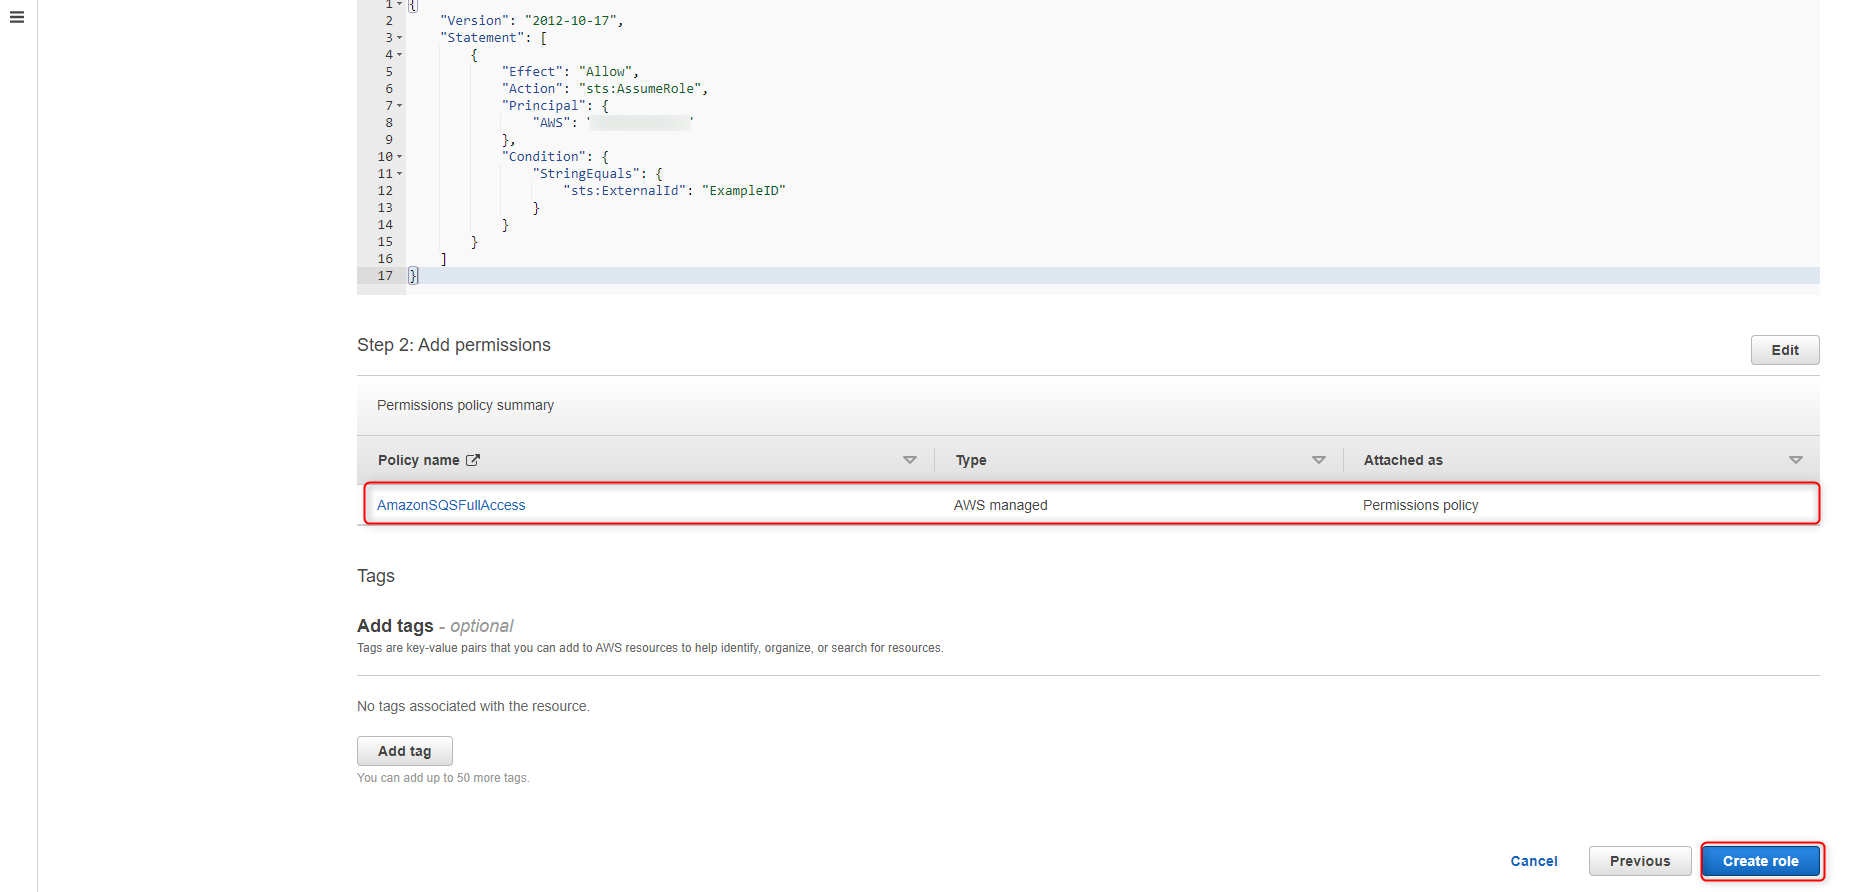
Once the Role has been defined, an SQS queue will need to be created with the role being the owner. Configure the queue with default settings except for the Access Policy section.
In this section, select Only the specified AWS accounts, IAM users, and roles, for both who can send and receive messages from the queue. Then add the Role ARN to the corresponding textbox. Once these fields have been added, create the queue.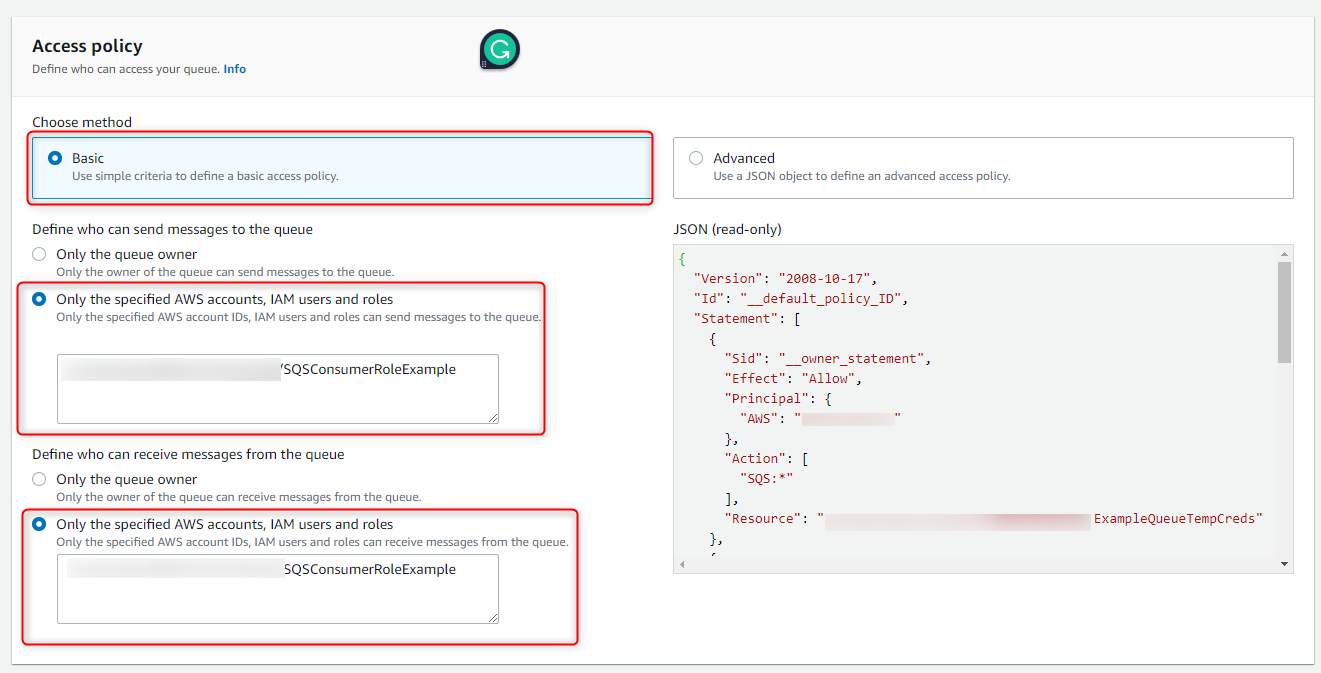
Enabling temporary credentials in Decisions
Once the queue values have been defined, in Decisions:
- On the System page, navigate to Settings > Amazon WebServices Settings.
- Select or create a new SQS Queue
- In the following dialog, check Use Temp Credentials. New textboxes will appear, allowing the user to specify the Role and External ID.

SQS Message Queue steps
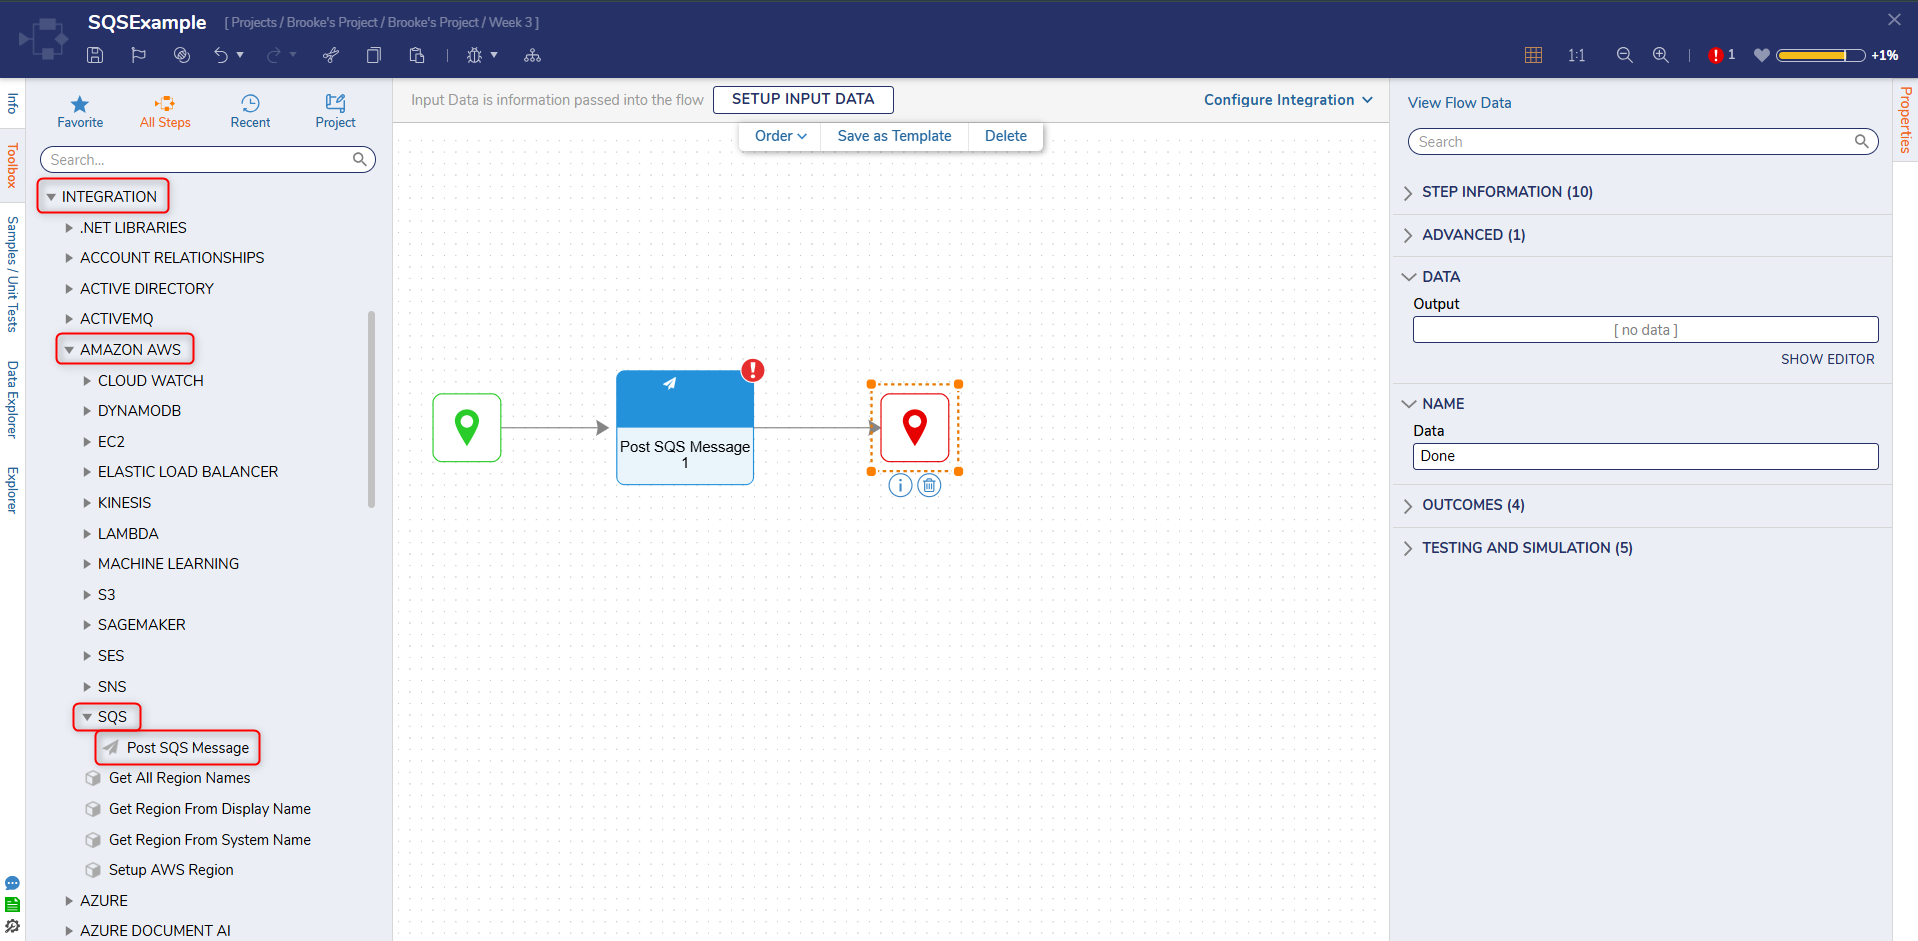
SQS Message queue steps can be found under Integration > Amazon AWS > SQS in the step toolbox.
Post SQS Message step
The Post SQS Message step accepts a String input as a message and returns an ID when the step completes. This ID will match the ID that the SQS queue generates.
| Input | Output |
|---|---|
| Message Text | Message ID |
Feature Changes
| Description | Version | Developer Task |
|---|---|---|
| A hidden Module called Decisions.MessageQueues Module will be downloaded automatically when any message queue Module is installed. | 9.0 | [DT-039289] |