Overview
| Feature Details | |
| Introduced in Version | 9.15 |
| Modified in Version | --- |
The Drawer Control allows Designers to add a dynamic panel to Forms and Pages. Unlike traditional sub-dialogs that block the screen, the Drawer lets users view or interact with additional data while keeping the main data visible.
This feature improves user experience in data-entry and workflow-heavy applications by reducing “sub dialog overload” and helping users stay in context. Instead of navigating away or losing visibility of the Form or Page, supporting content comes into view on demand and can be closed without disruption.
Why this matters:
- Keeps users focused by reducing unnecessary context switching.
- Provides a smoother alternative to modal sub-dialogs.
- Improves productivity in scenarios that require referencing or updating related data inline.
Use Case
| Example Use Cases | Description |
|---|---|
| Inline Data Review | A customer service agent opens a Drawer to quickly review an account's transaction history without leaving the Service Request Form. |
| Embedded Form Interaction | A healthcare worker fills out a patient intake Form, and a Drawer provides quick access to a secondary questionnaire without navigating away. |
| ADG Action Support | A user clicks an action icon in an Advanced Data Grid row, triggering a Drawer that loads details or editing options specific to that record. |
Drawer Settings
| Setting | Description | |
|---|---|---|
| Drawer Name | A unique identifier for the Drawer instance. Use this to bind sub-dialog buttons or Advanced Data Grid Row actions to the correct Drawer. | |
| Animation Type | Determines how the Drawer appears on screen. | |
| Slide | Panel slides in from the chosen direction. | |
| Fade | Panel fades into view without movement. | |
| Animation Speed | Controls how quickly the Drawer opens and closes. | |
| Slow | Predefined speeds. | |
| Medium | ||
| Fast | ||
| Custom | Enter a specific duration in milliseconds for fine-grained control. | |
| Animation Direction | Defines the axis from which the Drawer animates. | |
| Vertical | Opens from the top of the Form. | |
| Horizontal | Opens from the right side of the Form. | |
.png)
Sourcing Drawer Controls
Drawers can be sourced with Sub Dialog Buttons and Custom Action Icons Calculated Column.
| Source | Description | Screenshot |
|---|---|---|
| Sub Dialog Buttons, Links, or Images | A new setting called Use Drawer can be enabled. When true, the Form within the Sub-Dialog Flow appears inside the targeted Drawer. The Drawer Name must match exactly (case-sensitive). If it does not, the Form opens as a traditional Sub-Dialog. | 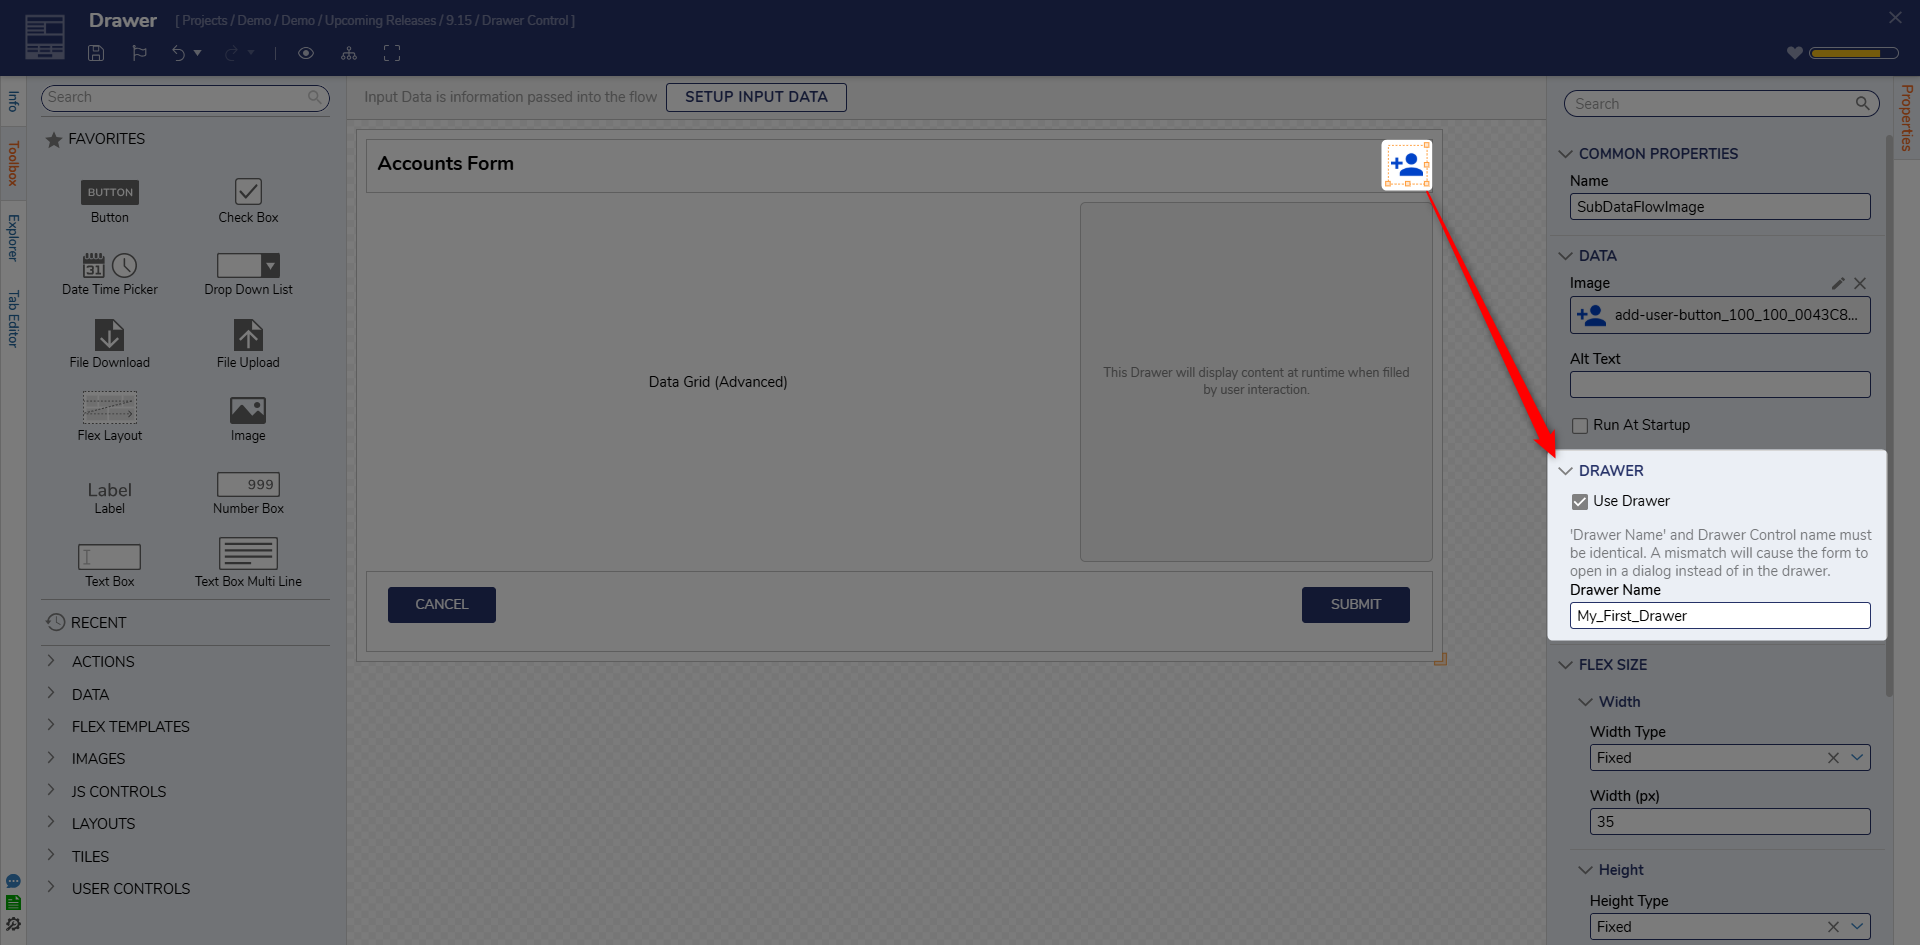 |
| Adv. Data Grid > Custom Action Icons | Each Action includes a setting called Run Action in Drawer. When true, the Form within the Action Flow appears in the targeted Drawer. The Drawer Name must match exactly (case-sensitive). If it does not, the Form opens as a traditional Sub-Dialog. | 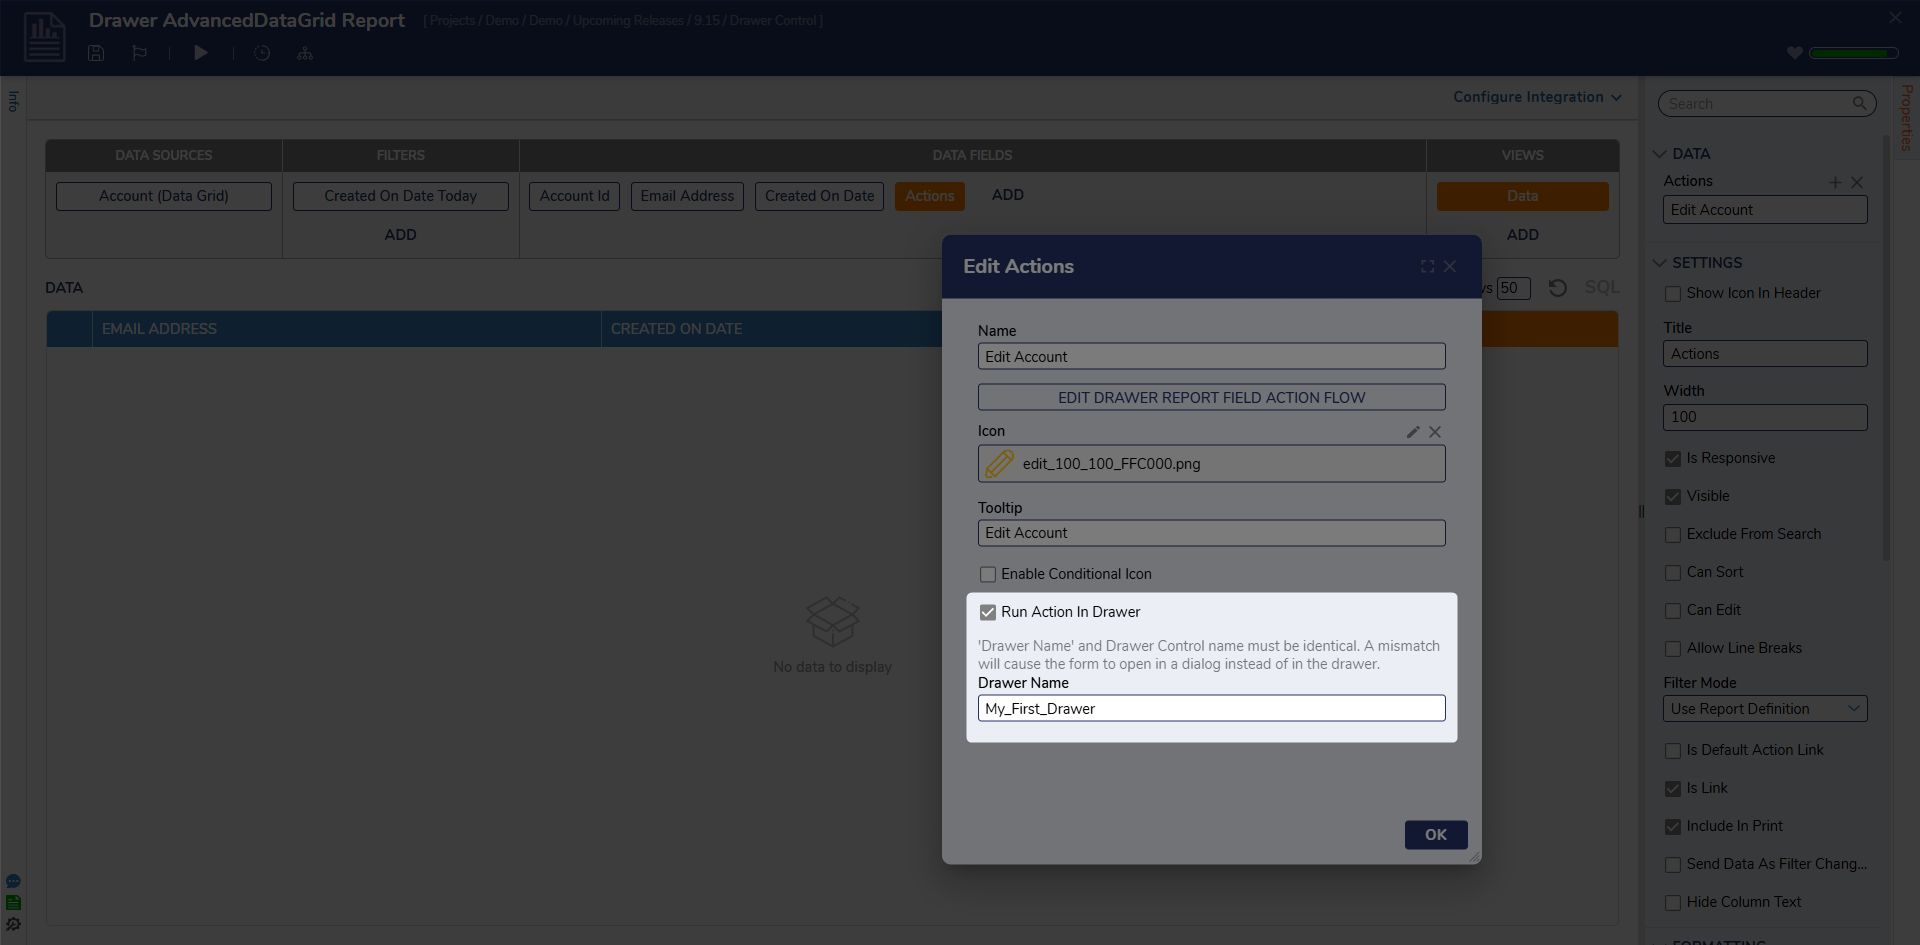 |
Example Configuration
When placing a Drawer on a Form, consider using Flex Layout instead of Grid Layout.
- In Grid Layout, the Drawer area appears as an empty space until triggered.
- In Flex Layout, the Drawer remains hidden until opened, and nearby controls shift responsively when the Drawer appears.
Traditional Sub-Dialog Forms automatically disable the background Form. Because the Drawer keeps the parent Form visible, you must include this control logic in the Flows sourcing the Drawer.
Steps to Configure
- Place a Drawer Control on the Form and give it a Name.
- Add a Sub-Dialog Button (or Link/Image) and set Use Drawer to True and provide the exact name of the Drawer Control.
- Ensure the Sub-Dialog Flow has Use Legacy = False under Input Data, so it supports Active Form Flow steps.
- Inside the Sub-Dialog Flow:
- Add a Set Controls Enabled/Disabled step at the start of the Flow and configure it to disable the desired parent Form controls.
- Add a Show Form Step to populate the Drawer with. This is the Form that will display within the Drawer. Add other logic within this Flow as needed/desired.
- Add another Set Controls Enabled/Disabled step at the end to re-enable the parent form controls once the Drawer is complete.
- Place the Form within a Flow to view the runtime experience.
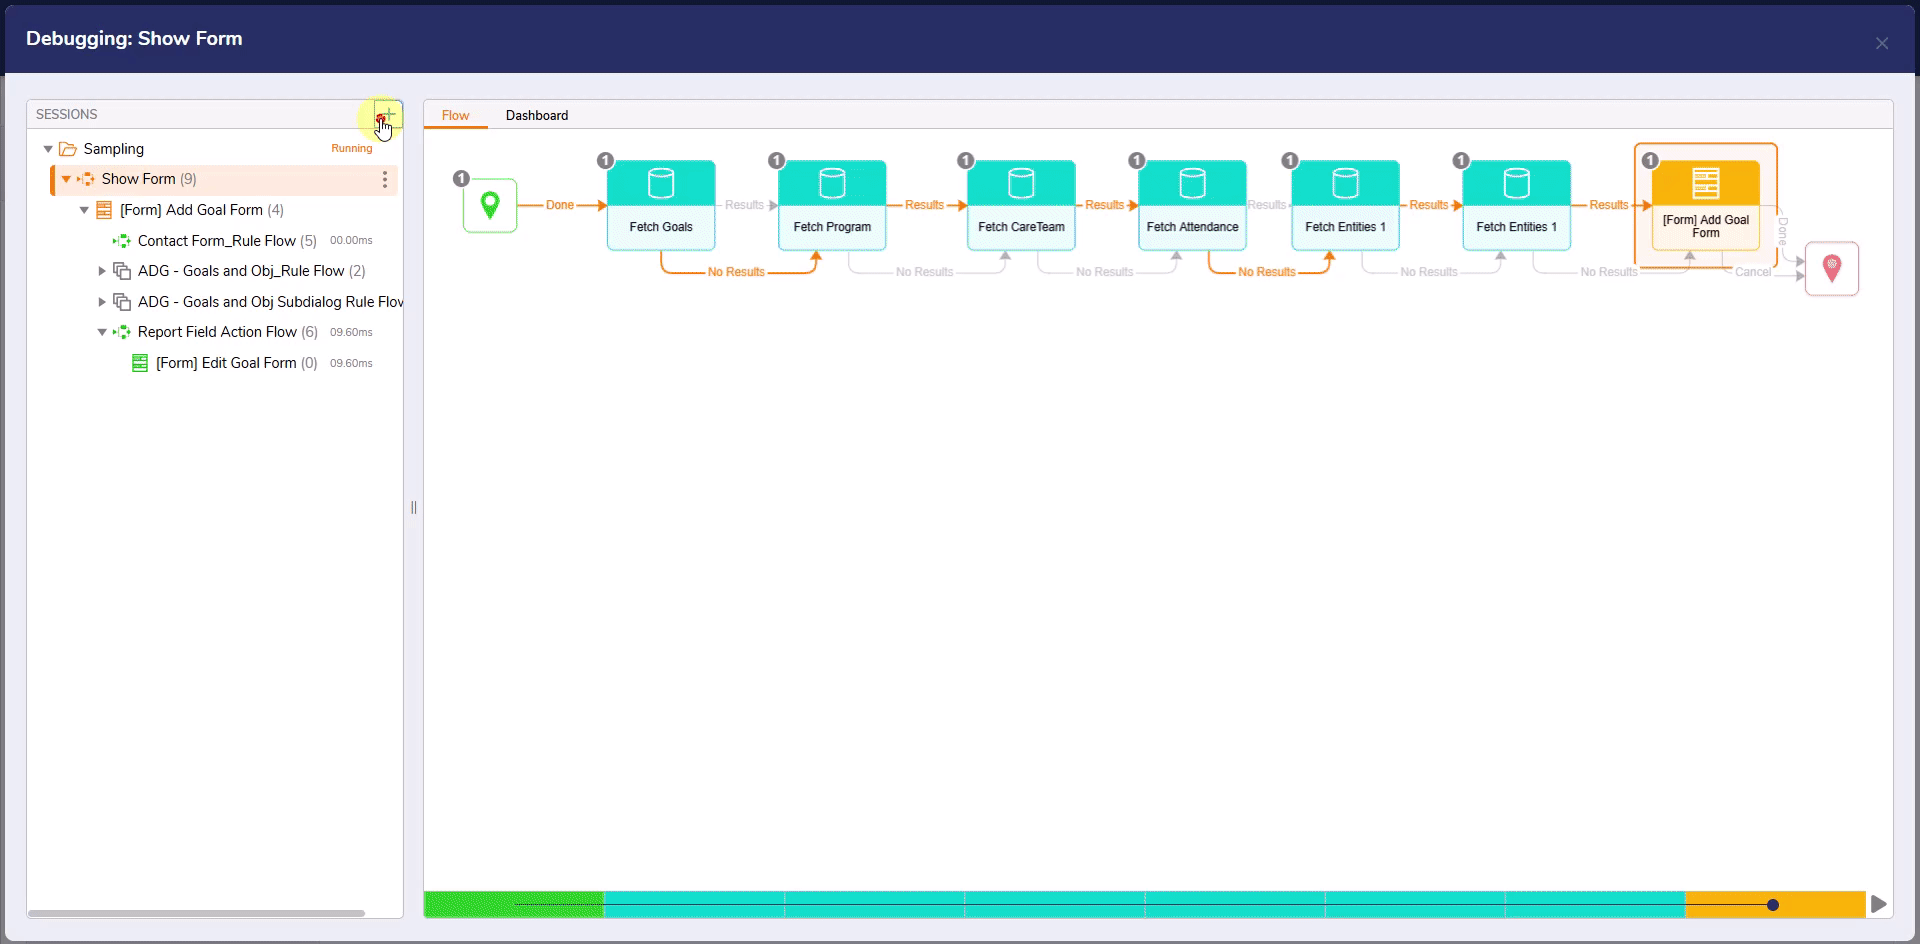
Runtime Experience
In the video below, both a Sub-Dialog Button and an Advanced Data Grid Custom Action are configured to target a Drawer. This demonstrates how multiple trigger types can open and interact with the same Drawer instance.
During runtime:
- Active Form Flow steps are used to disable and re-enable parent Form buttons while the Drawer is active.
- The Drawer allows inline interaction without leaving the parent Form.
- Data changes made within the Drawer are reflected on the parent Form by utilizing Active Form Flow steps, for example, updating rows in the Advanced Data Grid with new values.
| Forms | Pages |
|---|---|
 | 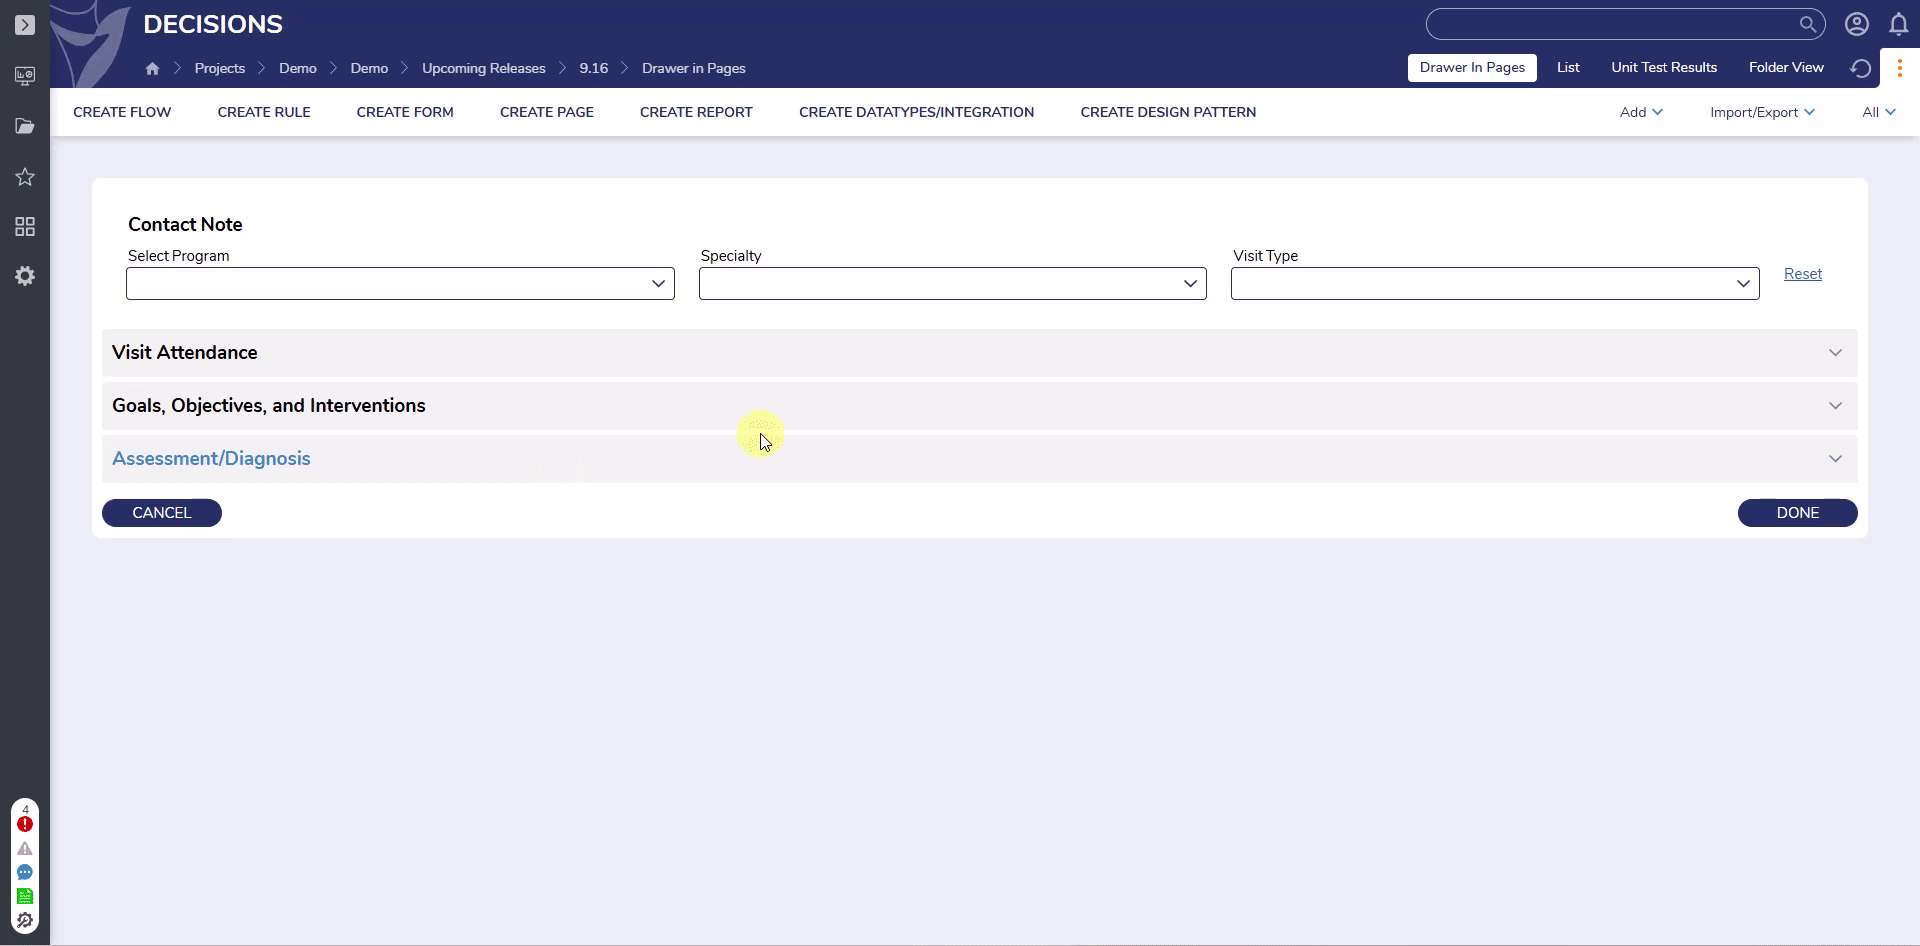 |