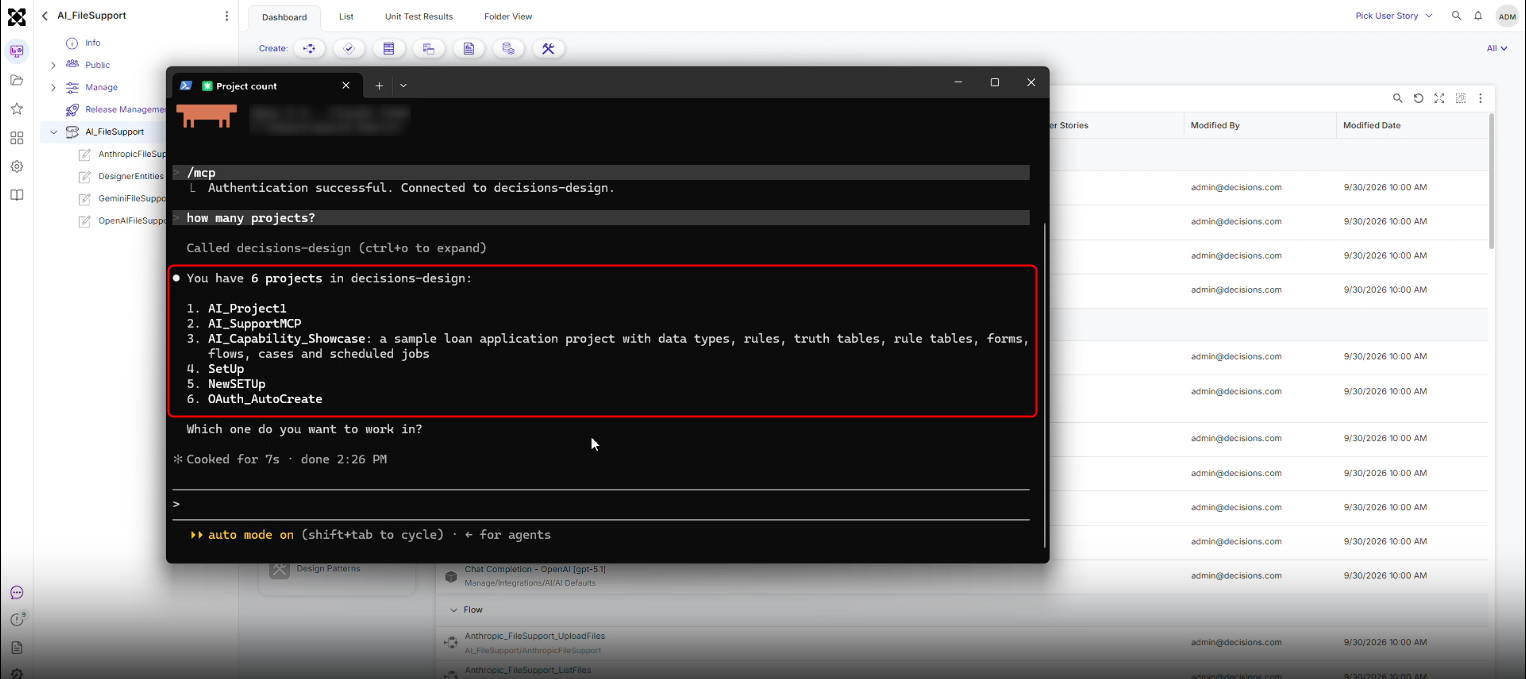
Overview
Decisions Developer MCP allows Users to connect supported third-party AI clients, such as Claude and Codex, to the Decisions platform and use them to assist with platform development and configuration.
The integration and available tools are considered stable; however, the guidance provided to AI clients continues to evolve. As a result, Users may notice differences in AI behavior and generated output between releases as the feature is refined.
Decisions Developer MCP provides a foundation for AI-assisted work in Decisions while maintaining customer responsibility for reviewing and validating all generated results before use.
Supported Capabilities
Decisions Developer MCP can create and modify the following asset types:
- Projects
- Designer Folders
- Public Folders
- Data Types
- Flows
- Statement Rules
- Truth Tables
- Rule Tables
- Forms
- Scheduled Jobs
- Project Documents
- Custom Web Apps
- Formulas
- Inline Rules
- Hidden Filter and Sort Rules
- Default Forms
- Case Instances (at runtime)
- REST API Endpoints
Non-Supported Capabilities
- Matrix Rules
- Pages
- Reports
- Dashboards
- Groups
- Accounts
- Standalone Formulas
- Integrations
- Connections
*Resources cannot be deleted through the available AI tools.
Considerations
- AI-generated content, configurations, and platform changes should always be reviewed and validated before use.
- The Decisions Developer MCP tools and integrations are considered stable and support AI-assisted development within the Decisions platform.
- The guidance and instructions provided to connected AI clients are actively evolving and may change between releases.
- As guidance evolves, Users may observe differences in AI-generated results, recommendations, and implementation approaches from one release to another.
- Changes in AI behavior do not necessarily reflect changes in underlying platform capabilities.
- Customers remain responsible for validating all generated content, configurations, and platform changes before deploying them to production environments.
Configuring the OAuth Application.png)
- Open the Edit OAuth Application dialog.
- Enter a Display Name for the OAuth application.
- Enable Public Client (PKCE only) by setting the toggle to True.
- Copy the Client ID value and save it for use during client configuration.
- Add the desired URLs in the Redirect URIs fields.
- Once all fields have been completed, click Ok to save the information and exit the window.
Example
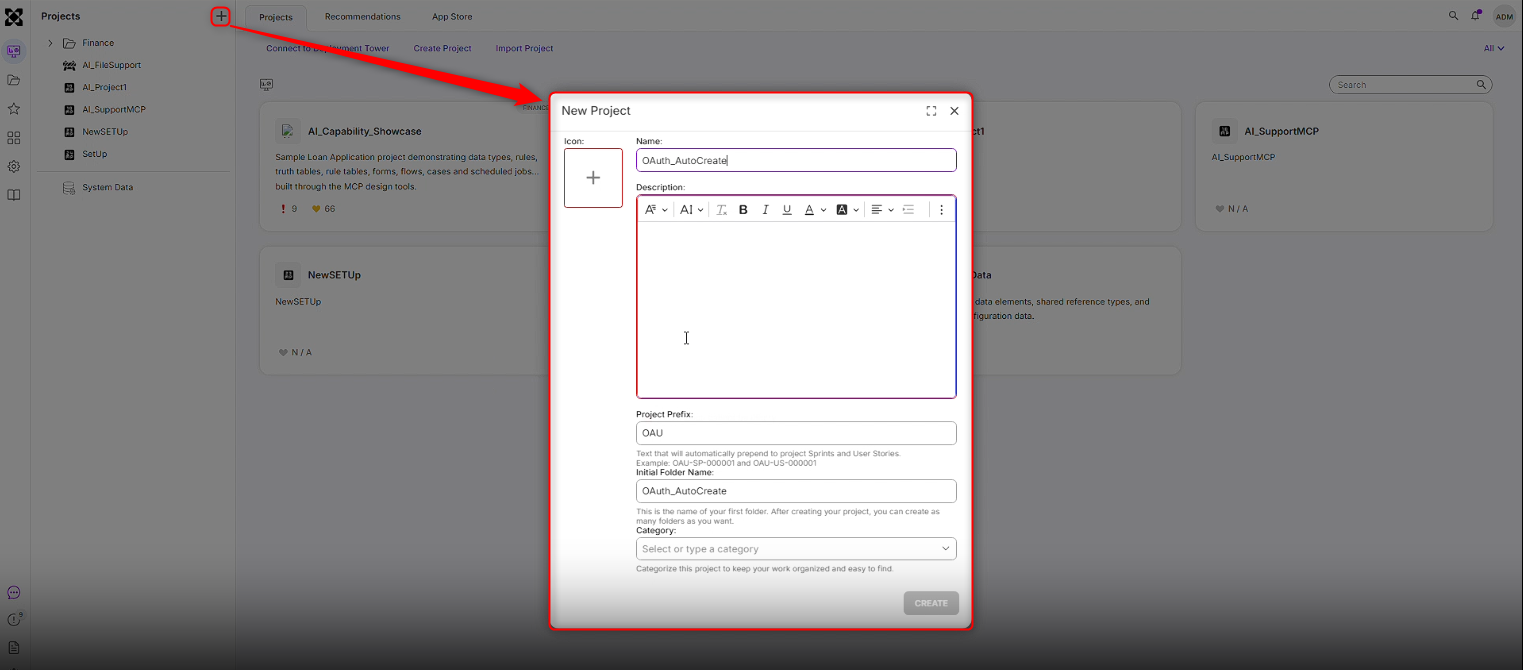
- Create a new Project.
- Navigate to Manage > Configuration > Settings, enable Allow Agents to Design with MCP, and click Create OAuth Connection.
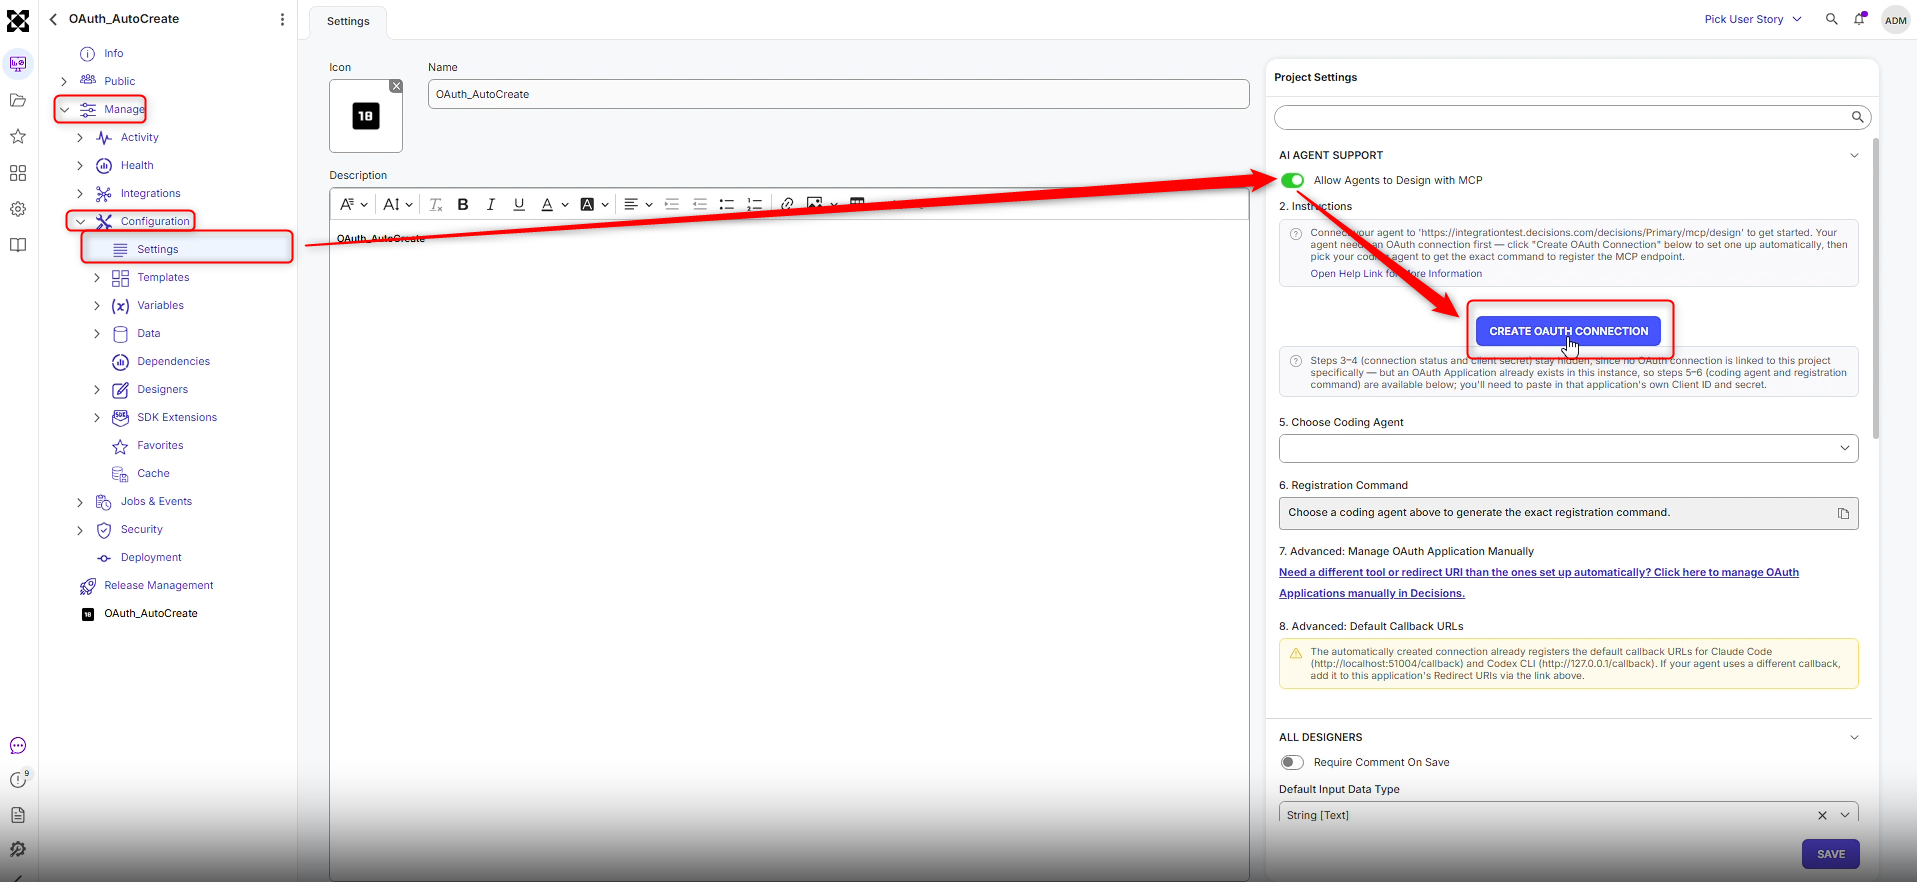
- Verify that the Connection Status shows Connected, select a Coding Agent, and click Save.
.png)
Users can click the link below, Advanced: Manage OAuth Application Manually, to edit existing OAuth applications.
Users can proceed to authenticate with their preferred coding agent. For this example, Claude Code was utilized.