Overview
The Kafka module provides the tools needed to connect to a Kafka Message Stream. Kafka is an open-source event streaming service that is mainly used as a message queue.
This module enables Decisions to set up and connect to a Kafka Queue. The Kafka module can utilize the Post Message and Post String Message steps listed under Integration > Message Queues. Using these steps avoids having to encode and decode a string of bytes when passing a message to a queue. Each step listed below will require a Kafka Queue configured in Decisions to be used.
This document provides a step-by-step guide to setting up Confluent Kafka. However, any version of Kafka is supported. Confluent is only used as an example.
Prerequistes
To use the Kafka Module capabilities, you will need to establish a dependency between your project and the Kafka Module. This information could be found in the Project Dependency documentation.
Considerations
The Kafka Message Broker can be installed in a container.
Kafka Module Settings
The steps below are instructions for viewing and updating the module settings.
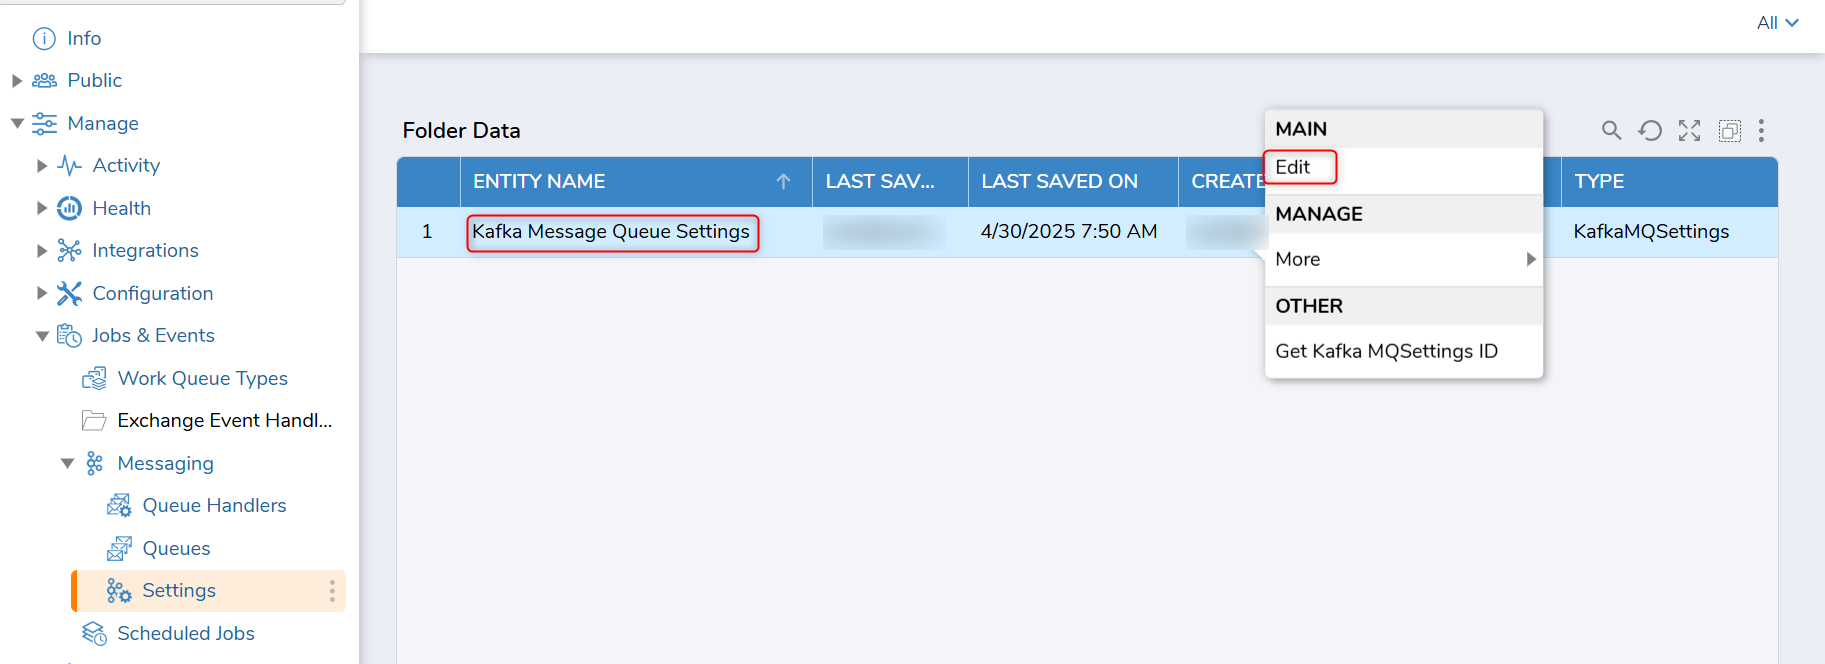
- Navigate to Manage > Jobs & Events > Messaging > Settings inside the project you are looking to integrate Kafka, then either select Kafka Message Queue Settings or right-click its name in the Report and select Edit.
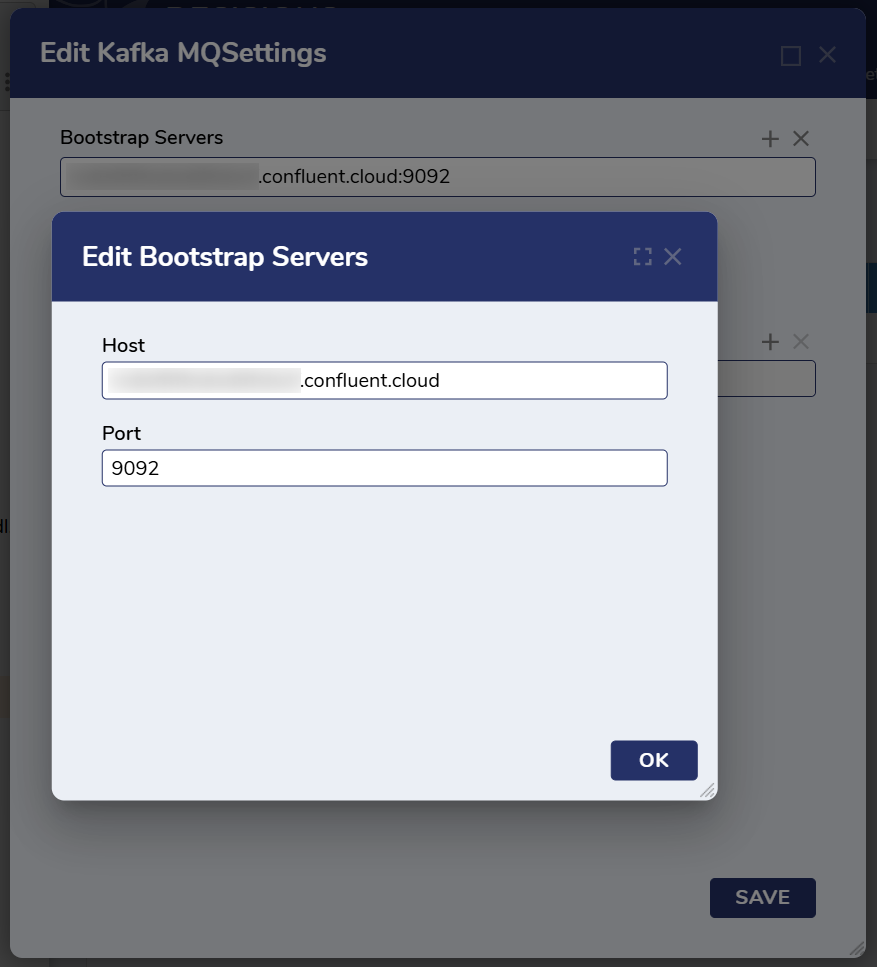
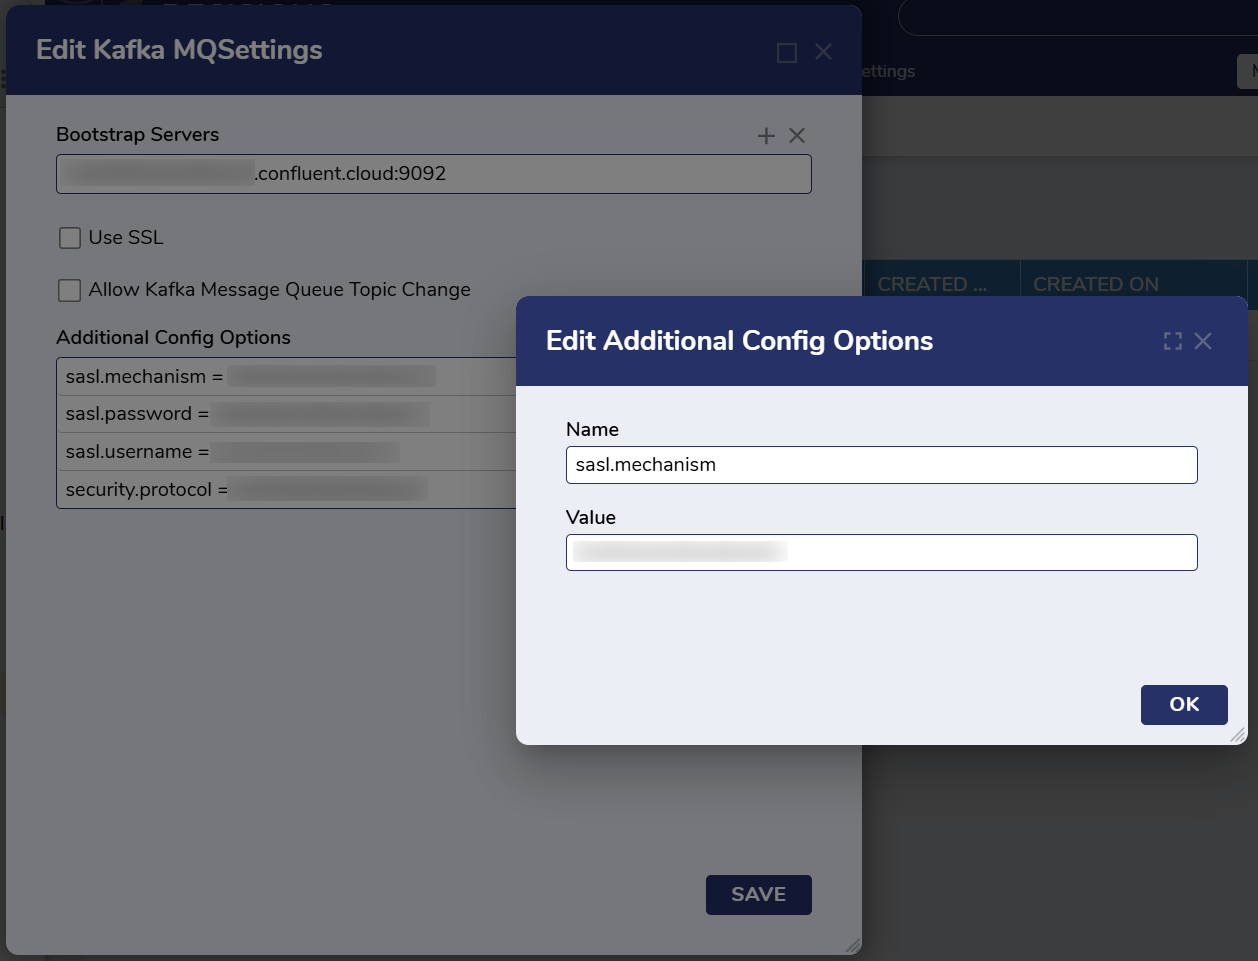
- From the Edit Kafka MQSettings window, under Bootstrap Servers, click ADD. From the Add Bootstrap Servers screen, provide the Host and Port for the Server, then click OK.
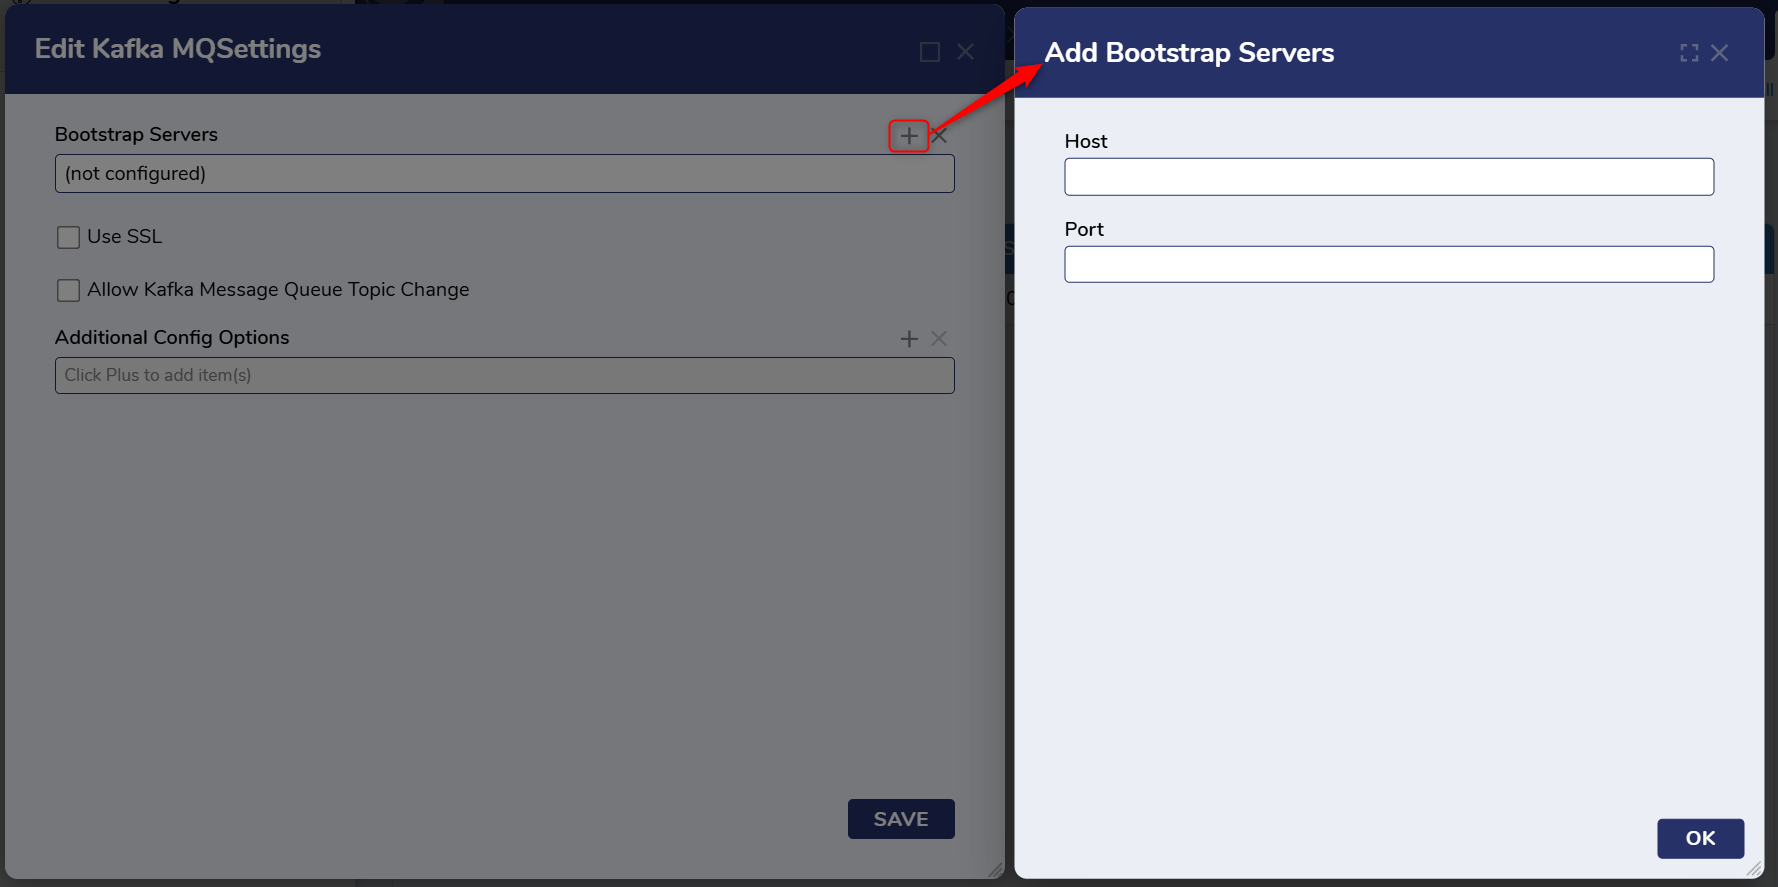
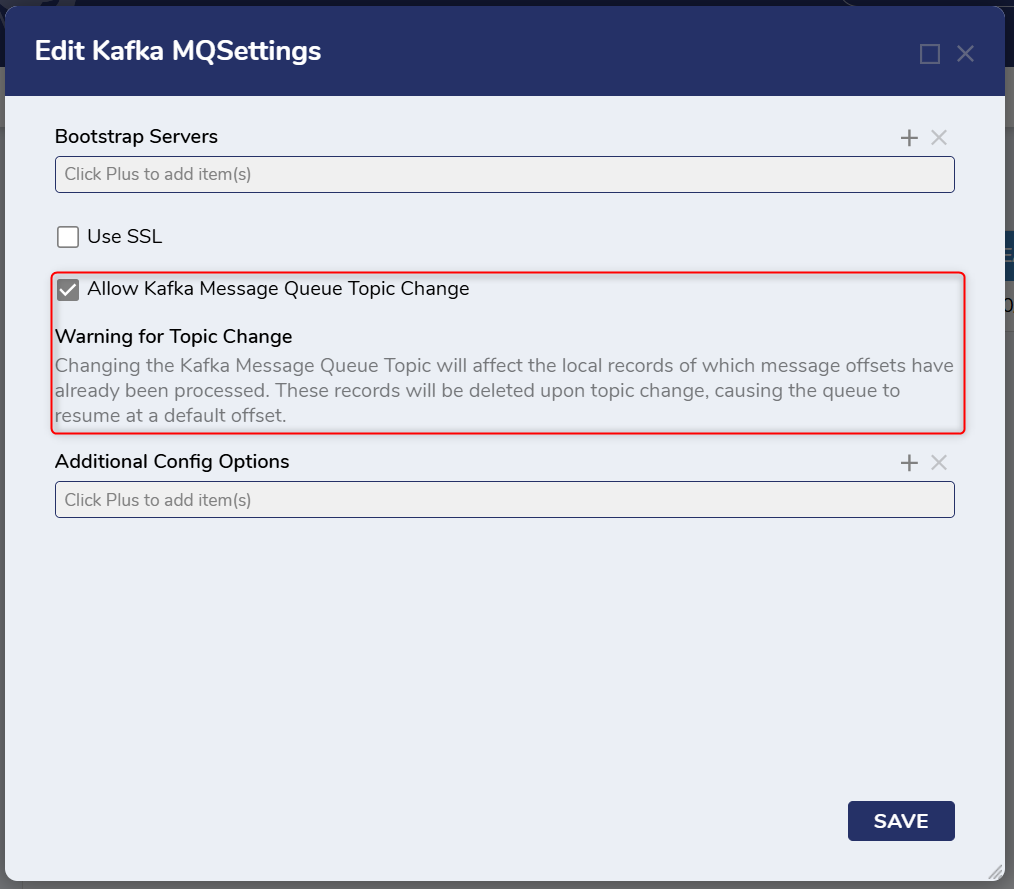
Setting Description Host The host IP or name of the server hosting Kafka. Port The Port number used by Kafka on its host machine. - To give developers the ability to be able to change the Kafka Queue Topic, the Allow Kafka Message Queue Topic Change checkbox needs to be checked. If left disabled, then once the topic name is set, it cannot be changed or altered.Warning for Topic ChangeChanging the Kafka Message Queue Topic will affect the local records of which message offsets have already been processed. These records will be deleted upon topic change, causing the queue to resume at a default offset.
- If Apache Kafka is using SSL, check the Use SSL box, then provide the CA File Path, Cert File Path, and Private Key File Path that correspond to the SSL Certificate.
Setting Description Use SSL Uses SSL to establish a connection to Kafka. An SSL certificate must be supplied and accessible on the machine hosting Decisions. CA File Path The path to the certificate store. Cert File Path The physical file path to the SSL certificate. Private Key File Path The file path to a file containing the private keys used by the certificate. 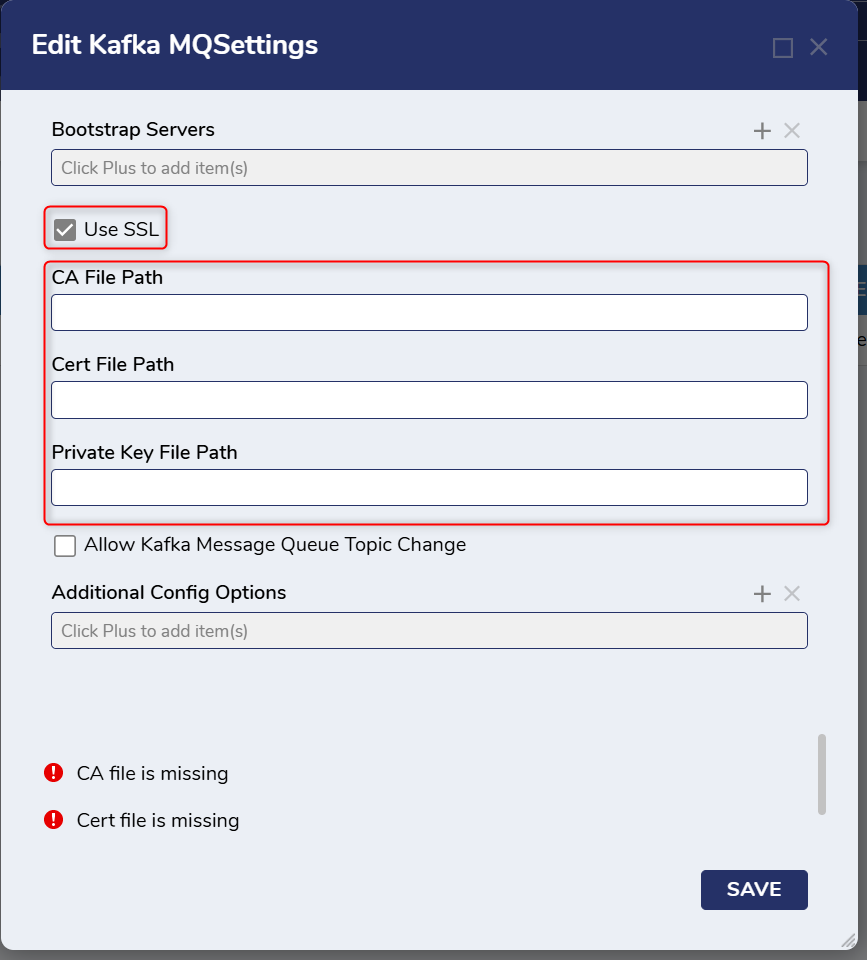
- If needed, click ADD under Additional Config Options. From here, provide the Name and Value pairs, such as the SSL keys. Then, click OK and SAVE. Below is an example that will keep the message queue alive when no messages exist.
Name Value socket.keepalive.enable True 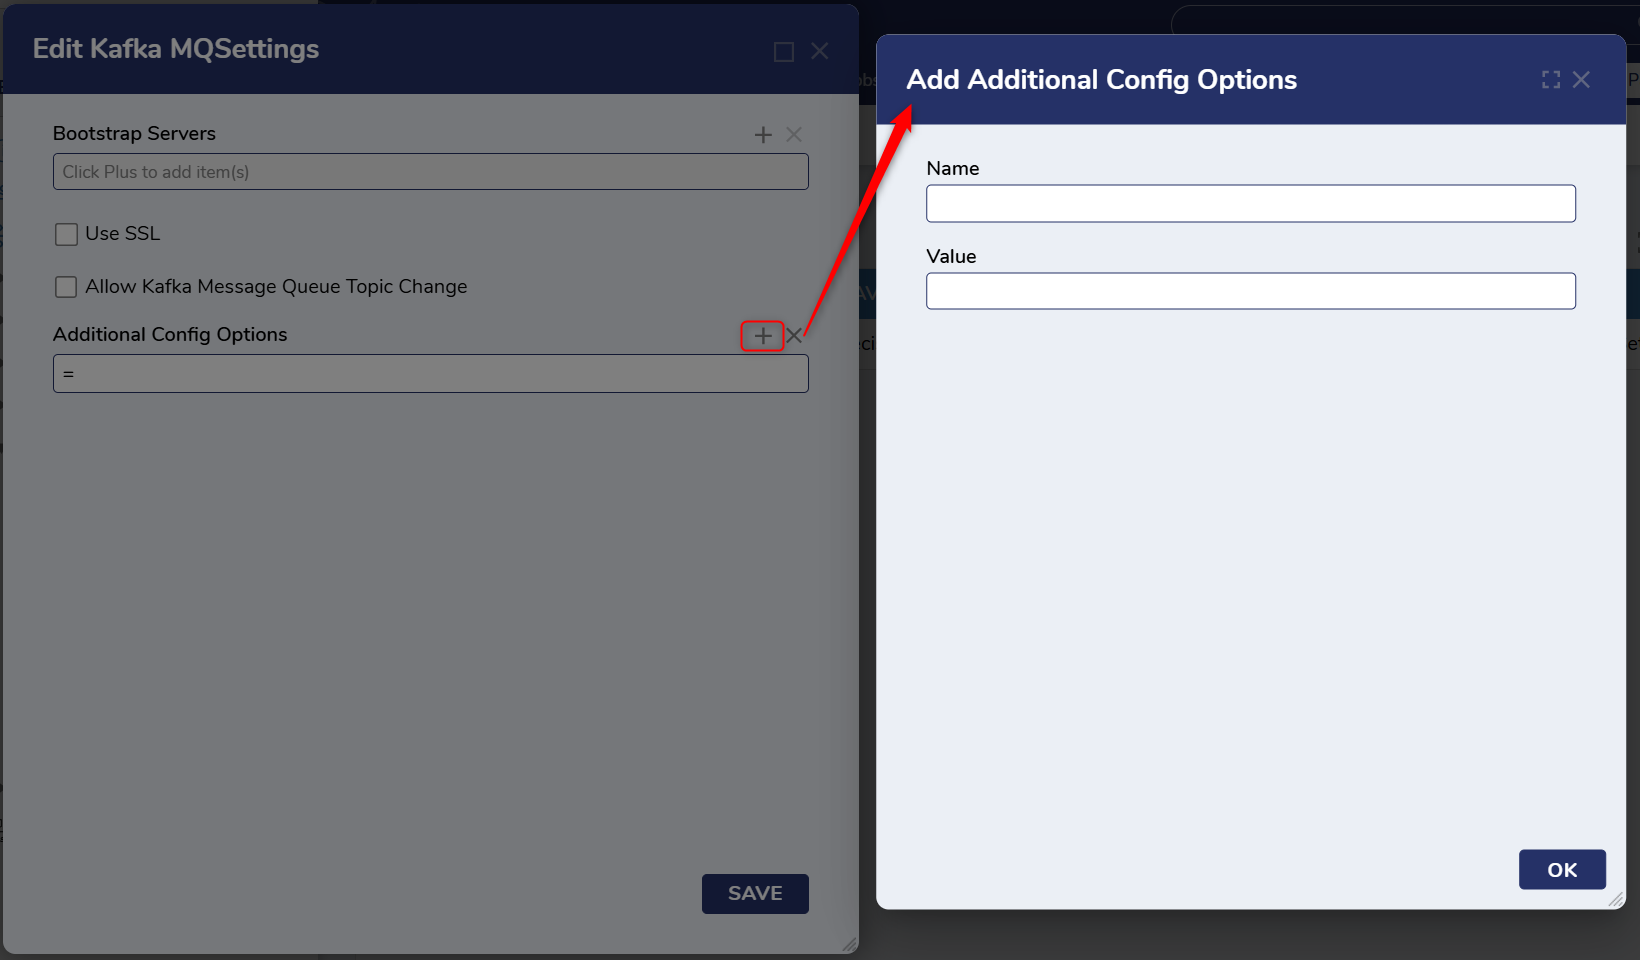
Adding a Kafka Message Queue
To connect to a Kafka Message Queue, navigate to System > Jobs and Events > Message Queues and select the ADD KAFKA QUEUE from the Action Bar. 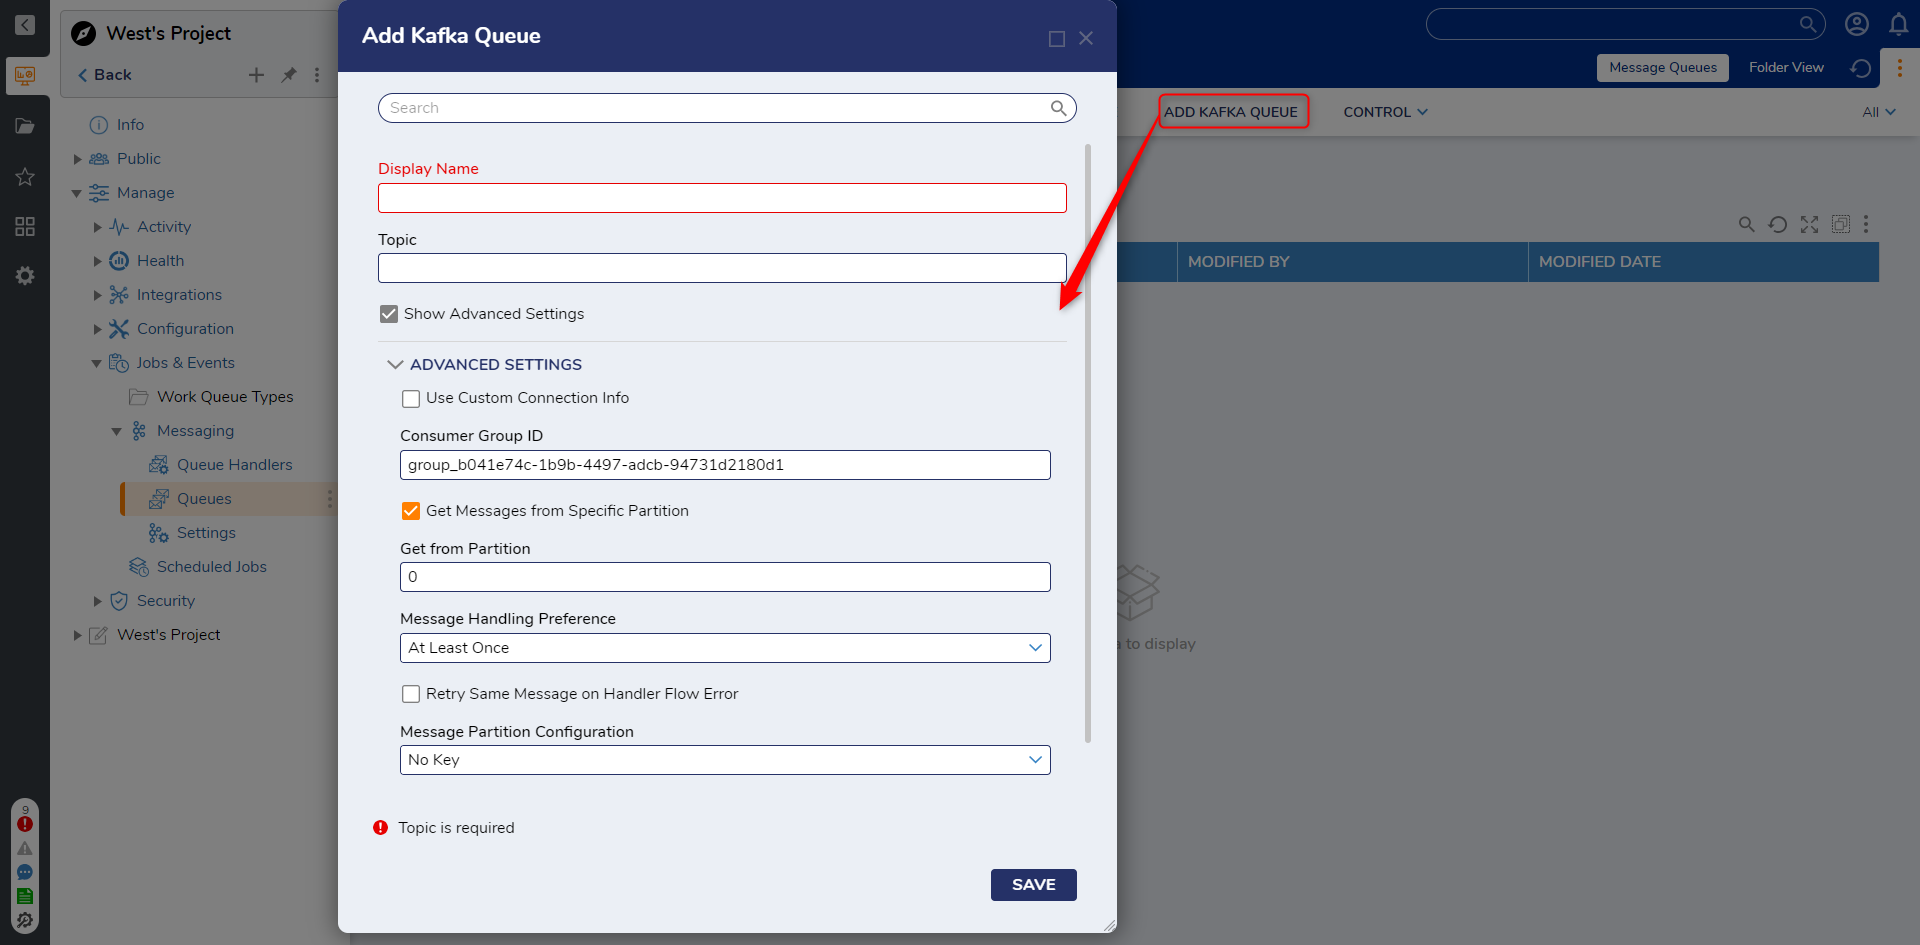
Kafka Message Queue Properties
| Setting | Description | ||
|---|---|---|---|
| Display Name | The name of the queue that will appear in Decisions. | ||
| Topic | The name of the Topic in Kafka where the messages will be sent. | ||
| Show Advanced Settings | Displays advanced settings that can be used to configure how messages will be sent and received. | ||
| Use Custom Connection Info | Allows users to override the Server settings defined from the Edit KafkaMQ Settings window, including the ability to add Bootstrap Servers and denote SSL Settings. | ||
| BootStrap Servers | Allows users to create a list of servers that can be added and connected to. The Host and Port should match what is running for Apache Kafka. This is typically the host's DNS name or IP Address and the default or user-declared Port number. | ||
| Use SSL | If enabled, allows the user to specify the SSL certificate. | ||
| Consumer Group ID | Used to identify Decisions as part of a group of consumers to a Kafka queue. This value is auto-generated when configuring the connection. | ||
| Get Messages from Specific Partition | If enabled, splits incoming messages from a specific partition. | ||
| Get from Partition | Specifies which partition to pull the messages from. | ||
| Message Handling Preference | Specifies how messages will be received and handled. The two options are At Least Once or At Most Once. | ||
| Message Partition Configuration | Designates where an outgoing message will be sent. Currently, there are three options:
| ||
| Always Retry After Connection Errors(Dangerous) | By design, the Kafka Module will stop and prevent message queues from creating threads if 20 consecutive attempts have failed. If this setting is enabled, messages will continue to create threads even after reaching the attempt count. | ||
Using Confluent Kafka
The following section covers the setup and configuration of a broker/message queue and is intended to serve as an example resource to integrate with Decisions. The example highlights the values needed to connect a message queue to Decisions and is meant for informational and troubleshooting purposes.
Please refer to the product's official documentation for a more in-depth and detailed guide on configuring a message queue for use in production environments.
Confluent is a cloud-based hosting service created by the original developers of Kafka. It provides a simple way to create and set up a Kafka message broker without using a container. To use this service, an account with Confluent must be created. For more information on setting up Confluent, see their quick start guide.
- Register and sign up to access the Confluent panel.
- Create or use an existing environment within Confluent.
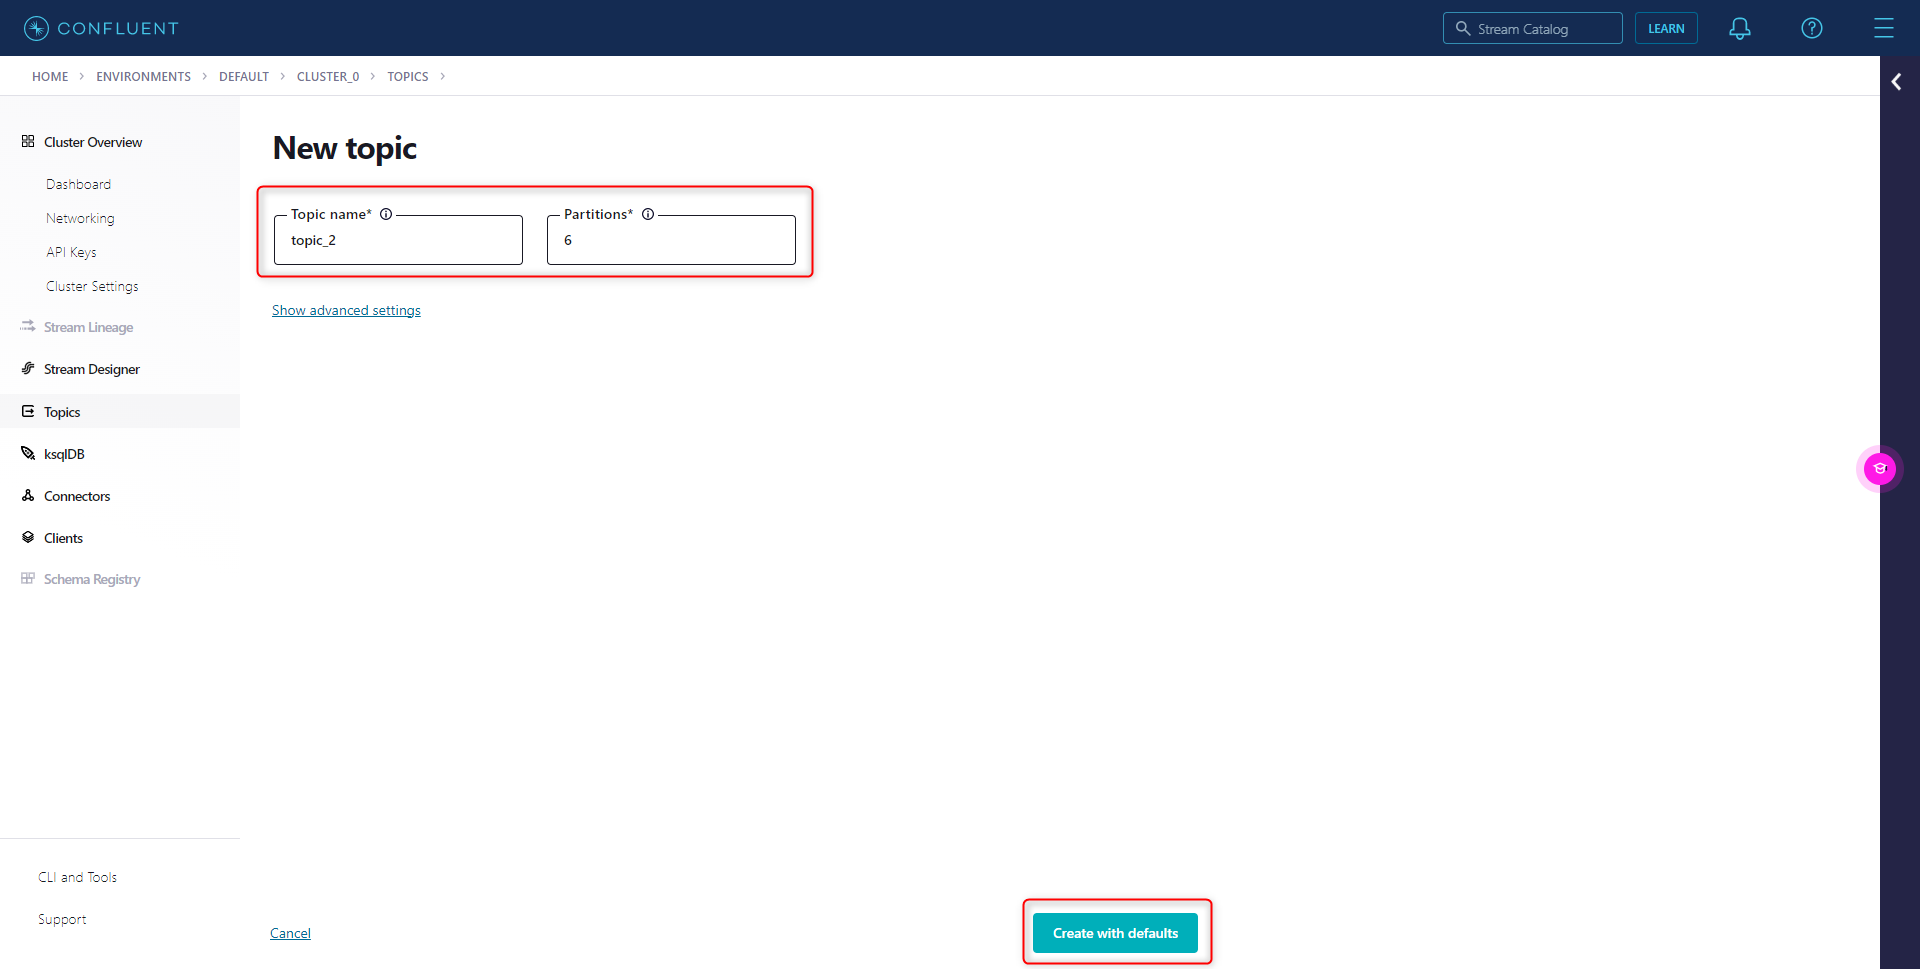
- Once in an environment, create a Topic in Confluent Kafka by navigating to Topics, then select the Add Topic button.

- Provide a name and the partition size. Once added, select the Create with Defaults button. A new topic will be created.
Connecting to Decisions
Once a Topic is created, configuration information such as the Bootstrap Server name will be needed. In addition, the following values, security.protocol, sasl.mechanisms, sasl.username, and sasl.password are needed to connect the queue to Decisions.
To locate these values in Confluent:
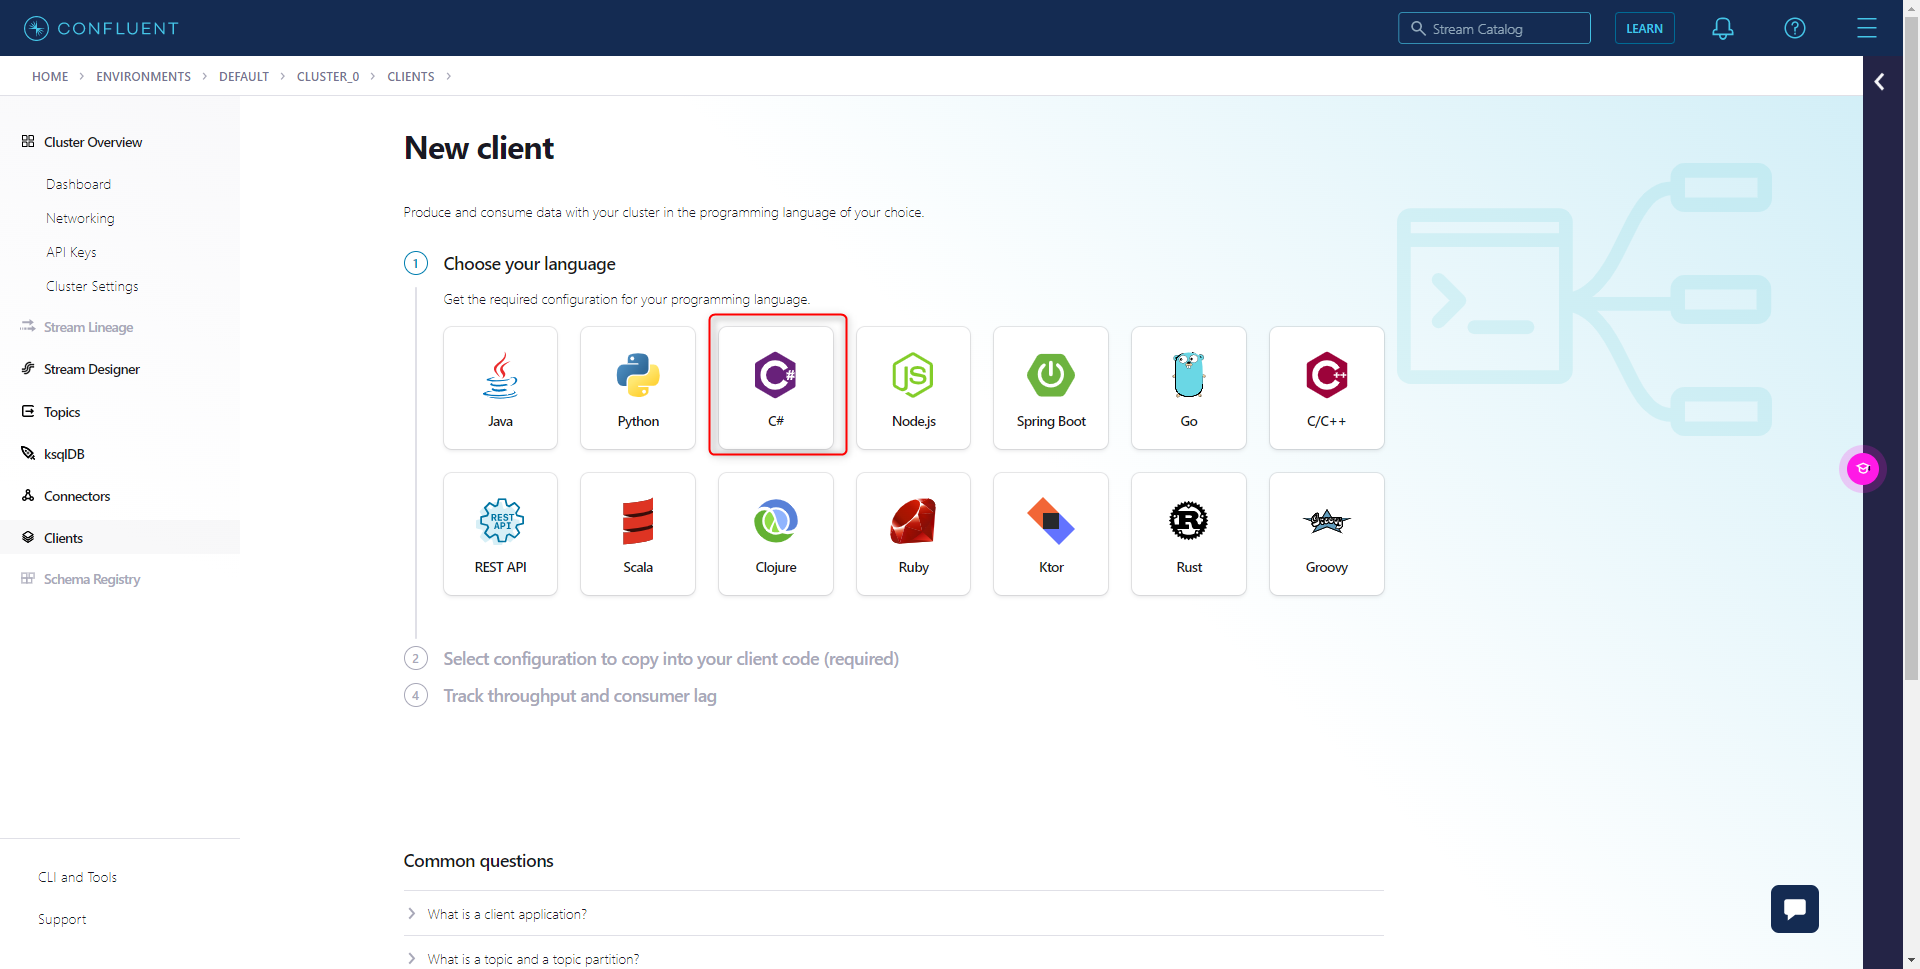
- Select Clients, then create a new Client

- Under Choose your language, Select C#
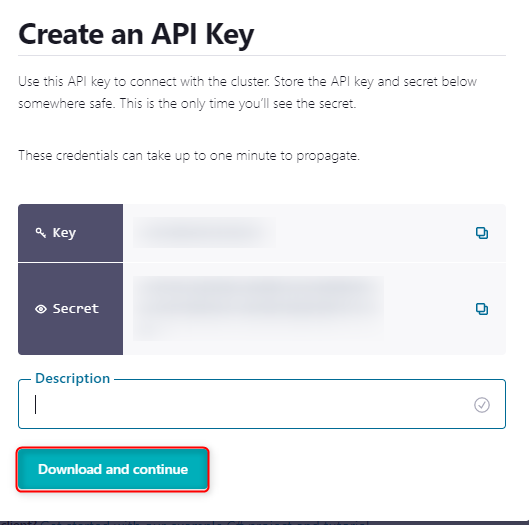
- In the next step, click on the Create a new Kafka Cluster API Key button. This will populate the following box with the connection information.
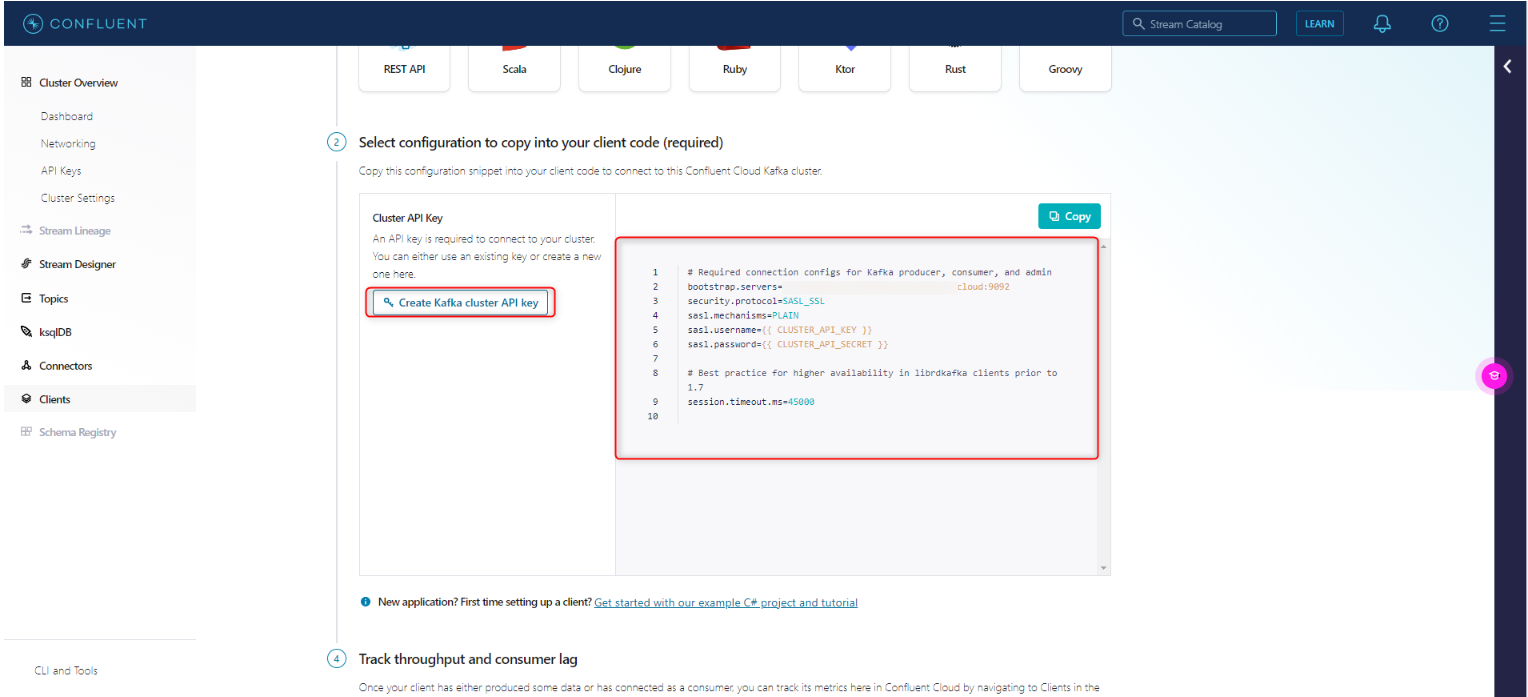
- Save the API Key
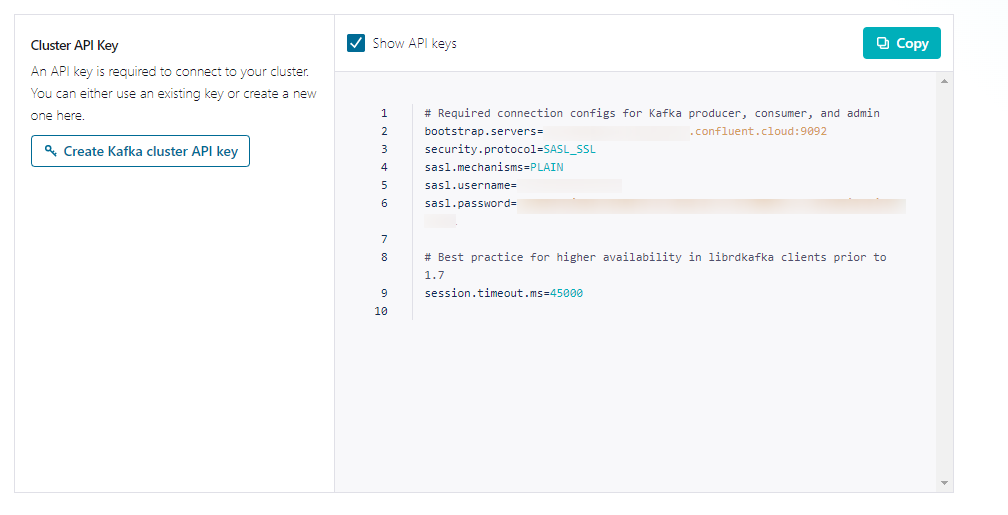
- Once the key is generated, the config file should be updated. These will be the values that will be entered into Decisions. Save this section into a new file for future reference.
- In Decisions, navigate to System > Settings > Kafka Module Settings
- Select ADD for Bootstrap Servers. Enter the host name and port from the bootstrap.servers entry from the configuration file.
- Under Additional Config Options, select Add and create entries for security.protocol, sasl.mechanisms, sasl.username, sasl.password entries from the configuration file.
- Click OK and save the settings.
- Right-click the module settings, select Manage > Resync Queue to resync the queue.
Feature Changes
| Description | Version | Release Date | Developer Task |
|---|---|---|---|
| A hidden Module called Decisions.MessageQueues Module will be downloaded automatically when any message queue Module is installed. | 9.0 | March 2024 | [DT-039289] |
| A new setting was added to provide the ability to modify a topic name for a message queue | 9.10 | April 2025 | [DT-044228] |