Overview
Only certain data types support outside values
The option to add outside values is only supported for String lists. It is not available for complex Entity data types such as Data Structures, FileData, or any etc data type comprised of multiple variables.
Dropdown Lists may accept external values not originally offered in its list.
Users may enter their own unique option that will be saved into the list to be available for selection in later Form runtimes.
An example may include a list of inventory items for purchase that the assigned user may add other items. Another may include displaying a list of accounts and adding another.
Example
External Values are not supported in Mobile Forms
Browser Forms support this feature.
- In a Designer Project, create a Flow. It will automatically open in the Flow Designer.
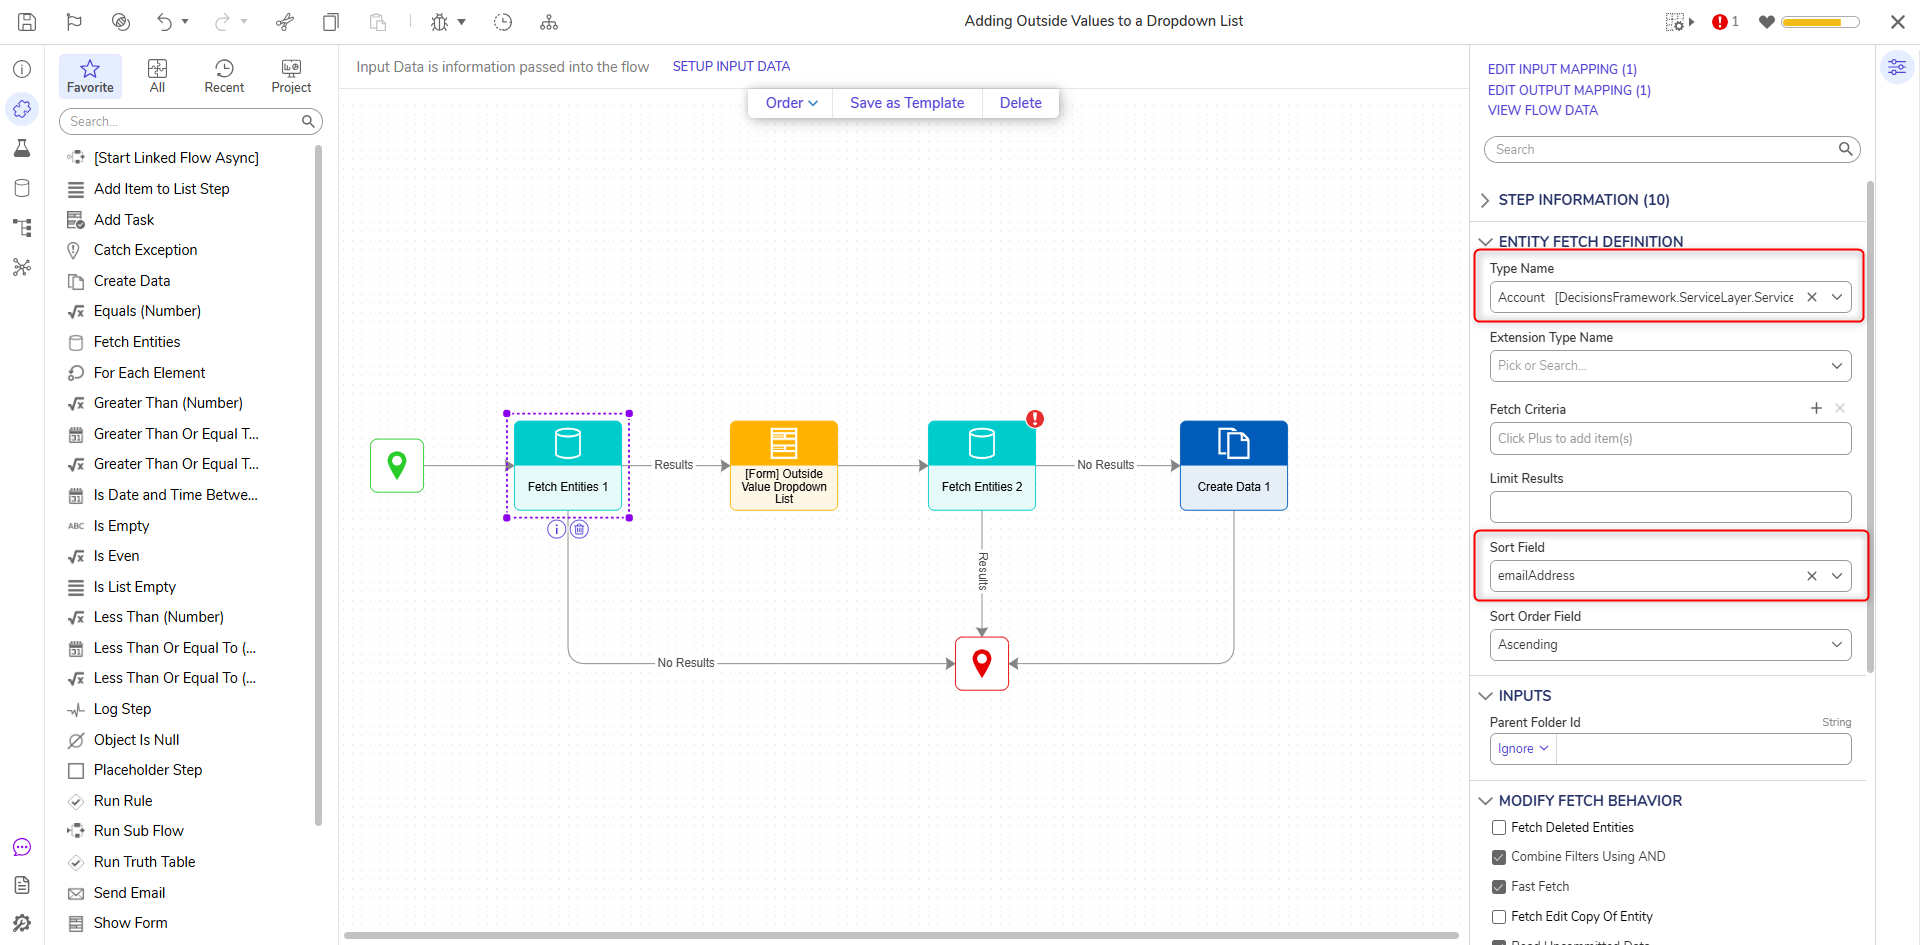
- In the Flow Designer, add Fetch Entities step from the Toolbox to the Start step.
- For the Fetch Entities, change the Type Name to Account and set Sort Field to emailAddress. Rename the output to 'AllAccounts' for better clarity.
- Next, connect the Results outcome of the Fetch Entities step to a Show Form step.
- Select the Show Form step and create a new Form. It will automatically open in the Form Designer.
- In the Form Designer, add a Button named 'Done' and a Drop Down List control from the Toolbox > FAVORITES section. Upon dragging it into the workspace, name it 'Email Address' and confirm with ENTER+SHIFT.
- With the Drop Down List control selected, navigate to the Properties panel > INPUT DATA > Type menu and change the type to String [Text]. Locate the List Input Source menu and select DataName.
Once the List Items DataName field appears, enter a name for the items in the drop-down list such as 'Accounts'. Enable the Allow external values to be selected Boolean.
- Save and close the Form Designer to return to the Flow Designer.
- Select the Show Form step, and set the Accounts input to a Select From Flow input mapping then choose the AllAccounts.All EmailAddress in the resulting window.
Set the Email Address input to Ignore since input is for a user-entered email address.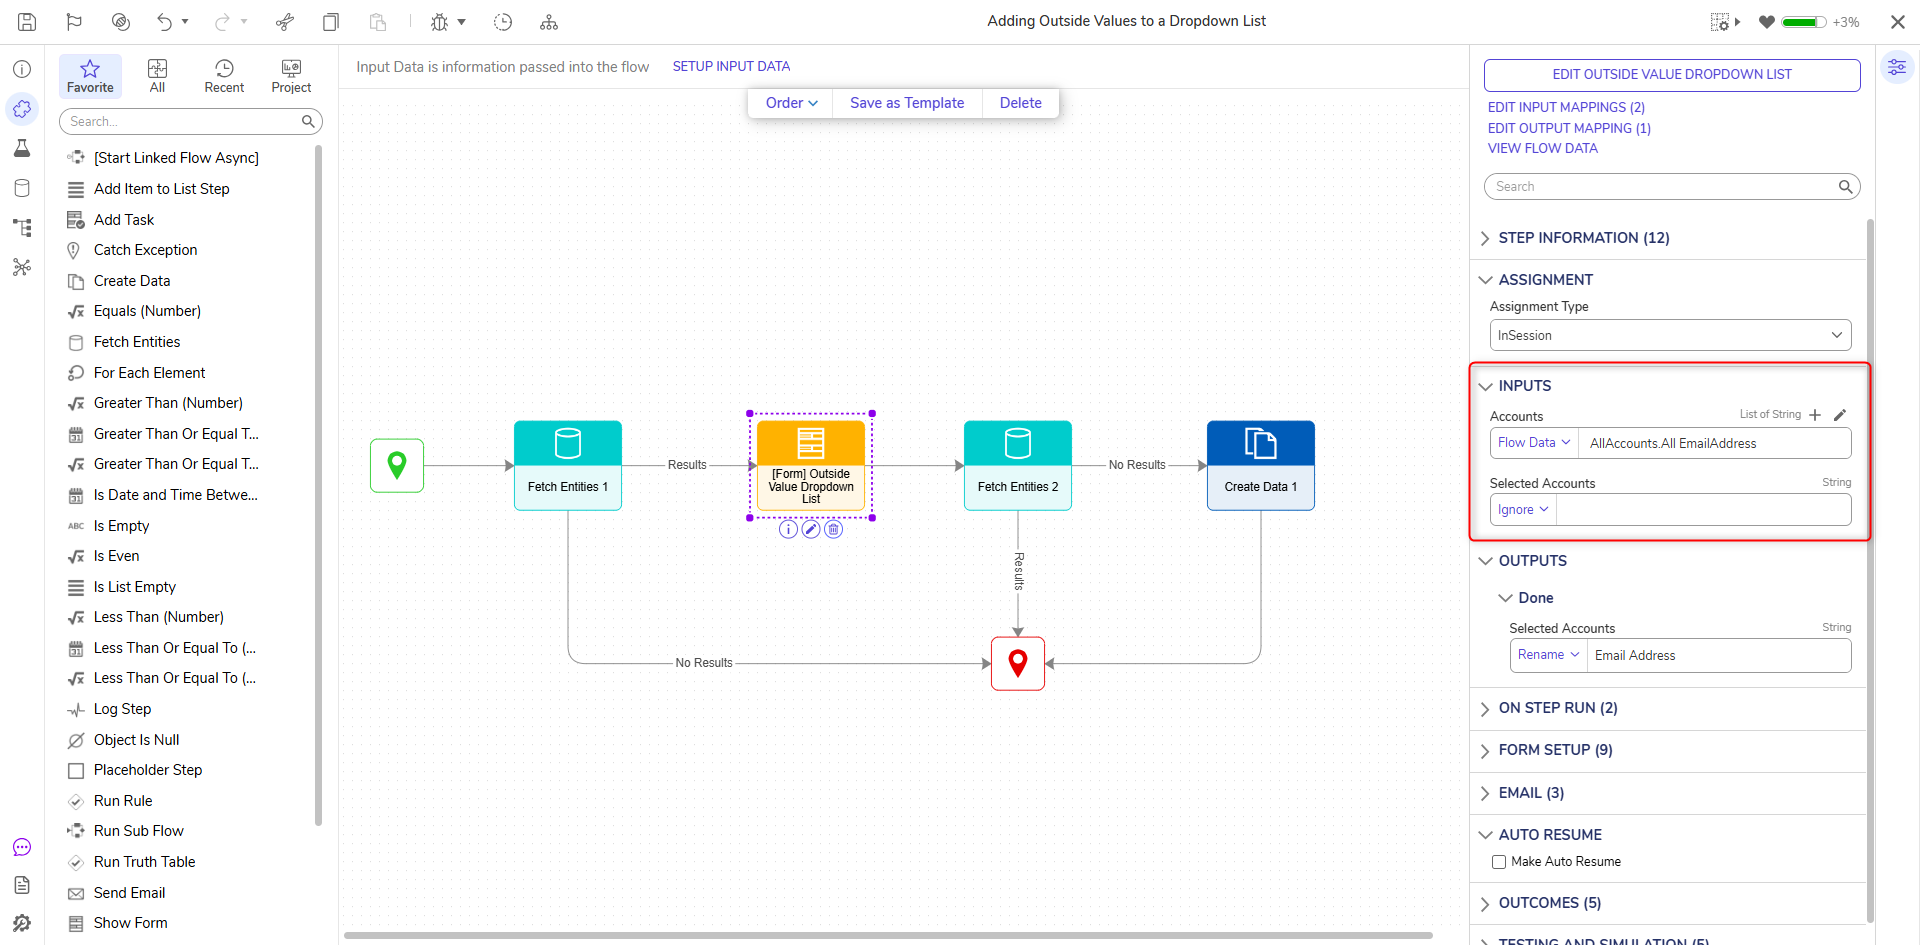
- Next, add another Fetch Entities step configured with Account as the Type Name. Enable the Show Path For One Result boolean. Locate the Fetch Criteria selector then click ADD.
In the Add Fetch Criteria window, select emailAddress from the Field Name menu. Click OK.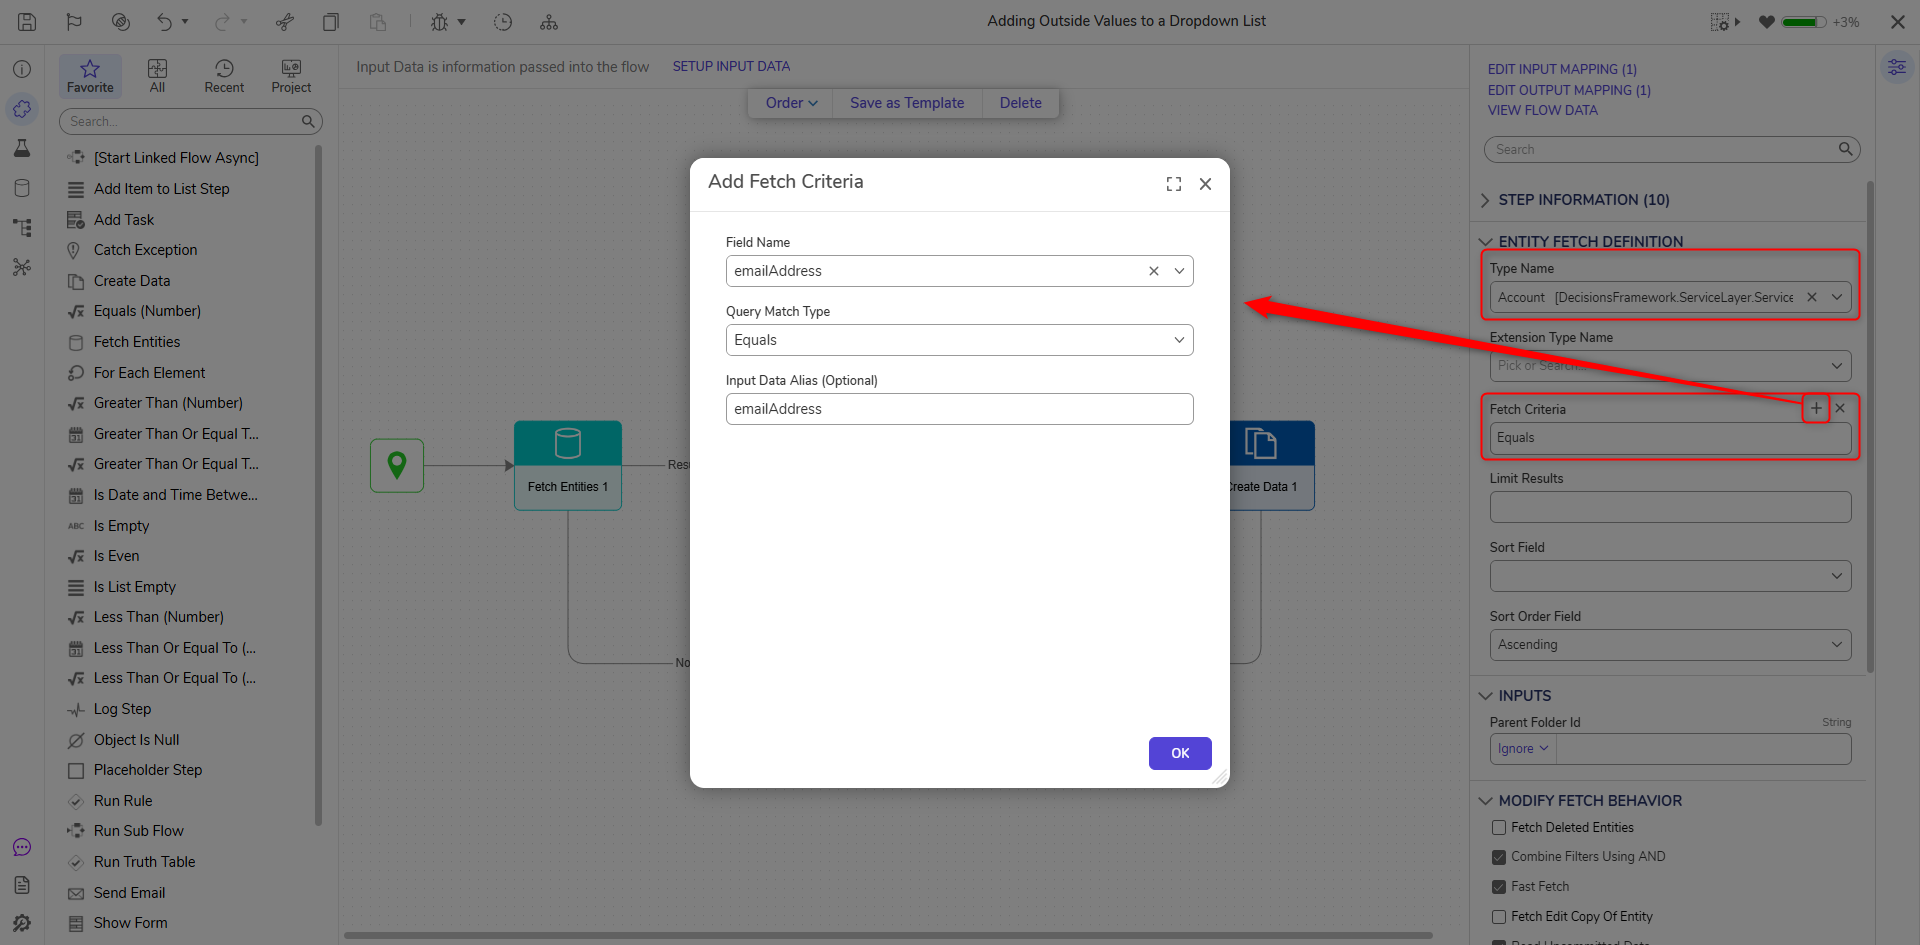
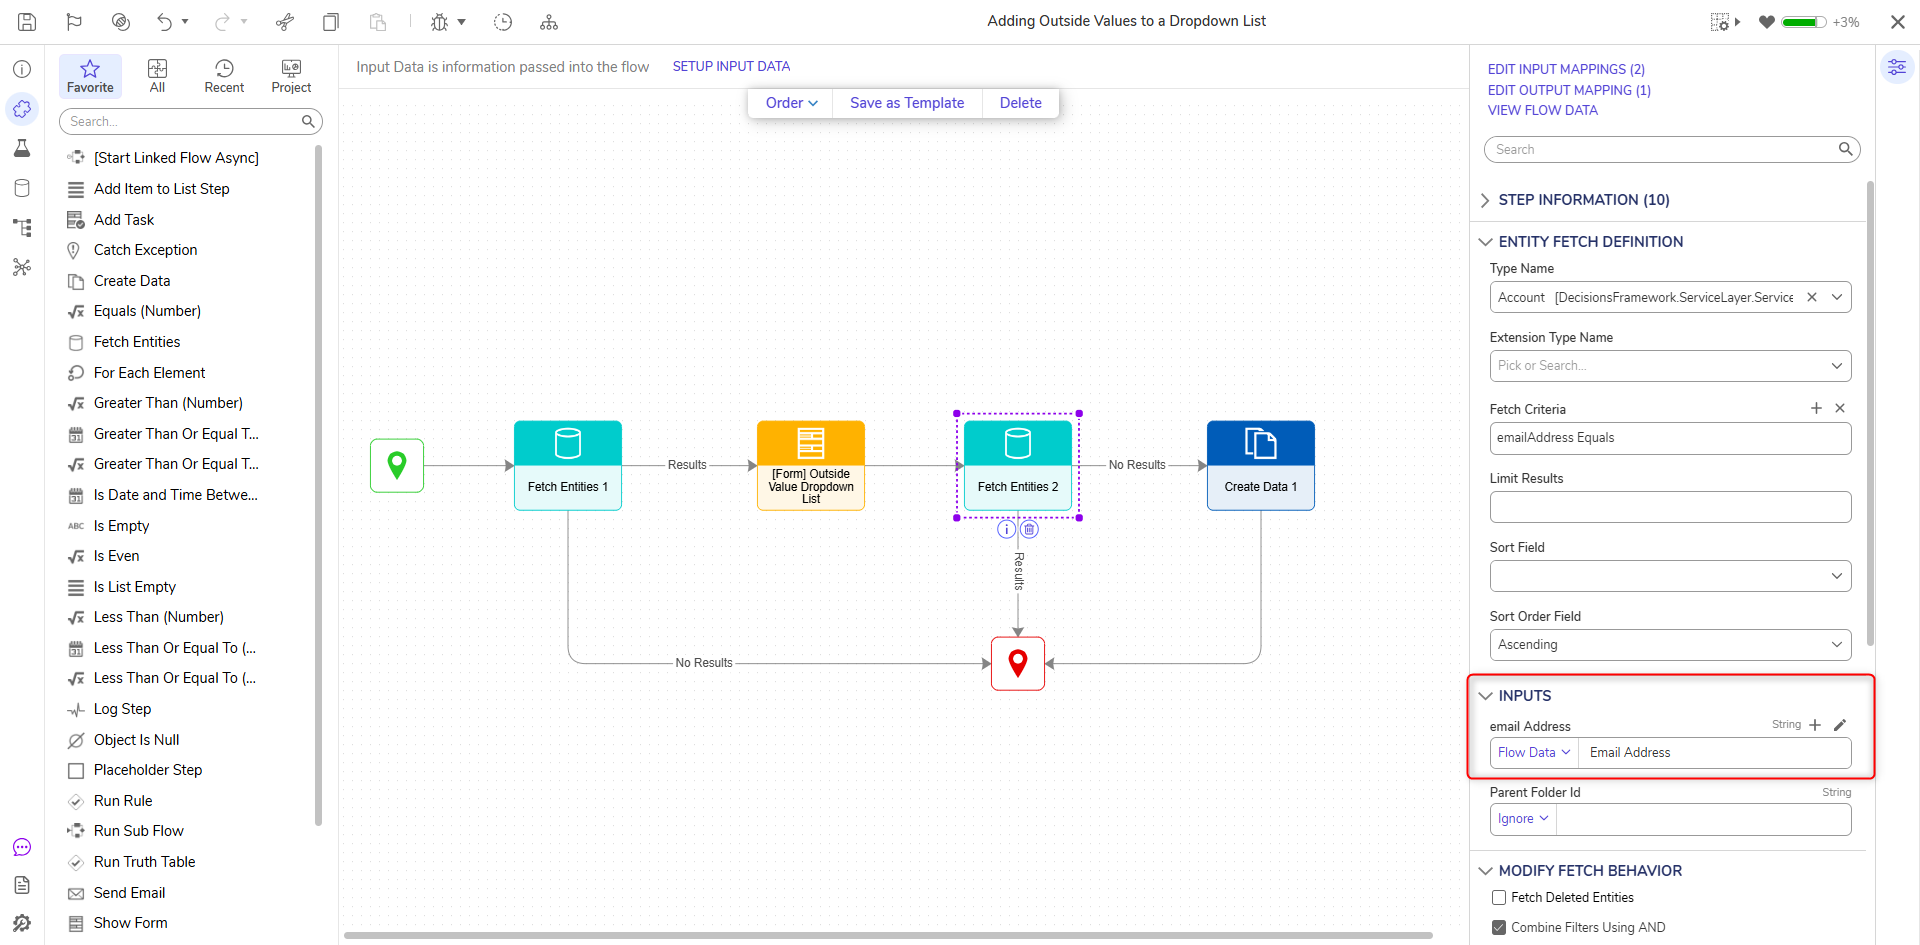
- Navigate to INPUTS > email Address and change the mapping to Select From Flow then select Email Address.
- Connect the single Result path to the end step. For the No Results path, add a Create Data step.
- In the Properties panel of this Create Data step, locate DATA > Data to Create click SHOW EDITOR. Add data named SelectedAccount with an Account type. Click SAVE, then close.
- Change the input mapping on the Selected Account input to Build Data. Change the EmailAddress input mapping to Select From Flow and select the user-inputted Email Address string.
Click the pencil icon and locate and select EmailAddress. Click OK to confirm selection.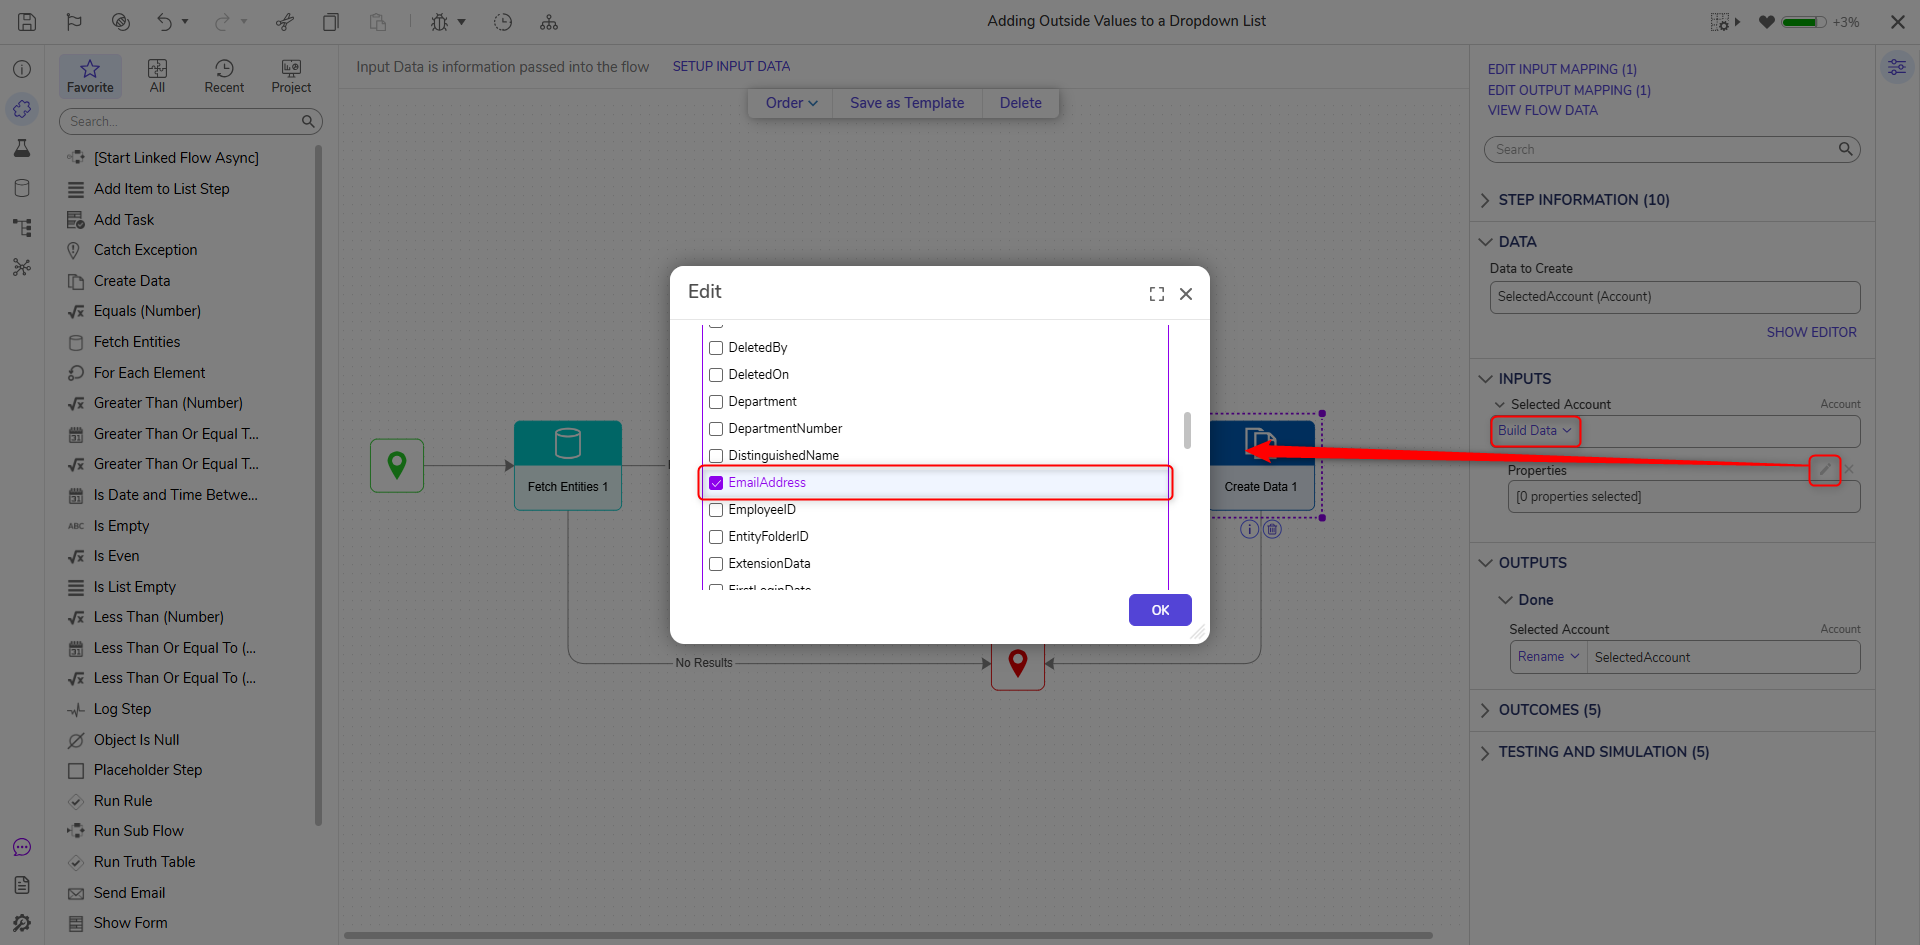
- After the Create Data step, connect it to the end step.
Debug
- Click Debug in the top bar; this will automatically save the Flow. In the Debugger, click START DEBUGGING.
- Select an existing email address and observe the Flow run successfully.
- Create a new session and attempt to add a new drop-down list value and after the Flow completes, click View Inputs and Outputs on the Create Data step and notice the new input information.