Overview
2FA (Two-Factor Authentication) is an extra security method used to increase the number of requisites to log in to an Account. This method requires the user to respond to a security question, provide an emailed passcode, etc.
Important Considerations
The 2FA email is sent from the Default Email Address defined in Portal Settings. By default, this email address is set to admin@decisions.com.
To ensure the proper functioning of 2FA email notifications, it is essential to update the Default Email Address. For more information, refer to Email and SMTP in Decisions.
Also note that 2FA will not work when the Decisions login is set up with Single Sign-On (SSO).
2FA is only meant for use with the login process. It cannot be called from a Flow via API.
2FA is only meant for use with the login process. It cannot be called from a Flow via API.
Configuration
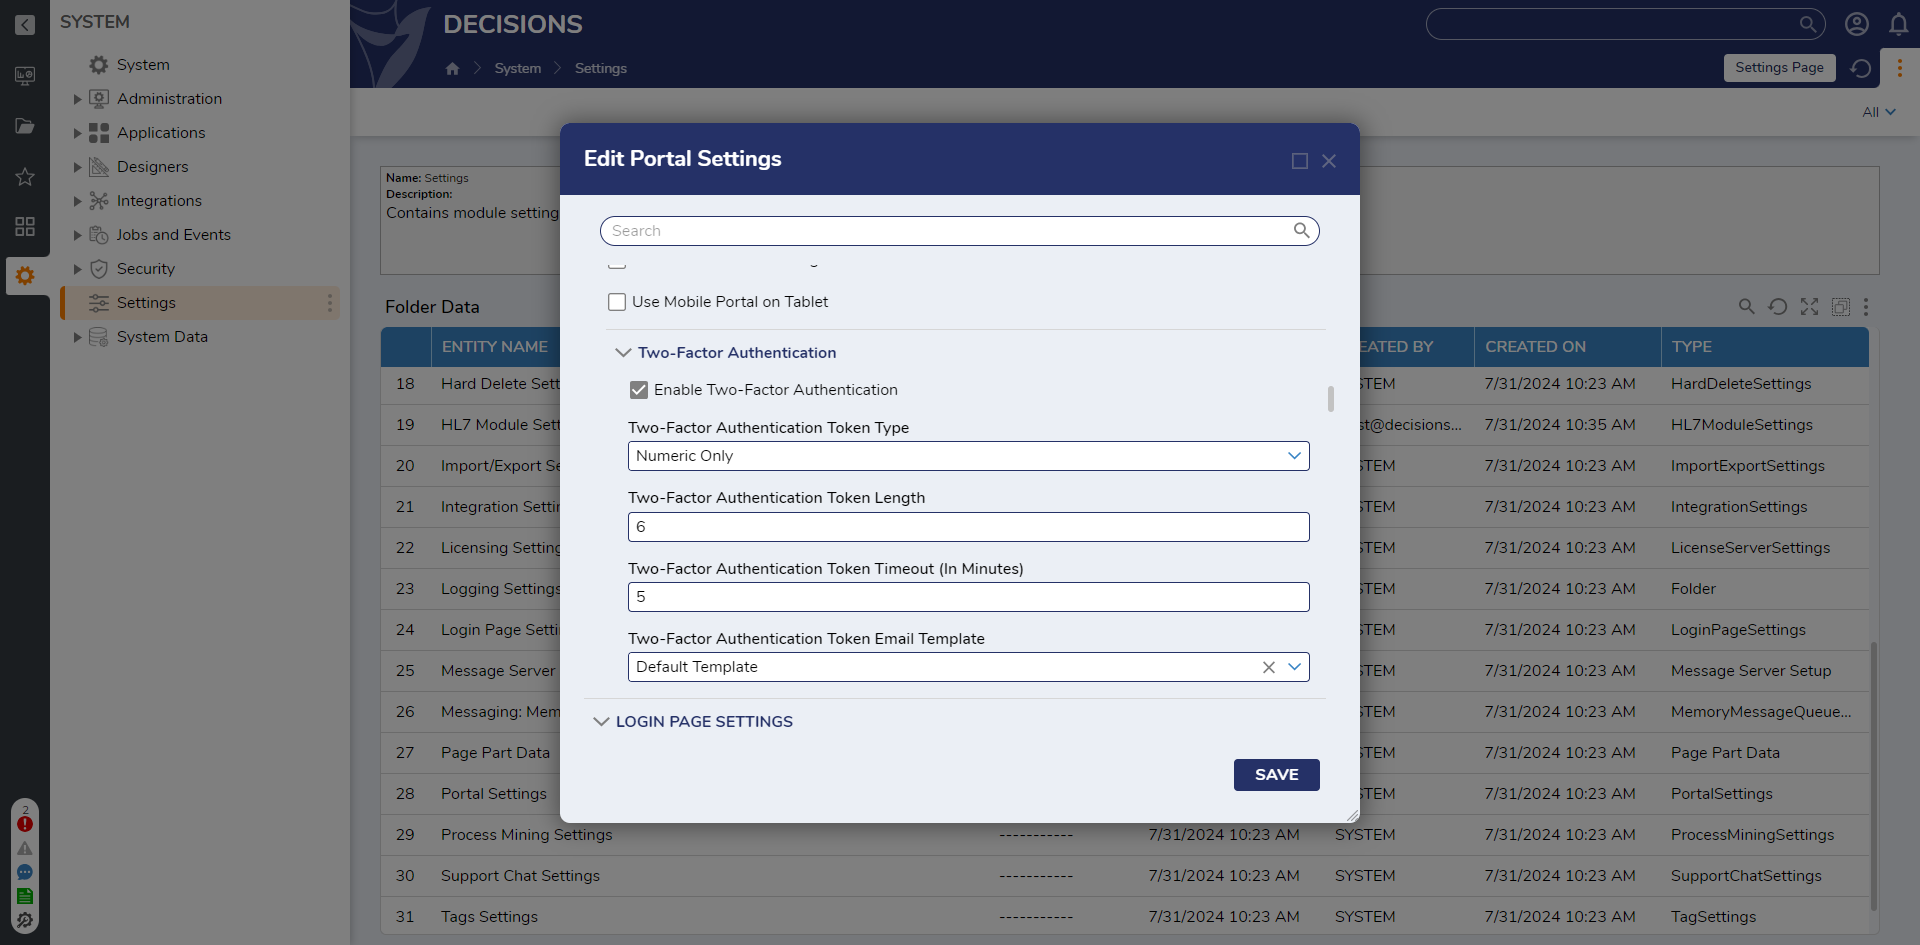
- Navigate to System > Settings, right-click Portal Settings and select Edit.
- From the Edit Portal Settings window, scroll down to log in and check the Enable Two-Factor Authentication box.
- Under Two-Factor Authentication Token Type, select the desired option, Numeric Only or Alphanumeric.
- Under Two-Factor Authentication Token Length, dictate the desired length (number of characters) for the Token.
- Under Two-Factor Authentication Token Timeout, provide the desired number of Minutes for the Token's expiration.
- For v9.12 and above there is a setting Two-Factor Authentication Required Password. This will require the user to enter their password after entering their token on the authentication page.
- If desired, select an option under the Two-Factor Authentication Token Email Template.
- Click SAVE to save changes and exit the Portal Settings.

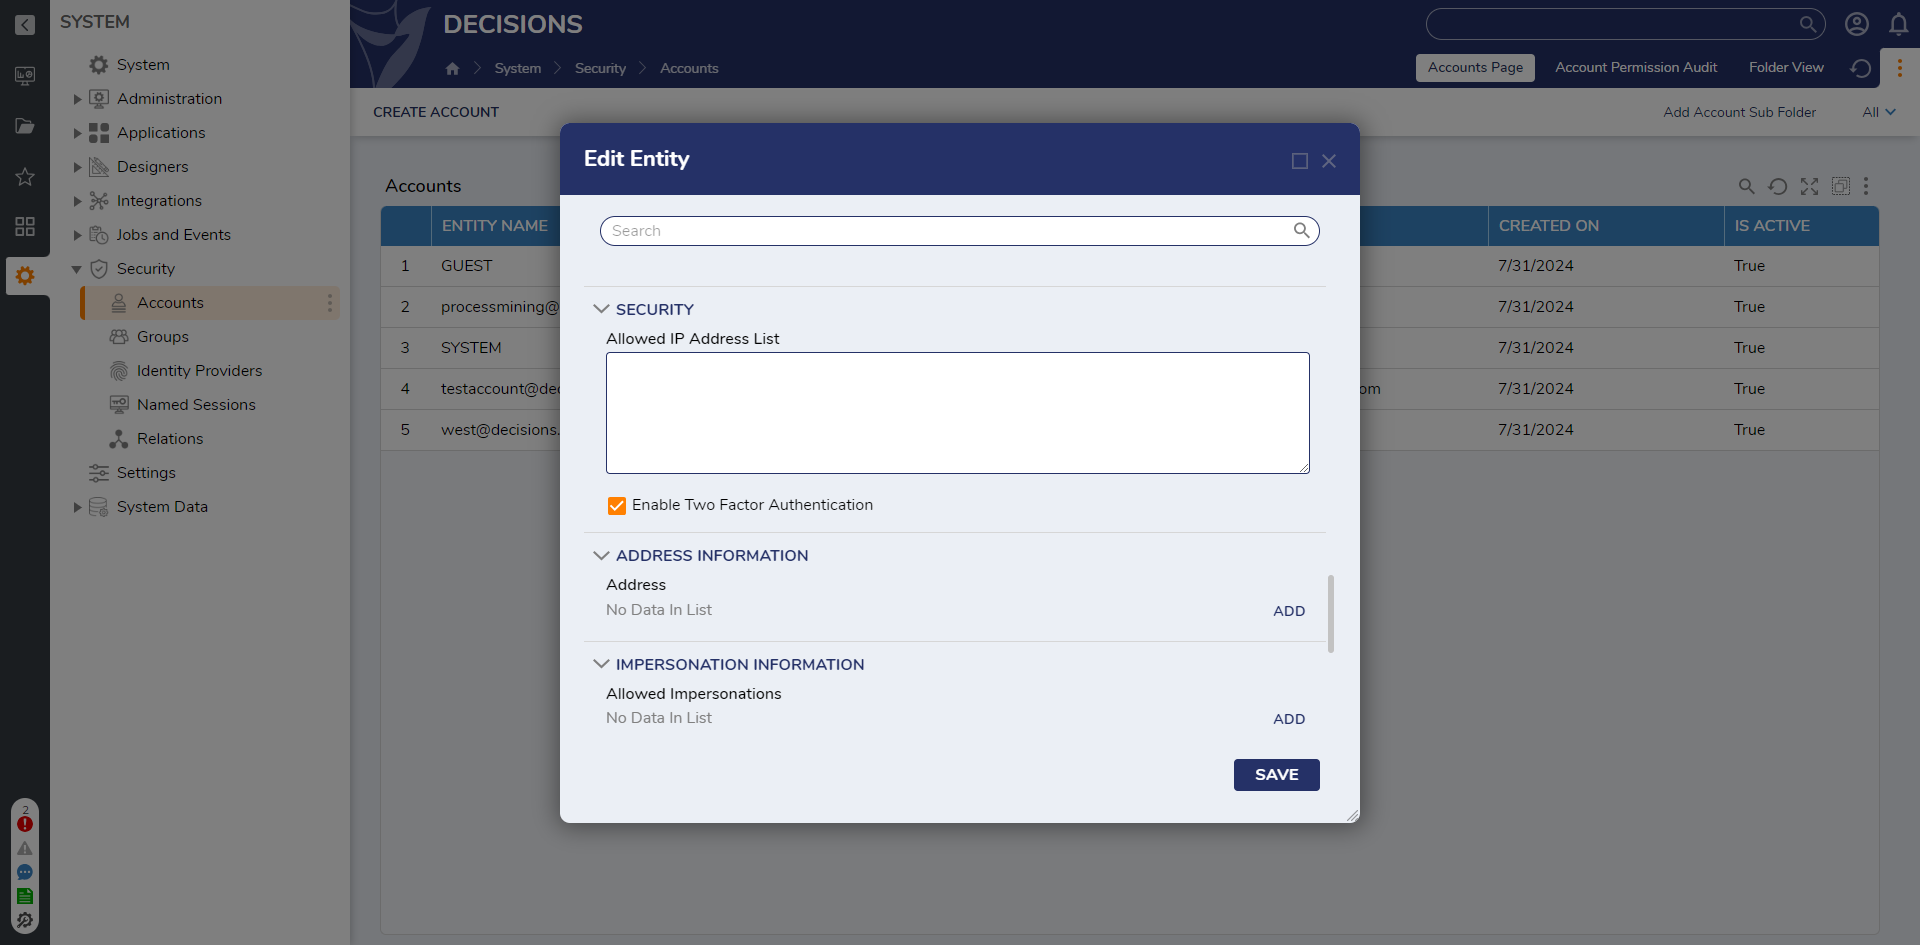
- Navigate to System > Security > Accounts; locate the desired Account, right-click it, and then select Edit Account. In v9.12 and above, newly created accounts do not need to have this applied to them.
- Under the Edit Entity screen, check Enable Two-Factor Authentication under the SECURITY category. Then, click SAVE.

- Attempt to log into the Account, navigate to the Account's Email inbox, and copy the received authentication token. Then, navigate back to the Login screen.
- SUBMIT the copied AUTHENTICATION TOKEN. If the token has expired, the user will get a prompt instructing them to login again. This will cause an email to be sent with a new token.

Feature Changes
| Description | Version | Release Date | Developer Task |
|---|---|---|---|
| Various updates. See the release notes for more. | 9.12 | June 2025 | [DT-044756] |