Overview
Unit Tests can be created using a Flow with a Rule to test data as it passes through. Using advanced techniques with Unit Tests, users can quickly and accurately check the data that is being passed through and provide a clear picture of what to test.
Using Unit Tests on Composite Data Types
- In a Designer Project, click CREATE FLOW and select Flow to create a new Flow.
- Click SETUP INPUT DATA.
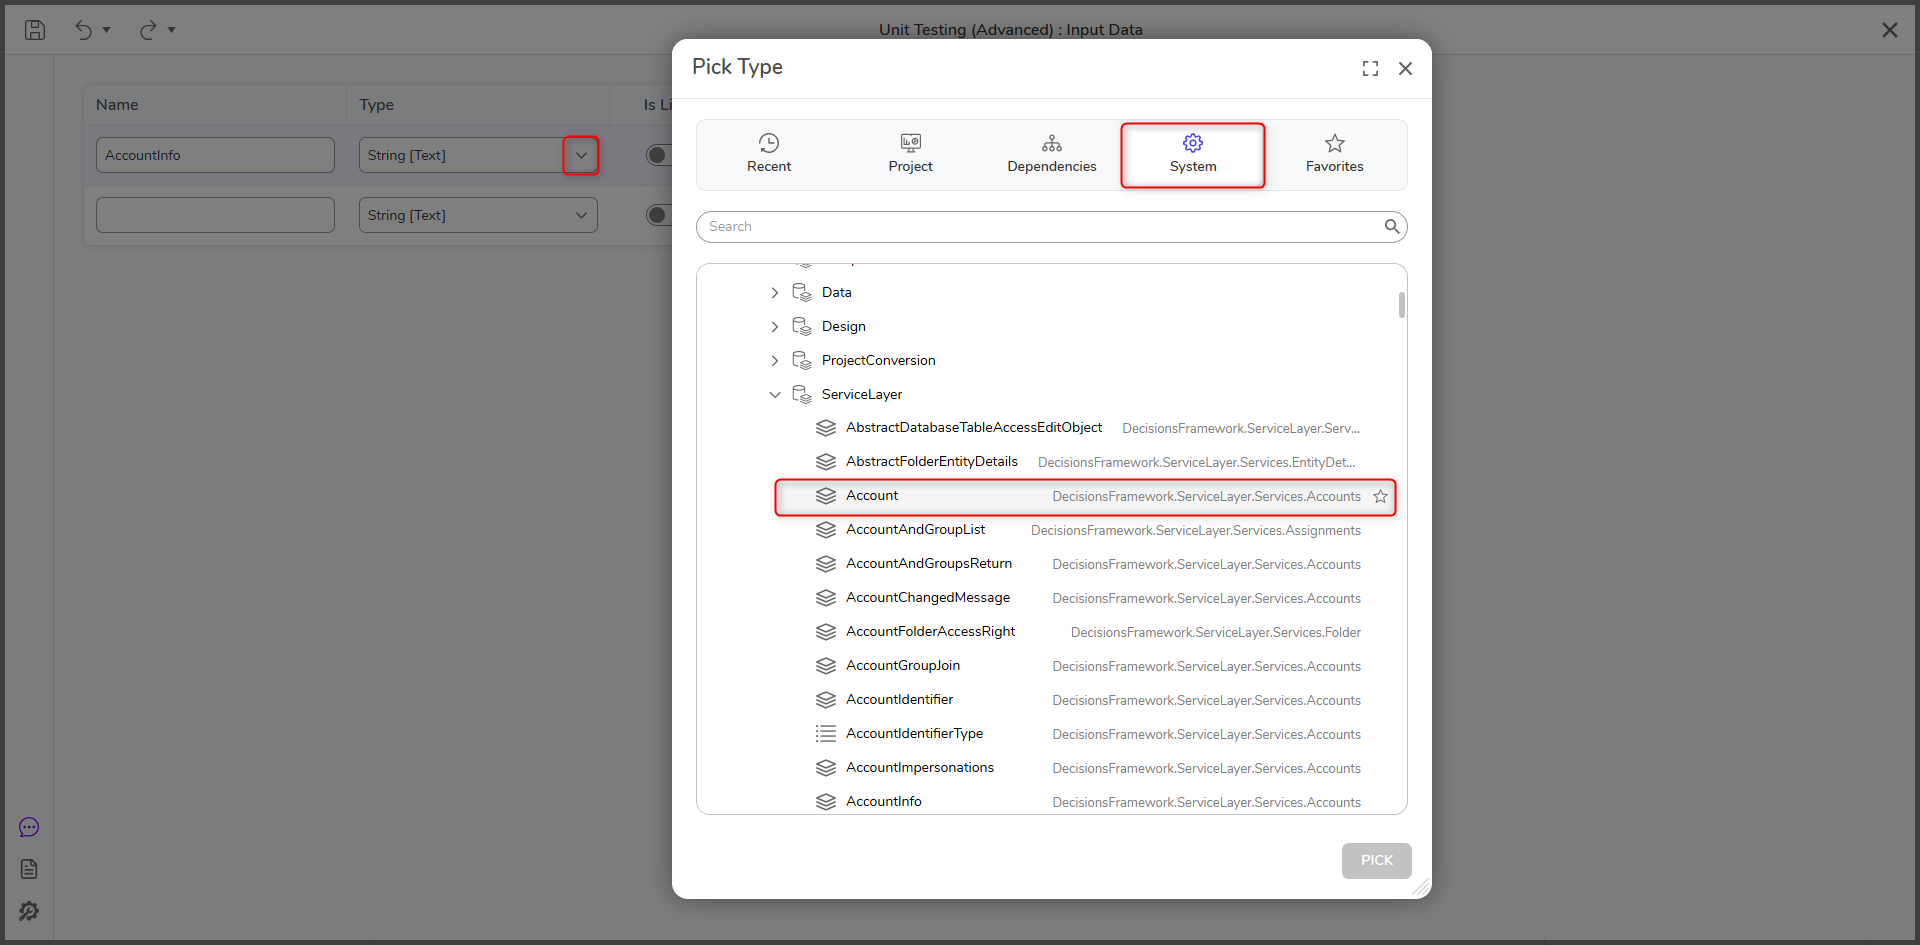
- In the Input Data window, enter "AccountInfo" under NAME. Enter "account" in the TYPE field and select Account. Click Save and close the window.
- Connect the Start step to the End step. Click Save to save changes to the Flow.
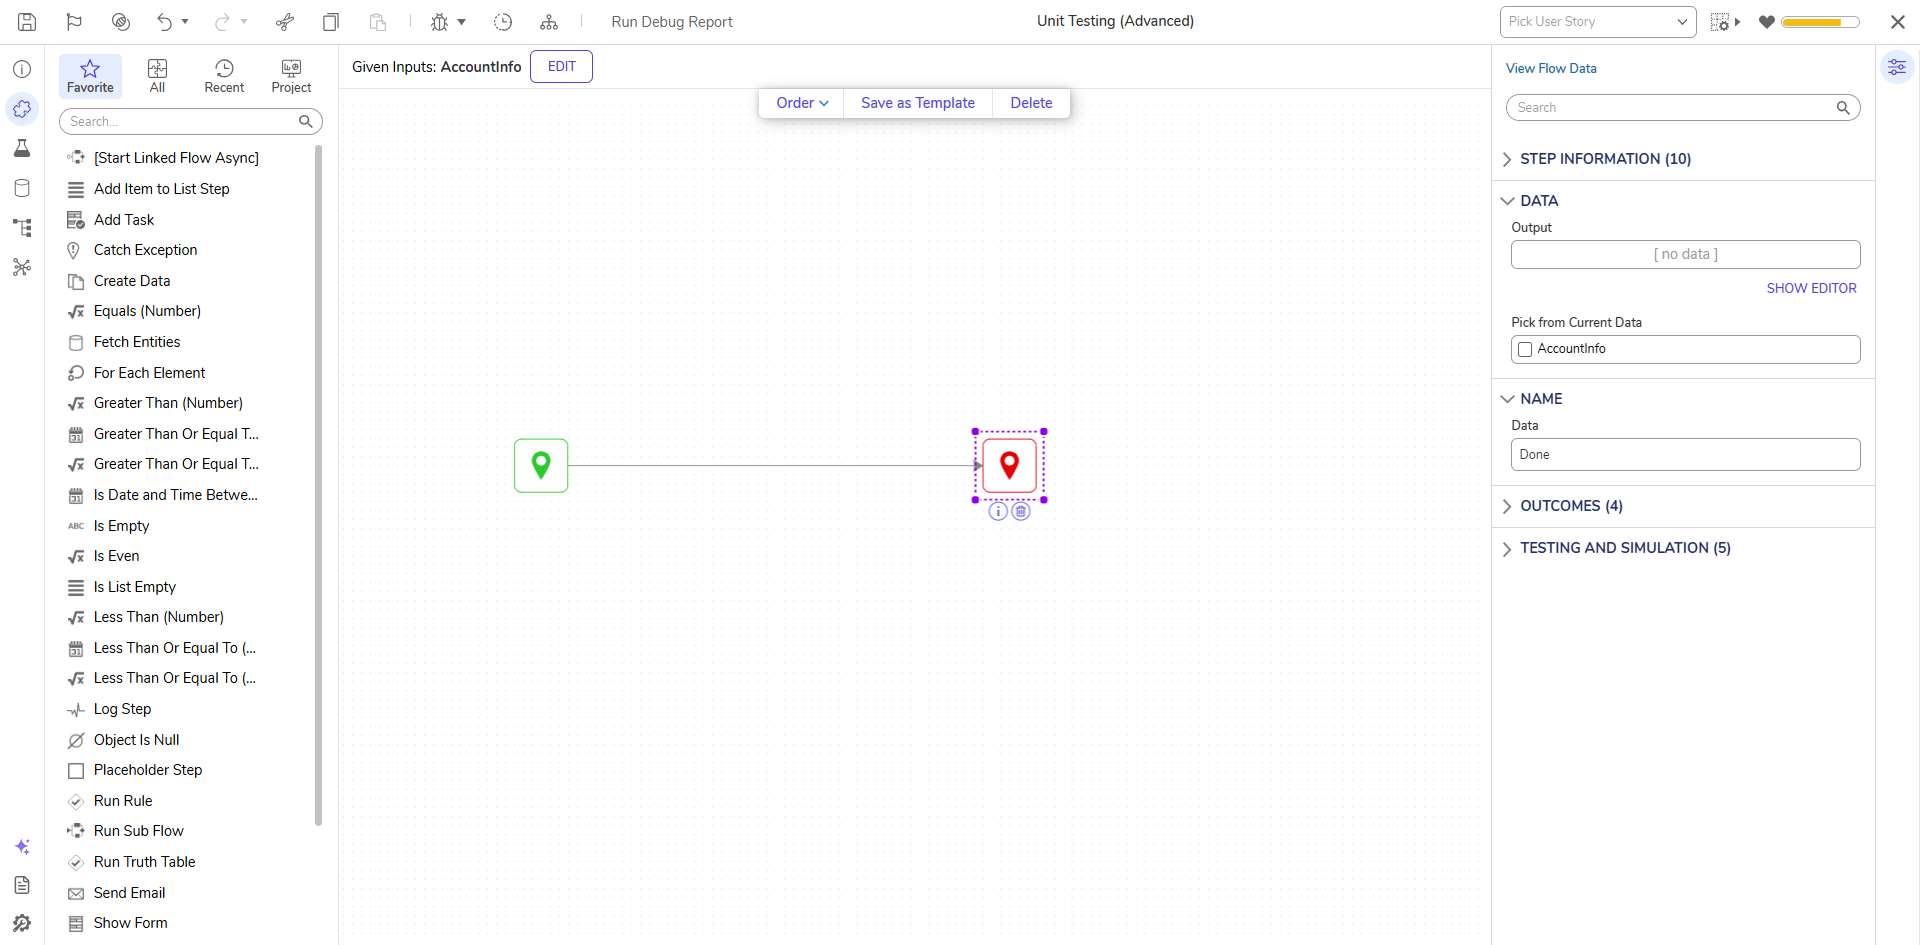
- Click Debug from the top action bar.
- In the Debugger, click + next to UNIT TESTS.
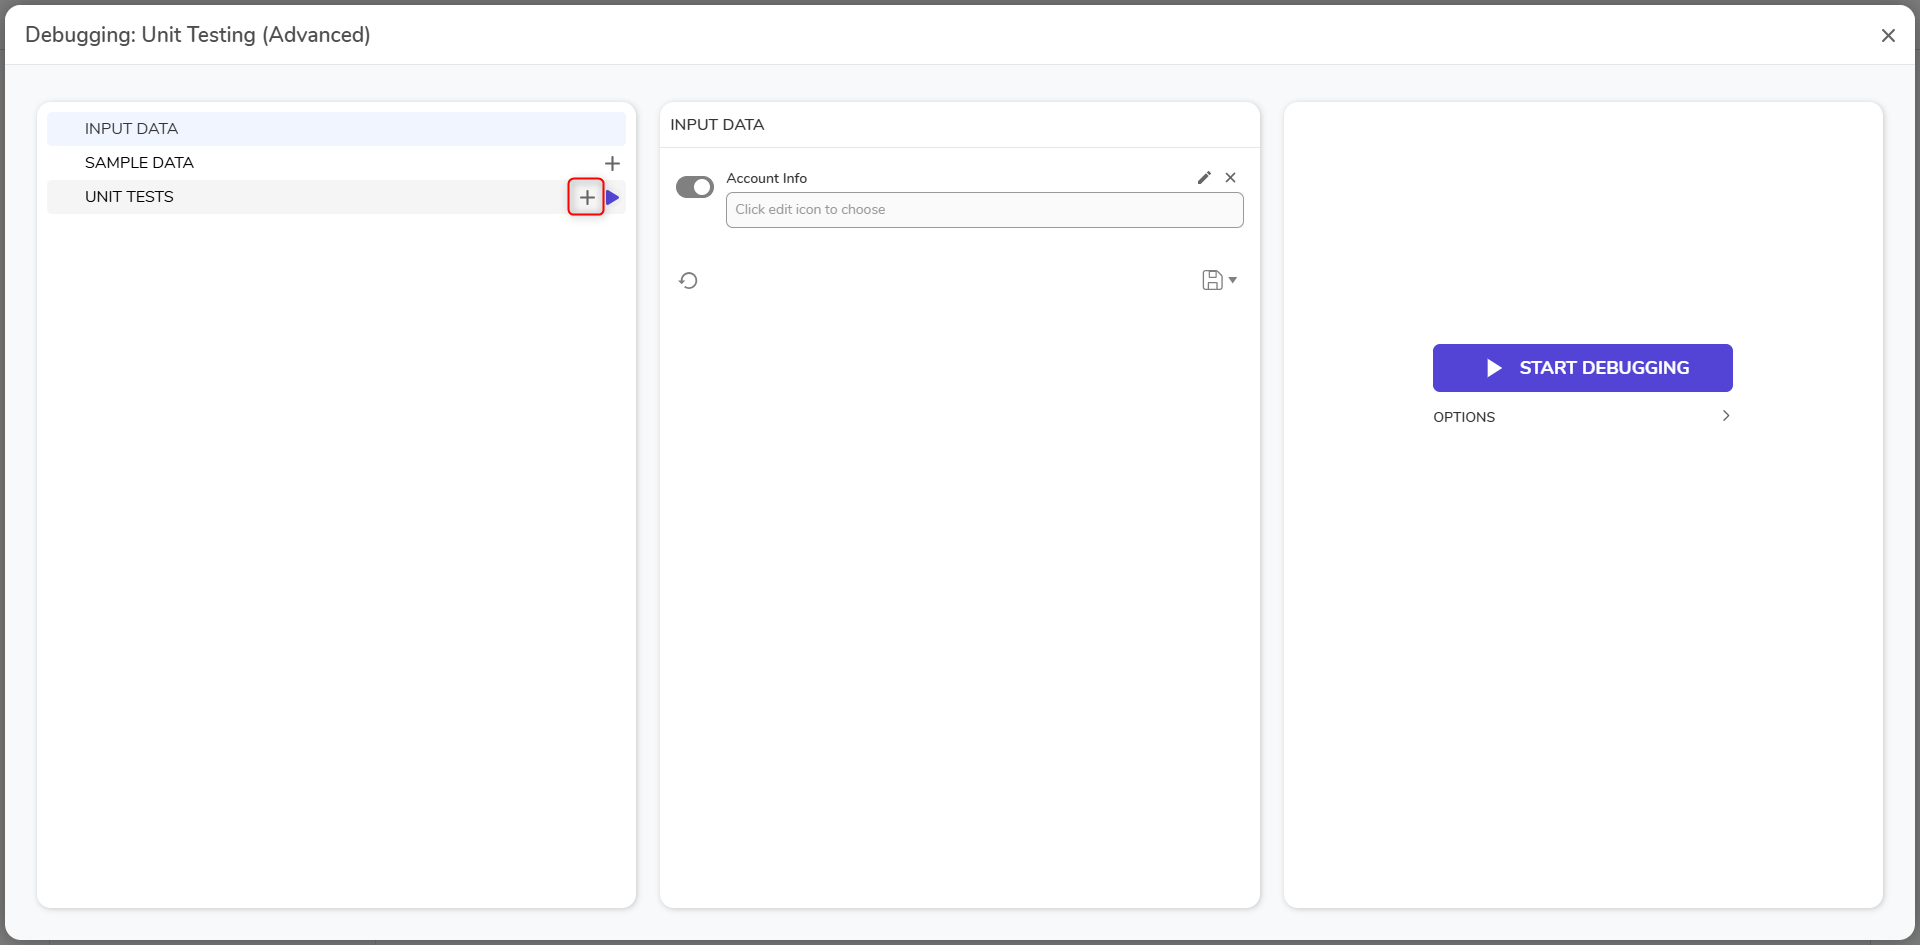
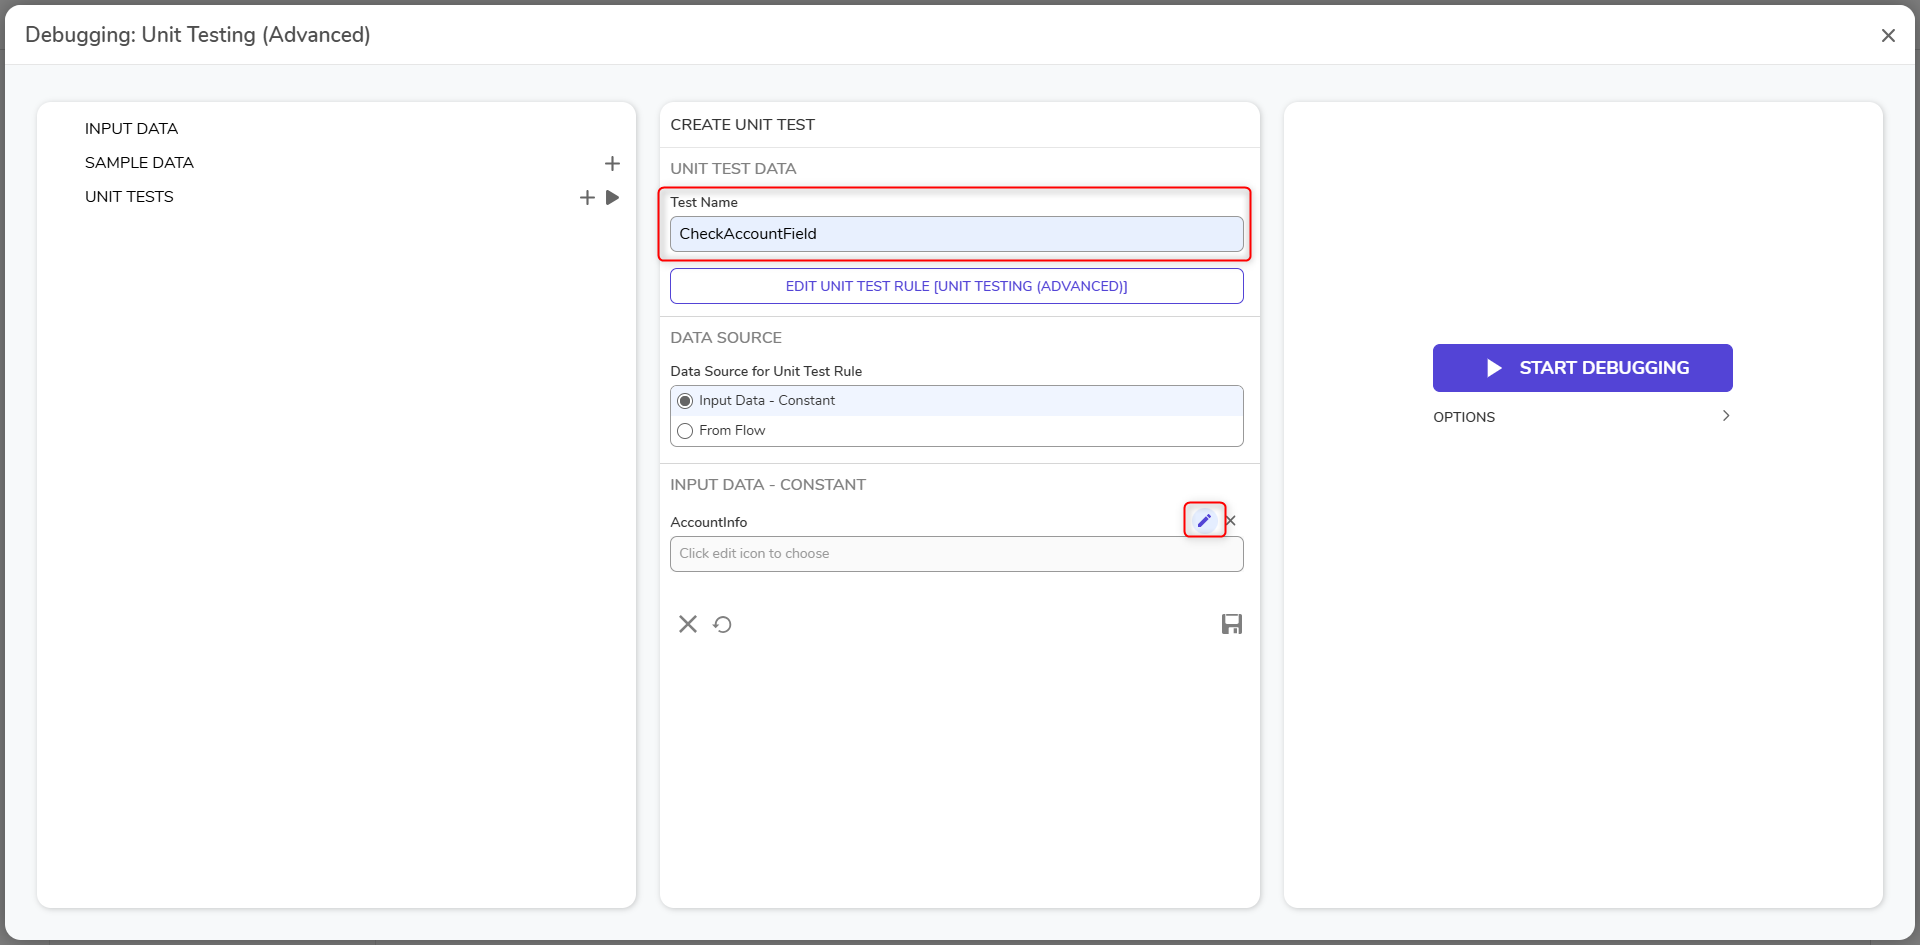
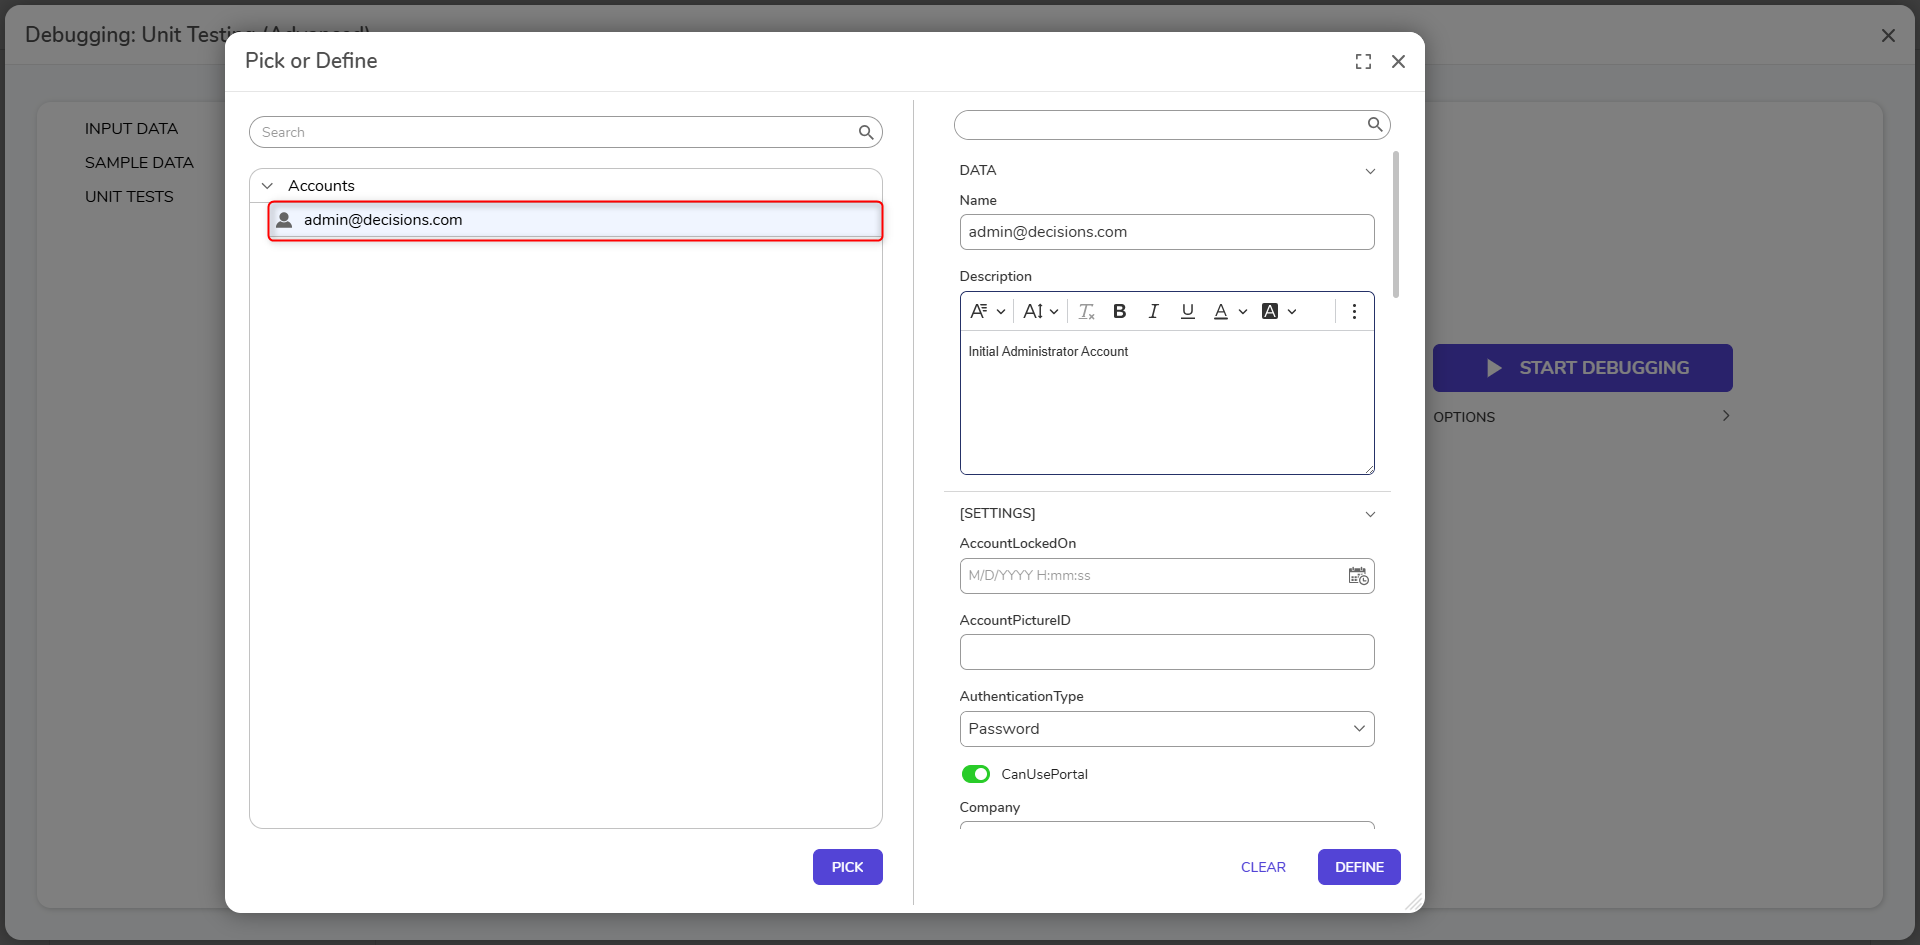
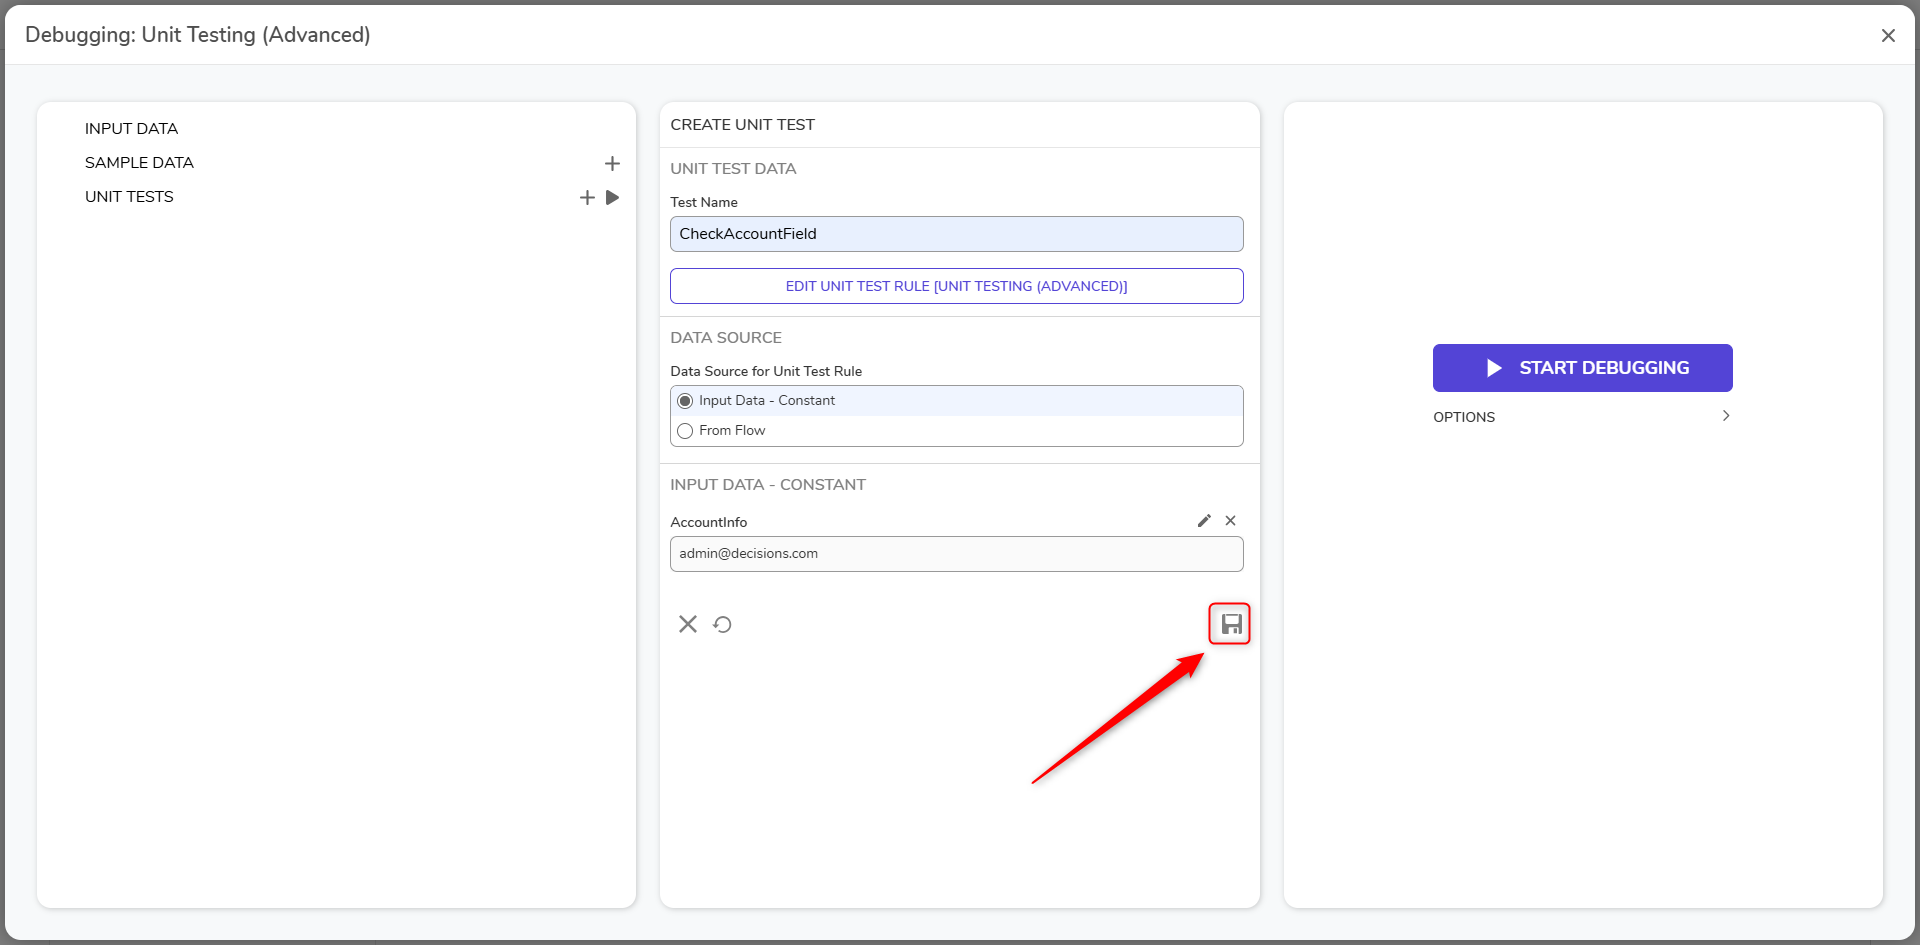
- Enter "CheckAccountField" under Test Name and click the pencil icon under the INPUT DATA - CONSTANT category next to the AccountInfo field.
- Select admin@decisions.com and click PICK.
- Click Save to save the Unit Test.
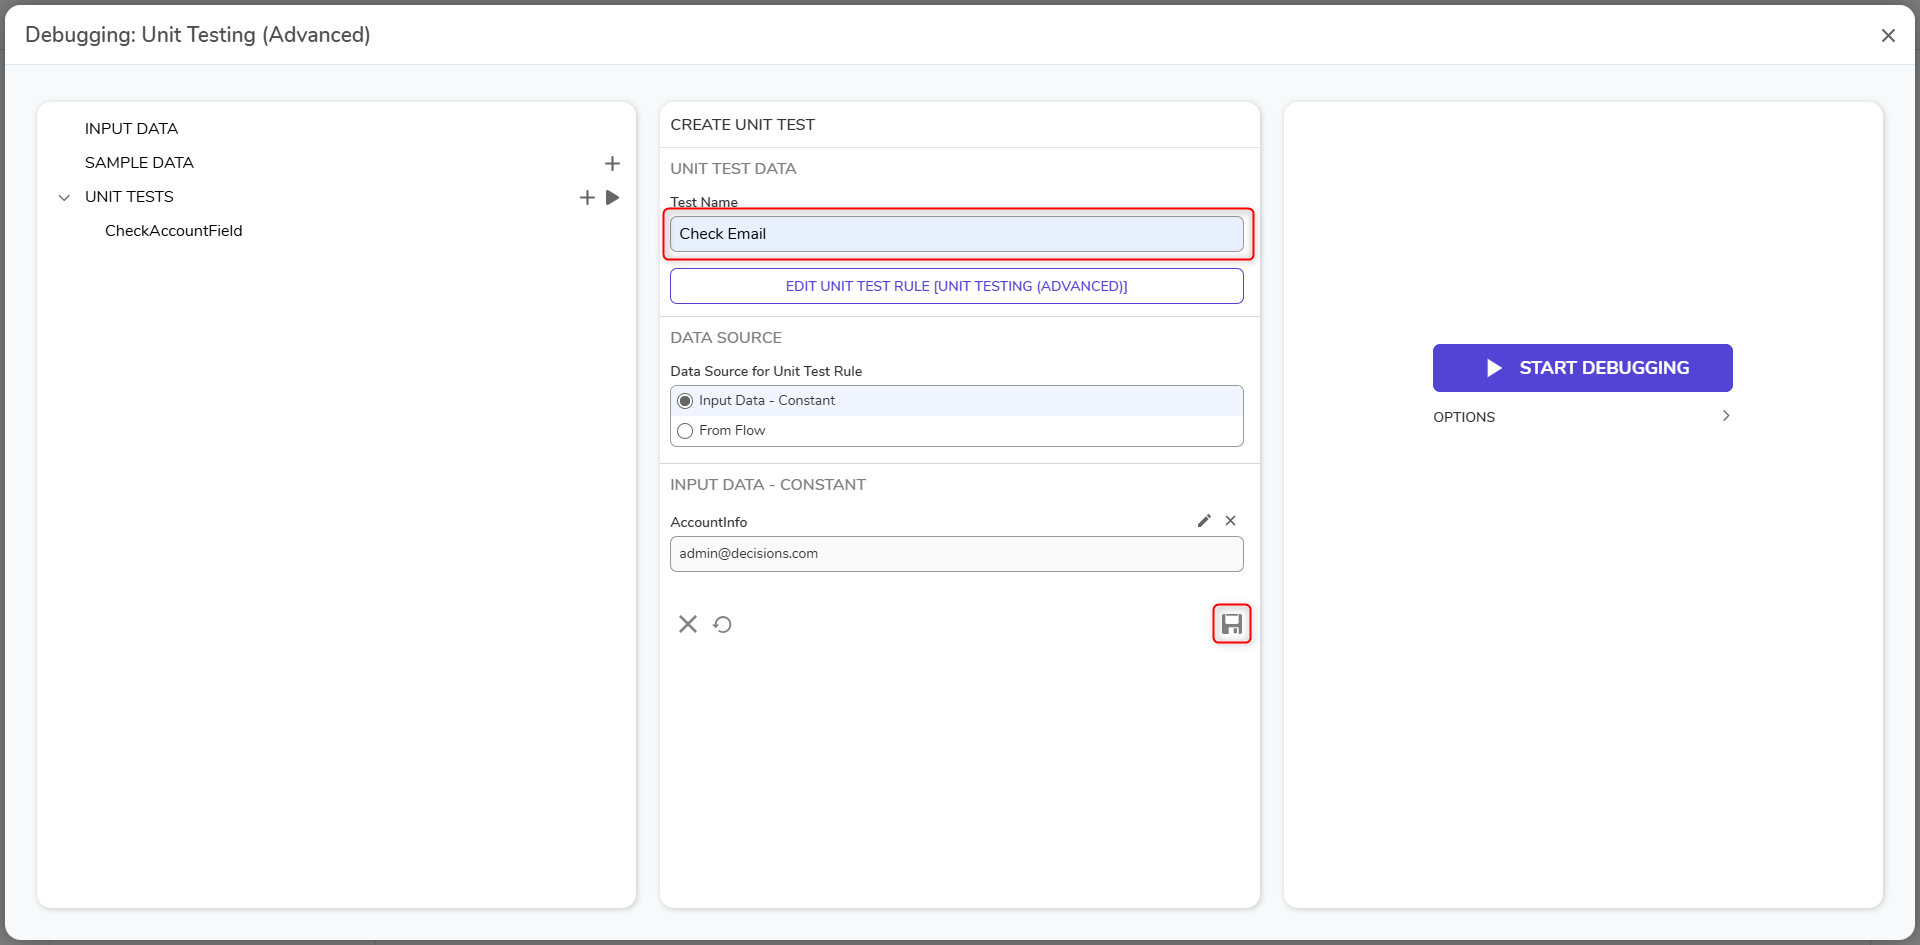
- Add a second Unit Test. Configure this test to use another account's email address.
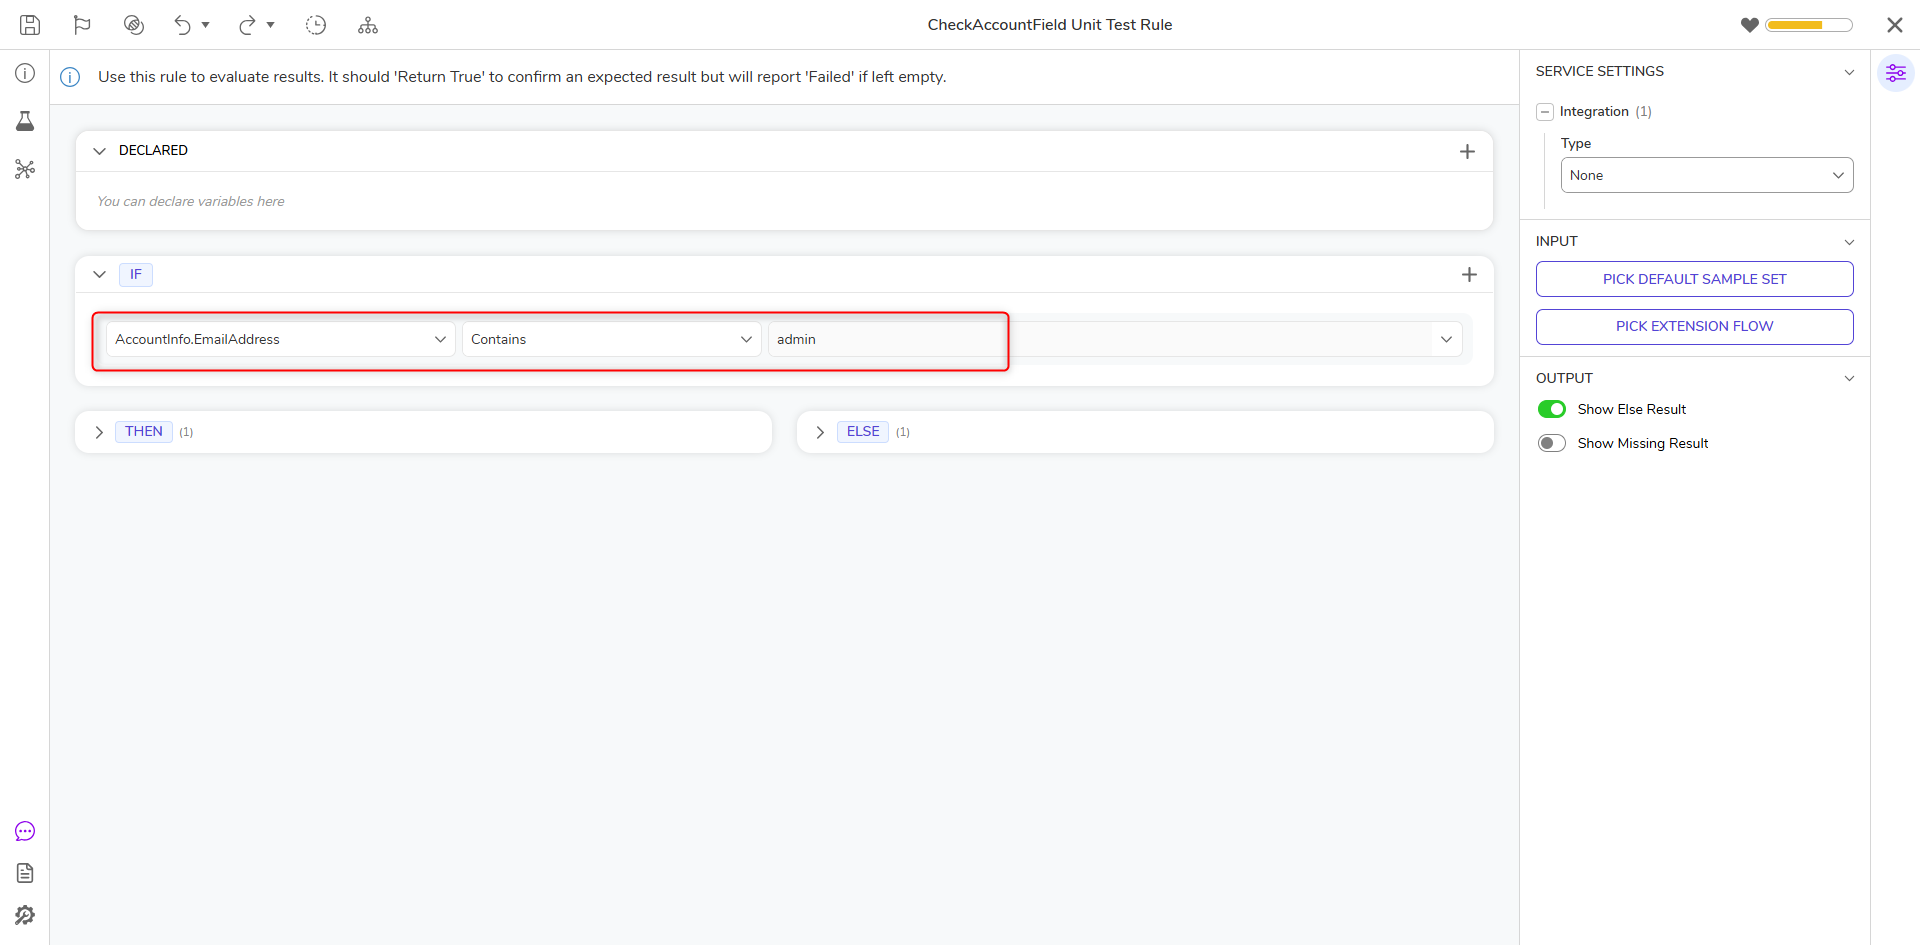
- Edit the Rule for each Unit Test by clicking EDIT [Name of Unit Test] RULE under the [UNIT TEST DATA] category.
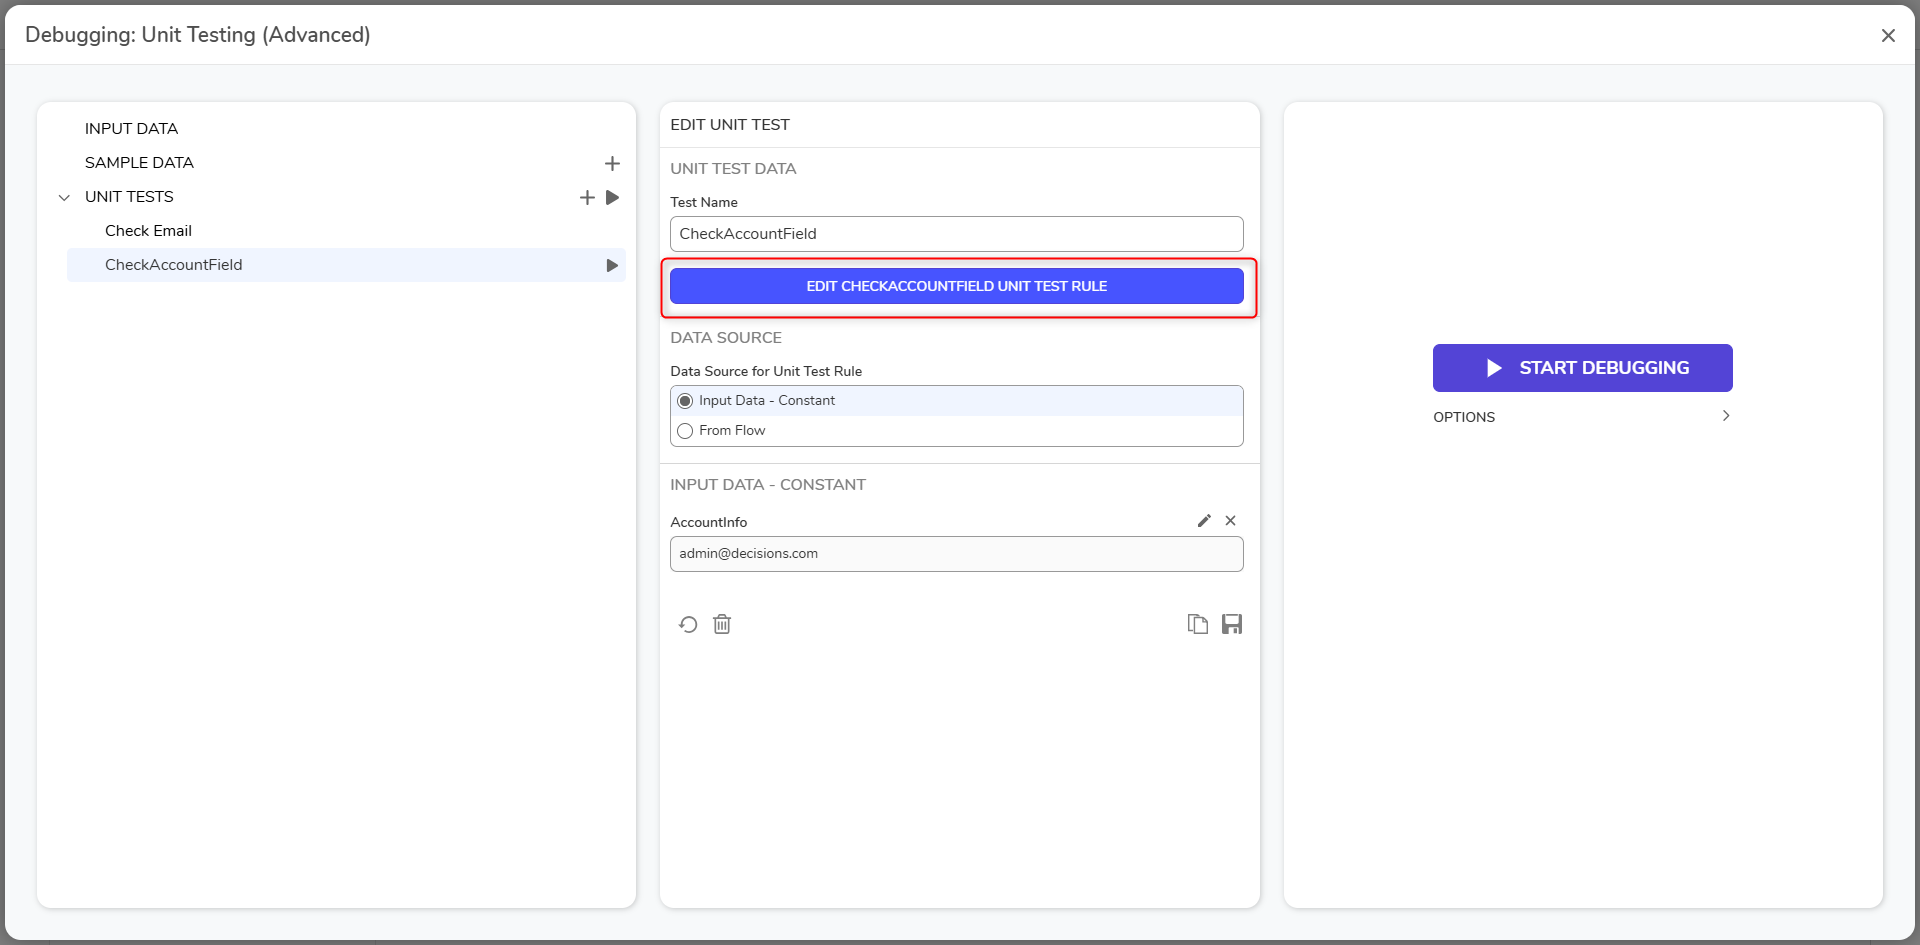
- Configure the Rules to state "if AccountInfo.EmailAddress Contains admin". Click Save and close the Rule Designer.
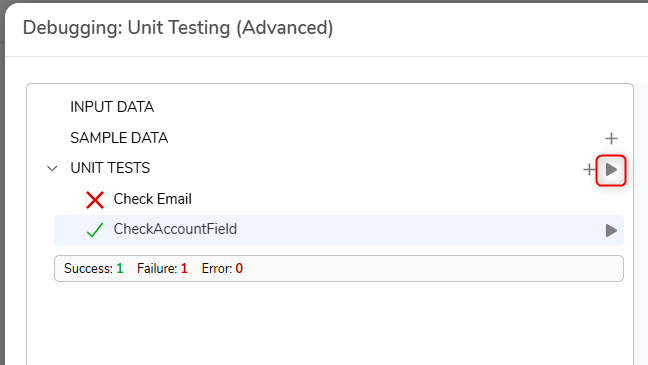
- Save the Rules. Click Run All next to UNIT TESTS to run all Unit Tests listed. The results will display which tests evaluated true (Success) or false (Failure).
Flow As Data Source
Users can also dynamically map in Flow Input Data as a Data Source for Unit Testing.
- From the Debugger, add a new Unit Test.
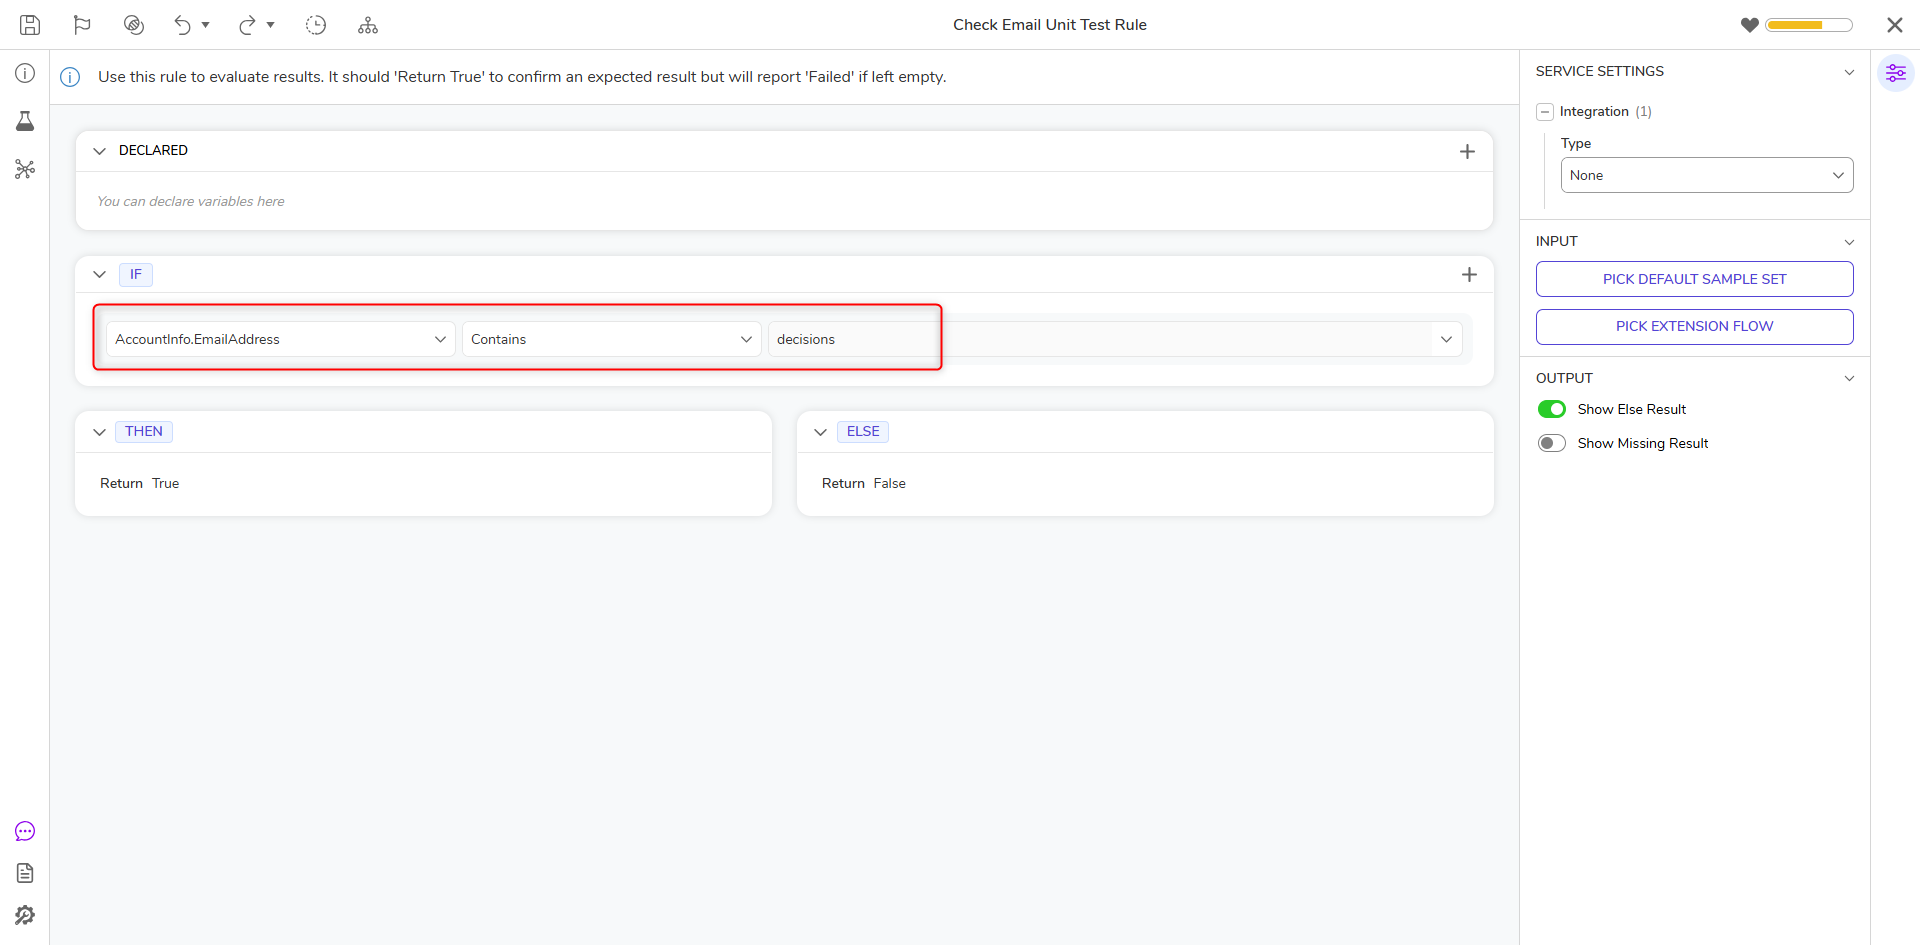
- Click EDIT UNIT TEST RULE and configure the Rule to state if "AccountInfo.EmailAddress Contains decisions". Click Save and close the Rule Designer.
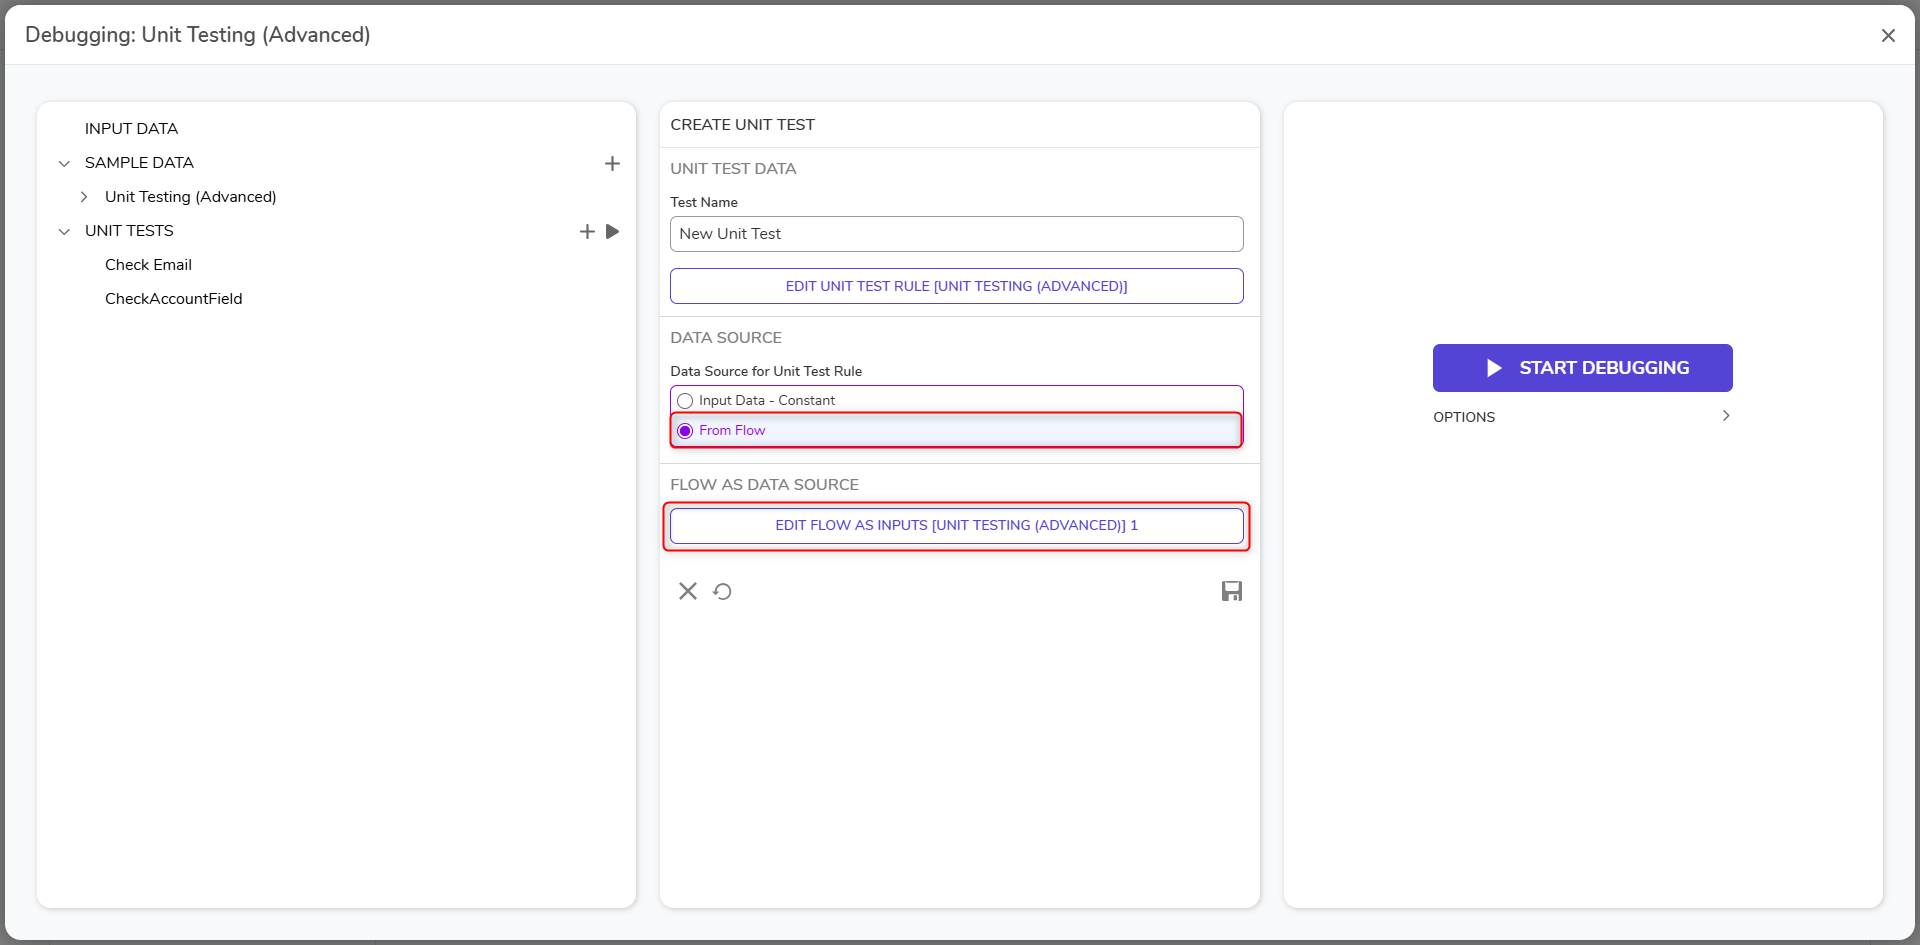
- In the Debugger, under UNIT TESTS > DATA SOURCE FOR UNIT TEST RULE, select From Flow. Under FLOW AS DATA SOURCE click EDIT FLOW AS INPUTS.
- In the Flow Designer, attach a Create Data step to the Start step. On the Properties panel, under DATA > Data to Create, select SHOW EDITOR. Note on Flow ConfigurationThe Create Data step is not required as it is only being used for example purposes. Any Flow logic that Outputs Data may be implemented to create dynamic Source Data for a Unit Test.
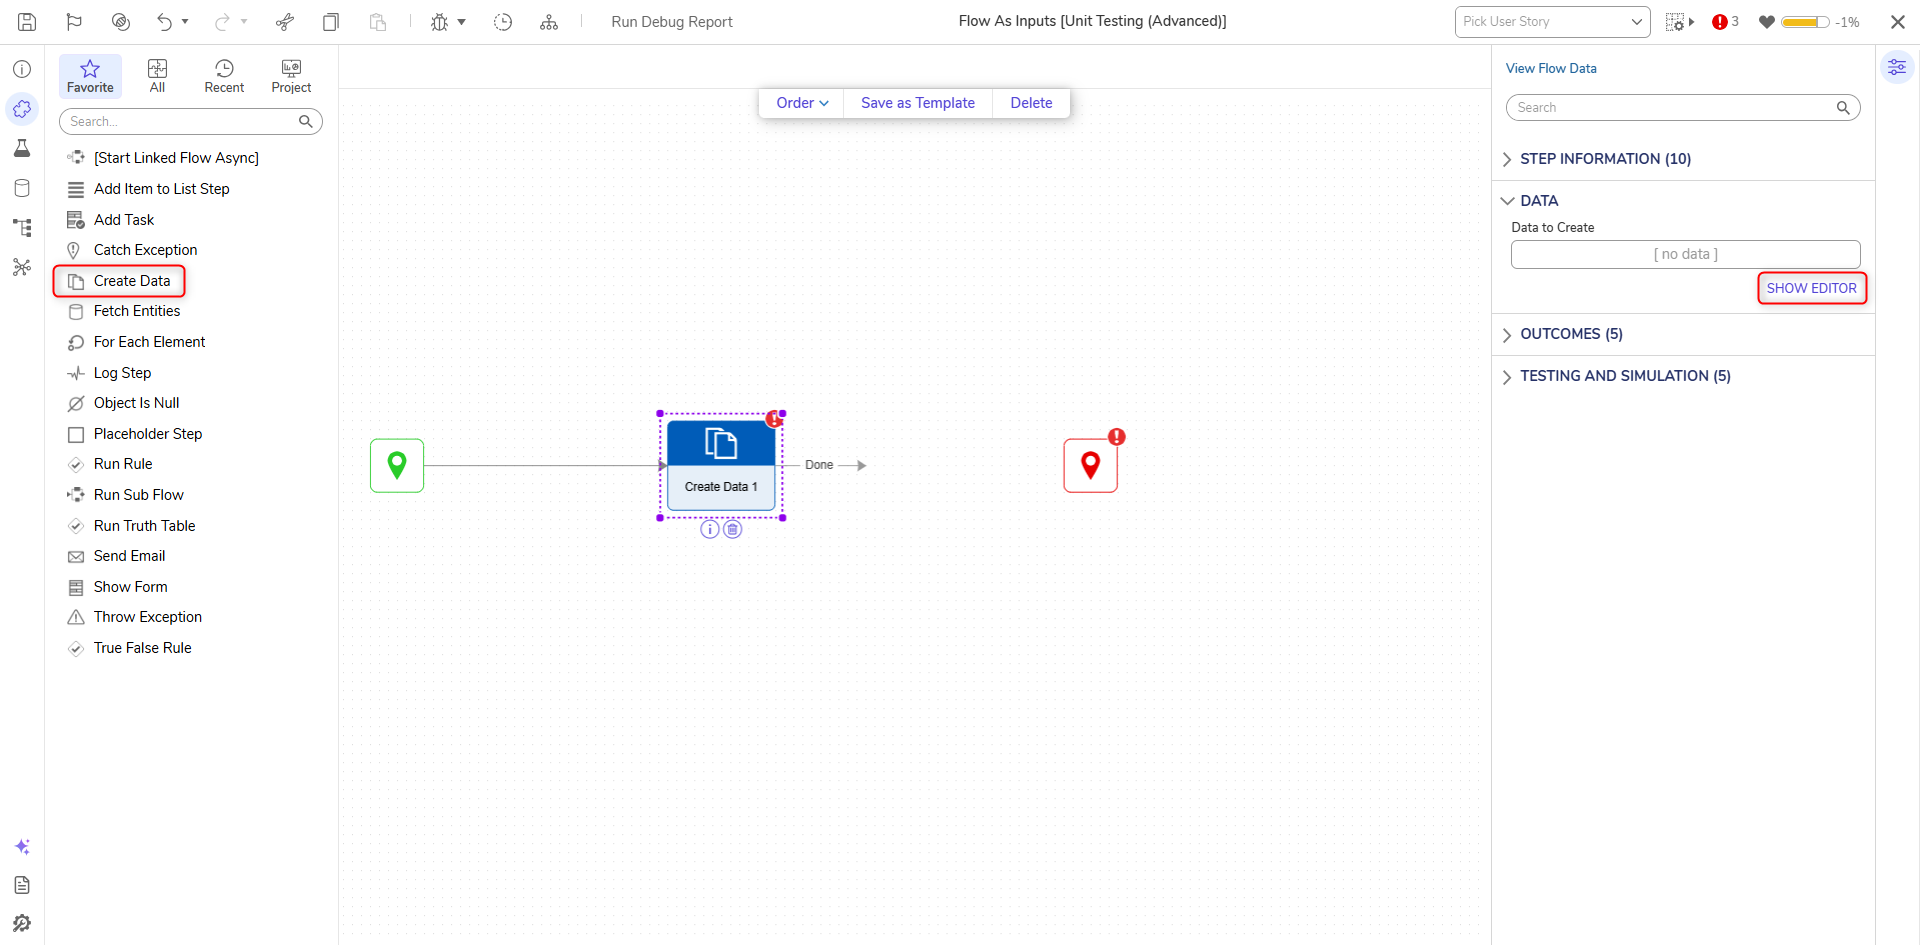
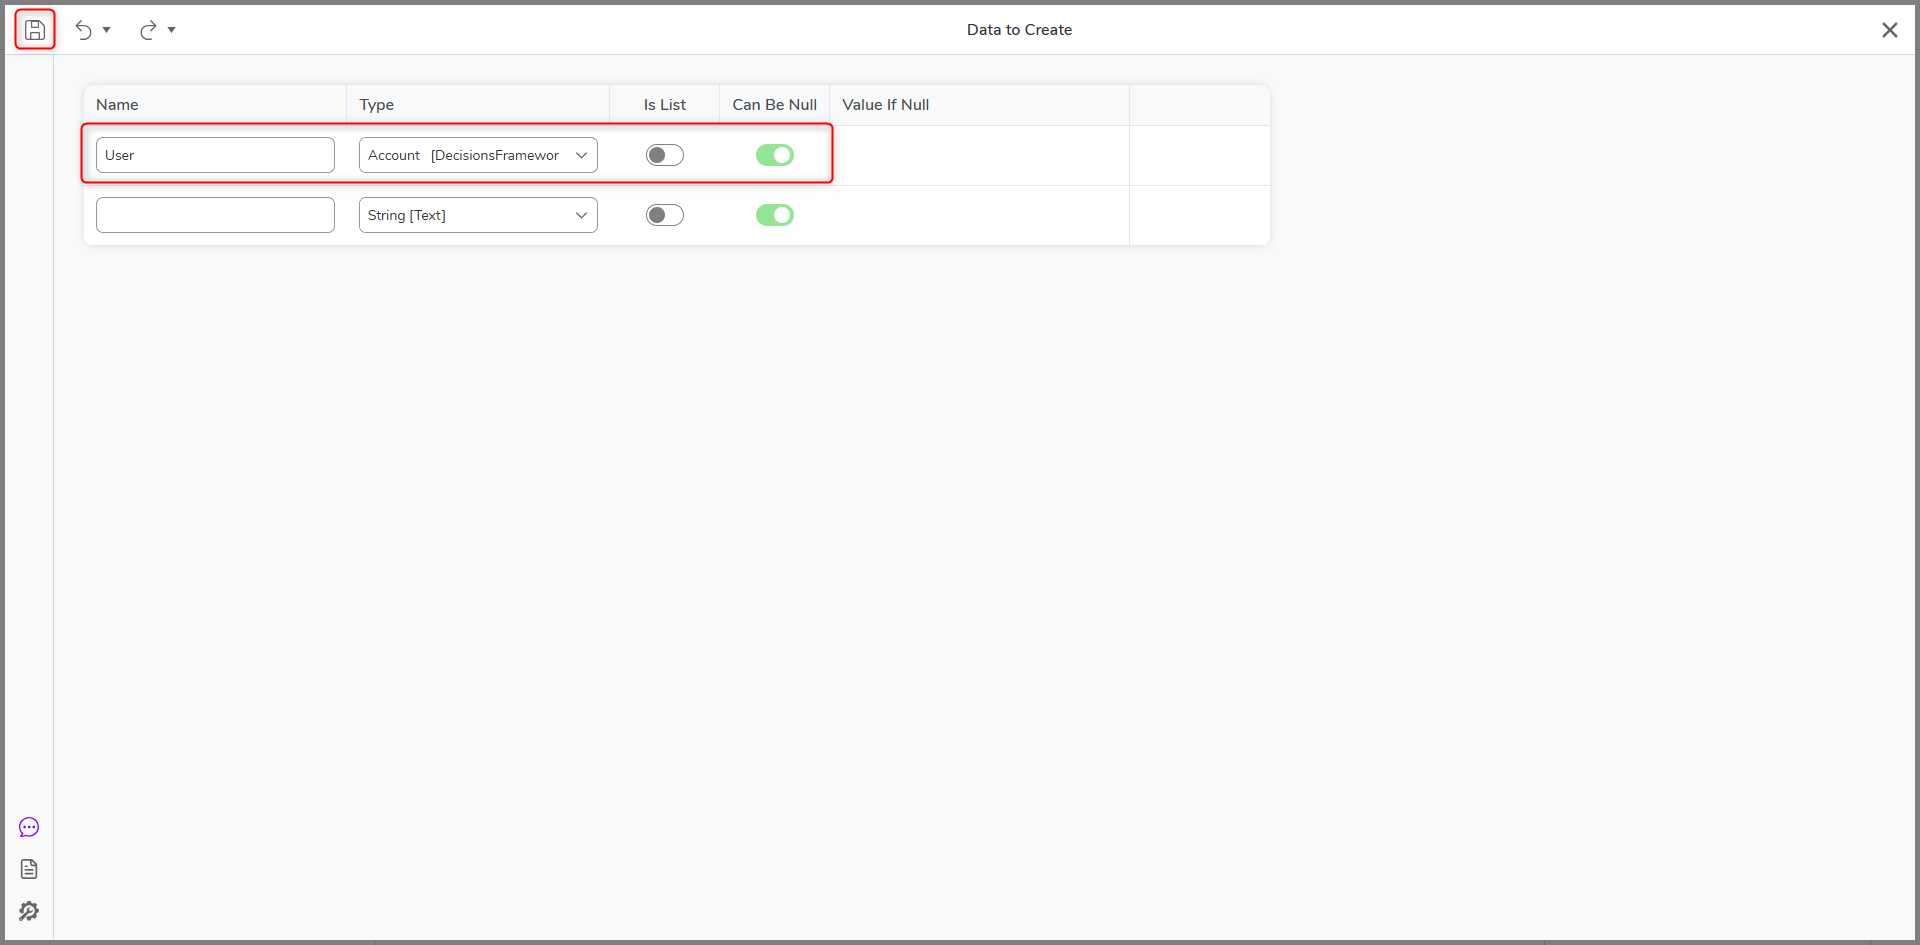
- Enter "User" under NAME and select Account as the TYPE. Click Save and close the window.
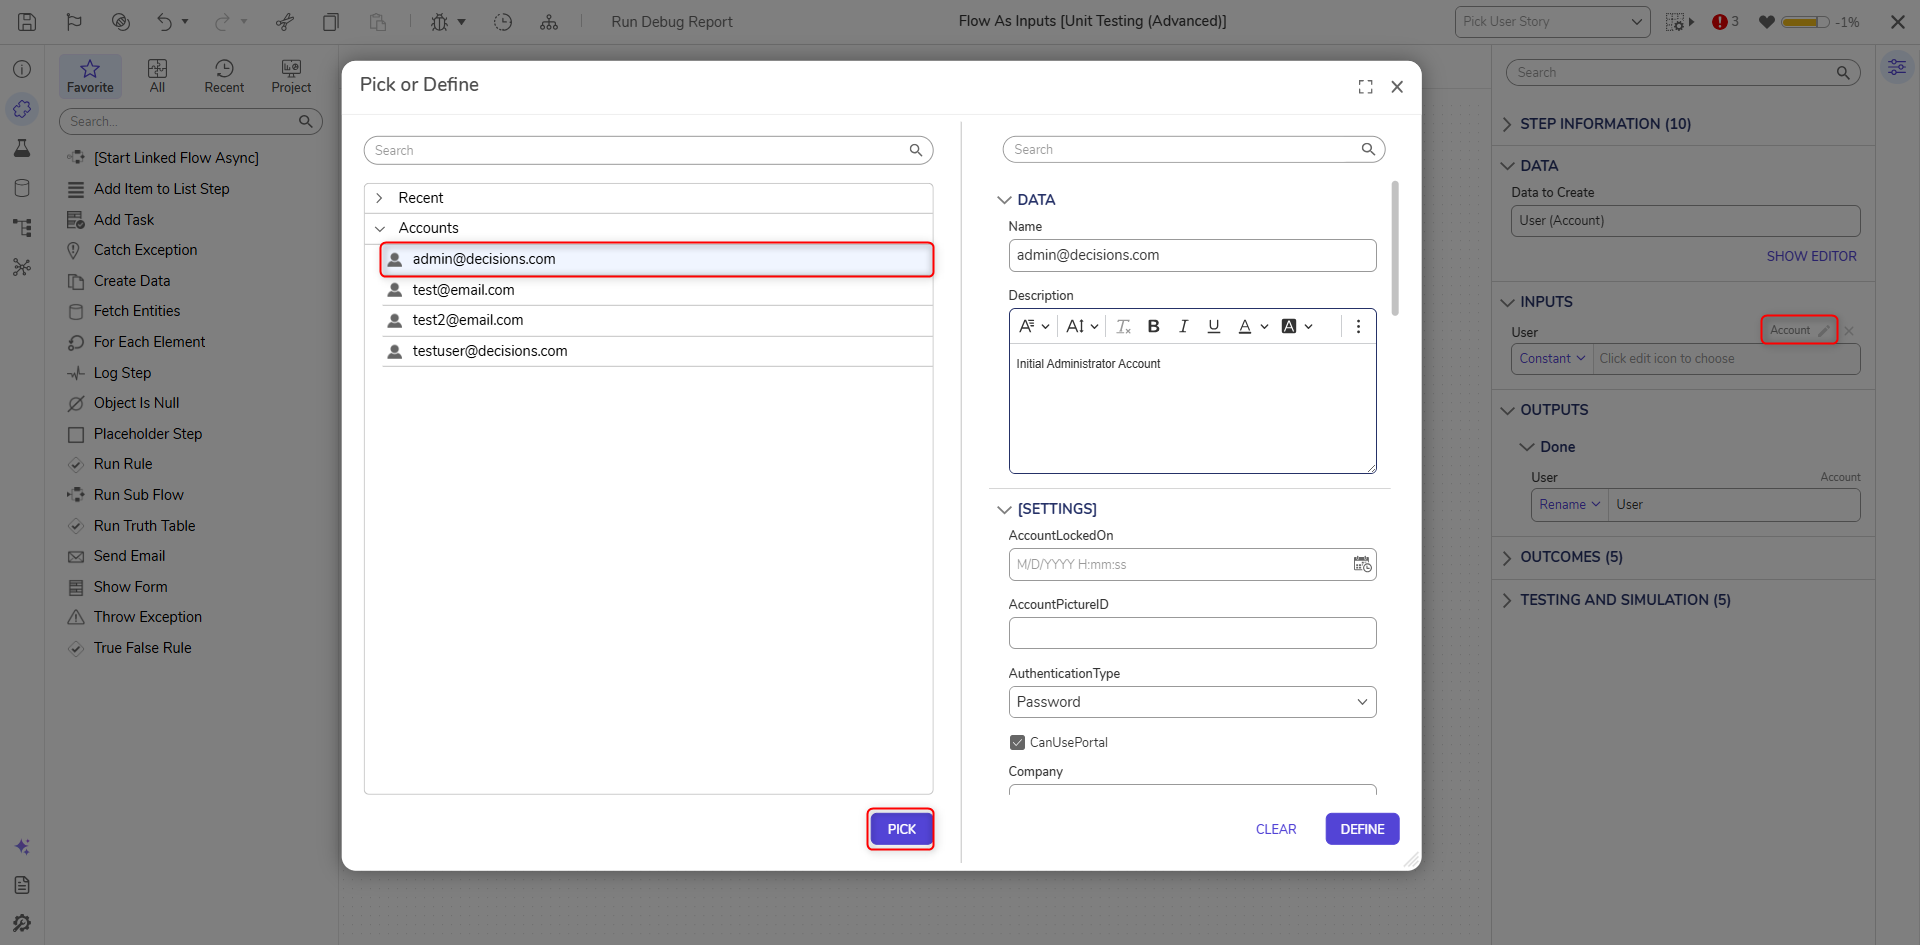
- Configure an input value for the User field by clicking the pencil icon and choosing an account.
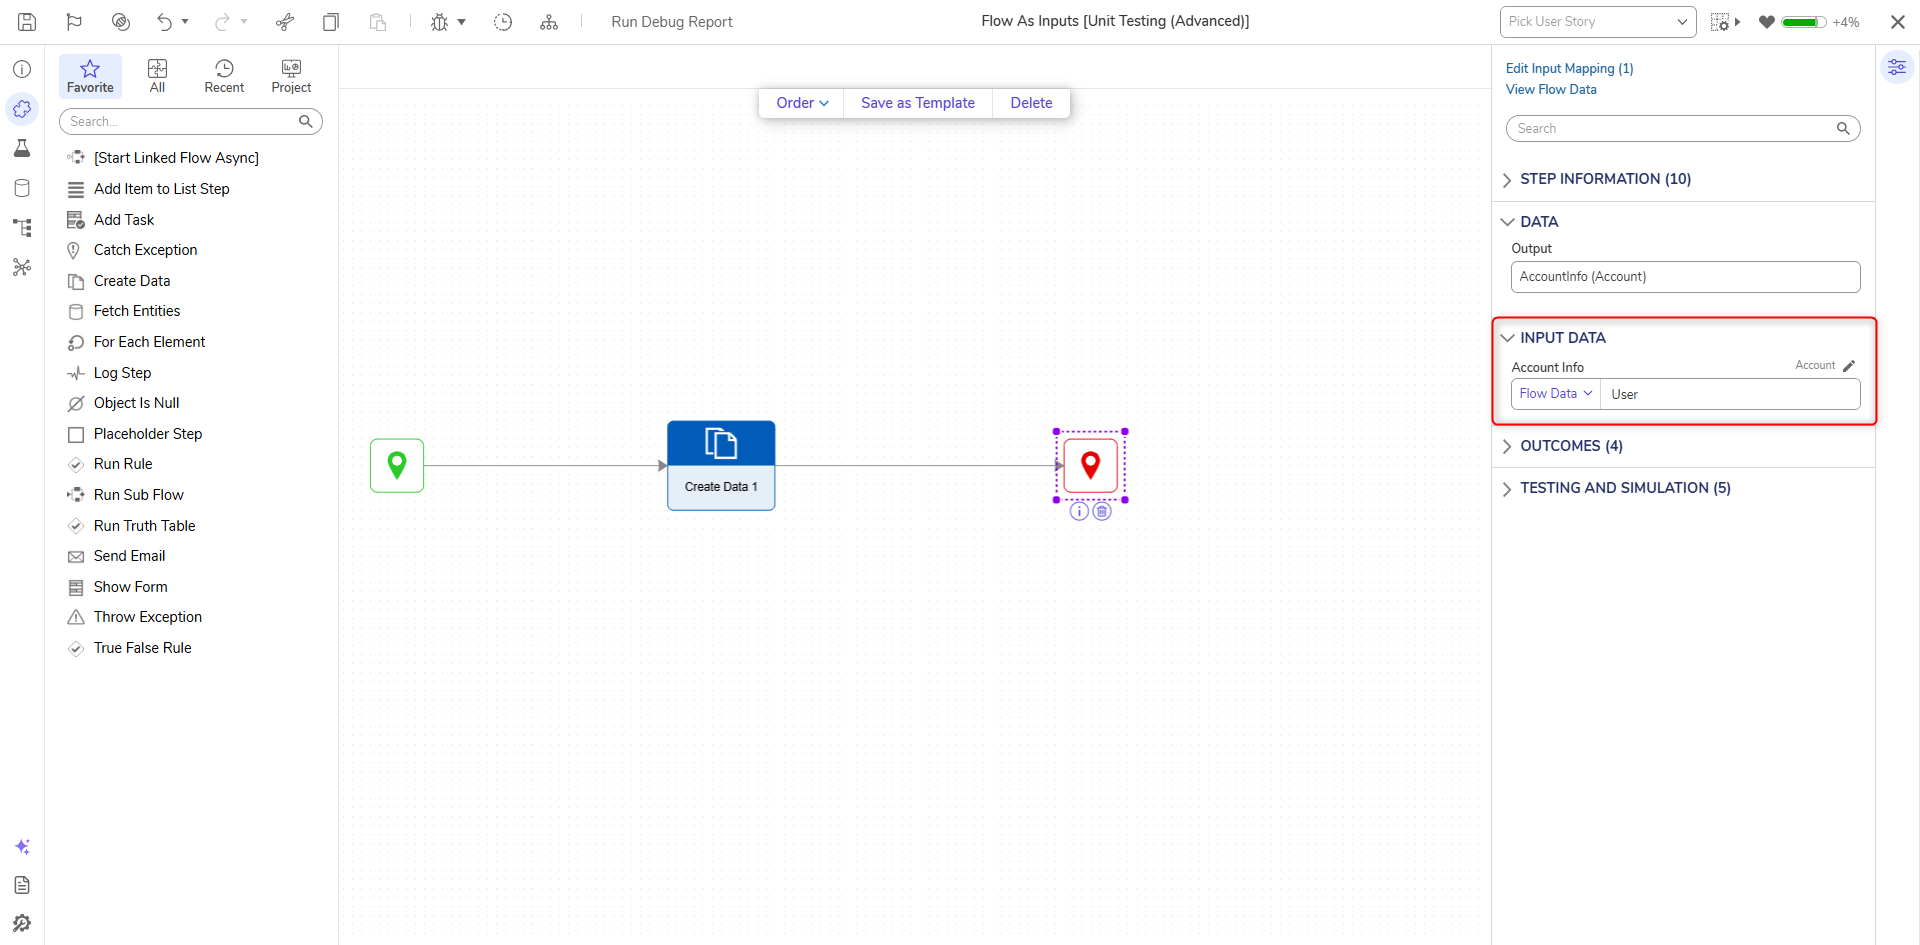
- Add Connect the Done path to the End step. Select the End step. On the Properties panel, change the mapping type of Account Info to User.
- Click Save and close the Flow.
- Save the Unit Test, then click Run All.
Using Unit Tests with Step Simulation Options
Running a Unit Test on a specified step is called Step Simulation. Step Simulation can be specified on a step or on a specific direction in a Flow.
- In the Flow, attach a Placeholder Step to the Start step by navigating in the Toolbox panel to the ANNOTATIONS category. On the Properties panel, under Outcomes, click ADD.
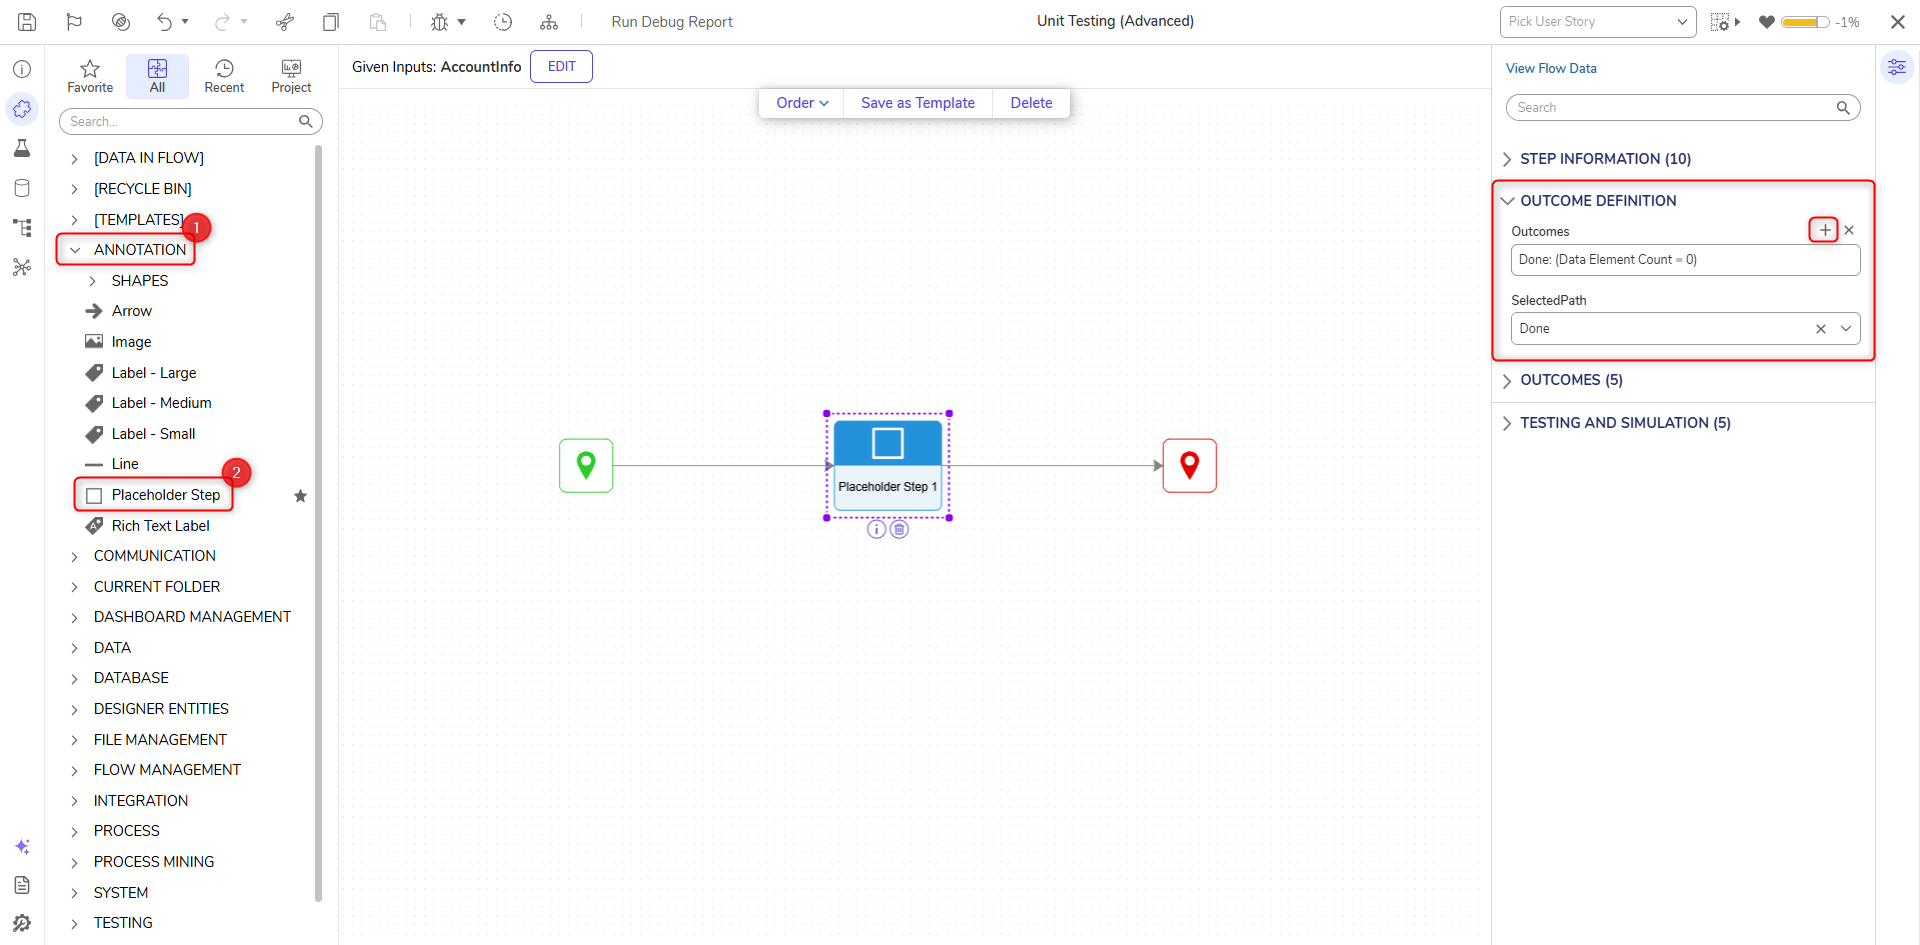
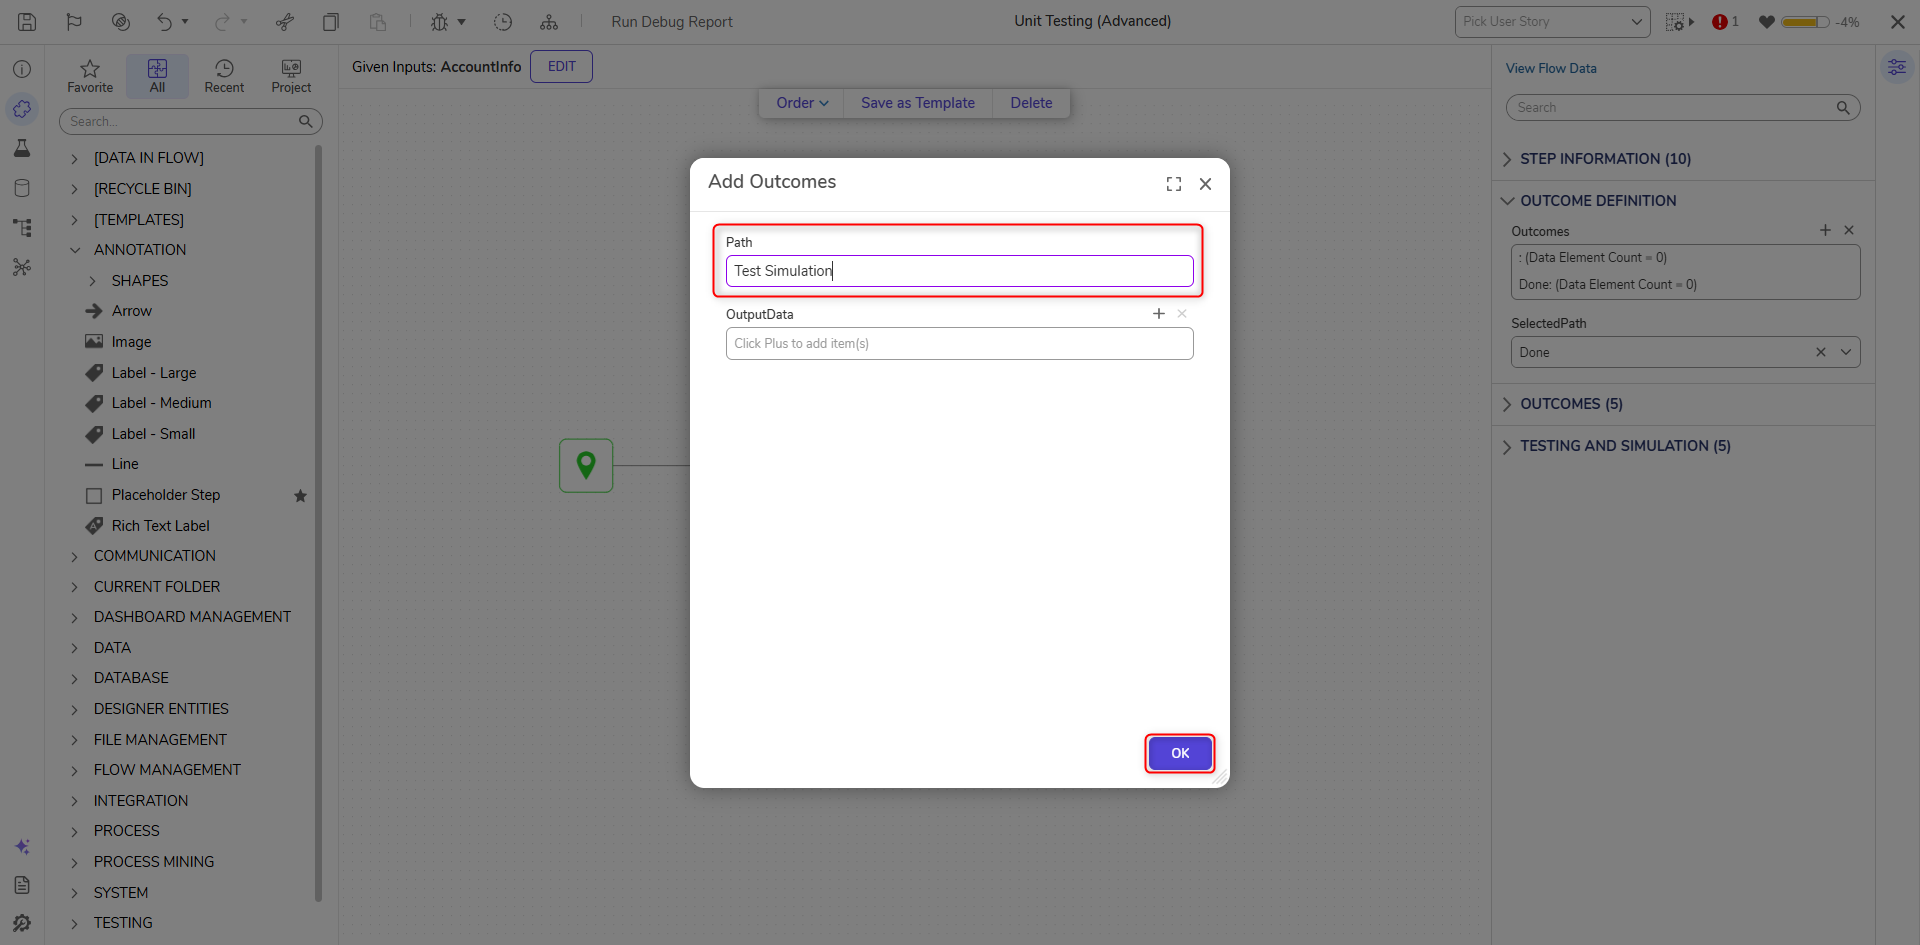
- Enter "Test Simulation" for Path then click OK.
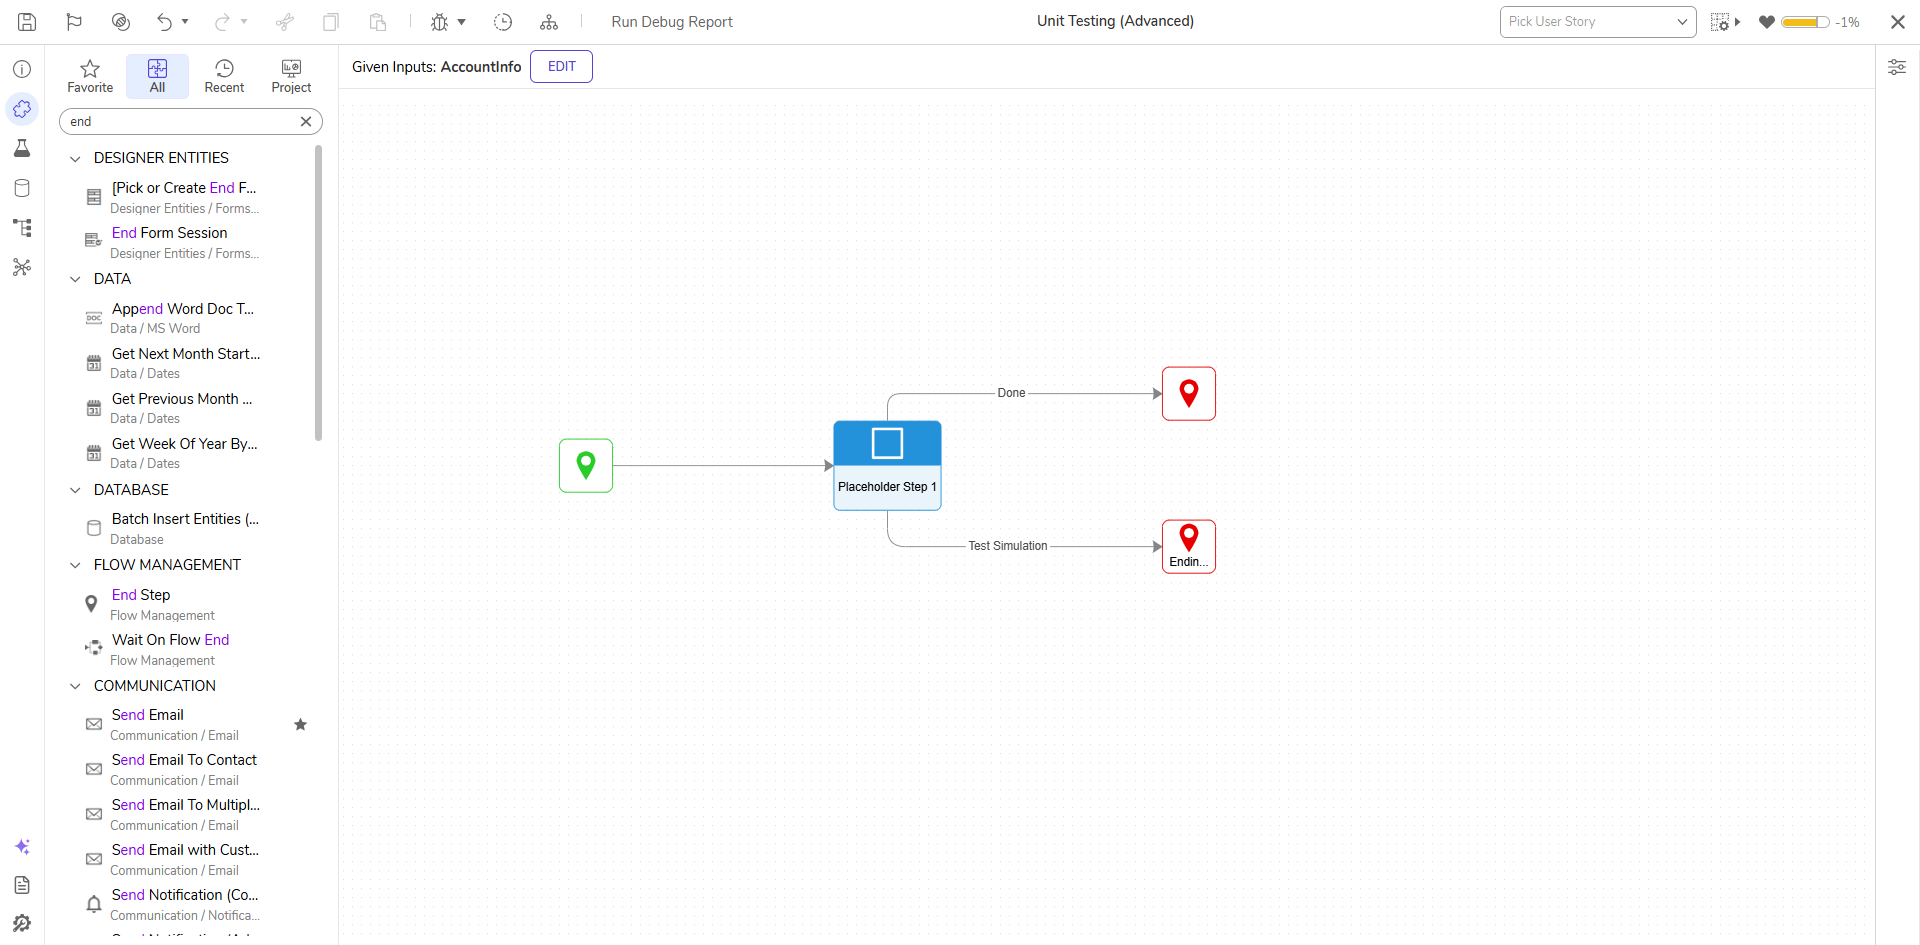
- Connect the Done path to the End Step.
- Add another End step from the Toolbox panel and name the step.
- Connect the Test Simulation path to the newly added End step.
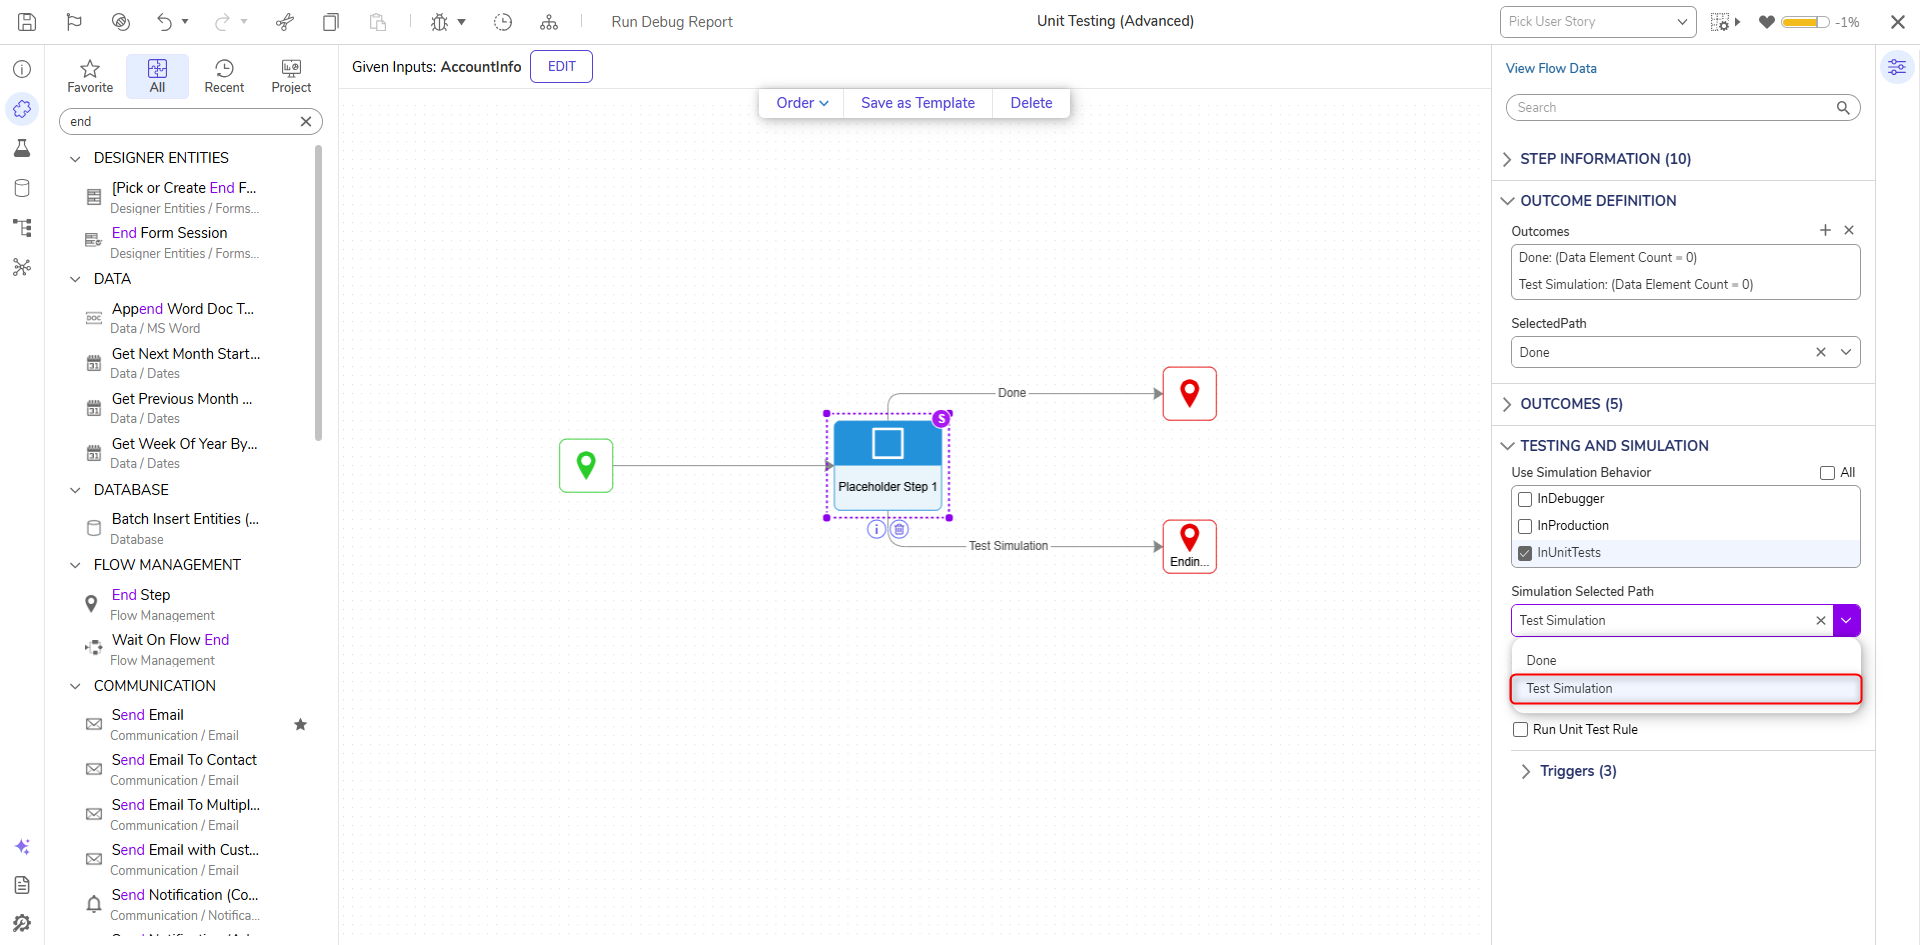
- Select the Placeholder Step and navigate to the TESTING AND SIMULATION category on the Properties panel.
- Under Use Simulation Behavior, select InUnitTests to run the Simulation Behavior in the Debugger. This will then display a yellow S icon on the step to mark that it is using a Simulation Behavior.
Simulation Behavior Description InDebugger Run the test in the Debugger on the selected pathway InProduction Run the test at Production on the selected pathway InUnitTests Run the Unit Tests in the Flow on the selected pathway 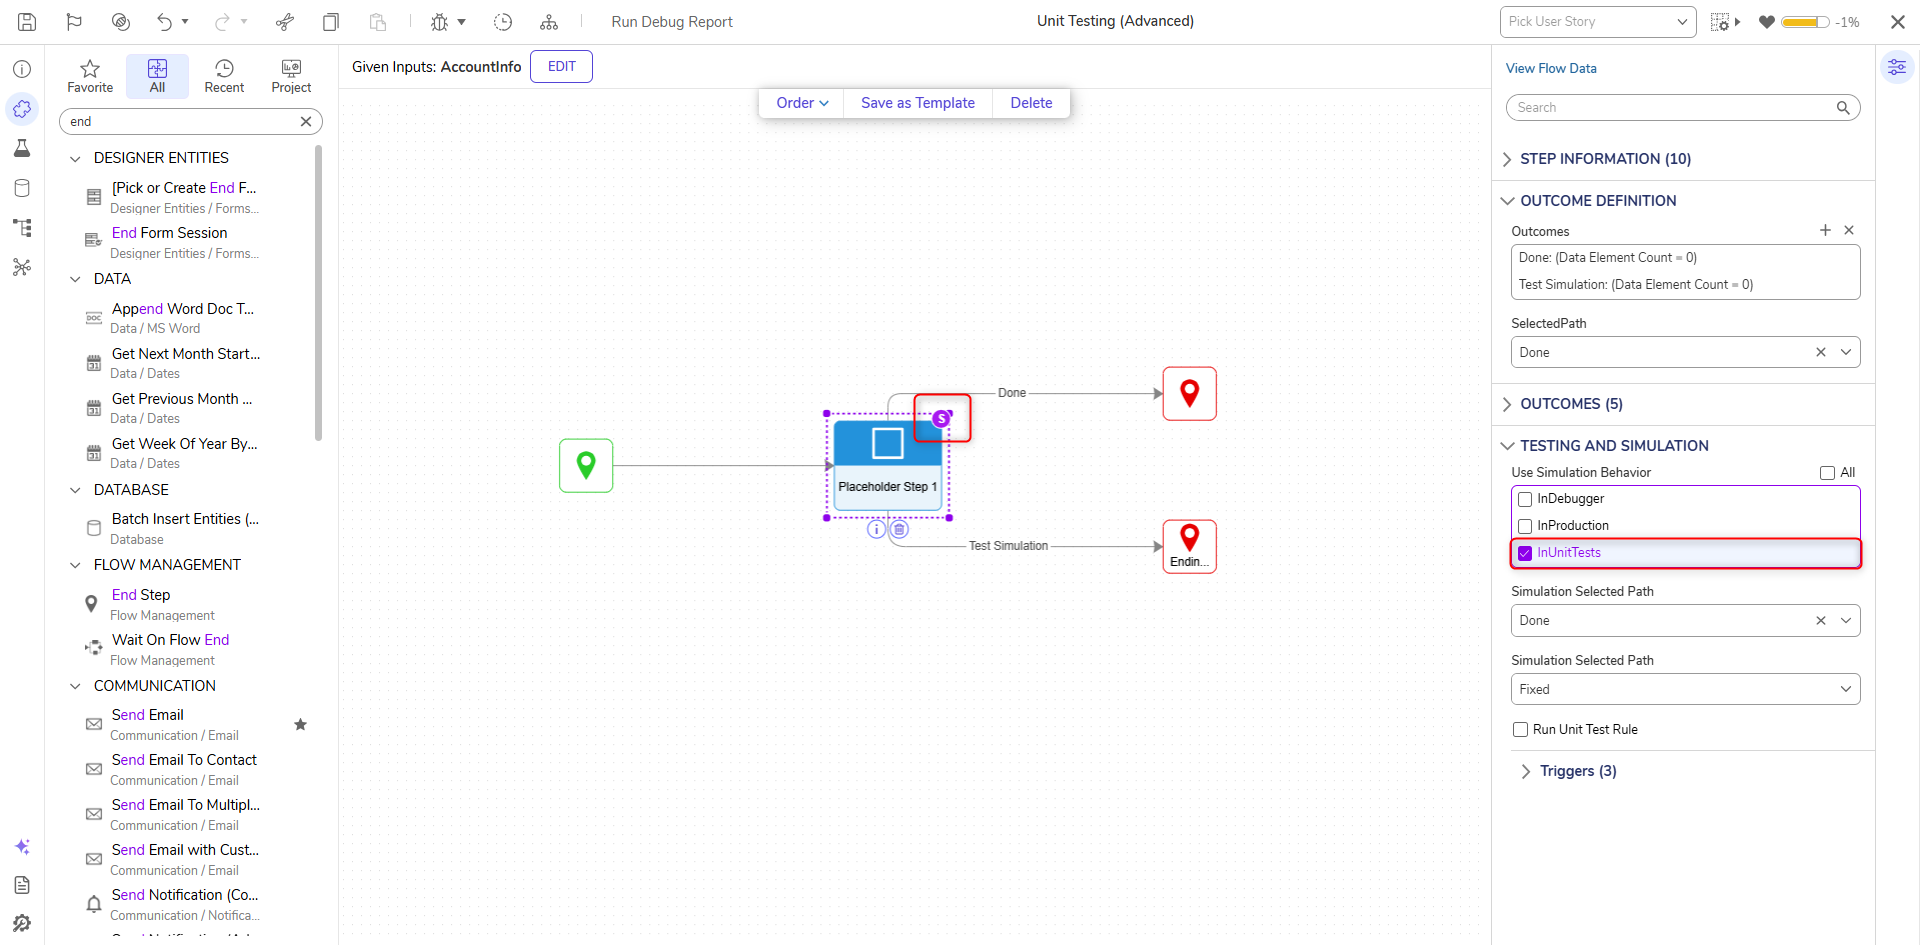
- Under Simulation Selected Path, expand the dropdown and select the Test Simulation to run the Simulation behavior on that specific path.
- Check the Run Unit Test Rule box, then click EDIT PLACEHOLDER STEP 1 UNIT TEST RULE to define the Unit Test Rule that will be run on the selected path.
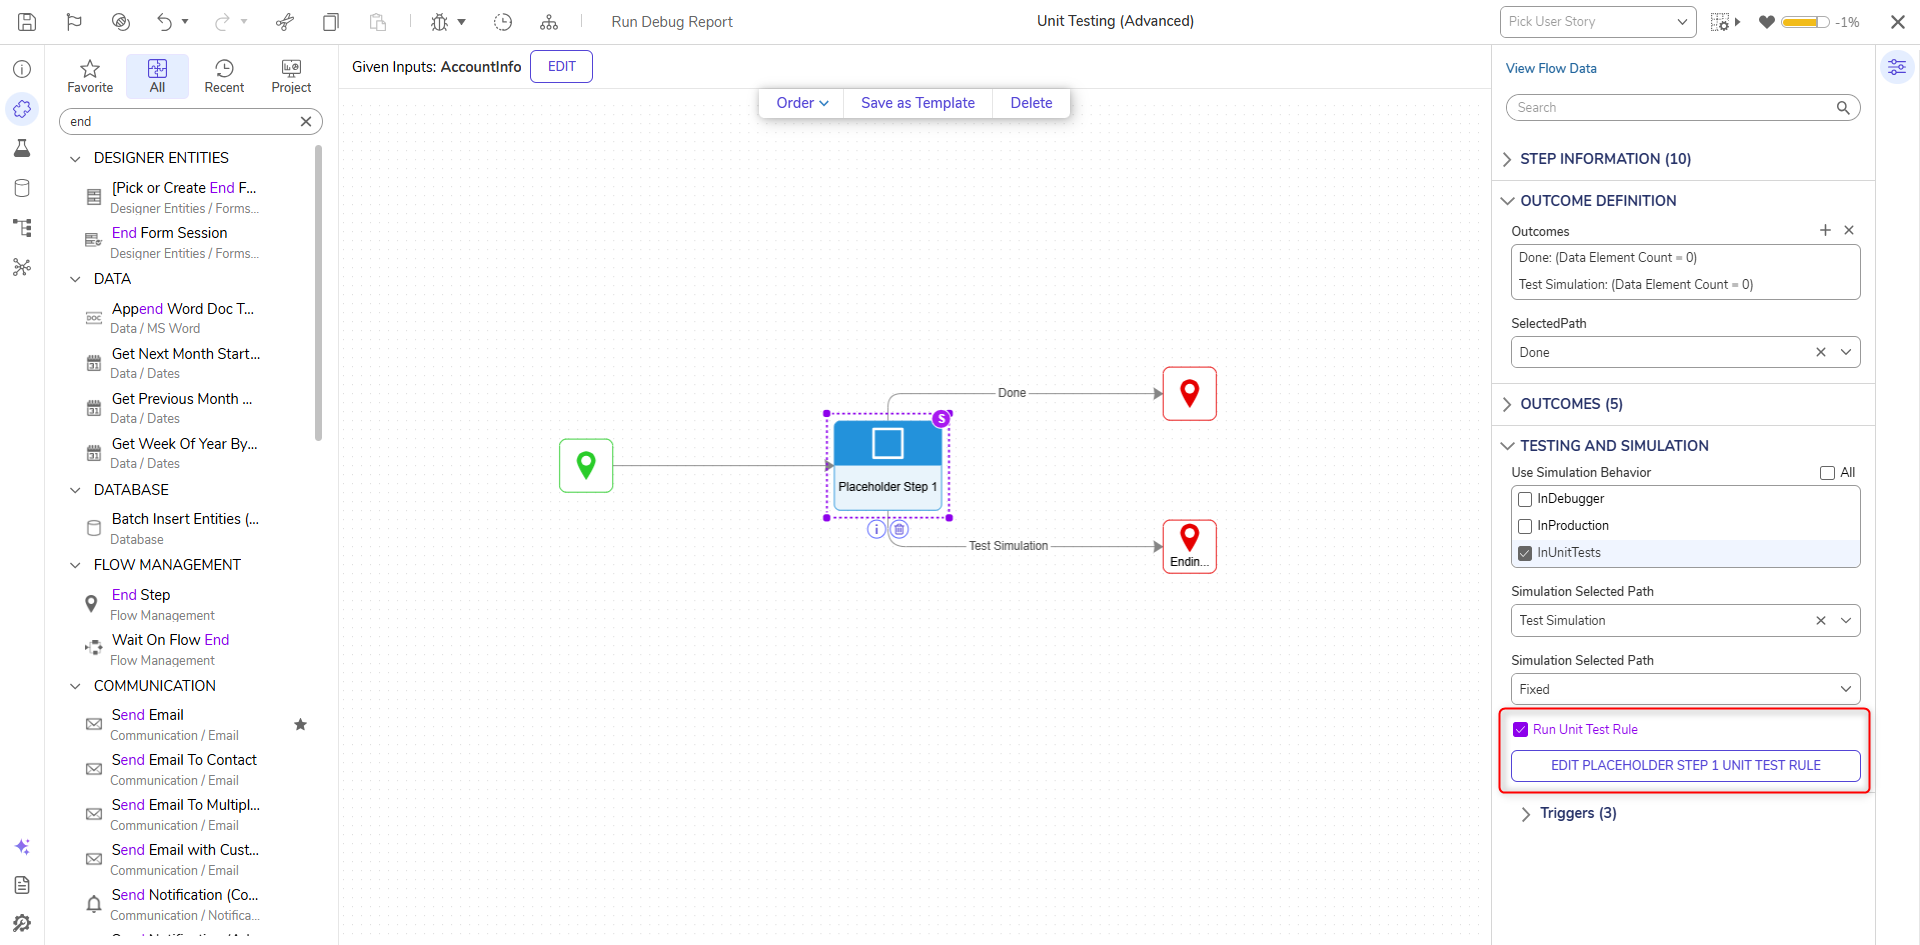
- Define the Rule to state "if Account.EmailAddress Contains docteam". Click Save and close the Rule.
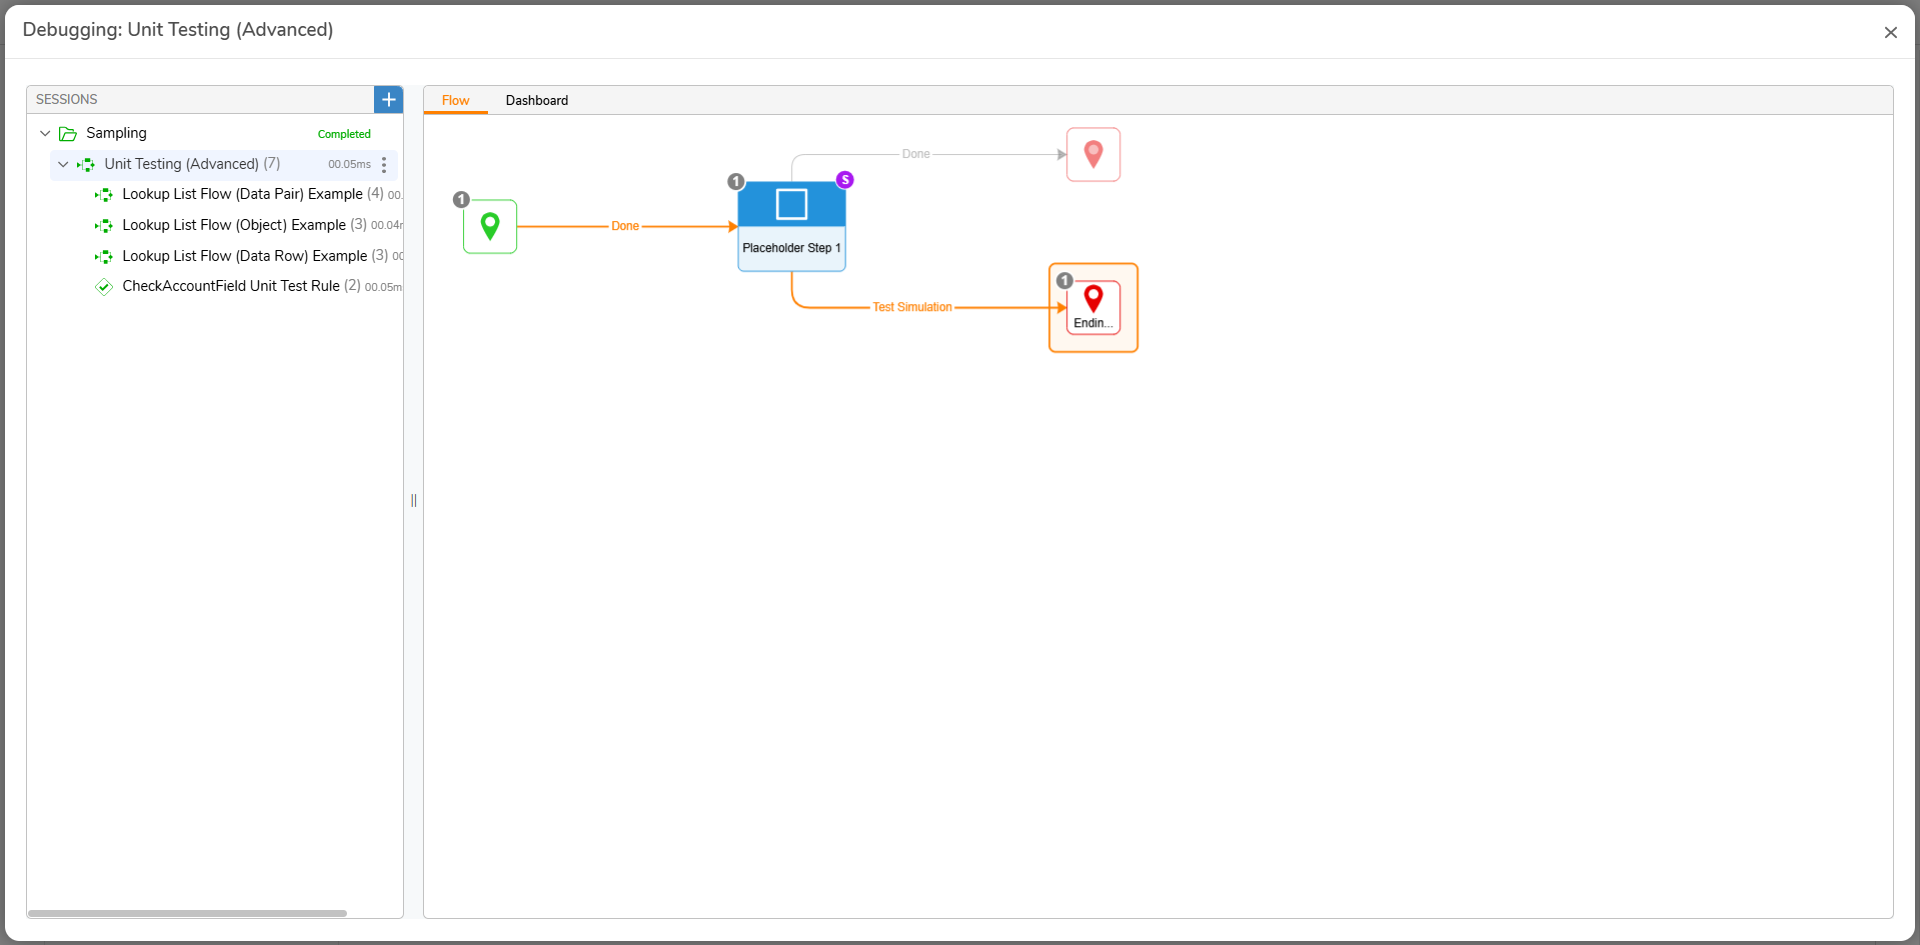
- Click Debug.
- Under UNIT TESTS, select the CheckAccountField Unit Test and Run the Unit Test. If the Unit Test evaluates False the Flow will stop in the Debugger. If the Unit test evaluates True the Flow will continue to deploy in the Debugger.
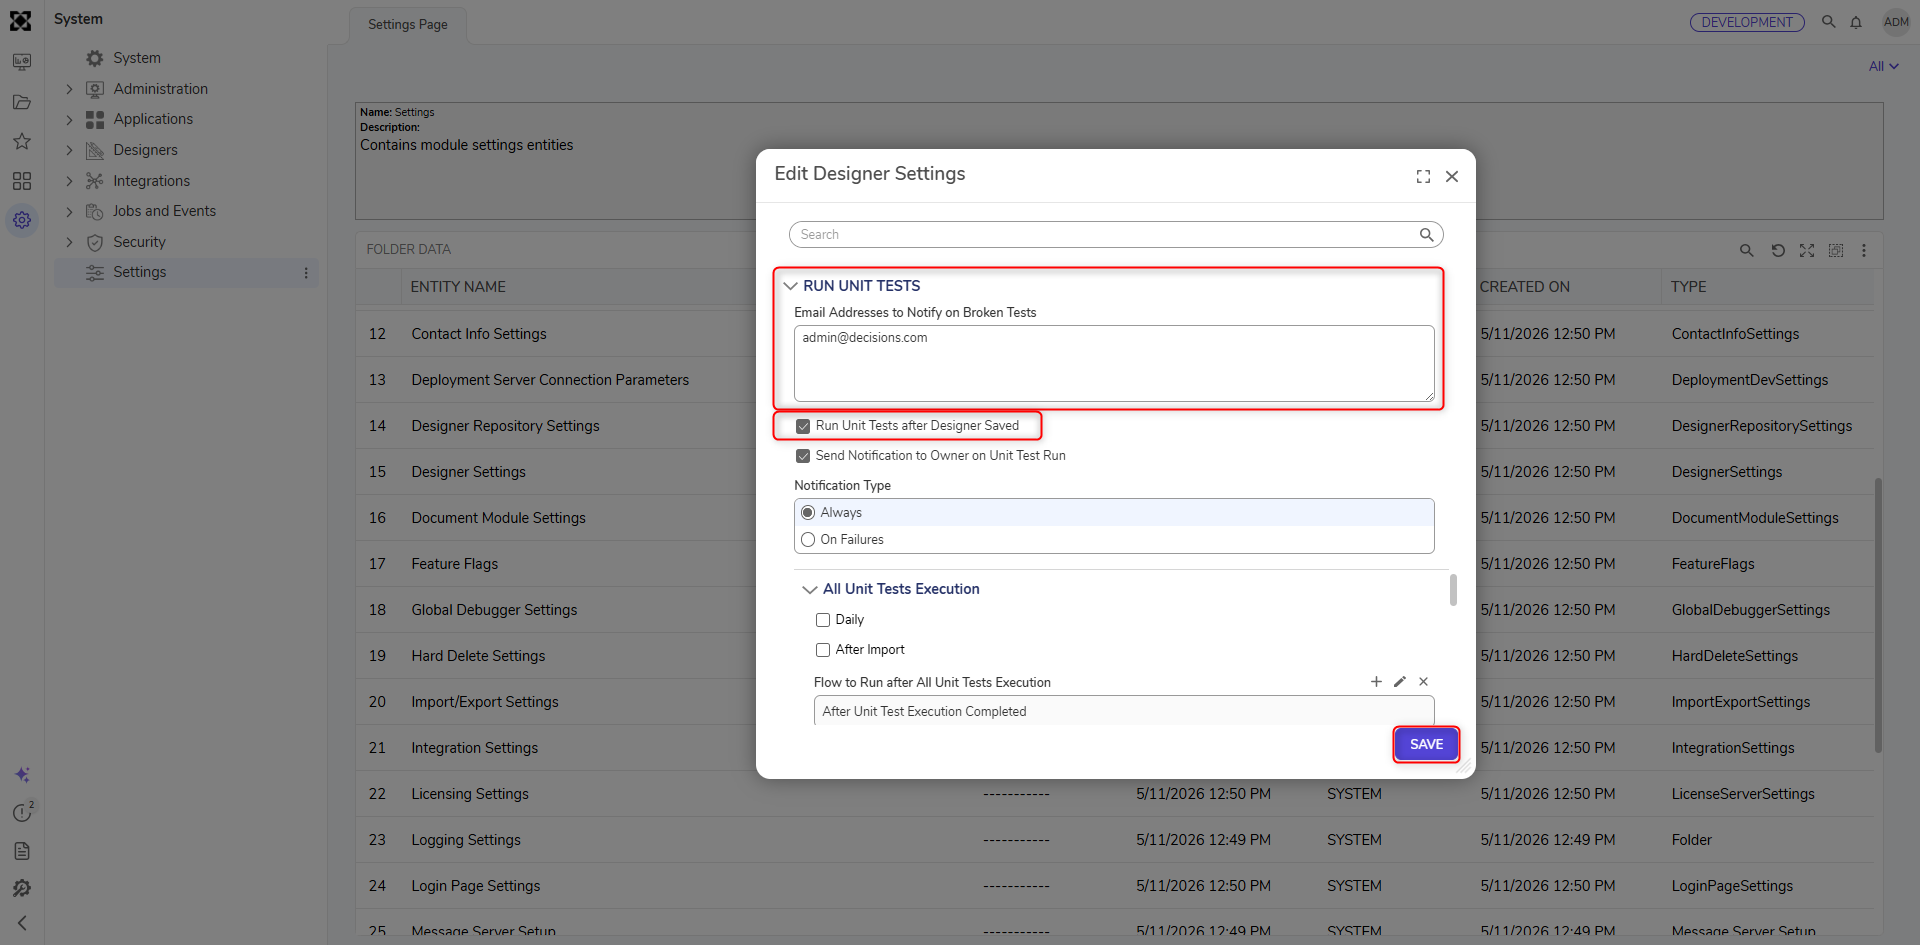
Creating a Unit Test Completion Notification Flow
The Flow to Run After Unit Tests Execution setting allows users to assign a specific Unit Test Completion Notification Flow to start either daily at a set time, after saving the project associated Flow or Rule, or after importing the Flow or Rule into an environment. When initialized, this Flow sends an email notification to the specified account with unit test failures and successes. When testing specific scenarios, the use of the Unit Test Completion Notification Flow helps pinpoint errors soon after it initially occurs.
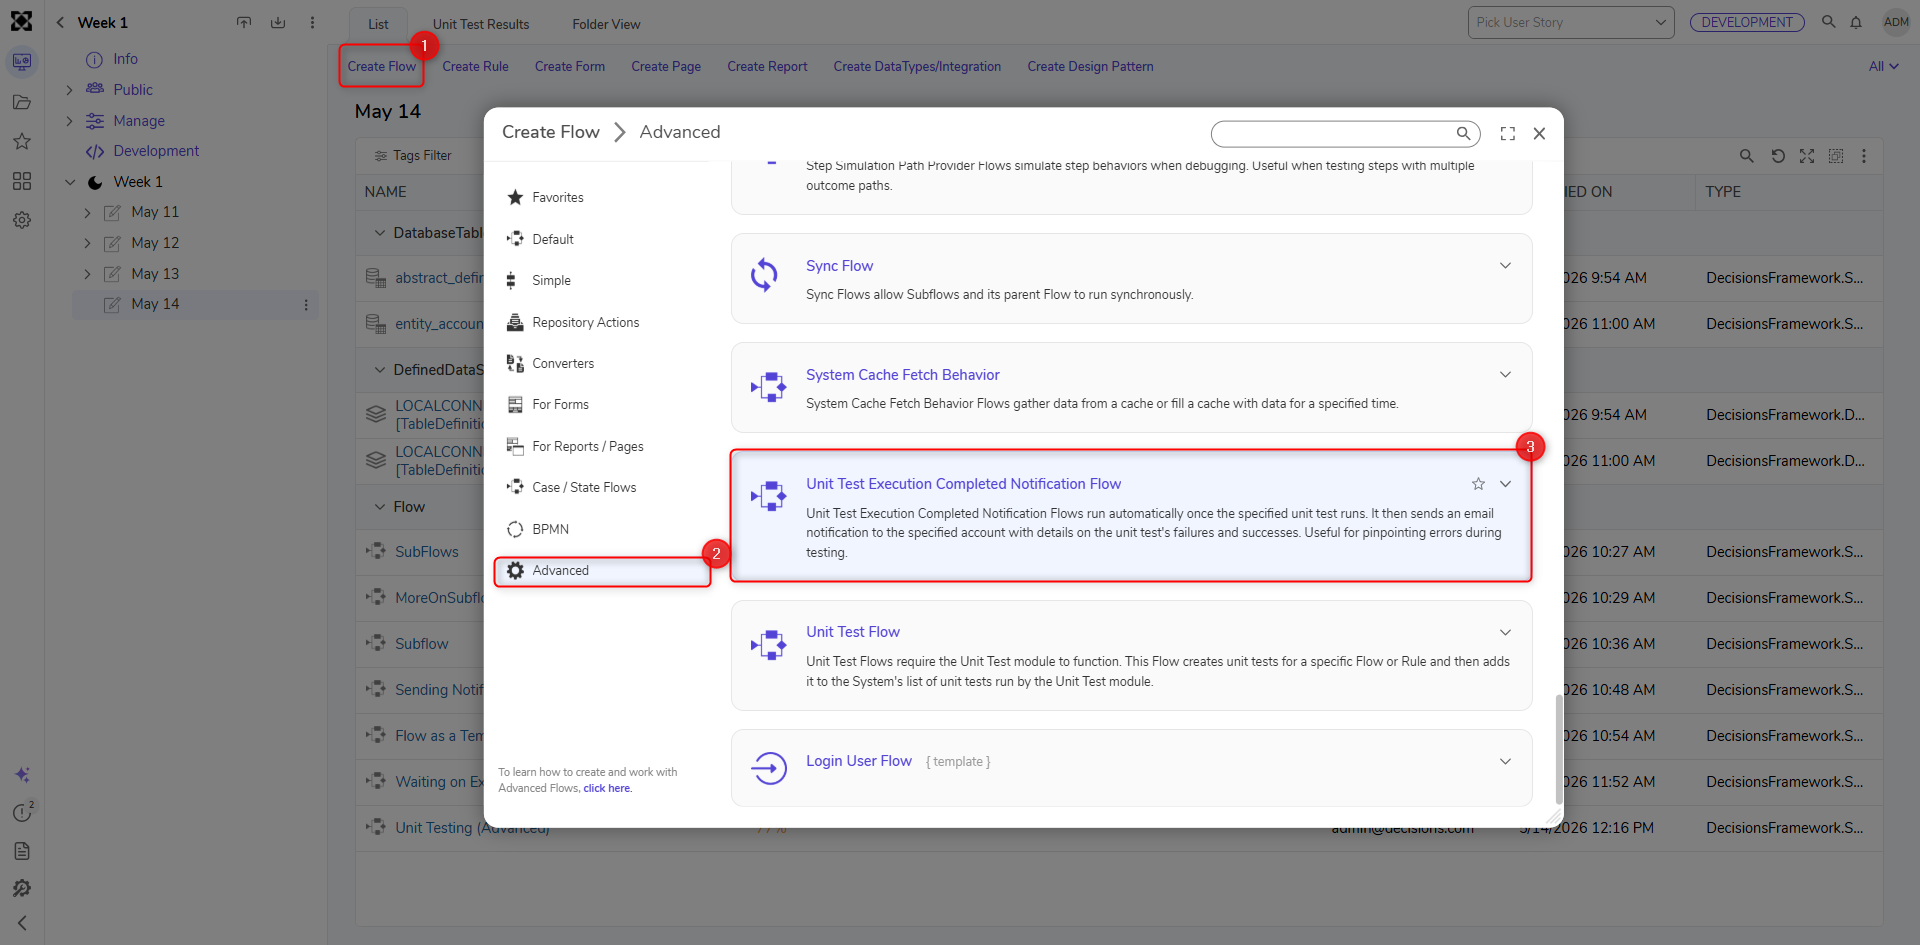
- In a Designer Project, select CREATE FLOW. Select Advanced and select Unit Test Completion Notification Flow.
- Attach a Send Email step from the Toolbox and connect it to the Start and End steps
- Configure the Send Email step to connect to desired email server's specifications. Debug the Flow and, upon successfully receiving the email, close the Flow Designer.
- In the Studio navigate to Settings > Designer Studio Settings > Run Unit Tests to view the Flow To Run After Unit Tests Execution setting. Select PICK and choose the created Flow.
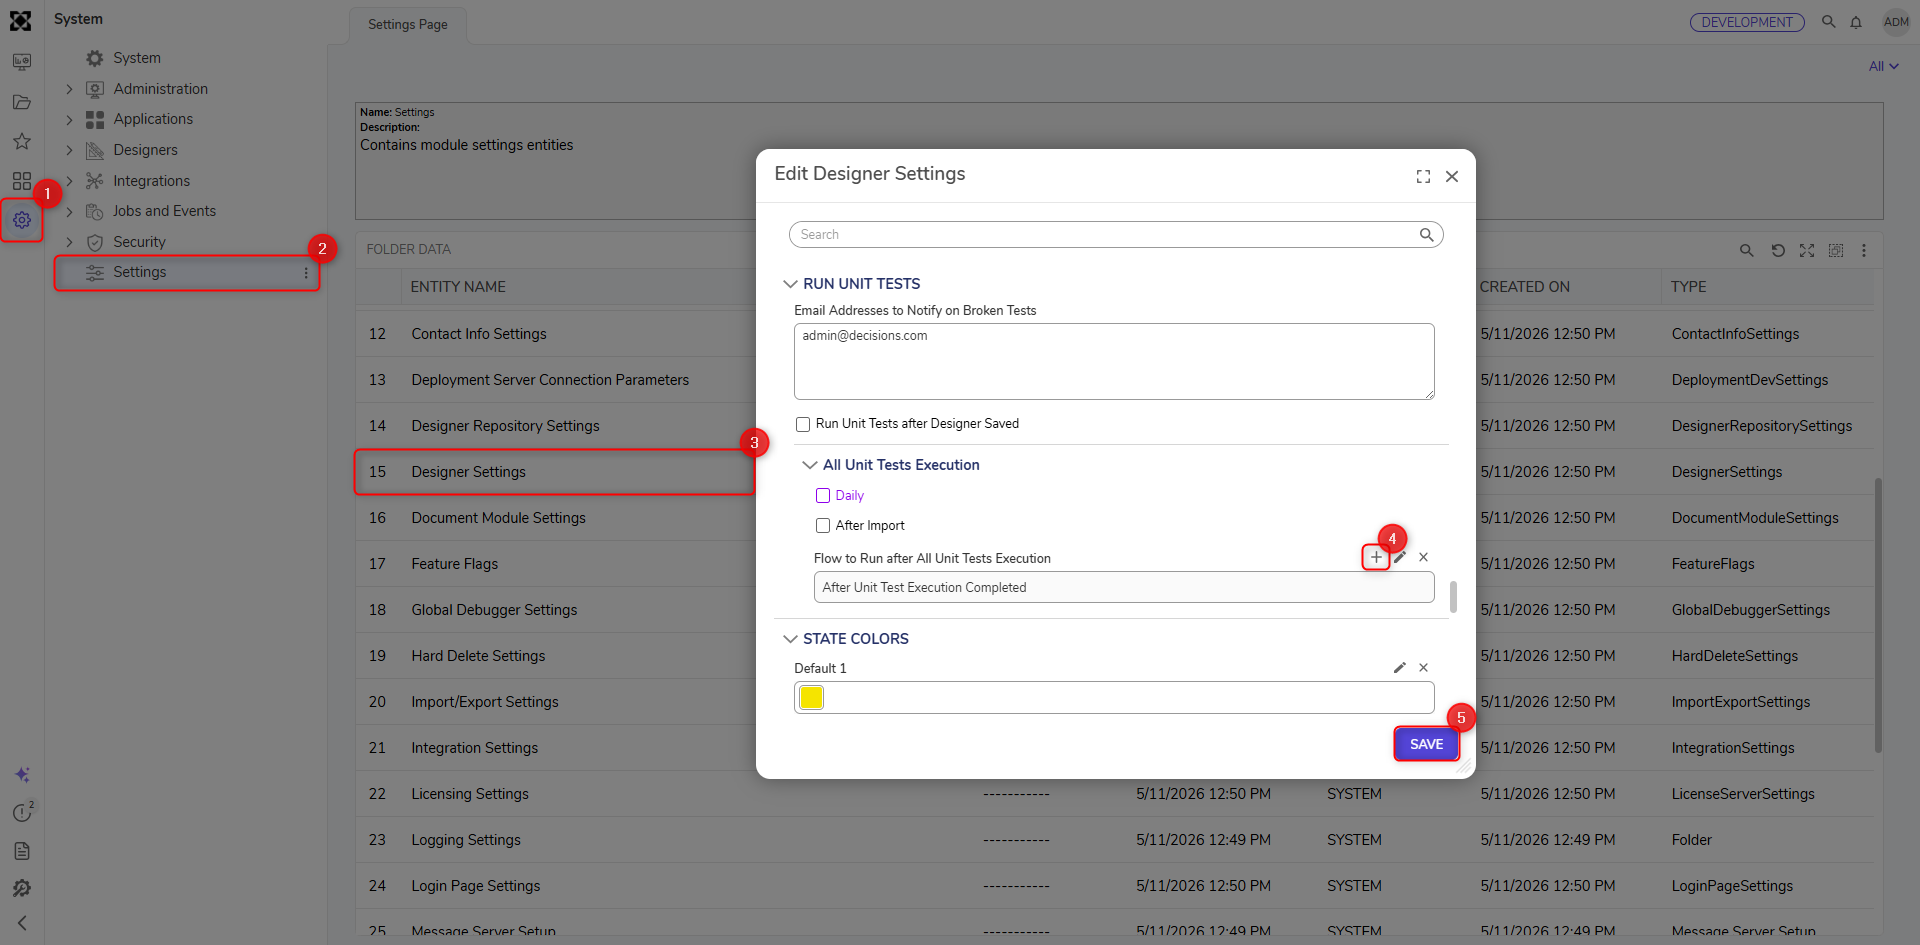
- Select the interval to run the Notification Flow. For this example, the After Save option is selected. Enter an email address and click SAVE.
- Check the inbox of the specified receiving email account. An email reporting all project-associated Unit Tests along with individual success and failure information will appear.
Using Production Data for Unit Tests
To use real production data as a basis for unit tests, use the Save Sample Data step. Add the step to a Flow generating the desired data and it will be available in the Unit Test screen in the Debugger.
| Property | Description | |
|---|---|---|
| Category | This is used as the name of the Unit Test within the Debugger | 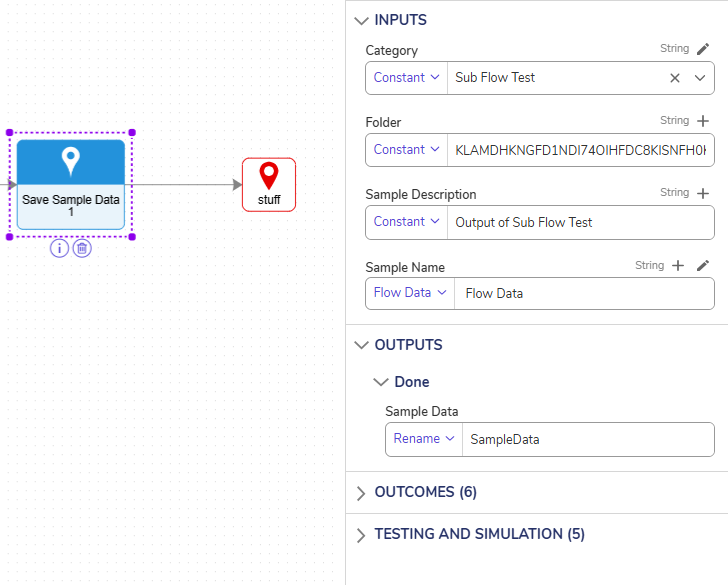 |
| Folder | The FolderId of the Decisions Folder that will hold the saved data. This must be set up first. | |
| Sample Description | The description of the recorded sample data. | |
| Sample Name | This is the name the data will be saved as within the Folder, and what will appear when looking for data to run under the Category name in the Debugger. |