Overview
The Login User Flow Behavior allows the user to incorporate a process that triggers in Decisions based on a User Login Event. A User Login Event can be set to run whenever a user logs in to the Portal, and adds functionality around the login process.
Why Use a Login Flow?
Some login scenarios require a user-facing form to appear before accessing the Decisions portal. This can be used to display an annual terms of service agreement, collect updated account information, or present other required content that must be acknowledged or submitted before proceeding.
To support this, a login behavior with UI can be configured. This type of Flow runs before the portal loads and allows for form-based interaction. It ensures that the necessary information is collected or shown before any other activity within the platform.
This documentation focuses on the Login User Flow Behavior, which runs after login and does not support user interface elements. For cases that require showing a form during the login process, use the login behavior that supports UI.
Types of Login Flows and When to Use Them
Decisions supports several types of login-related behaviors. Each serves different authentication or post-login scenarios. The following describes when each is typically used.
1. SAML Login Flow
A SAML Login Flow handles users who authenticate through an external identity provider (IdP) using the SAML protocol, such as Entra ID.
Use cases include:
- Routing or grouping users based on security groups or domains defined in the IdP.
- Running custom logic triggered by SSO authentication events.
- Support for environments where SAML SSO is the primary authentication mechanism.
This flow type is configured within SAML Settings after installing the SAML module and entering IdP credentials.
Example
- From a Designer Project, select the CREATE FLOW button from the top Action bar.
- Select Flow, provide a Name, and click CREATE.
- From the Flow Designer, navigate to the Properties tab on the right.
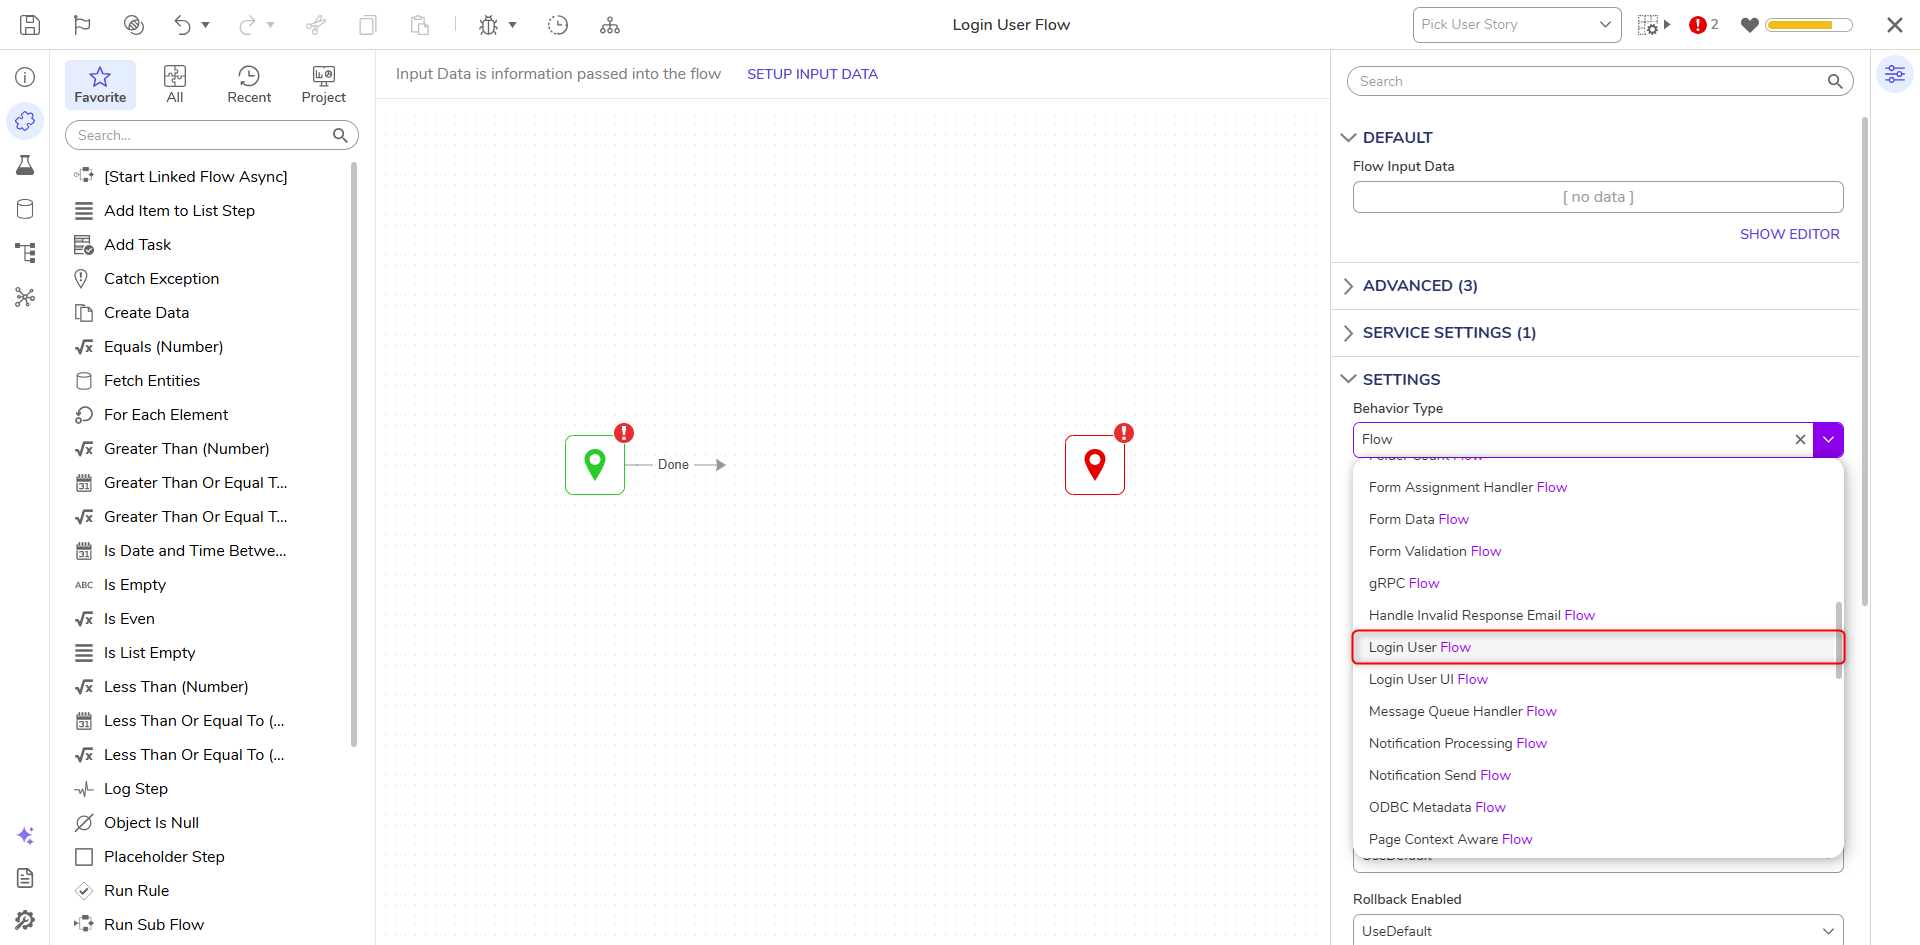
- Under SETTINGS > Behavior Type, select Login User Flow from the dropdown.
- From the ALL category of the Toolbox, attach a Show Popup step to the Start step, and the End step.
- Select the Show Popup step to navigate to its Properties.
- Toggle the Specify User box and PICK the desired Account under Notify Account.
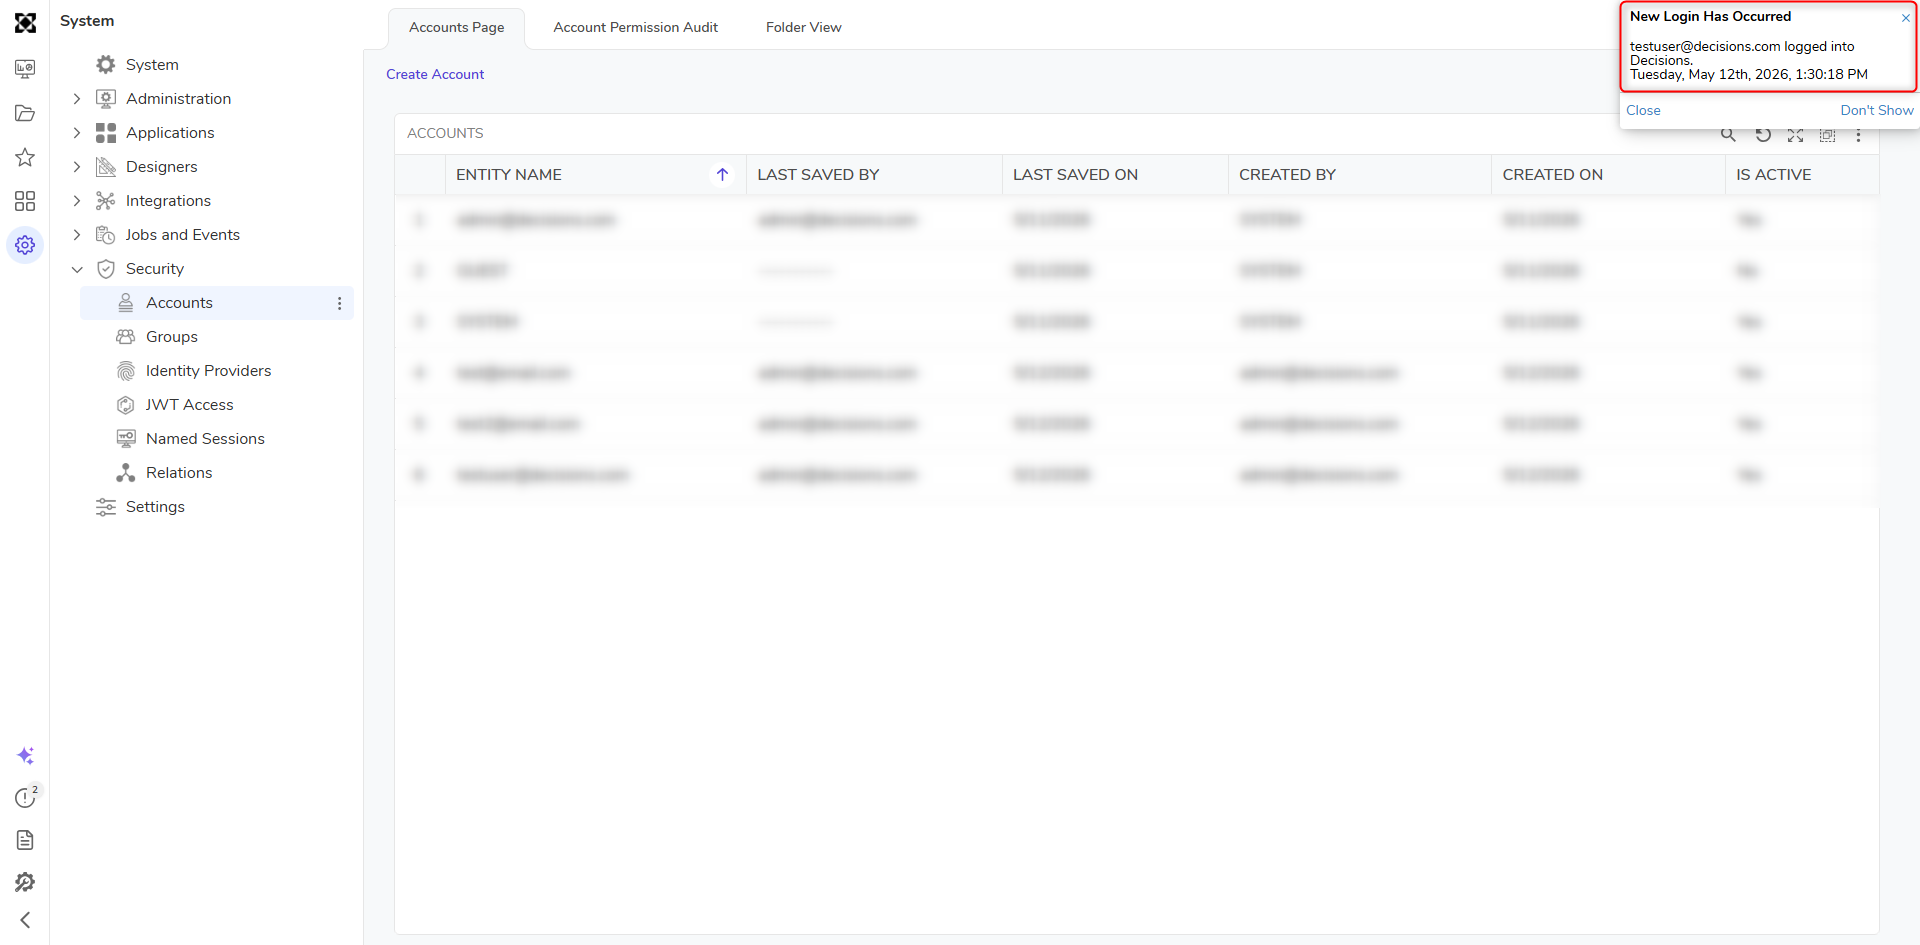
- Constant map the Subject "A New Login Event Occurred."
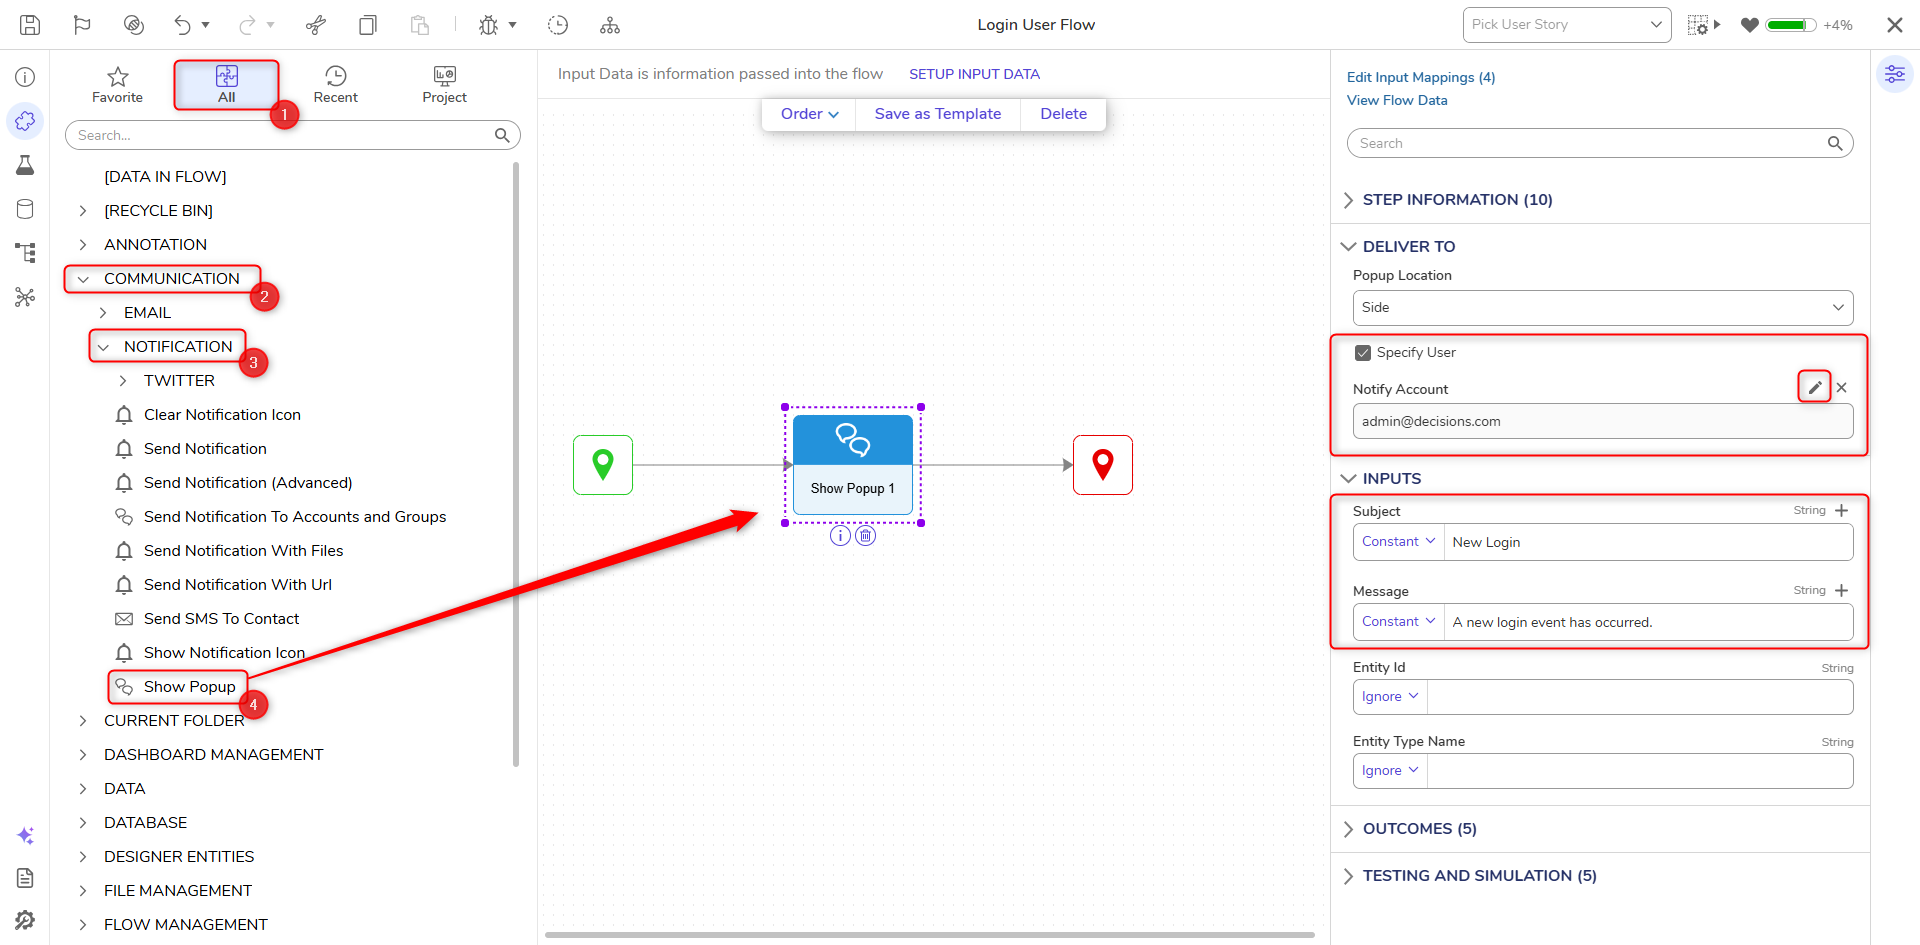
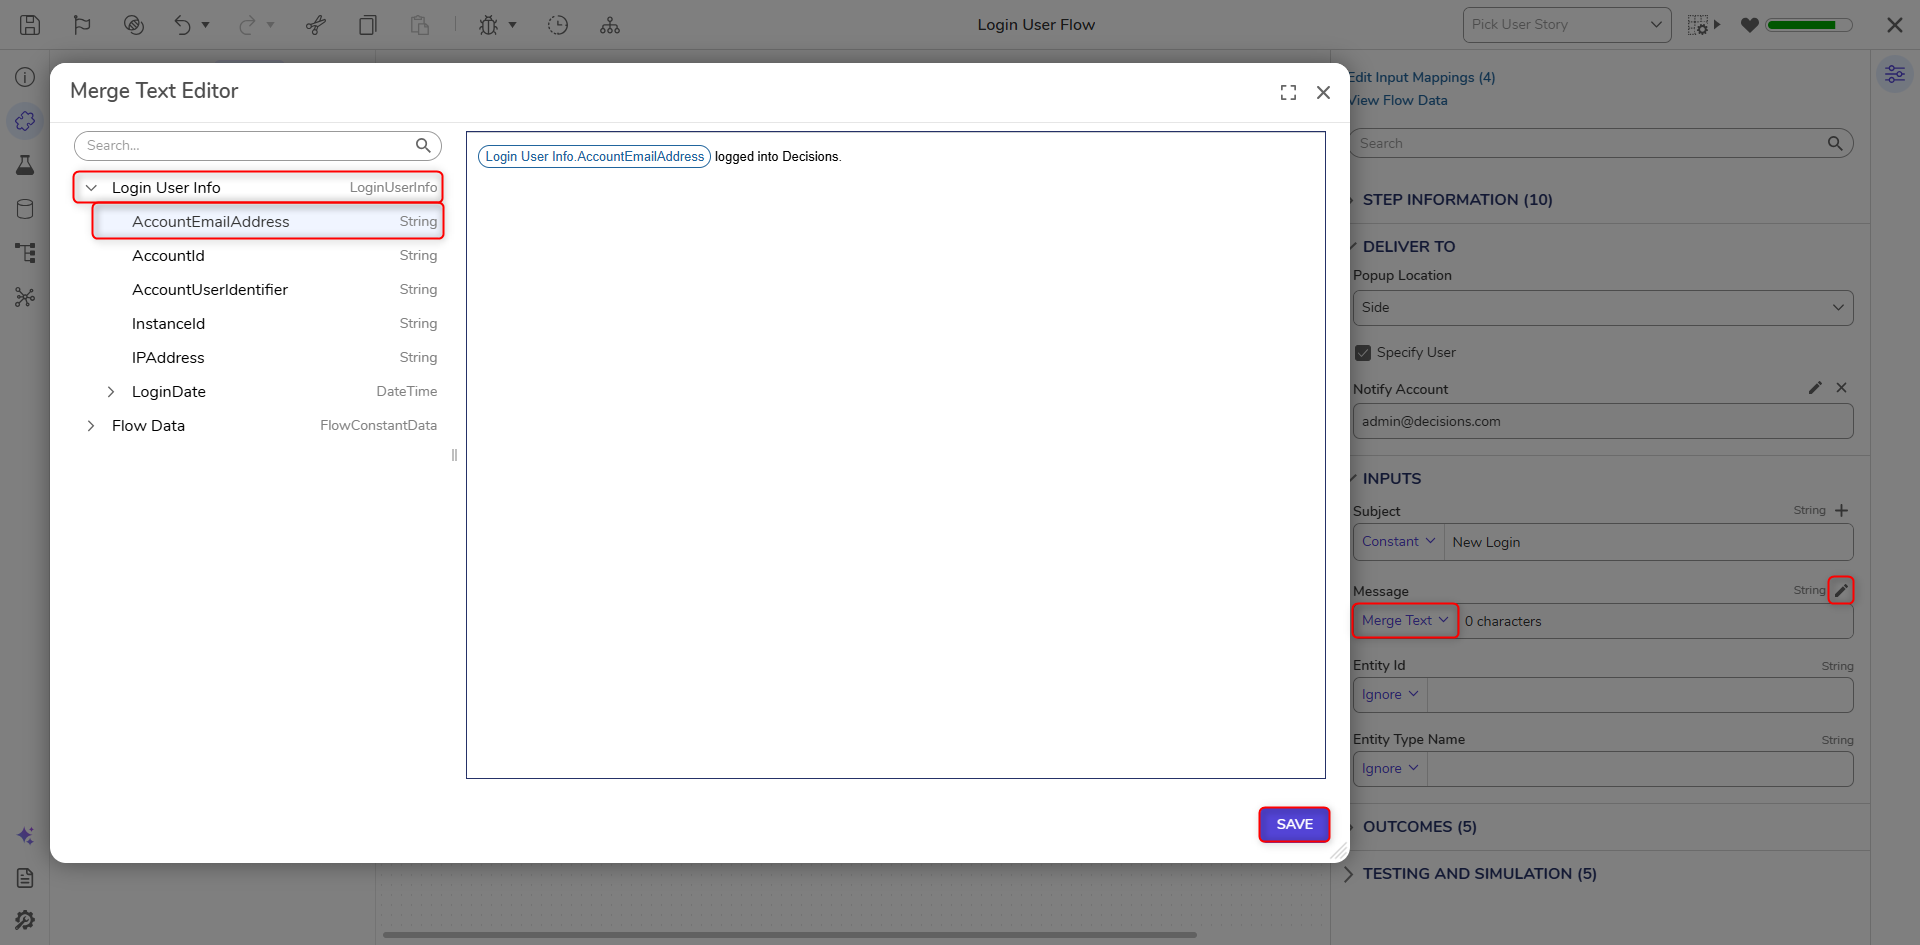
- Change the mapping for Message to Merge Plain Text, then click SHOW EDITOR.
- Define the Message in the Merge Text Editor as "Login User Info .AccoutEmailAddress logged into Decisions." by selecting and adding the corresponding Data from the left. Then, click SAVE.
- Save the Flow, the close with X.
Add Flow To Portal Settings
- From the Designer Studio, navigate to System > Settings > Portal Settings.
- From the Edit Portal Settings window, scroll to a navigate to LOGIN.
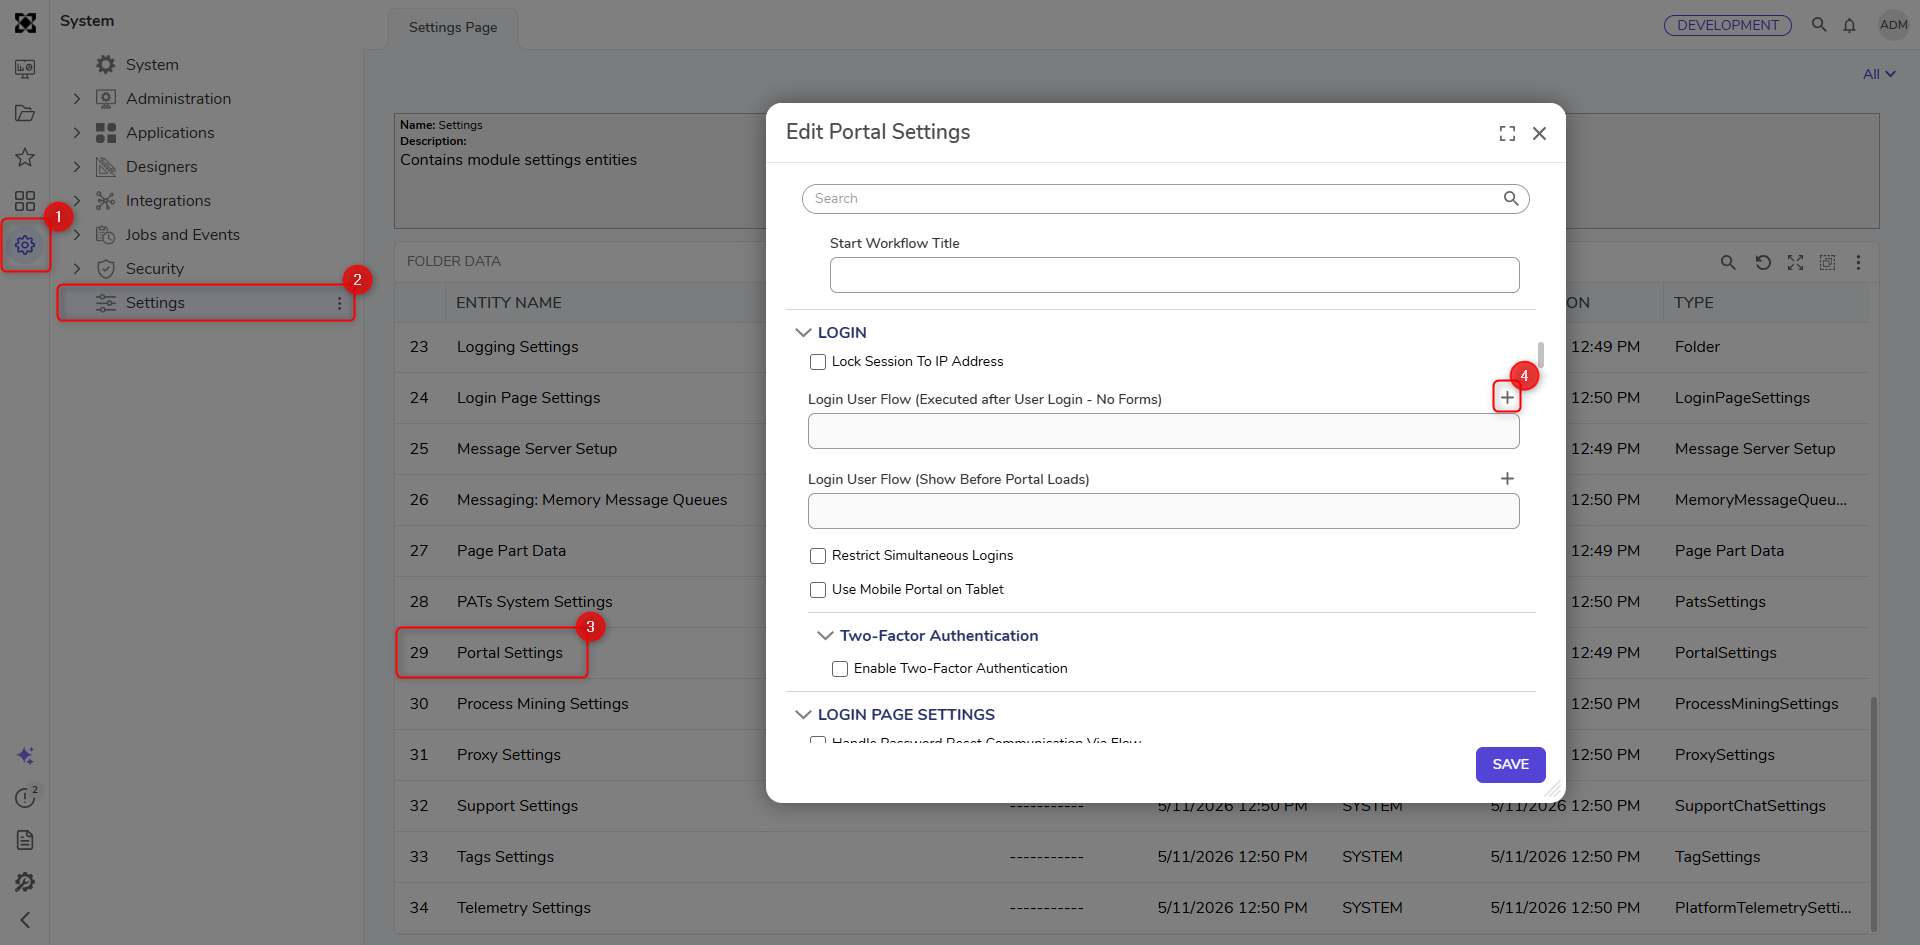
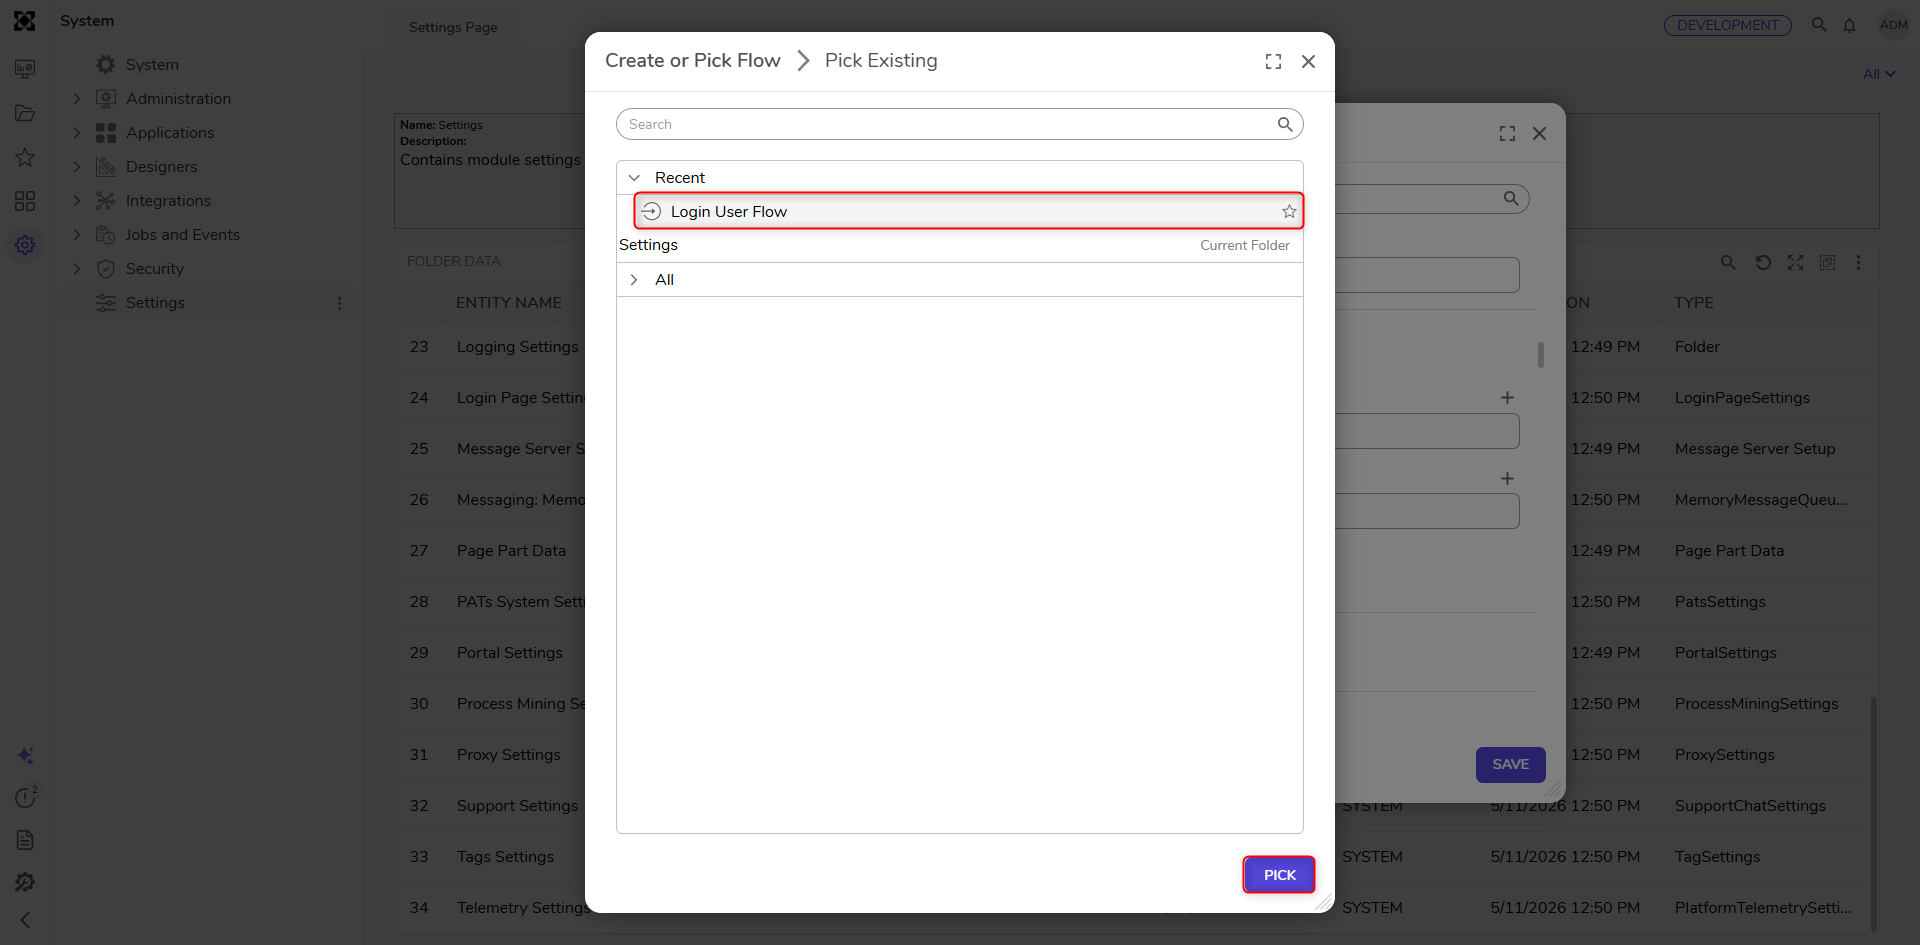
- Under Login User Flow (Executed after User Login - No Forms), PICK the User Login Form from the previous example.
- Click SAVE.
- Open a Private browsing window and navigate to the Decisions environment; log in to a separate user account.
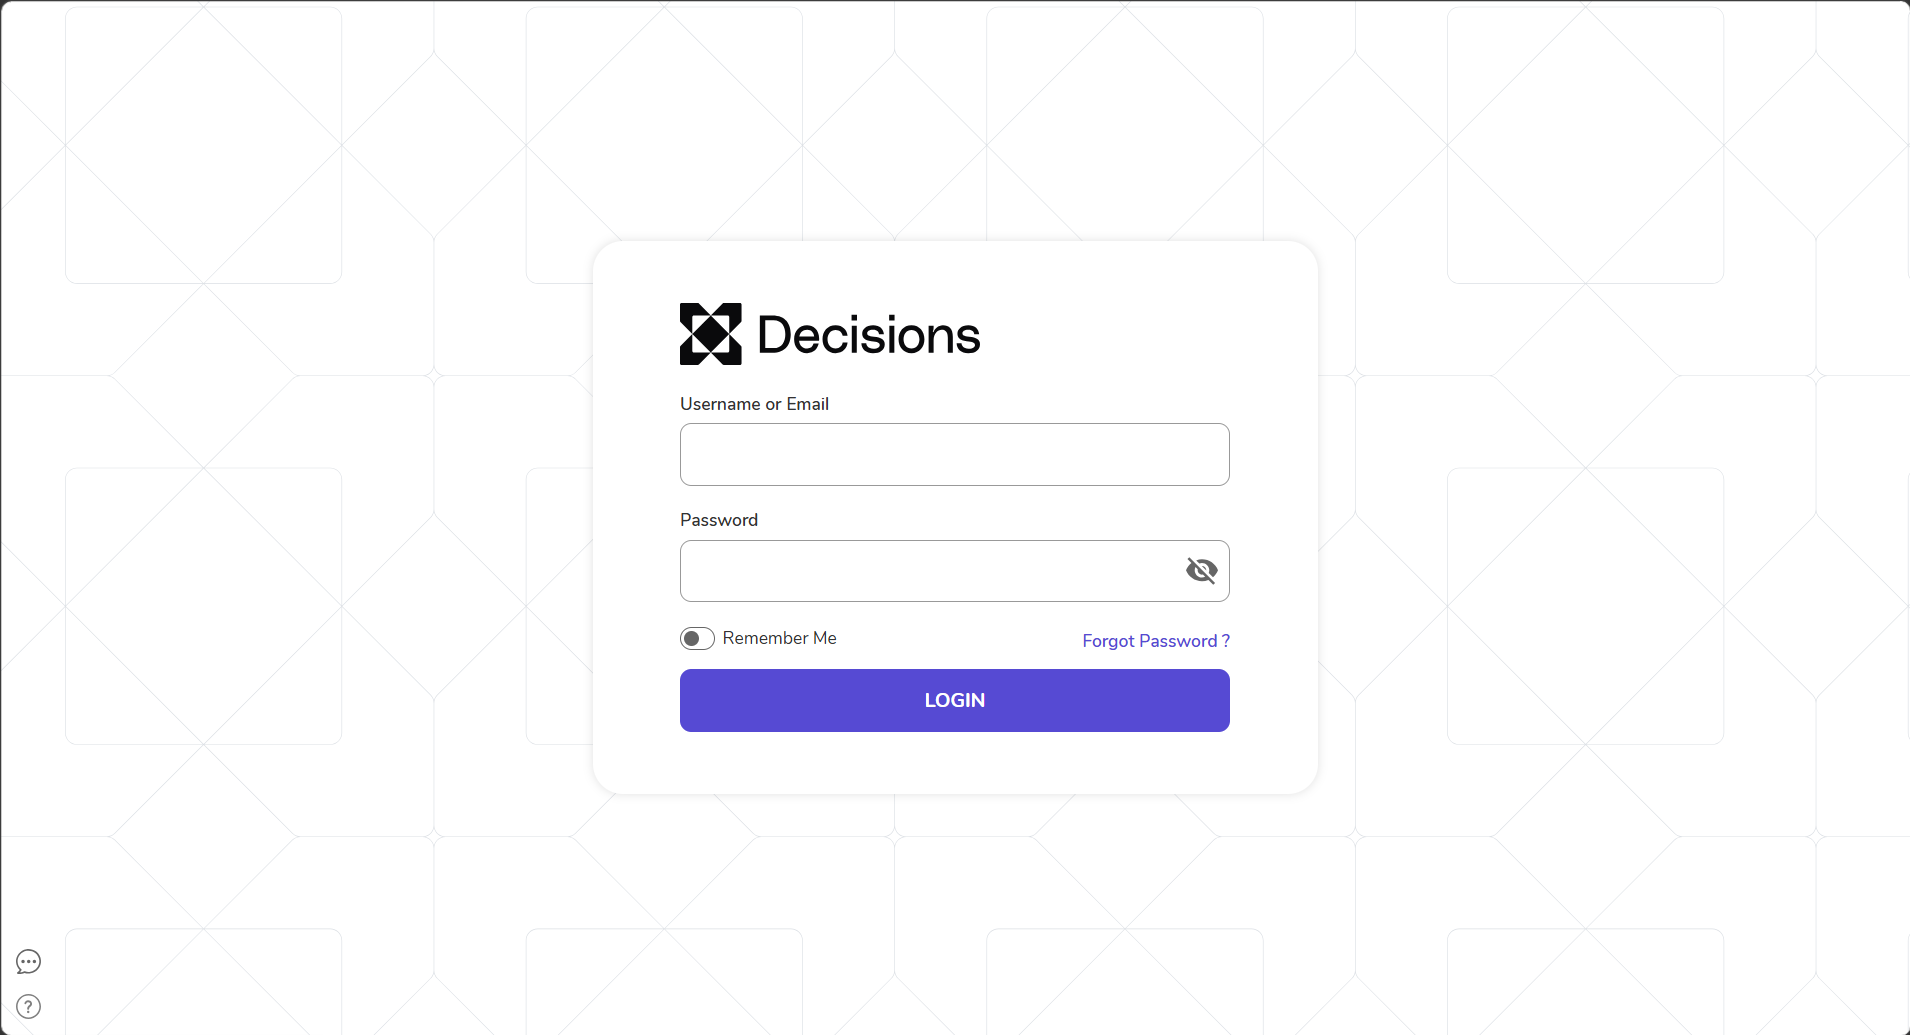
- Click back to the initial Decisions instance and view the pop-up that occurs after login.