Overview
WARNING
This will require appropriate technical resources on the clients' side to be able to implement. Please have a specialist with experience available to streamline the process. Our support team is available to help, but may not be able to answer questions or solve problems that are unique to a company.
Prerequisites
- Active Okta account
- SAML modules installed. To learn how to install modules, see Installing Modules in Decisions.
- Configuration of Okta module. To learn more, see Installing and Configuring the Okta Module.
Accounts created before the following module is installed will need to be updated before using single-sign-on. Please contact support on how to update the account.
Example
This example will demonstrate how to configure Okta to work with the platform.
- In Okta, create a Web and SAML 2.0 app.
- Set the Base URL to http://[BASE PORTAL URL]/SAML/AssertionConsumer.ashxTo find the base portal URL, open a web browser. The 'BasePortalURL' will usually be the first two fields after the "http://" By default, decisions local installs will usually be "http://localhost/decisions" or "http://localhost" if it is a root install. In production environments, it may be "https://YourCompanyDNSname.com/decisions" or "https://YourCompanyDNSname.com/" if it's a root install.
- Set Audience URI (SP Entity ID) to the base portal URL.
- Set Name ID format to EmailAddress and click Next.
- Select "I'm an Okta customer adding an internal app" then check the This is an internal app that we have created box. Click Finish to navigate to the Sign On tab.ImportantRemain on this page as the info here will be needed for later.
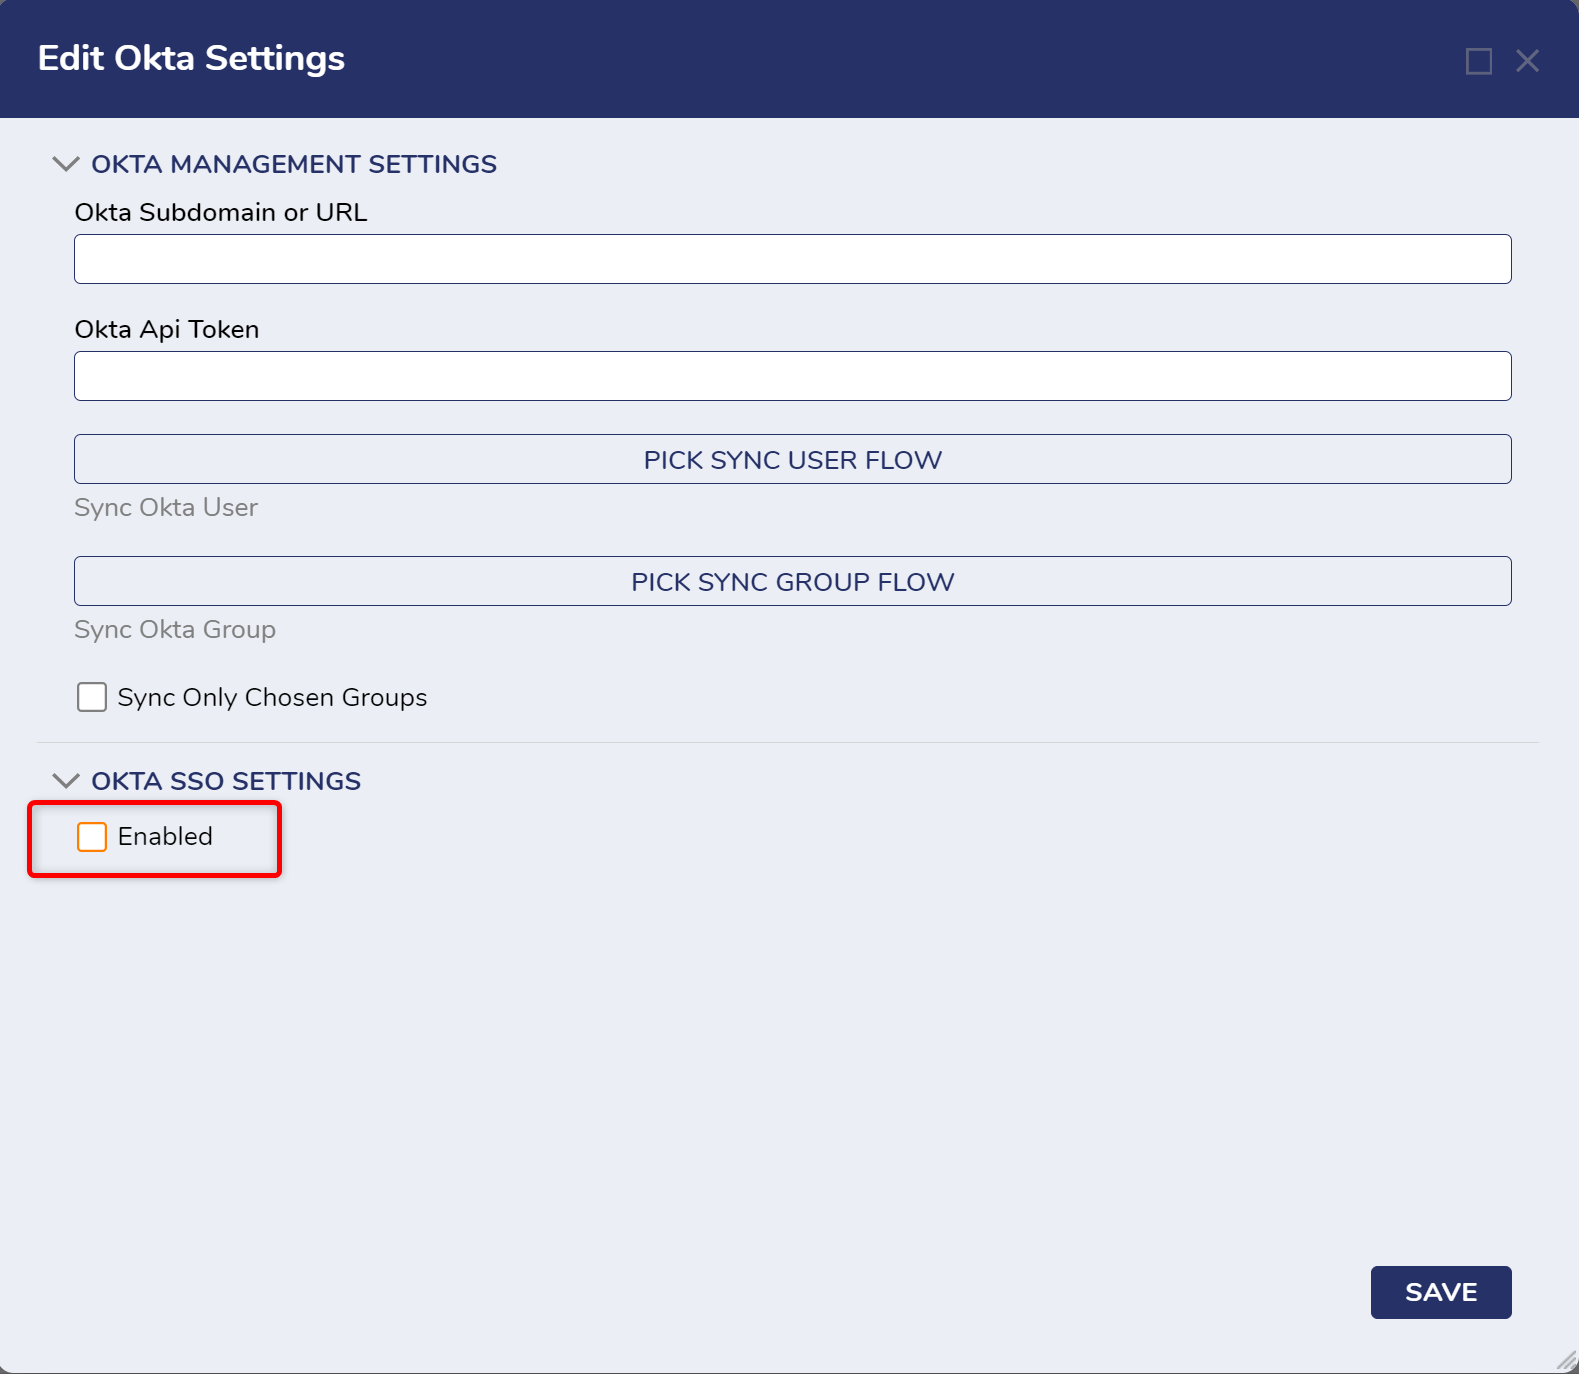
- In Decisions, navigate to System > Settings. Right-click Okta Settings and click Edit.
.png)
- On the Edit Okta Settings window, check the Enabled checkbox.
- On the Sign-On tab of the Okta app, click the View Setup Instructions button.
- Locate the Identity Provider Single Sign-On URL and X.509 Certificate values and enter them in the appropriate fields on the Edit Okta Settings window.
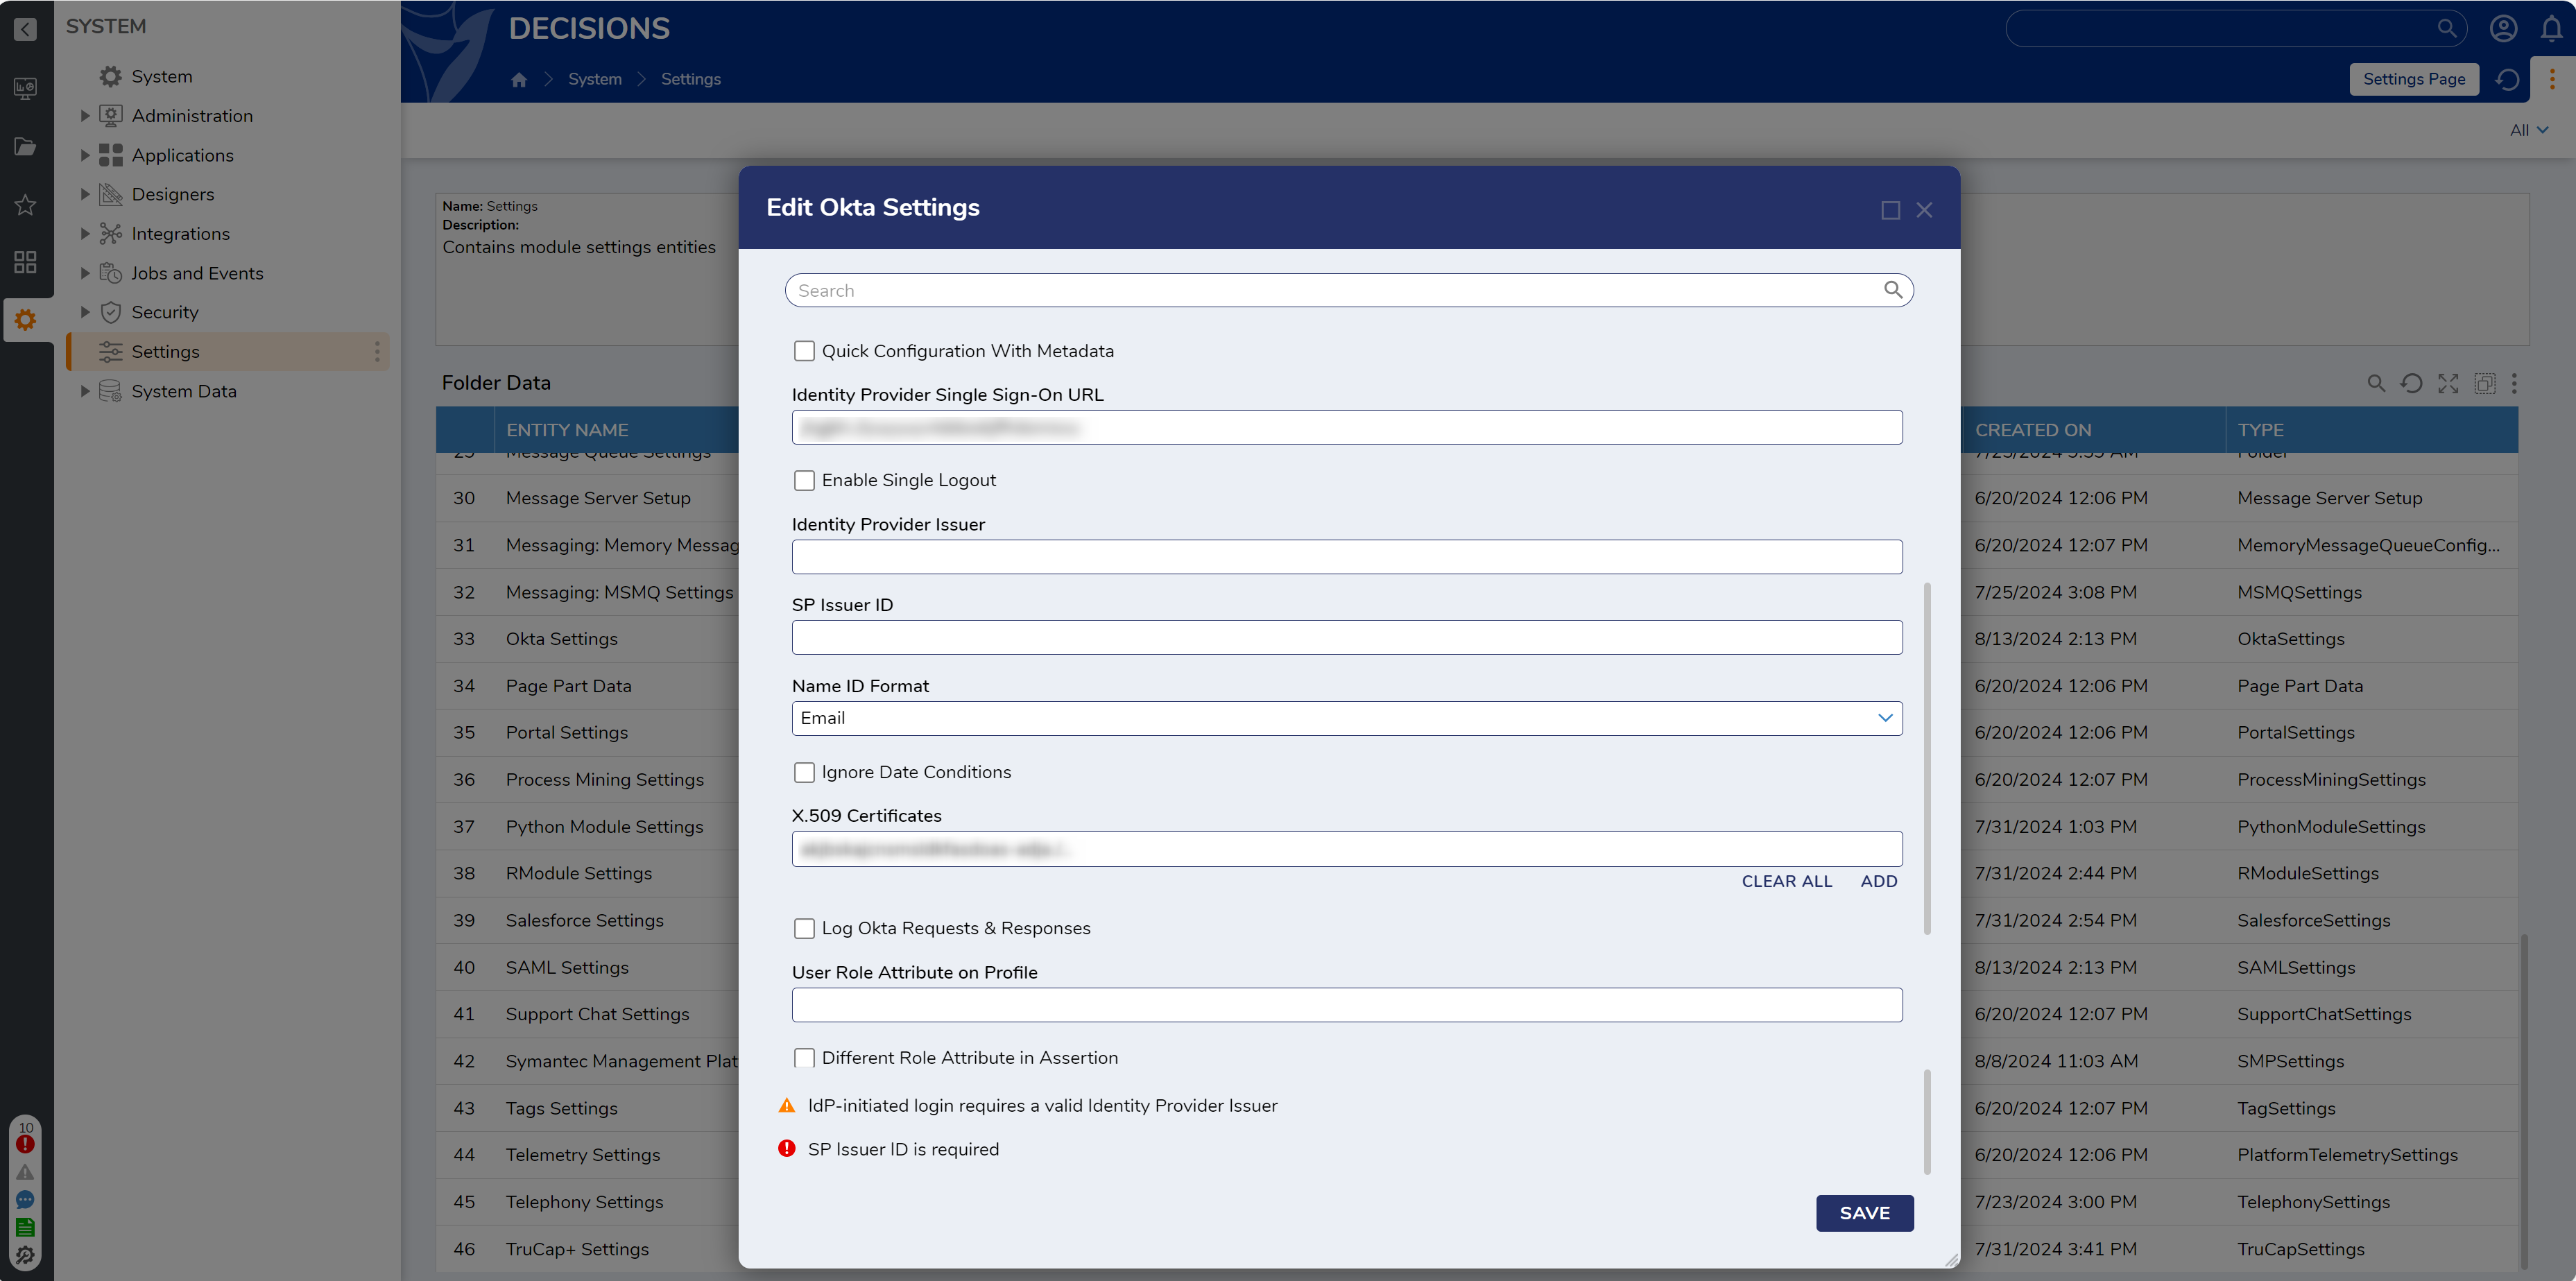
- The SP Issuer ID field can be set to the value of Identity Provider Issuer or any other value of choice.
- Supply the Okta Subdomain or URL and an Okta API Token at the top of Okta Settings to automatically sync users & groups or to manage Okta accounts from Decisions. If the organization has is named myOrganization.okta.com, enter "myOrganization". If the organization is like dev-999999.oktapreview.com, enter " dev-999999.oktapreview.com". After all other fields are configured, click SAVE.
- As the Okta app administrator, navigate to Security > API > Tokens > Create Token in Okta to generate API token.
- Click OK to save settings.
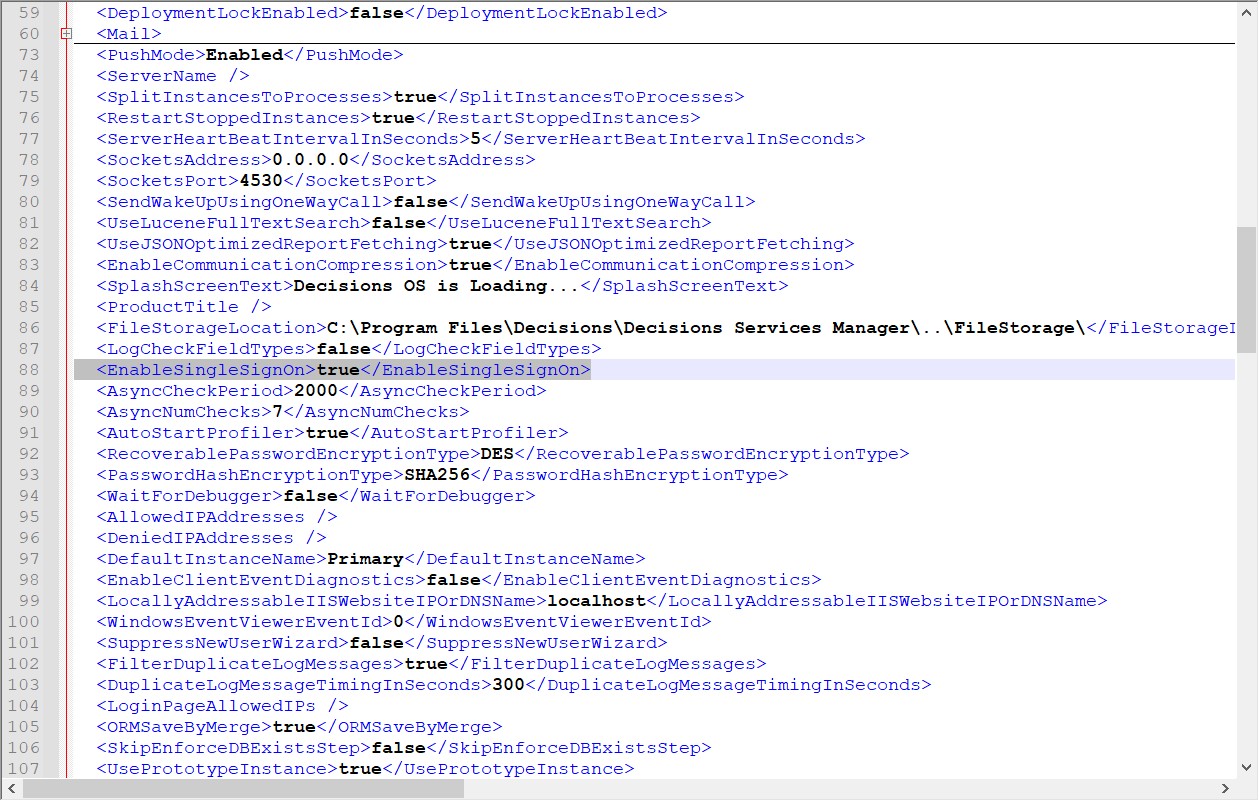
- Set EnableSingleSignOn to true in Settings.xml and restart SHM. Logins will now be handled by Okta.
The Okta Module uses the SAML Module as it passes the configuration information right to it. There are two options for logout with the SAML Module: No logout at all and Single logout.
There is a checkbox on both sides (Okta and Decisions) that will need to be checked and fields filled with information. A private key certificate is needed in pfx/p12 format which is obtained from creating it (this should be something you or someone in the organization will need to do). The file name is about the filename of the private key certificate that was put on the server; those can have passwords and the URL field will be on the View Setup Instructions that will redirect to a tab of the Okta App.
Frequently Asked Questions:
- Users with admin rights may not be able to log in as it is not assigned in the Okta application? Yes
- Can a user log in straight into Decisions as admin - not assigned in the Okta application and then log into decisions? No, only SSO accounts can log in while SSO is enabled
- Is it possible to revert back changes after Okta integration, if no admin user is assigned or if an admin gets blocked? Yes, this is possible by turning off SSO in Settings.XML, then log in with the admin account and give admin rights to whatever Okta accounts
- Error on login to Decisions: In the SAML Settings changing Signature Algorithm and Digest Algorithm to SHA1 will fix the following error