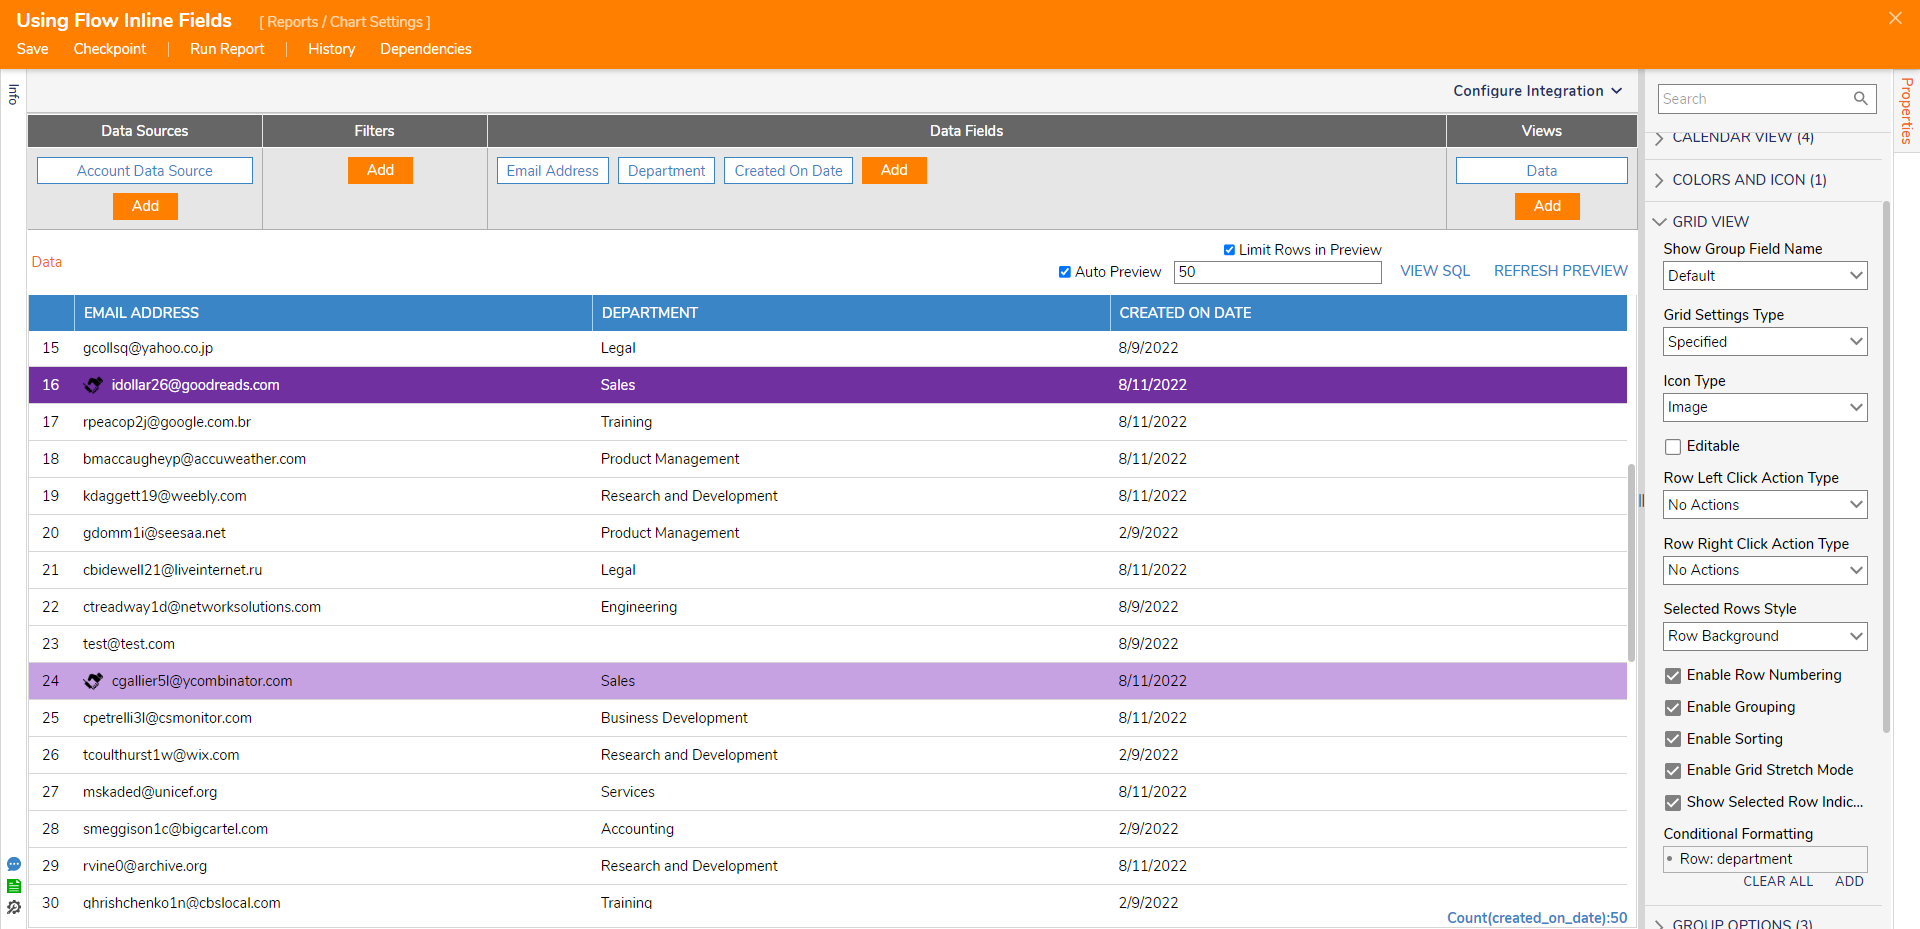
In a Report, the Conditional Formatting feature changes the color of a row or column based on a specific value. The Conditional Formatting feature is similar to the Color and Icon Rules, however, is only supported with String and Boolean data types. Additionally, if both the Conditional Formatting and a Color/Icon Rule were used simultaneously, they would behave identically if the outputs are defined the same.
Example
- In a Designer Project, select CREATE REPORT from the Global Action Bar.
- Select and name the default Report in the resulting window, then click CREATE to enter the Report Designer.
- In the Report Designer, click Add under Data Source. Then, expand Common and select Account Data Source.
- Next, add Email Address, Department, and Created on Date under Data Fields.
- Navigate to Properties > GRID VIEW, change Grid Settings Type to Specified, and change Icon Type to Image.
- Under Properties > GRID VIEW > Conditional Formatting, select ADD.
.png)
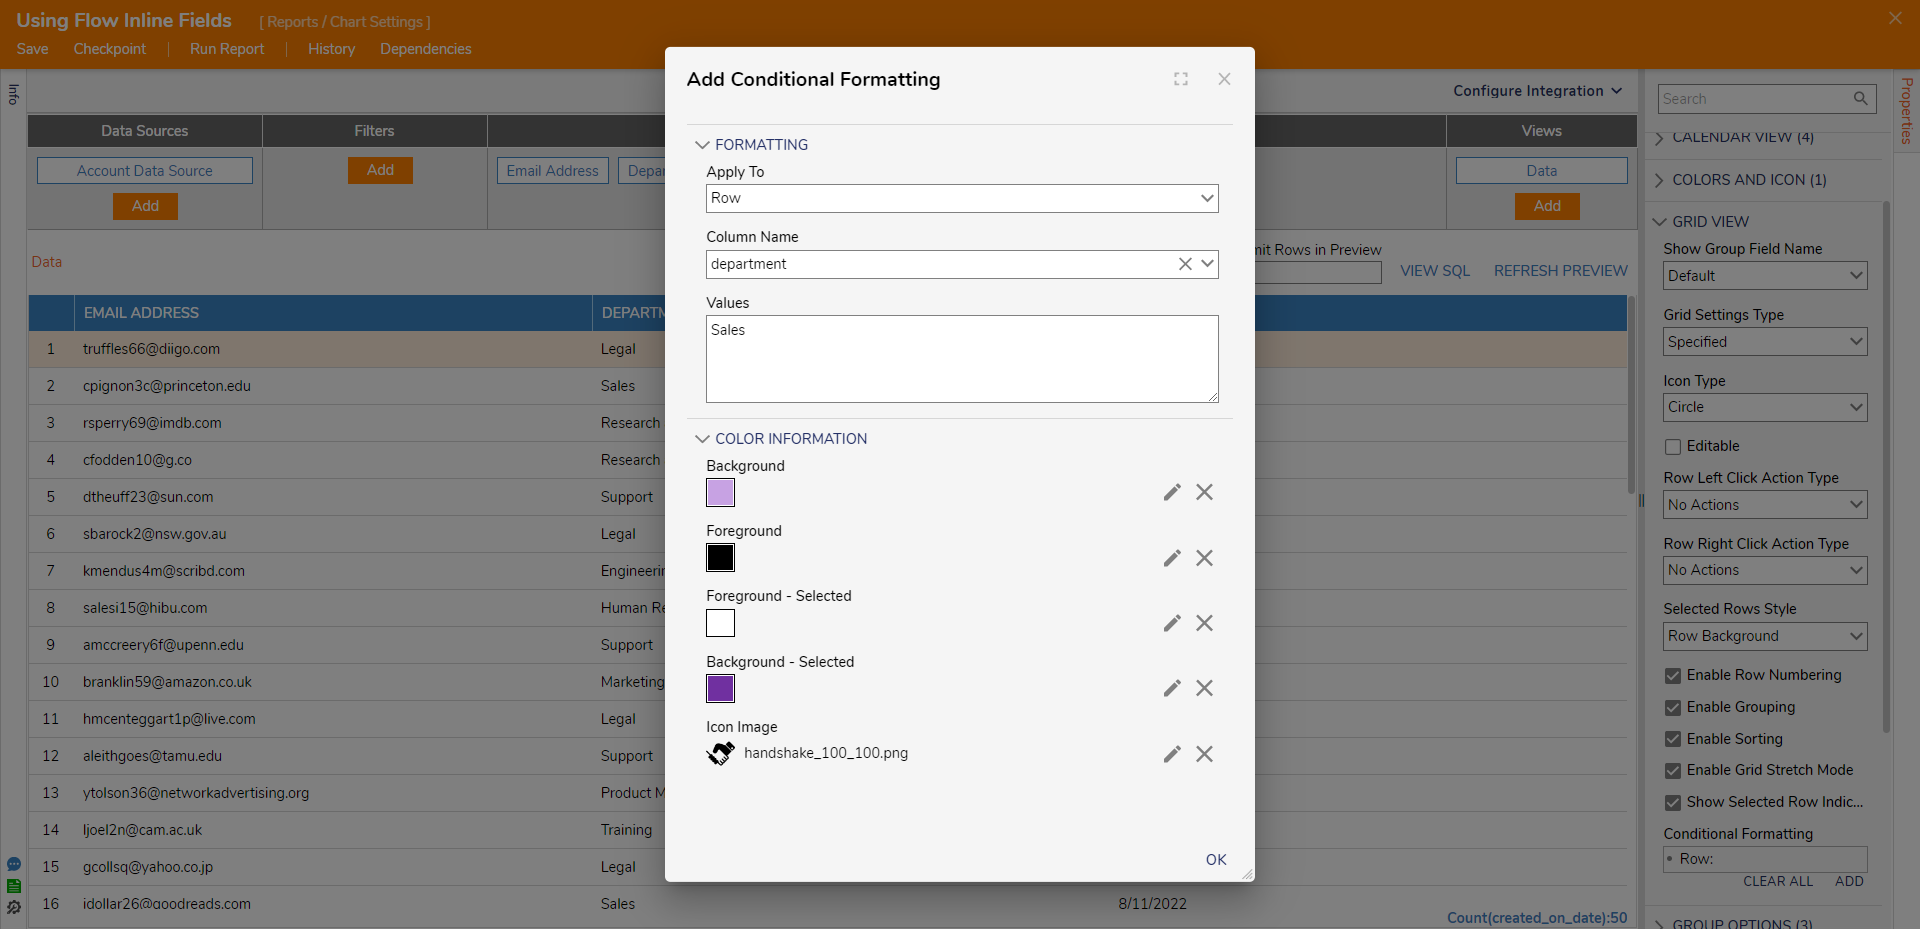
- In the resulting window, under FORMATTING > Apply To, select Row or Column.
- Next, select department from the FORMATTING > Column Name drop-down list.
- In the Values field, add a specific value.
- Set Background and Foreground colors to highlight the specified accounts. The Background is the Row color, and the Foreground is the Text color.
- Choose an Icon Image, if desired. Then, select OK.

- In the Report Designer, click REFRESH PREVIEW to see the updated highlighted Row or Column. Additionally, the highlights will also appear when clicking Run Report.
