Overview
To assist with localization in Decisions, users are provided the option to establish a User Culture via their Account Settings. User Cultures are used to provide users an automatic DateTime translation to reflect their own local values, as opposed to the System's default values. Furthermore, changing the user culture may change the presentation of data in Reports, Pages, and Forms. For example, changing to the en-GB (UK Culture) displays the negative sign for numbers formatted as currency.
Additionally, users may map in the values for all User Cultures within an environment, into a Flow via the Get List of Cultures step.
The following document details how to establish a User Culture for a User Account and how to return a List of all User Cultures.

Example A: Setting User Culture
To establish the User Culture setting for a User Account:
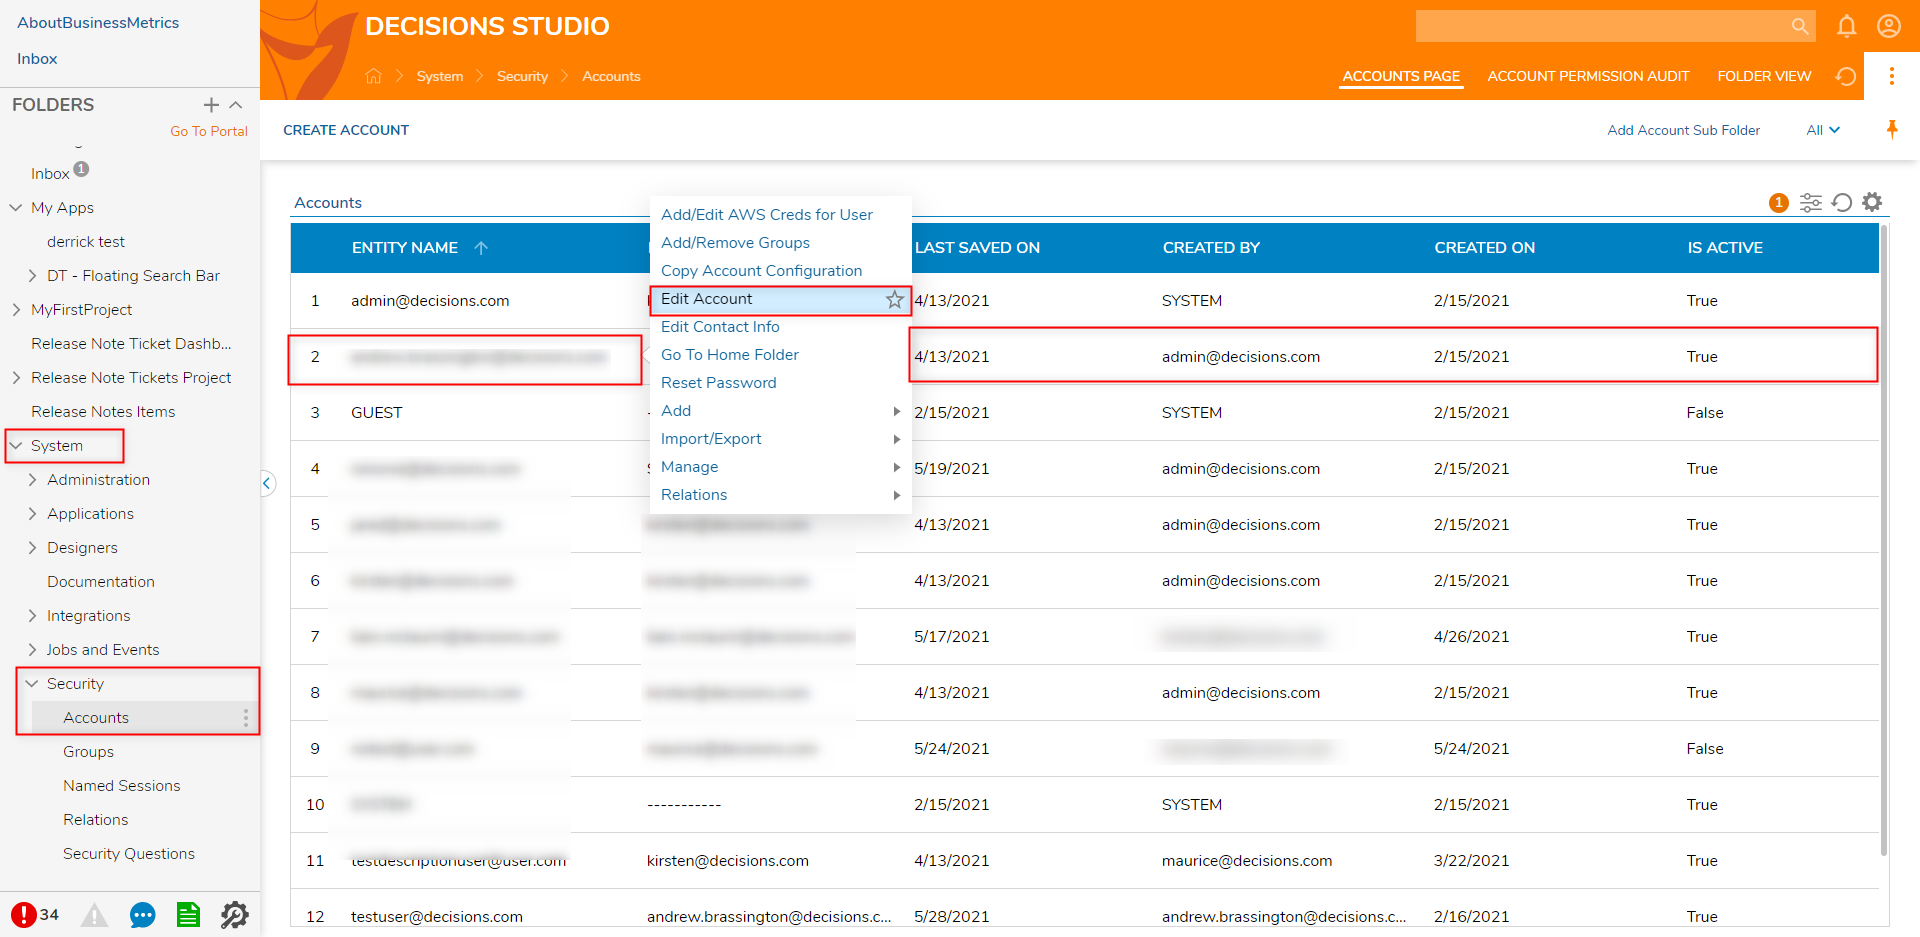
- From the Decisions Studio, navigate to System > Security > Accounts.
- Right-click the desired Account and select Edit Account.
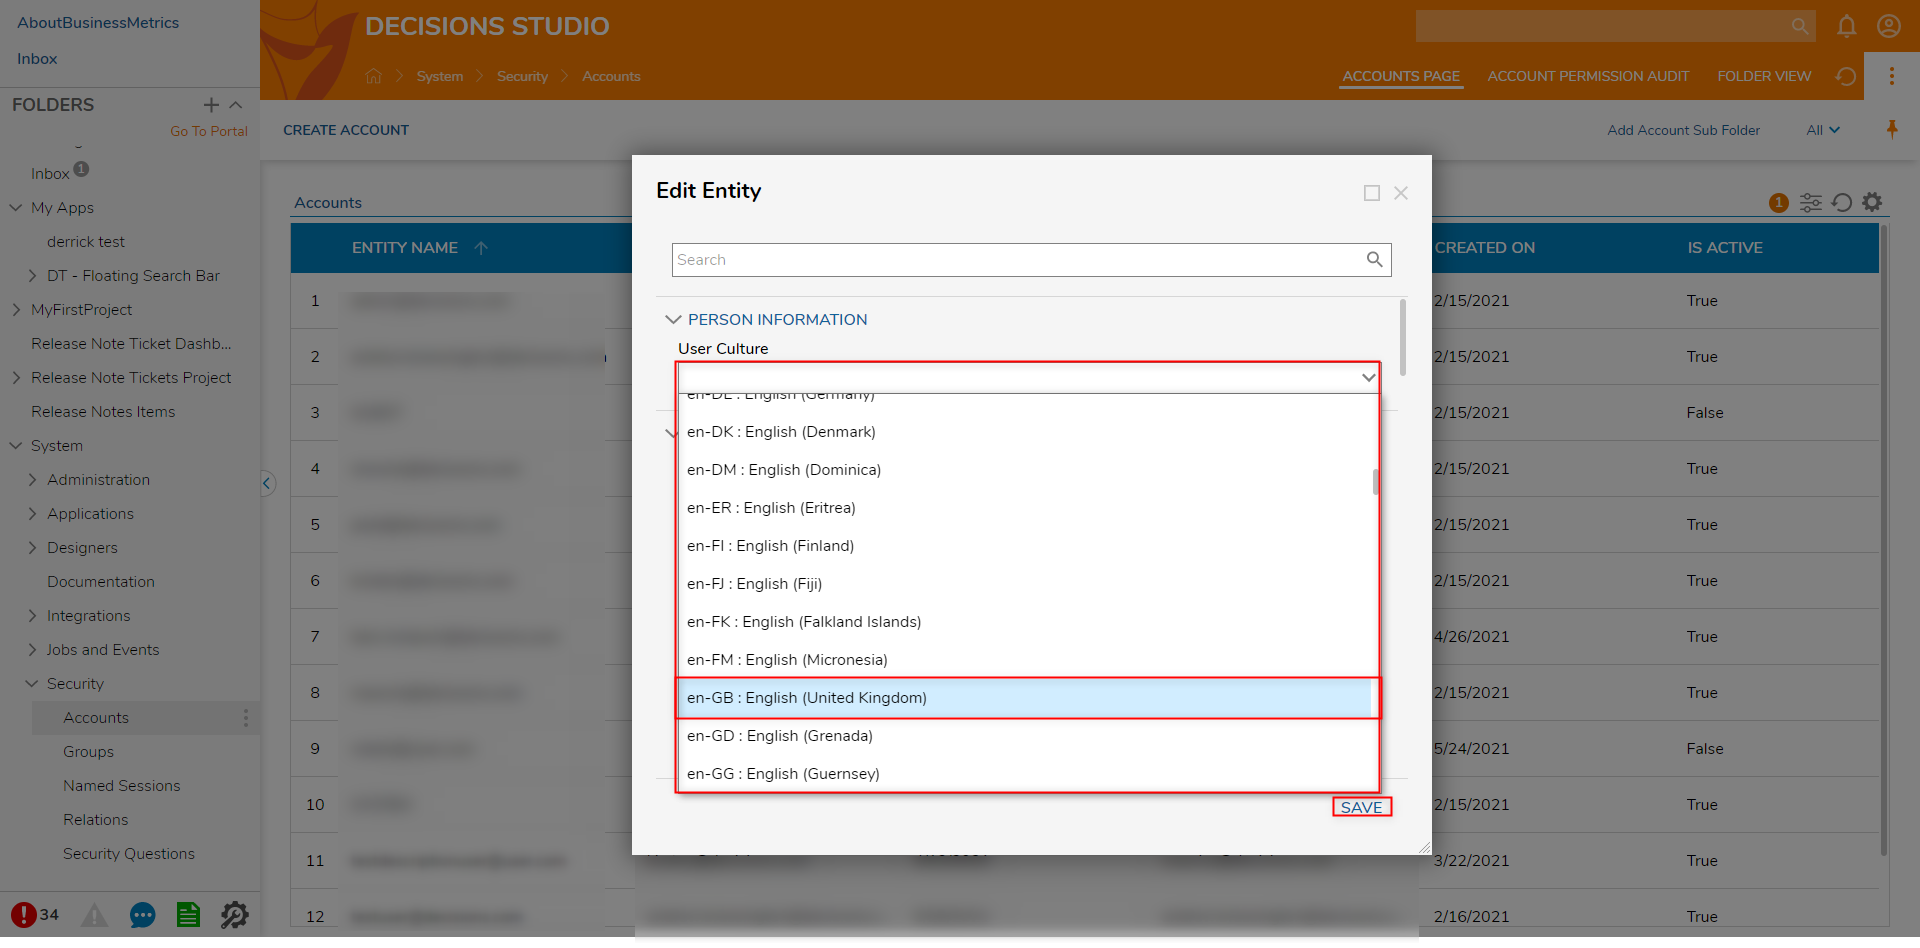
- From the Account Edit Entity window, under PERSON INFORMATION, select the desire User Culture from the dropdown. Then click SAVE.
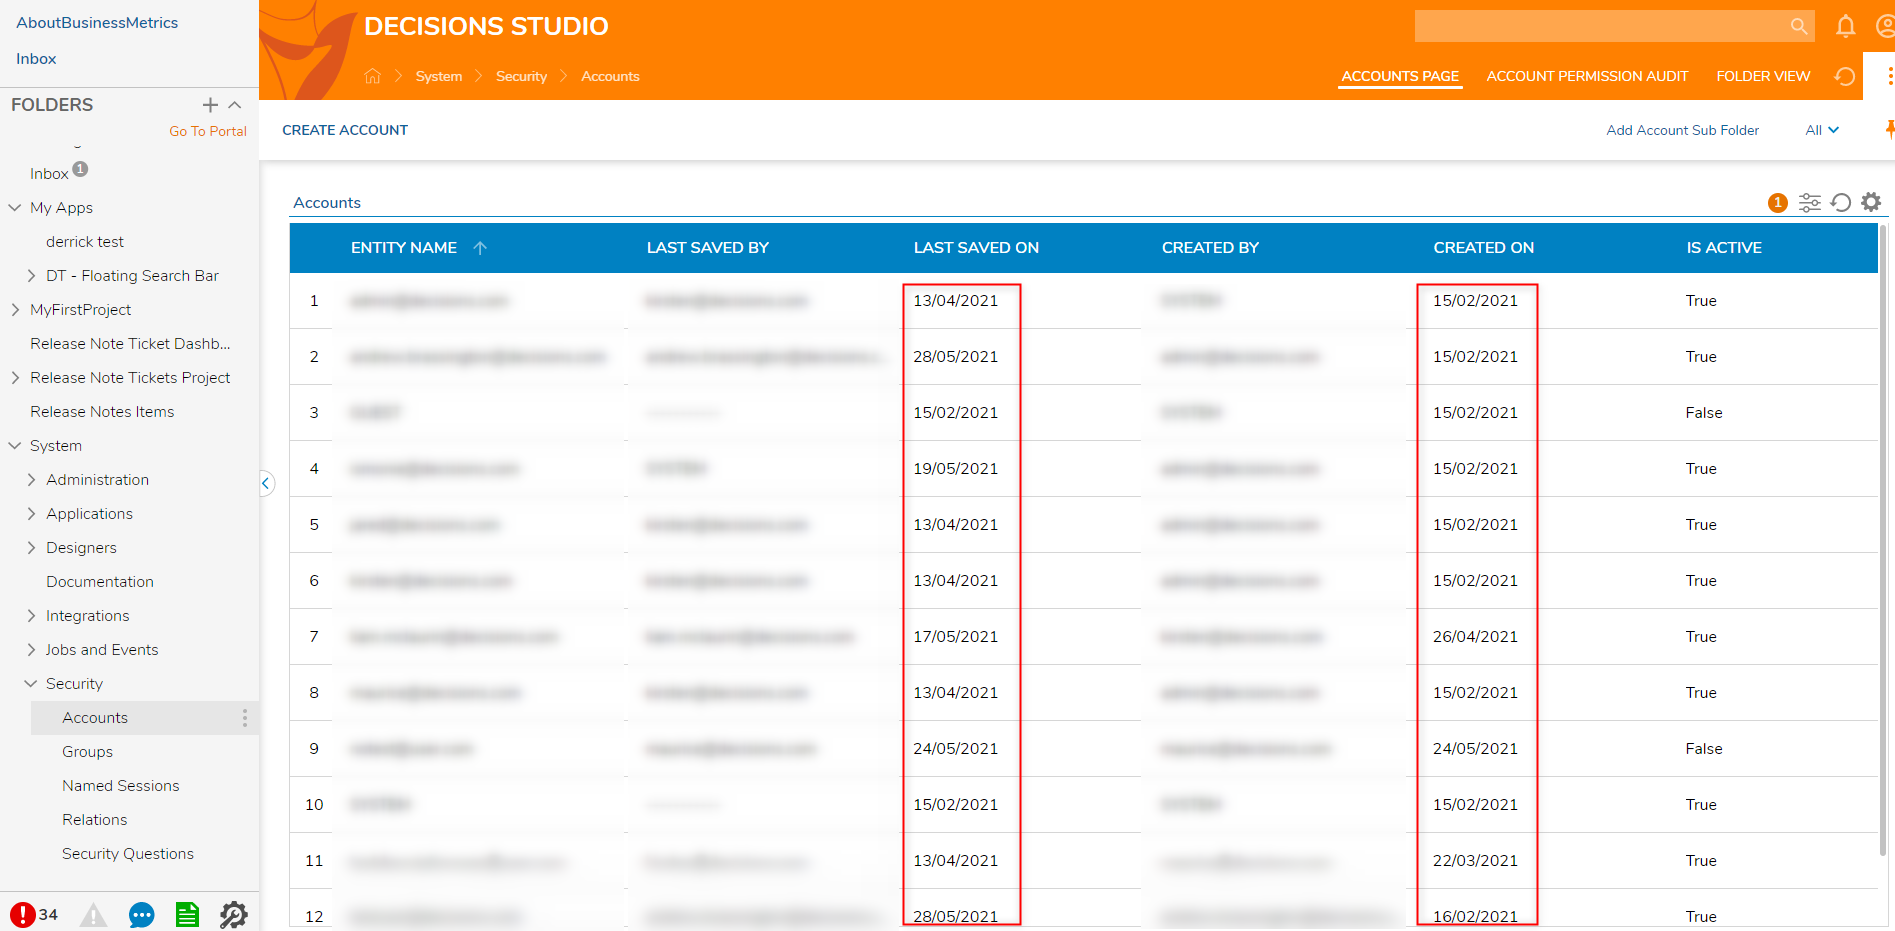
- Verify that the User Culture was properly set by observing any changes in the DateTime values on a Report (for example, the Accounts Report). Note on User CultureNote that the User Culture should only change for the Account it was established on. If the Culture was set for a different Account, log in to that Account to verify the changes.
Example B: Get List of Cultures
To return a list of User Cultures for use in a Flow:
- From a Designer Project, select CREATE FLOW from the GlobalActionBar. Then, CREATE a new Flow.
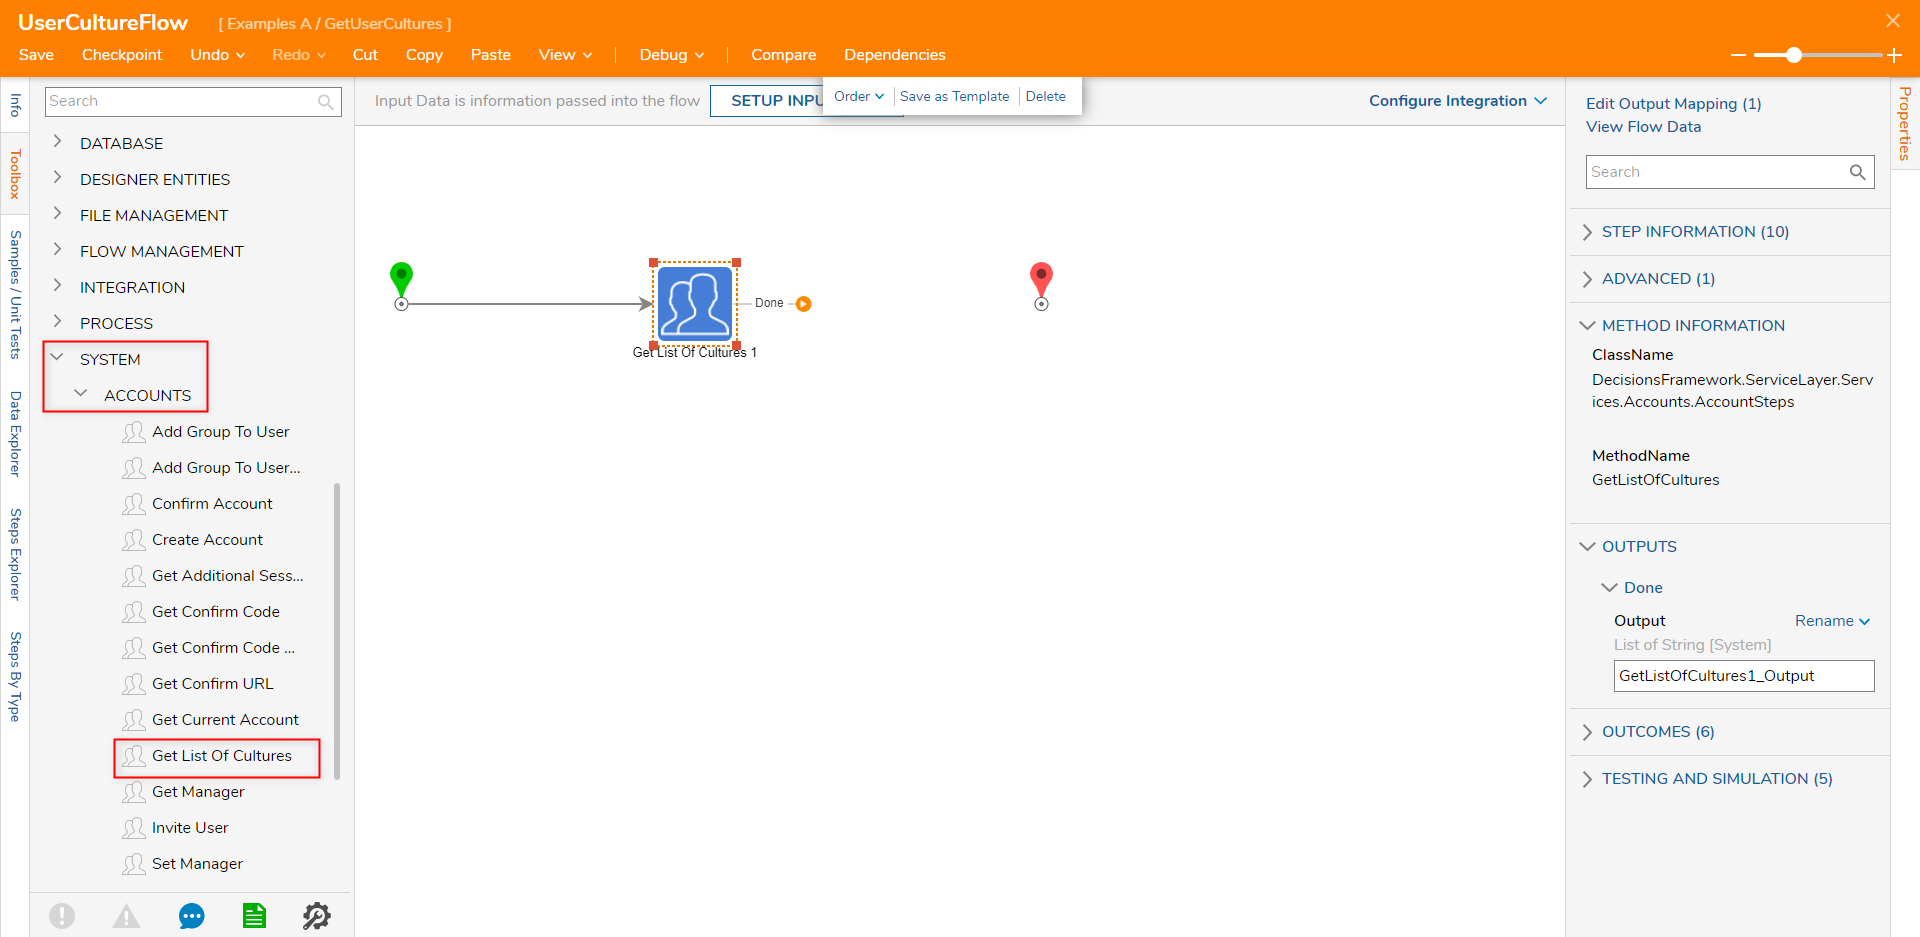
- From the Flow Designer, attach a Get List Of Cultures step, from the SYSTEM > ACCOUNTS category of the Toolbox tab, to the Start step.
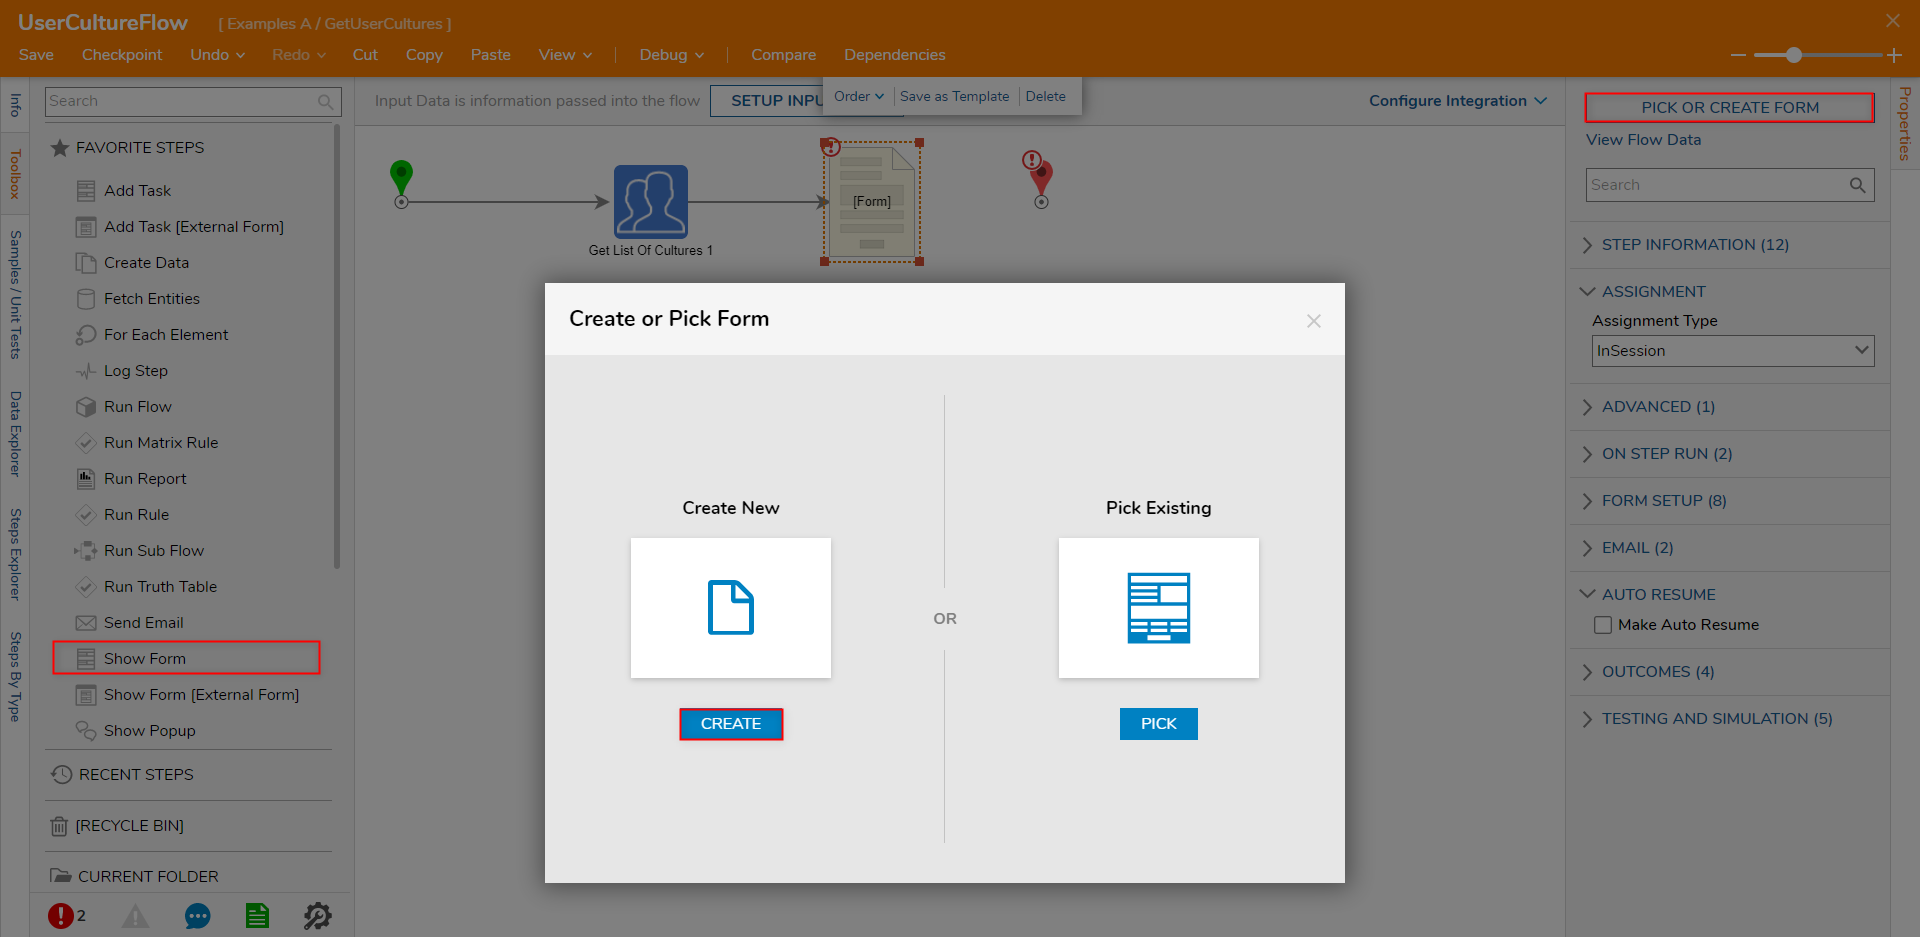
- From Toolbox > FAVORITE STEPS, attach a Show Form step to the Done path of the Get List Of Cultures step.
- From the Properties tab of the Show Form step, select PICK OR CREATE FORM, then CREATE a new Form.
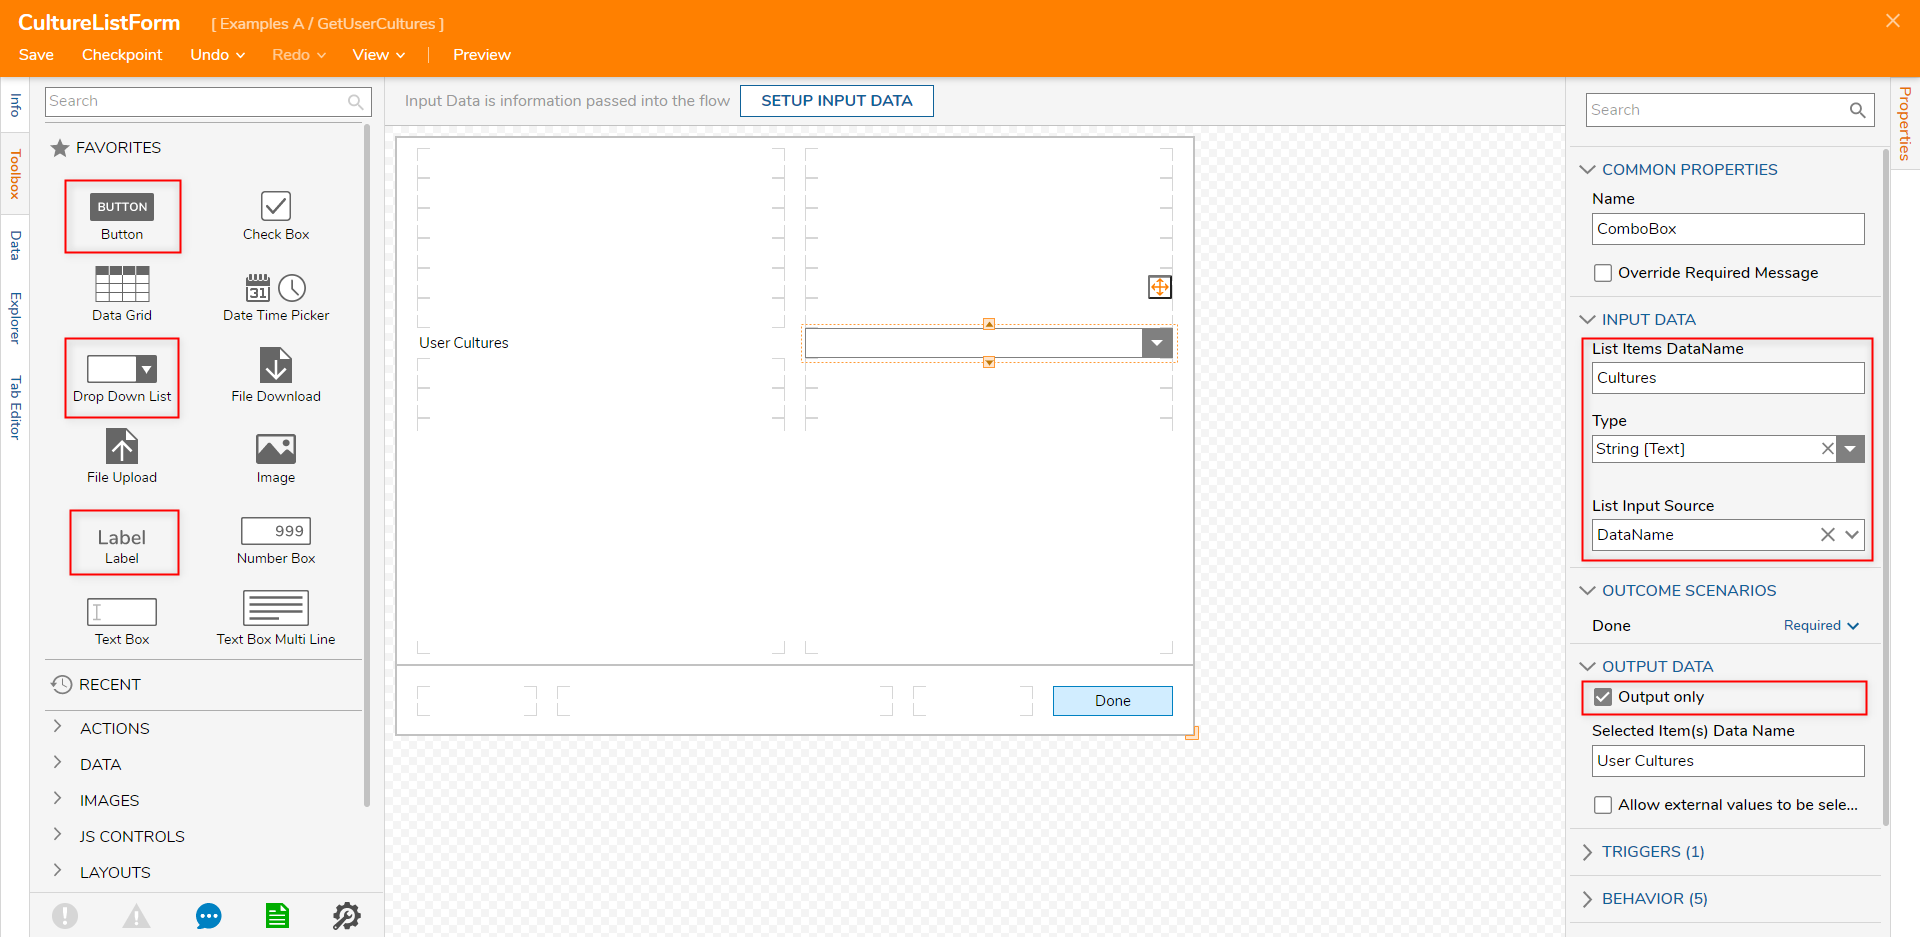
- From the Form Designer, add a Drop Down List labeled "User Cultures" and add a Button component Labeled "Done".
- Select the Drop Down List and under INPUT DATA > List Input Source, select DataName. Select String [Text] from the Type dropdown, then input the desired List Items DataName.
- Under OUTPUT DATA, check the Output only box. Then Save the Form, then close via X.
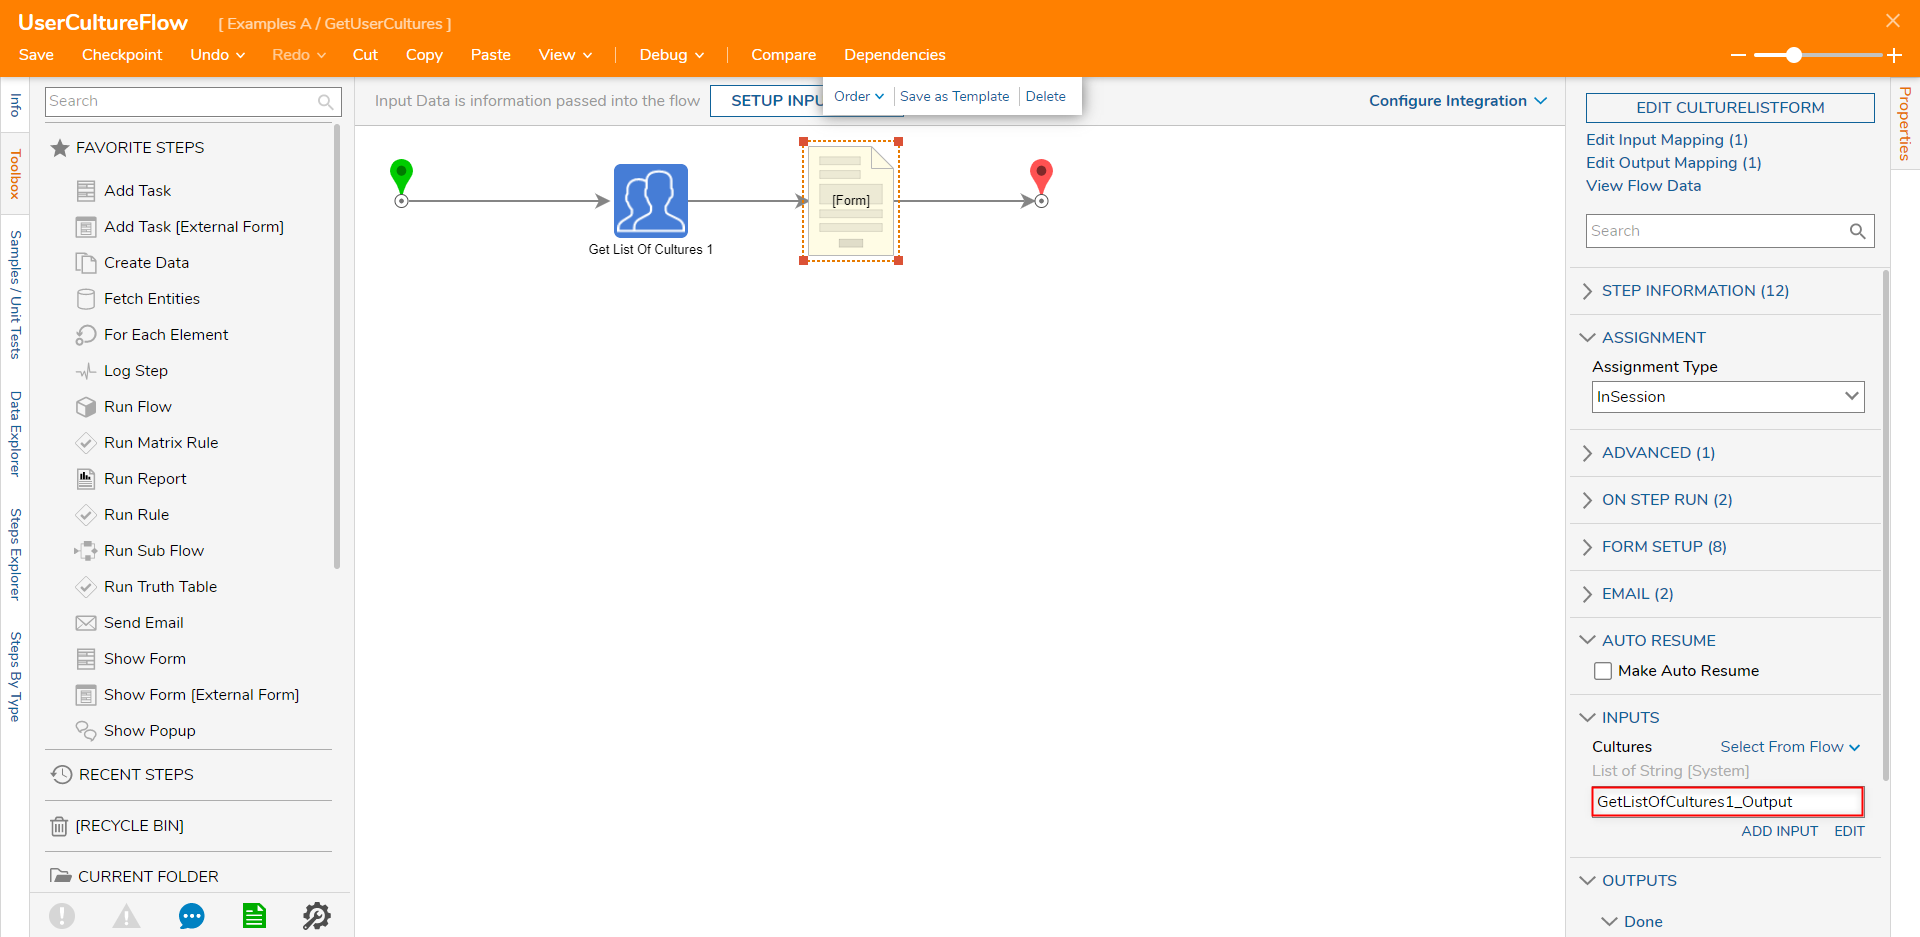
- Back in the Flow Designer, Select From Flow map GetListOfCultures1_Output to INPUTS > Cultures. Then, connect the Done path of the Form step to the End step.
- Save the Flow, then if desired close via X.
- From the Flow Designer, select the Debug link from the top Action bar, then click START DEBUGGING.
- Upon reaching the Form step, expand the User Cultures dropdown to see all the available User Culture options. Select one then click the Done button.
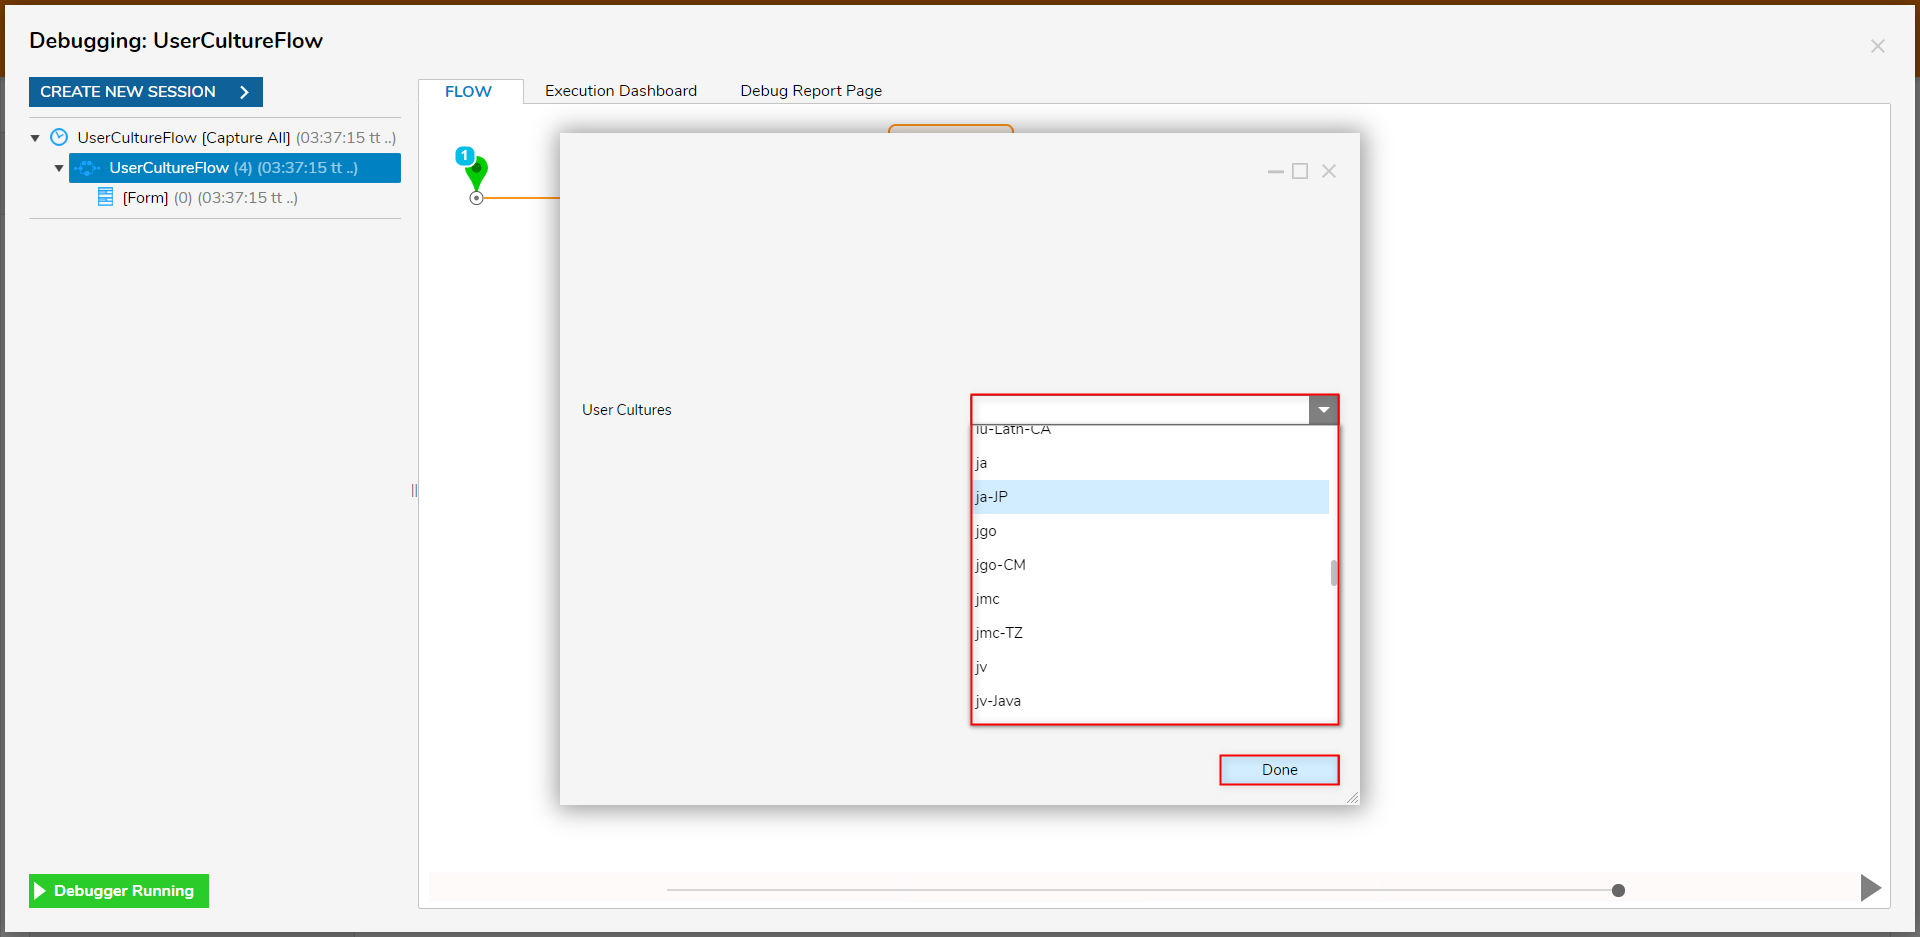
- After completing the Flow, verify that the Form output the selected User Culture. Additional Info Get List Of CulturesNote that the Output for this Flow is for demonstrative purposes. This output can then be implemented as Input within a larger Flow containing the demonstrated steps.
Example C: Get All Culture
Similar to how the Get List of Cultures step functions, the Get All Culture step returns a list of all available User Cultures in the Decisions environment.
This step differs in that rather than just returning the abbreviated Name of the User Culture, it returns each Culture as a Data Pair consisting of its Name as well as its DisplayName.
To use this step with the same Culture List Form as Example B:
- From the Flow Designer, navigate to Toolbox > INTEGRATION > INTERNAL SERVICES > PORTALSETTINGS, and attach a GetAllCulture step to the Start step.

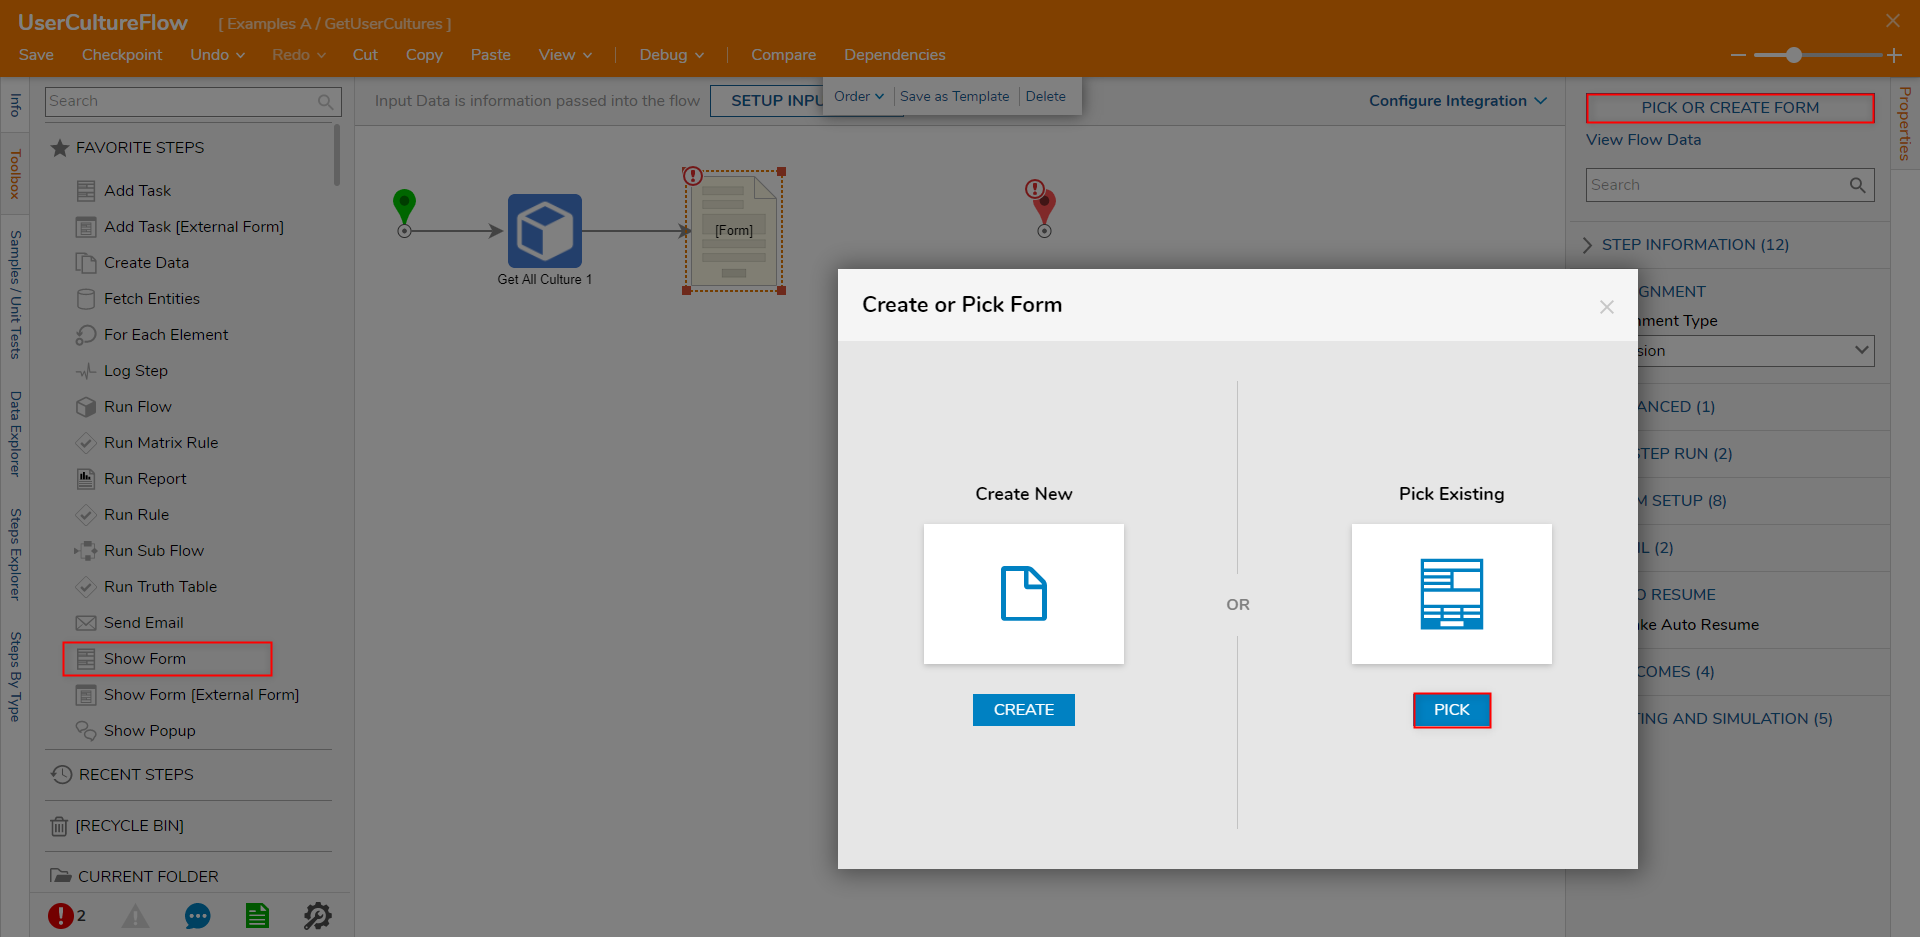
- Attach a Show Form step from the FAVORITE STEPS category of the Toolbox tab, to the Done path of the Get All Culture step.
- From the Properties tab of the Show Form step, select PICK OR CREATE FORM, then PICK the preexisting Culture List Form.
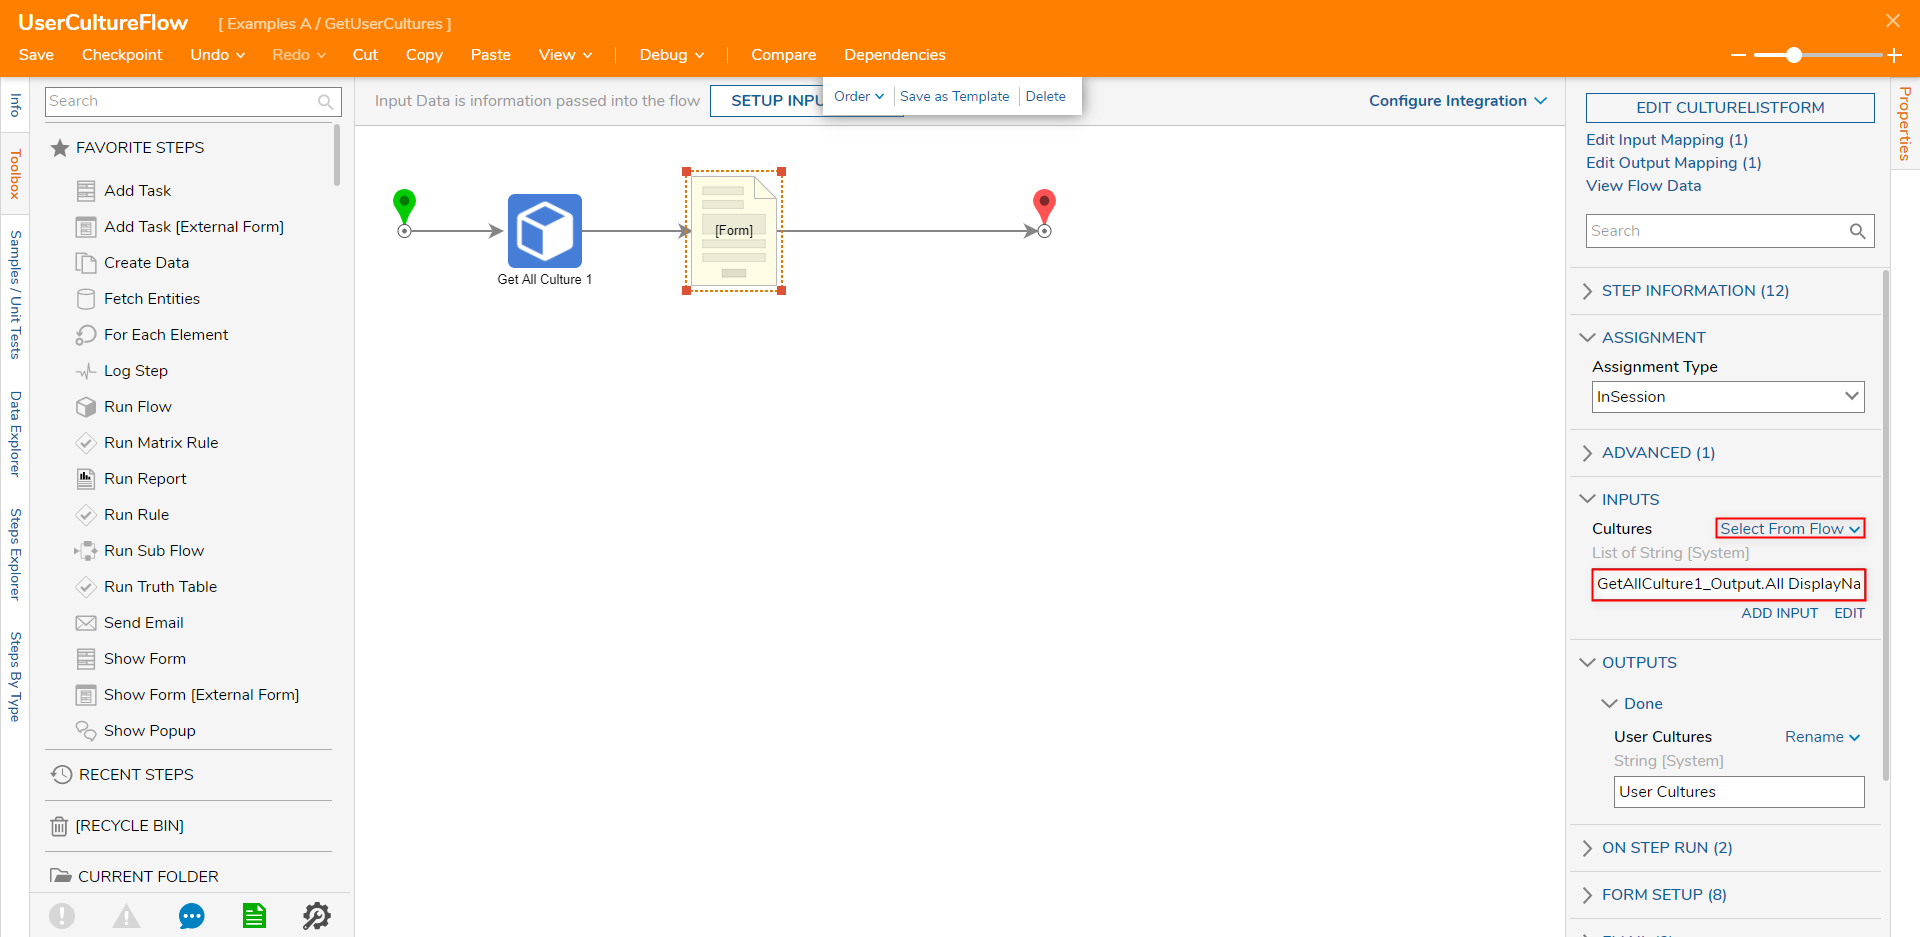
- From the Properties tab of the Form step, Select From Flow map GetAllCulture1_Output.All DisplayName to the Form's INPUT.
- Connect the Done path to the End step, then Save the Flow.
- Select the Debug link from the top Action bar, then click START DEBUGGING.
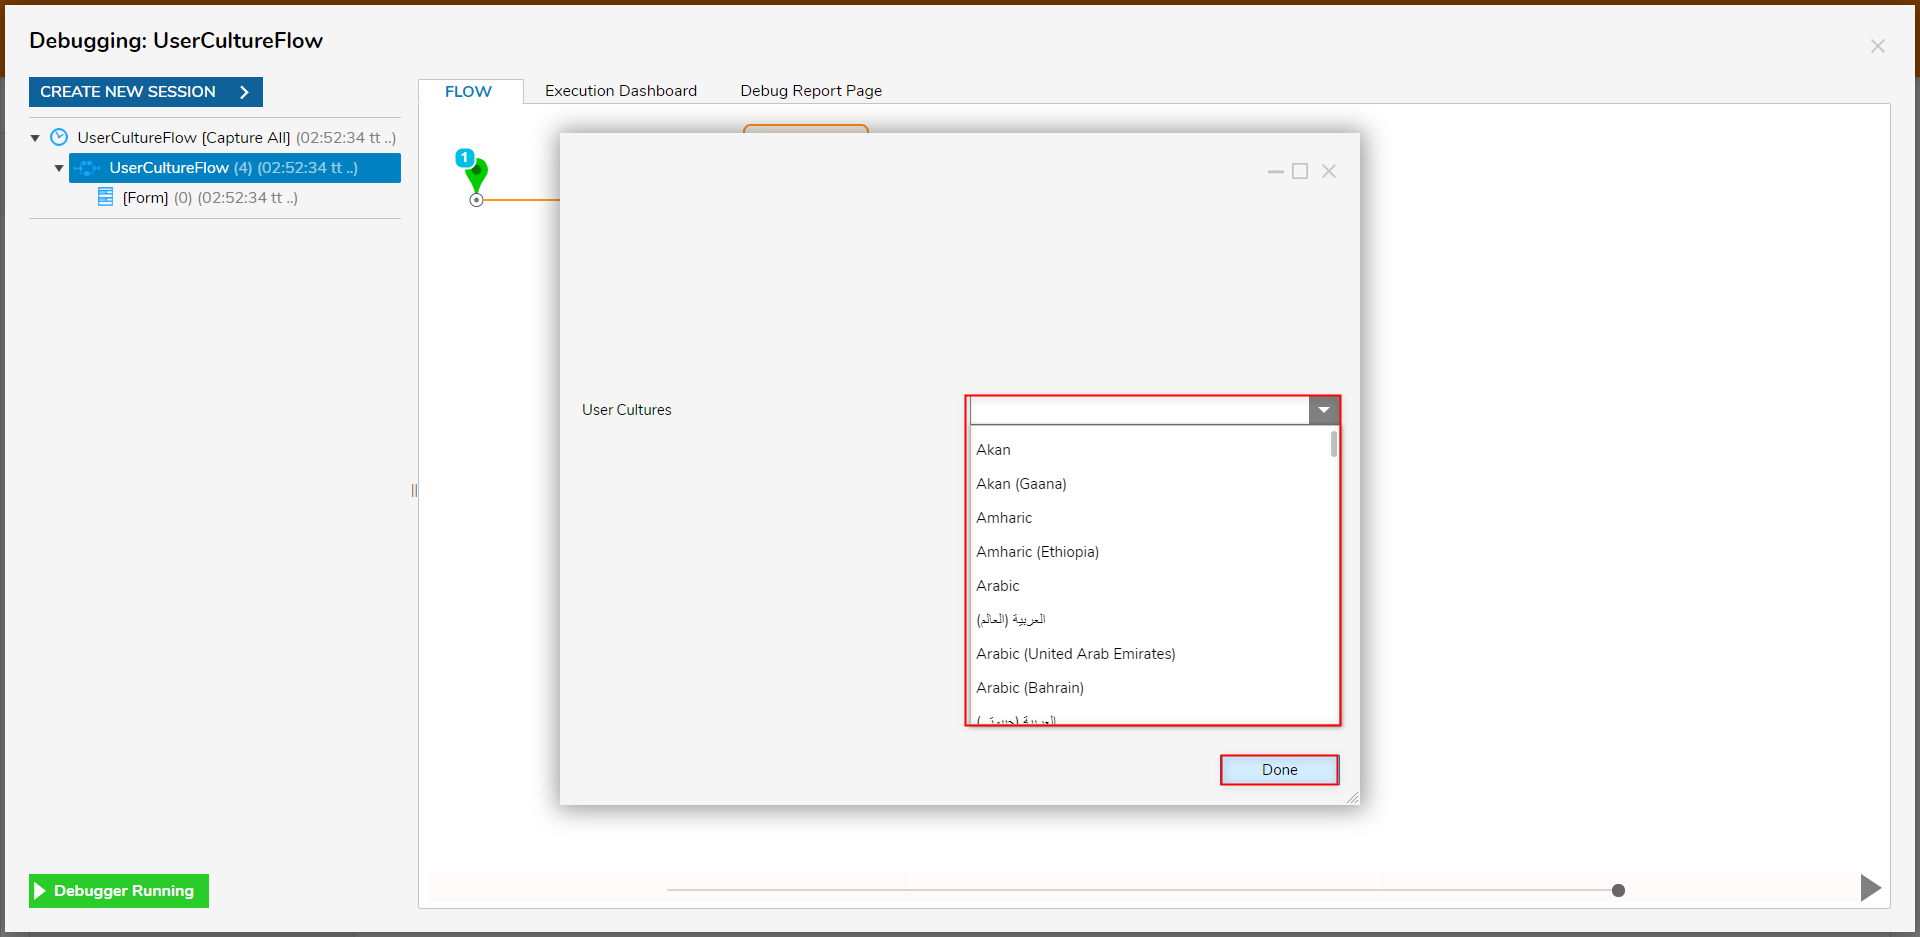
- From the Culture List Form, select the desired User Culture by choosing the desired Display Name from the dropdown. Then click the Done button.
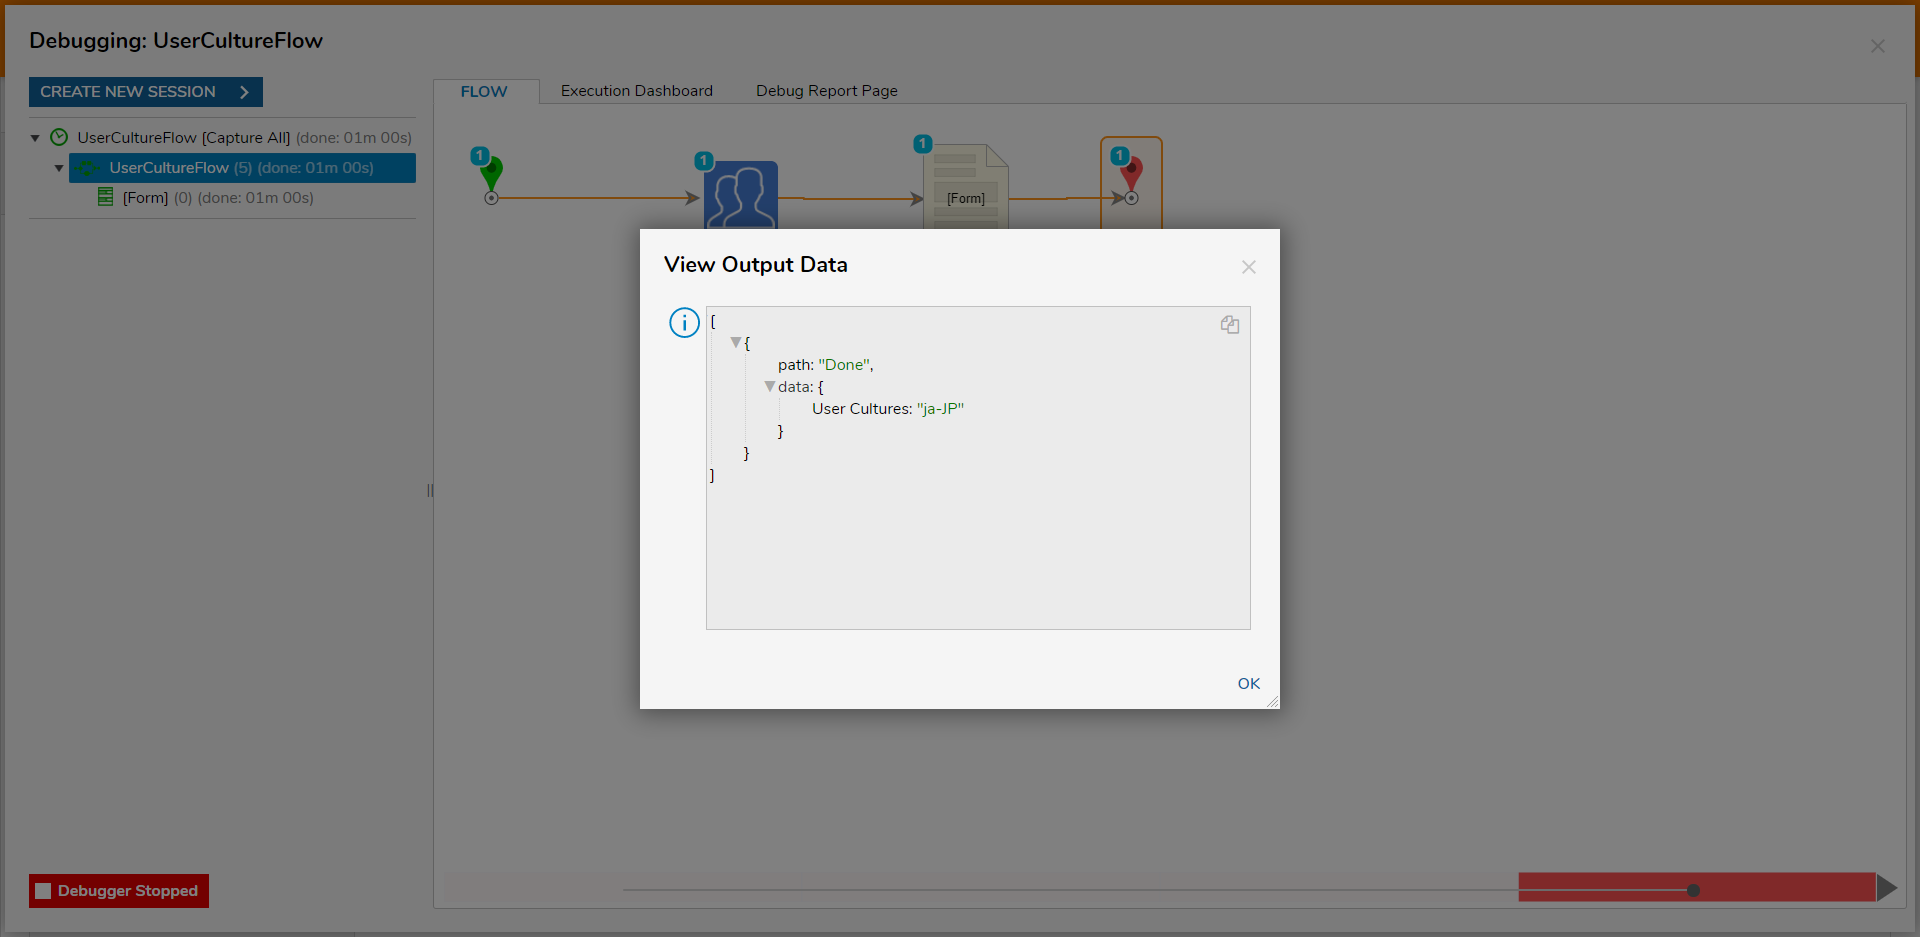
- Once the Flow concludes, verify that it outputs the selected Culture by selecting [Form] > Execution 1 > Show Output Data and checking the data > User Cultures value.
