SSO setup requires detailed settings that vary by provider and customer environment. It's best to have someone experienced in SSO and IT infrastructure to streamline the process. Decisions support team can help but may not solve unique problems.
Upgrading to v8.17:
Microsoft has renamed Azure Active Directory (Azure AD) to Microsoft Entra ID. This change has been incorporated into the platform starting from version 8.17 and above.
Decisions allow users to use Single Sign-On using Microsoft Entra ID (formerly known as Azure Active Directory) using the SAML Module.
Prerequisites
- Create and Enable single sign-on for an Enterprise application within Entra ID (Non-Gallery App).
- A metadata document from the application in Azure.
- SAML Module installed.
Accounts created before SSO setup?
If accounts were created before installing the SAML module, it is essential to modify them before enabling Single Sign-On for those particular accounts. Contact support@decisions.com to update the account. For more information, refer to Converting Account Types.
Configuring Entra ID
- Navigate to SAML Configuration within the Enterprise Application.
- Edit the following settings under the Basic SAML Configuration section.
- Identifier (Entity ID): Portalbase URL of decisions environment
- Reply URL (Assertion Consumer Service URL):
[Portalbase URL]/Primary/SAML/AssertionConsumer
- Scroll down to the SAML Certificates. Copy the link for the App Federation Metadata URL.

Configuring SAML Module in Decisions
- In Decisions Studio, navigate to System > Settings, right-click SAML Settings, and select Edit.
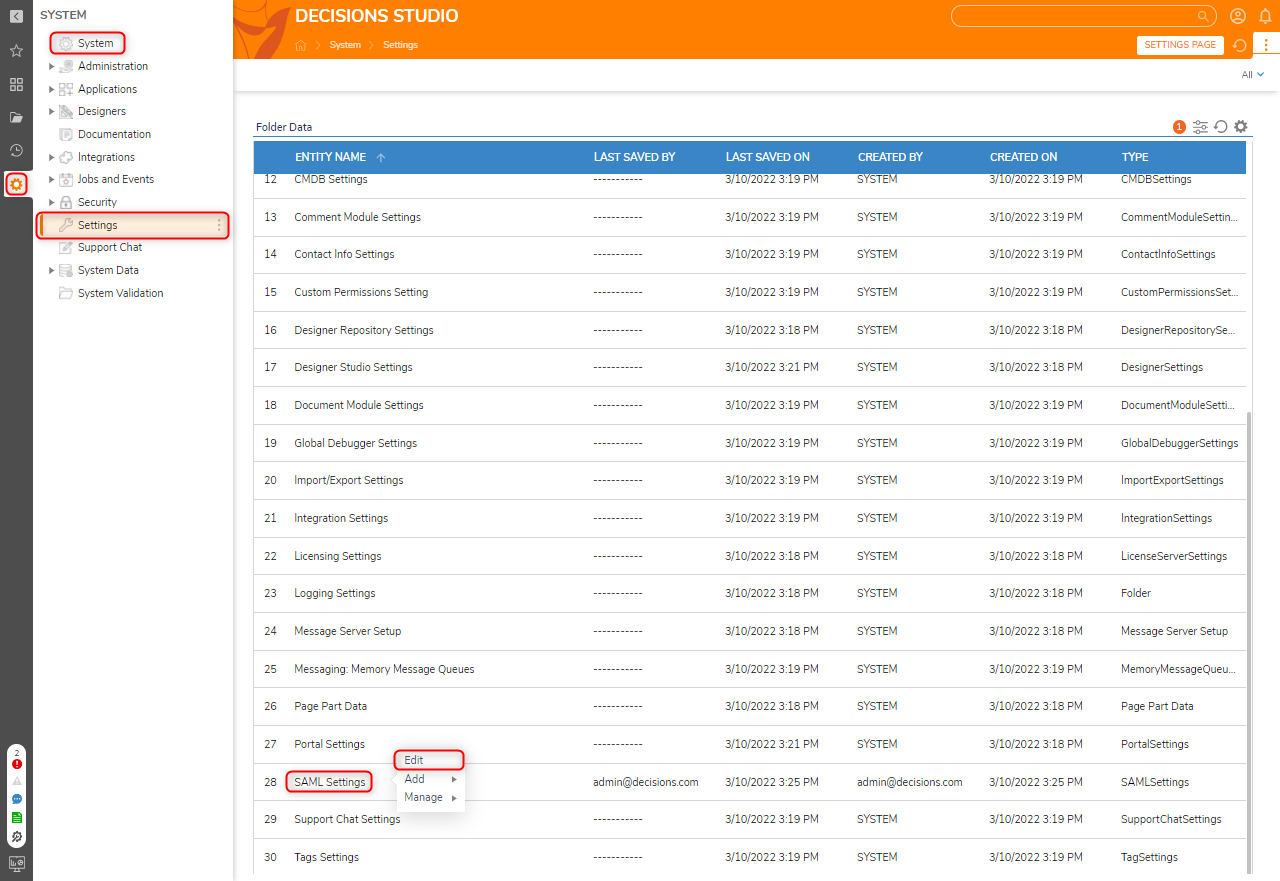
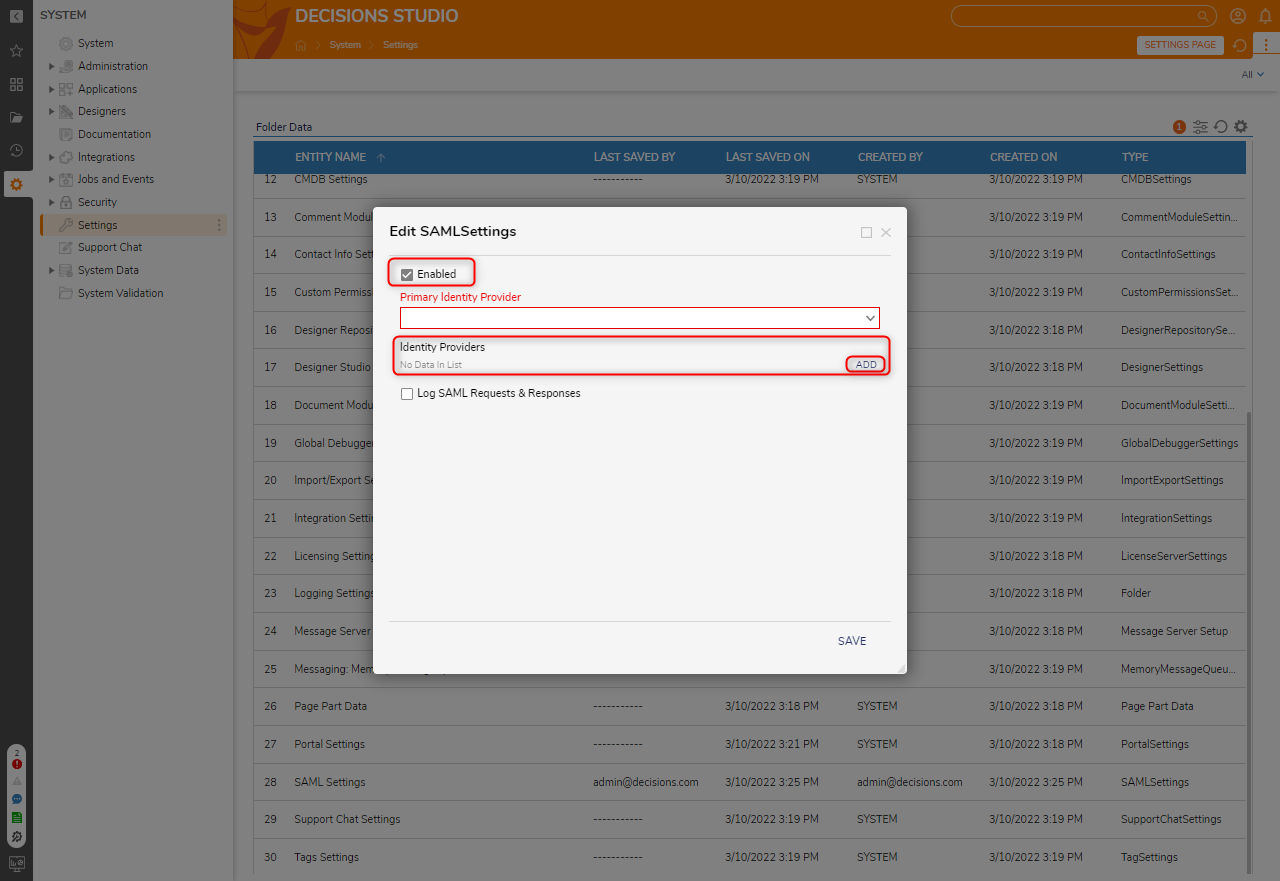
- From the Edit SAML Settings window, check the Enabled box. Then, under Identity Providers, click ADD.
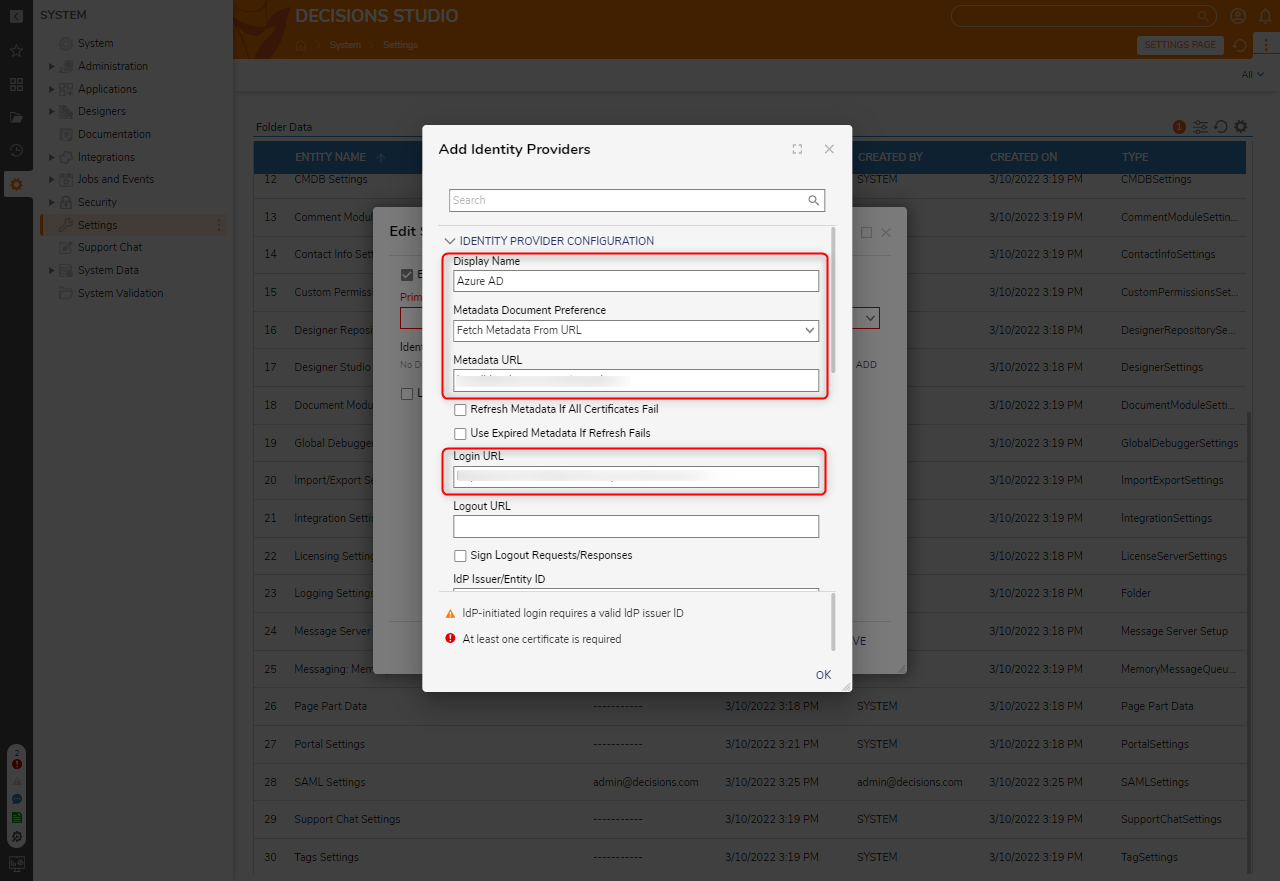
- From Add Identity Providers, provide a Display Name. Under Metadata Document Preference, select Fetch Metadata From URL. Then, map the applicable Metadata via the chosen method. The Metadata URL is generated by the Entra ID server and is a required input. Providing it will automatically fill in all fields of the Module except for the SP Issuer ID, which is the Portal Base URL.
 The screenshot below is an example of the Azure Portal to demonstrate where to find the metadata URL for a created app.
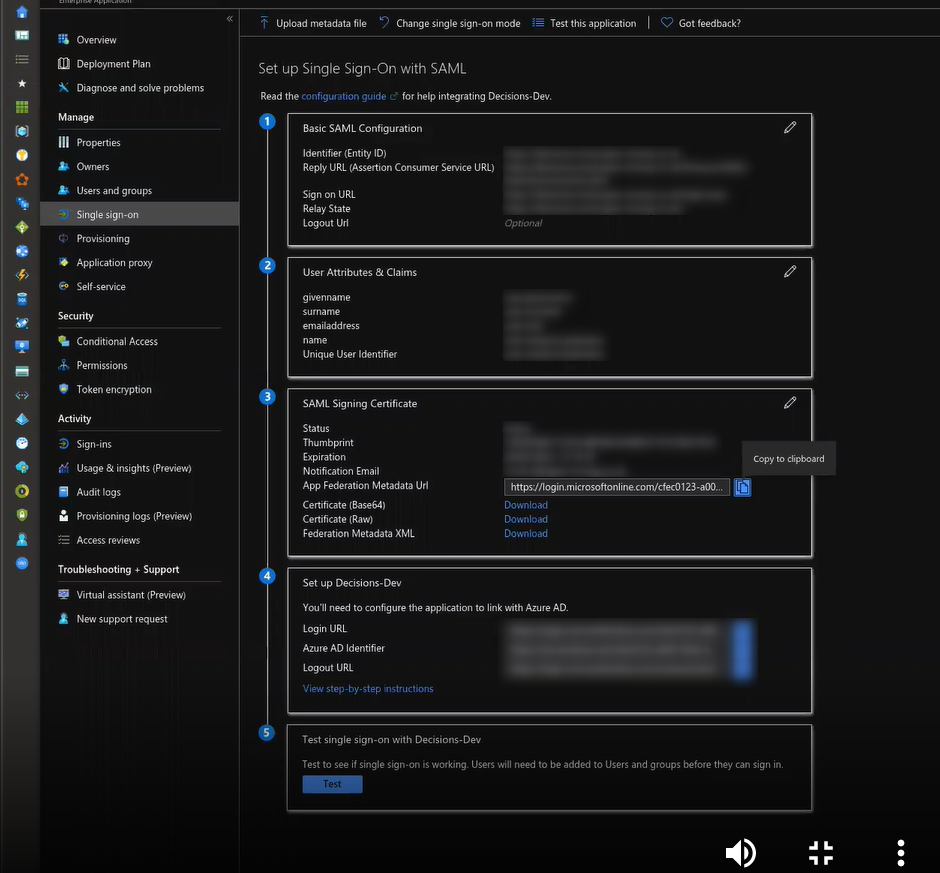
- Under the PROCESS IF USER NOT FOUND category, select Run Flow In Background. Under Run Flow, click PICK OR CREATE FLOW and pick SAMLDefaultCreateAccount.
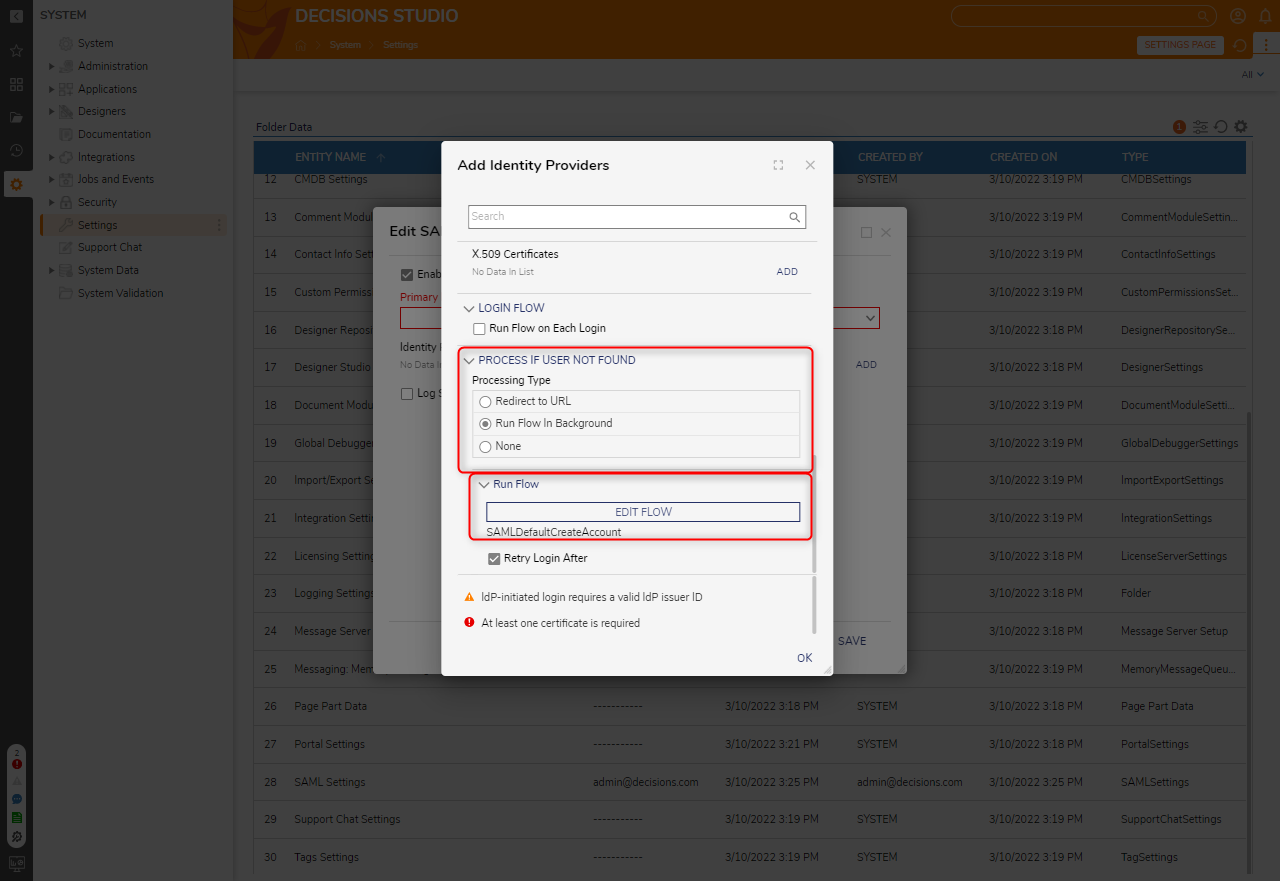
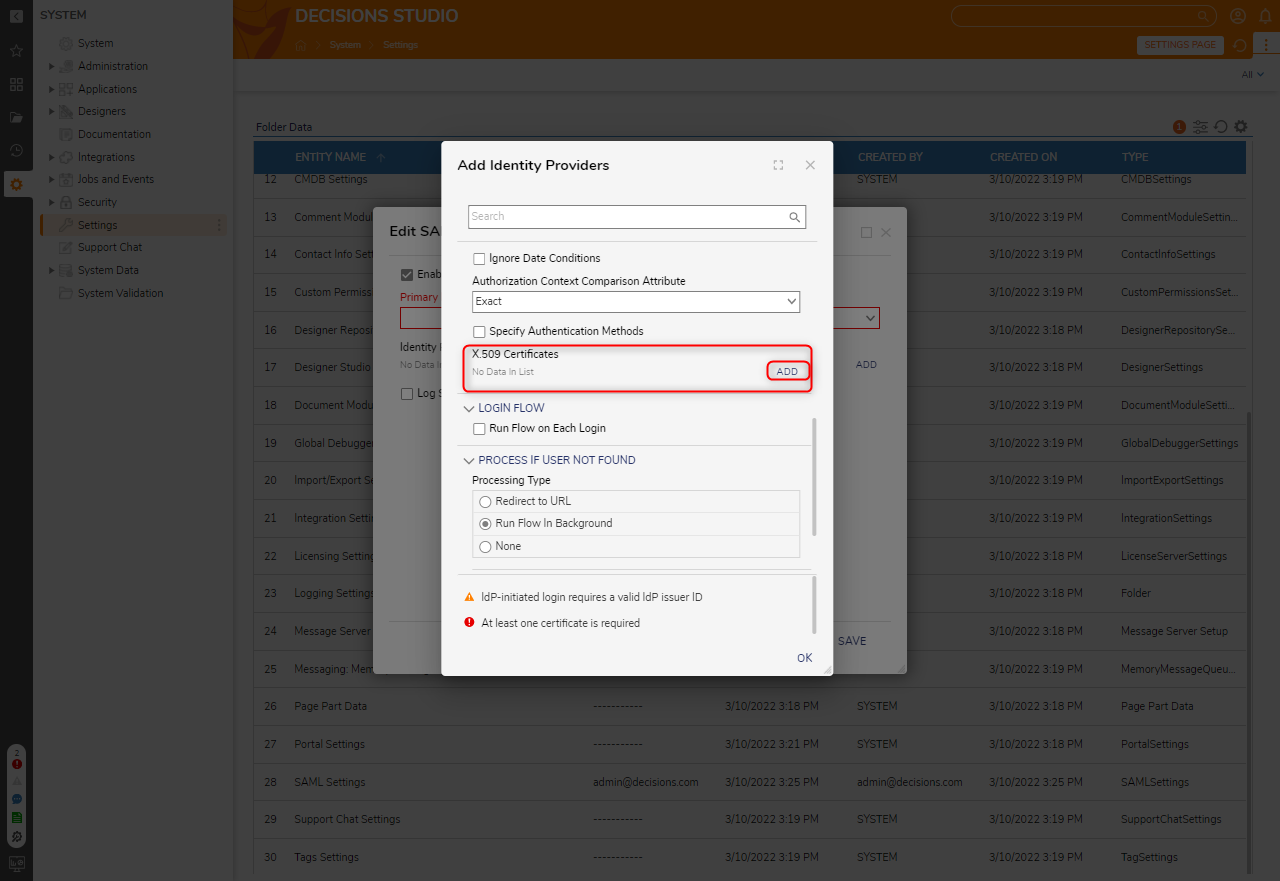
- If manually configuring the module, click ADD under X.509 Certificates and add a valid x509 Certificate. Click OK. If the metadata URL was used, the X.509 certificate would automatically be pulled. For more information on x.509 Certificates, see What is an x509 Certificate?
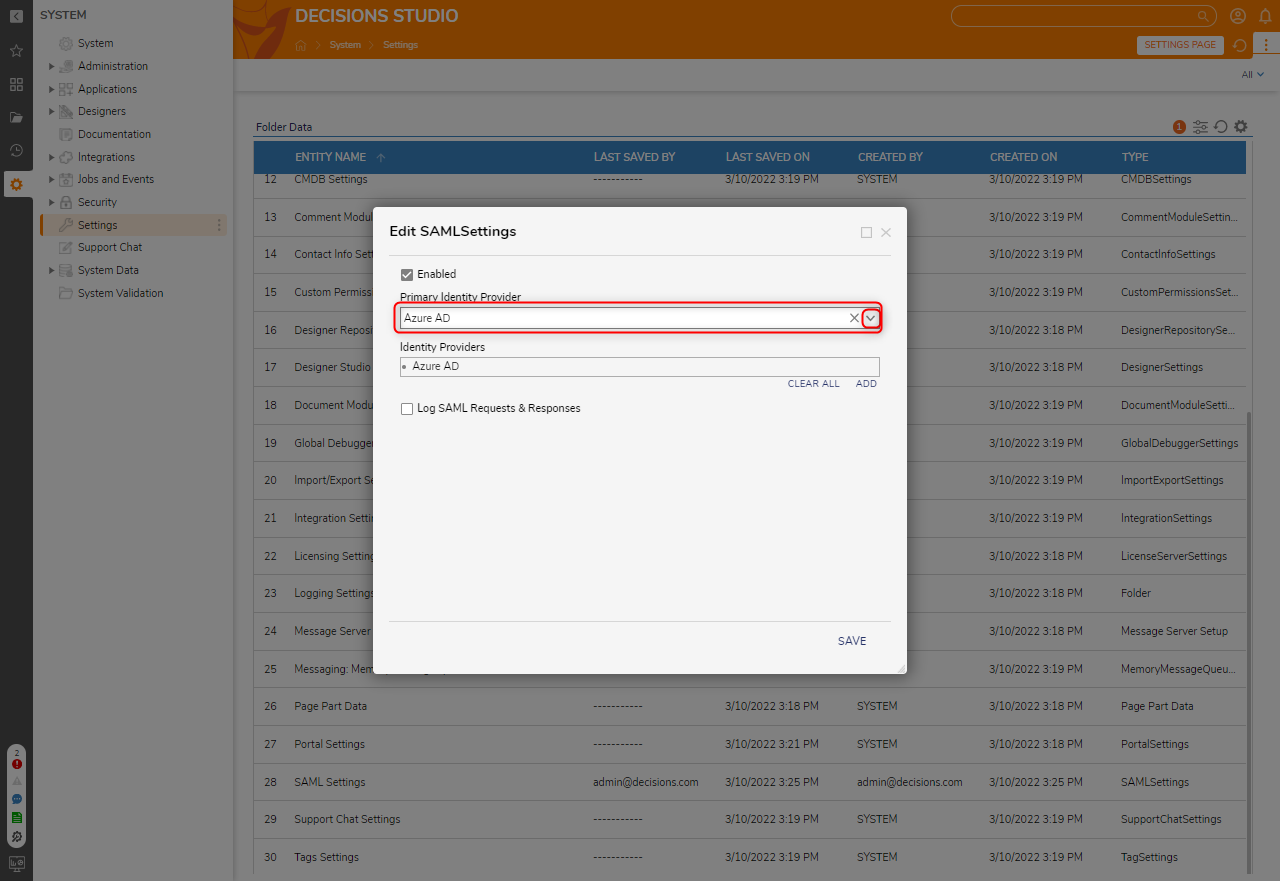
- In the Edit SAMLSettings window, select the newly added Identity Provider from the Primary Identity Provider list. Save once the Primary Identity Provider has been configured.Log SAML Requests & Responses is an optional setting that should only be enabled when troubleshooting. Ensure that this setting is disabled otherwise. Once enabled, the location for the SAML logs can be found at C:\Program Files\Decisions\Decisions Server\Logs.
Enabling SSO
- Navigate to C:\Program Files\Decisions\Decisions Server and open the Settings.xml in a Text Editor.
- Locate the <EnableSingleSignOn> line and change the false value to true. Save and close the file.
- Restart the Decisions Server.
- Continue testing on an Incognito Session; use the first open session to uncheck the Enabled button in the SAML module should something not work. This saves users from setting EnableSSO to false and restarting the Decisions Server again.
Troubleshooting
If a user wants to convert a local account to a SAML/SSO account or if a user receives errors when updating the User Identifier:
- Modify the UserID of the account
- Use SQL to modify the entity_account table and change the type of account
- Create a new account after SAML has been turned on and add it to the admin group
If the redirect is working only on a refresh of the initial login:
- Check the Retry on Log-In checkbox
- Ensure “/Login” is at the end of the Sign-On URL (case-sensitive)
When there is a "Context can only be used from localhost" error:
- Add the IP/Domain to <LoginAllowedIPs></LoginPageAllowedIPs> in the Settings.xml file
For further information on Active Directory, visit the Decisions Forum.