iCal Module
- 03 May 2022
- 3 Minutes to read
- Print
- DarkLight
iCal Module
- Updated on 03 May 2022
- 3 Minutes to read
- Print
- DarkLight
Article Summary
Share feedback
Thanks for sharing your feedback!
Overview
The iCal Module allows users to create, send, and receive calendar events through Decisions to calendar applications, such as Microsoft Outlook and Gmail.
To follow this example, the iCal Module needs to be installed.
The iCal module has multiple steps to help manage calendar events.
| iCal Step | Description |
|---|---|
| Create Event | Allows a user to create event information and outputs the details as an iCal file type. |
| Create Recurring Event | Allows a user to create a recurrent event. |
| Cancel Event | Allows a user to cancel an event that matches the Appointment ID, Location, and Start Date/Time. |
| Email Appointment Invite | Allows a user to enter meeting details and send the email invite within the same step. |
| Email Appointment Cancellation | Allows a user to enter the meeting details and send the cancellation email within the same step. The meeting information, which includes the Appointment ID, Location and Start Date/time, must be identical for the cancellation to take place. |
| Email Calendar File | Allows a user to send the iCal File type to the specified email address. |
| Get Event From File | Will take the .ics File Data as an input and output the event. |
Prerequisites
The following is required before proceeding with the example below:
- Access to one of the supported iCalendar format Accounts.
- Proper installation and setup of the iCal Module in Decisions.
For more information on how to install Modules in Decisions, see: Installing Modules.
Example
Sending Email Appointment Invite
This example will demonstrate how to email an appointment invite.
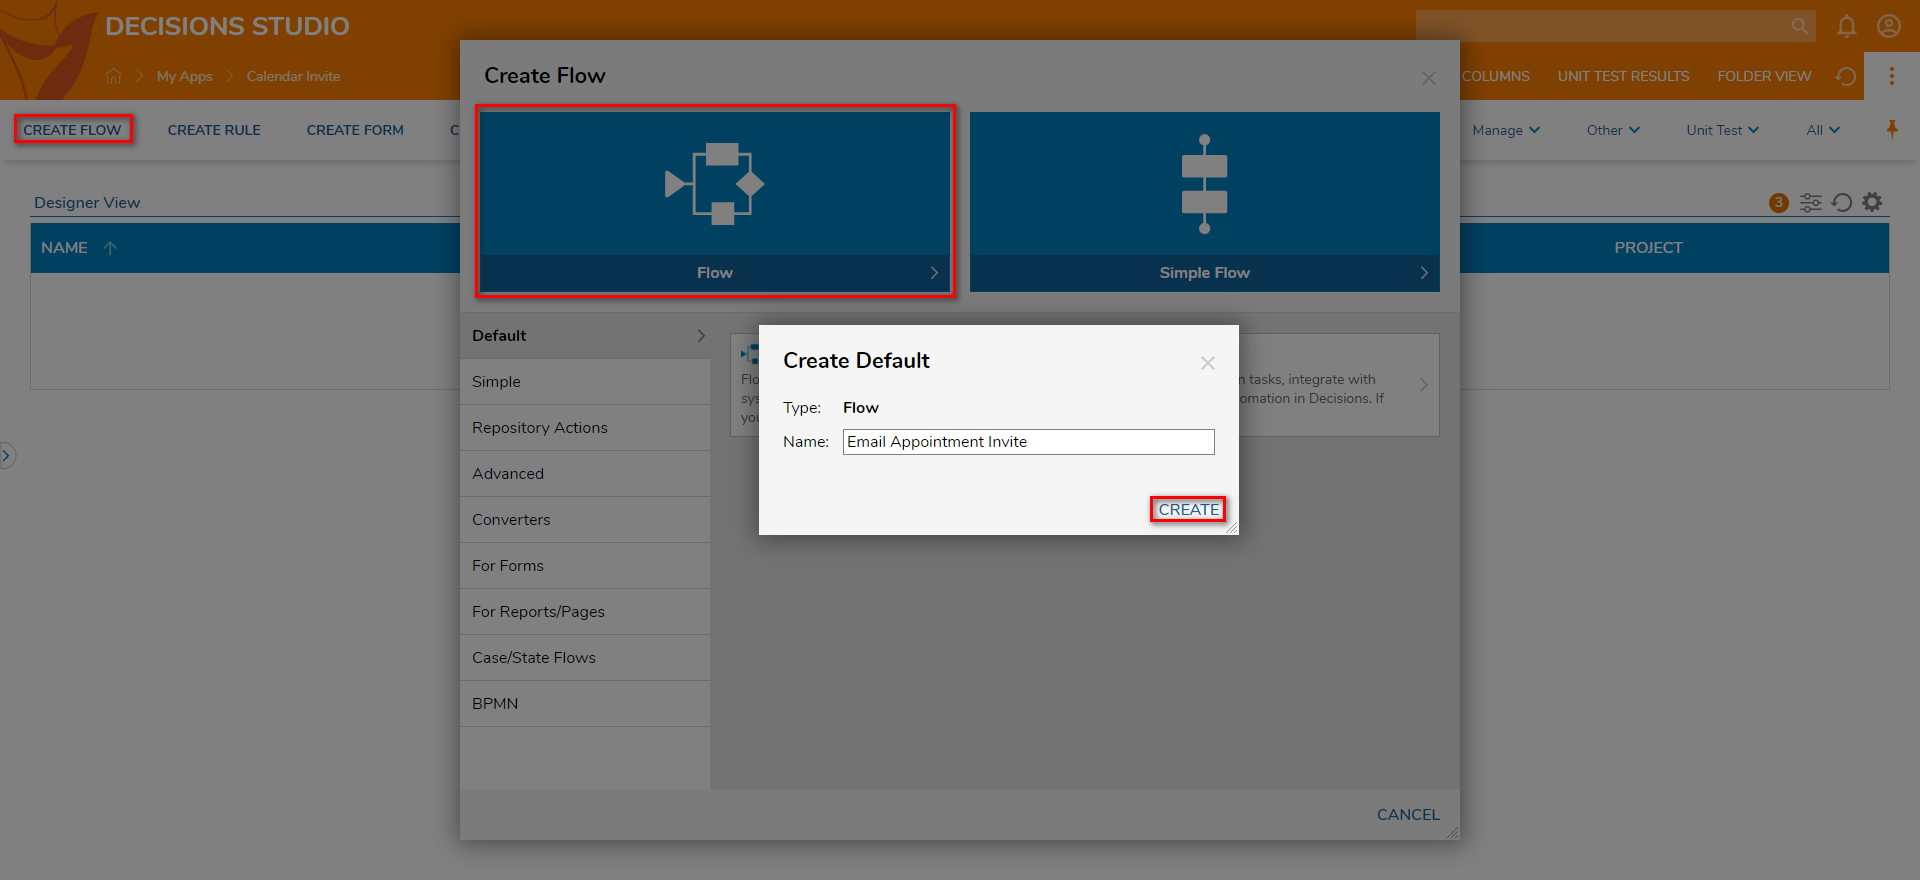
- In the Designer Project, click CREATE FLOW on the Global Action Bar and select Flow. Name the Flow (Email Appointment Invite) and click CREATE.
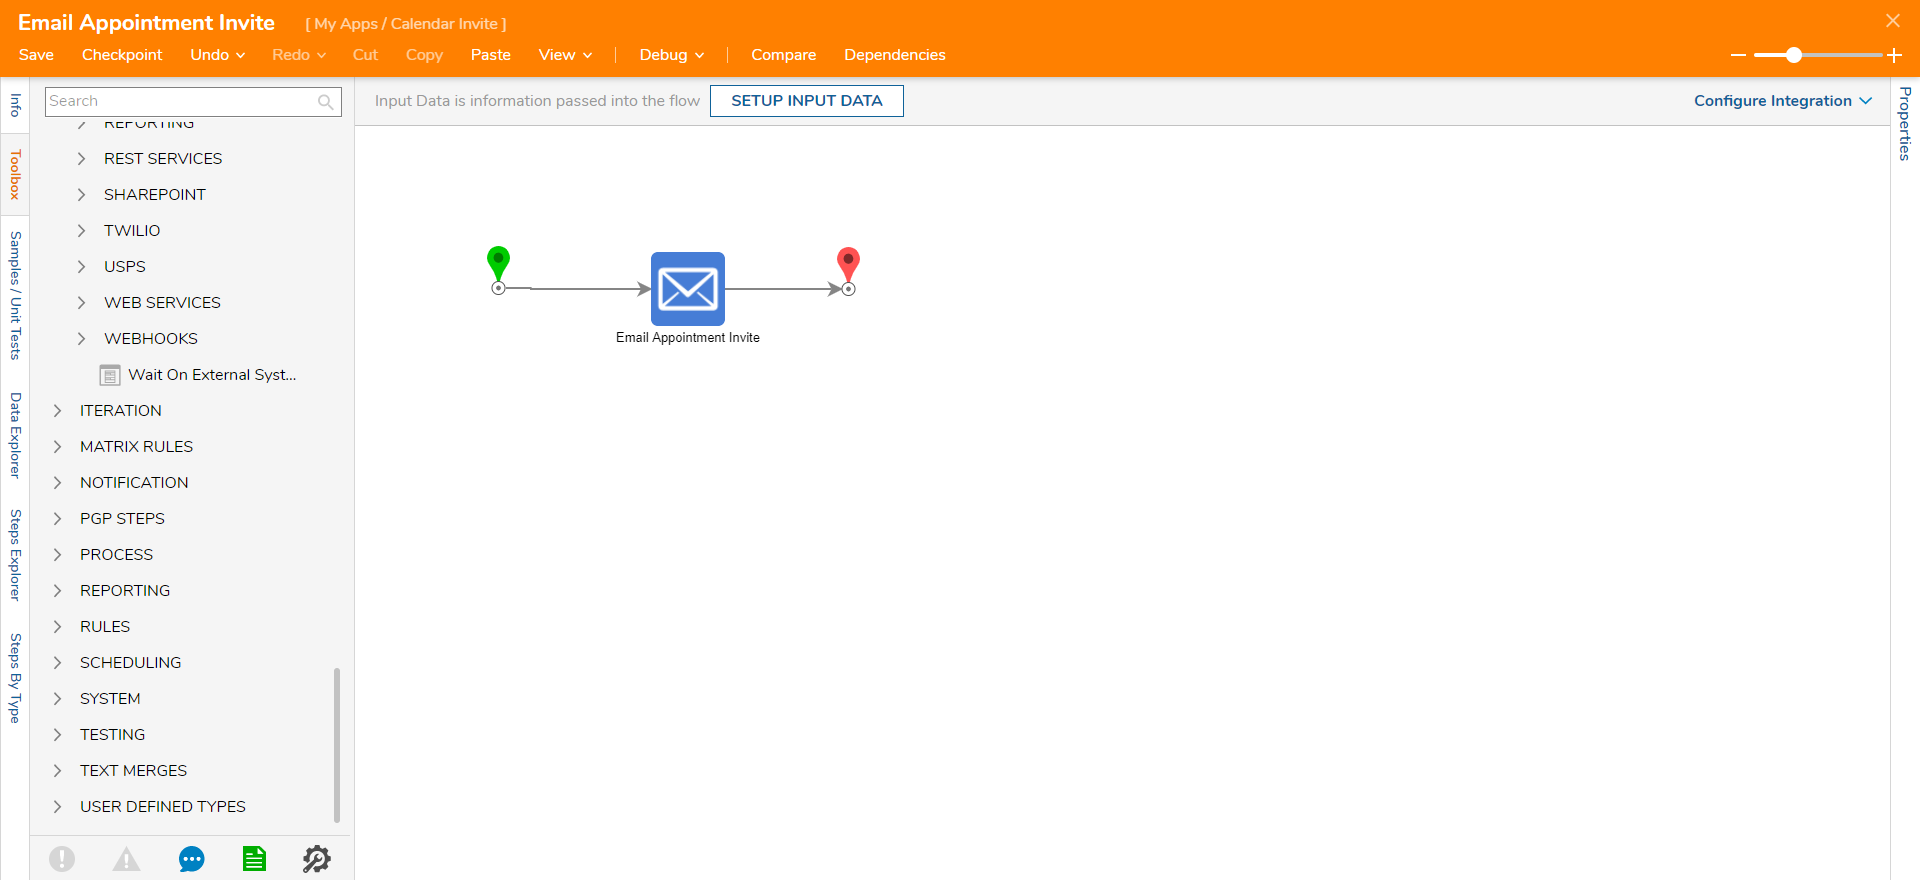
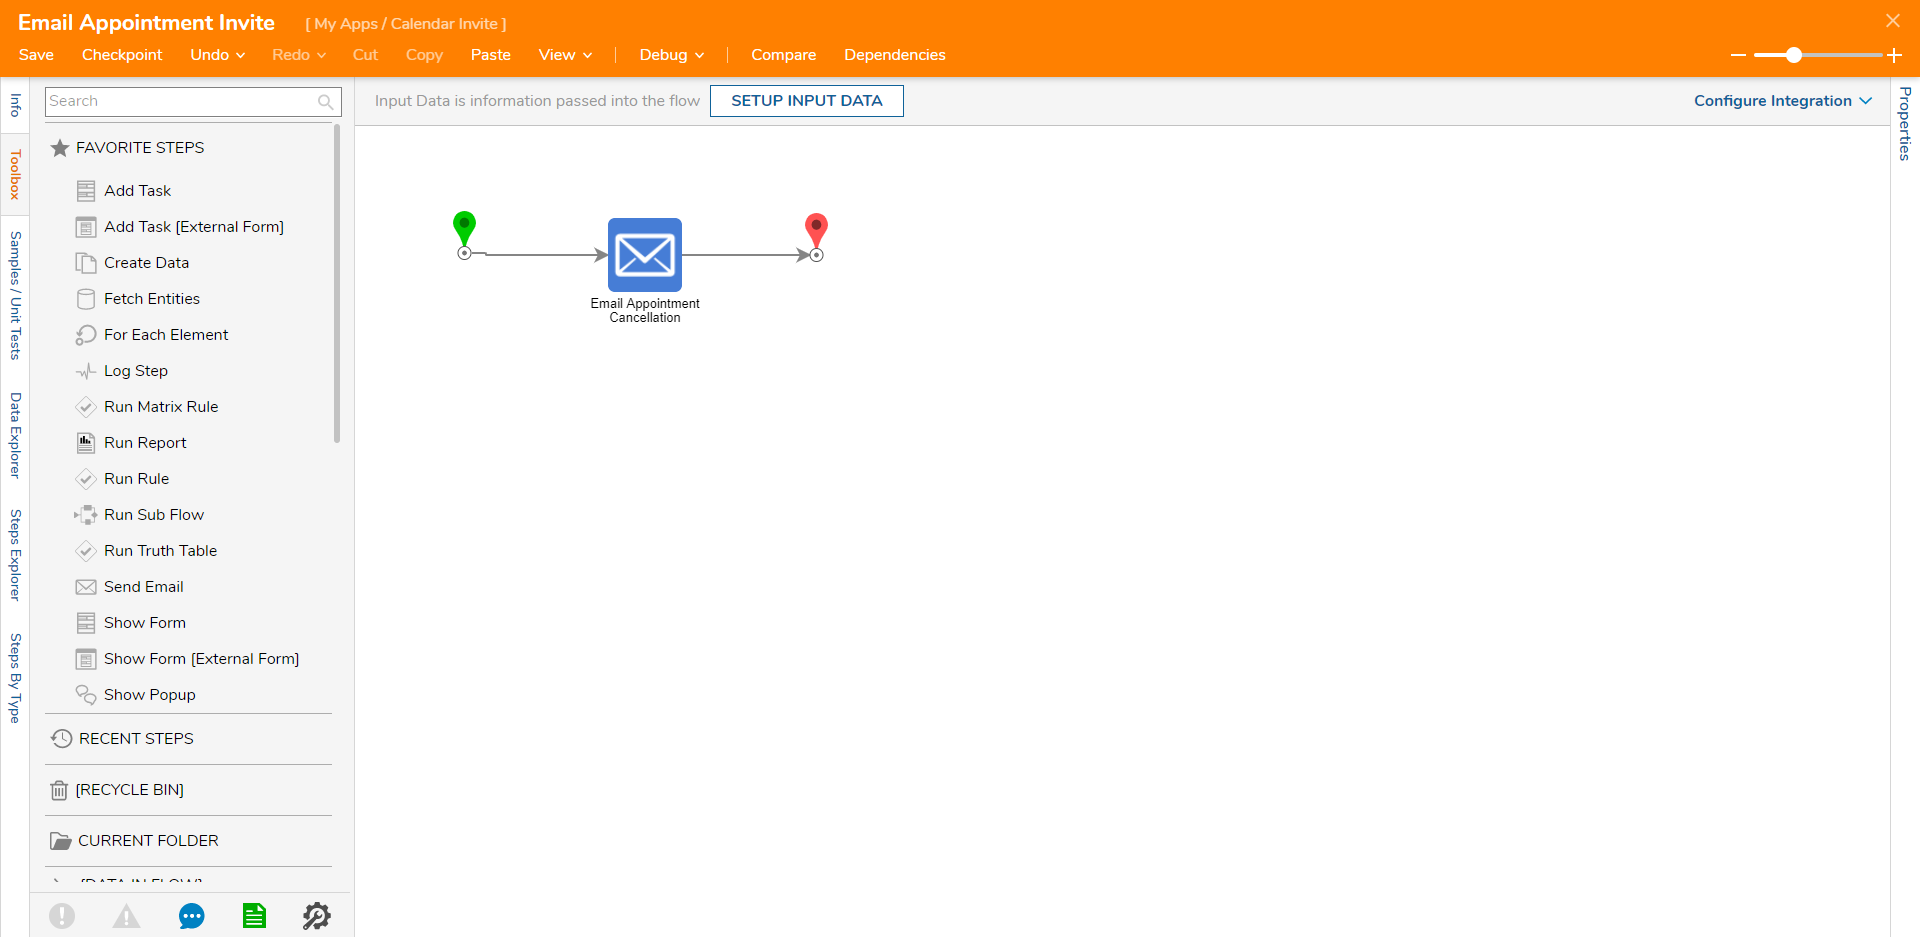
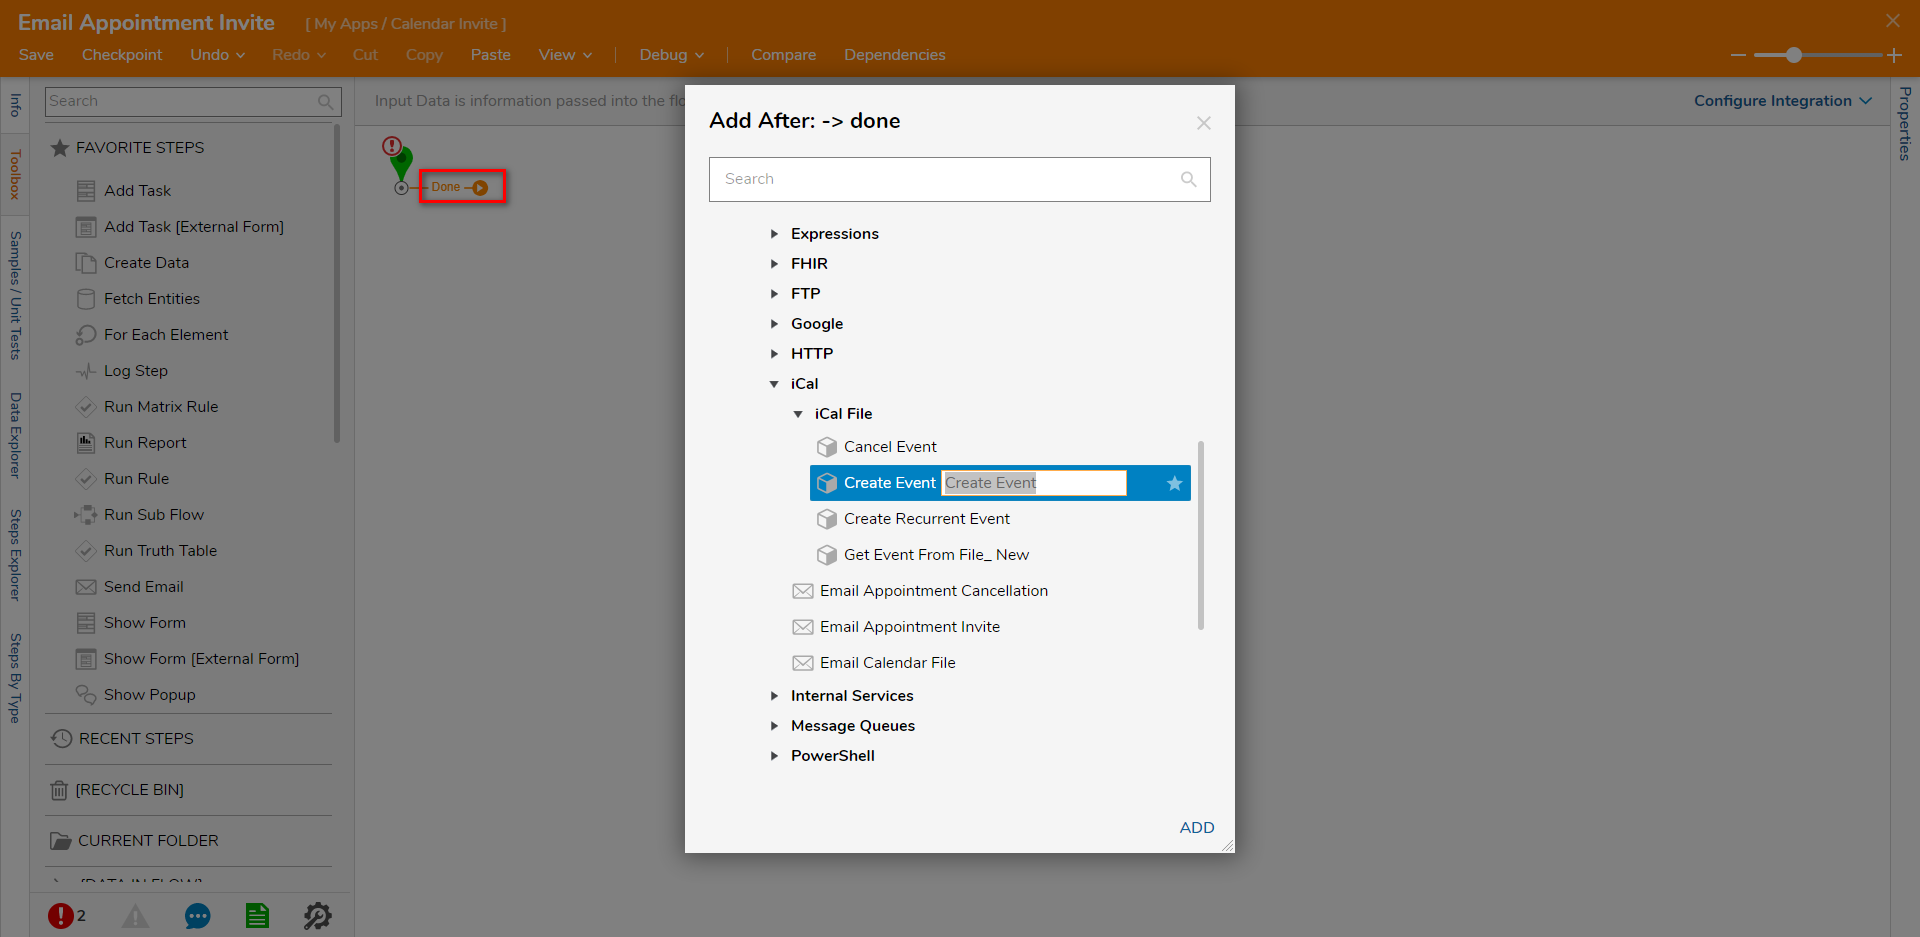
- Click the Done path on the Start step and navigate to Integrations > All Integrations > iCal. Select the Email Appointment Invite and click ADD.

- Under the APPOINTMENT category on the Properties panel, configure the required input fields. Select Unknown for the Start Date / Time and select Constant. Configure this field for a future date.
.png)
- Set the Duration field as a Constant for 30 minutes.
.png)
- Set the Appointment Description as a Constant and enter "Sales Meeting".
.png)
- Set the Location as a Constant and enter "Conference Room 302".
.png)
- Set the Appointment ID as a Constant and enter "343".
.png)
- In the Summary text box enter "Discussion on Recent Sales for Q3".

- Under the INPUTS category on the Properties panel, configure the To, From, Body, and Subject text boxes.
- Connect the Sent path to the End step. Click Save to save the changes to the Flow.
- Click Debug on the top action panel. Then, click START DEBUGGING. After the Debugger runs, check the inbox of the email that the invite was sent.To Cancel an Appointment EventUse the Email Appointment Cancellation step to cancel a created appointment. The appointment inputs and details should be the same used in the email appointment invite step for the transaction to be valid.


.png)
.png)
.png)
.png)
.png)


Send an invite to an Event via Email Calendar File
This example will demonstrate how to create an event with an email calendar file.
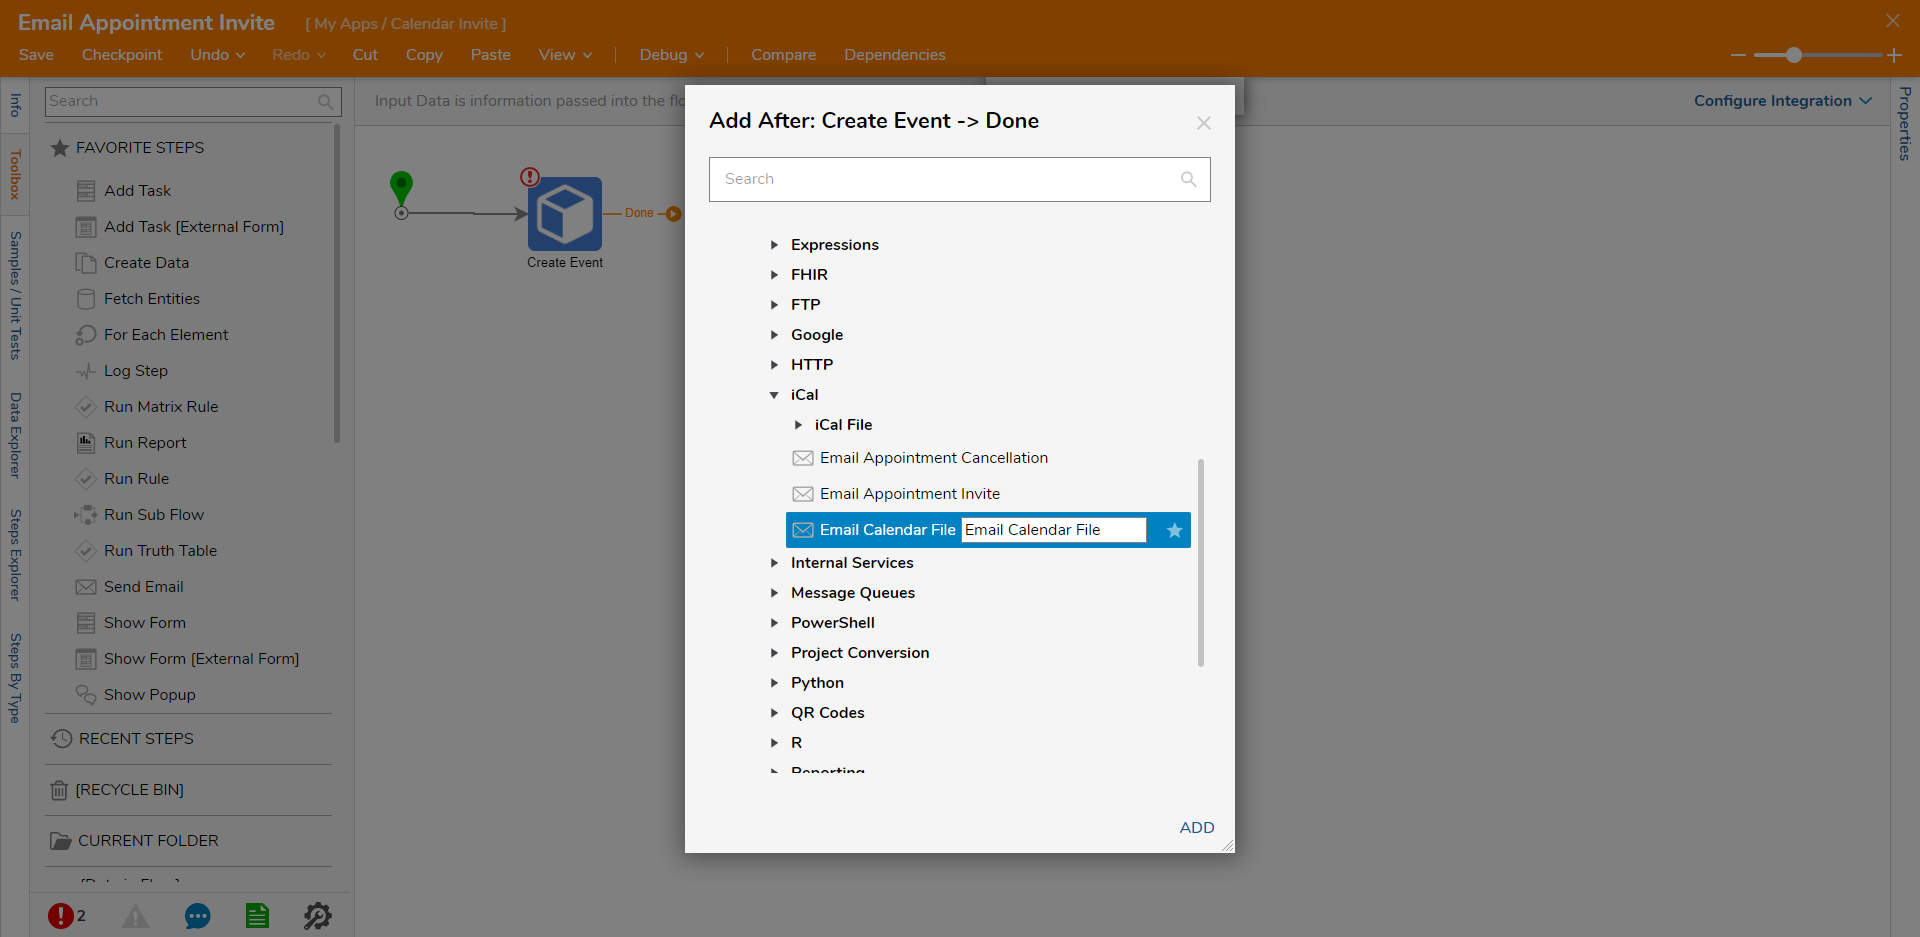
- In a Flow, click the Done path on the Start step. Navigate to Integrations > All Integrations > iCal > iCal File and select Create Event.The Create Event step will create an appointment and output the information as an iCal file type. The Email Calendar file requires this file type to properly load in programs like Microsoft Outlook or Gmail.
- With the Create Event step selected, configure the event under the INPUTS category.

- Click the Done path on the Create Event step and navigate to Integrations > All Integrations > iCal. Select Email Calendar File and click ADD.
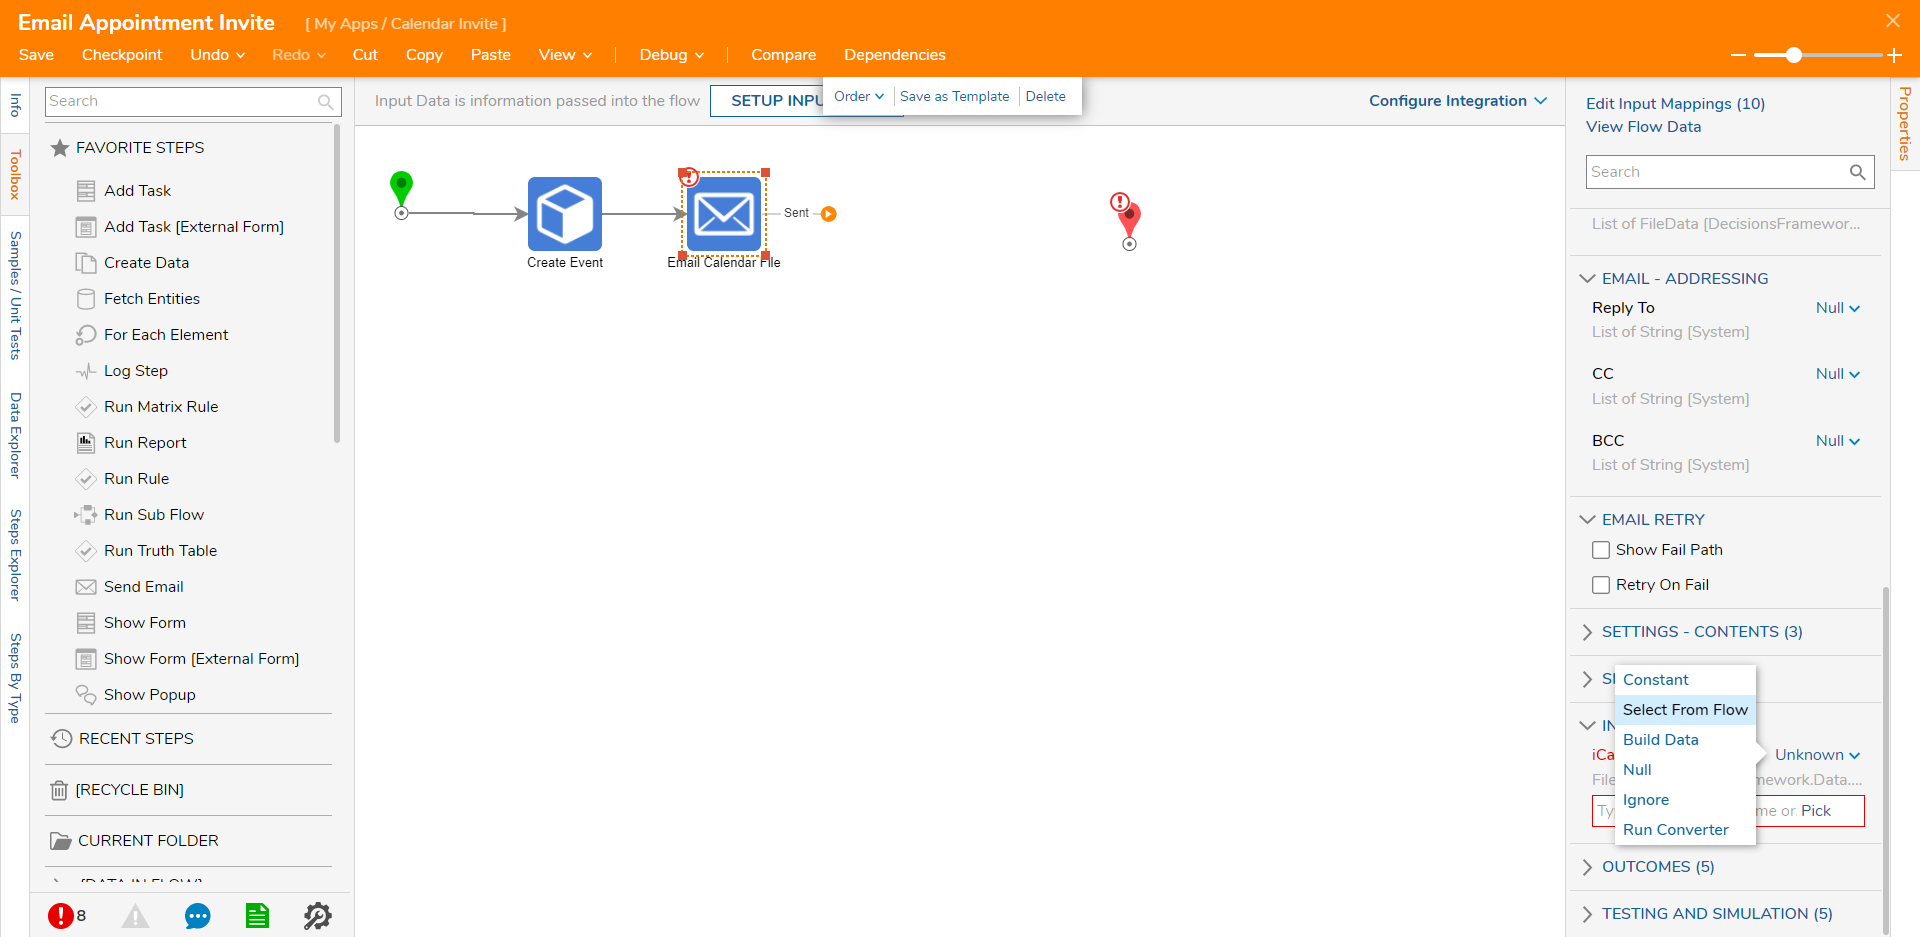
- Under INPUTS on the Properties panel, select Unknown and click Select From Flow.
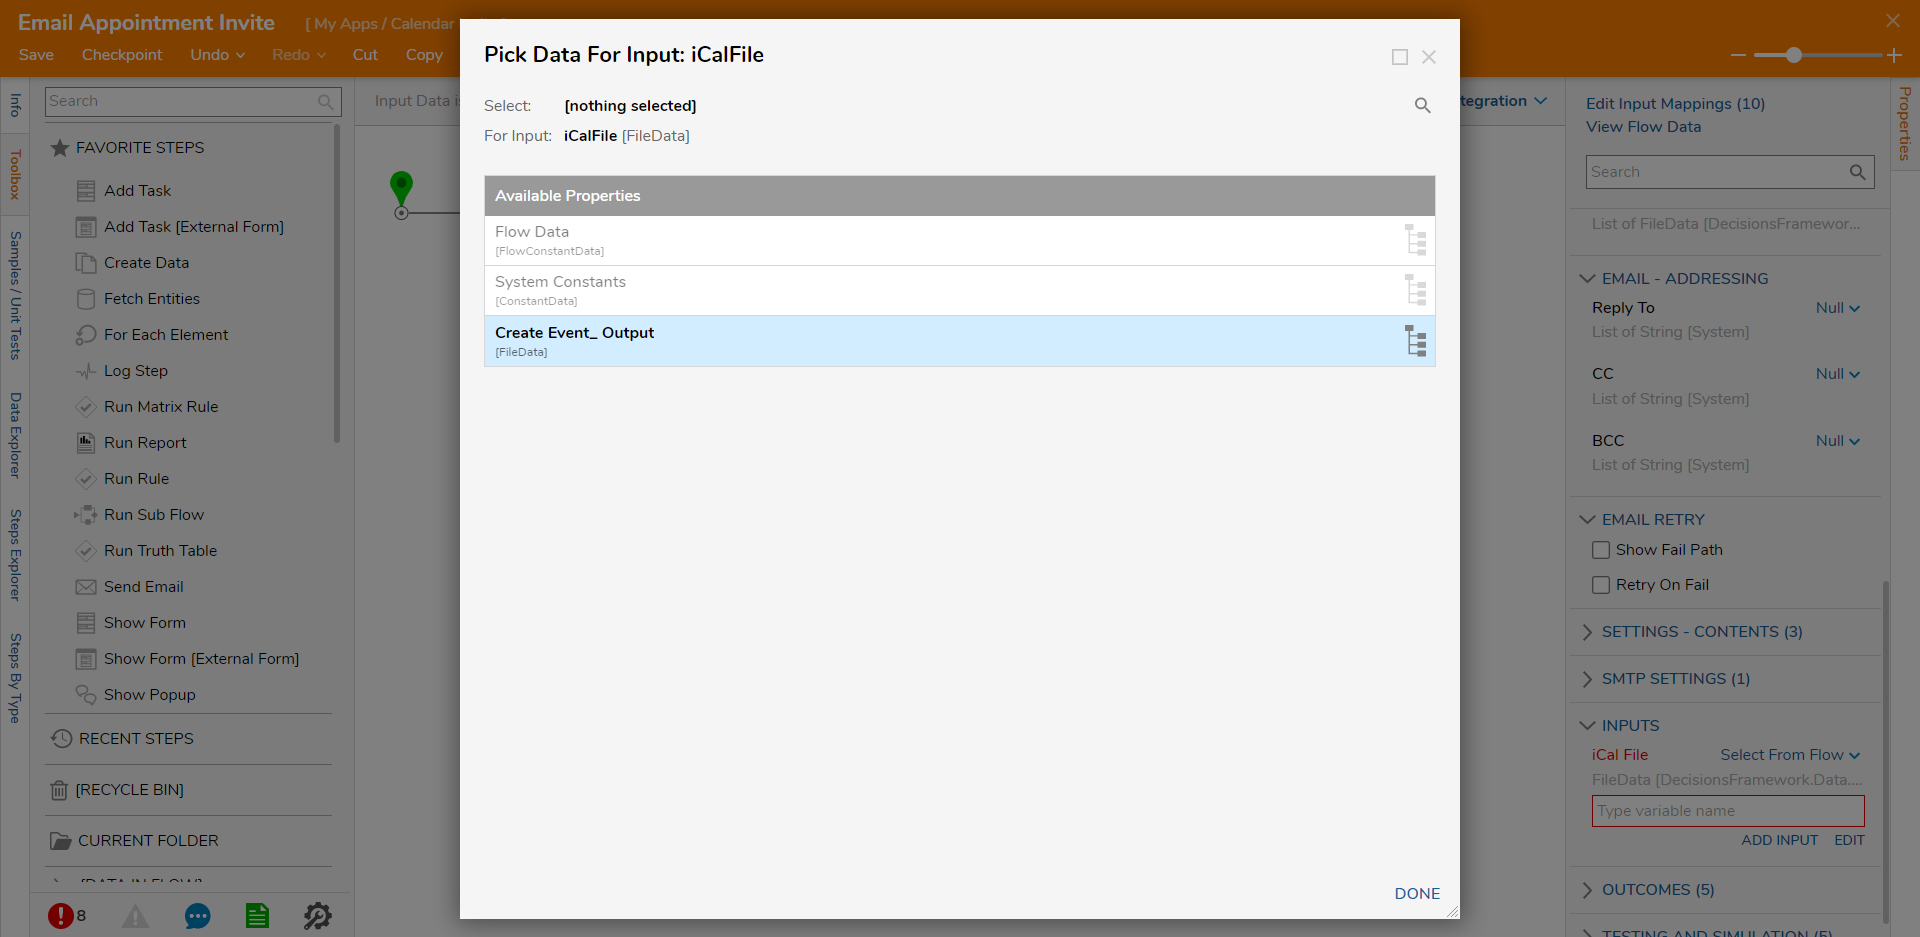
- Select the Create Event_ Output on the Pick Data For Input window and click DONE.
- Connect the Sent path to the End step. Then, click Save to save the changes to the Flow.
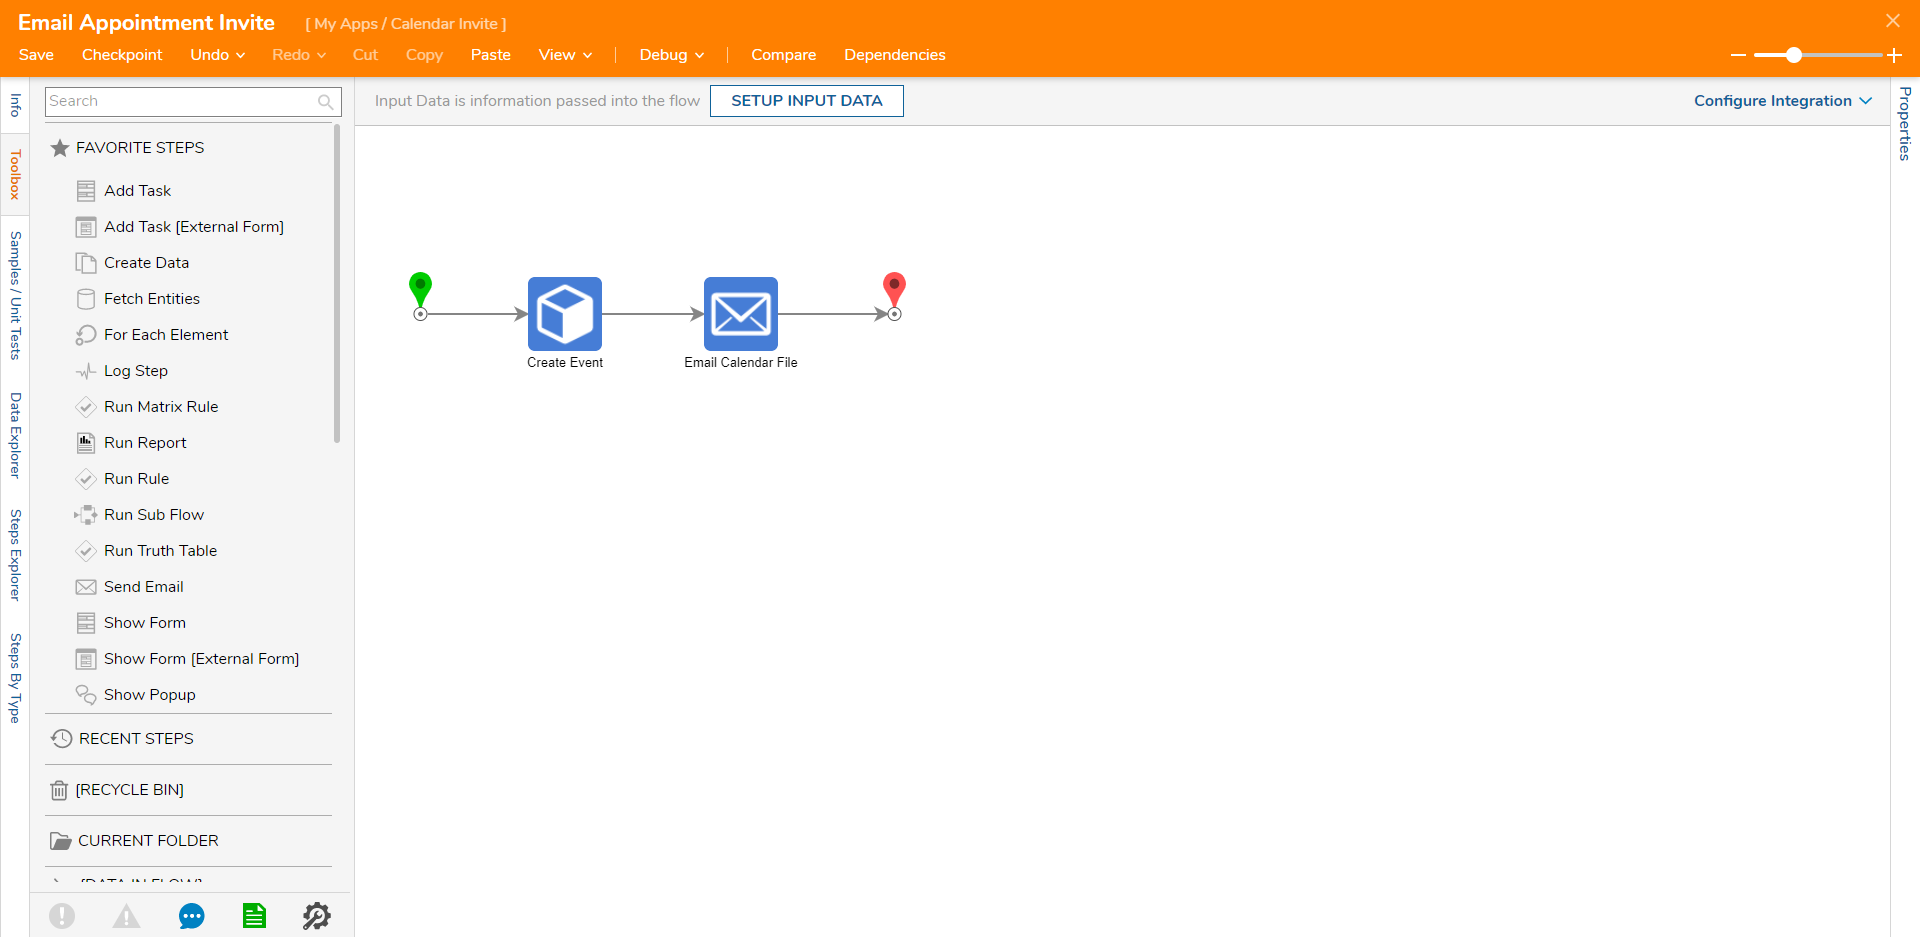
- On the top action bar, click Debug. Then, click START DEBUGGING. After the Debugger runs, the invite will appear in the user's email inbox.


Unsupported Modules
- MSCRM
- MSCRM2011
- OPC
- SymantecSMP
- SCCM
- SCO
- Unsupported Modules if Hosting in Containers
- Powershell
- SolaceMQ
- Python
- R
Was this article helpful?