Overview
| Data Structure Quick Summary | ||||||
|---|---|---|---|---|---|---|
| Complexity? | Performance Impact? | Saves to Database? | Configuration Folder? | Entity Framework? | Folder Behavior? | Process Tracking? |
| High | High | Yes | Yes | Yes | Yes | Yes |
The Case Entity Data Structure is a folder-based data type that has multiple states that can be defined. It is not limited to following a linear process but can move from one state to any other state. The Case Editor allows users to define actions that apply to each state. The folder type behavior allows users to build Dashboards or store other data such as Entities or Assignments.
Creating A Case Entity
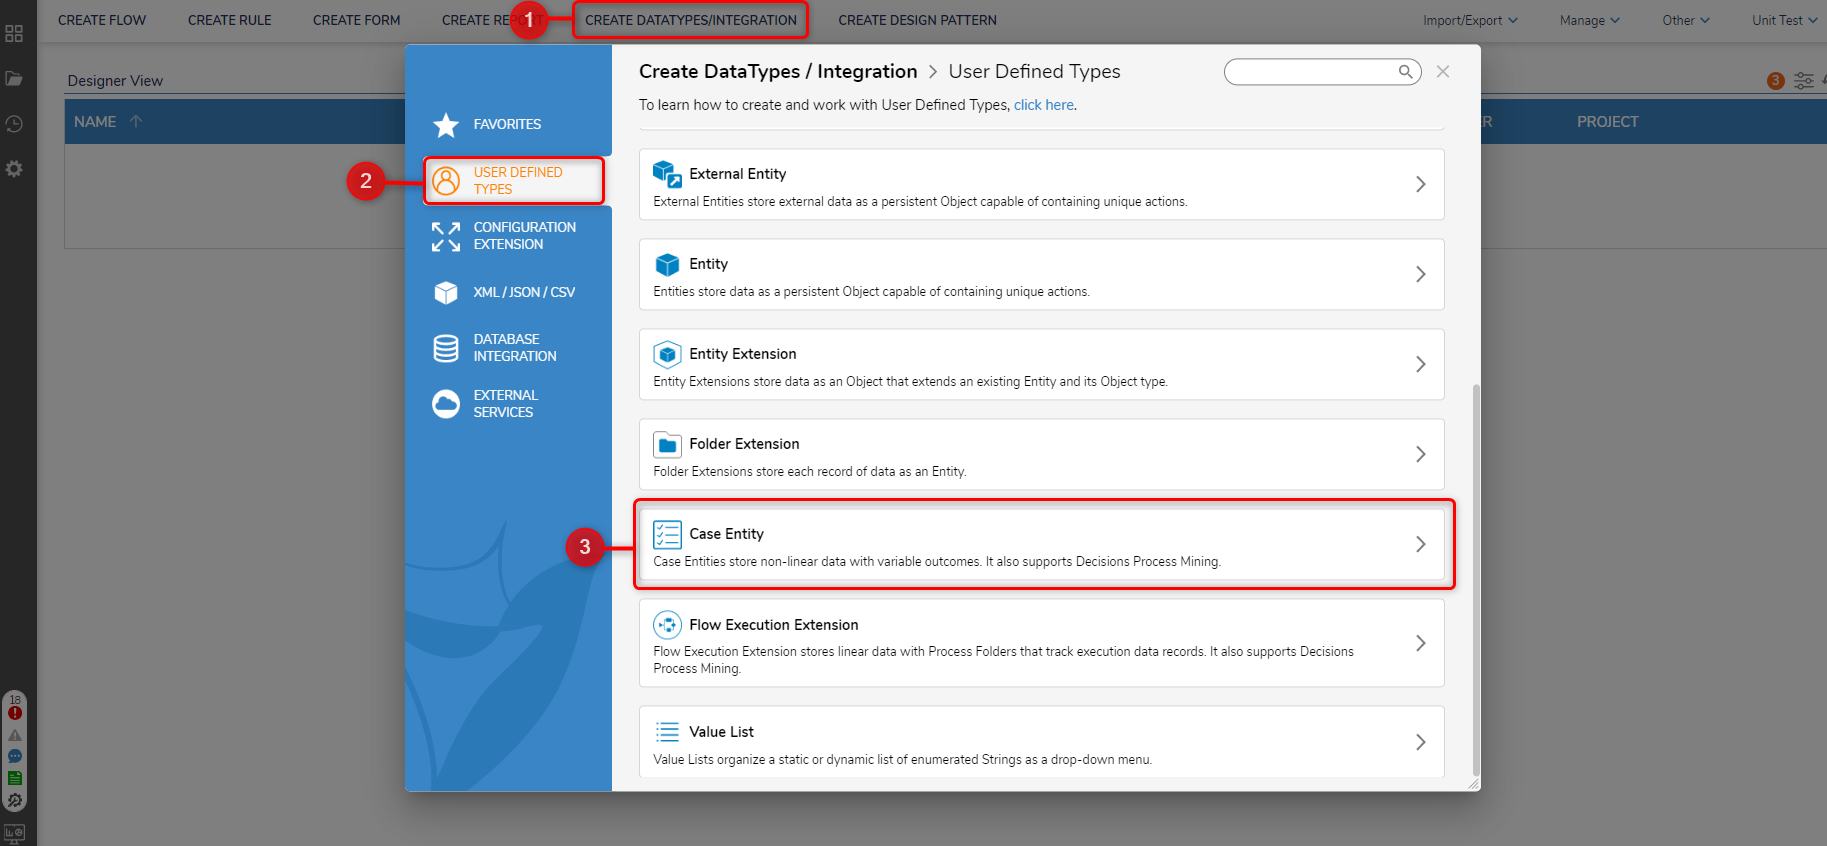
- In a Designer Project, select CREATE DATATYPES/INTEGRATION from the Global Action Bar.
- In the Create DataTypes/Integration window, select Case Entity.
- In the resulting Case Entity window, declare a name for the Case Entity (EmploymentApplication).
- Declare the Case Entity's data fields by inputting a Name and selecting a Type. This example creates String data fields with the names "ApplicantFirstName", "ApplicantLastName", "ApplicantEmail". "YearsOfExperience", "HasResume", and "RequestedSalary".
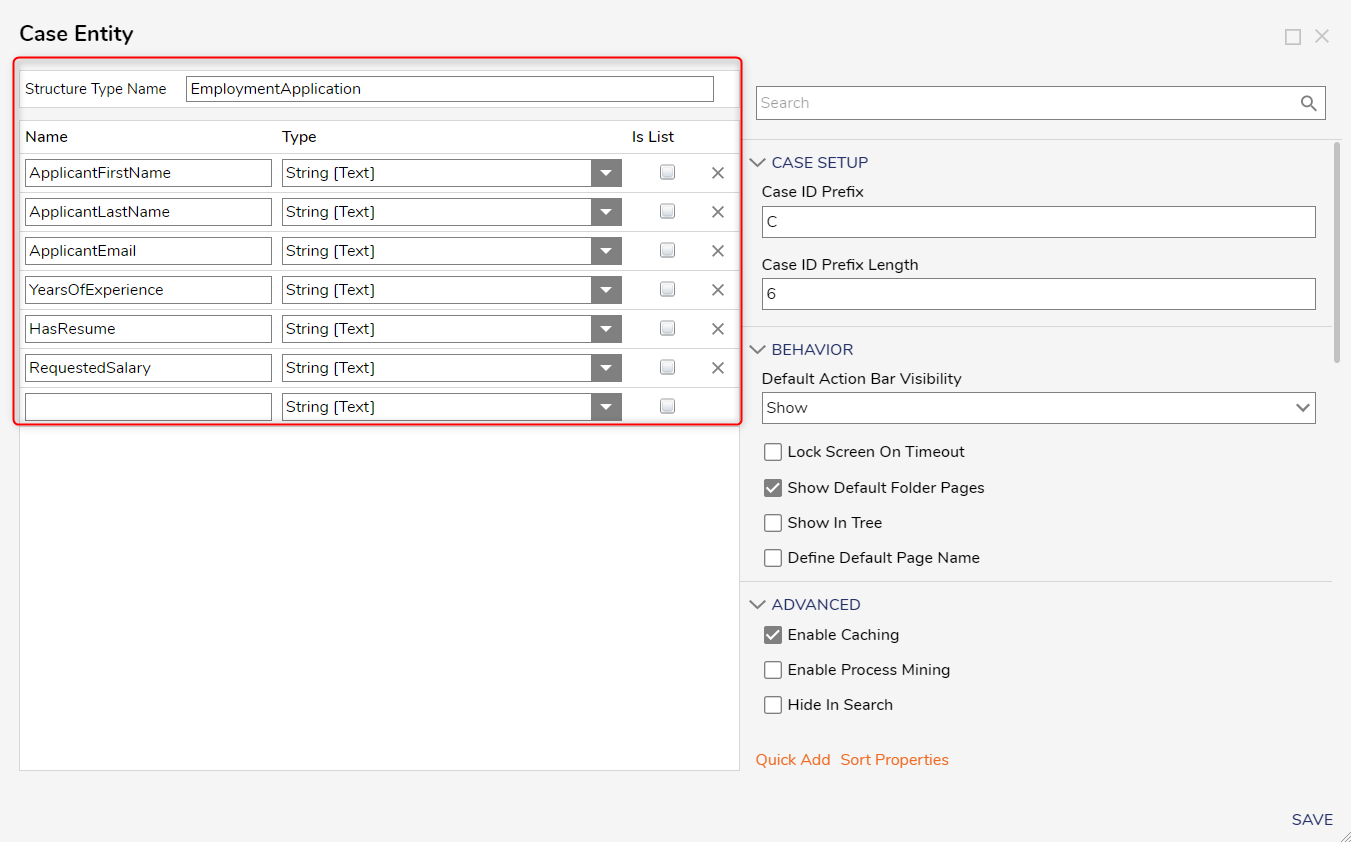
- Select SAVE to create the Case Entity.
Case Entity Creation Settings
| CASE SETUP | ||
| Case ID Prefix | Adds a prefix character to the Case ID | |
| Case ID Prefix Length | Specifies the length of the Case ID | |
| BEHAVIOR | ||
| Default Action Bar Visibility | Specifies how to action bar is displayed (Show, Collapse, Hide) | |
| Lock Screen On Timeout | Locks the screen when timeout period as started | |
| Show Default Folder Pages | Displays the default folder | |
| Show In Tree | Displays the Folder Extension in the Folder Tree | |
| Define Default Page Name | Specifies the default page name | |
| ADVANCED | ||
| Enable Caching | Enables the Entity to be loaded into the cache | |
| Enable Process Mining | Enables the Data Structure to be used with Process Mining | |
| Hide In Search | Hides the data type from appearing when being searched | |
| Include ID In Flow Cache Key | Adds the GUID to the Cache Step Key for easier searching | |
| Type Name Space | Creates the unique identifier for the Entity (namespace.typename) to generate the SQL table name for the Entity (namespace_typename) | |
| Audit Changes | Saves changes to Entity data in the Audited Entities table. This option is used when data monitoring is required for this Entity | |
| Category Order | Allows data field categories to be organized by the Designer. | |
| Include Type Name In Description | This enables or disables the visibility of the Type namespace | |
| ACTIONS | ||
| Show Add With Data | Displays the Add With Data action | |
| Override Create Action Name | Allows user to specify a different name for the Create action | |
| Show Description On Add | Displays the description on the Create window | |
| Add Category Name | Allows a Category name to be specified | |
| Add Sub Category Name | Allows a Sub Category Name | |
| Show Delete Action | Displays Delete action | |
| Show Edit Action | Displays Edit action | |
| Show Add Comment | Displays Add Comment action | |
| Show Add Document | Displays Add Document action | |
| Show Manage Permissions | Displays ability to manage permissions | |
| Show Move Folder | Displays Move Folder action | |
| Show Add Sub Folder | Displays Add Sub Folder action | |
| Show Add ToDo | Displays Add ToDo action | |
| Show Change Name | Displays the ability to Change Name | |
| Show Change State Action | Displays Change State action | |
Enabling Process Mining
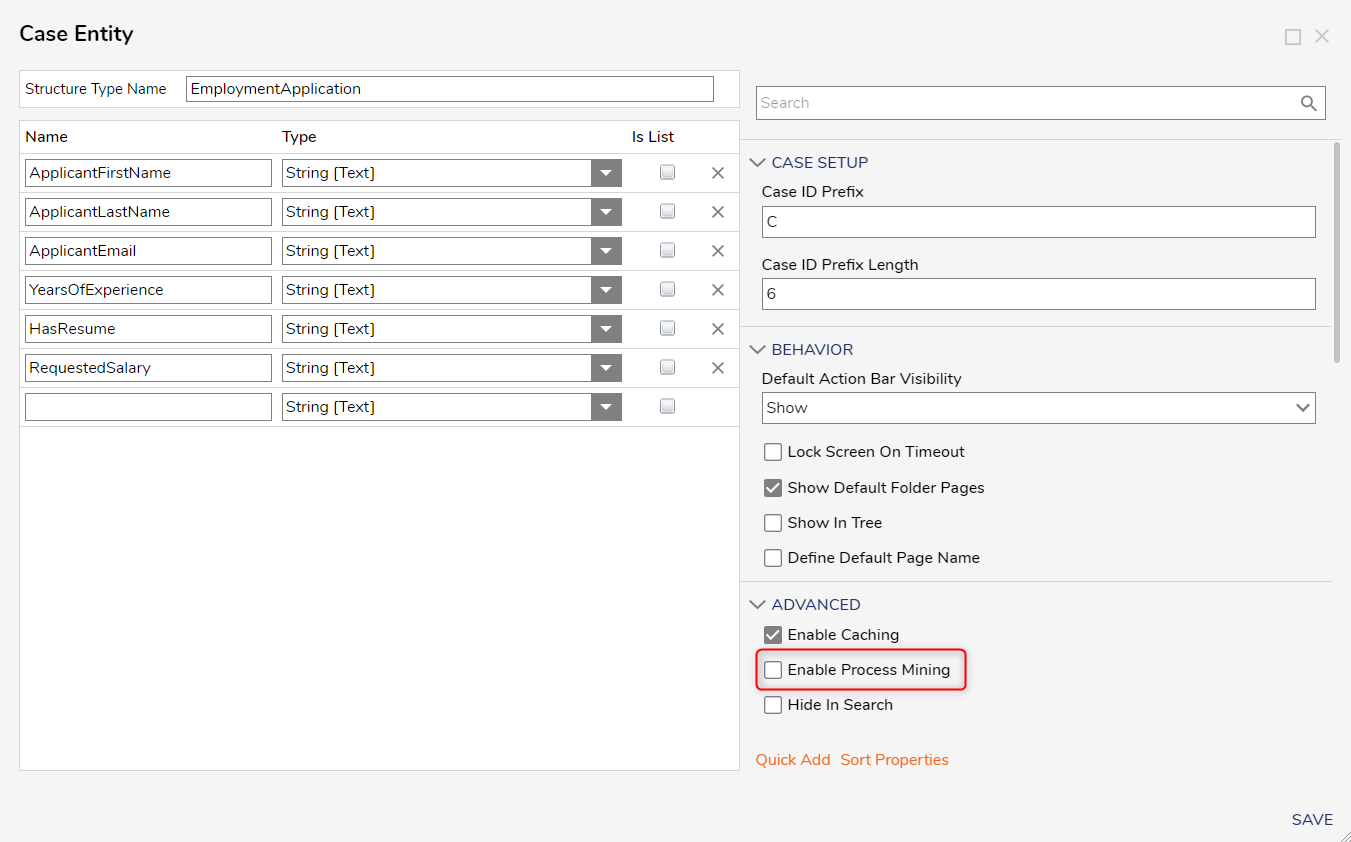
To allow data within the Case Entity to be used in process mining, enabled the Enable Process Mining setting in the Case Entity creation dialog under the Advanced section.
Ensure there are data fields within the Case Entity that fulfill the data variable requirements for process mining.
State Configuration
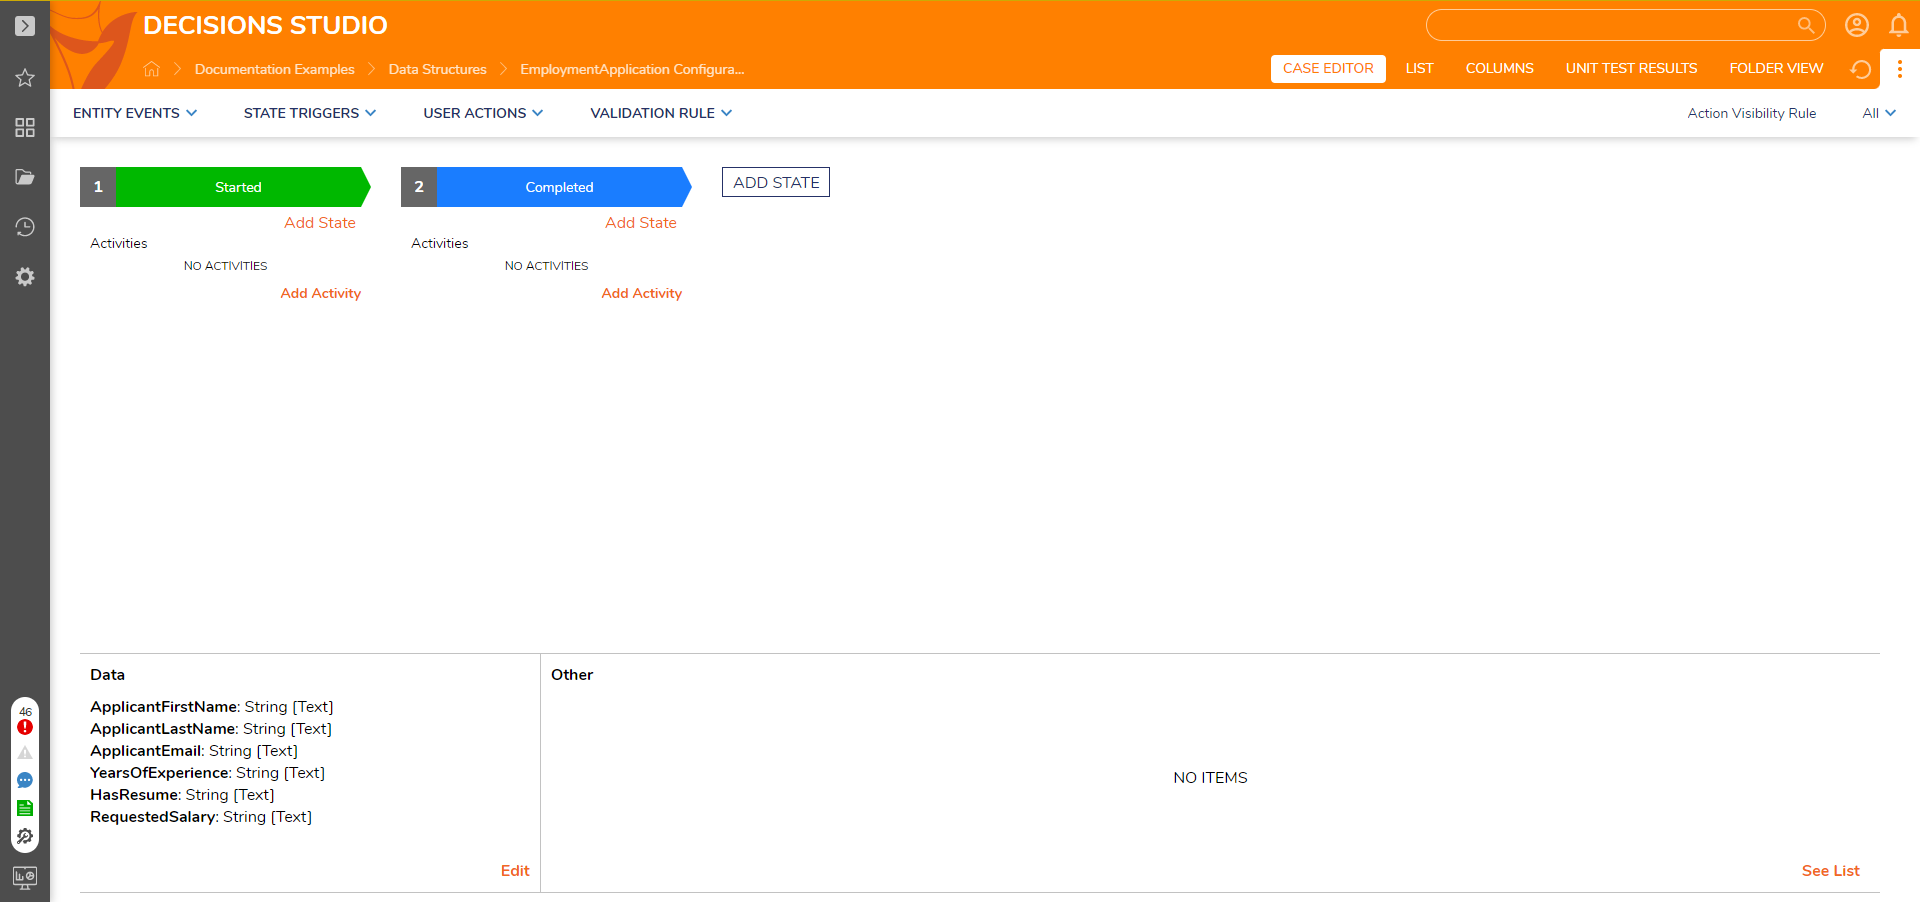
After clicking SAVE to confirm creation, the CASE EDITOR Page automatically opens.
The Case Editor organizes data within the Case Entity as states numbered and placed linearly from left to right. By default, the Case Editor only contains Started and Completed states.
To add more states to the Data Structure click the ADD STATE button to add another state at the end of the current chronological sequence.
To rearrange states, hover over the state, click the dropdown arrow, and select either the Move Left or Move Right actions. The States at the end of the order cannot move further right and vice versa.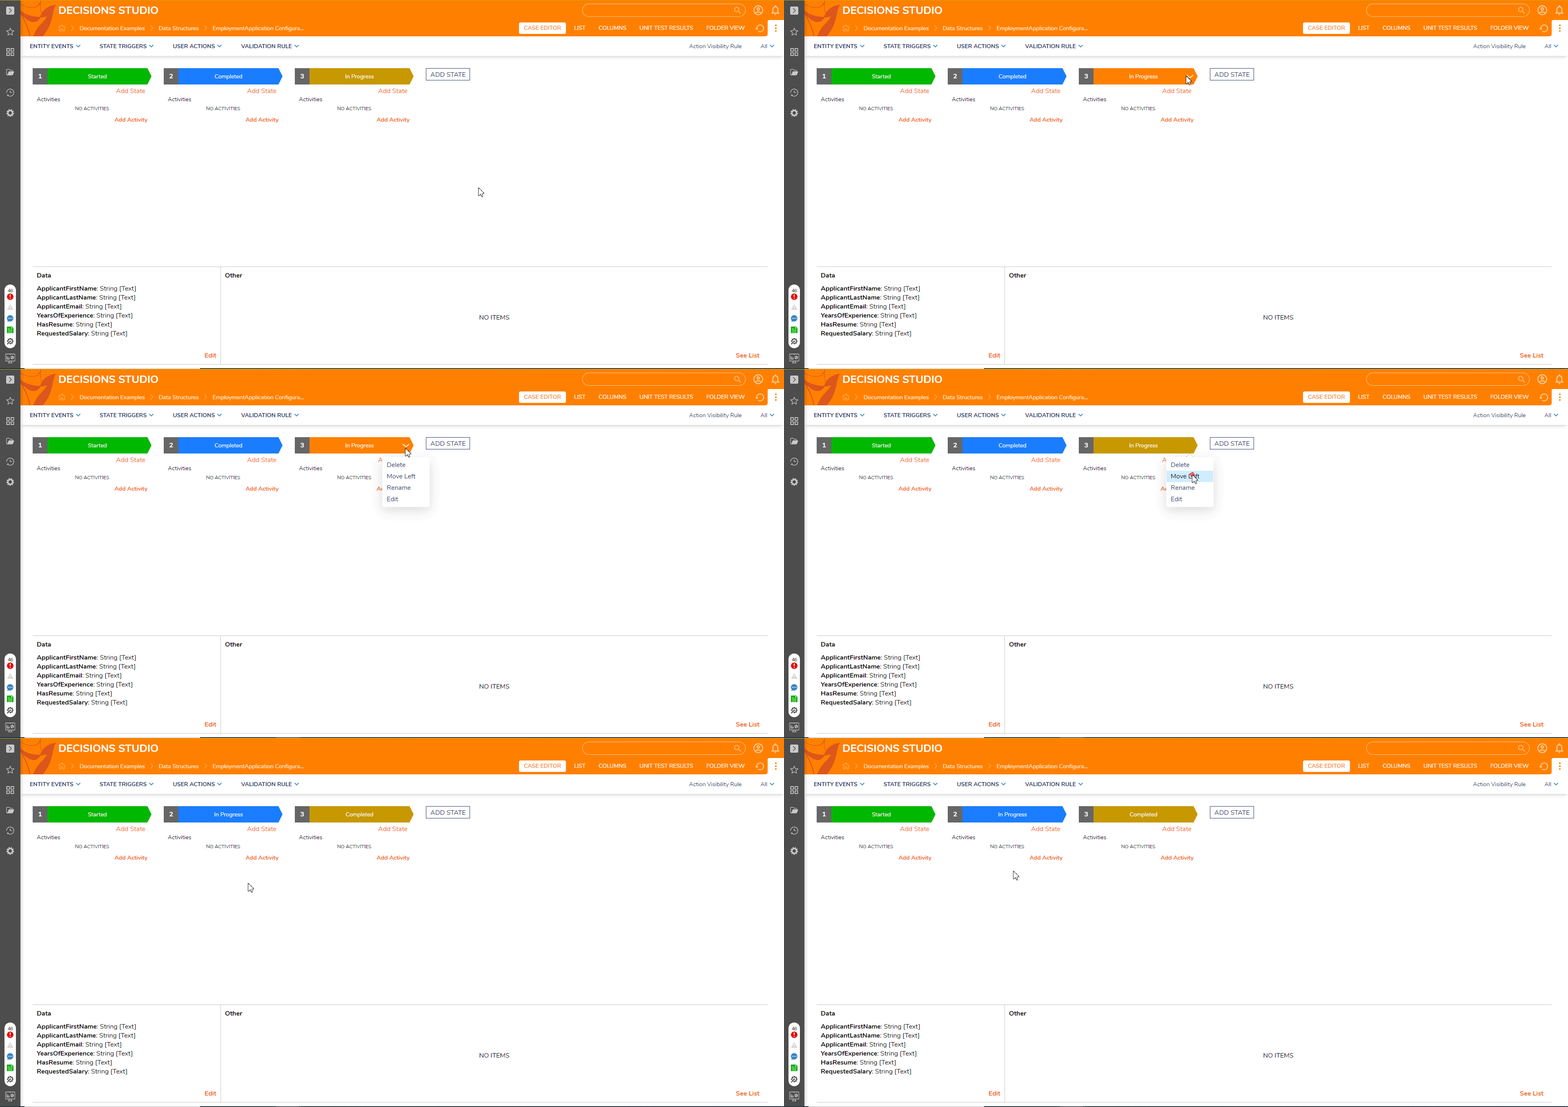
To edit the State hover over the State, click the dropdown arrow, and select Edit in the action menu. The Edit Expected State window will allow users to configure the Order, Color, Create Assignments, and Assign the state to accounts or groups.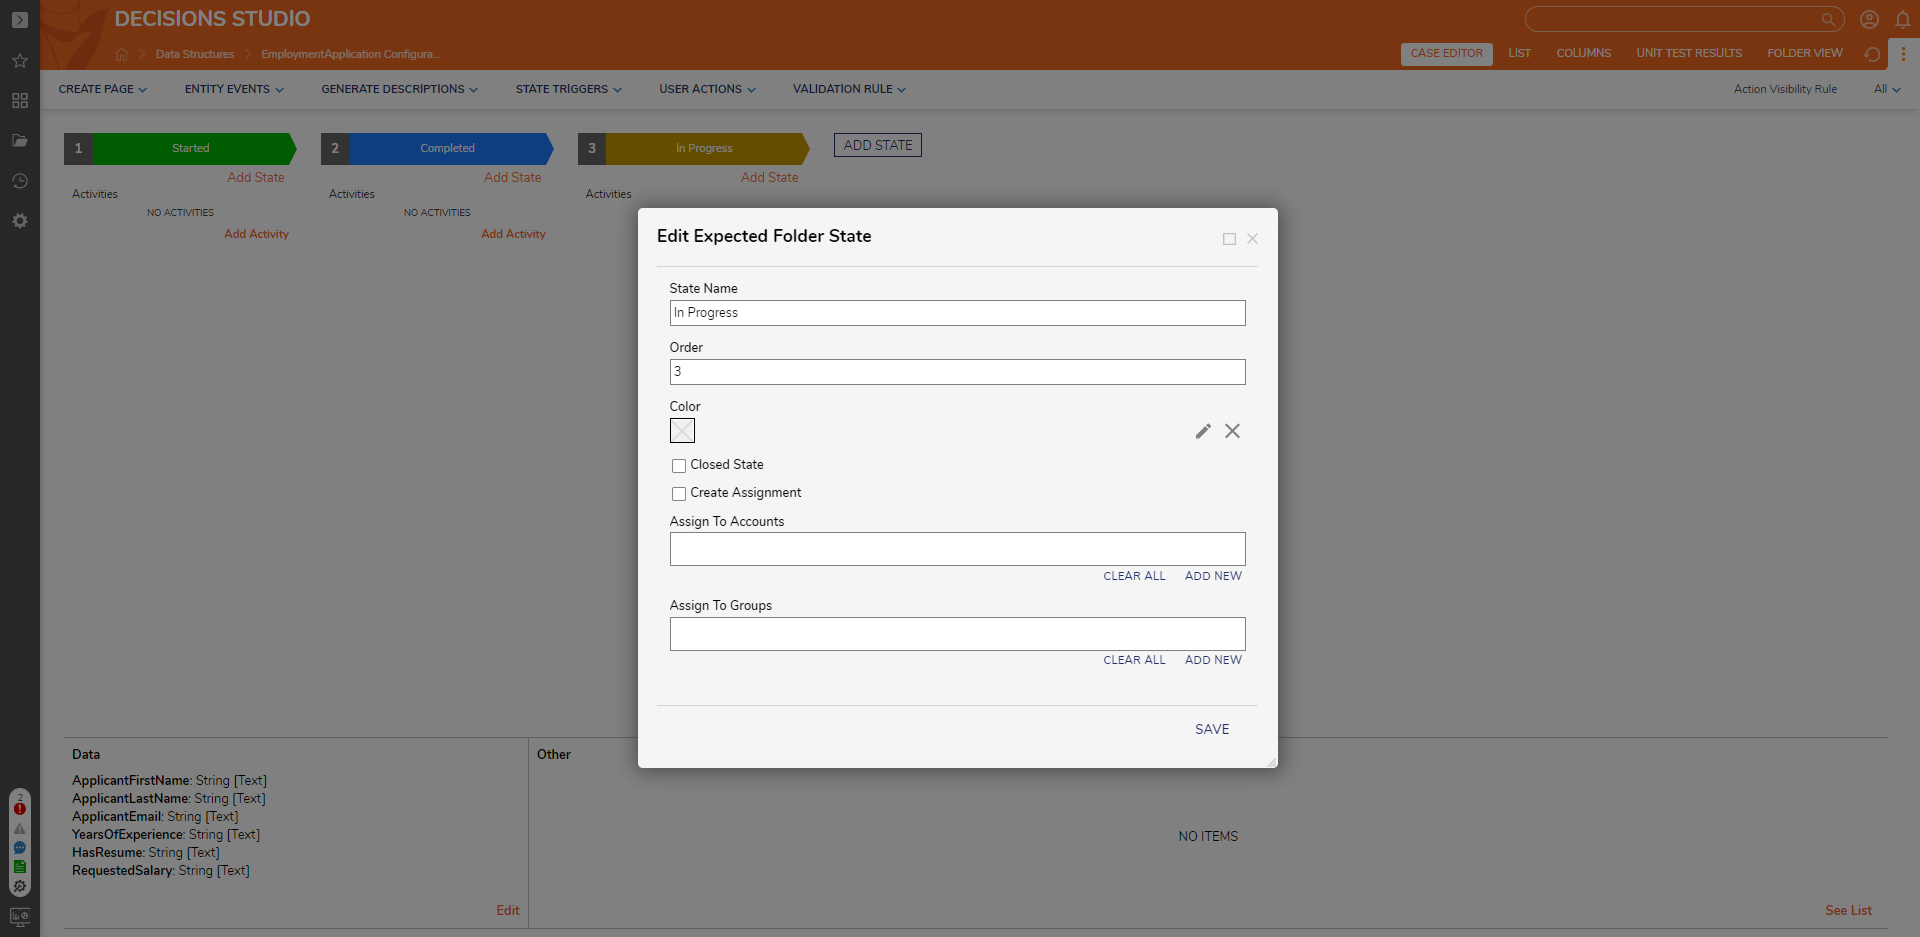
Adding an Activity or Trigger Flow
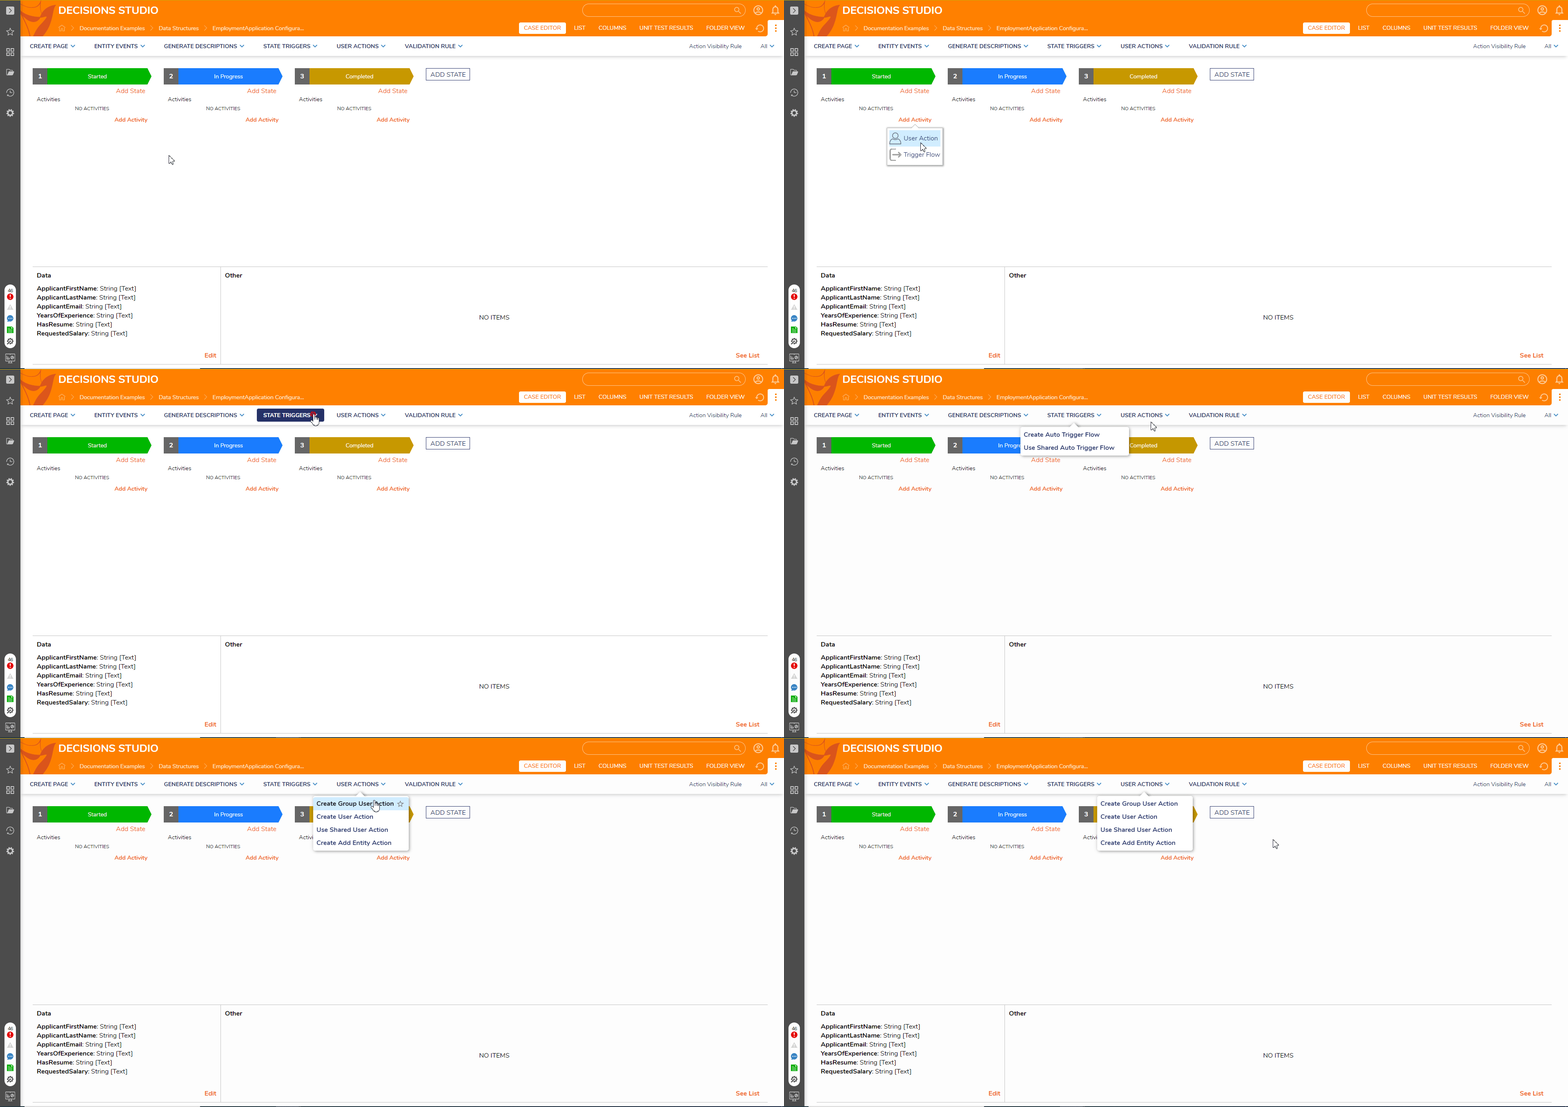
The next significant action in the Case Editor is the Add Activity action underneath a state. When clicked on, this opens a menu containing the User Action and Trigger Flow actions.
Furthermore, more types of Activities and Trigger Flows are available under their respective dropdown menus at the top of the Case Editor Page.
| Action Activity | Function | ||
|---|---|---|---|
| User Action | Creates a right-clickable action via Flow logic to act upon reported data | ||
| User Action | Create an action visible only within this specific Case Entity | ||
| Group User Action | Create an action visible for a group of Case Entities | ||
| Shared User Action | Create an action visible in all Case Entities in the instance i.e. create a new custom, global user action | ||
| Add Entity Action | Create an action visible on all Entities within the Case Entity | ||
| Trigger Flows | Creates a Flow that will run once a case within the Case Entity enters the specified state | ||
| Auto Trigger/Transition | Create a Flow(s) that starts once data enters the specified state in the Case Entity | ||
| Shared Auto Trigger/State Transition | Create a Flow(s) that starts once data enters the same named state occurring in any and all Case Entities i.e. a new global auto trigger flow for the specified state | ||
Hiding the Actions Bar in the Case View
After creating data for a Case Entity, it can be viewed in the Folder in the Case View.
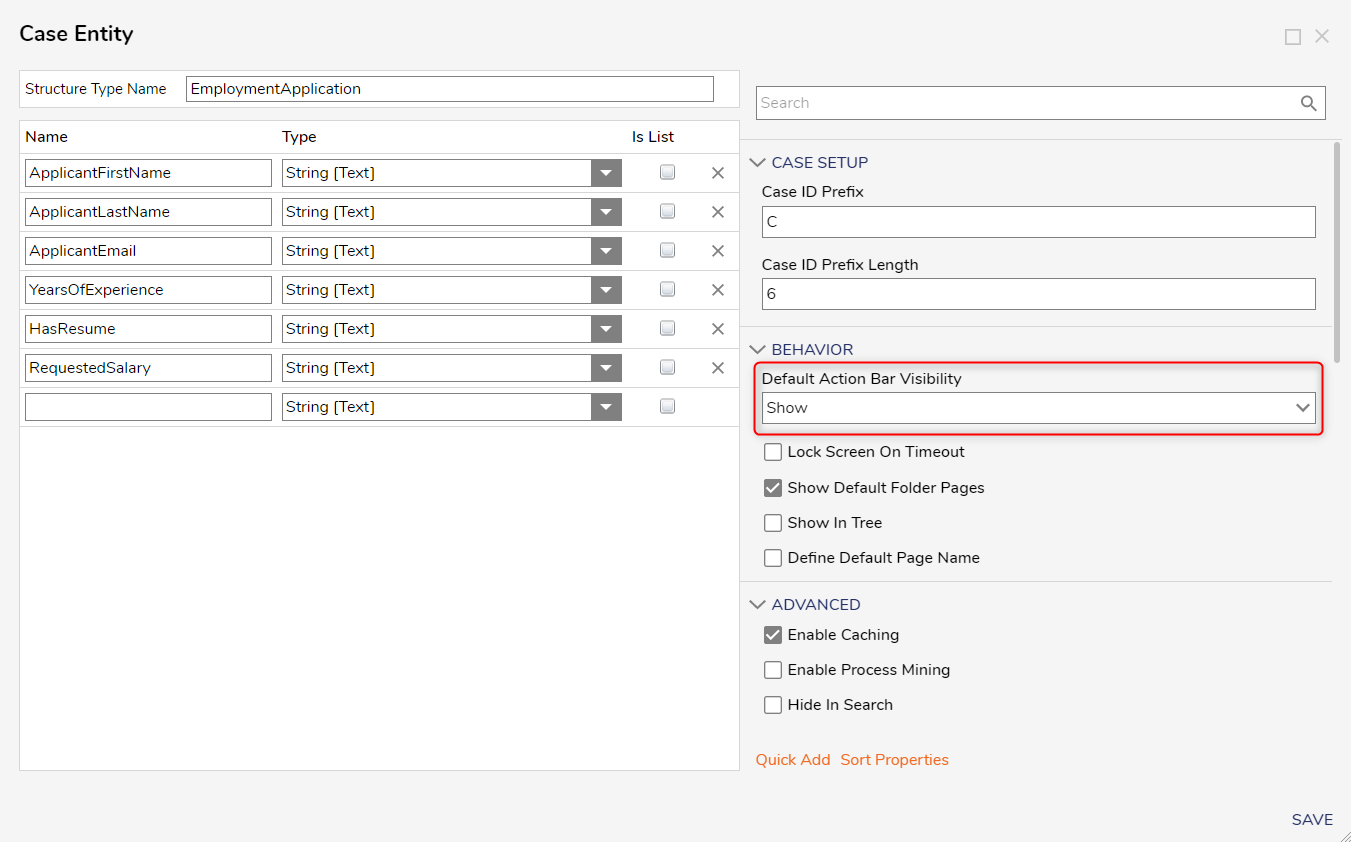
In the Case View, the Actions Bar's view can be edited the Default Action Bar Visibility setting either upon Case Entity creation or edited later in the Edit Case Entity window. Changing this setting effects all data even those created before the change.
| Action Bar Visibility Option | Description |
|---|---|
| Show | The Action Bar appears underneath the orange banner similar to the Folder view. |
| Collapse | The Action Bar appears by default, but it may be collapsed |
| Hide | The Action Bar is hidden from the Case View. |