Rule Filter On Report
- 22 Nov 2022
- 1 Minute to read
- Print
- DarkLight
Rule Filter On Report
- Updated on 22 Nov 2022
- 1 Minute to read
- Print
- DarkLight
Article Summary
Share feedback
Thanks for sharing your feedback!
Overview
Decisions allows users to set up Rules that can filter the results of a Report. In a business environment, filtering Reports may be useful for refining large data sets, like a group of users. There are several options for using the pre-configured Report filters; however, if no standard filter exists for the desired function, a custom Rule filter can be used instead. This is shown in the example below.
Testing Large Reports
Using filters on large-scale Reports can severely impact performance. Please test those filters in a development environment to avoid end-user impact.
Example
This example will demonstrate filtering an Accounts Report based on when the account was created. This Report uses the Account data type, which is standard to Decisions. The Email Address, Created On Date, and Can User Portal data fields are added as some sample columns with data.
- Begin in a Designer Project and select CREATE REPORT from the top Action Bar.
- Select the Report tile and provide a name, then click CREATE.
- In the Report Designer, under Data Sources, select 'Add', then search for the Account Data Source. Select it and select 'Close'.
- Under Data Fields, select 'Add' and search for Email Address, Created on Date, and Can Use Portal fields and add them to the Report. For more information on creating Reports, please visit the Create a Report article.
- Now, create the custom Rule Filter. Under Filters, select Rule Filter.
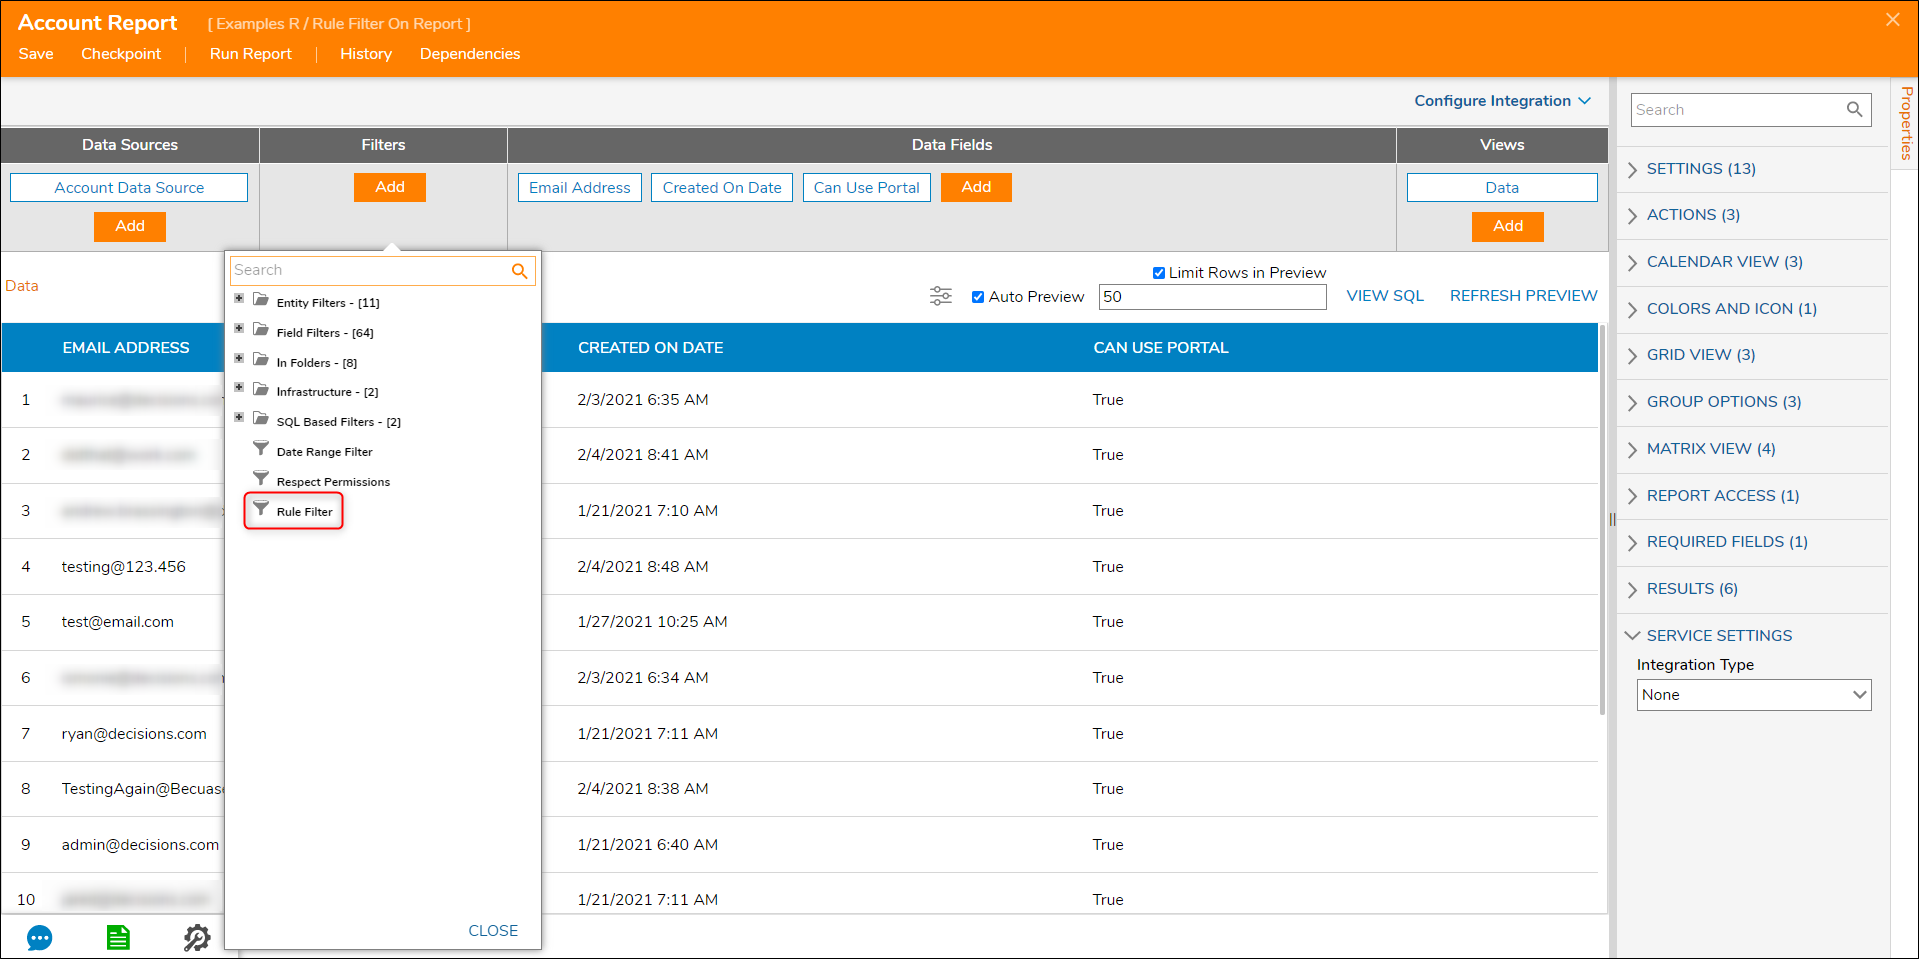
- Select the Rule Filter, so the Properties populate on the right; select the pencil icon under the FILTER RULE section.
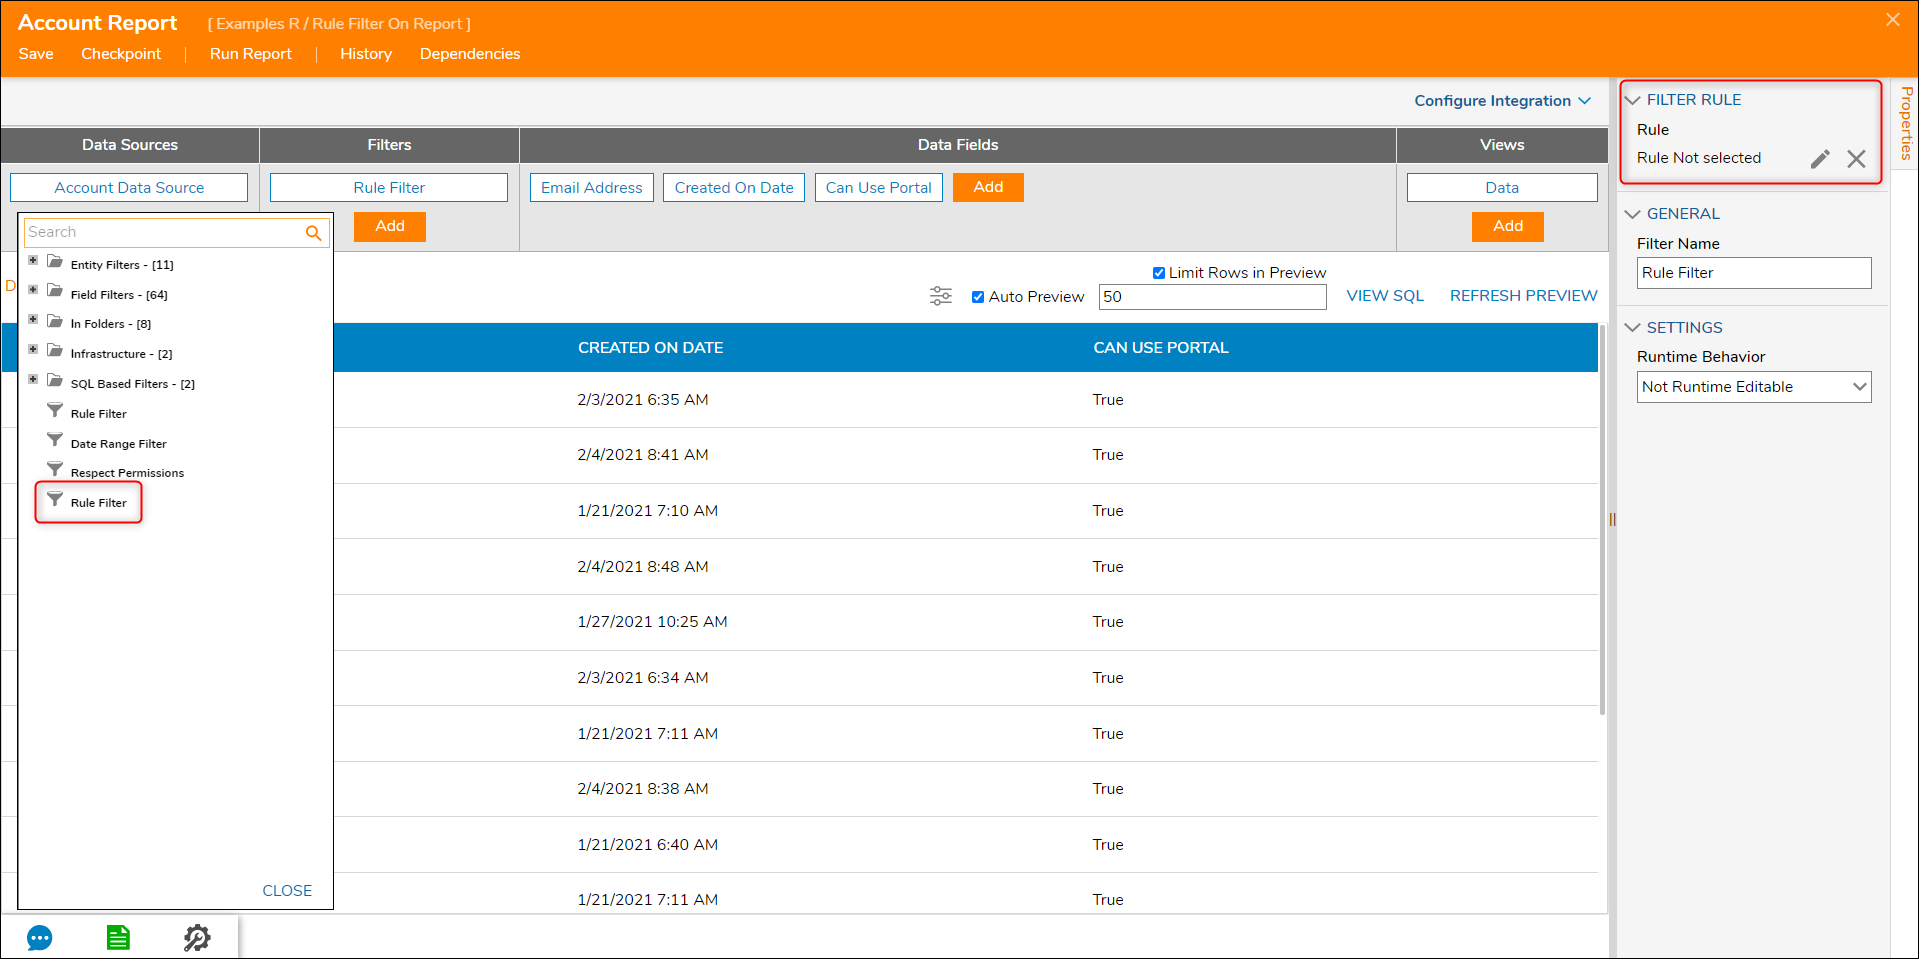
- Select 'Create'; in the Create New Rule dialog, name the Rule and select 'OK'.
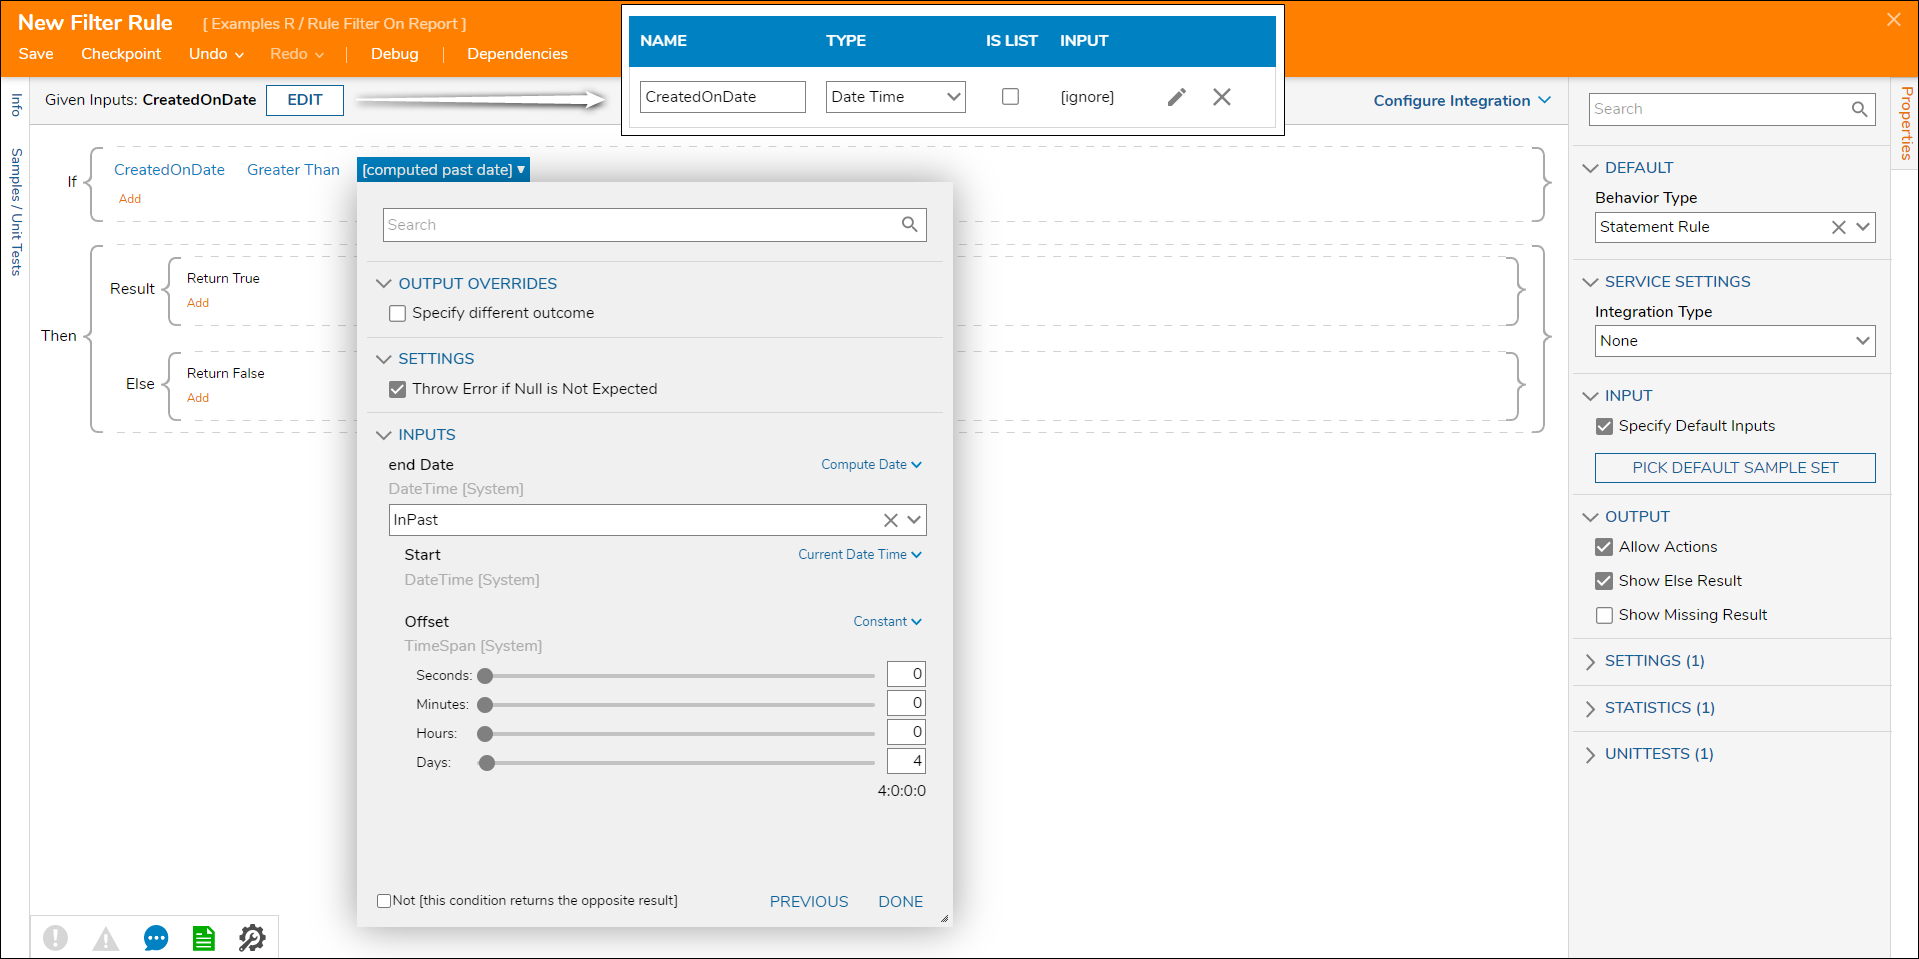
- In the Rule Designer, select the SETUP INPUT DATA button at the top.
- Enter CreatedOnDate for NAME and Date Time for TYPE, then save and exit the input data window.
- Configure the statement to "if CreatedOnDate Greater Than [computed past the date of 4 days]".
- The Rule is configured as shown below. For more information on creating Rules, please visit the Create a Rule article.
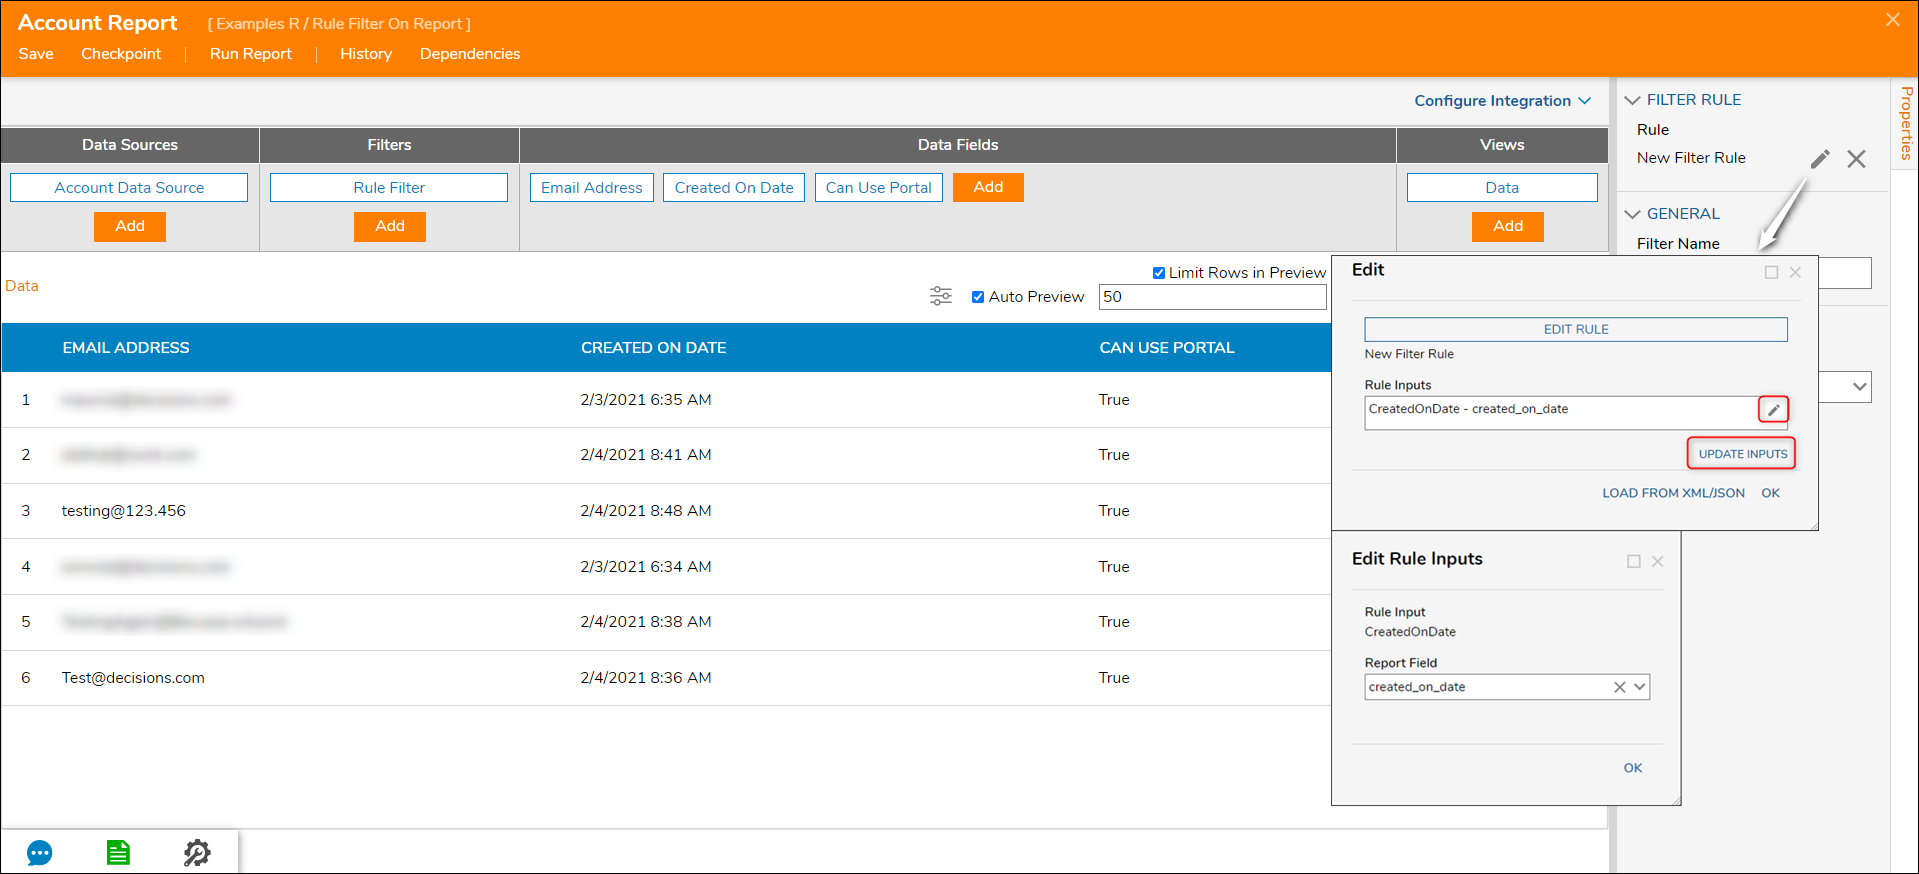
- Back in the Edit dialog, select Update Inputs button.
- Under Rule Inputs, select the pencil icon next to created_on_date.
- In the following dialog select the Data field that the Rule should take in, for this example select created_on_date. Select 'Ok'.
- Now, run the Accounts Report, this custom Rule will filter results based on if the account is younger than 4 days.


Was this article helpful?