Return Dynamic Data Rows When Fetching Data From Database
- 04 Aug 2022
- 2 Minutes to read
- Print
- DarkLight
Return Dynamic Data Rows When Fetching Data From Database
- Updated on 04 Aug 2022
- 2 Minutes to read
- Print
- DarkLight
Article Summary
Share feedback
Thanks for sharing your feedback!
Overview
Decisions has the built-in capability to integrate with an external Database. To find more information on setting up an external database connection, please visit the Integrate with Database Table article. Once the connection is configured, users can manipulate and extract data from the database table within the Flow Designer. When Fetching Data from an external database, there are times when the schema of the returned data will change or be dynamic. Decisions has the ability to handle the data dynamically.
Example
This example will fetch data from a database table, establish it as Dynamic Rows, then use an indexing step to display the data dynamically on a Form. Select the .zip file below to download the example for this article. The integration will still need to be completed to the database table and configured through system settings. For more information on importing a project into Decisions, please visit the Importing and Exporting Overview article.
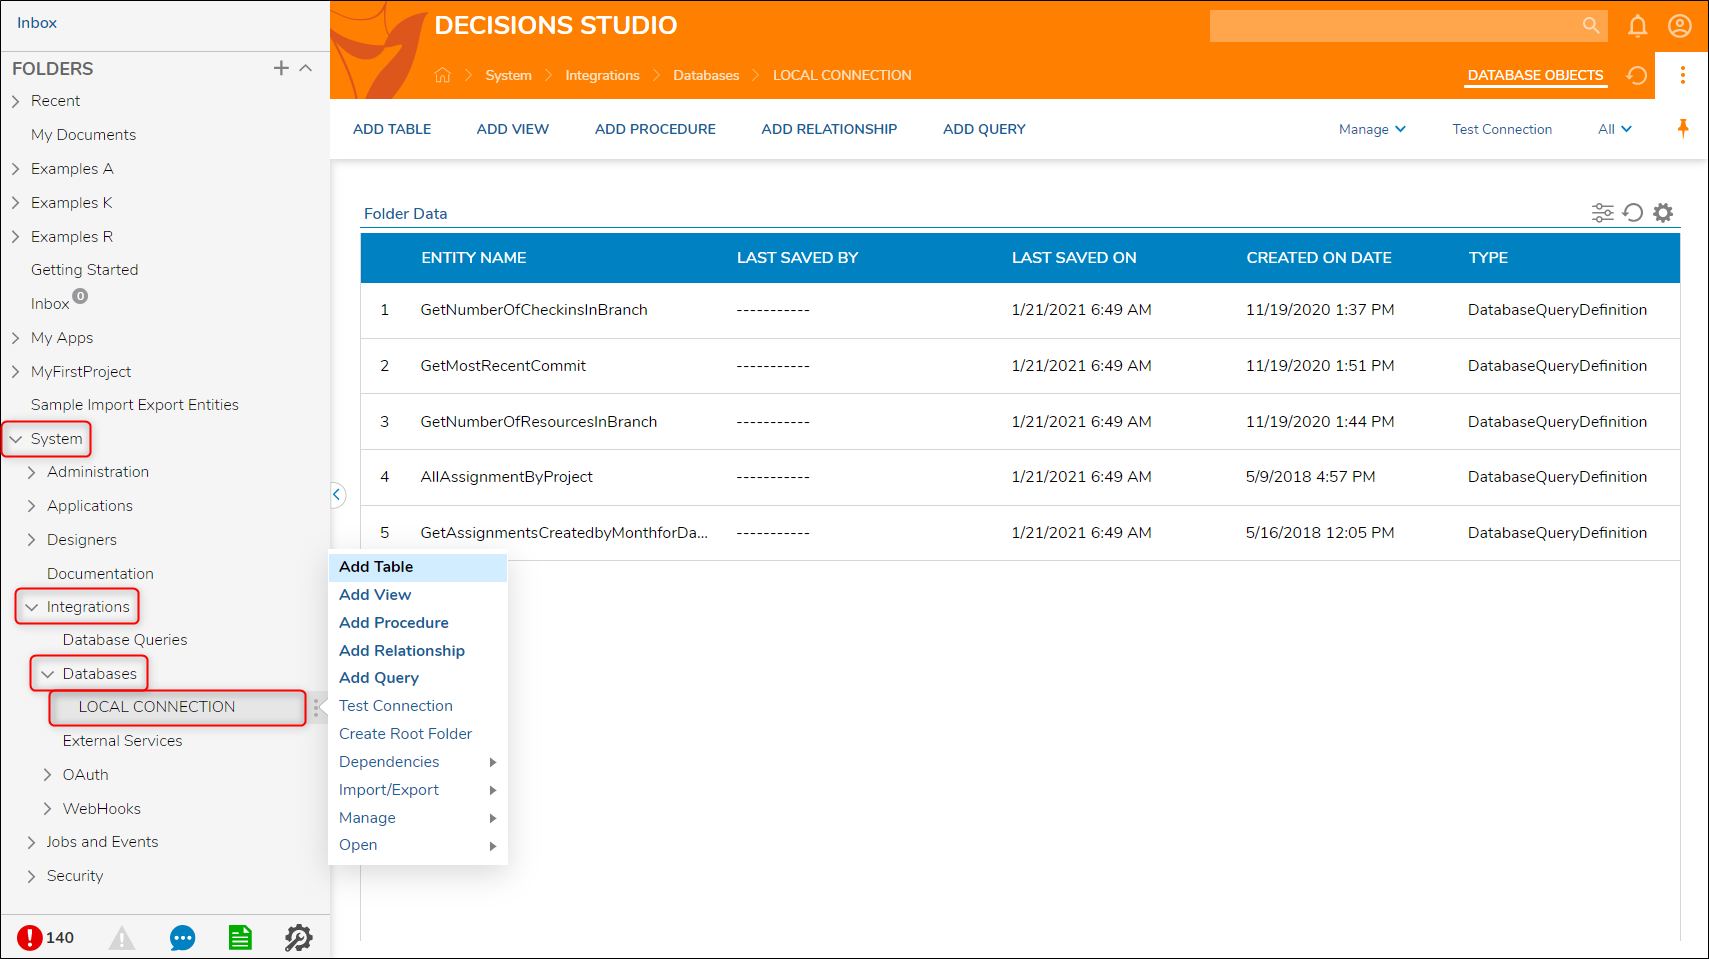
- Integrate with the dbo.entity_account table from the Decisions database. To do this go to System > Integrations > Databases > Local Connection > Add Table.
- Select the Object to use for the Flow. In this example, dbo.entity_account is used.
- Select or unselect the properties needed.
- In a Designer Folder, create a Flow to open the flow designer.
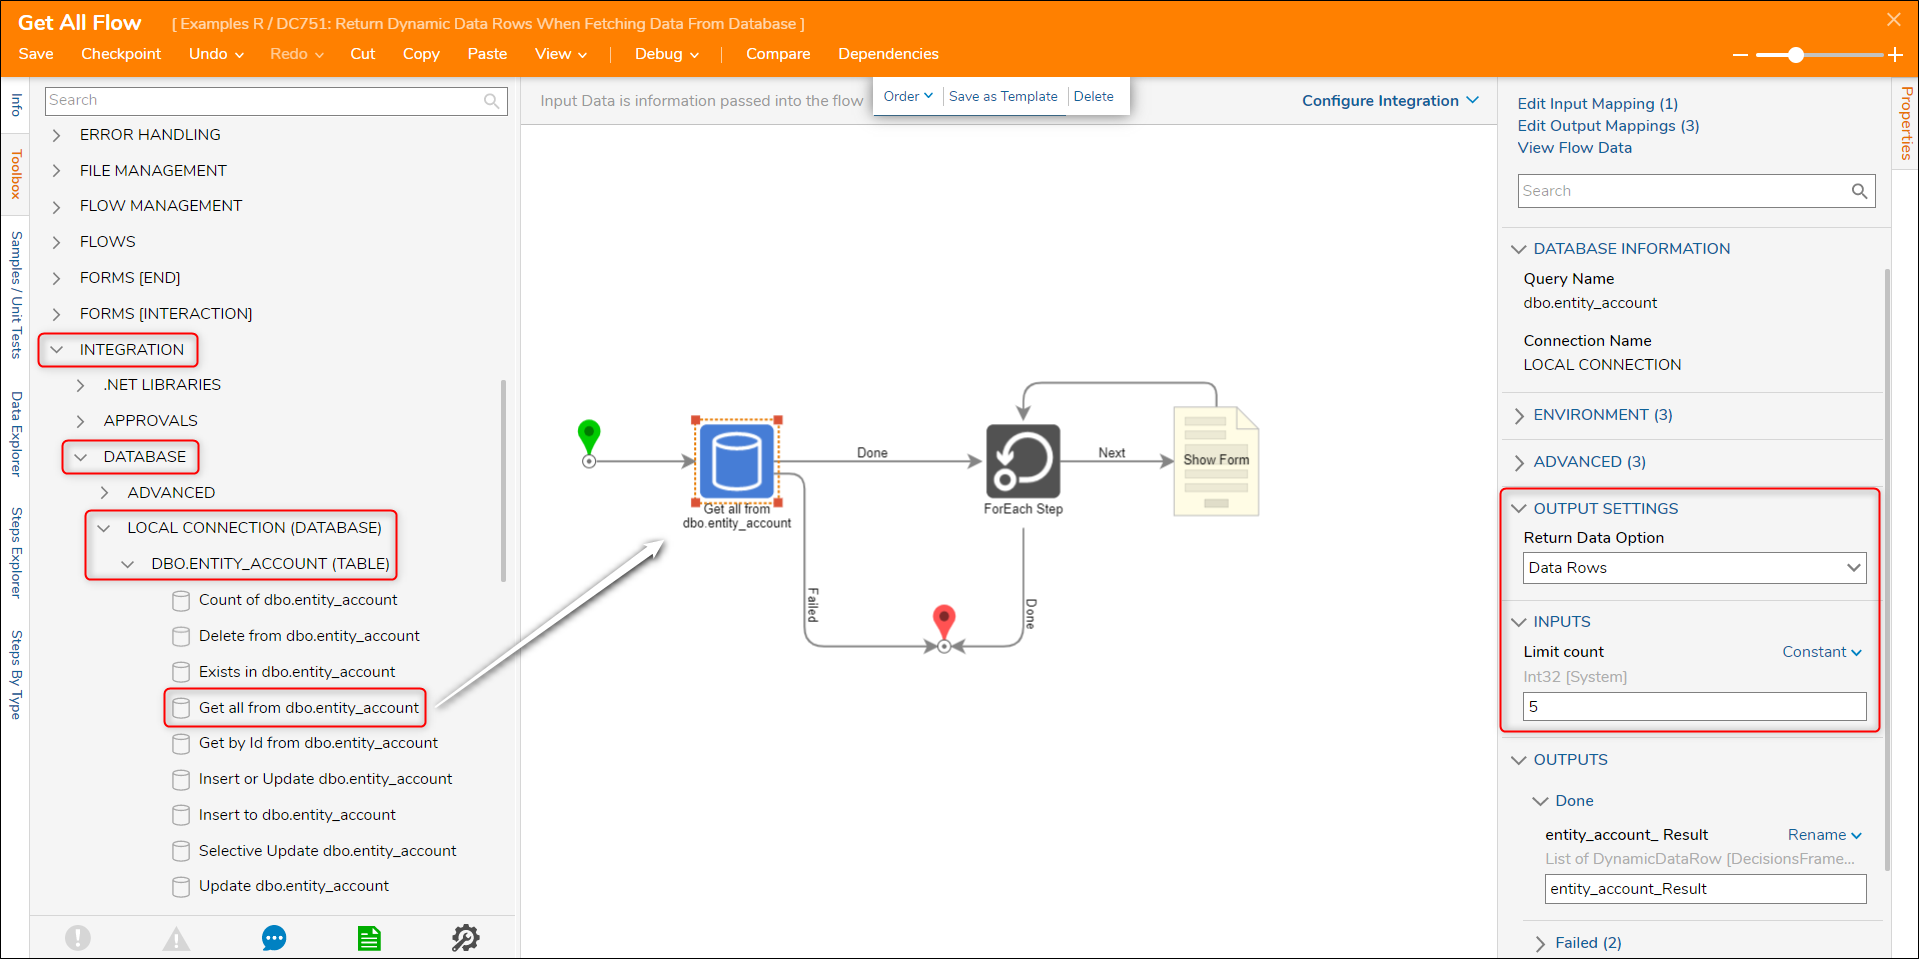
- In the Flow Designer, navigate to Integration > Database > Local Connection > dbo.entity_account (Table) category. Within the specific database table, select the Get all from dbo.entity_account step.
- Next, configure the settings on the Get all from dbo_entity_account step. In the Properties panel on the right under Output Settings select the Data Rows option from the Return Data Option drop-down list.
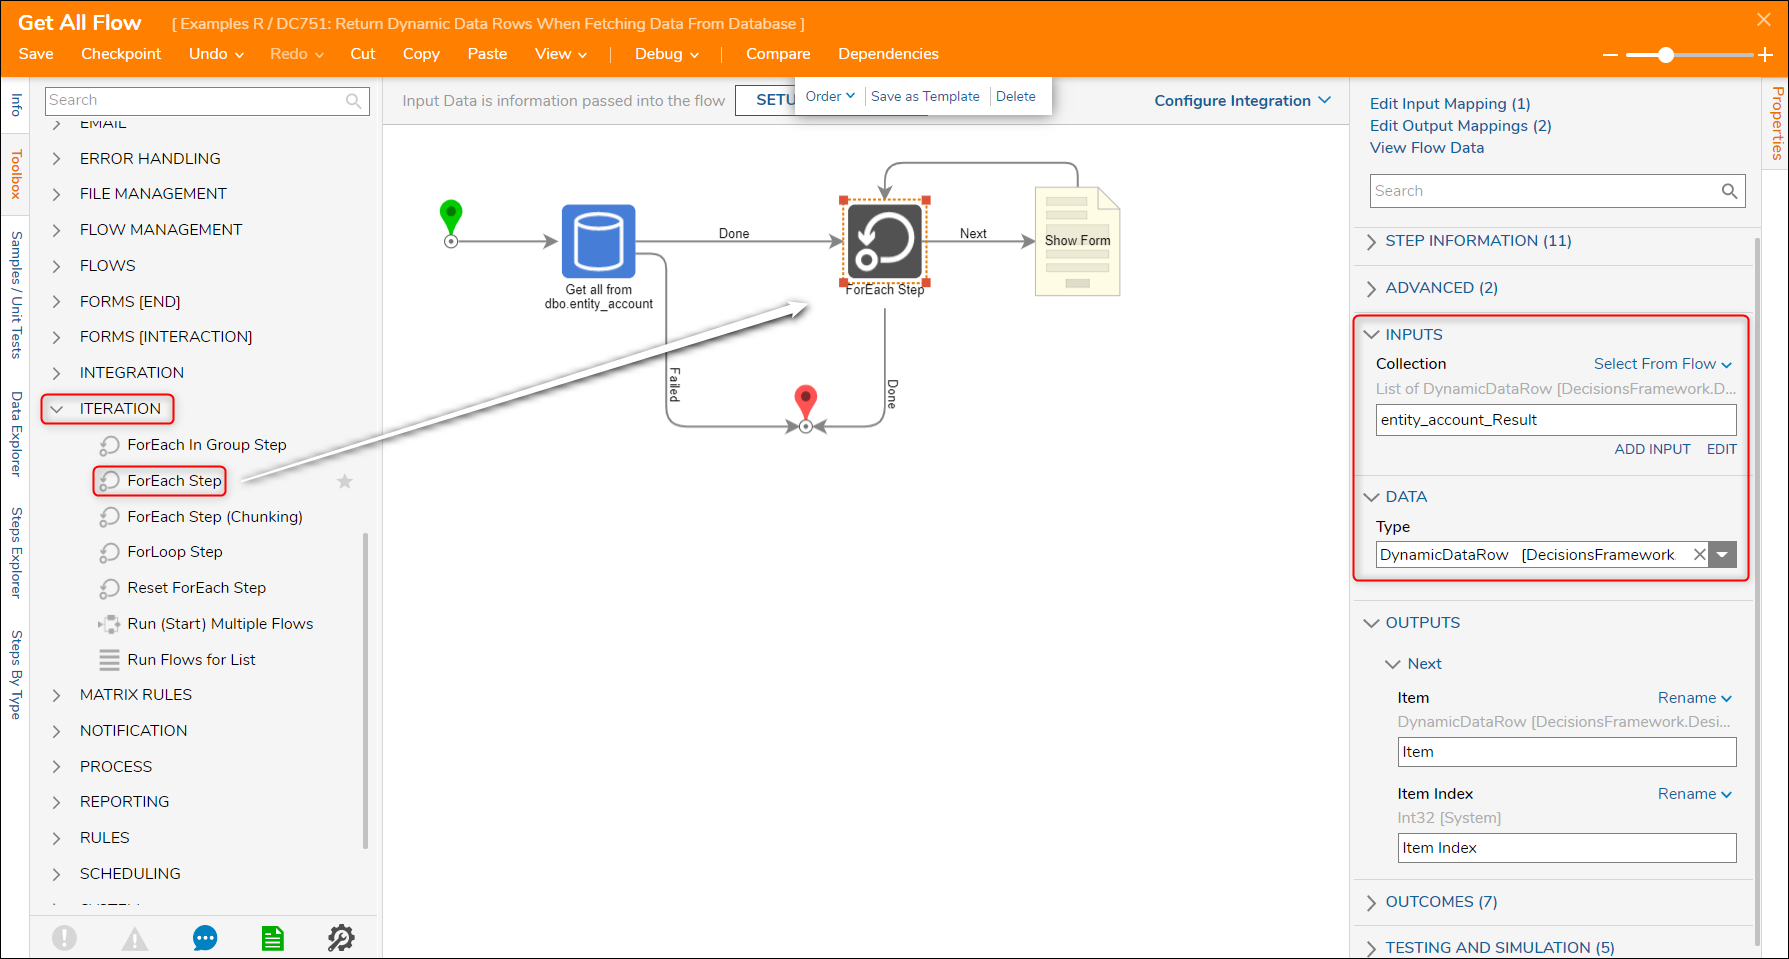
- Next, locate the For Each step in the Iteration section of the Toolbox and add it to the Flow.
- In the Properties panel on the right under Data, the default option is DynamicDataRow as invoked by the Get All step. This uses conversion to a Decisions type in order to output it as dynamically mapped data.Under Outputs on the For Each step, a single item that is of the type Dynamic Data Row and has numerous fields that we can use in the flow to display our data.
Next, add a [Pick or Create Form] step to the Flow. Now create a Form that will display the Dynamic Row.
First, locate a Label control and drag one onto the form. Set the labels to dynamic and they will display data from the Flow.
To accomplish this, in the Properties panel, under Common Properties check the box "Text from Data Name" and supply data names (such as Item Feild 21) that will represent the field. Locate the drop-down under Validation Source and under Asterisk for a required field, select Dynamic. Save and close to return back to the Flow Designer.
Select the Form to edit the Inputs, here the label can be specified to the database. Set Item Feild 21 (this will be the email address) to mapping type Select From Flow. Here choose the corresponding Item.Field#.TextValue for the label.
When the Flow debugger runs the field values are displayed on the Form. In this example, the email address fields. The first few accounts do not contain emails, but the third that appears shows how the field was mapped.
Clicking the Next button will step through each row in the database table and display the fields that were specified. The example stops at 3 because on the Get all from dbo_entity_account step we specified the Limit Count.


Was this article helpful?