Handling Custom .DLL Files
- 27 Jan 2022
- 1 Minute to read
- Print
- DarkLight
Handling Custom .DLL Files
- Updated on 27 Jan 2022
- 1 Minute to read
- Print
- DarkLight
Article Summary
Share feedback
Thanks for sharing your feedback!
Overview
Version 7.x .NET Architecture Change
- Versions 7.0.1 - 7.1 require .NET Core 3.1
- Versions 7.2 - 7.9 require .NET 5
- Versions 7.10+ require .NET 6
To understand how to add custom code to the platform, developers should be well acquainted with an integrated development environment (IDE) and on building Class Libraries in .NET Core.
This article details how to add, update, and delete a custom .dll file into a Decisions environment.
If experiencing issues with a custom .dll, refer to the Troubleshooting a Custom .DLL File article for further information.
Uploading a Custom .DLL File
This example will demonstrate how to add the .dll file created from a compiled .NET Core project. The following method will be used in this example.
public static double GetSimpleInterest(decimal interest, int termInYears, double principal) {

            return principal * (double)interest * termInYears;

}- After compiling the code in a .NET Core project, navigate to where the .dll Class Library file is located and copy the file.
- Navigate to C:\Program Files\Decisions\Decisions Server\modules\Decisions.Local\CoreServicesDlls and paste the file to this folder.
.PNG)
- Restart the Decisions Server.
- In the Toolbox panel of the Flow Designer, navigate to INTEGRATION > .NET LIBRARIES > [CLASS LIBRARY NAME] > [CLASS]to find the step that was created from the compiled method.Steps that are not categorized when using the SDK will be displayed under the .NET Libraries category. To learn more about creating and customizing steps, see SDK: Flow Steps (Basic) and SDK: Flow Steps (Advanced)
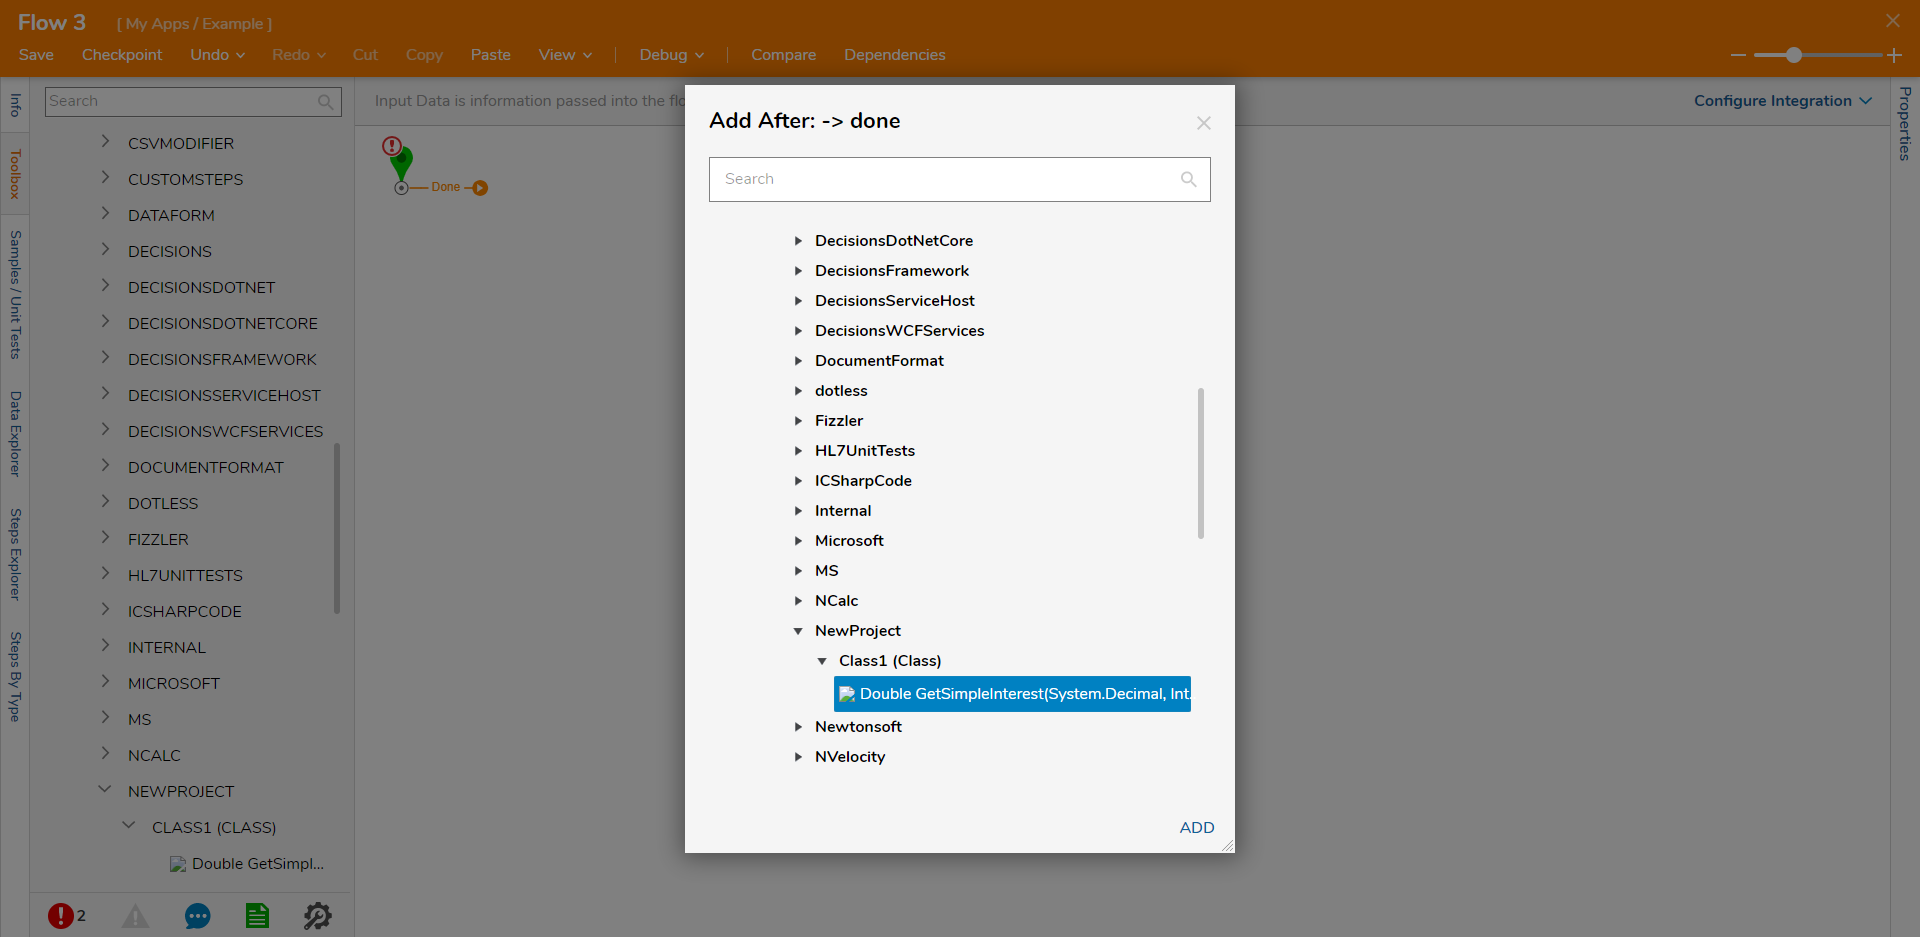
.PNG)

Resetting or Removing a Custom .DLL
This tutorial demonstrates how to reset local Module .dlls for removal and/or update custom .dlls using the Decisions.LocalModuleReset.exe tool.
Decisions stores custom DLLs in the database so a High Availability Cluster can apply these .dlls files to all nodes within the cluster without having to apply the .dlls manually to all servers within that cluster.
On startup, any custom DLL in the C:\Program Files\Decisions\Decisions Server\modules\Decisions.Local\CoreServicesDlls
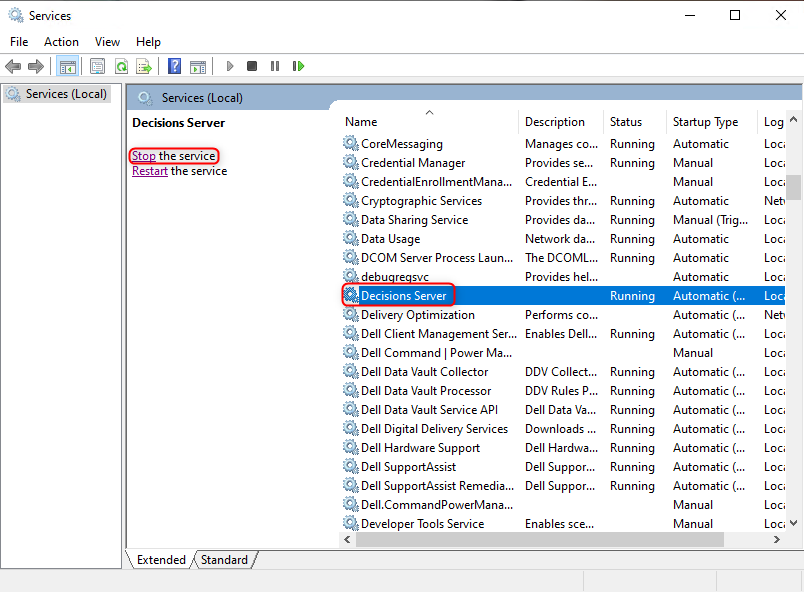
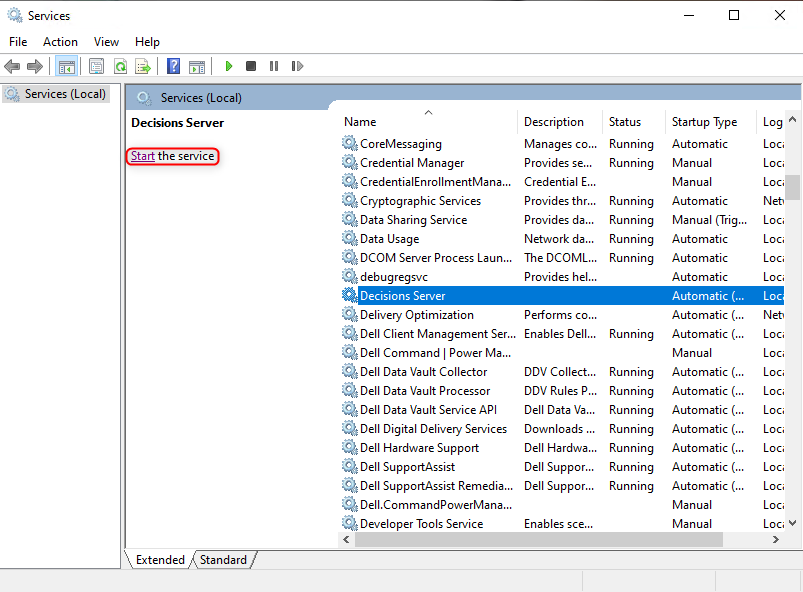
- Stop the Decisions Server service located in Windows Local Services.
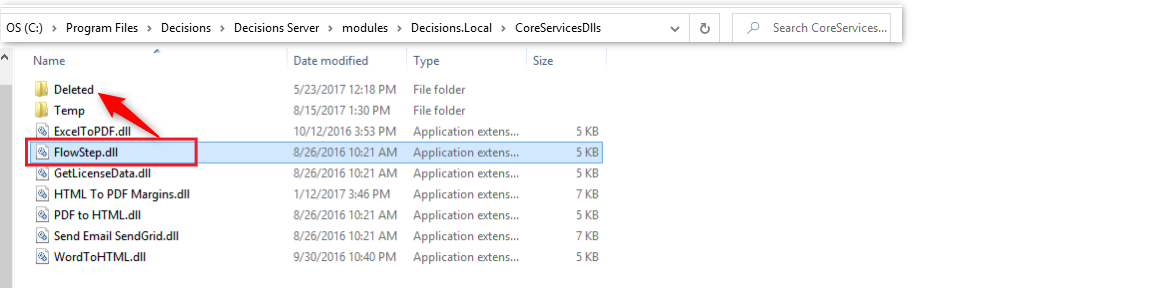
- Navigate to C:\Program Files\Decisions\Decisions Services Manager\modules\Decisions.Local\CoreServicesDlls. After the Decisions Server service stops, move the desired dll into the Deleted directory.This directory prevents Decisions from re-loading the dll when the Decisions service starts.
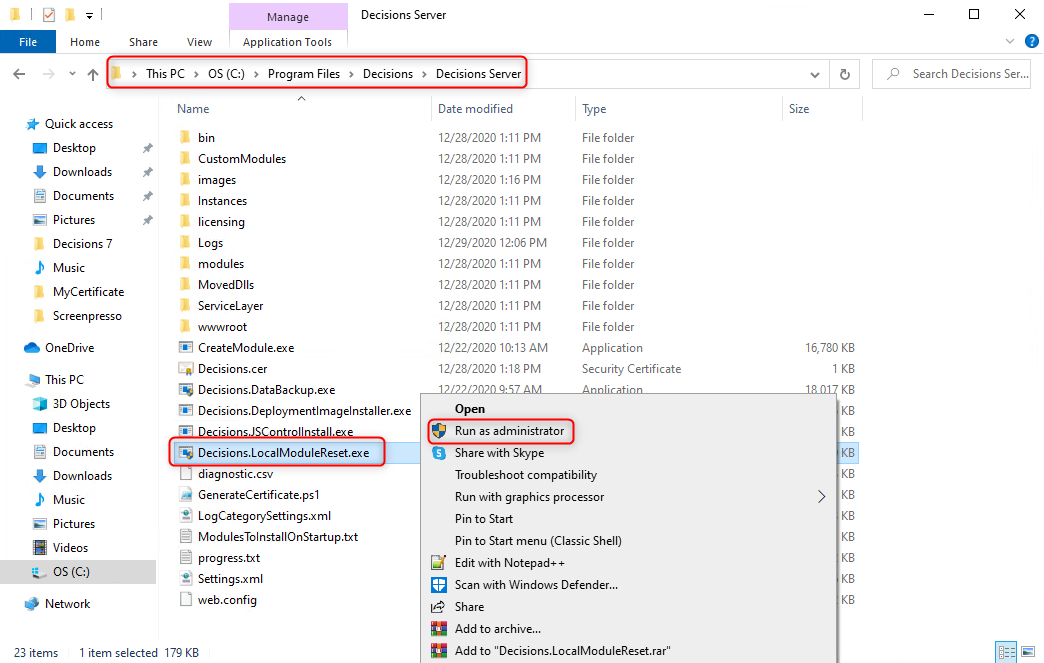
- Run the Decisions.LocalModuleReset.exe tool as an Administrator located in C:\Program Files\Decisions\Decisions Server. This tool is created during default installation.
- After the tool finishes running, start the Decisions Server service to successfully remove the custom dll.


Was this article helpful?