Running Unit Tests on a Flow
- 17 Jan 2022
- 2 Minutes to read
- Print
- DarkLight
Running Unit Tests on a Flow
- Updated on 17 Jan 2022
- 2 Minutes to read
- Print
- DarkLight
Article Summary
Share feedback
Thanks for sharing your feedback!
Overview
Unit tests run like regular tests in the Debugger but allow users to define default Flow input data. This prevents the user from having to enter data when running each time. If a Flow does not have input data, the Unit Test option will not appear in the debugger. Using a unit test is especially helpful during the development of a Flow that uses many types of input data. Unit tests also allow the ability to define an Output Rule for evaluating Flow output data, if present. If there is no output data, this may be ignored. This lets users evaluate whether a Flow is returning the expected output data when running with a certain set of input data.
Example
In this example, a Flow will add 10 to any number and output the result.
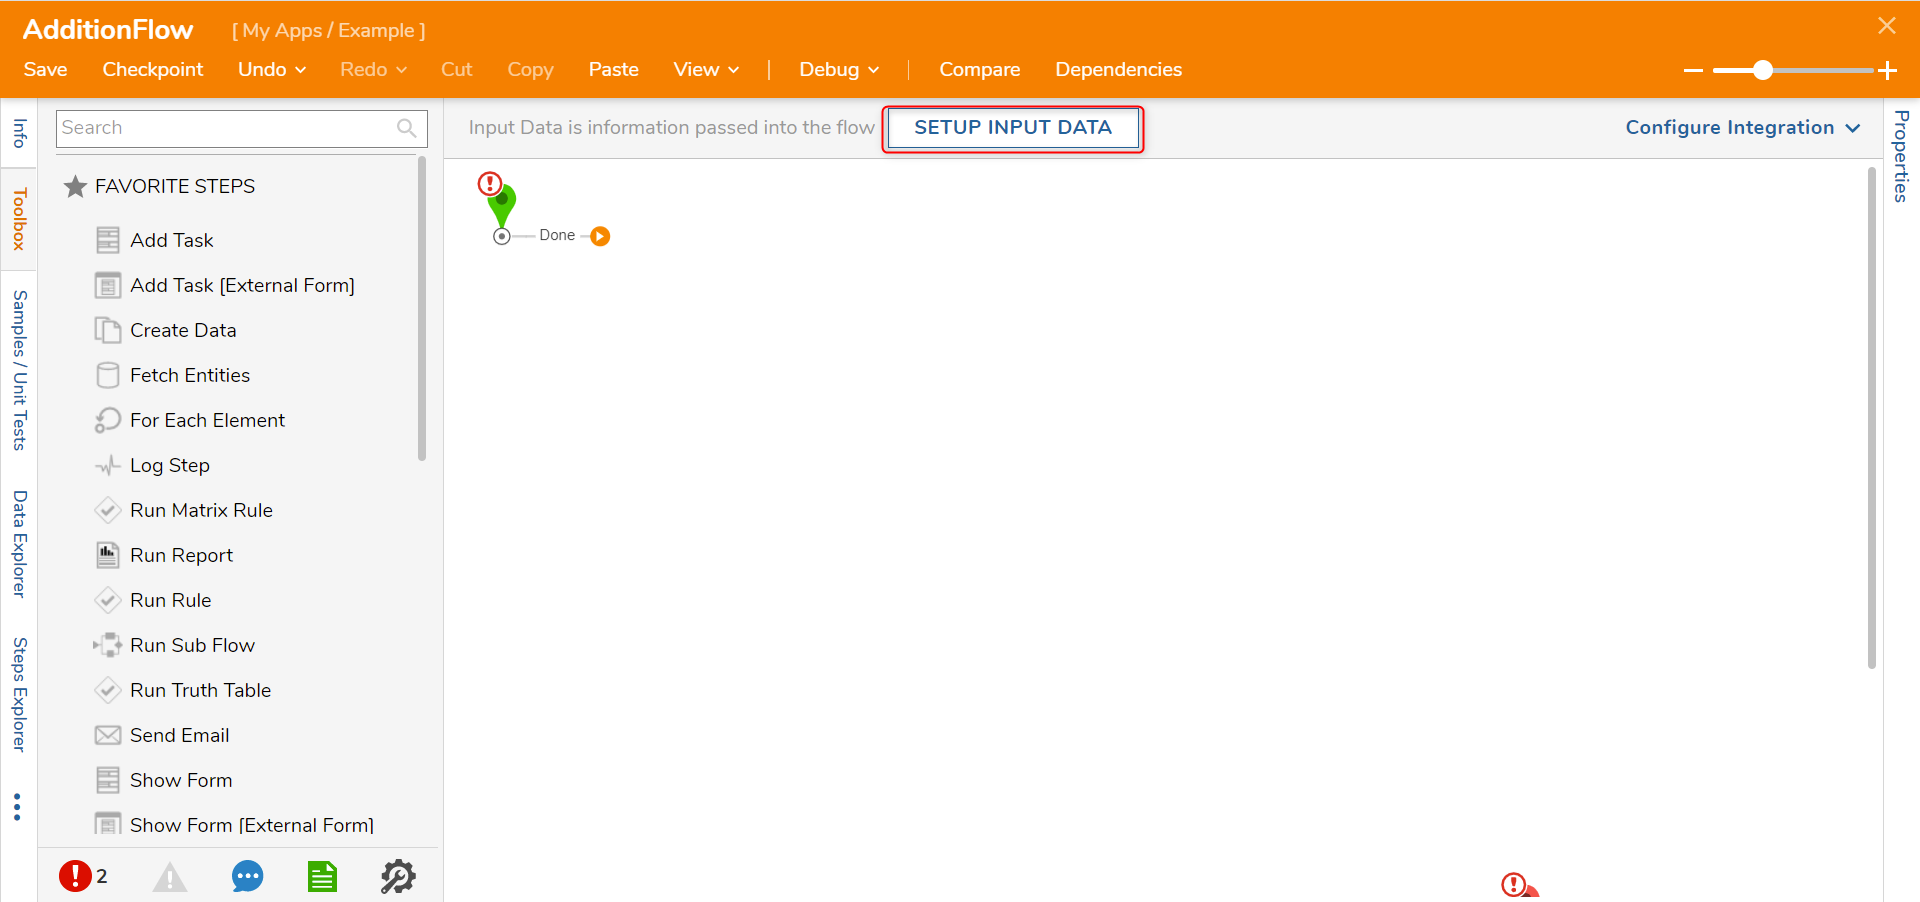
- In a Designer Project, click CREATE FLOW on the Global Action Bar. Select Flow, name the Flow (AdditionFlow) and click CREATE.
- Click SETUP INPUT DATA. Click DEFINE.
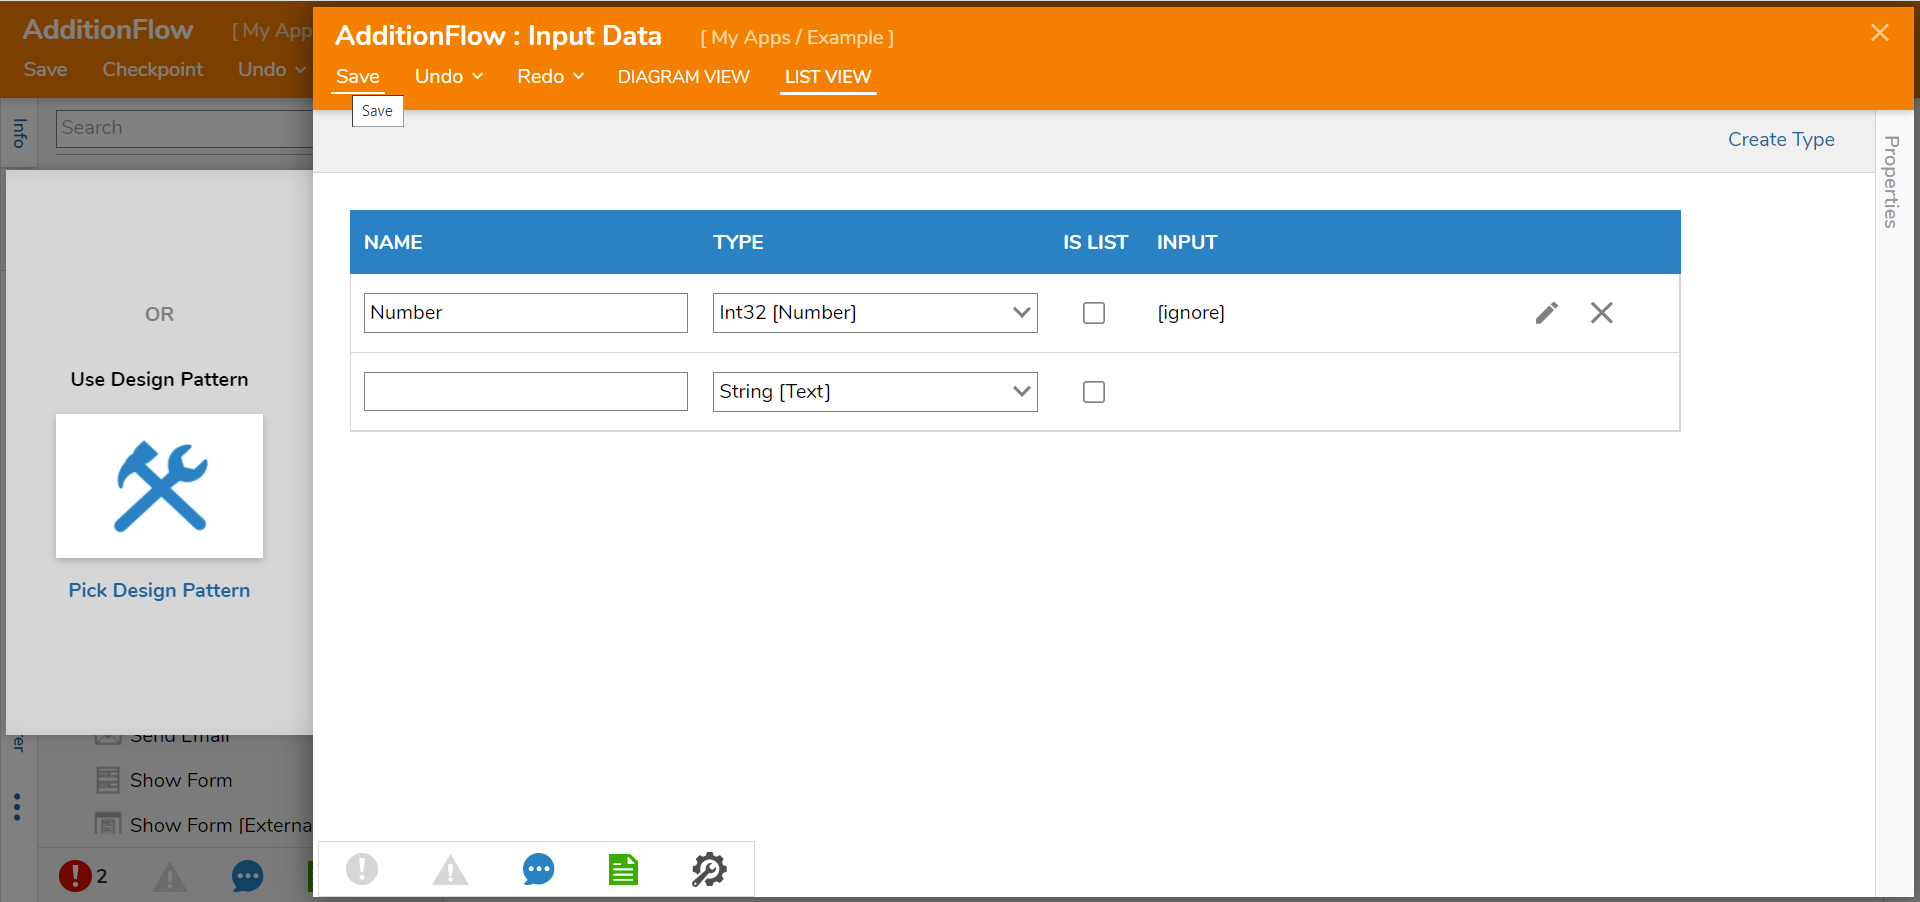
- In the Input Data window, enter "Number" under NAME and change the TYPE to Int32 [Number]. Click Save and close the window.
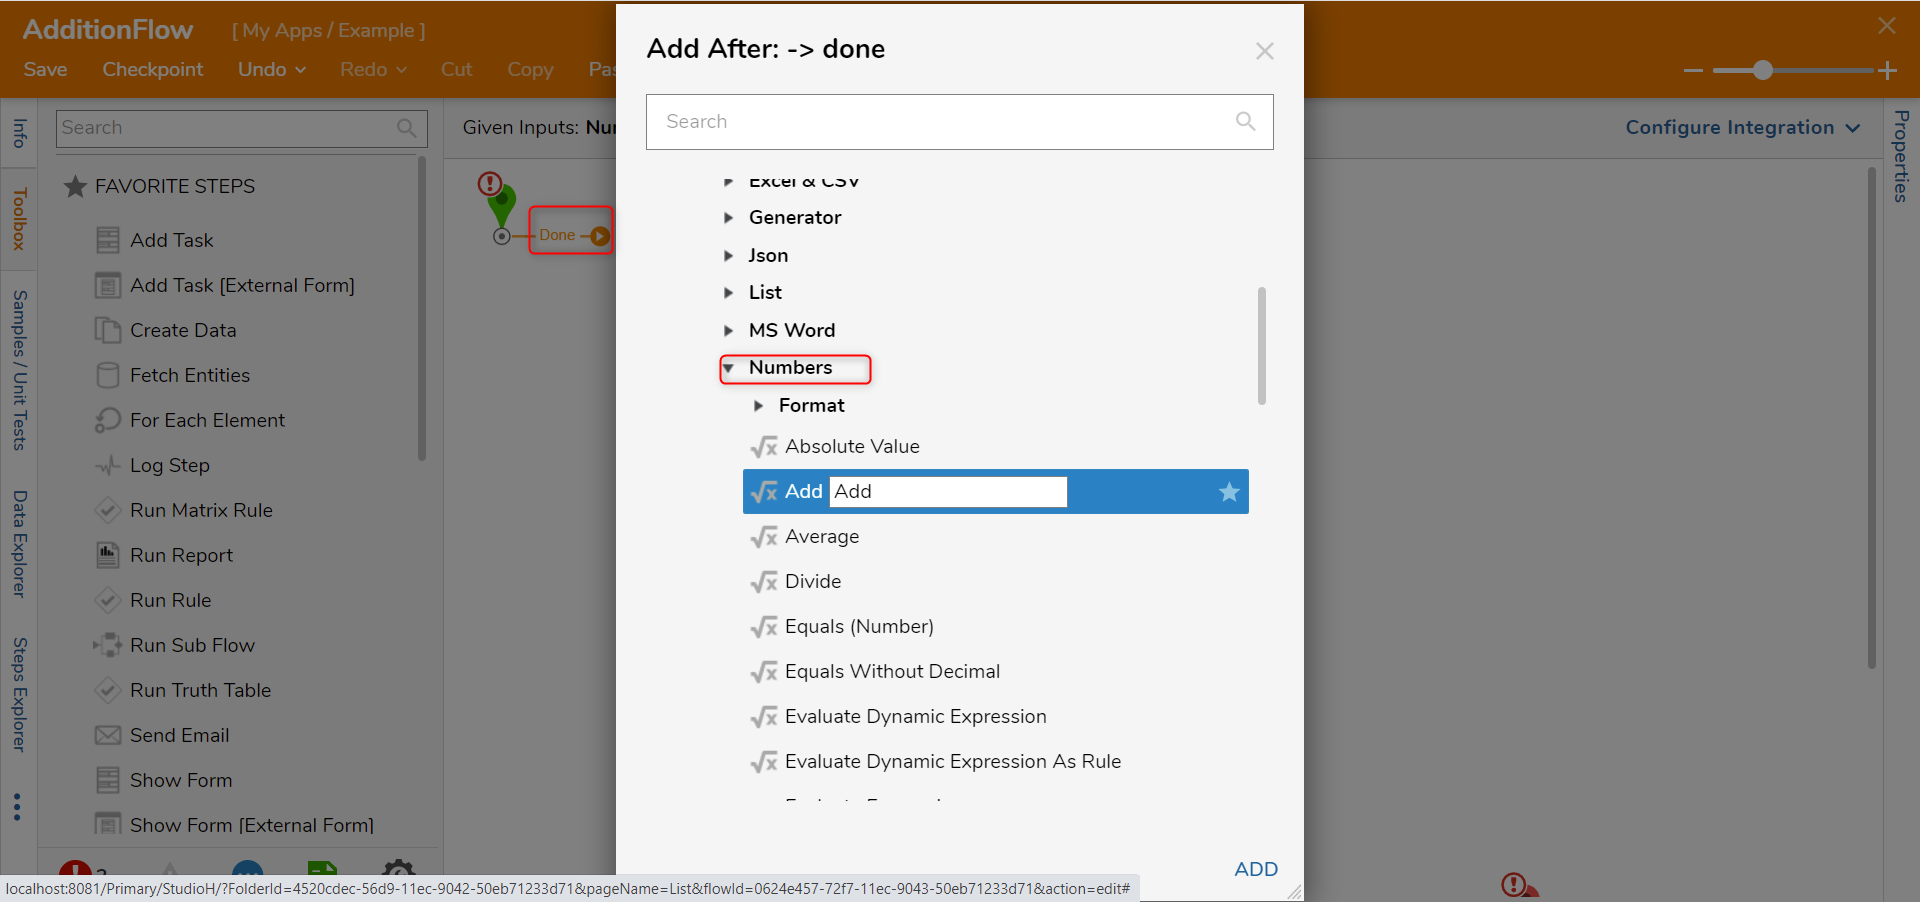
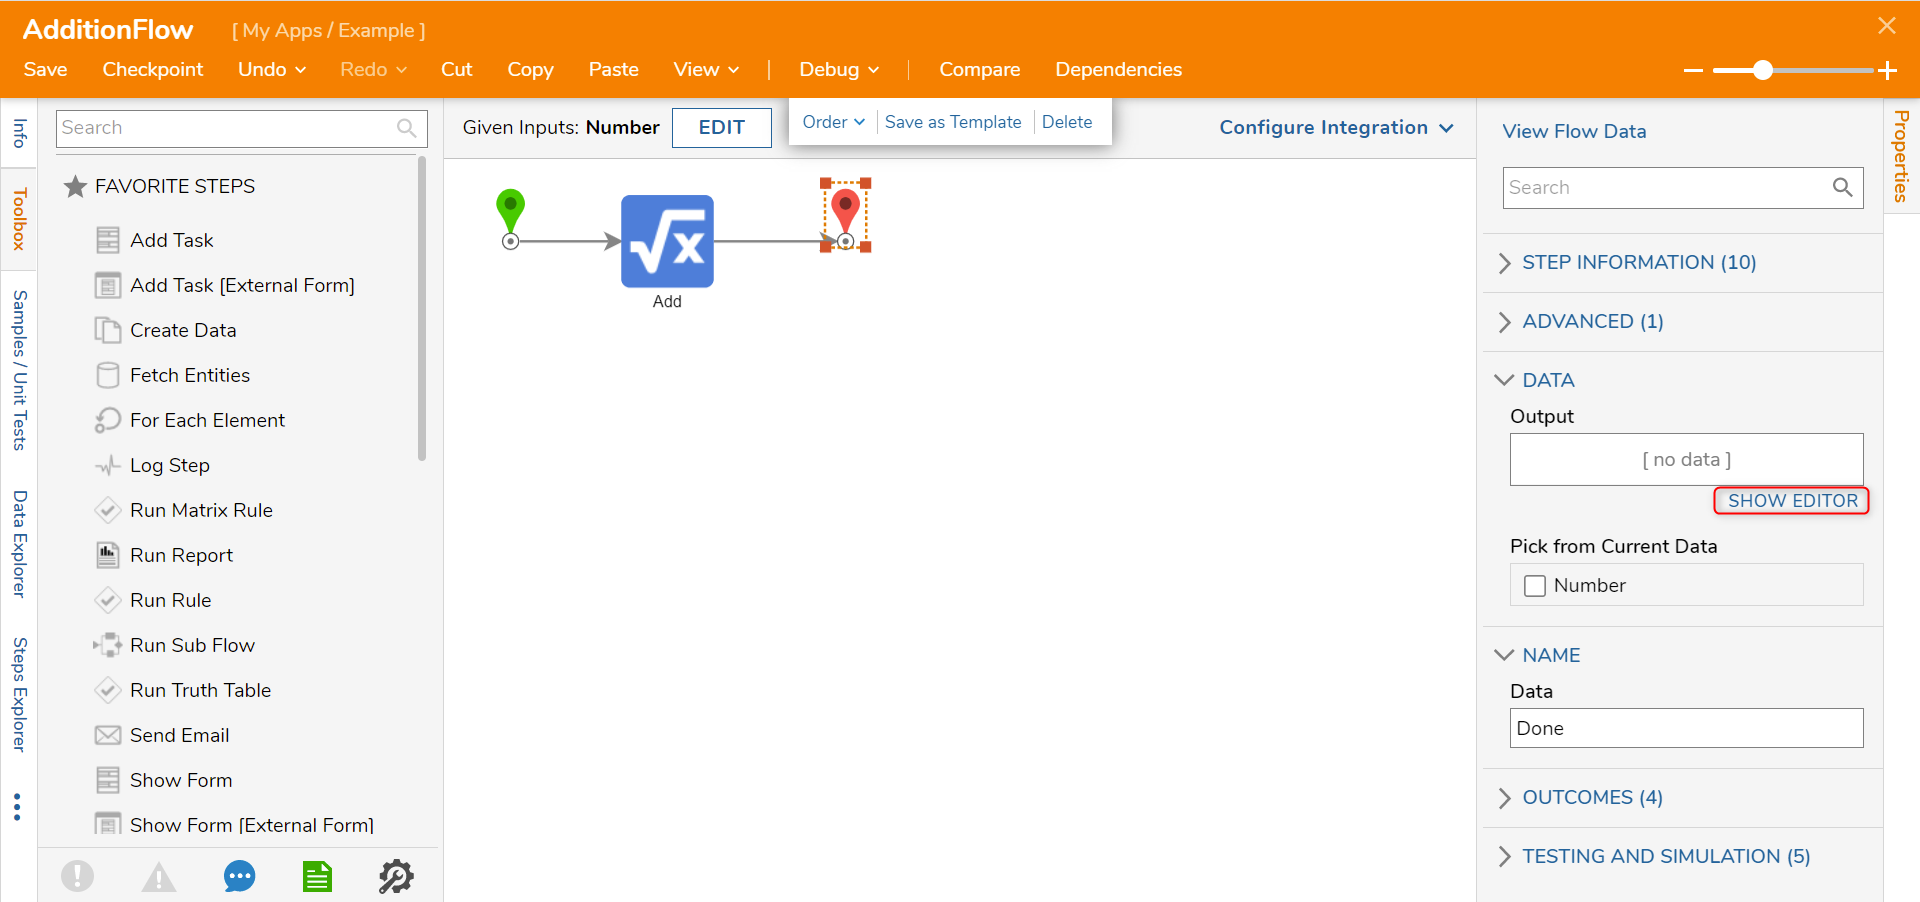
- Click the Done path on the Start step. Navigate to All Steps [Catalog] > Data > Numbers and select the Add step. Click ADD.
- On the Properties panel, click Edit Input Mappings.
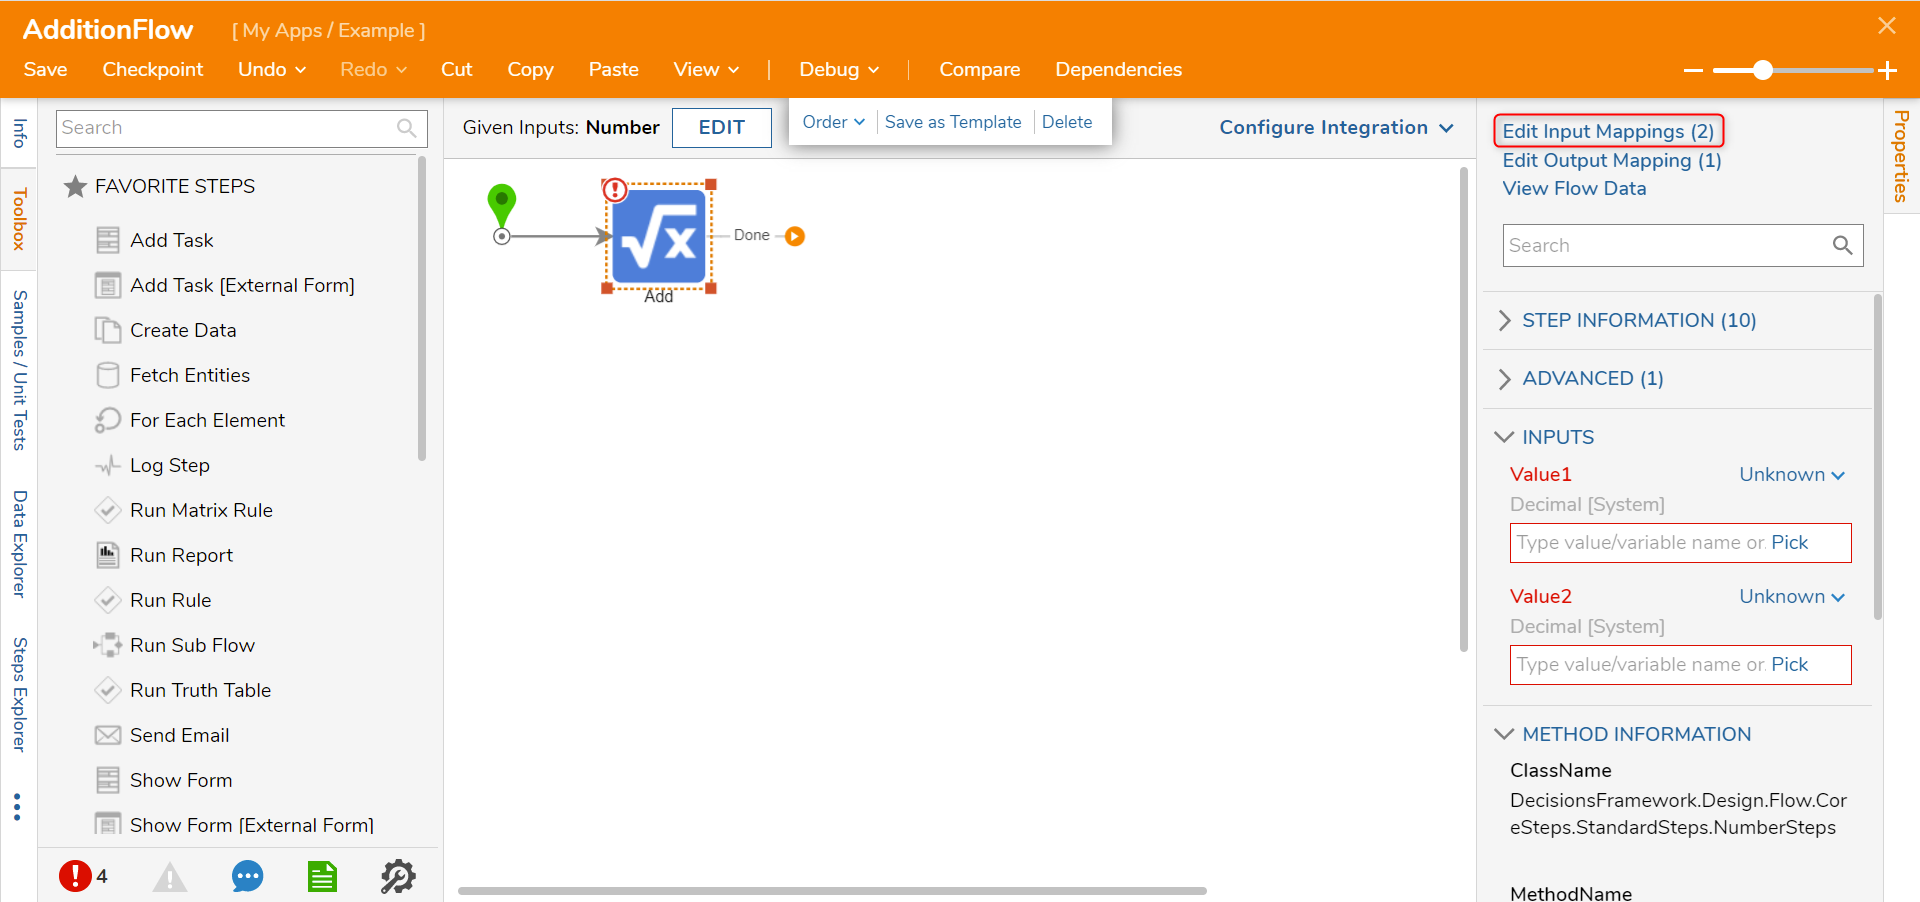
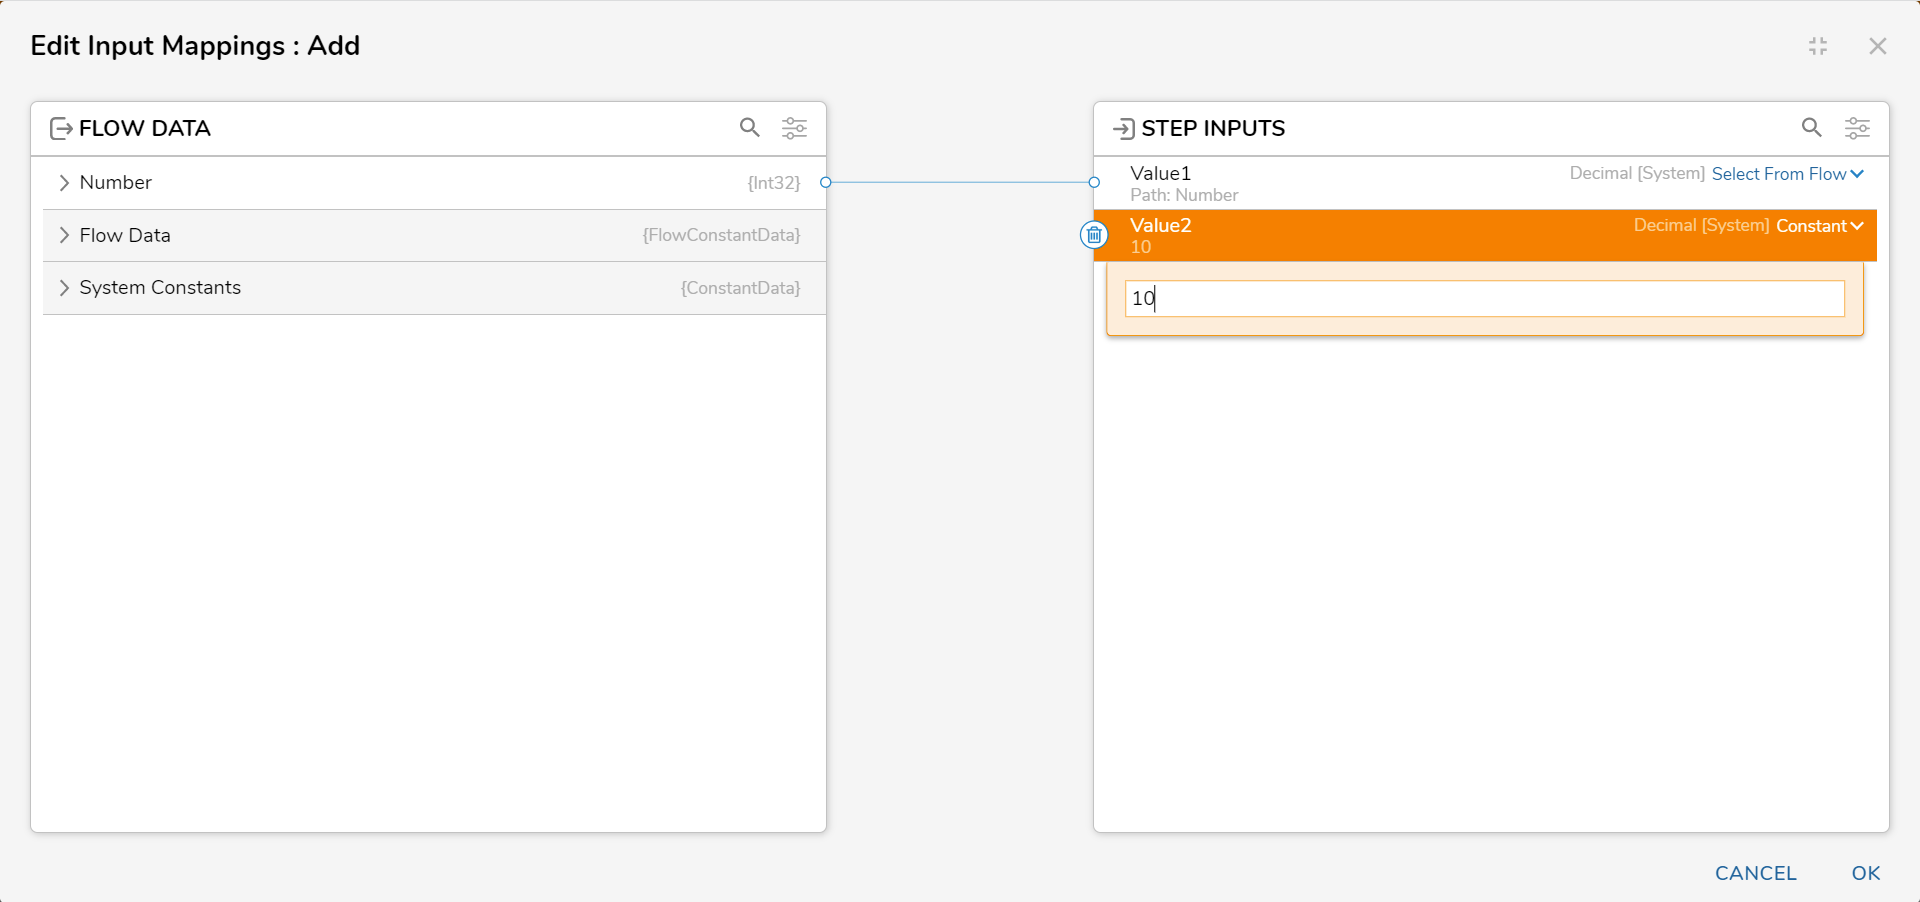
- Attach the Number path to Value1. For Value2, select Constant map and enter "10". Click OK.
- Attach the Done path of the Add step to the End step.
- Select the End step. On the Properties panel click SHOW EDITOR from under the Output field under the DATA category.
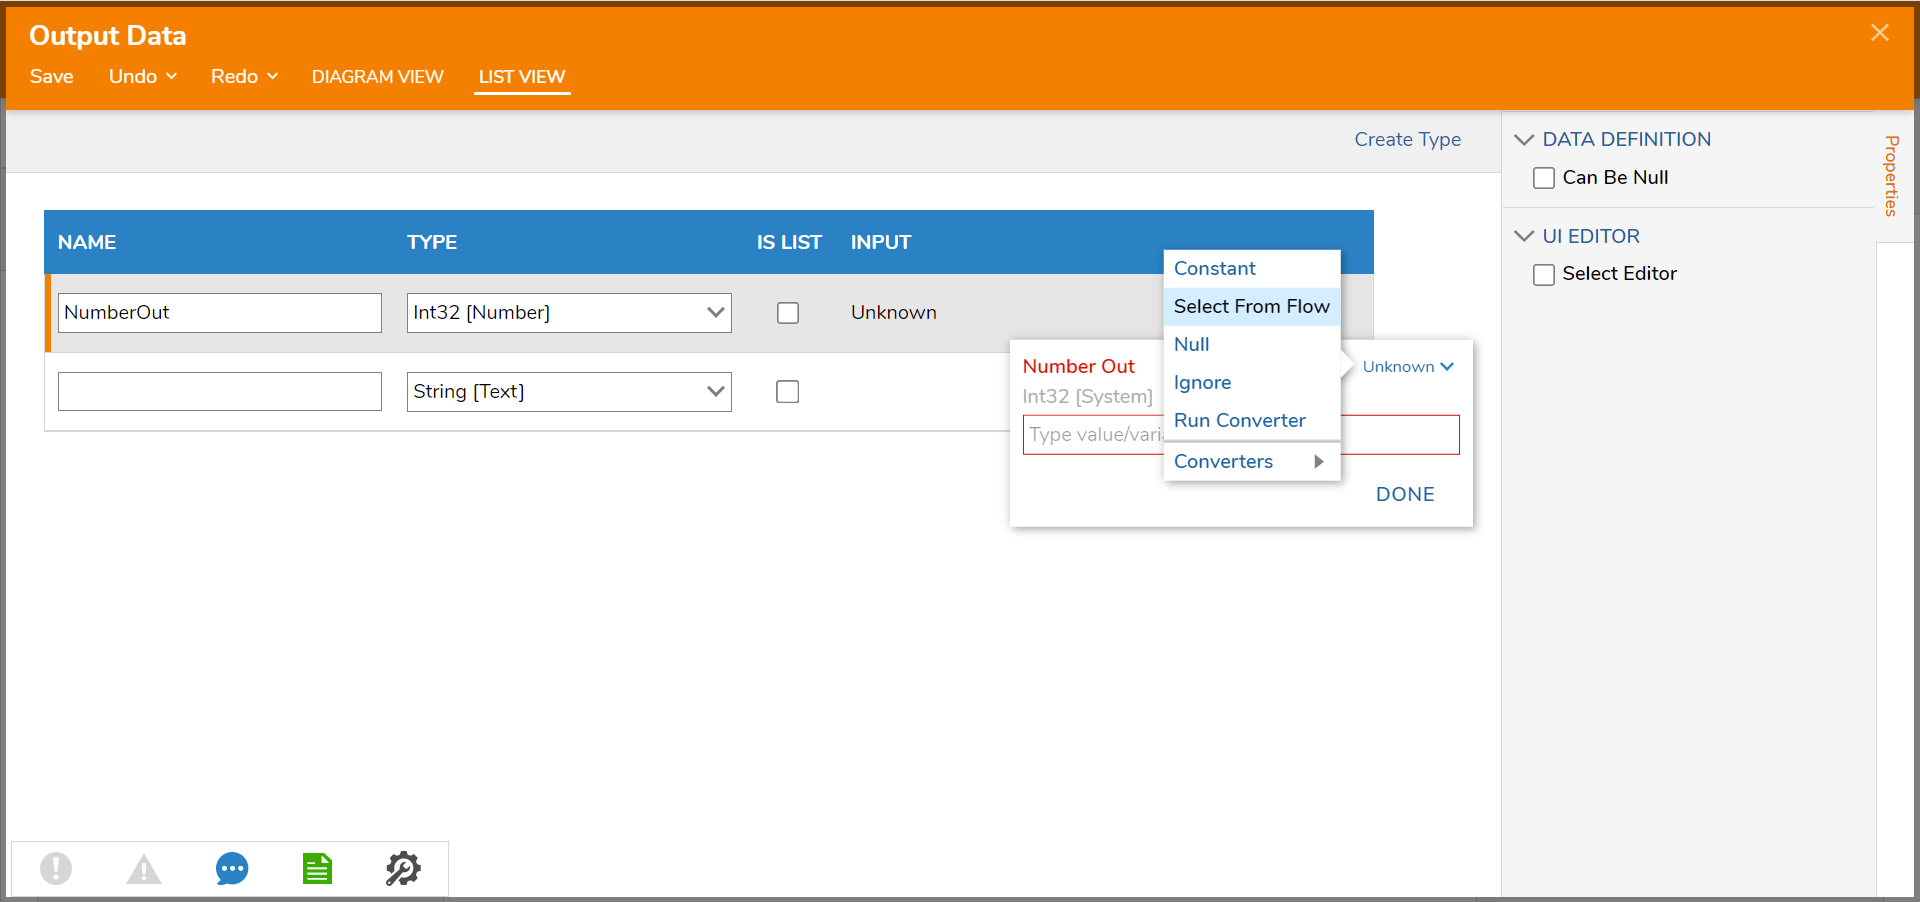
- In the window, enter "NumberOut" with an Int32 [Number] Type. Click the pencil icon. Select Unknown and select Select From Flow. Select Add_Output and click DONE. Click Save and close the window.
- Click Save to save changes to the Flow.


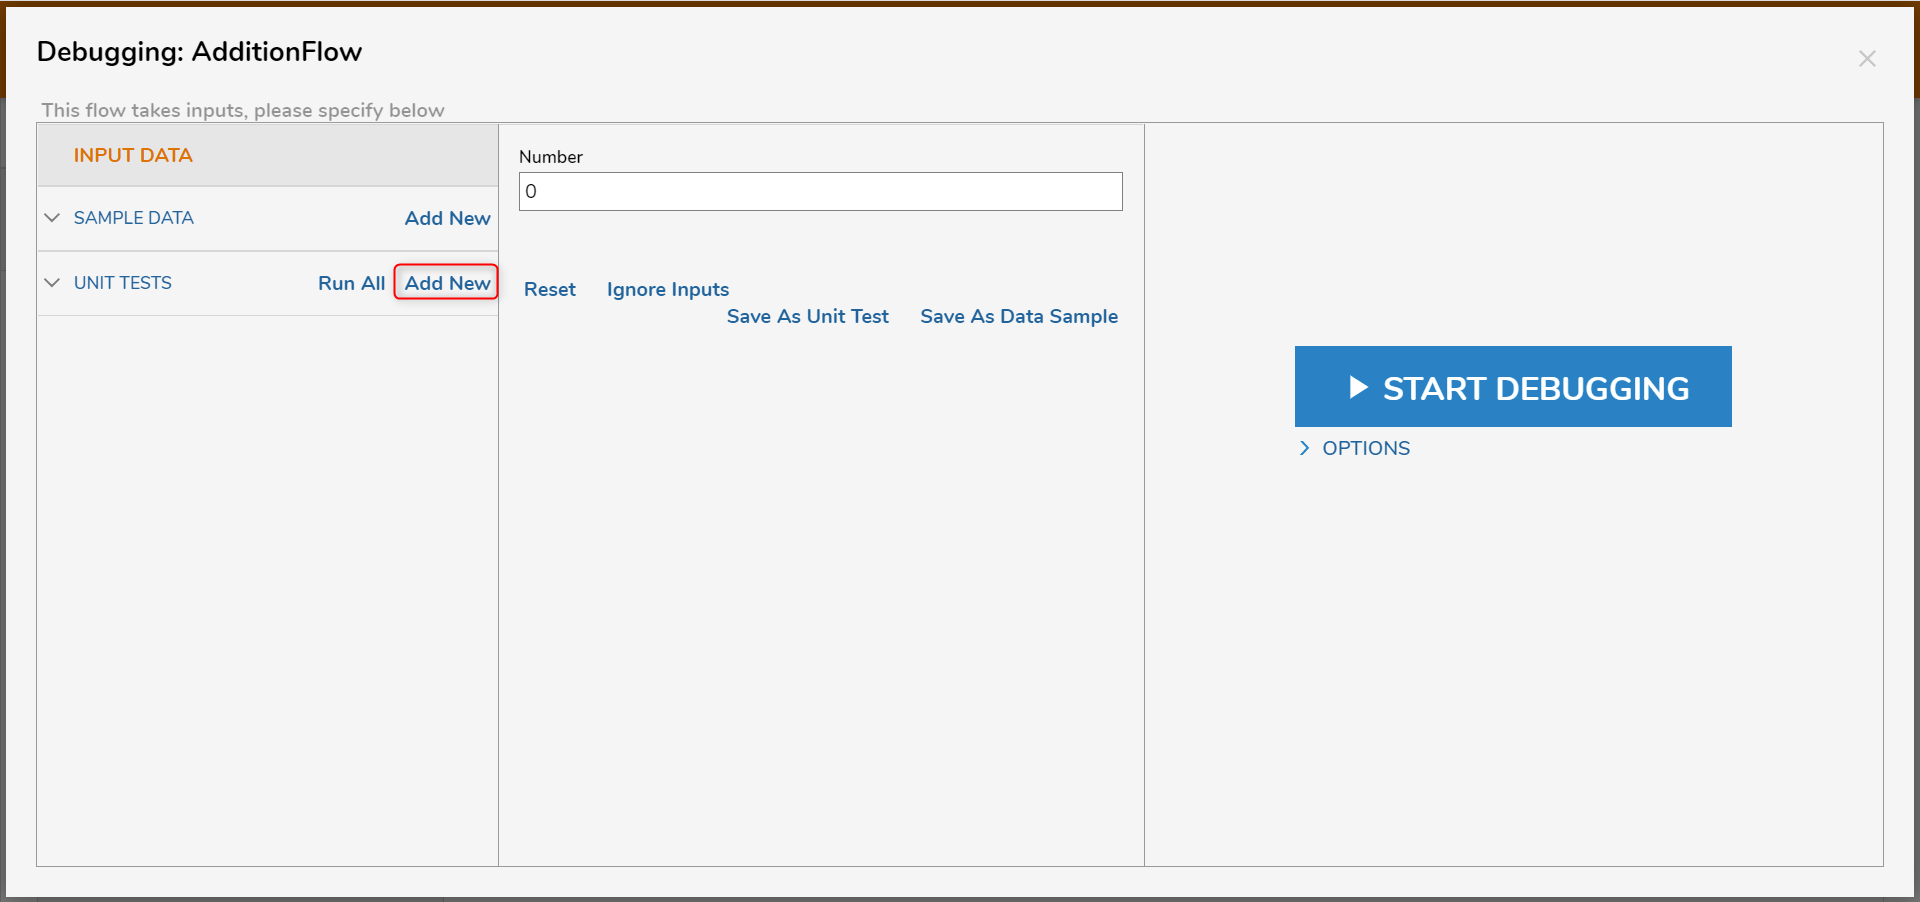
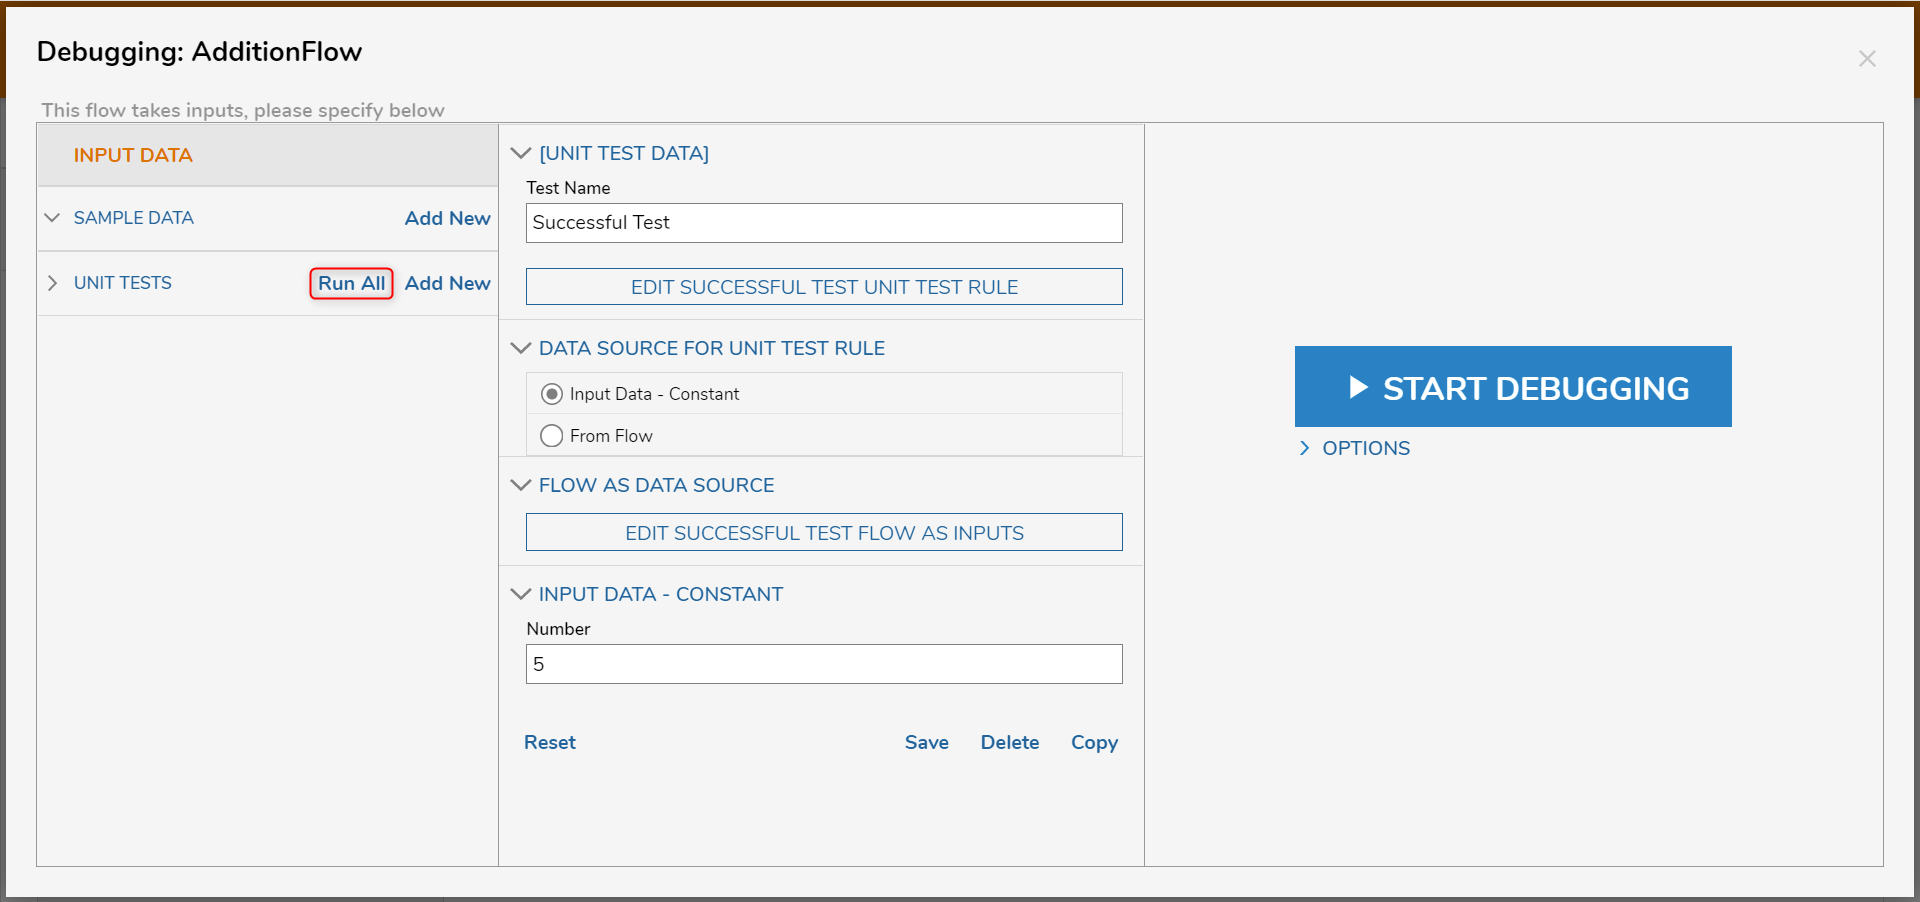
Add Unit Test
- On the top action bar, click Debug.
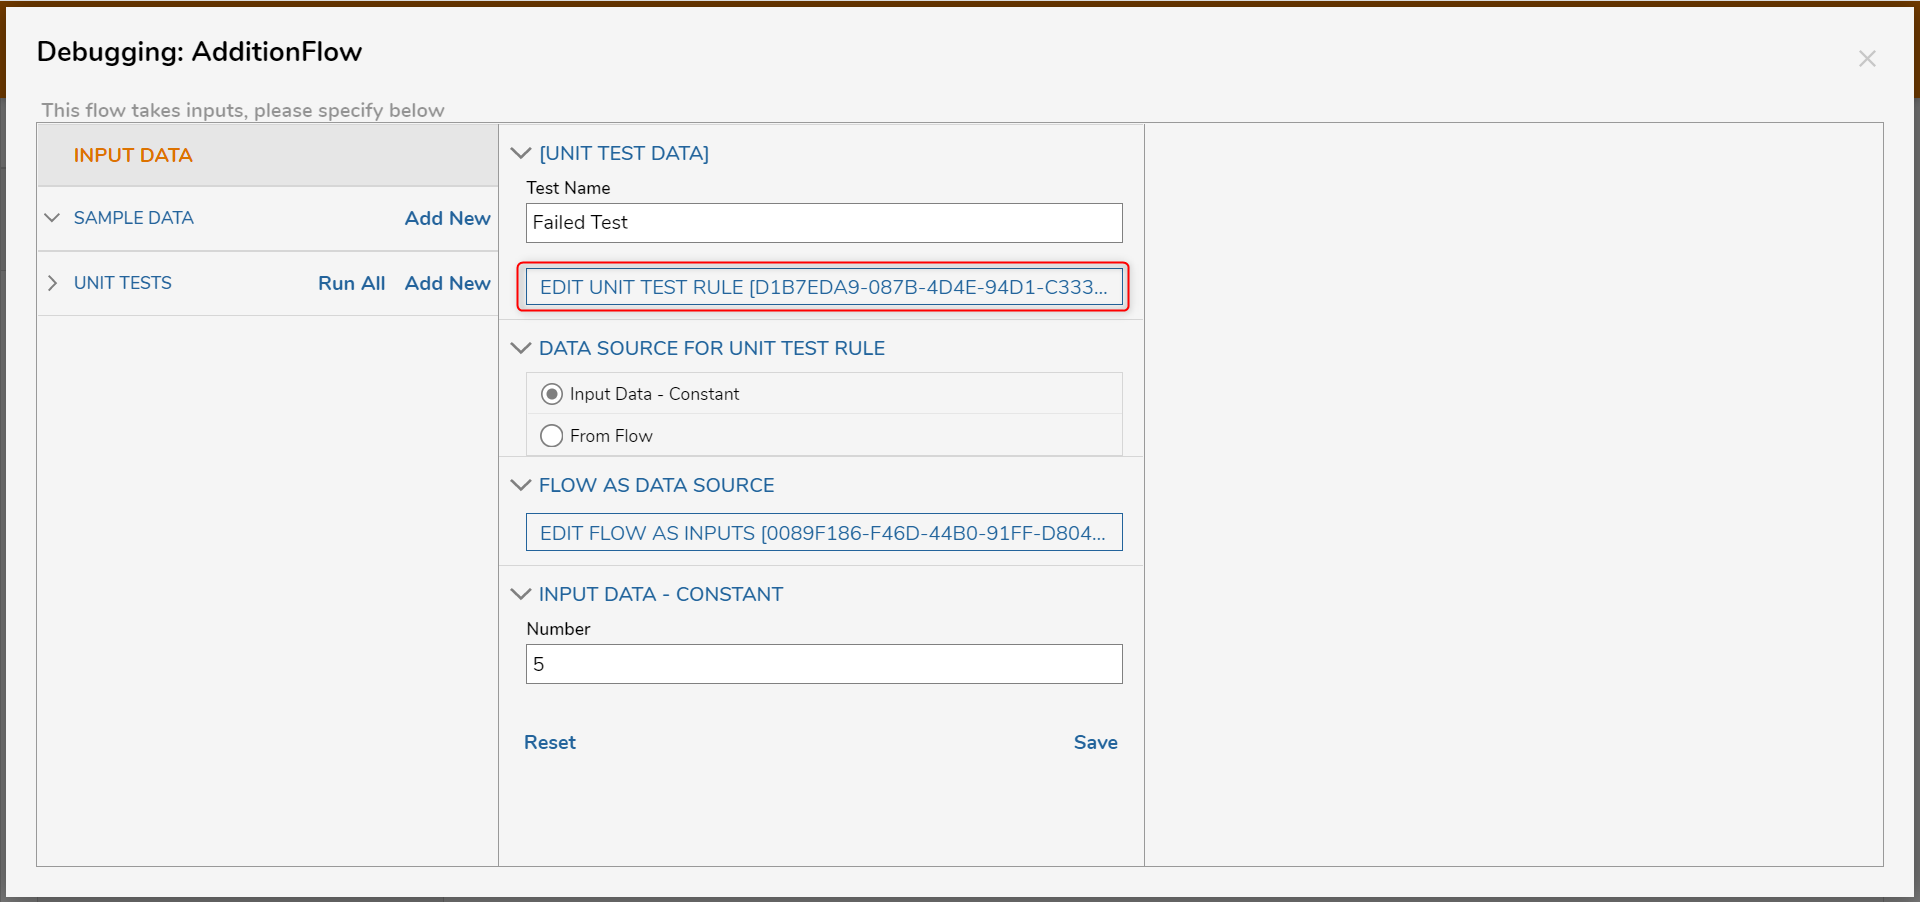
- Next to UNIT TEST, click Add New.
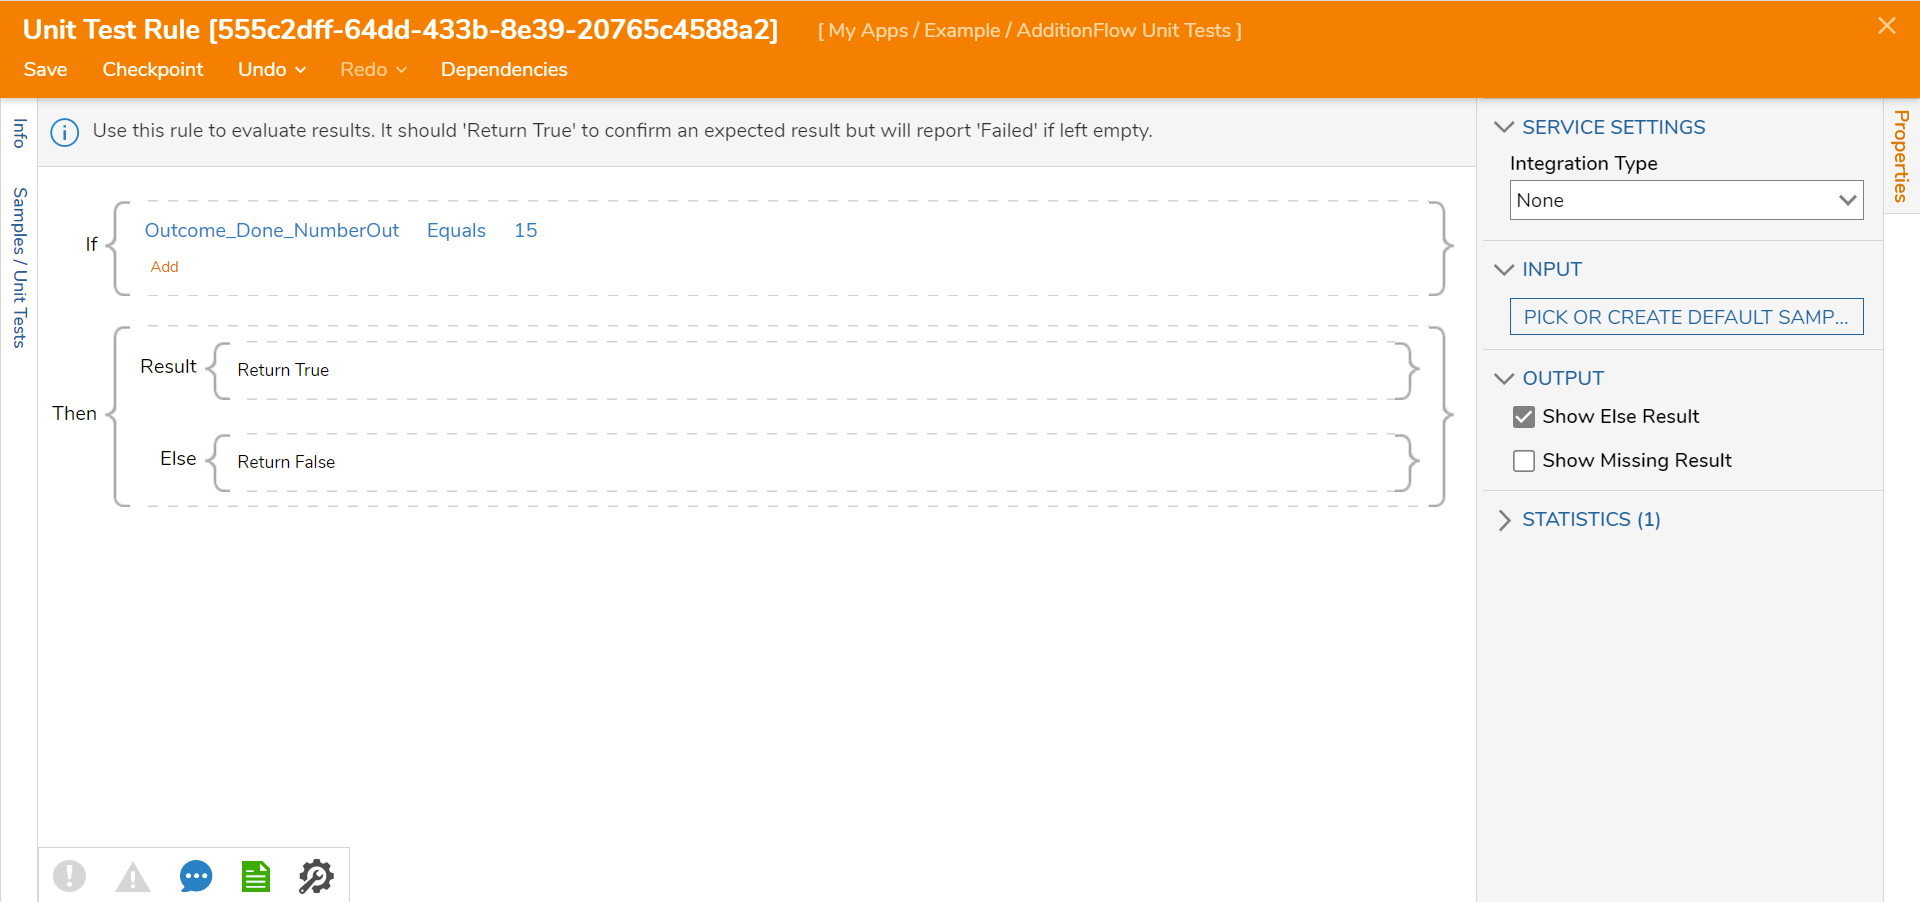
- Enter "Failed Test" in the Test Name field. Under the INPUT DATA - CONSTANT category, enter "5" as the Number. Click EDIT UNIT TEST RULE.
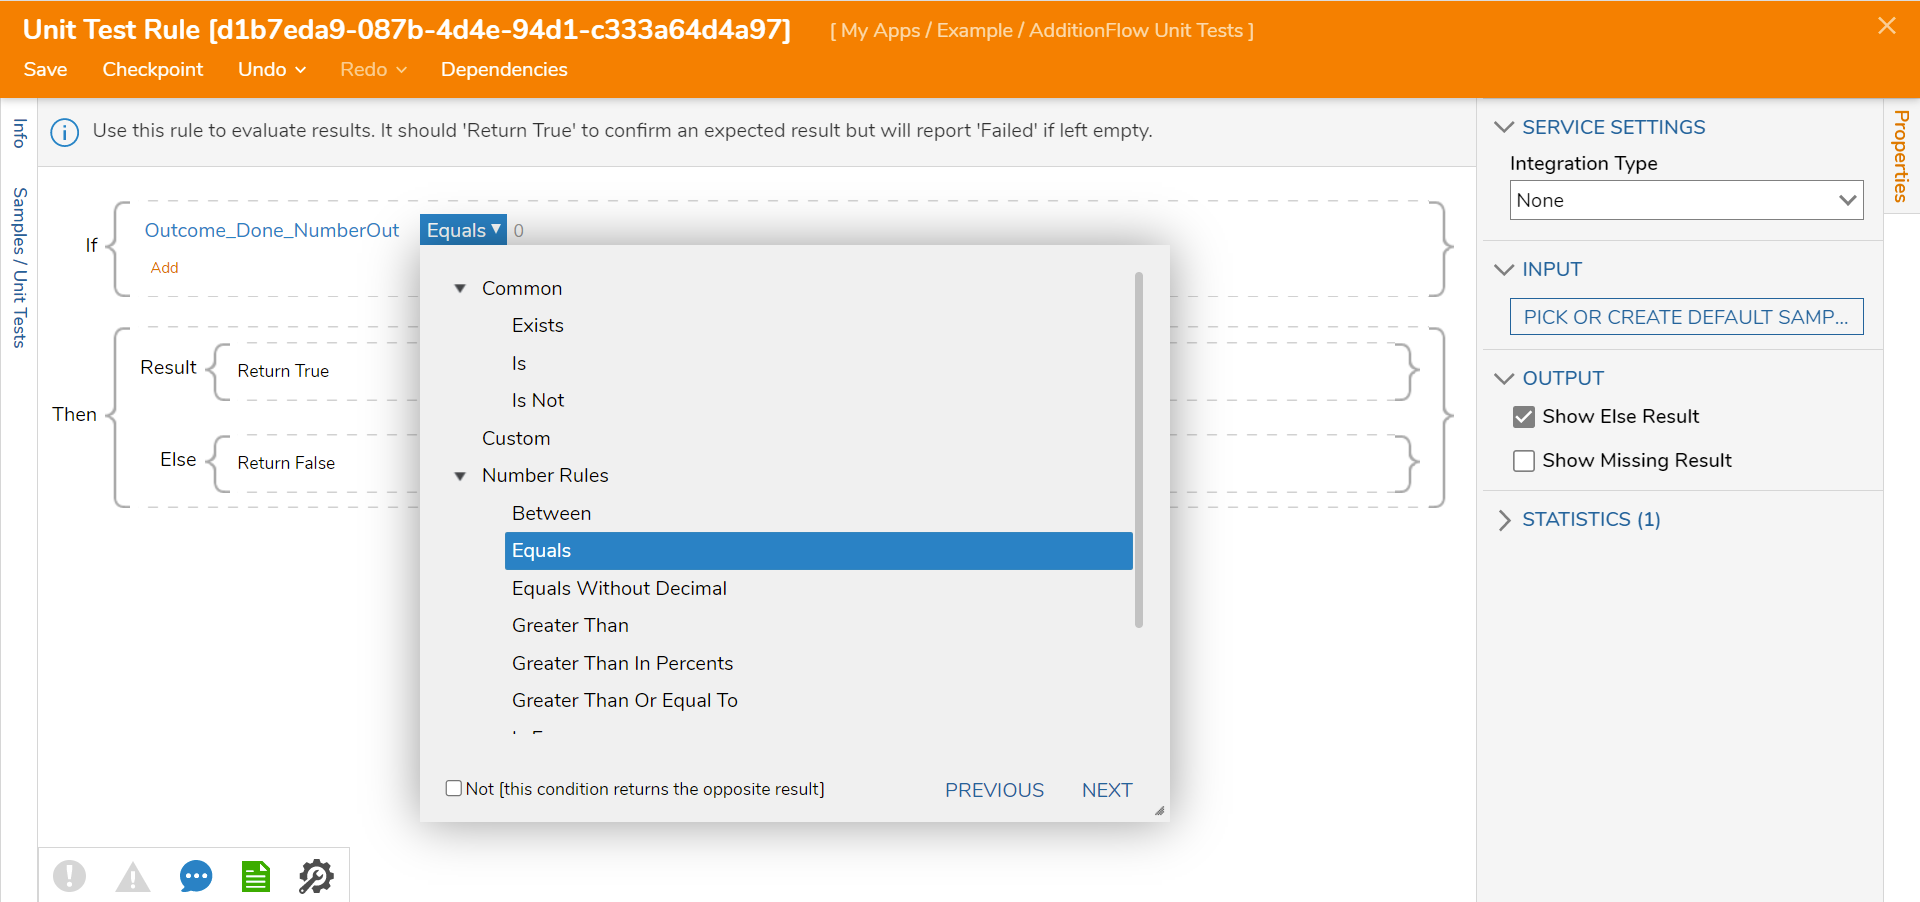
- Click Select Data Element and select Outcome_Done_NumberOut. Click NEXT.

- Select Equals as the verb and click NEXT.
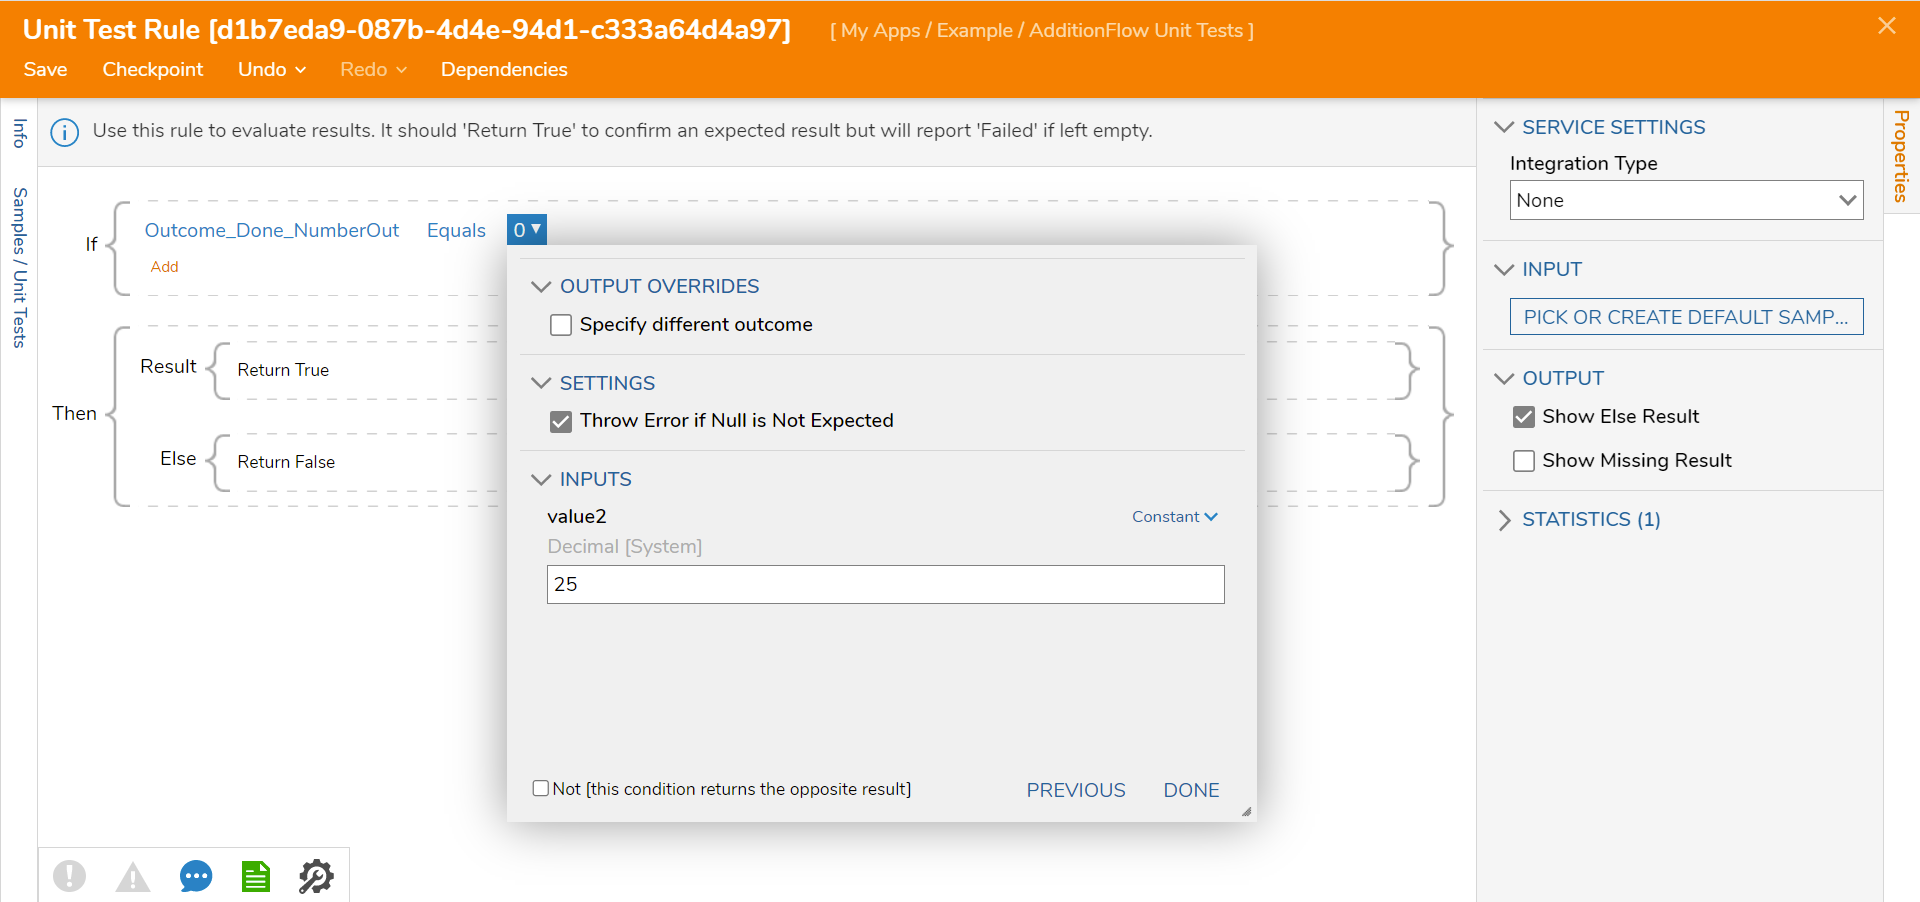
- Enter "25" in the value field and click DONE. Click Save to save changes and close the Rule Designer.
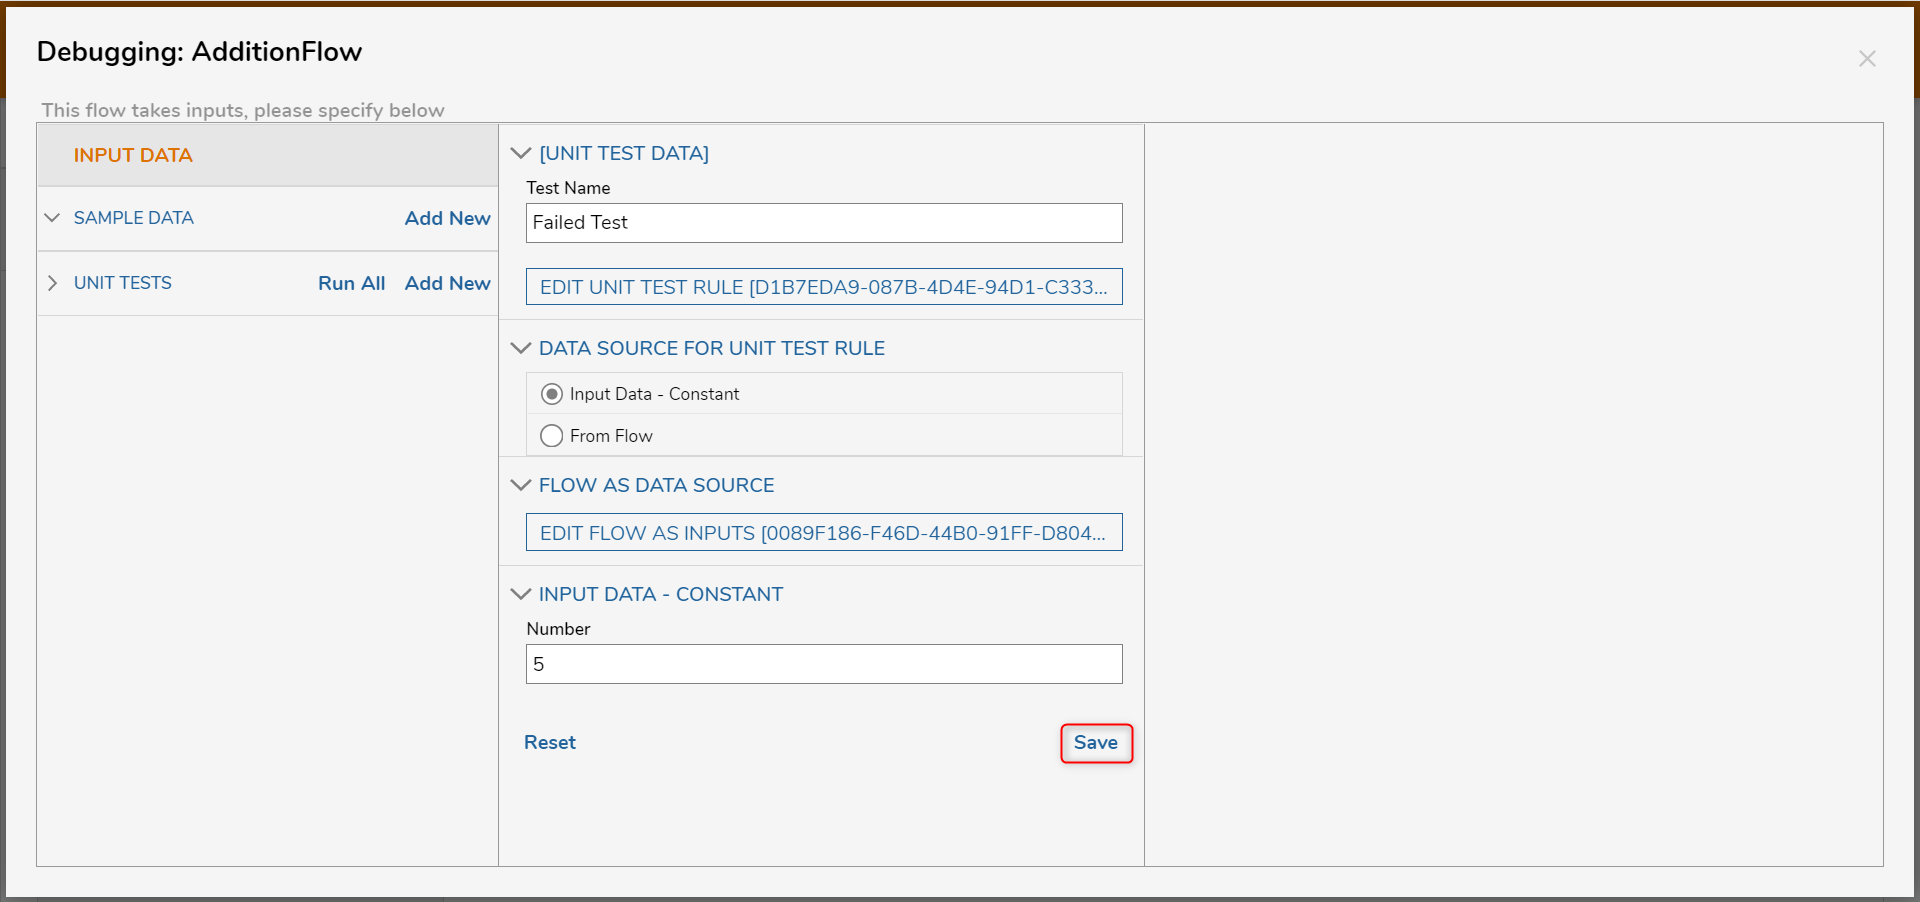
- Click Save to save the Unit Test.
- Add another Unit Test named "Successful Test" with a constant number of "5". Configure the Unit Test Rule to evaluate if "Outcome_Done_NumberOut Equals 15".
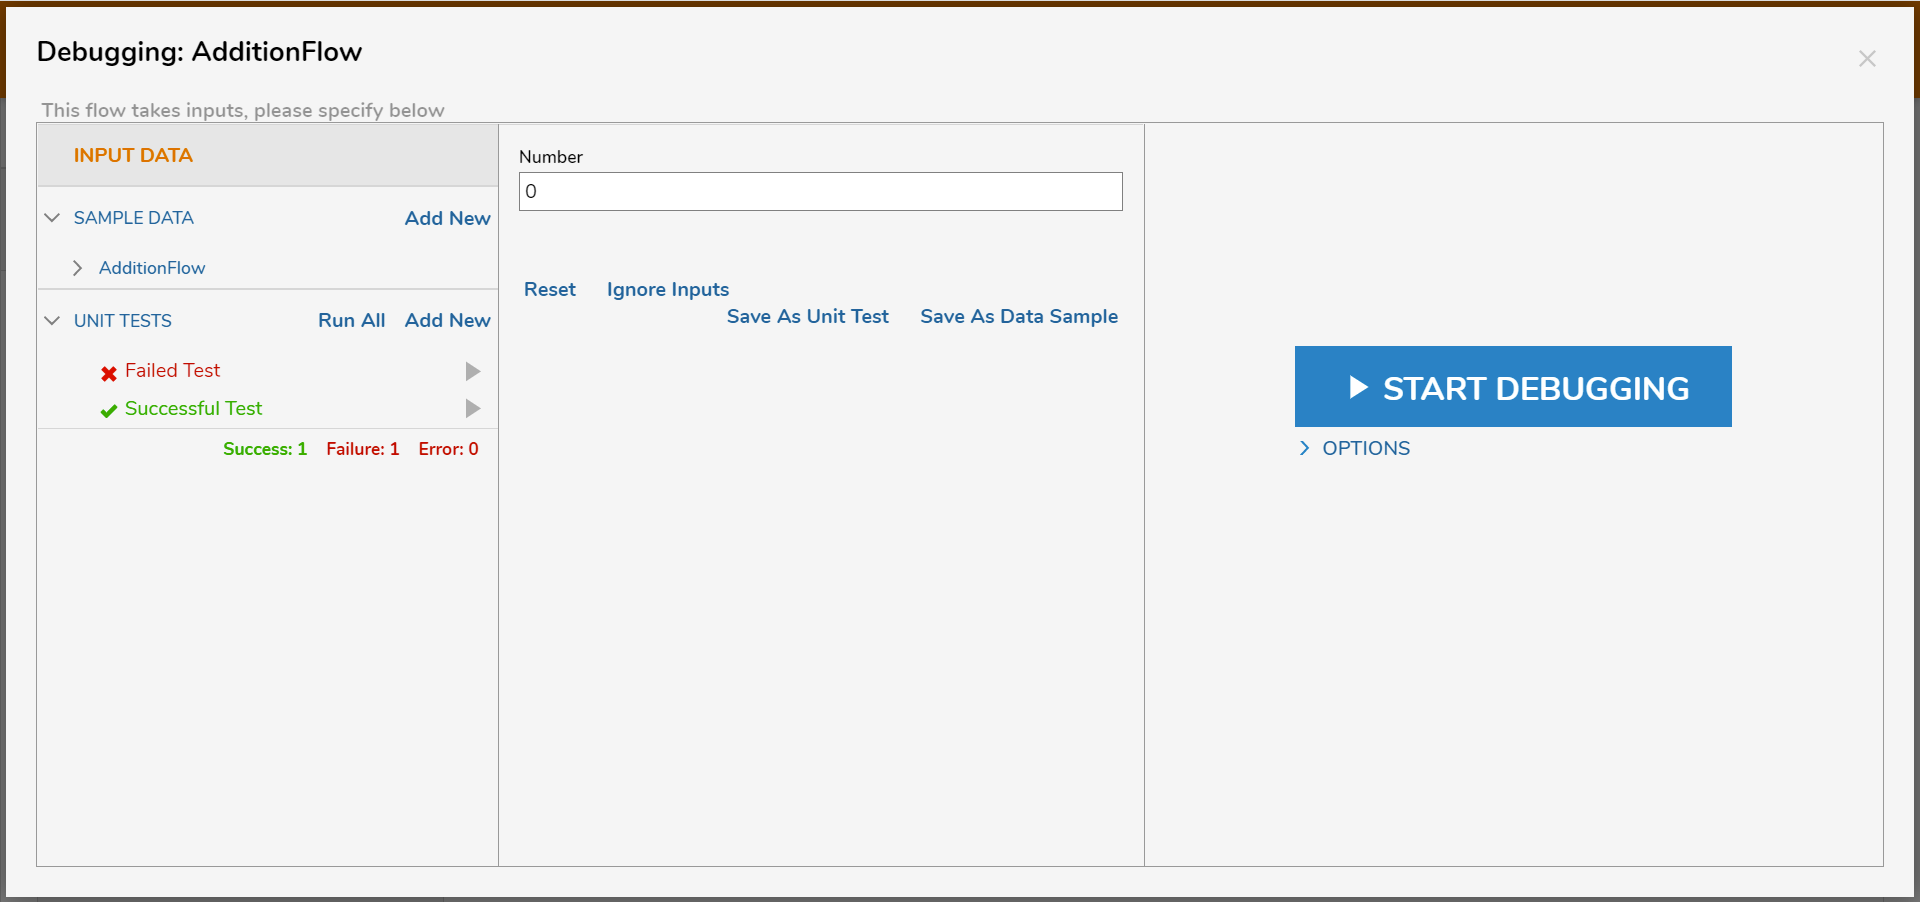
- Click Run All next to UNIT TEST.
- The first test will have a Failure result. The second test will have a Successful result. To run a test individually, click the play button on the right side of each unit test entry.


Was this article helpful?