Creating Dynamic Page Content with Tiles
- 30 Mar 2021
- 3 Minutes to read
- Print
- DarkLight
Creating Dynamic Page Content with Tiles
- Updated on 30 Mar 2021
- 3 Minutes to read
- Print
- DarkLight
Article Summary
Share feedback
Thanks for sharing your feedback!
Overview
Portal Pages can display dynamic Page content with the use of Tile components. Tiles can be placed on any Portal Page, but the Tile content must be generated via a Flow. To display dynamic content, a user must create a Flow that outputs a Tile Return data object which contains the desired content. The following article will demonstrate how to generate dynamic Page content with the use of a Simple Tile component.
Example
In this example, a previously created Folder Extension Data Structure [Vehicle] is used, please navigate to Folder Extension Data Structures for more information.
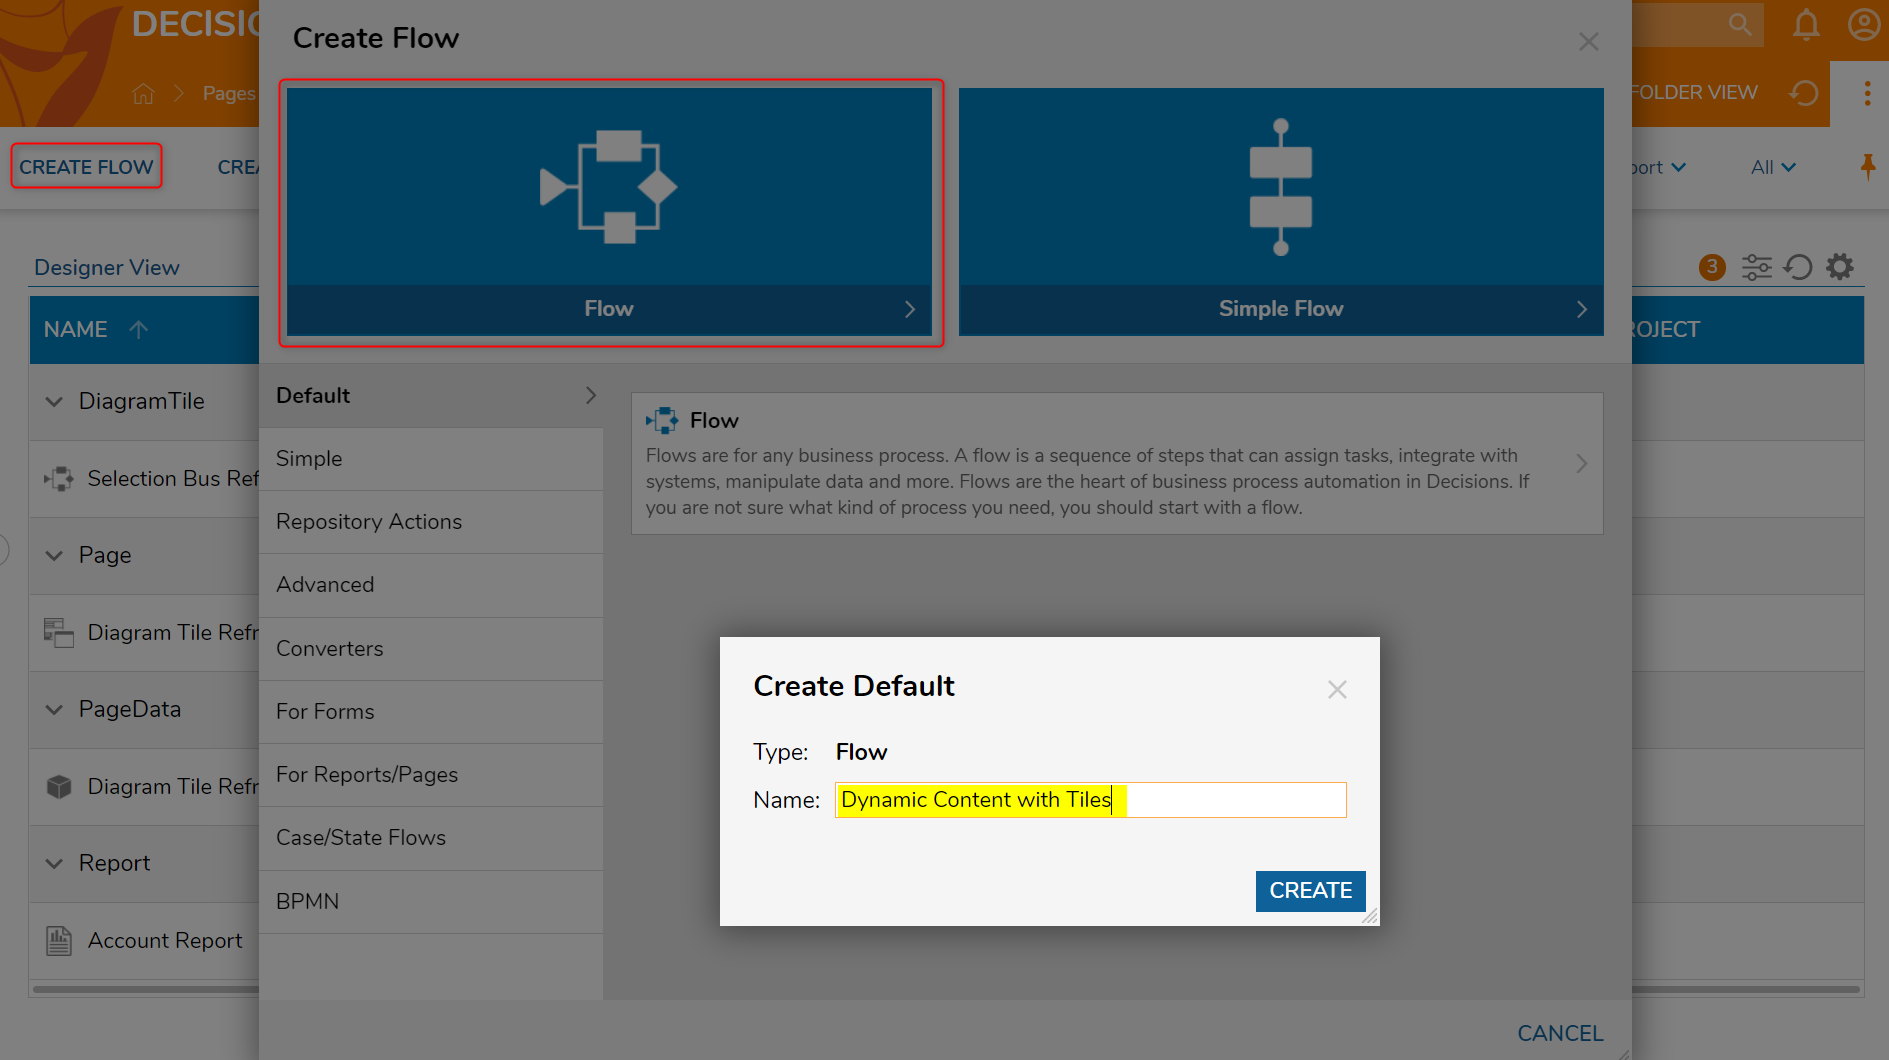
- Begin in a Designer Folder, navigate to the Global Action Bar and select CREATE FLOW.
- In the resulting Create Flow window, select and name the default Flow [Dynamic Content with Tiles]. Click CREATE to open the Flow Designer.
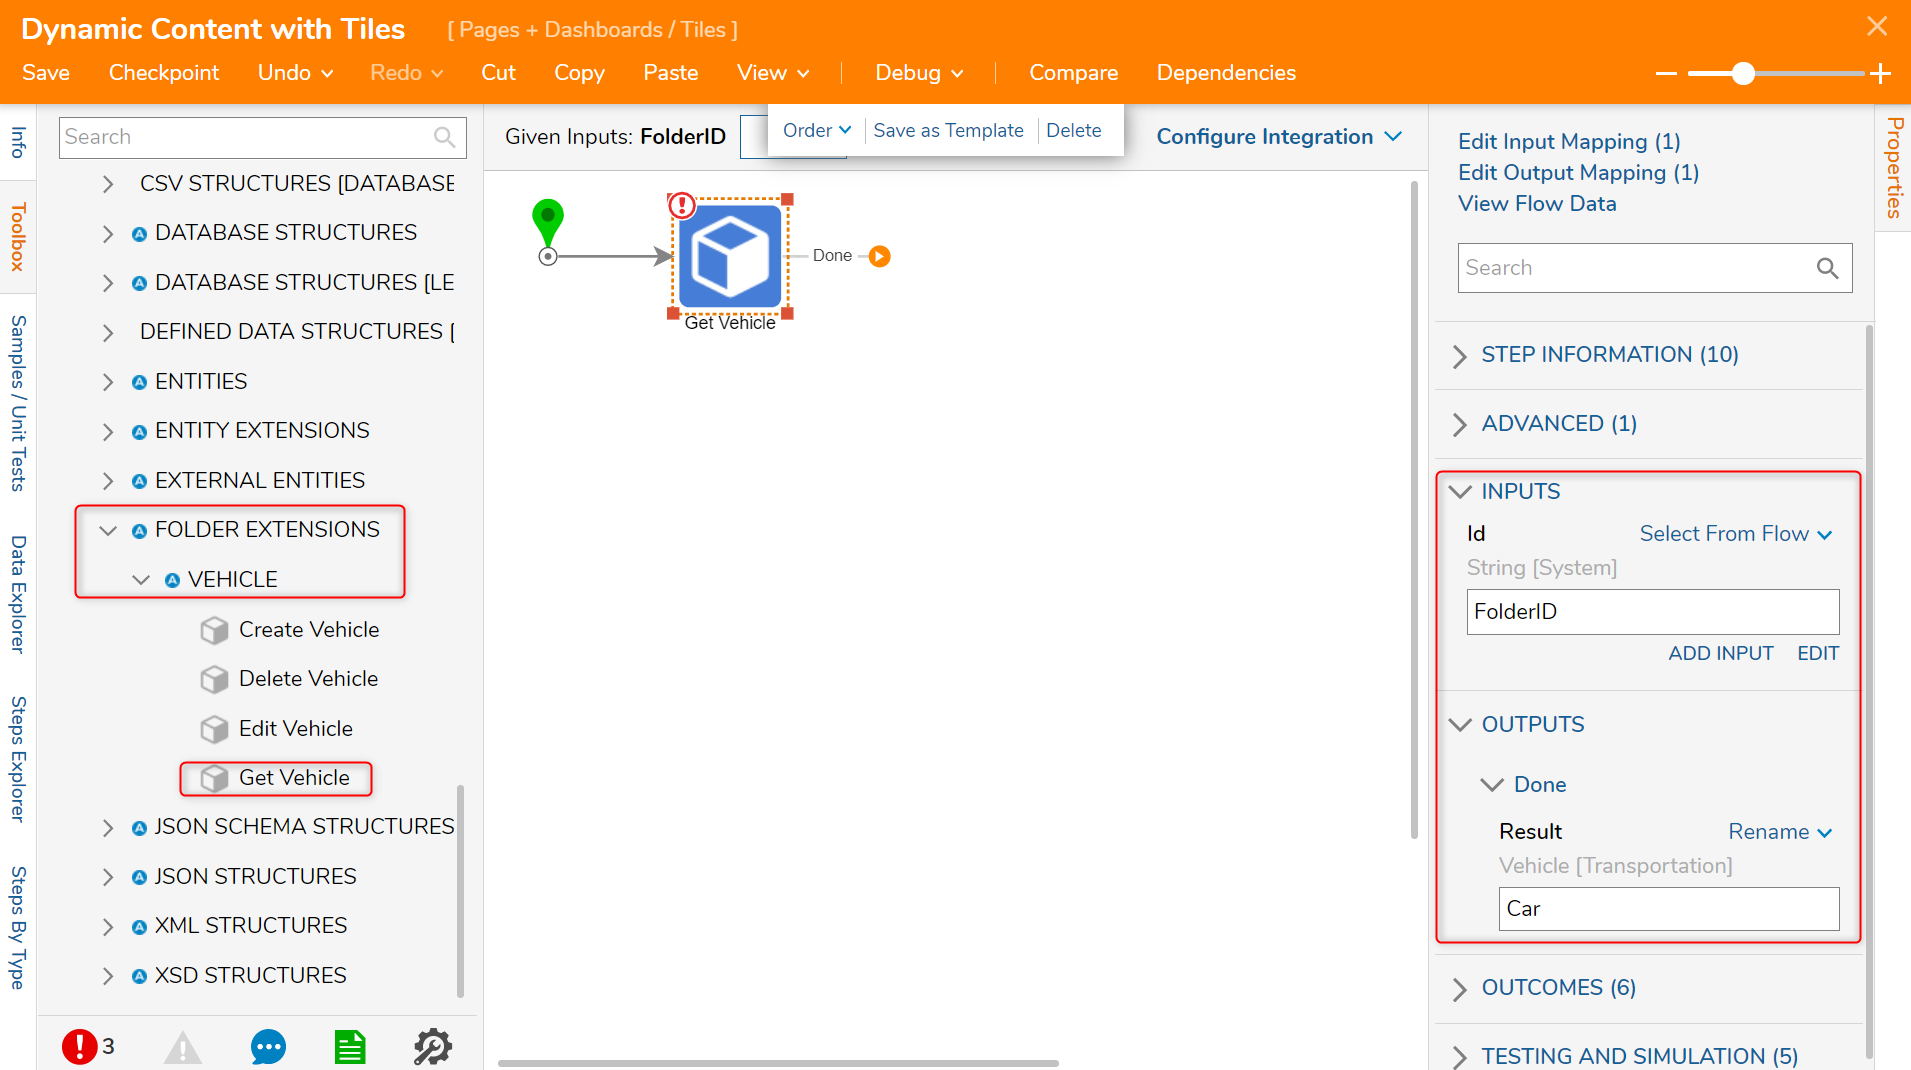
- In the Flow Designer, select the Start step and locate the Properties panel > FLOW INPUTS > Flow Input Data selector. Click SHOW EDITOR.
- In the Flow Inputs window, add the Data Definition "FolderID" into the NAME value field and select String [Text] from the TYPE drop down list.
- Save the Flow Inputs.

- Navigate to the Toolbox > USER DEFINED TYPES > FOLDER EXTENSIONS > VEHICLE category and drag and connect a Get Vehicle component to the Start step.
- With the Get Vehicle component selected, locate the Properties panel > INPUTS > Id value field and change the input mapping to Select From Flow, and select FolderID.
- In the OUTPUTS > Done > Results value field, change the value to Car.
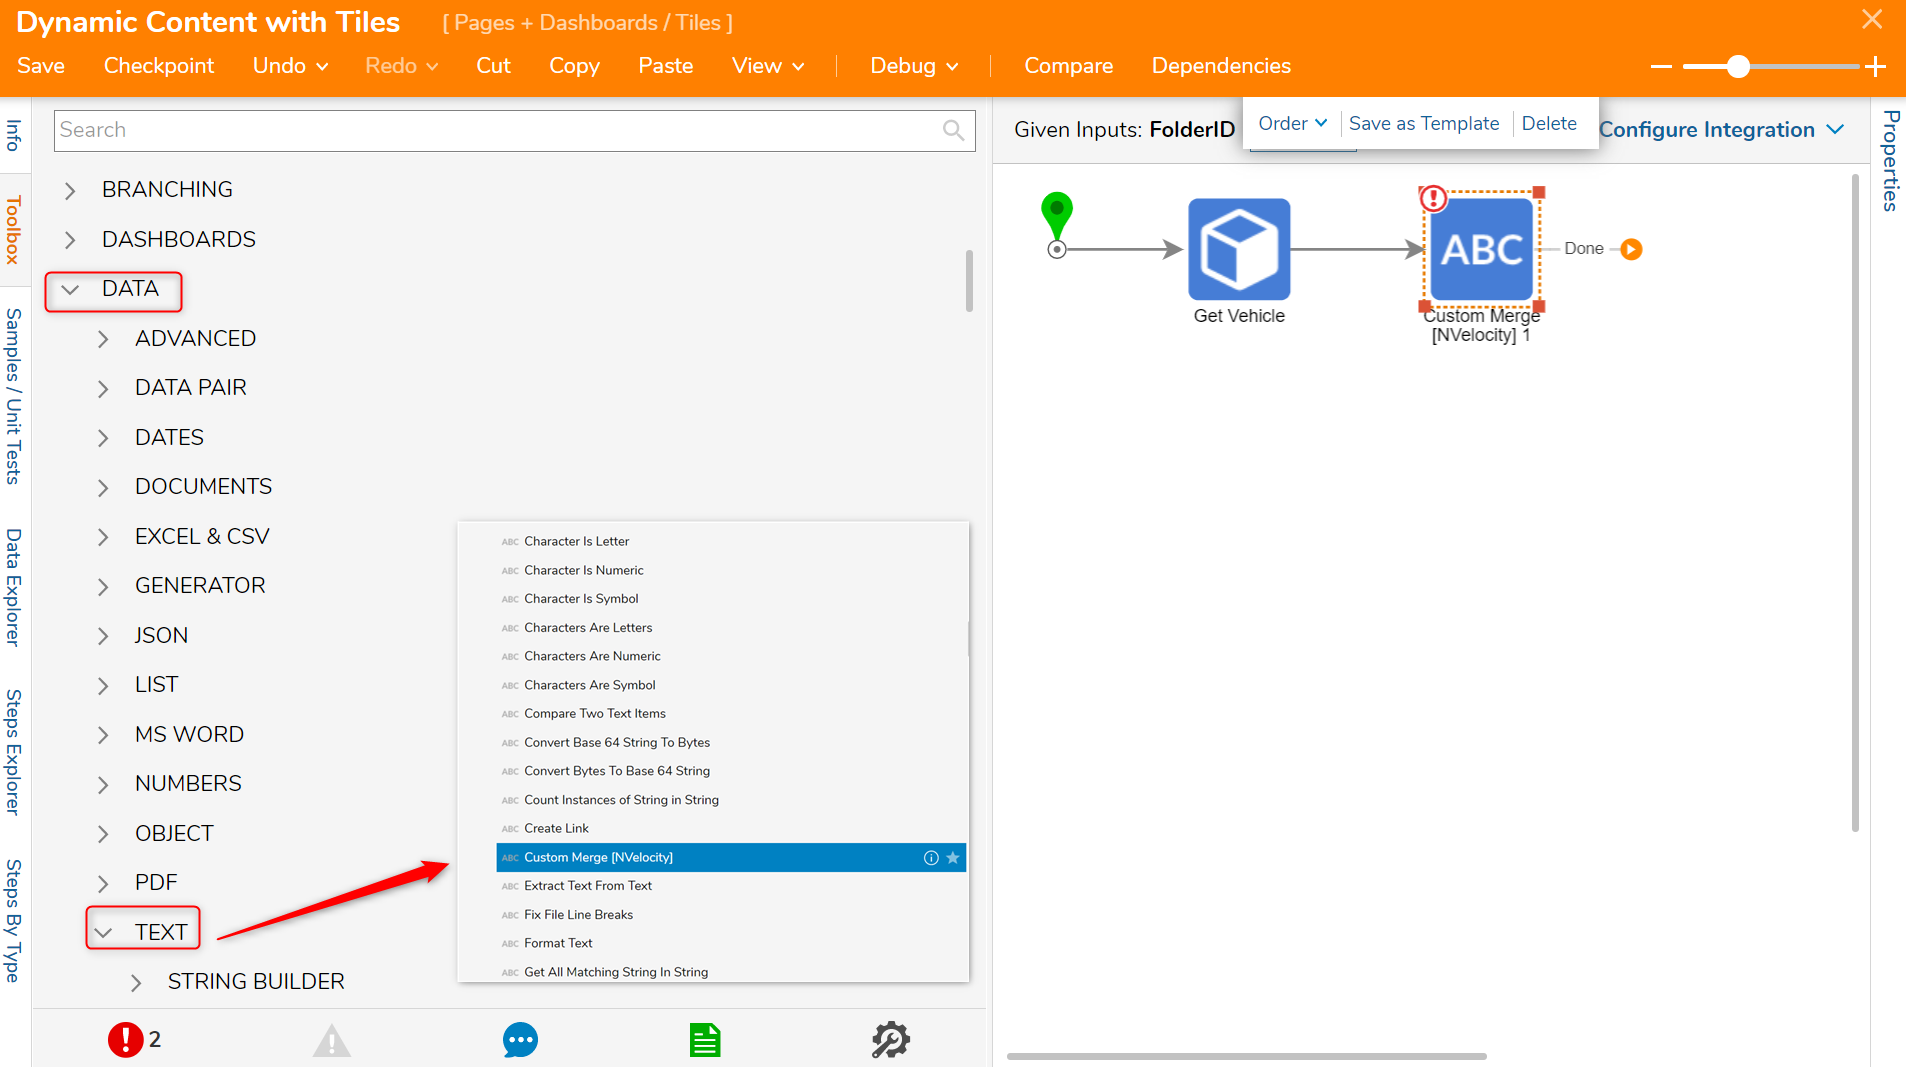
- Navigate to the Toolbox > DATA > TEXT section and drag and connect a Custom Merge [NVelocity] step to the Get Vehicle step.The details of the Car folder need to be turned into HTML to display on the Tile, that is why the Custom Merge [NVelocity] step is necessary.
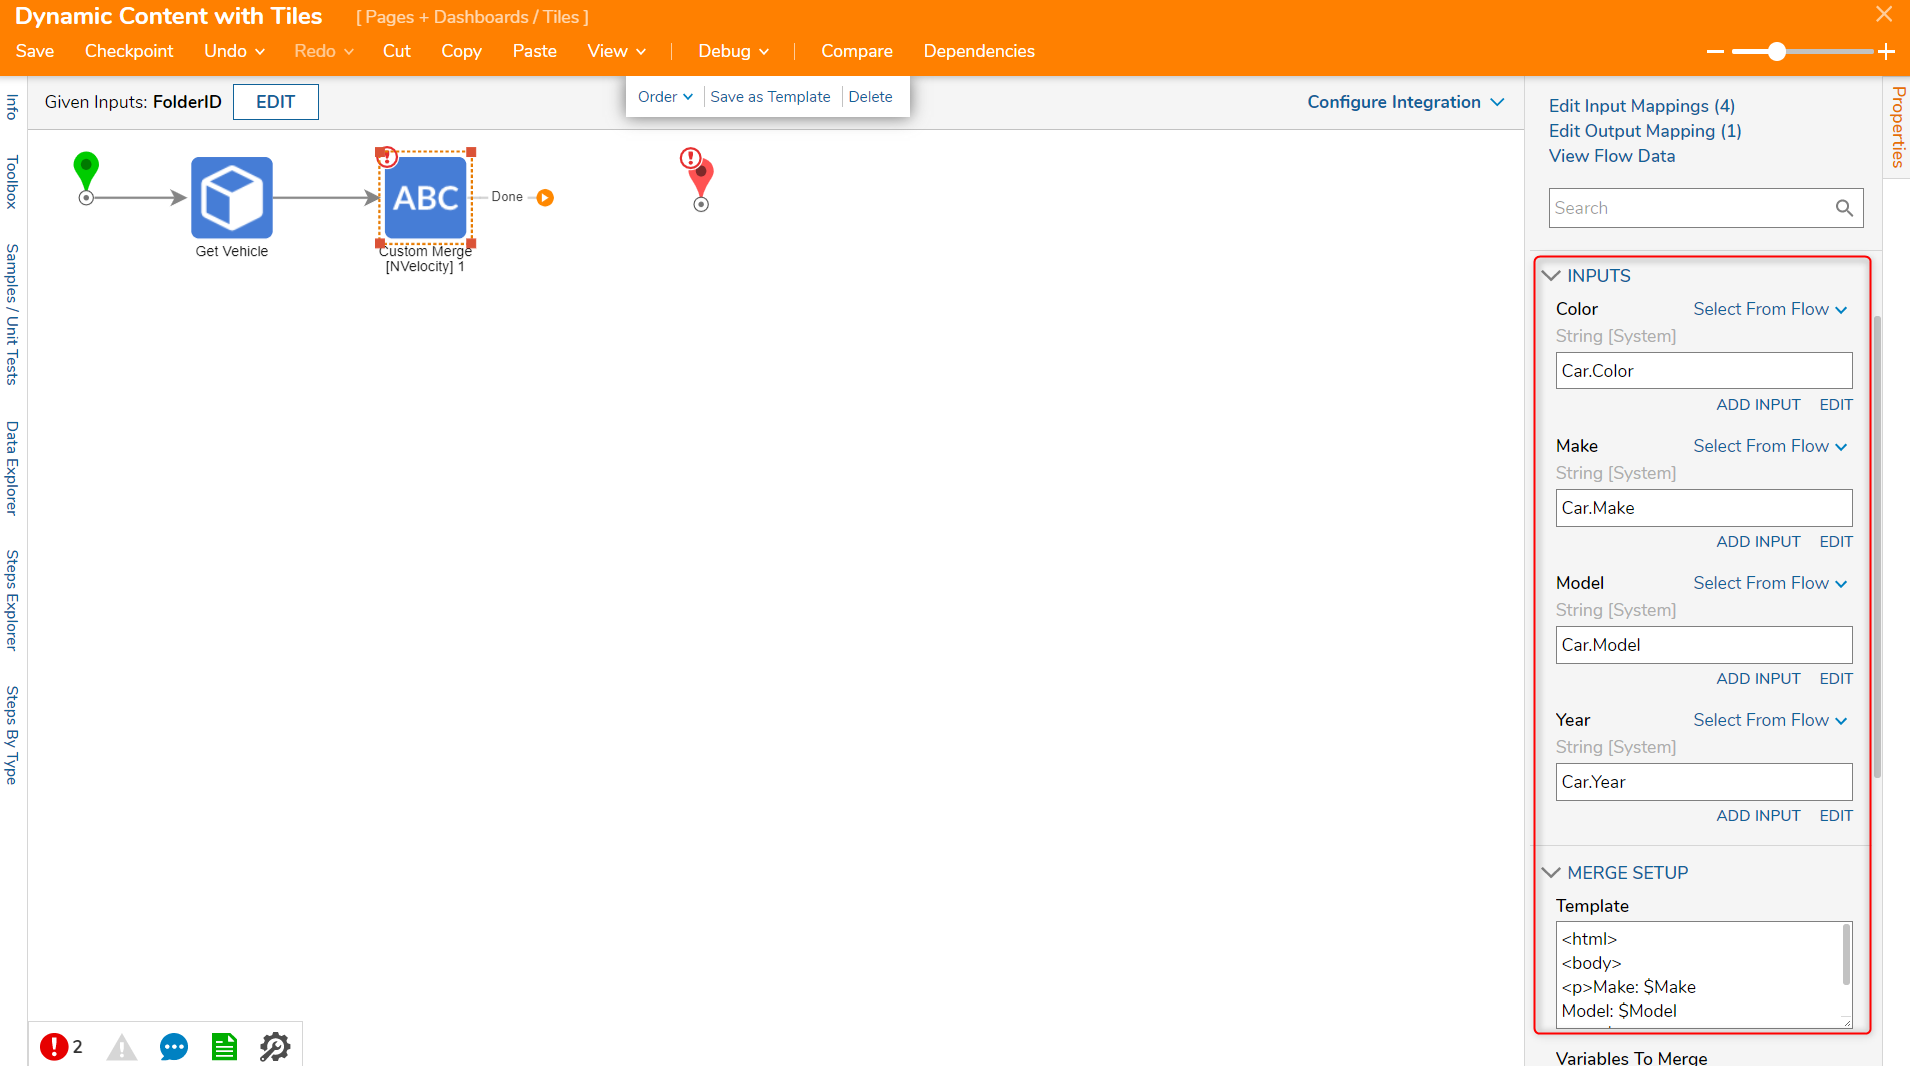
- With the Custom Merge [NVelocity] step selected, navigate to the Properties panel > MERGE SETUP > Template value field and input the HTML code below.
<html>
<body>
<p>Make: $Make
Model: $Model
Year: $Year
Color: $Color
The $FieldName syntax helps to define the dynamic variables of the Tile. - Next, once the HTML code has been entered within the Template value field, the Custom Merge [NVelocity] step will immediately detect the dynamic variables and create corresponding INPUTS.
- Set each input to a Select From Flow mapping and drill down to the corresponding value (e.g. INPUTS > Color will have a Car.Color value).
- Set each input to a Select From Flow mapping and drill down to the corresponding value (e.g. INPUTS > Color will have a Car.Color value).
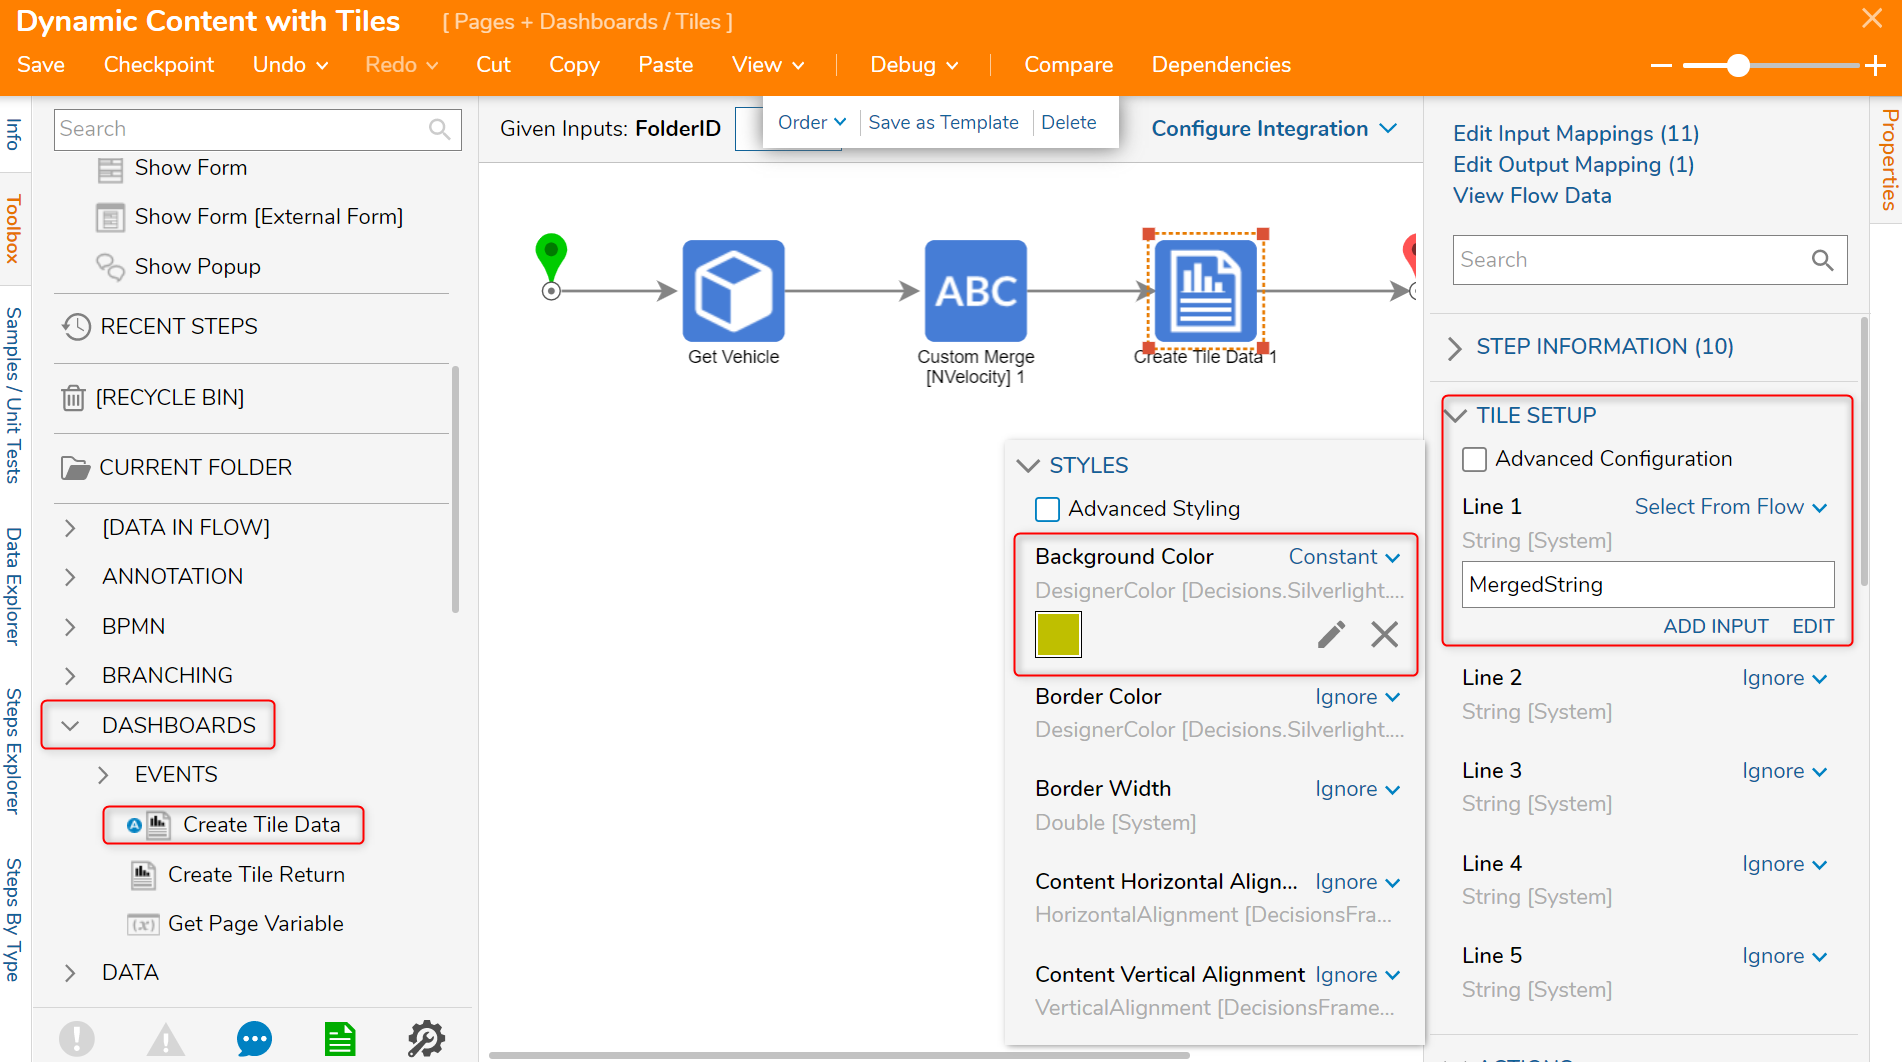
- Navigate to the Toolbox > DASHBOARDS category and drag and connect a Create Tile Data step to the Custom Merge [NVelocity] step and End step.
- With the Create Tile Data step selected, locate the Properties panel > TILE SETUP > Line 1 value field and change the input mapping to Select From Flow, and selecting the Merged String output from the Custom Merge [NVelocity] step.
- Next, navigate to STYLES > Background Color and change the input mapping to Constant and click the pencil icon to select a color.In this example, the selected color will be sage green.
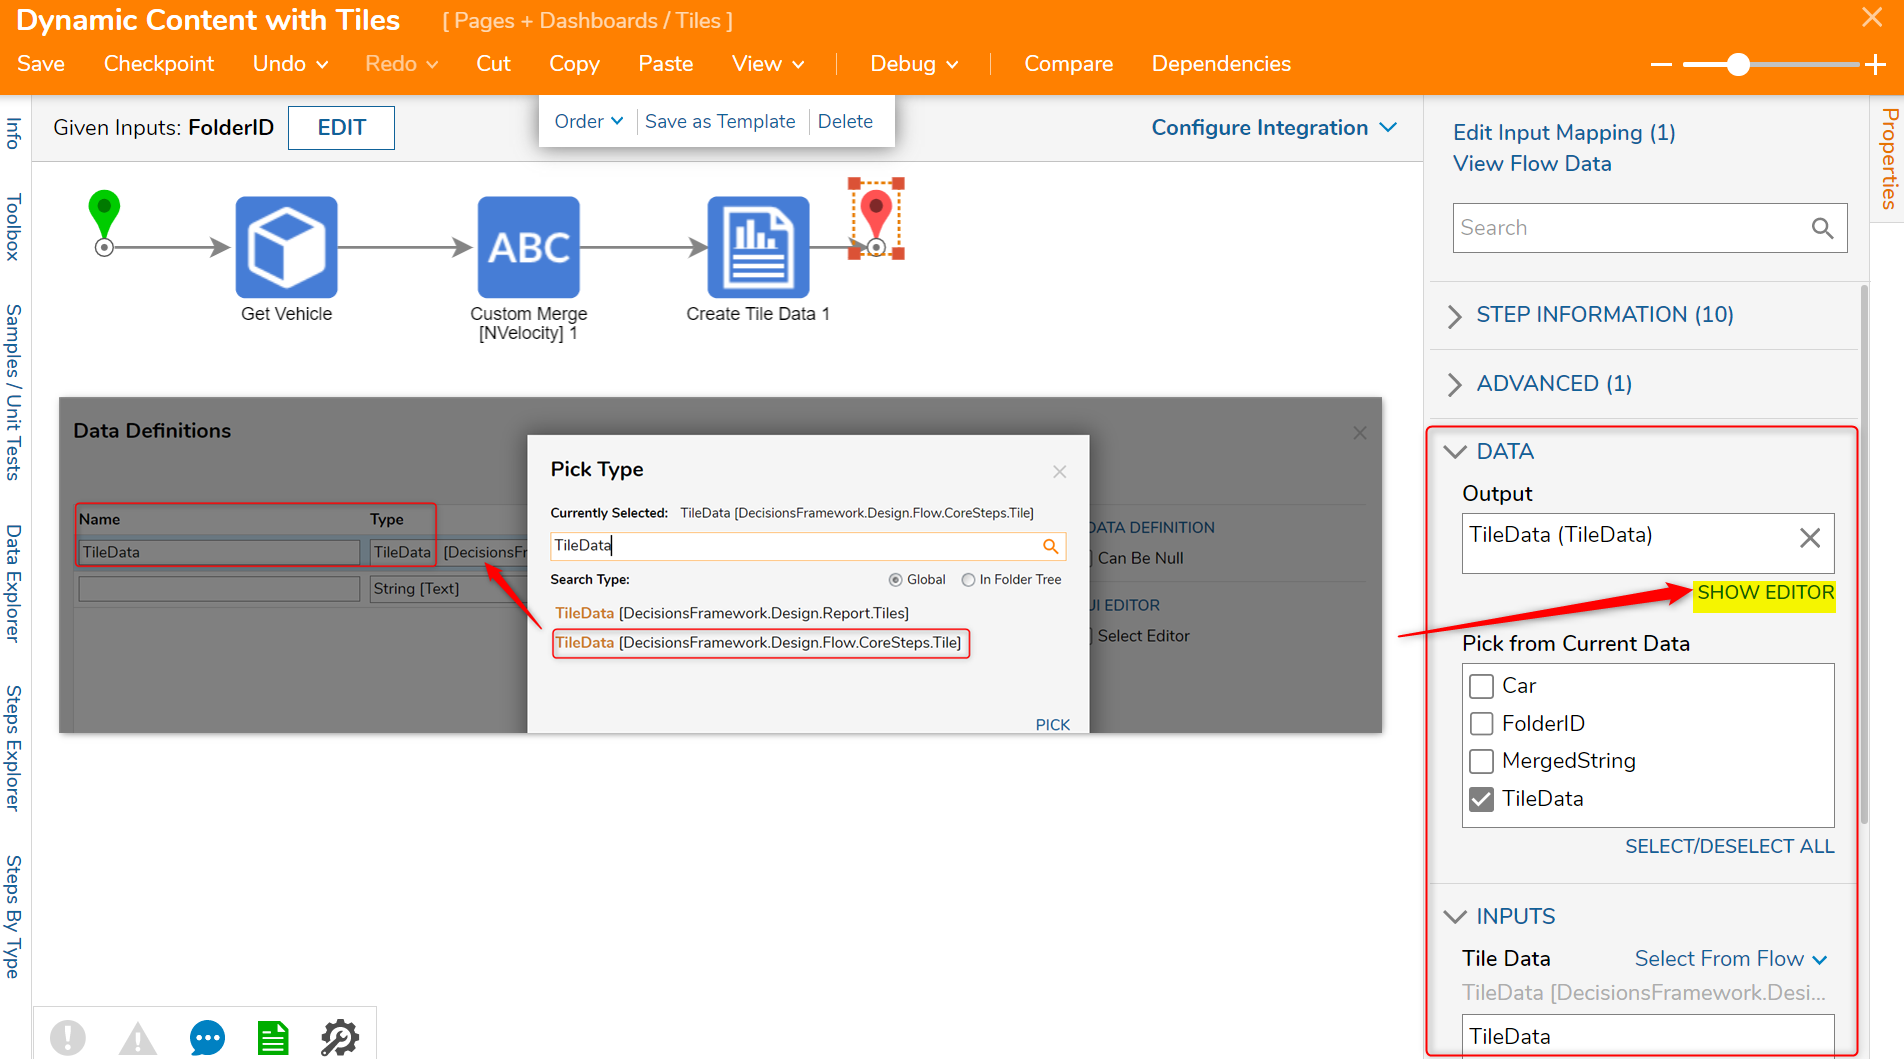
- Select the End step and navigate to the Properties panel > DATA > Output selector and click SHOW EDITOR.
- In the Data Definitions window, input TileData into the Name field and search TileData in the Type drop down list.
- Select the second option. Close when complete.
- Navigate to the Properties panel > INPUTS > Tile Data and change the input mapping to Select From Flow and choose TileData.
- Save and Close the Flow Designer.
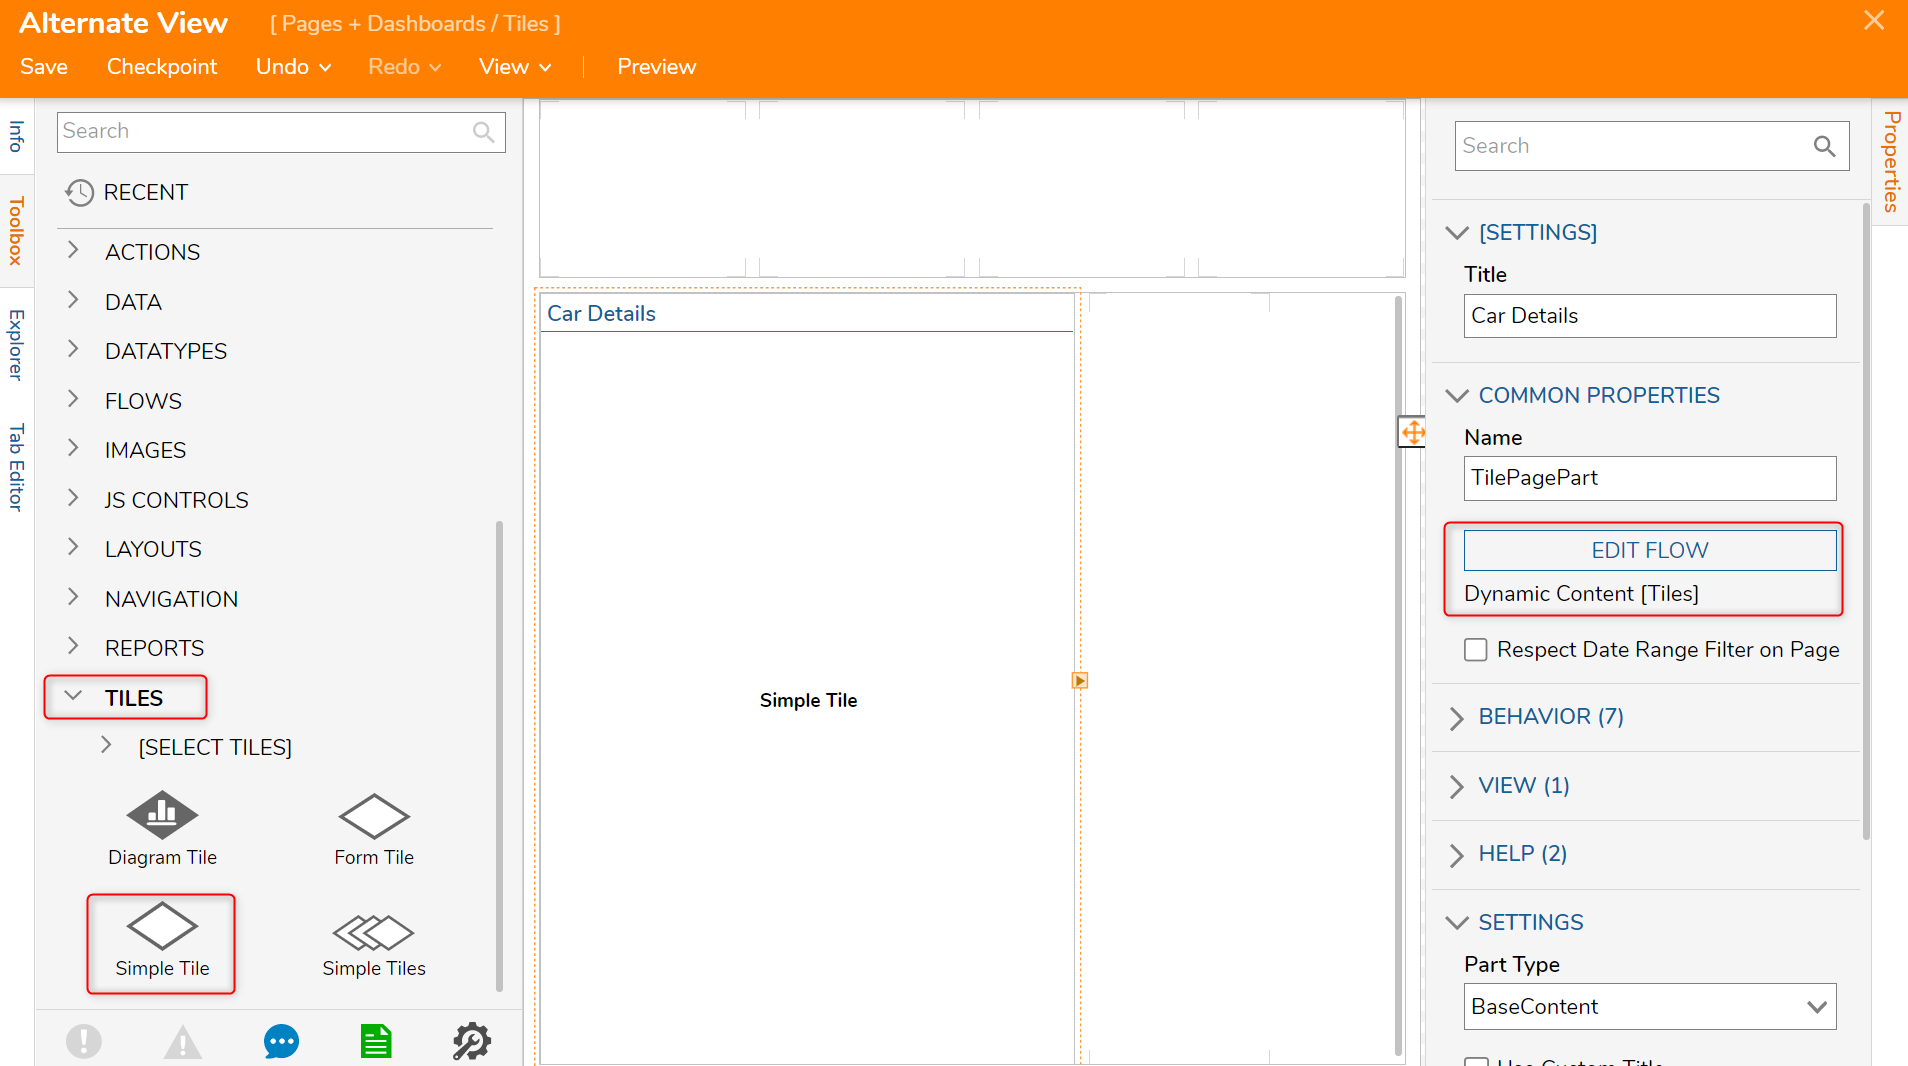
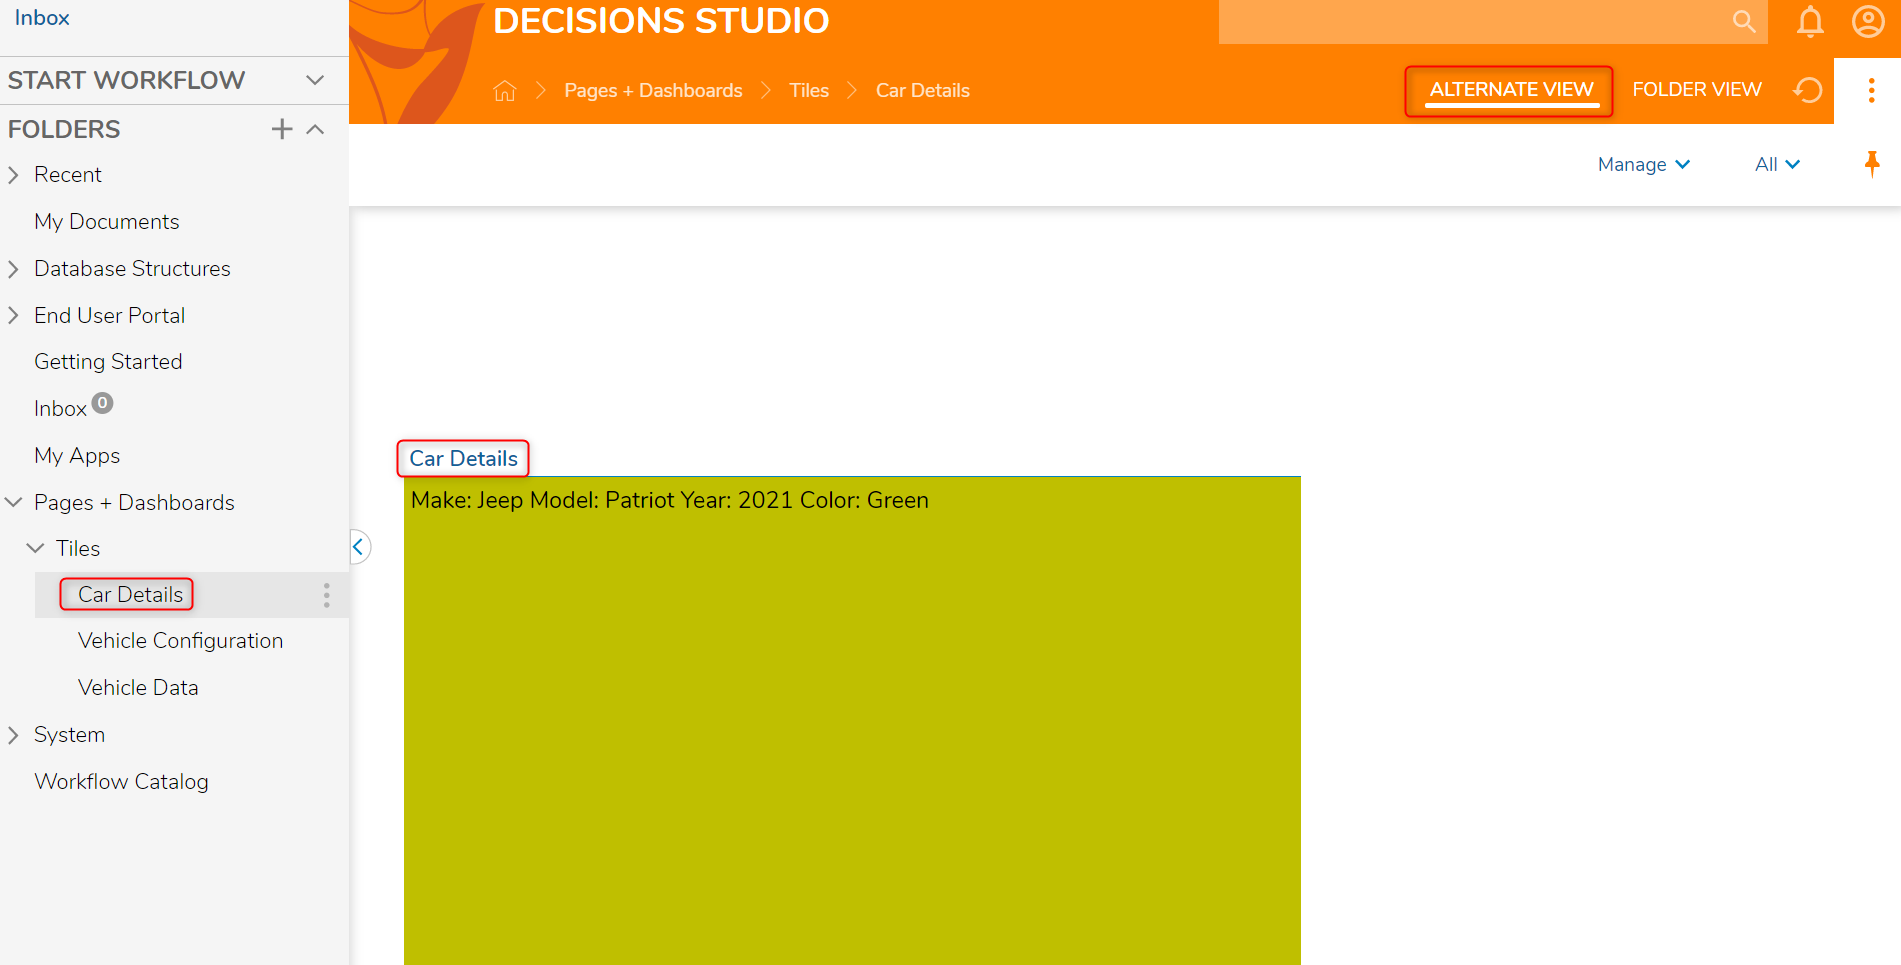
- Next, navigate to the Page Designer of a Portal Page.The Portal Page in this example is named Alternate View.
- In the Page Designer of the Portal Page [Alternate View], from the Toolbox > TILES category, add a Simple Tile component to the page.
- In the Properties panel > COMMON PROPERTIES section of the Simple Tile component, select PICK FLOW and PICK the Flow [Dynamic Content [Tiles]] that was just created.
- Save and Close the Page Designer.
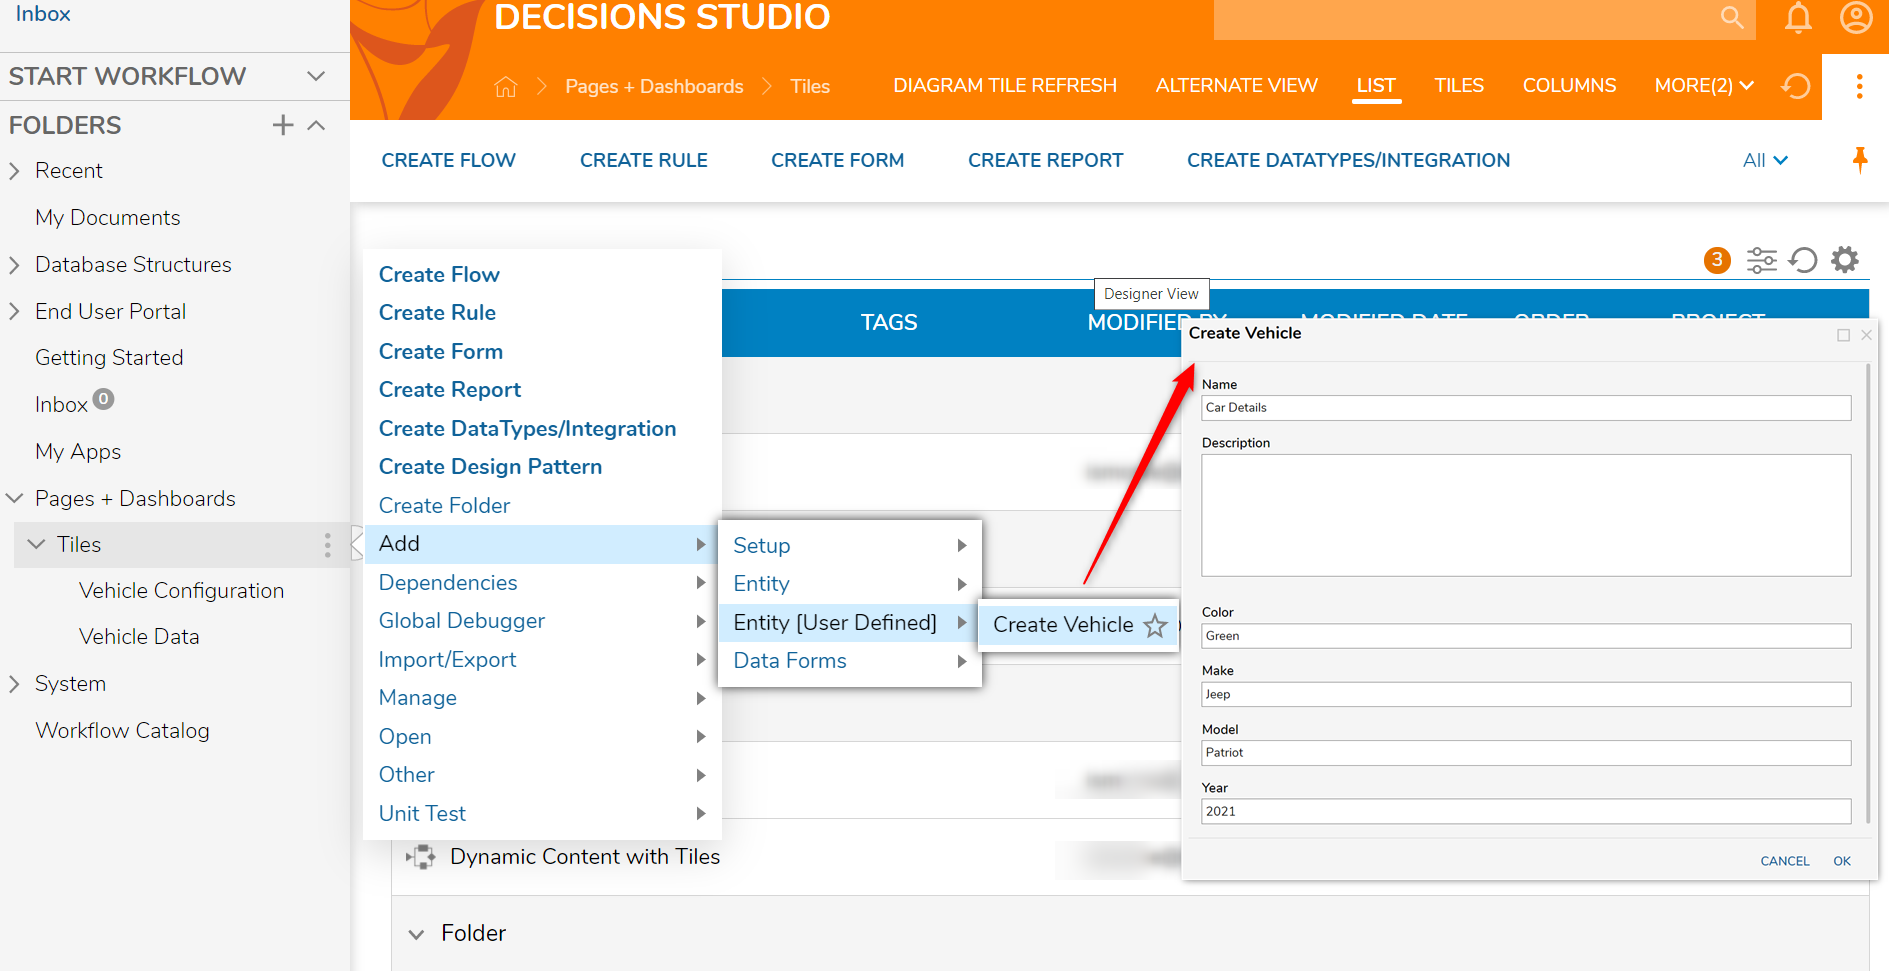
- In the Folder Tree, navigate to the Folder where the Folder Extension Data Structure [Vehicle] is located, right-click and navigate to Add > Entity [User Defined] > Create Vehicle in the Action Menu.
- In the resulting Create Vehicle window, in the Name value field insert "Car Details". In this example, the value fields reflect a 2021 Jeep Patriot that is green.
- Next, the Folder [Car Details] has appeared. The Tile will display with the HTML information from the Flow on the Portal Page [Alternate View].


Was this article helpful?