Connect to MySQL
- 28 Jul 2023
- 1 Minute to read
- Print
- DarkLight
Connect to MySQL
- Updated on 28 Jul 2023
- 1 Minute to read
- Print
- DarkLight
Article Summary
Share feedback
Thanks for sharing your feedback!
Upgrading from v6 to v7?
Please review the Upgrading Decisions (v6 to v7) article for IMPORTANT CONSIDERATIONS.
Version 7.x .NET Architecture Change:
Versions 7.0.1 - 7.1 require .NET Core 3.1
Versions 7.2 - 7.9 require .NET 5
Versions 7.10+ require .NET 6
Versions 7.0.1 - 7.1 require .NET Core 3.1
Versions 7.2 - 7.9 require .NET 5
Versions 7.10+ require .NET 6
Impact on Upgrades:
- ALL custom libraries will need to be recompiled for the new .NET architecture.
- Custom assemblies will need to be re-written.
- Modules may require reinstallation or design refactoring.
Overview
This tutorial demonstrates how to connect the Decisions platform to a MySQL database. The Query Editor can search and view the contents of the MySQL database.
MySQL functionality requires manual installation of the MySQL connector.
MySQL Install
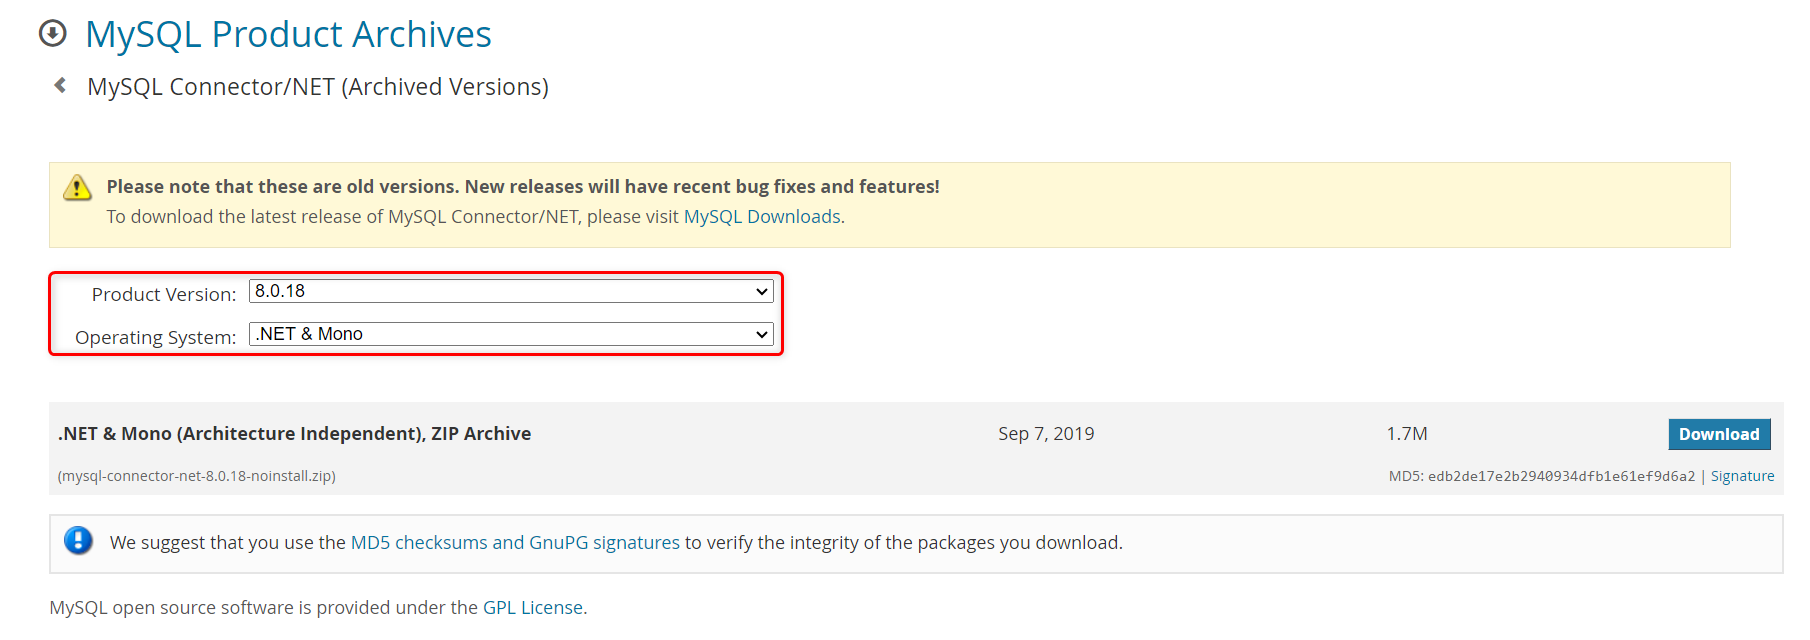
- After installing Decisions using MS SQL, visit the MySQL Product Archives Page.
- Select Product Version: 8.0.18, set the OS to .NET & Mono, and then click Download. An Oracle Login is not required.
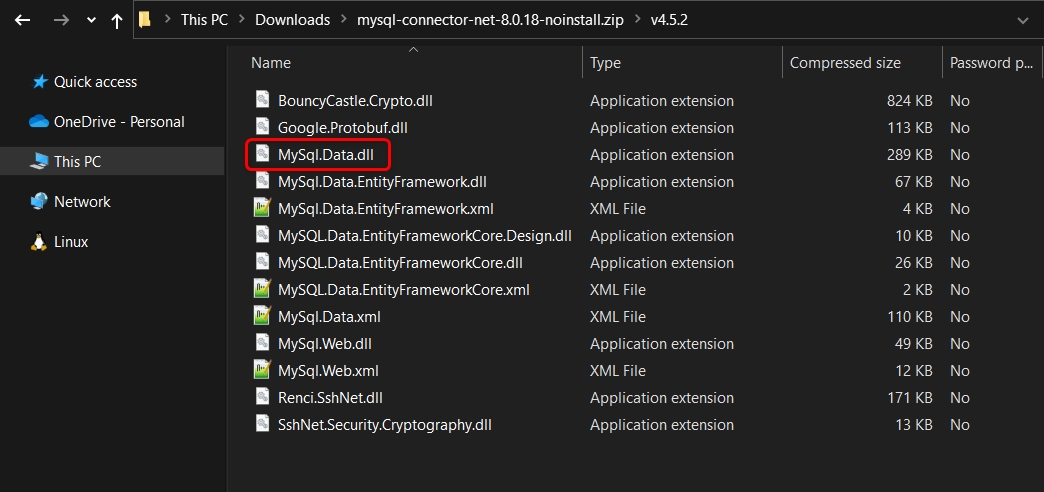
- Extract and open the downloaded .zip file.
- Within the v4.5.2 folder, locate and copy MySql.Data.dll.
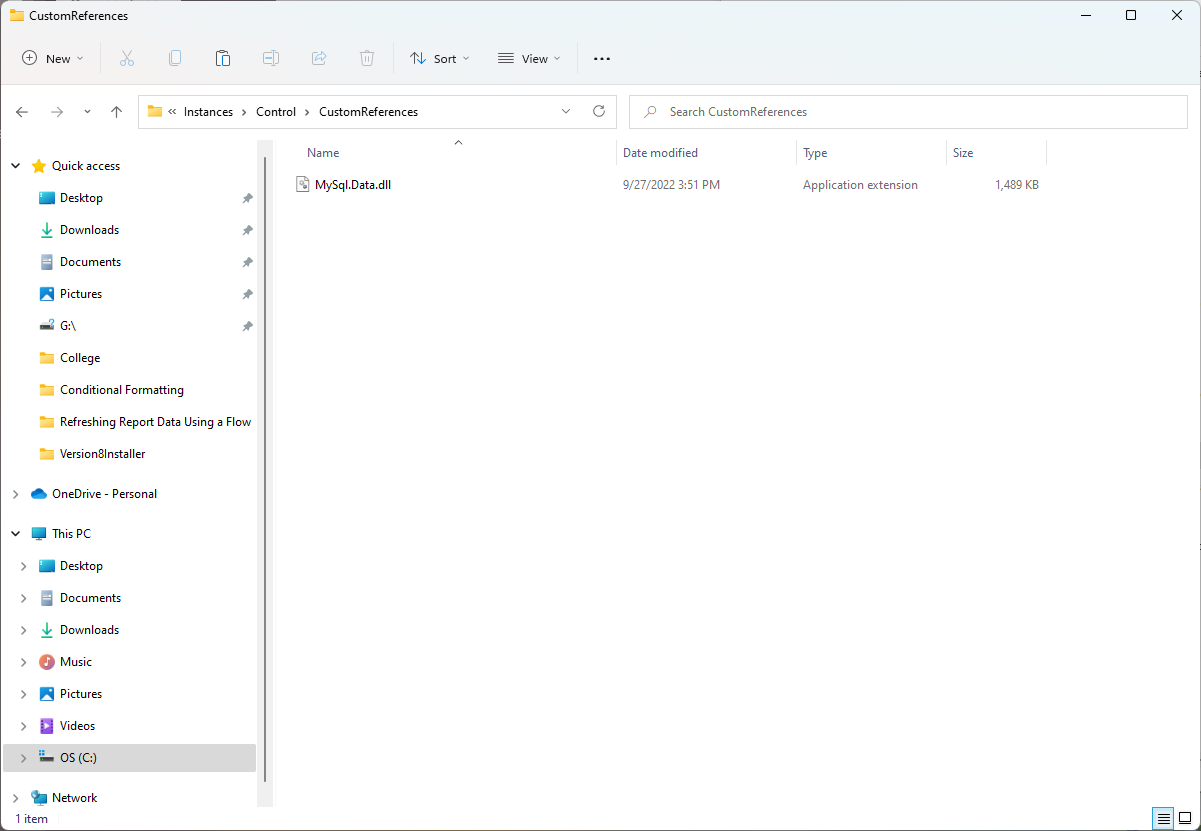
- Paste these files into C:\Program Files\Decisions\Decisions Server\Instances\Control\CustomReferences\.
- Restart the Decisions Server or IIS App Pool.
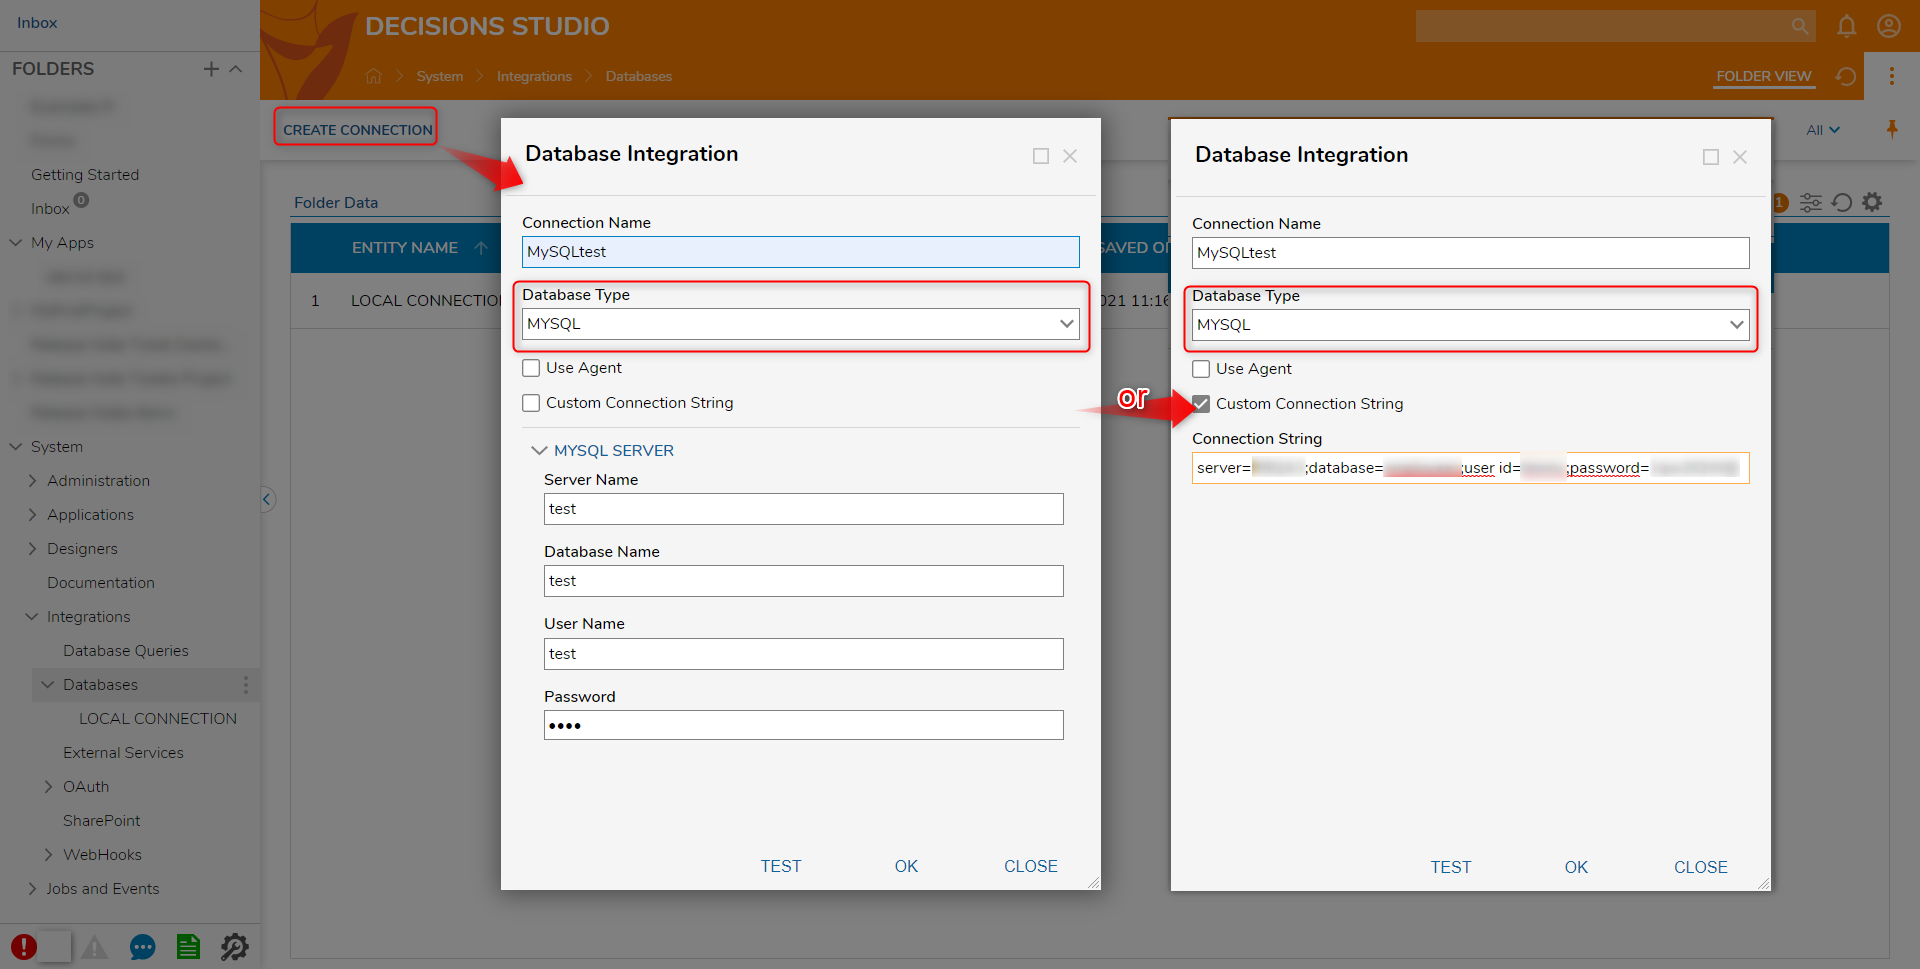
- Upon reconnection to the Studio, navigate to System > Integrations > Databases. Click CREATE CONNECTION in the top action bar.
- In the Database Integration panel, specify a Connection Name, e.g., "MySQLtest," and set the Database Type to MYSQL. Configure the connection via MYSQL Server fields or Custom Connection String.
- Click TEST to confirm successful connectivity, then click OK.


For further information on Installation, visit the Decisions Forum.
Was this article helpful?