Tile Source Flow Behavior
- 02 Jun 2022
- 2 Minutes to read
- Print
- DarkLight
Tile Source Flow Behavior
- Updated on 02 Jun 2022
- 2 Minutes to read
- Print
- DarkLight
Article Summary
Share feedback
Thanks for sharing your feedback!
Overview
The Tile Source Flow Behavior sources an actionable Page Tile with dynamically mapped data from a Flow. Furthermore, it may also initiate another Flow, navigate to a Folder, open a link, or send parameters to another Page and/or Form components to filter or update an ongoing process. A typical use case of this Behavior involves creating Dashboards with Tiles displaying dynamically updated key performance indicators.
The Tile Source Flow sources data for other tile options as well. The function is universal as long as TileData is being provided to the component. Some components require TileReturn data instead of TileData. TileReturn data uses a similar step with different configuration options for counter, text, and media data.
Example
This example case contains a Tile Source Flow that fetches the number of active accounts and gives that data to the tile.
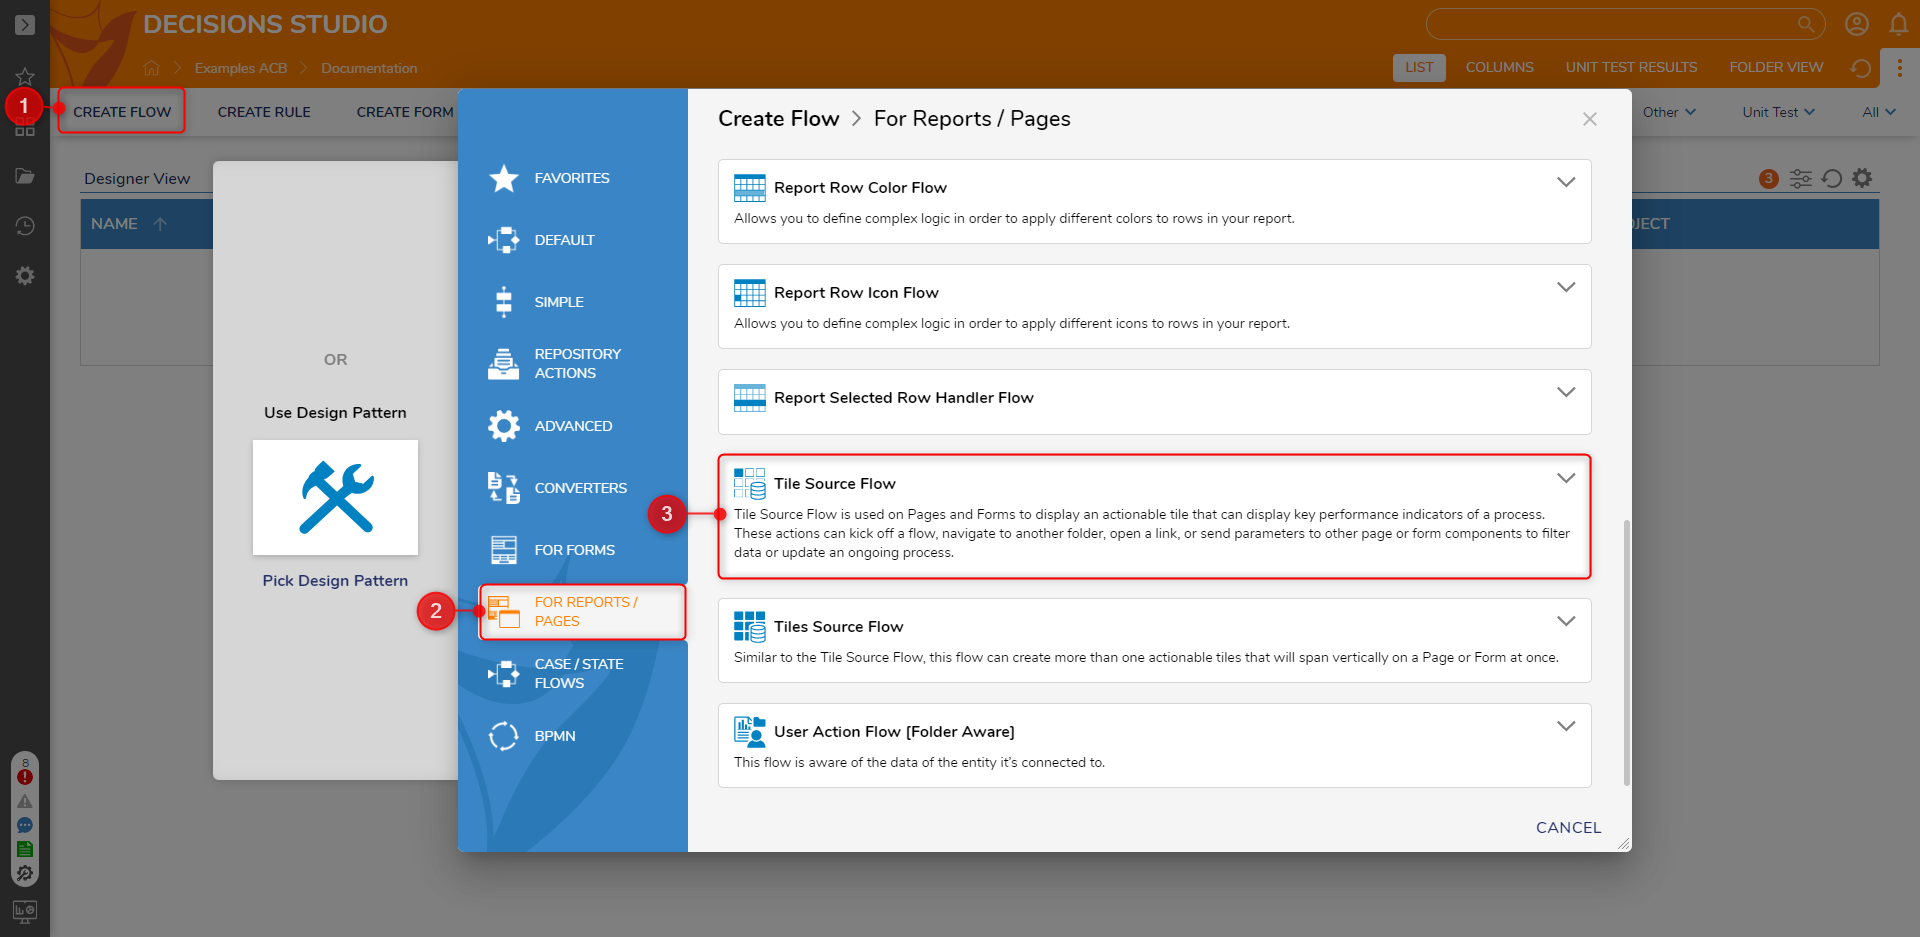
- In a Designer Project, select the CREATE FLOW button from the Global Action Bar.
- When the window appears, select the For Reports/Pages tab on the left.
- Select the Tile Source Flow option.
- Provide a name for the Flow, then select CREATE. The Flow Designer opens with the Create Tile Data step already connected to the Start/End step since the Tile Source Flow Behavior was selected on creation.
- In the Toolbox on the left, navigate to INTEGRATION > INTERNAL SERVICES > ACCOUNTSERVICE and locate the Get All step, then move it to the workspace between the Start and Create Tile Data step.

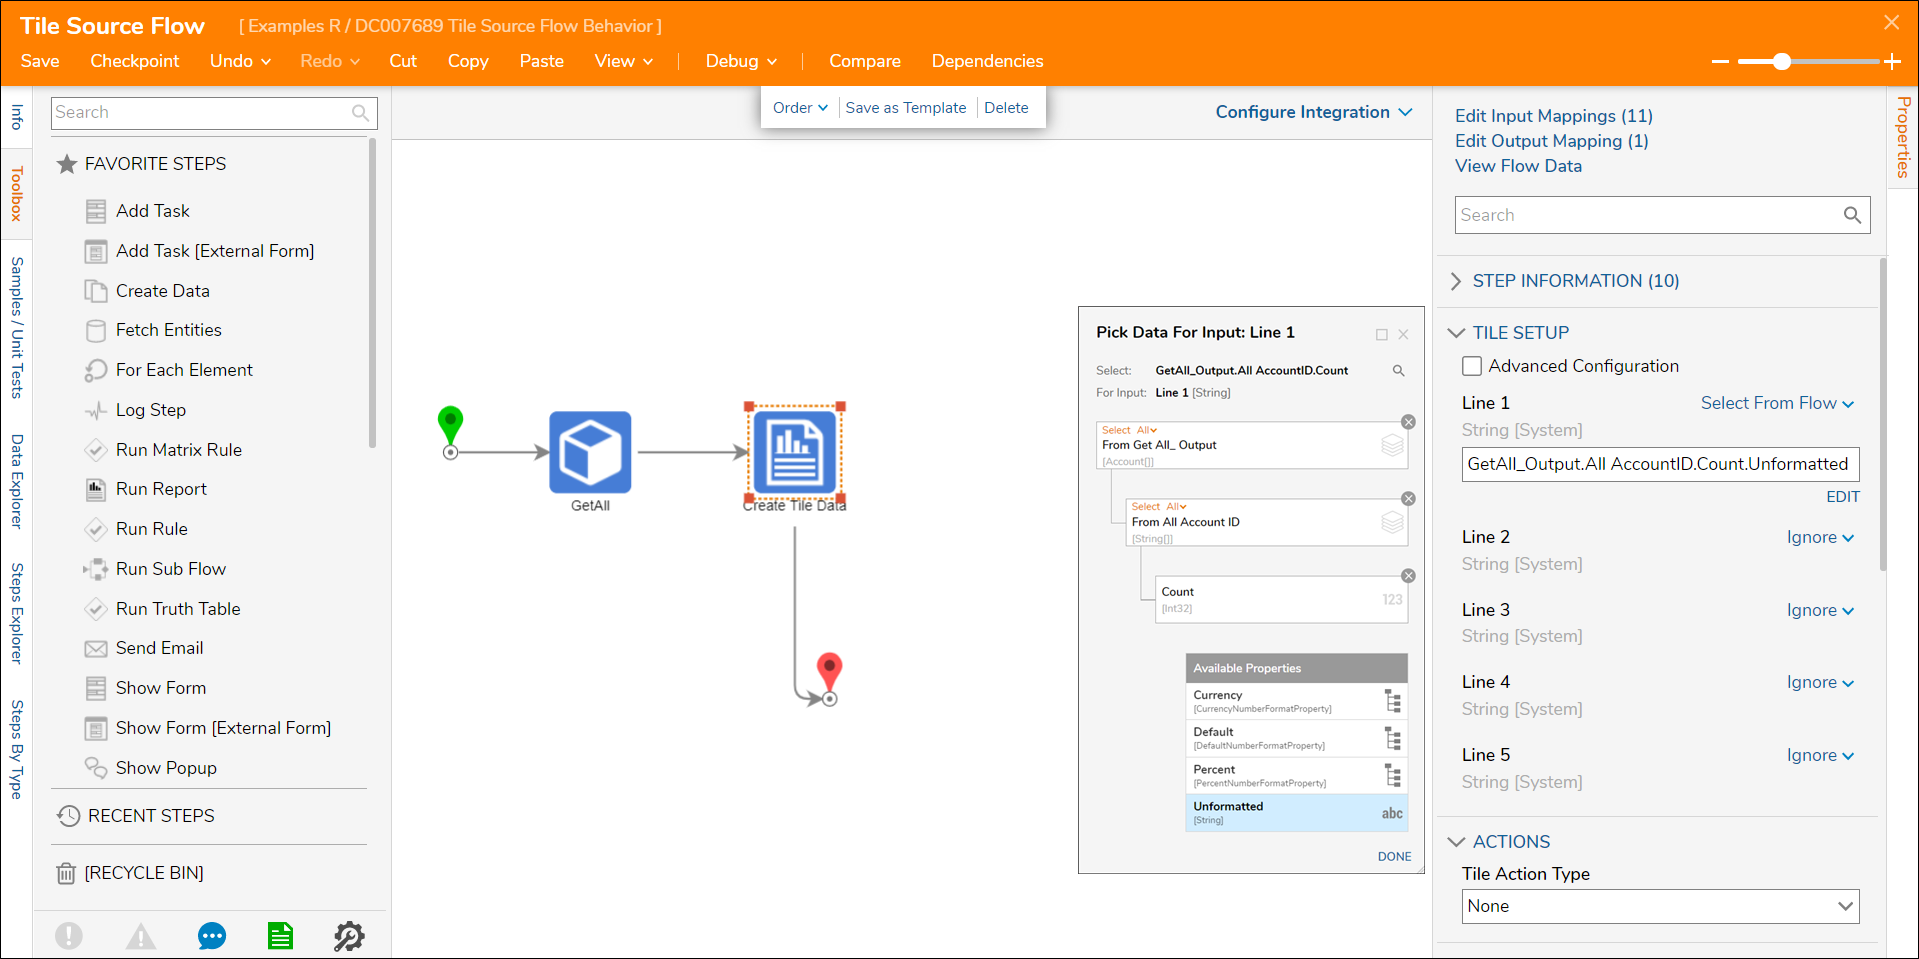
- Select the Create Tile Data step so that the Properties appear.
- Expand the TILE SETUP section.
- For Line 1, select Ignore so that the input mapping list appears, then choose the Select From Flow option.
- When the Pick Data For Input window appears, select Get All_Output (the list of accounts) > All Account ID (every account ID in the environment) > Count (the number of account IDs in the environment) > Unformatted (the String version of Count data).
- Select DONE once the mapping is complete. This example utilizes the first line, but the other four lines can be mapped to data similarly.
- There are several configurations in the Properties of this step that can attribute to the appearance of the data; expand the STYLES section for customization options.
- Select the Constant mapping type option for any of these attributes to change their value, as shown with Content Horizontal/Vertical Alignment.
- With the End step selected, navigate to INPUTS > Tile Data and change the input mapping from Unknown to Select From Flow, and select Tile Data. This selection will clear the exception on the End step.
- Save and Close the Flow.

- In the Designer Project, select the CREATE FORM button from the Global Action Bar.
- Select the Page tile in the top right of the window that appears.
- Provide a name for the Page and select CREATE.
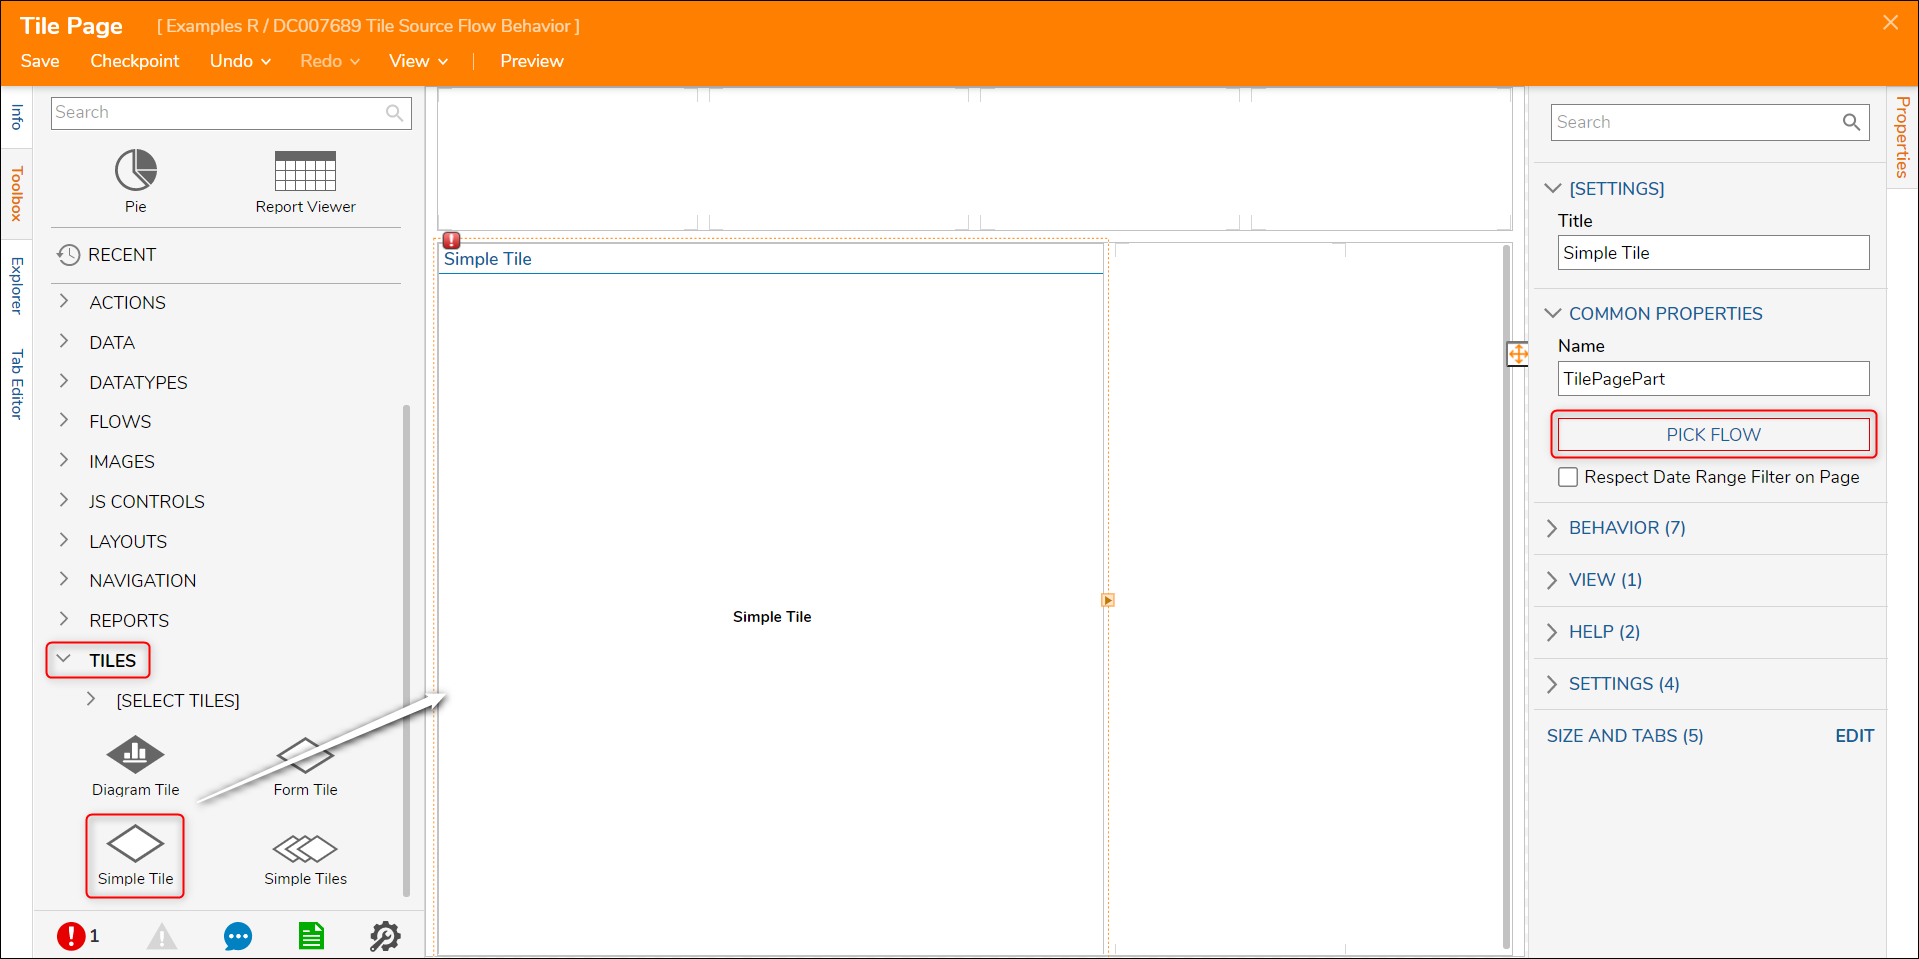
- In the Page Designer, expand the TILES section of the Toolbox and add a Simple Tile to the Page workspace.
- With the Simple Tile selected in the workspace and the properties exposed, expand the COMMON PROPERTIES section and select PICK FLOW.
- When the window appears, select PICK and choose the Tile Source Flow that was created.
- Select the Preview button from the top Action Bar of the Page Designer to see that the Flow has successfully executed to retrieve the accounts and provide the count data to the Page tile at runtime.


Was this article helpful?