Sub Dialog Data Flow
- 17 May 2023
- 2 Minutes to read
- Print
- DarkLight
Sub Dialog Data Flow
- Updated on 17 May 2023
- 2 Minutes to read
- Print
- DarkLight
Article Summary
Share feedback
Thanks for sharing your feedback!
Overview
Sub Dialog Flows serve as a means to present smaller, targeted portions of information to users, allowing for enhanced user interaction while avoiding unnecessary clutter. They extend the functionality and flexibility of user interactions within a Form. Instead of overwhelming users with a comprehensive display of all data, Sub Dialogs enable the presentation of specific subsets of information, ensuring a more focused and efficient user experience.
By utilizing Sub Dialog Flows, developers can selectively display relevant data from the parent Form within a smaller dialog window or section.
Example
This example will display a Form with a Data Grid showing a list of all current accounts. There will be two buttons on the Form; one will be a Sub Dialog Button that will create a new account, and the second button will close the Form.
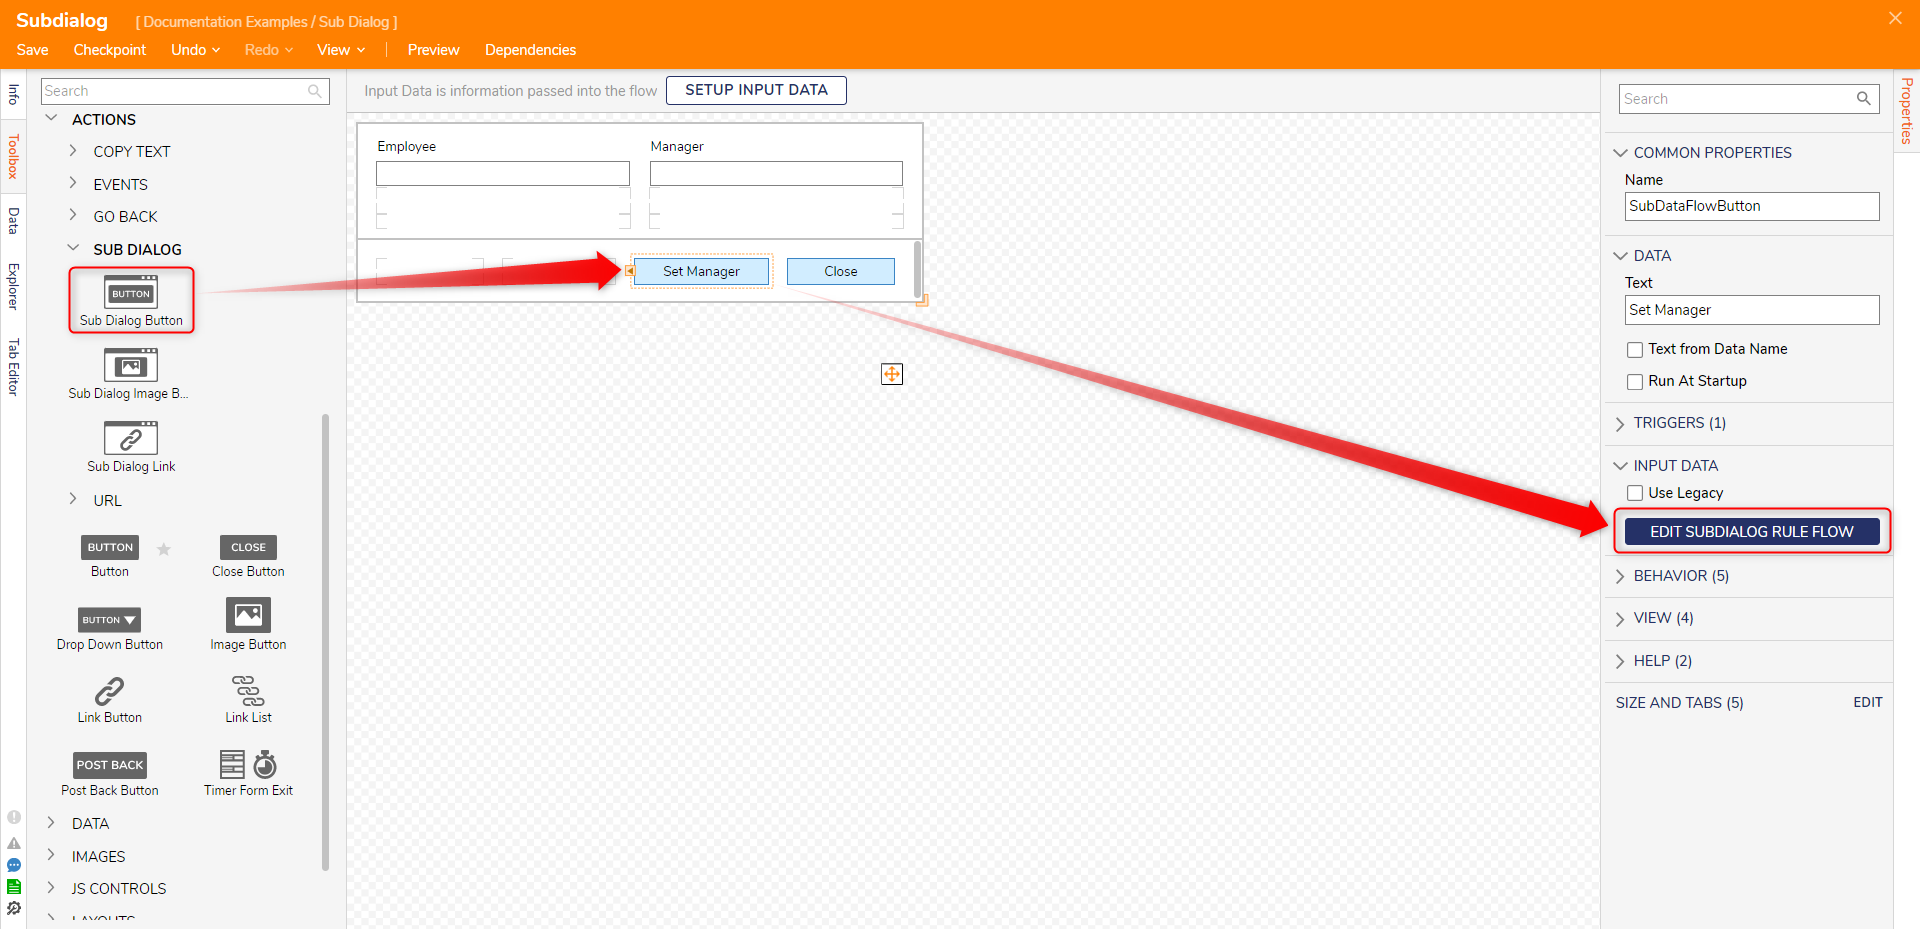
- Create a Flow that contains a Form. For this example, the Form contains two text boxes, a button, and a Sub Dialog Button that will be configured in this article.
- The Sub Dialog Button can be renamed in the Properties panel under Data > Text.
Setting Description Data Text Rename the Text that is displayed on the button. Text from Data Name Text can be set from Data Name by setting this check box to be true; this means the name will be set at runtime based on data within the Flow. Run At Startup When set to True, the Sub Dialog Flow attached to this button will run when the Form is opened at runtime. Input Data Use Legacy Changes the "Edit Subdialog Rule Flow" to "Pick or Create Flow ID"; this is available to prevent breakage from upgrading Decisions from older versions. Edit Subdialog Rule Flow Select this button to enter the Flow Designer to create/edit the Subdialog Flow that runs when the Sub Dialog Button is selected. - Select Edit Subdialog Rule Flow.
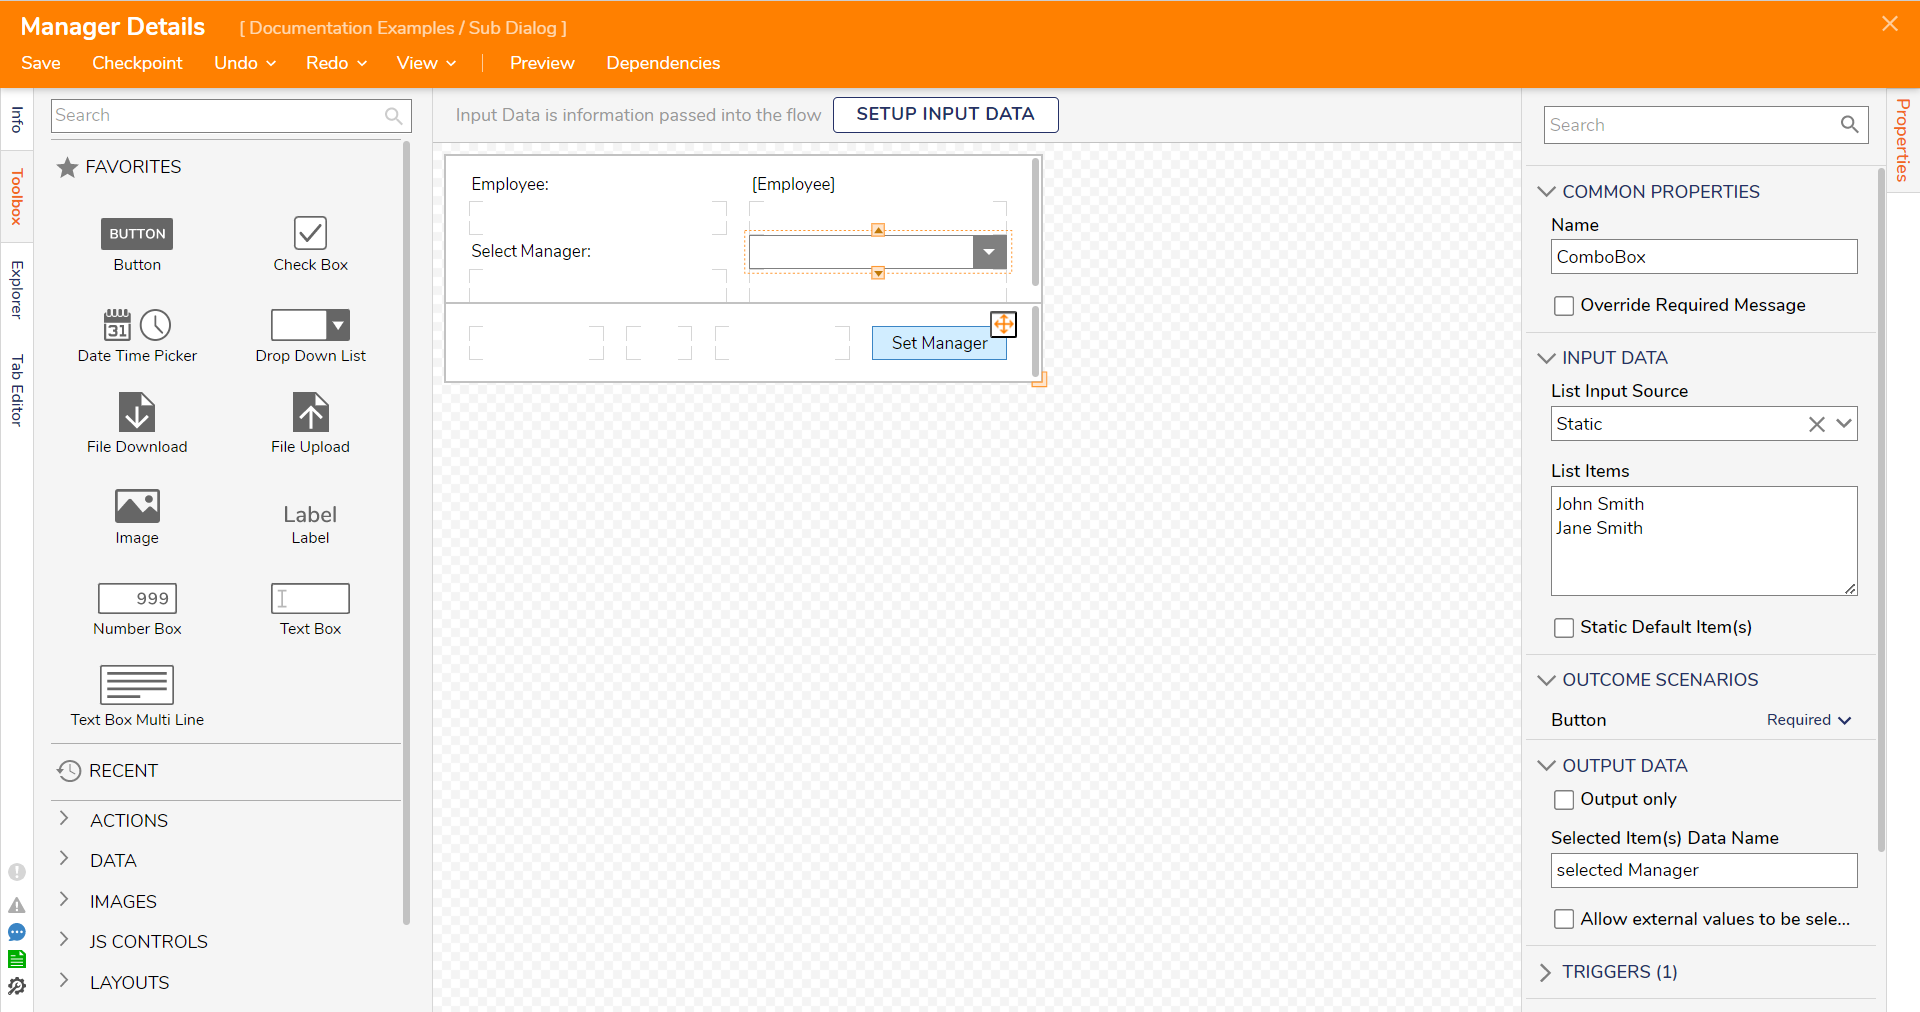
- Add a Form to the Flow Designer; in the Form Designer of the New Form, add a Button, three Labels, and a Drop Down Form Control from the Toolbox.
- Configure one label to read "Employee" and the other to read "Manager"; the final Label will be the value of the Employee name that will be retrieved from the main Form. Set the Label to get the Text from Data Name.
- Configure the Drop Down with constant data for example purposes. Save and close the Form Designer.
- Select the Form and pick Form Data > Employee Text Box > Value. This sets the Label to the value of the Text Box from the main Form.
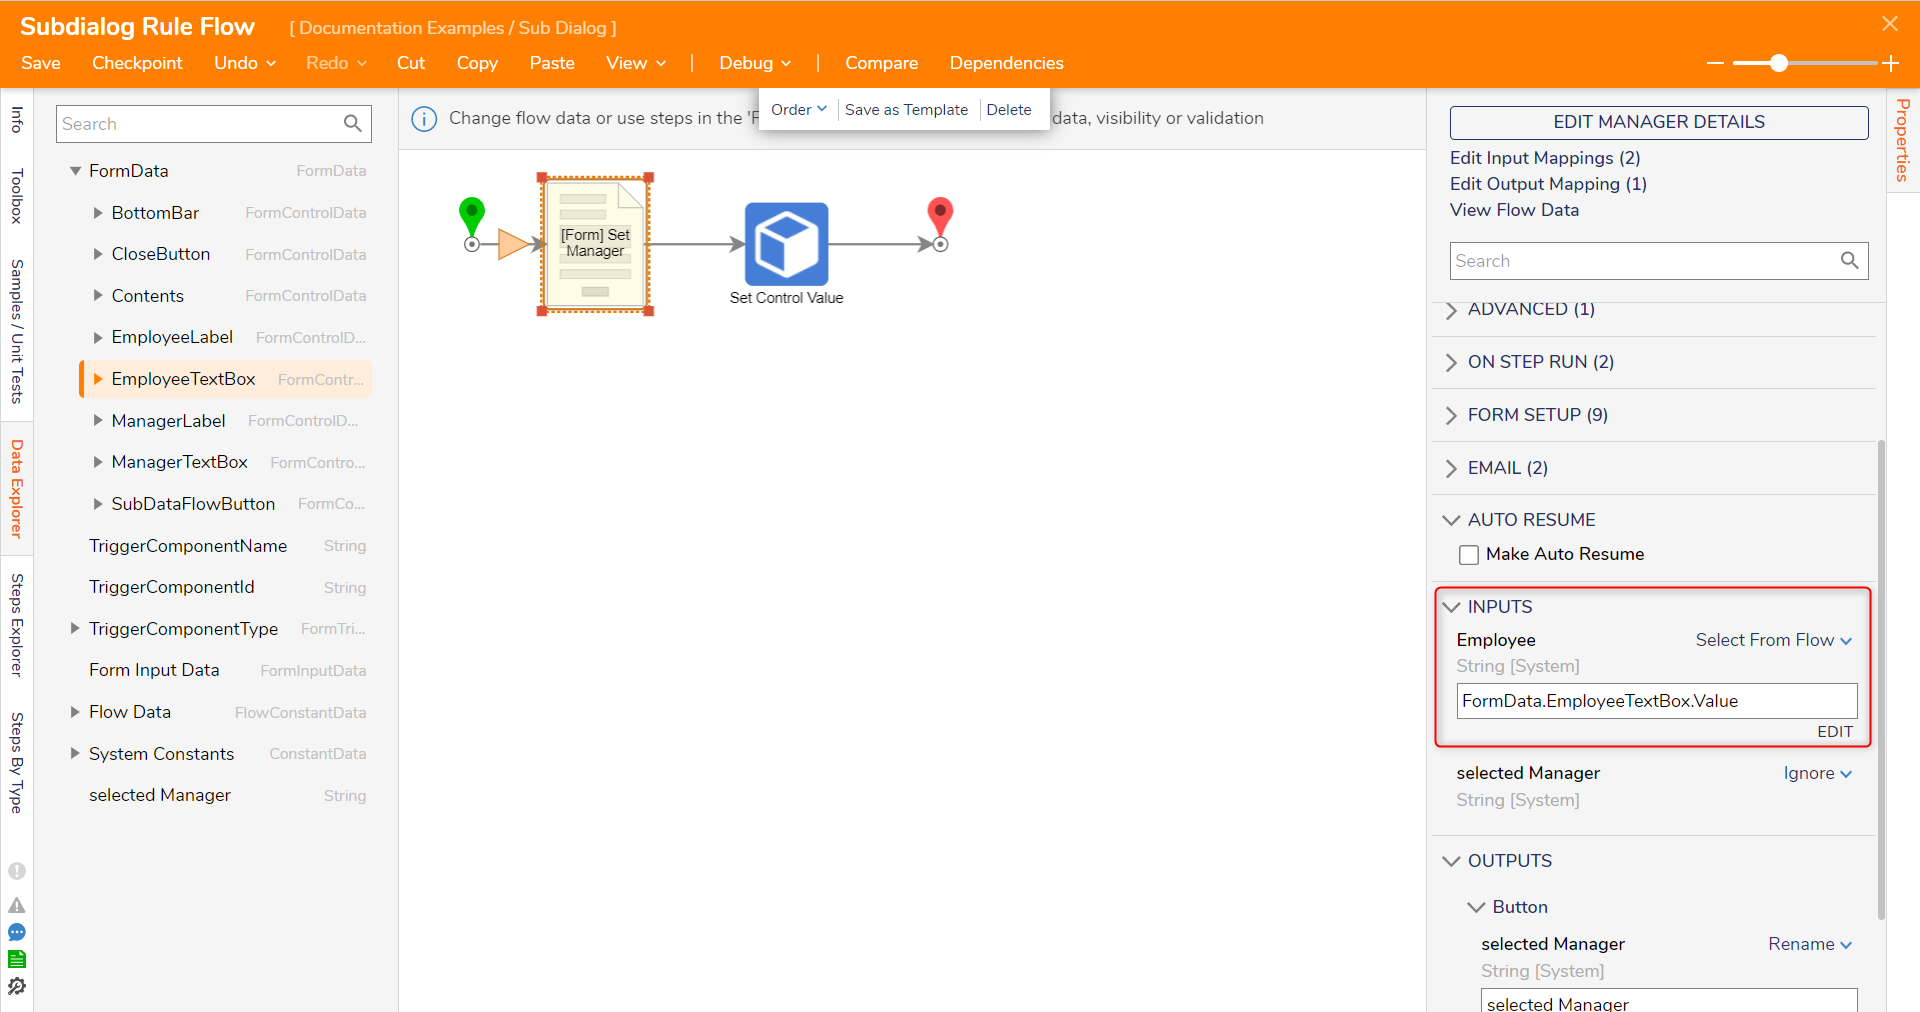
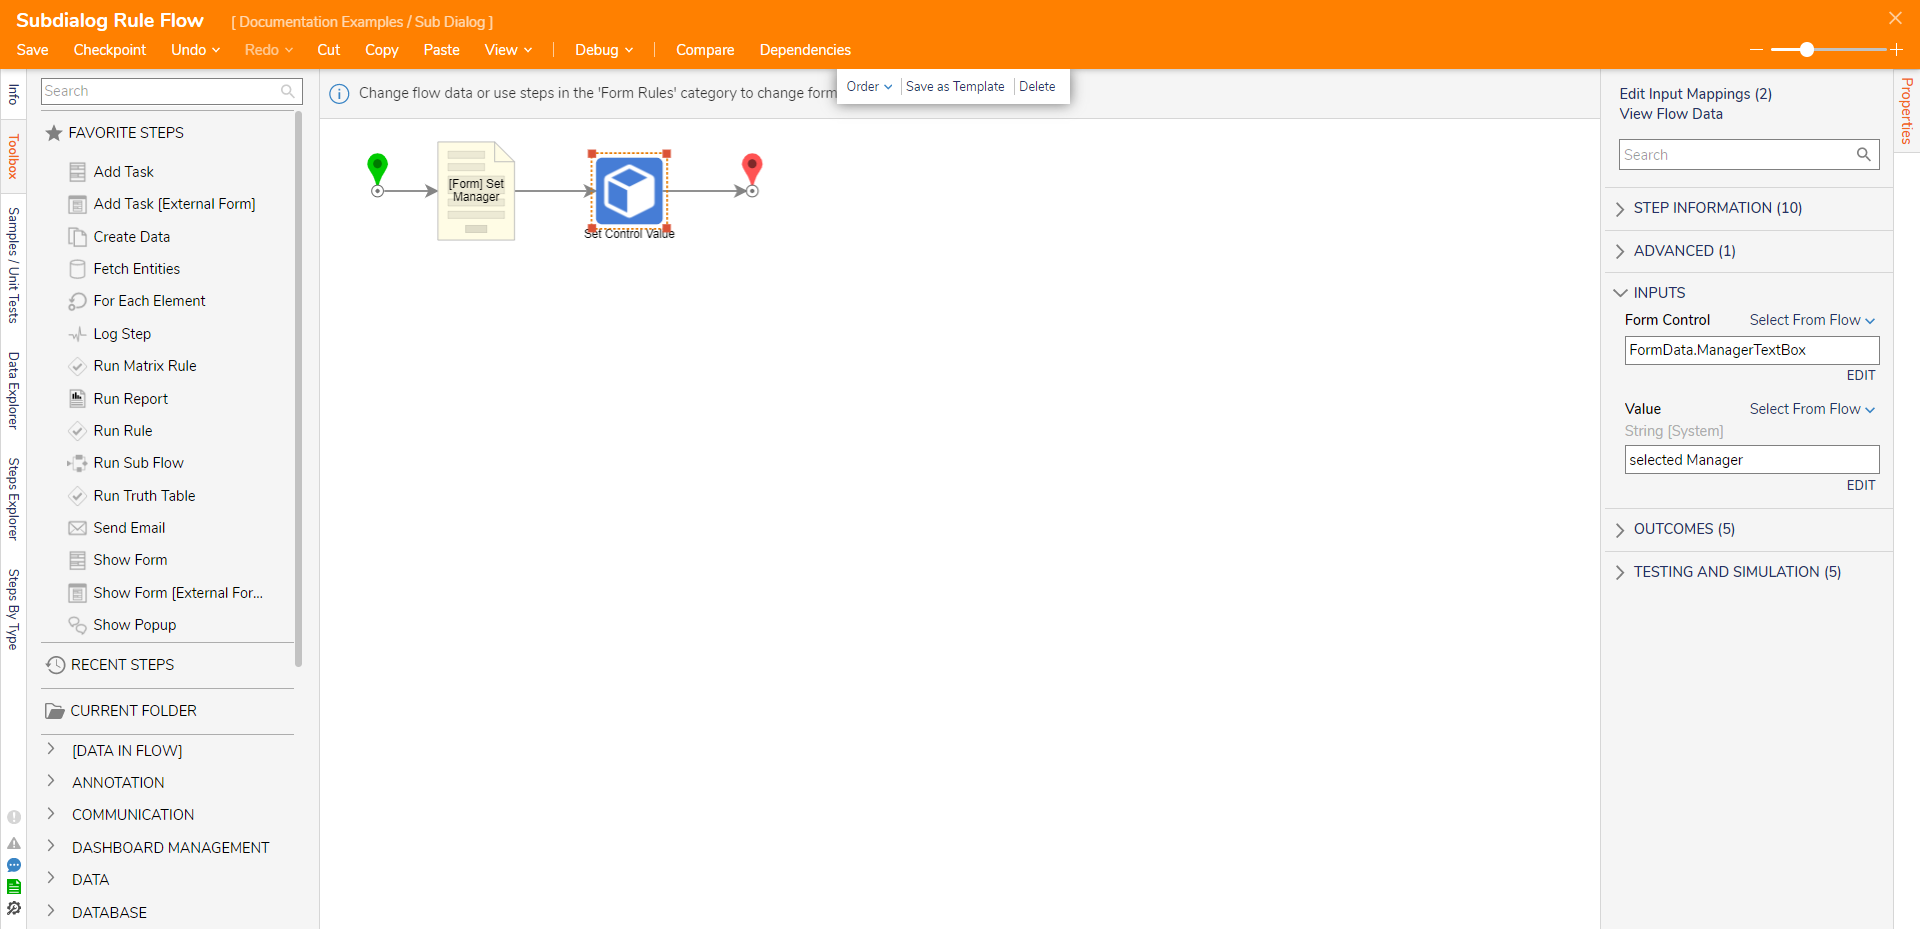
- On the outcome path of the Form that was just created, add a Set Control Value step from the Form Rules category in the Toolbox. In the Properties panel of the Set Control Value step, set Inputs > Form Control to the Form Control to set on the main Form. Set the Value as the output data of the Form. Save and close the Flow Designer to return to the main Form.


Debug
- Debug the main Flow; click on the Debug action in the Flow Designer. Then, click on the Sub Dialog button to initiate the Sub Dialog Flow. Notice the data from the main Form is accessible within the Sub Dialog, and notice how the main Form gets updated with data from the Sub Dialog Form. This interaction between the two forms allows for data exchange during the process.
.gif)
.gif)
Was this article helpful?