Managing Languages
- 11 Oct 2023
- 3 Minutes to read
- Print
- DarkLight
Managing Languages
- Updated on 11 Oct 2023
- 3 Minutes to read
- Print
- DarkLight
Article Summary
Share feedback
Thanks for sharing your feedback!
The content visible to the end-user interface can be easily converted into a preferred language by filling the Master Translation List with the necessary Strings to Translate. Subsequently, these strings can be translated within dedicated language folders.
These translated versions are captured as Translation Strings and linked to specific source Strings to Translate, thereby enabling the same text to be translated across multiple languages.
The process of translation can take place on a broad scale, such as altering the default language of the application instance or on an individual basis by adjusting the language setting of a user account. Translations can also be executed in real-time during the execution of Flows, involving operations like the Translate Text step.
Unsupported Translation Text
Translation applies to any static elements within the Portal. The listed texts do not support translation:
- Dynamic data e.g. Flow Data
- Visual Designers (e.g. Flow Designer, Form Designer, etc.) and other Studio-related UI
- Activity Panel content
- Chart Titles
- Report Titles
- Folder names
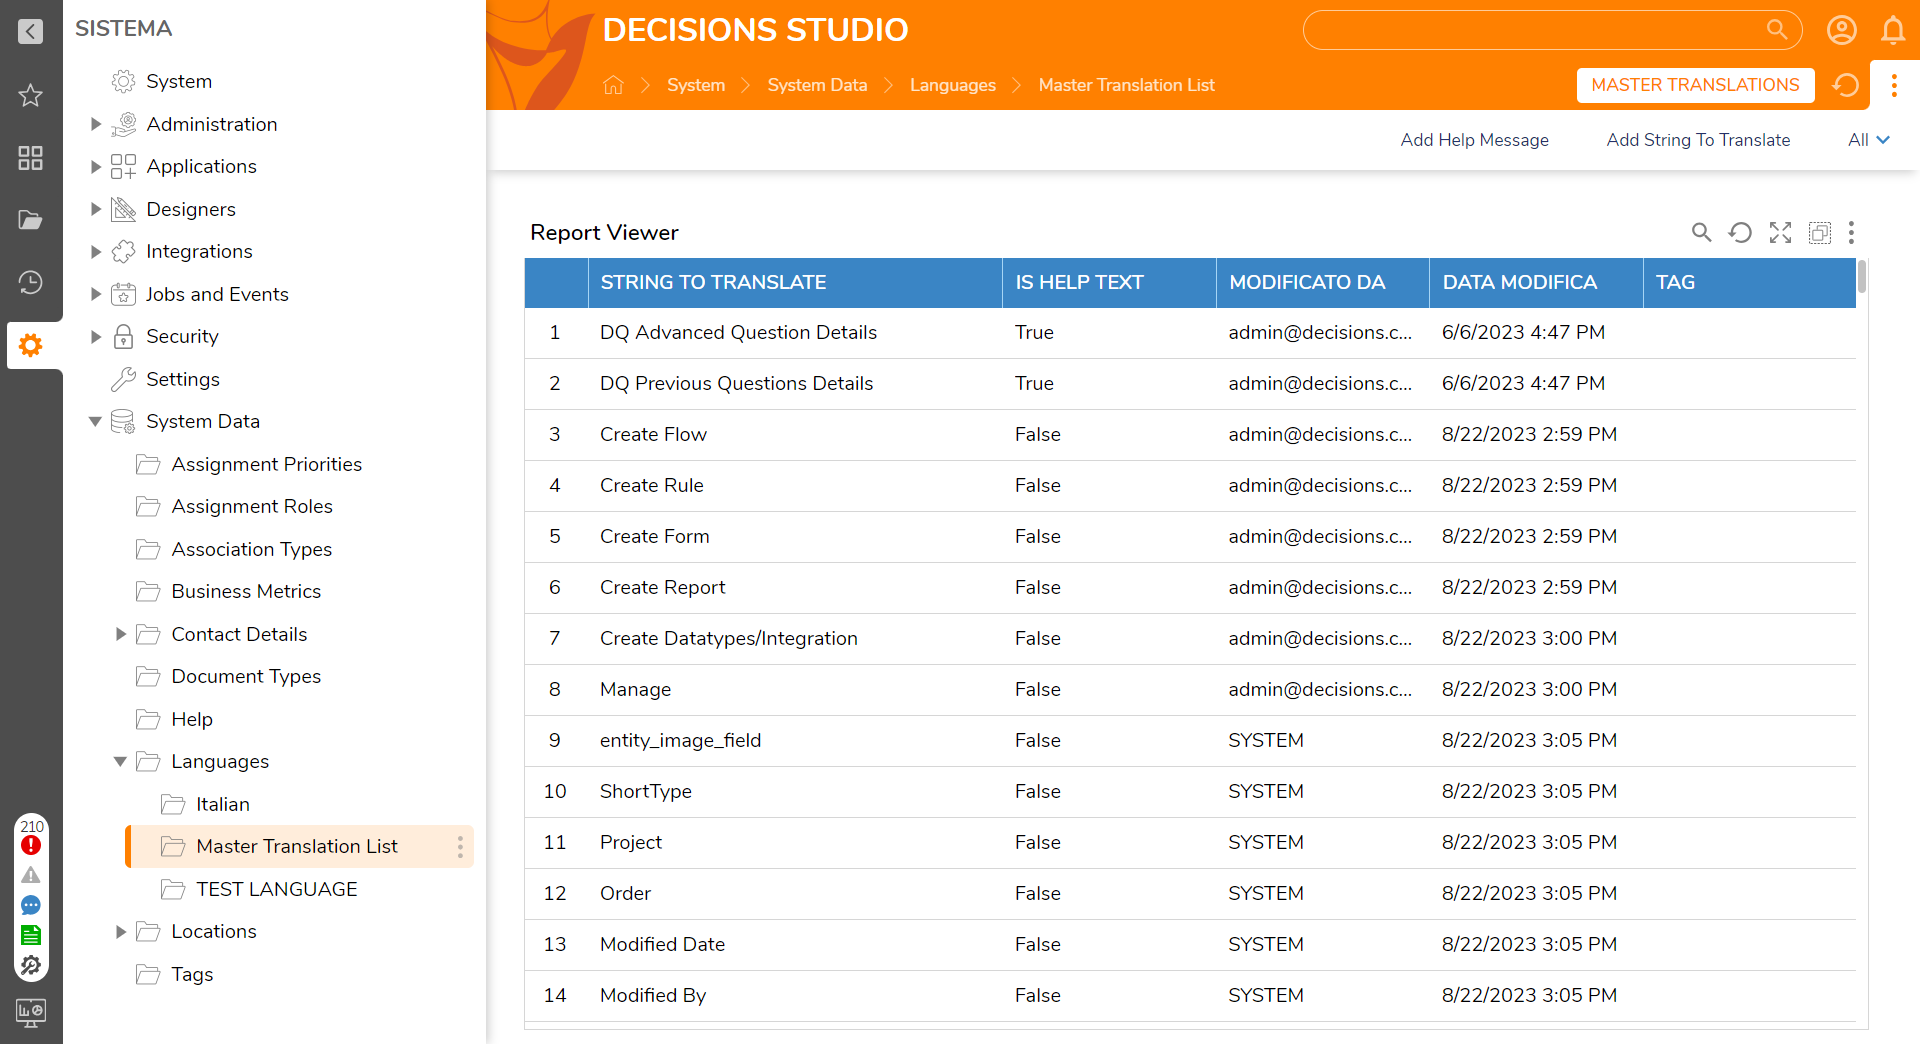
Translation List
The Master Translation List holds all the Strings to Translate; this list will be available for all added languages to be translated. This Dashboard has a couple of actions: Add Help Message and Add String To Translate.
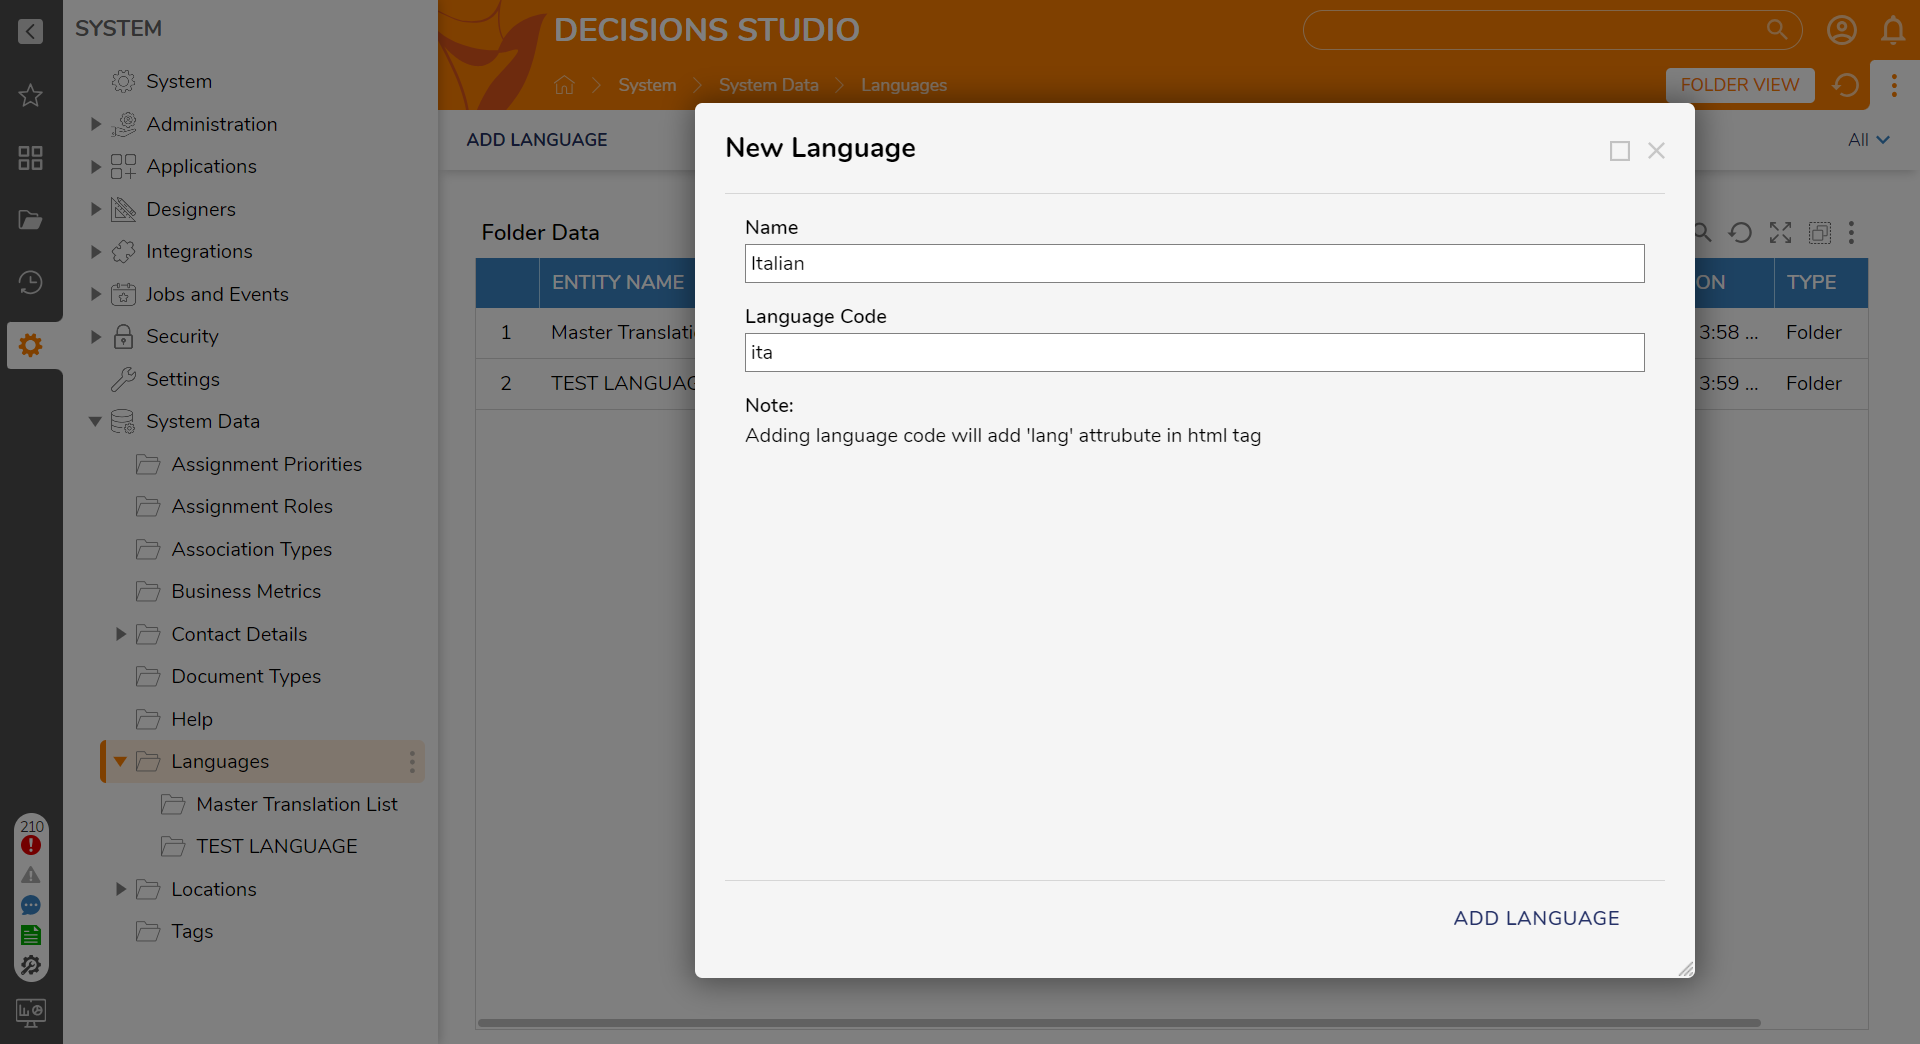
Creating a New Language
- From the Studio, navigate to System > System Data > Languages. Select ADD LANGUAGE from the Global Action Bar. Enter the name of the language for translation.
- Set the Default Language Code to add a 'lang' attribute to the HTML tag.
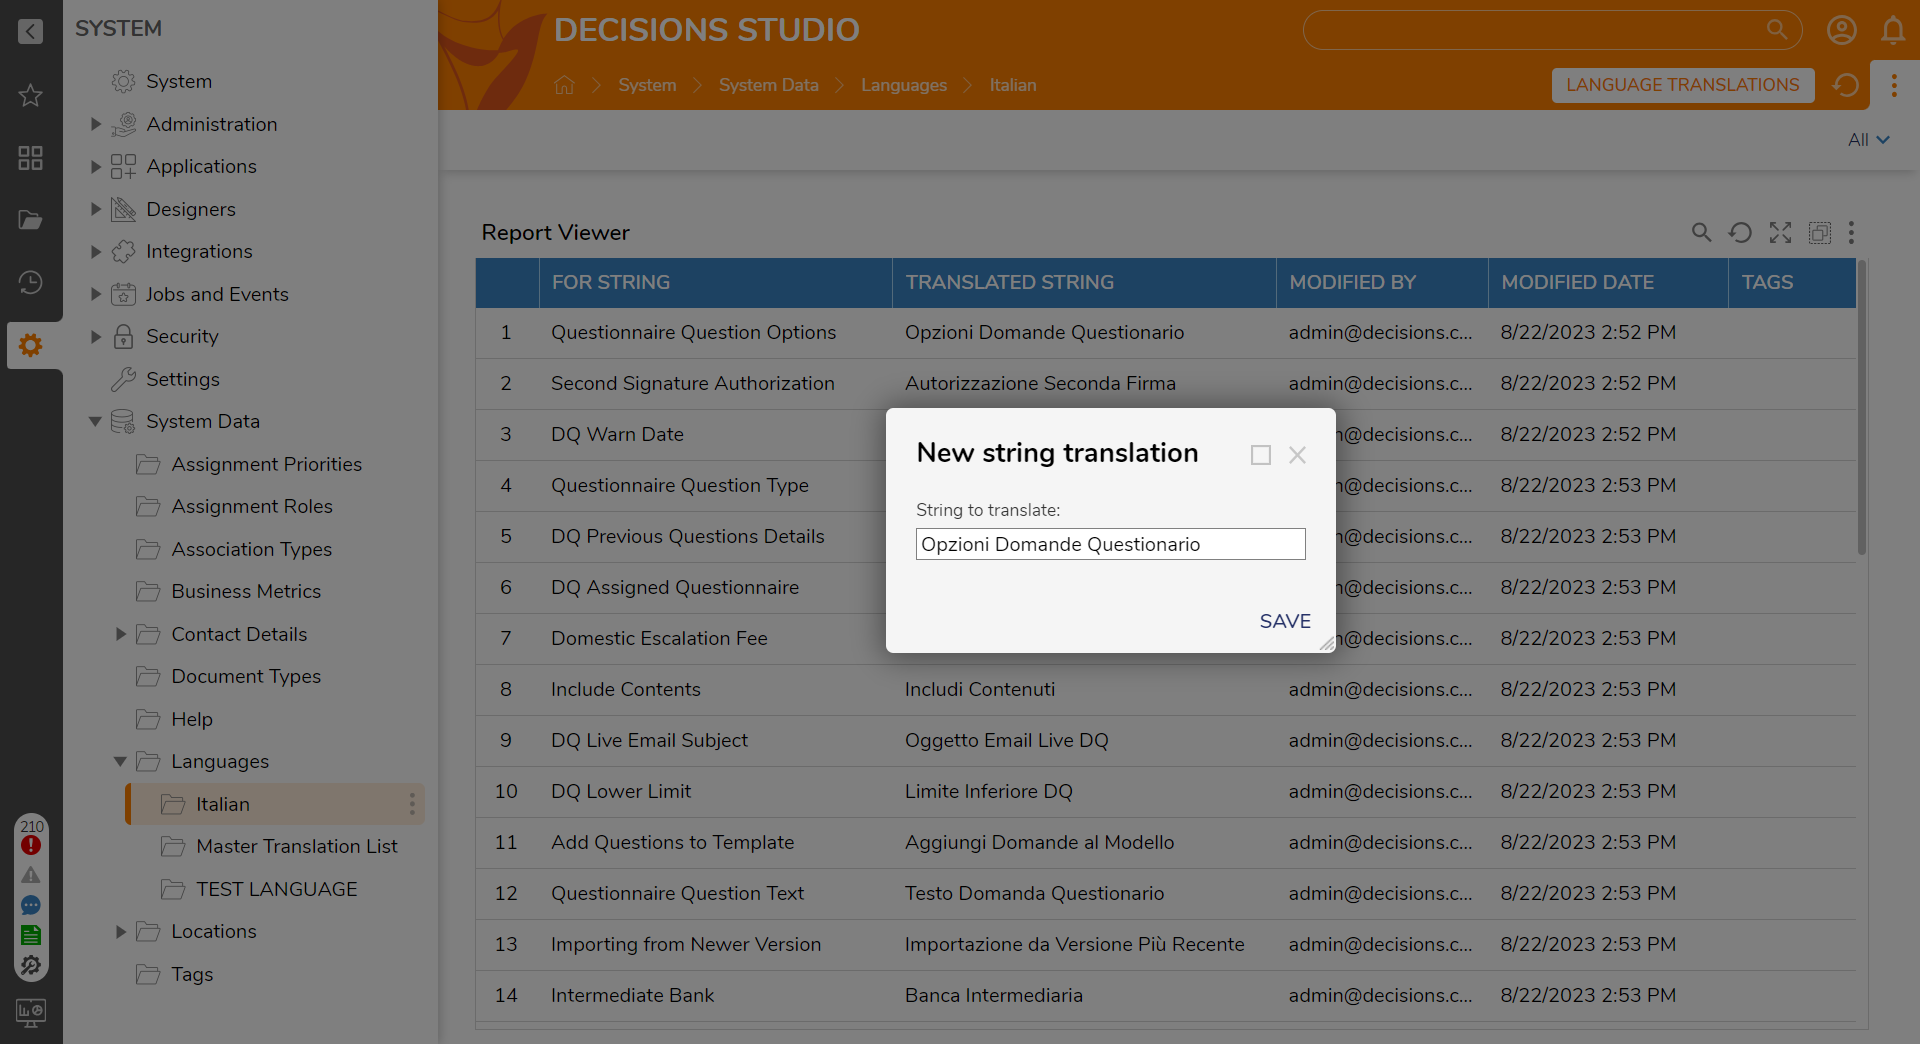
- Open the folder for the newly added Language. Right-click the Translation String, then click Set Translation.
- In the New string translation window, enter the translated text into the String to Translate box. Then, click SAVE. This process may be repeated as many times as needed to translate each String to Translate for the language. Additionally, a Flow can be built using the Internal Services >Translation Service steps to speed up the process of saving Translated Strings.
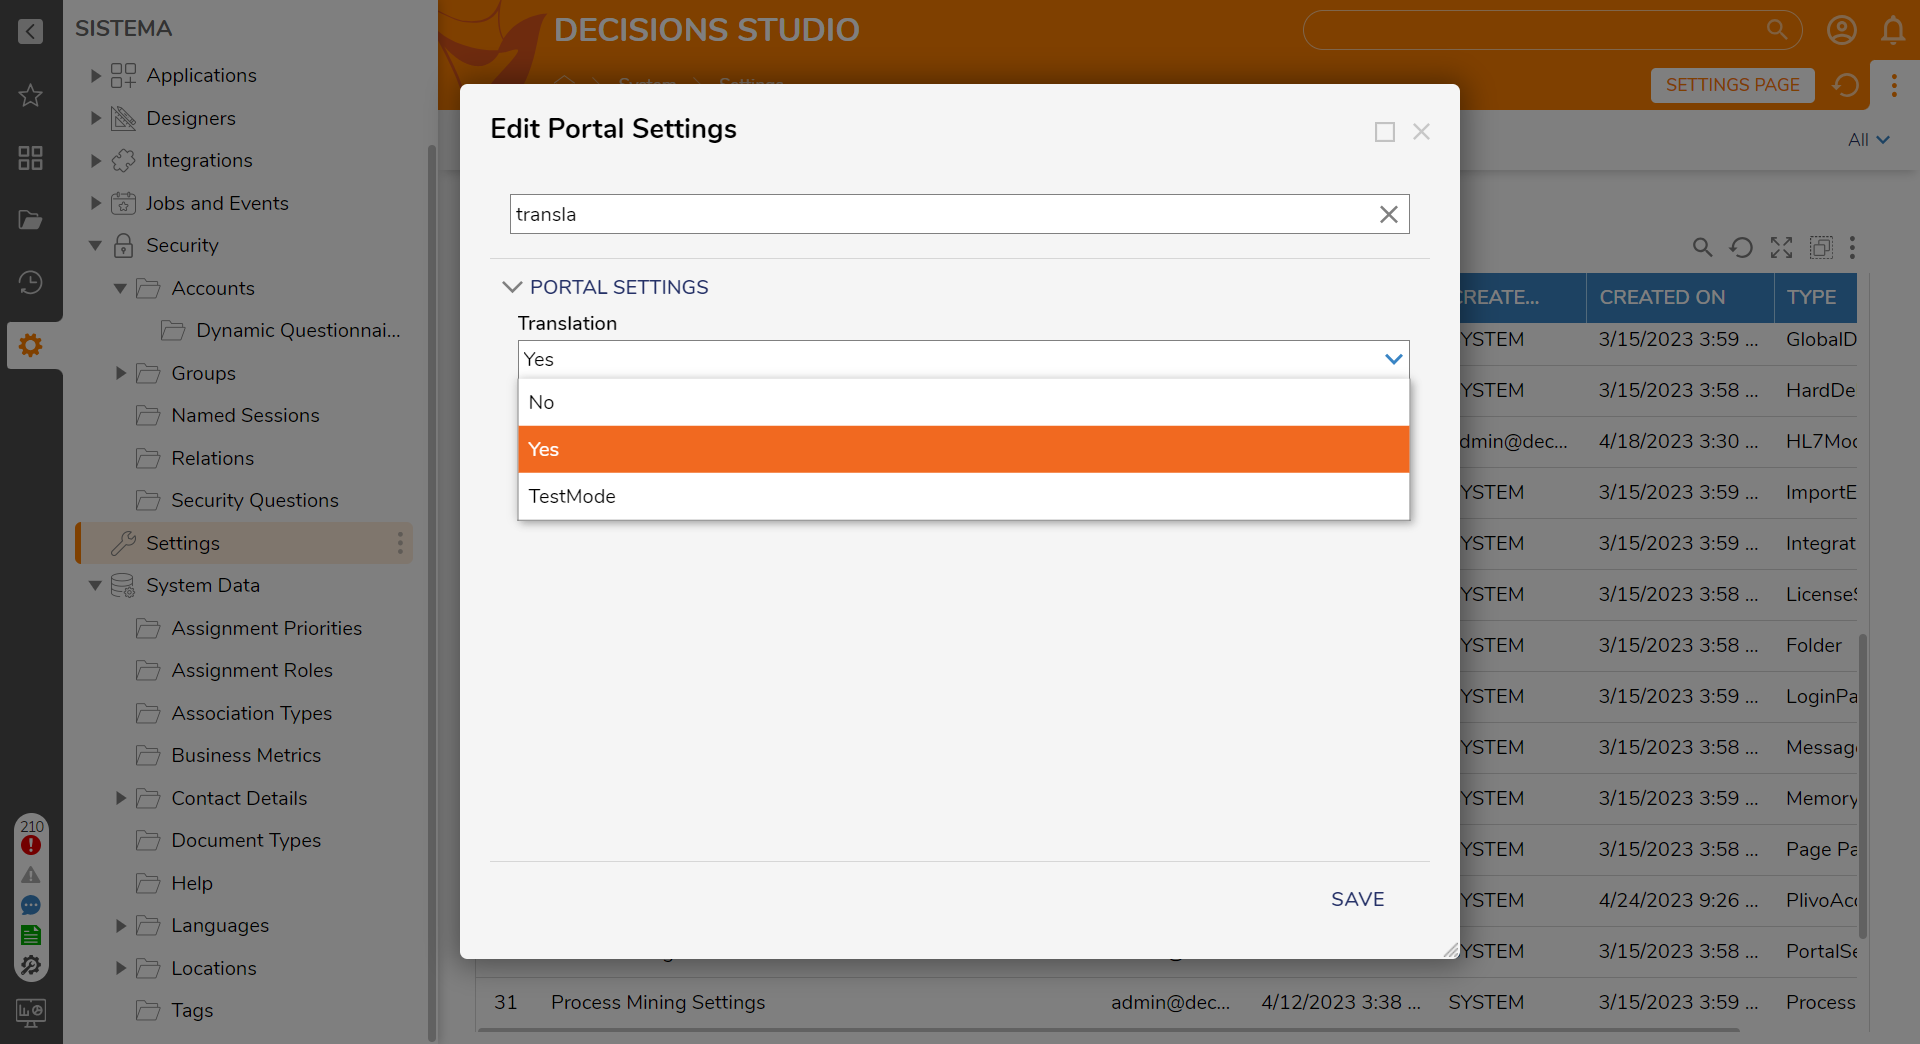
- Navigate to System > Settings > Portal Settings > Translation in the drop-down list. The options are No, Yes, and TestMode. Select Yes, and any String to Translate text occurrences will automatically translate into the chosen language. The TestMode selection is no longer supported. The updated method for testing involves creating a language with the exact name "TEST LANGUAGE" (case-sensitive). When "TEST LANGUAGE" is set as the active language, all translated strings will carry the prefix **.
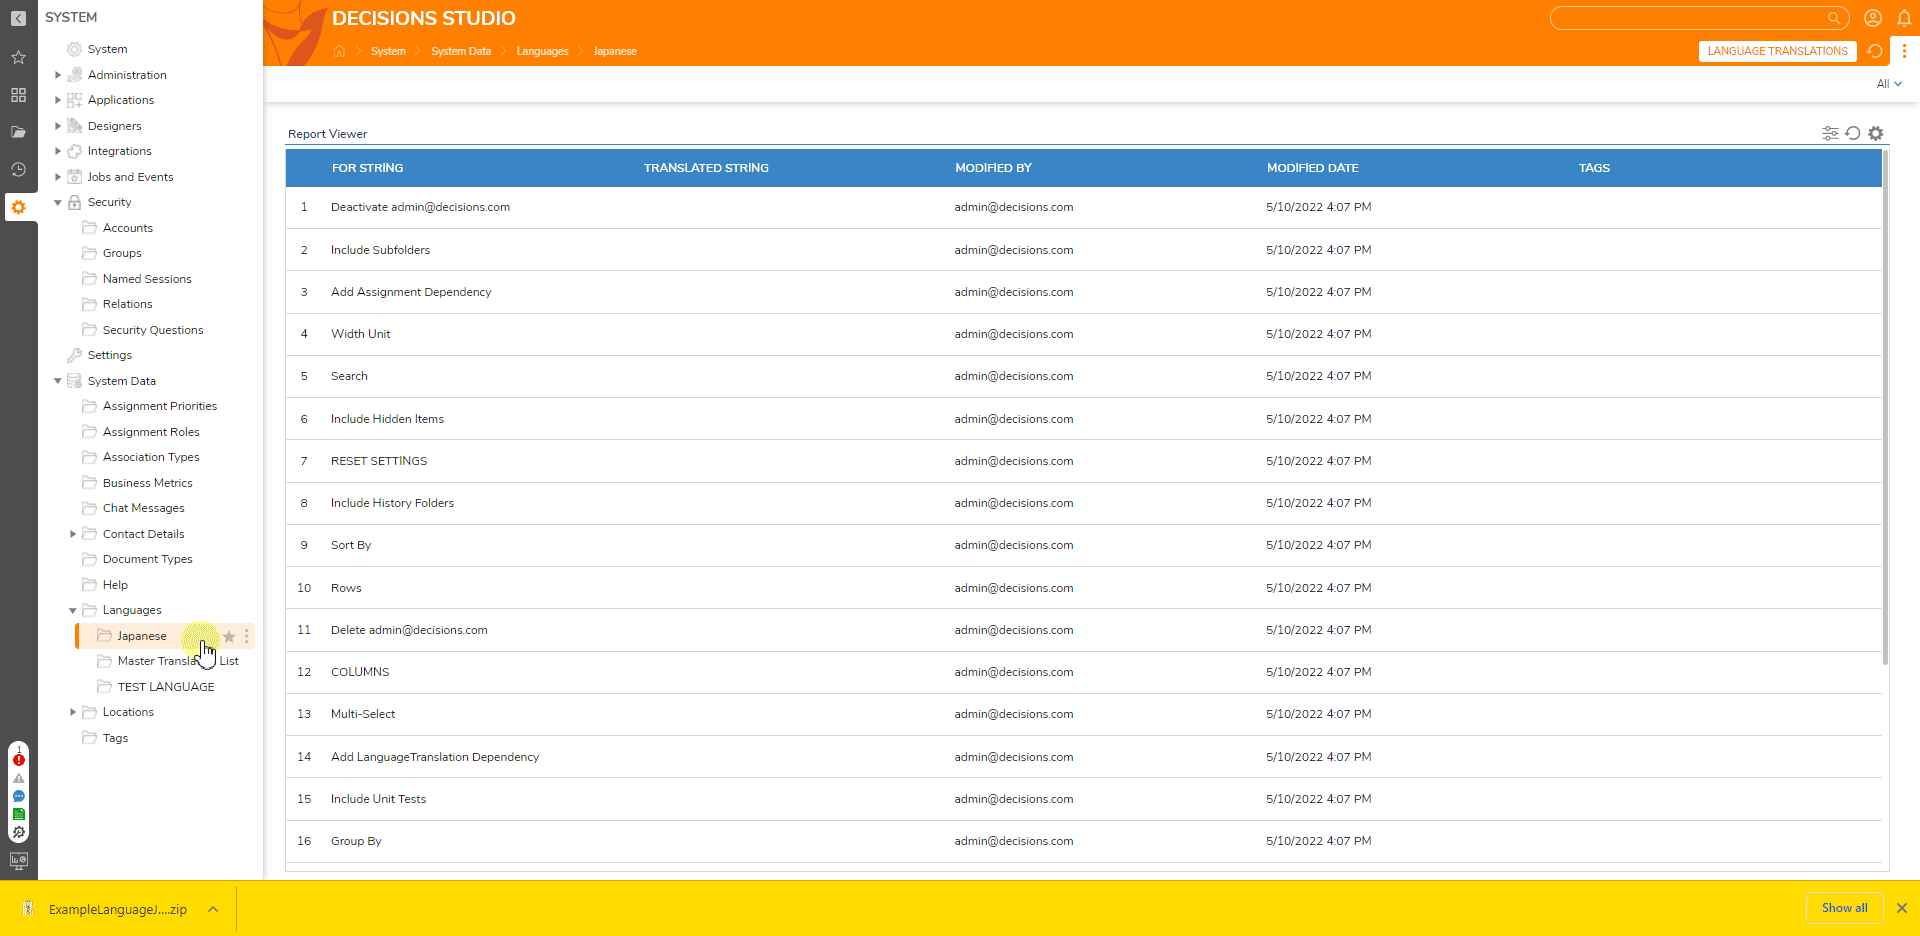
- After translating the Strings To Translate, navigate the platform and notice the translated text. This example shows several translated action names.


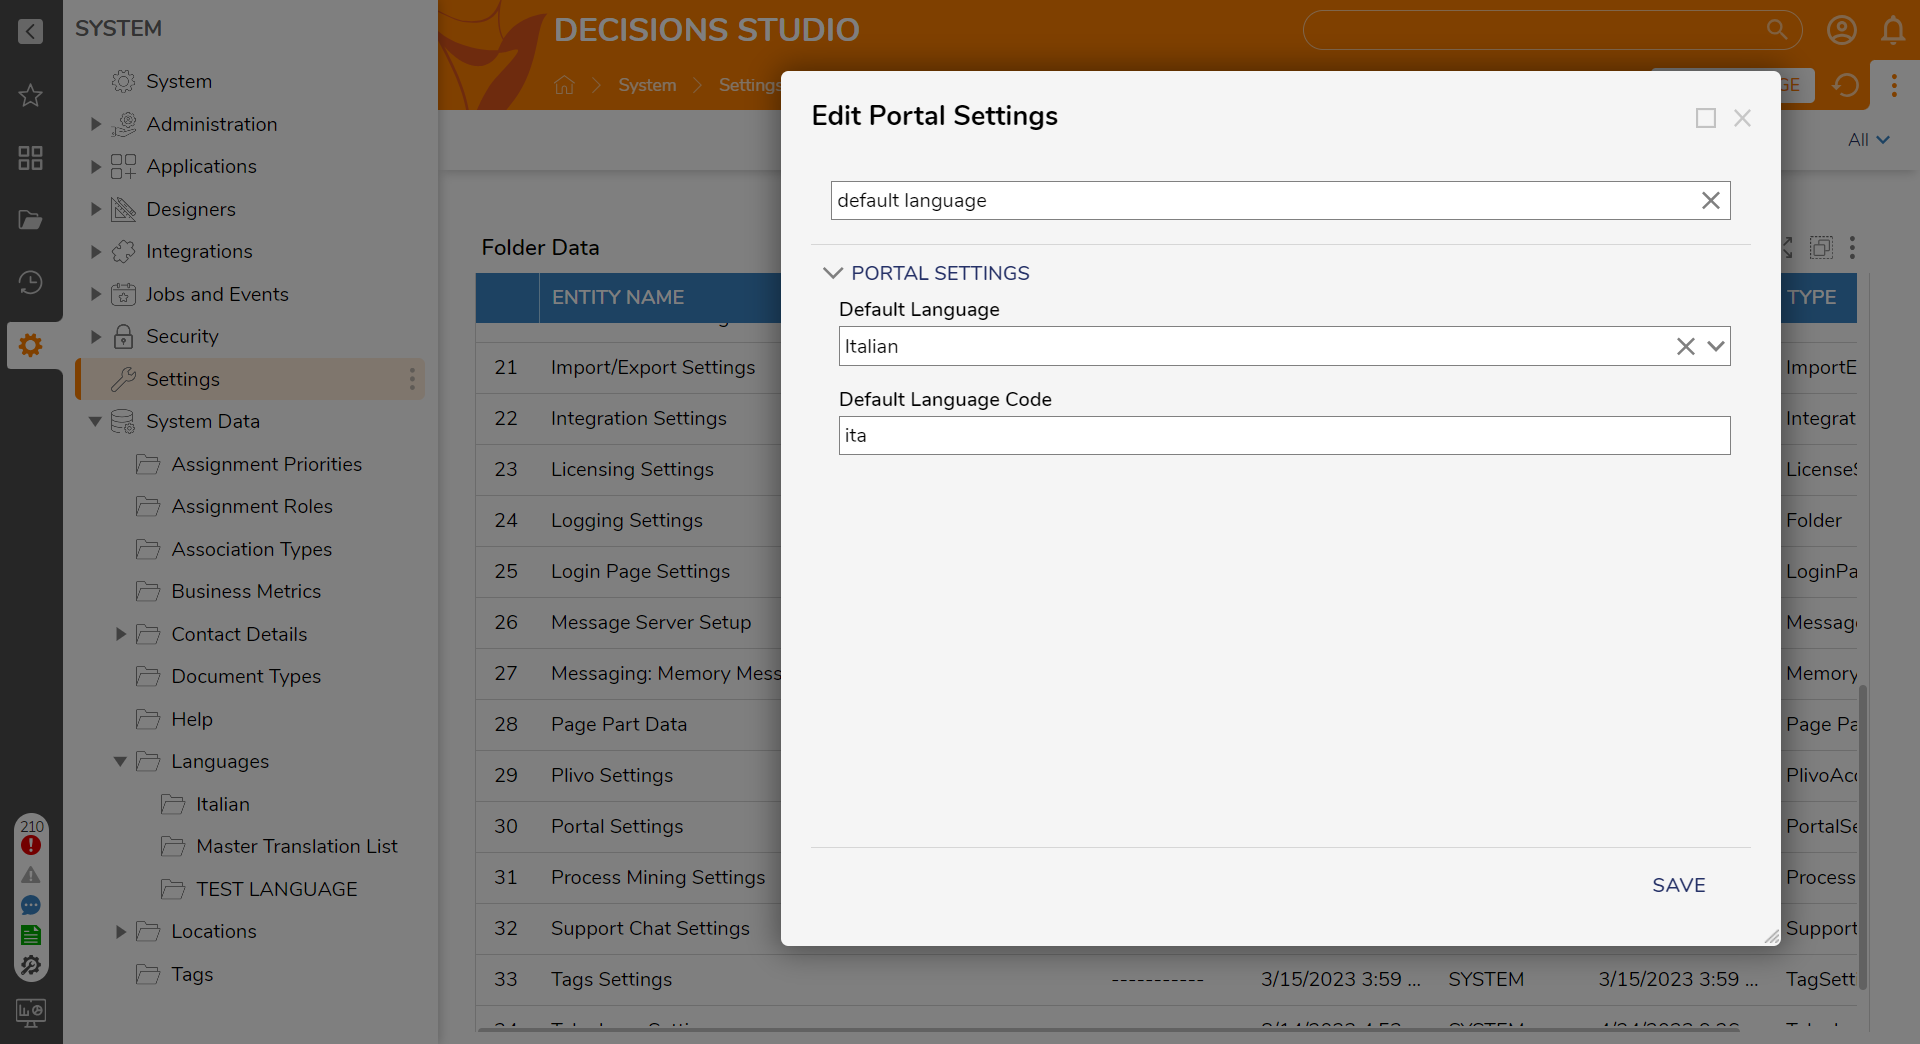
Changing the Default Language
The default language affects the entire instance unless a different language is specified on the account level.
- Log in to an Administrator account and navigate to System > Settings > Portal Settings.
- In the Portal Settings, locate the Default Language setting, select a language, and set a language code.

Setting the Account Language
Individual accounts may select a language different than the system default.
- In the Studio or Portal, select the Account icon at the top right of the screen. Then select My Account to redirect to the My Documents folder.
- Select SET LANGUAGE in the top action bar. Select the desired available language from the drop-down. Upon selecting SET, the translations for that language will take immediate effect.


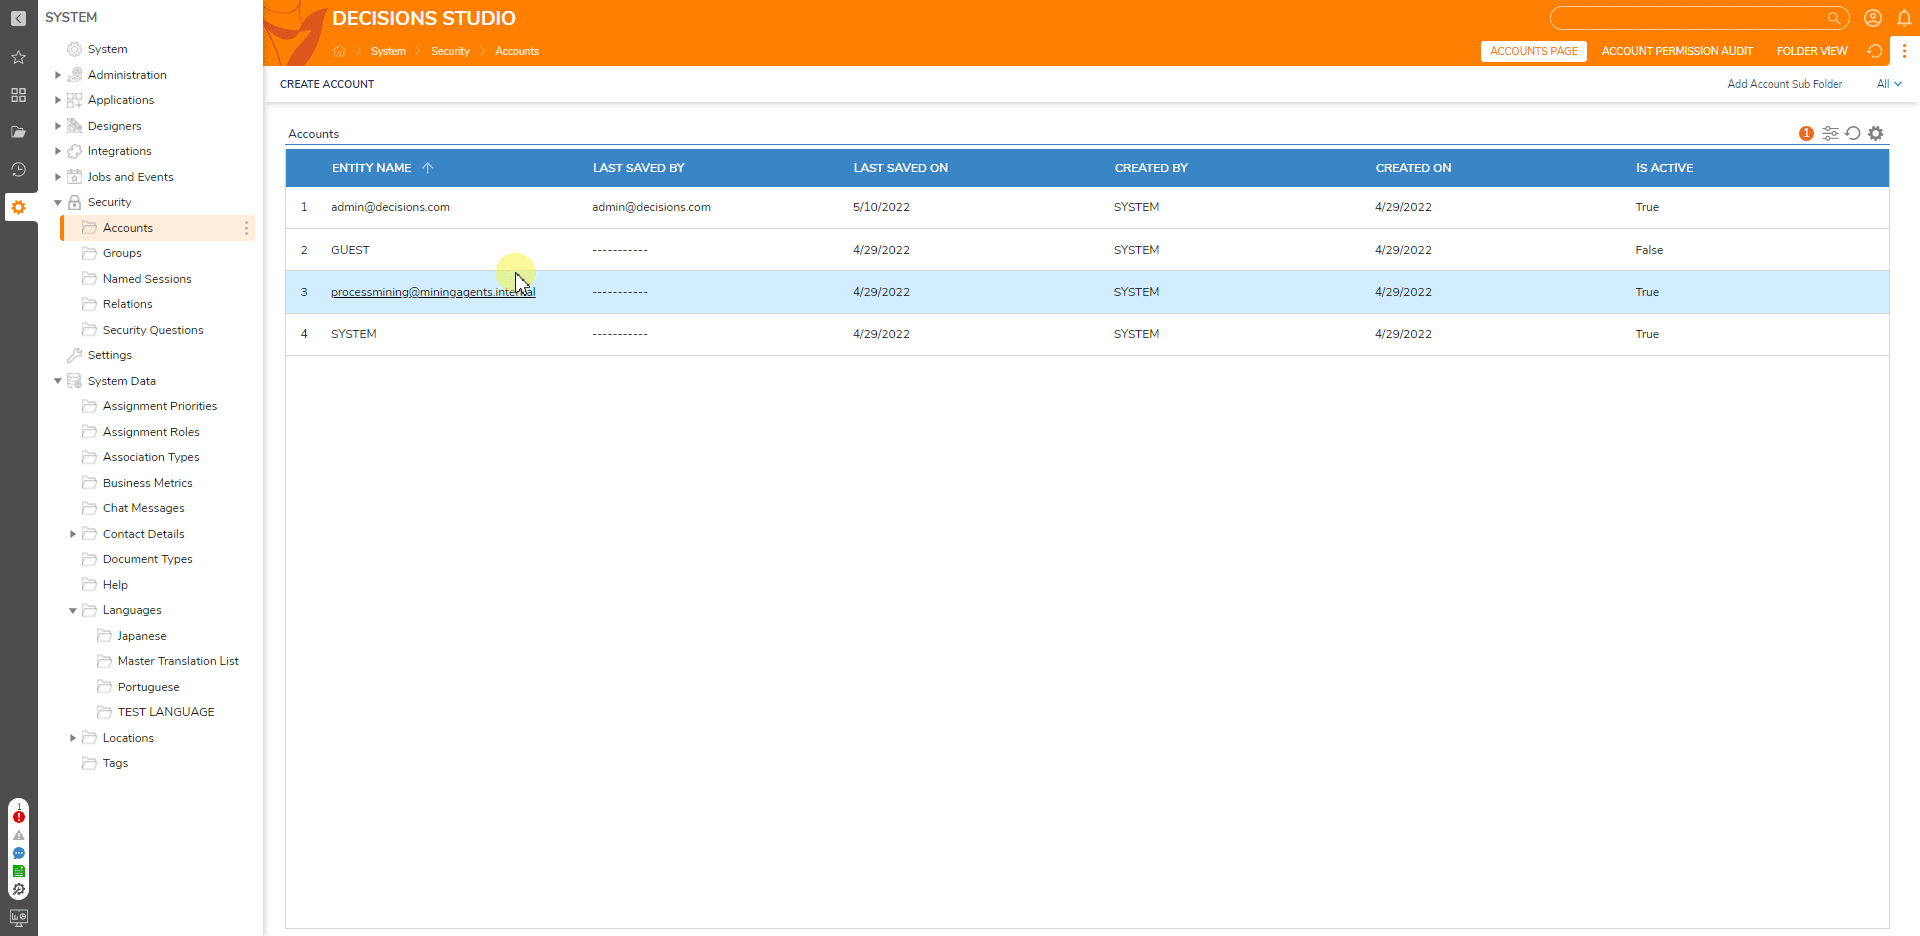
Reverting Back to the Default Language
The default language is not listed in the Set Language drop-down. To return to the default language, an Administrator must open the account's settings and clear its language setting.
- As an Administrator, navigate to System > Security > Accounts and select the account to remove language settings.
- In the Edit Entity window, locate the Language settings and select the X icon to clear the account-specific language. Selecting Save, the change immediately occurs.

Importing/Exporting a Language
A language may be exported from one instance and imported into another to reduce time on multiple translations greatly. For containerized environments sharing the same database, this will not be necessary.
Languages export as decObj. files similar to exporting a Designer Element. It does support exporting as a CSV or Excel file extension.
- Open the Languages folder and right-click on any supported language folder. Select Import/Export and then select Export.
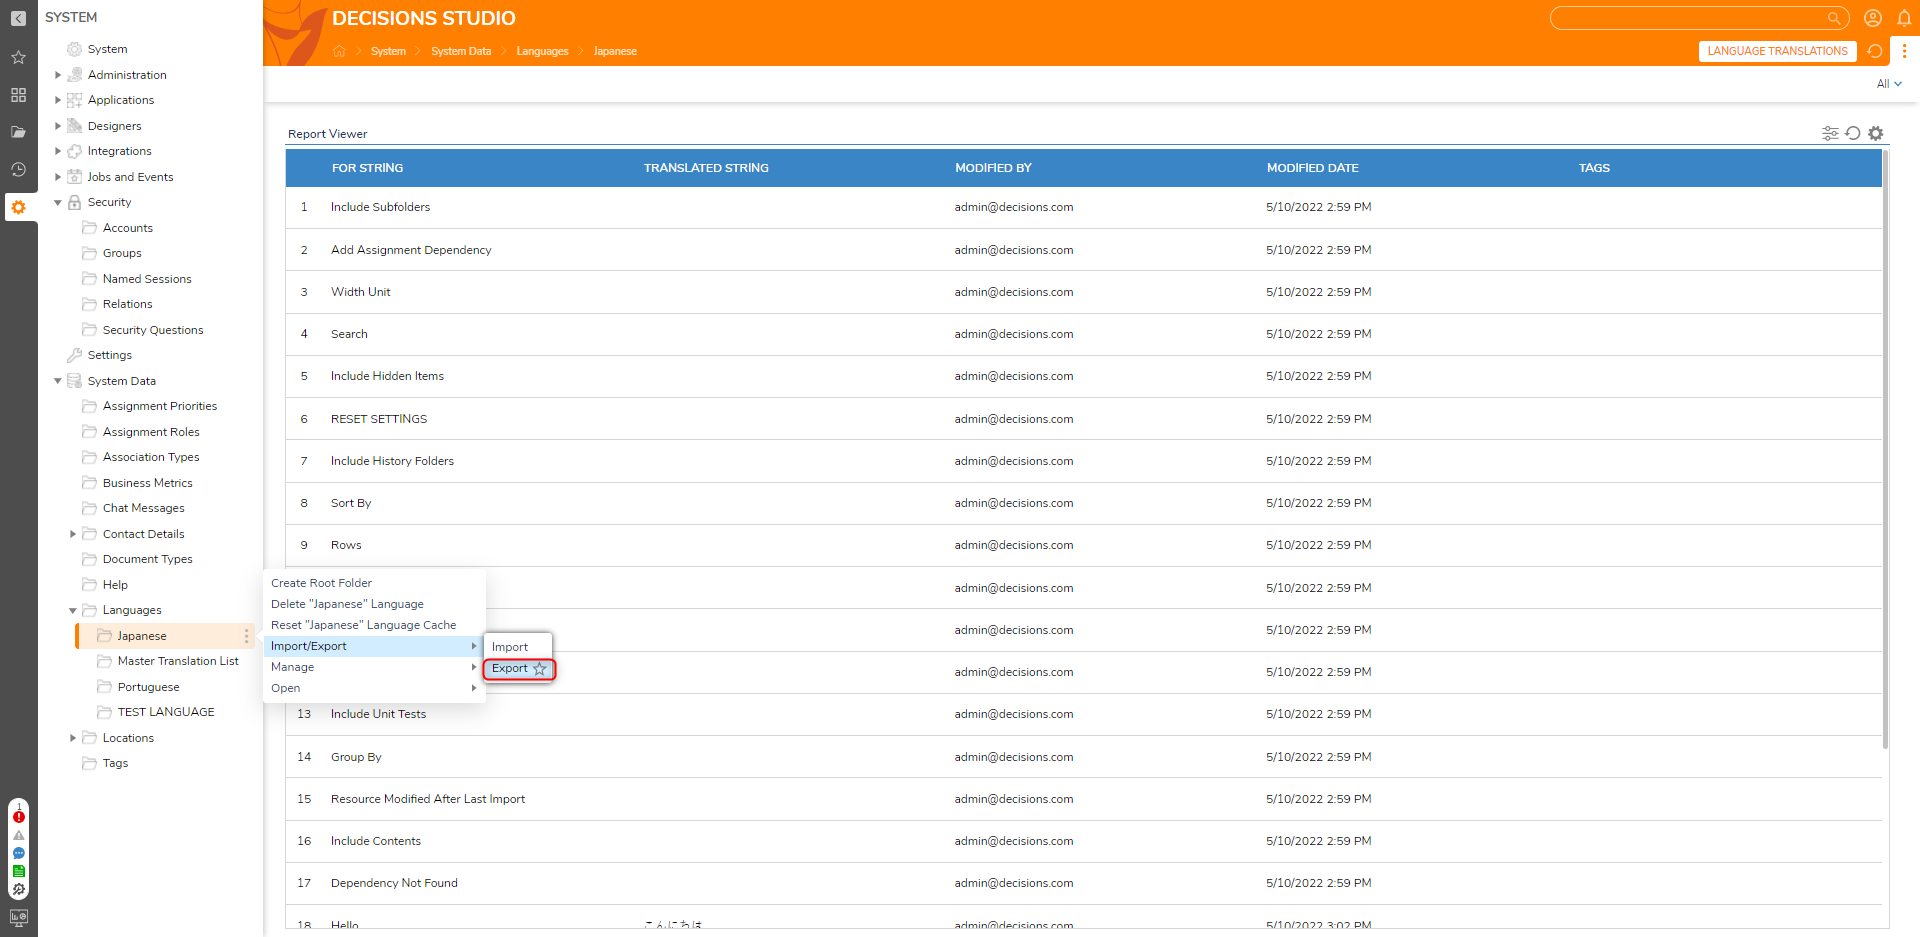
- Continue down the Export dialog and download the .zip folder. If prompted, provide a project name and export the project.
- In a different instance, repeat step three in the Creating a New Language section to create a new language folder.
- Right-click on the new language folder and select to Import/Export > Import from the action menu. Once complete, it is available for use.


For further information on Administration, visit the Decisions Forum.
Was this article helpful?