Extending Report Distribution Options
- 04 May 2022
- 1 Minute to read
- Print
- DarkLight
Extending Report Distribution Options
- Updated on 04 May 2022
- 1 Minute to read
- Print
- DarkLight
Article Summary
Share feedback
Thanks for sharing your feedback!
Overview
This tutorial demonstrates how to use Report Distribution functionality. Report Distribution allows users to create and manage how Reports can be distributed (download, send over email, etc.).
Example
This example will overview Report Distribution functionality and extend it by creating a simple Report Distribution type.
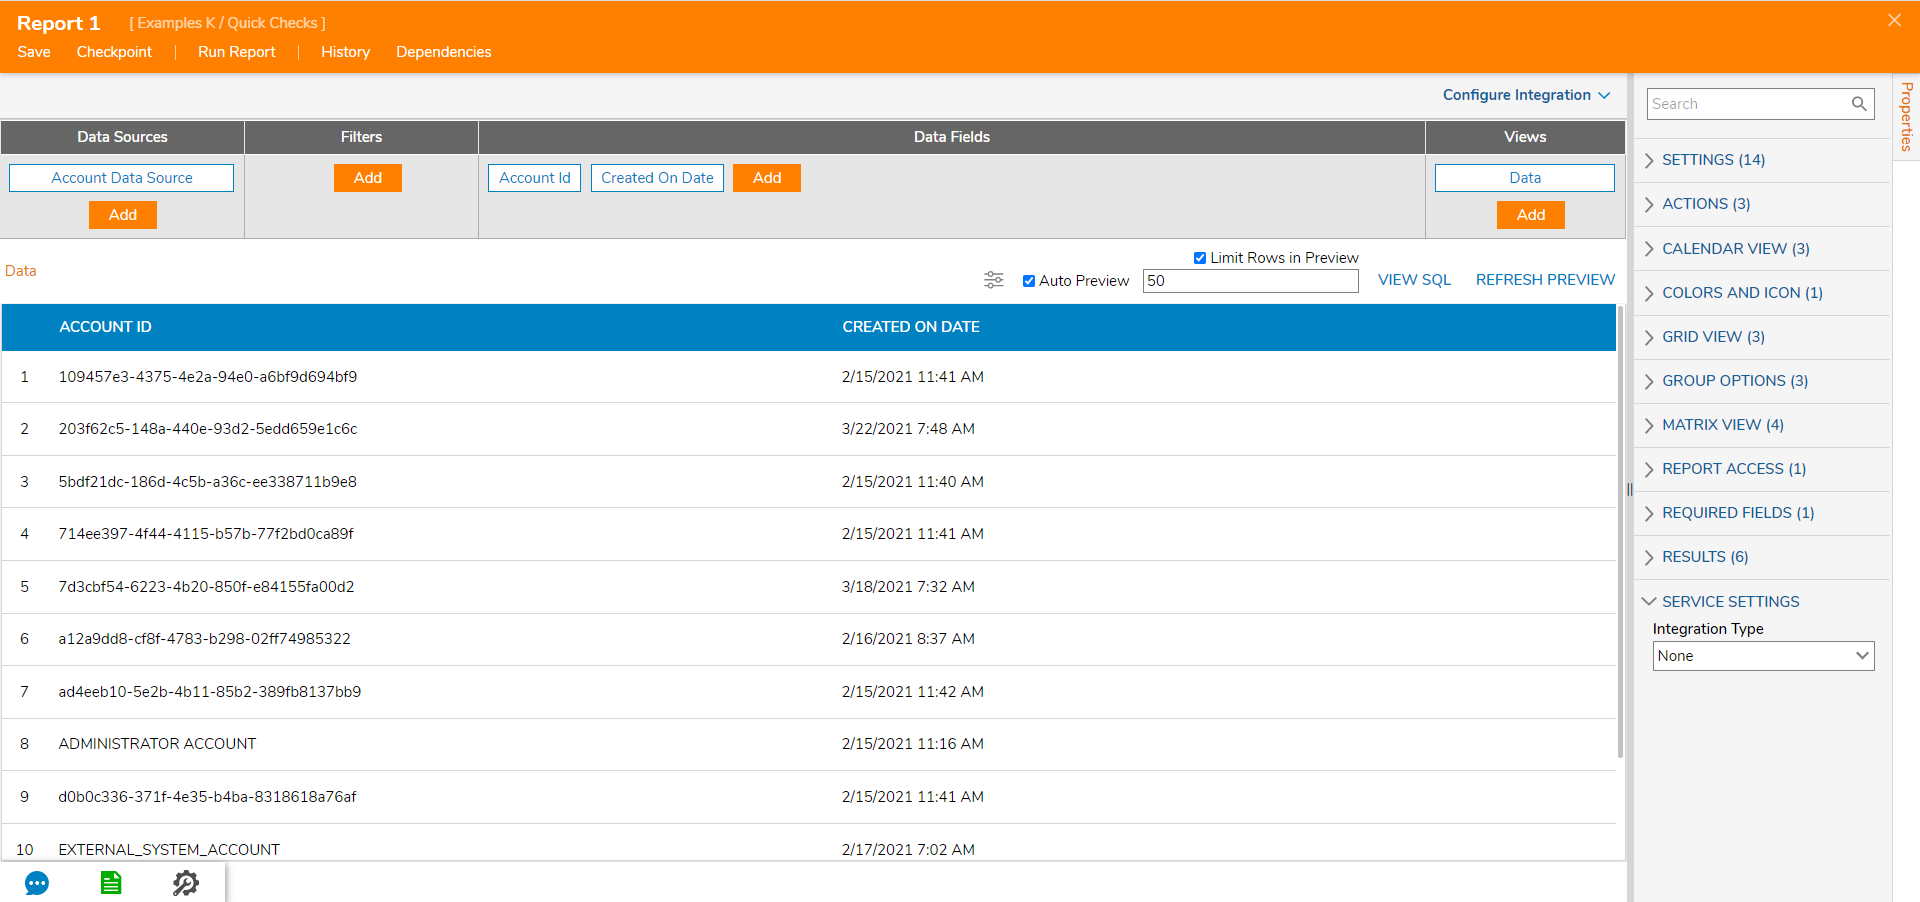
- Create a Report using the Account Data Source and Account Id and Created on Date Data Fields.
- Select Run Report in the top action panel.
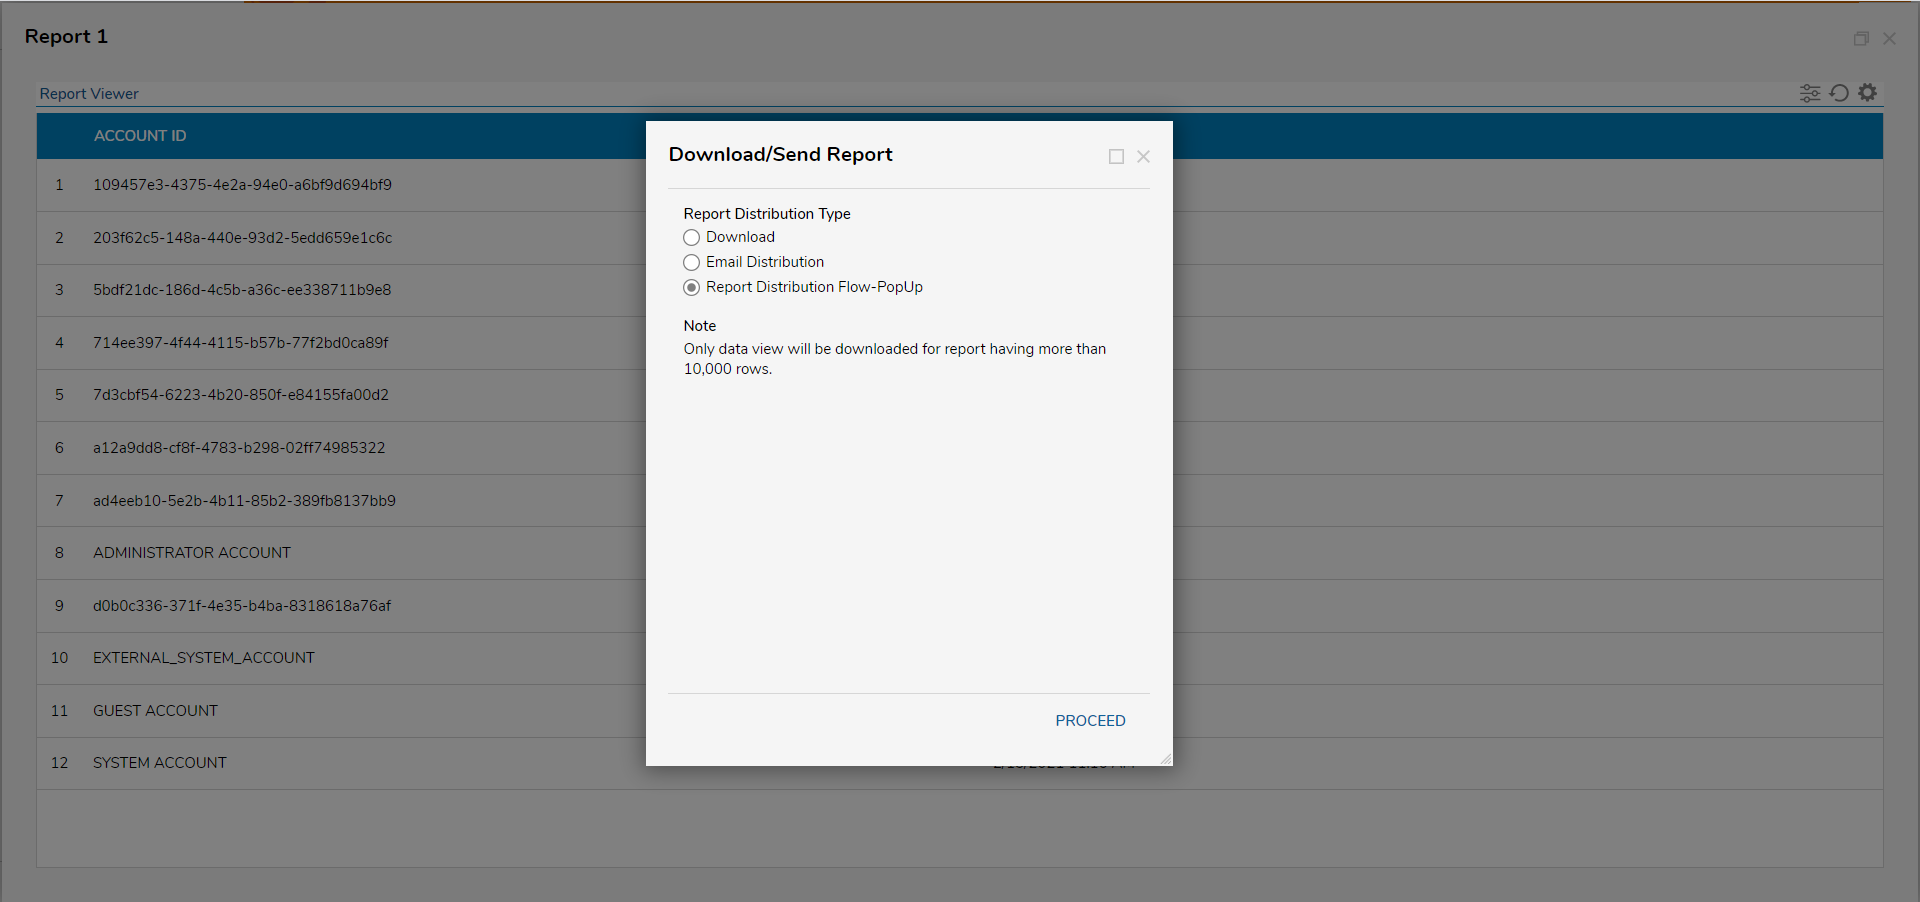
- Select the gear icon to open the Report Actions, select the printer icon located in the upper right corner.
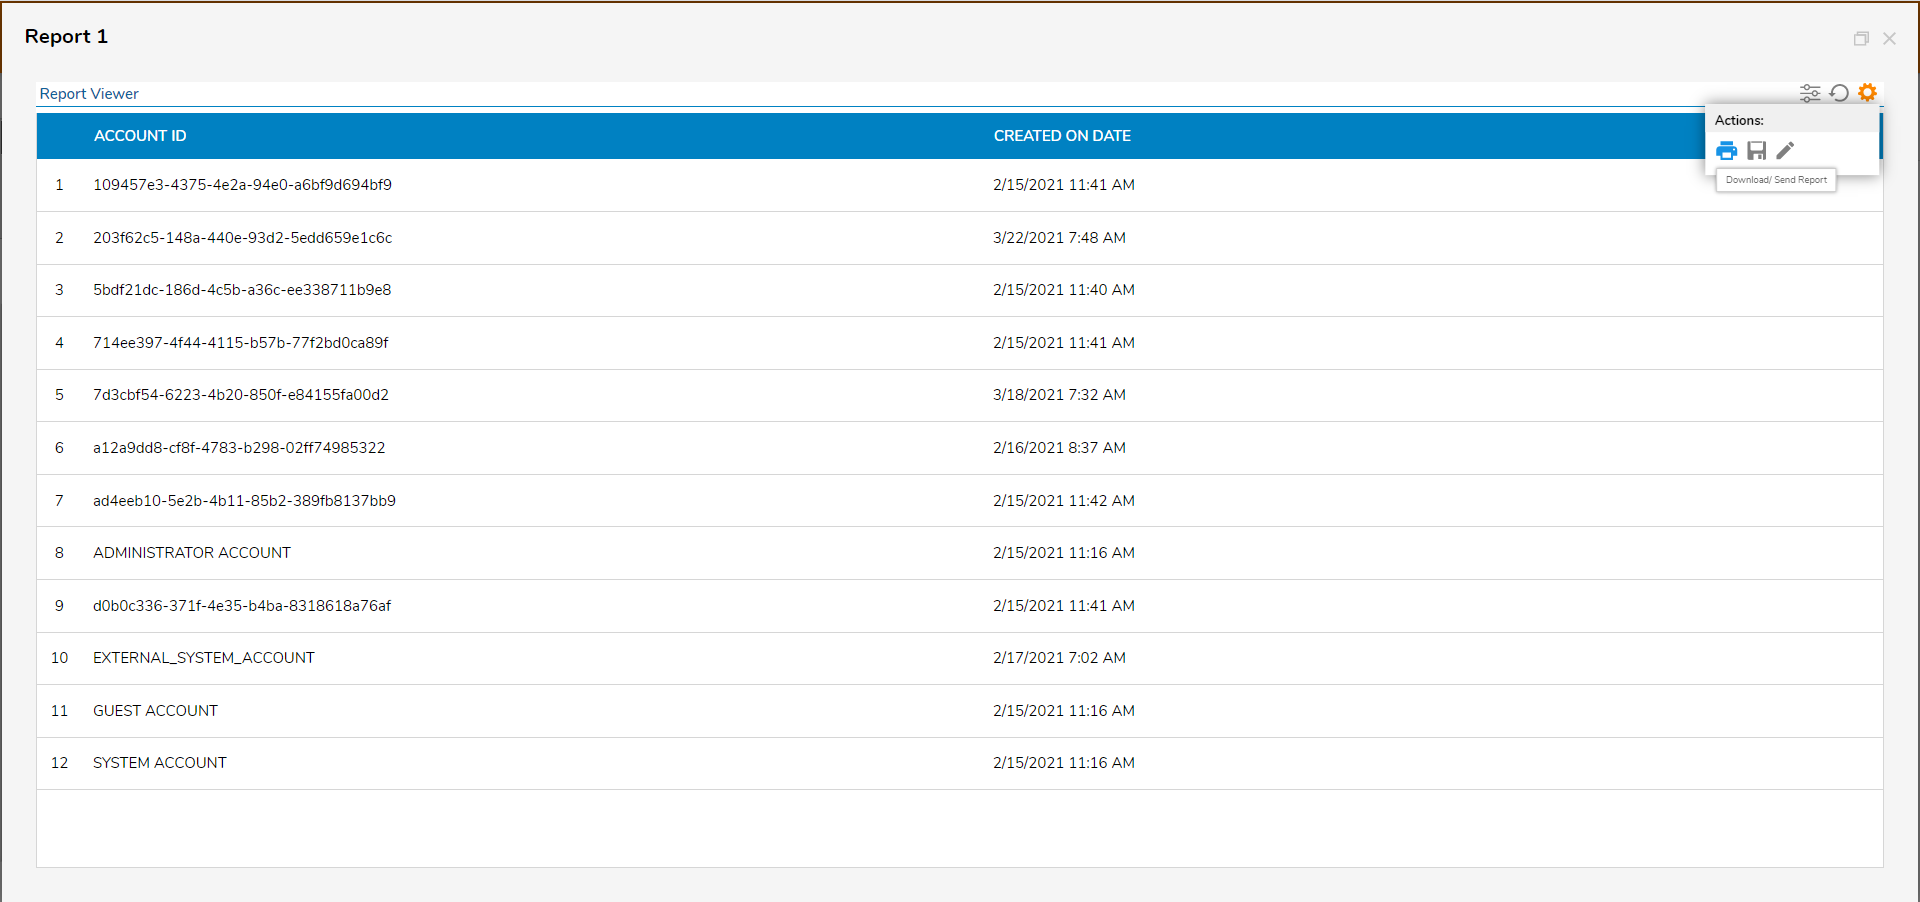
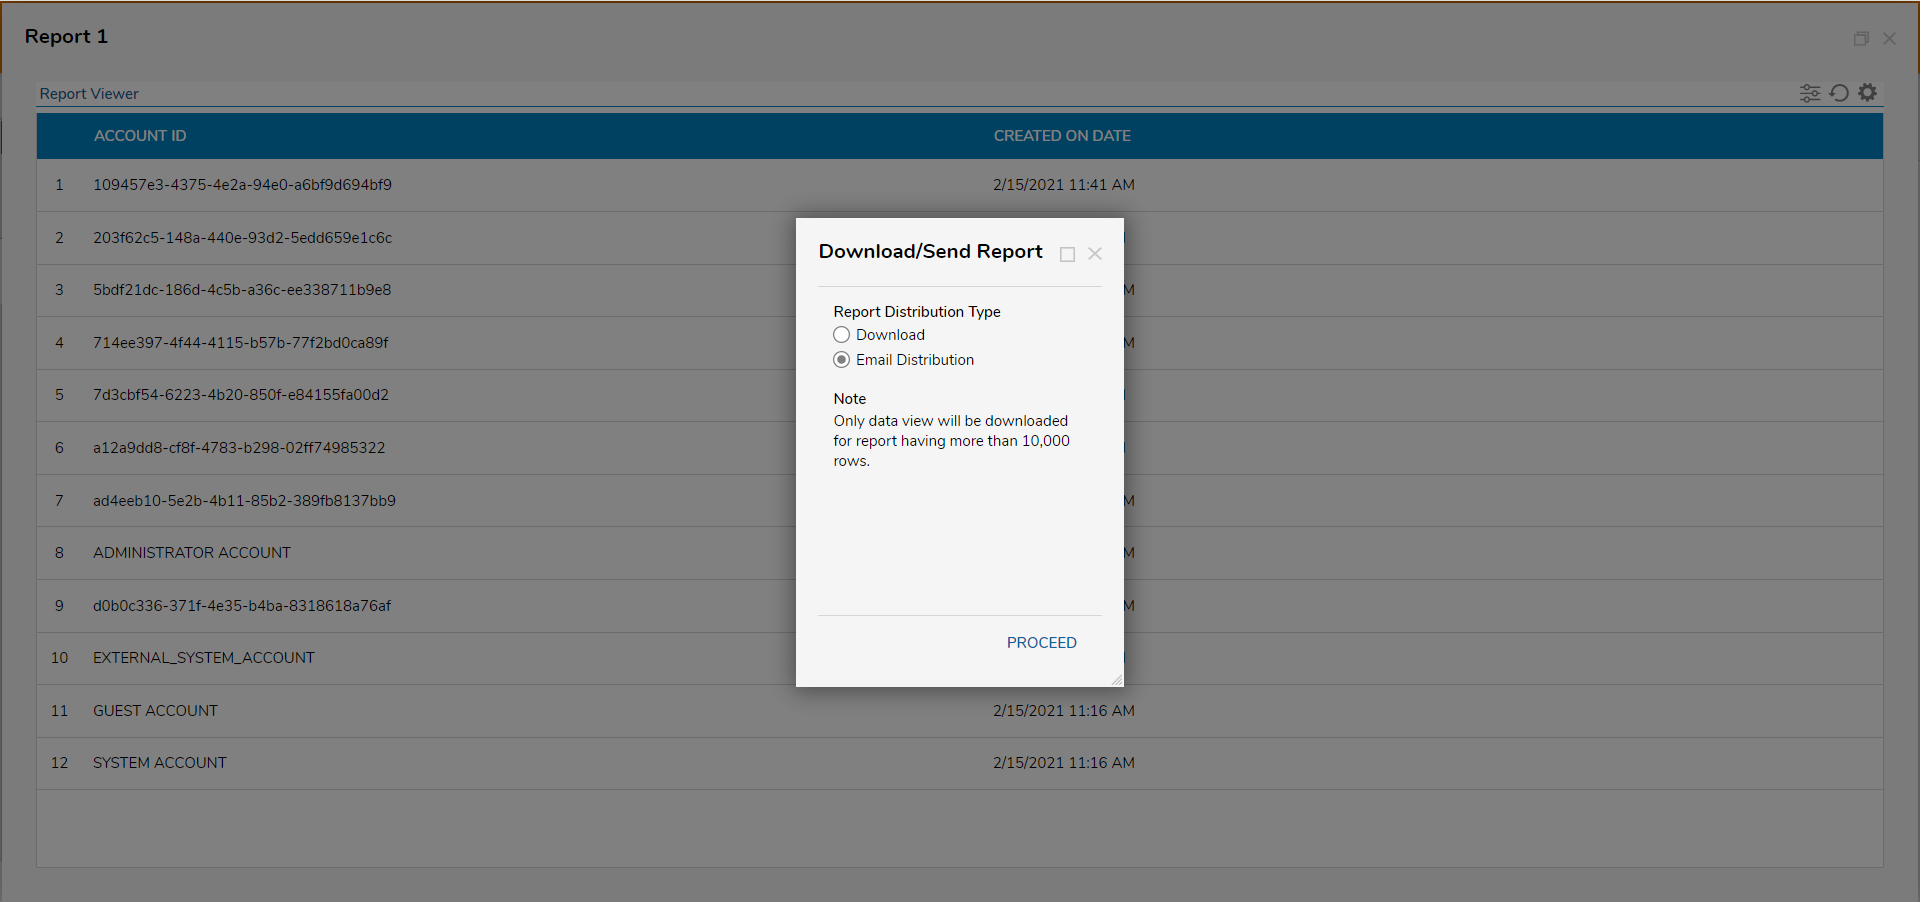
- The Download/Send Report dialog shows. Choose the Report Distribution type; the default options are Download and Email Distribution Flow.
- Select Email Distribution and select PROCEED.
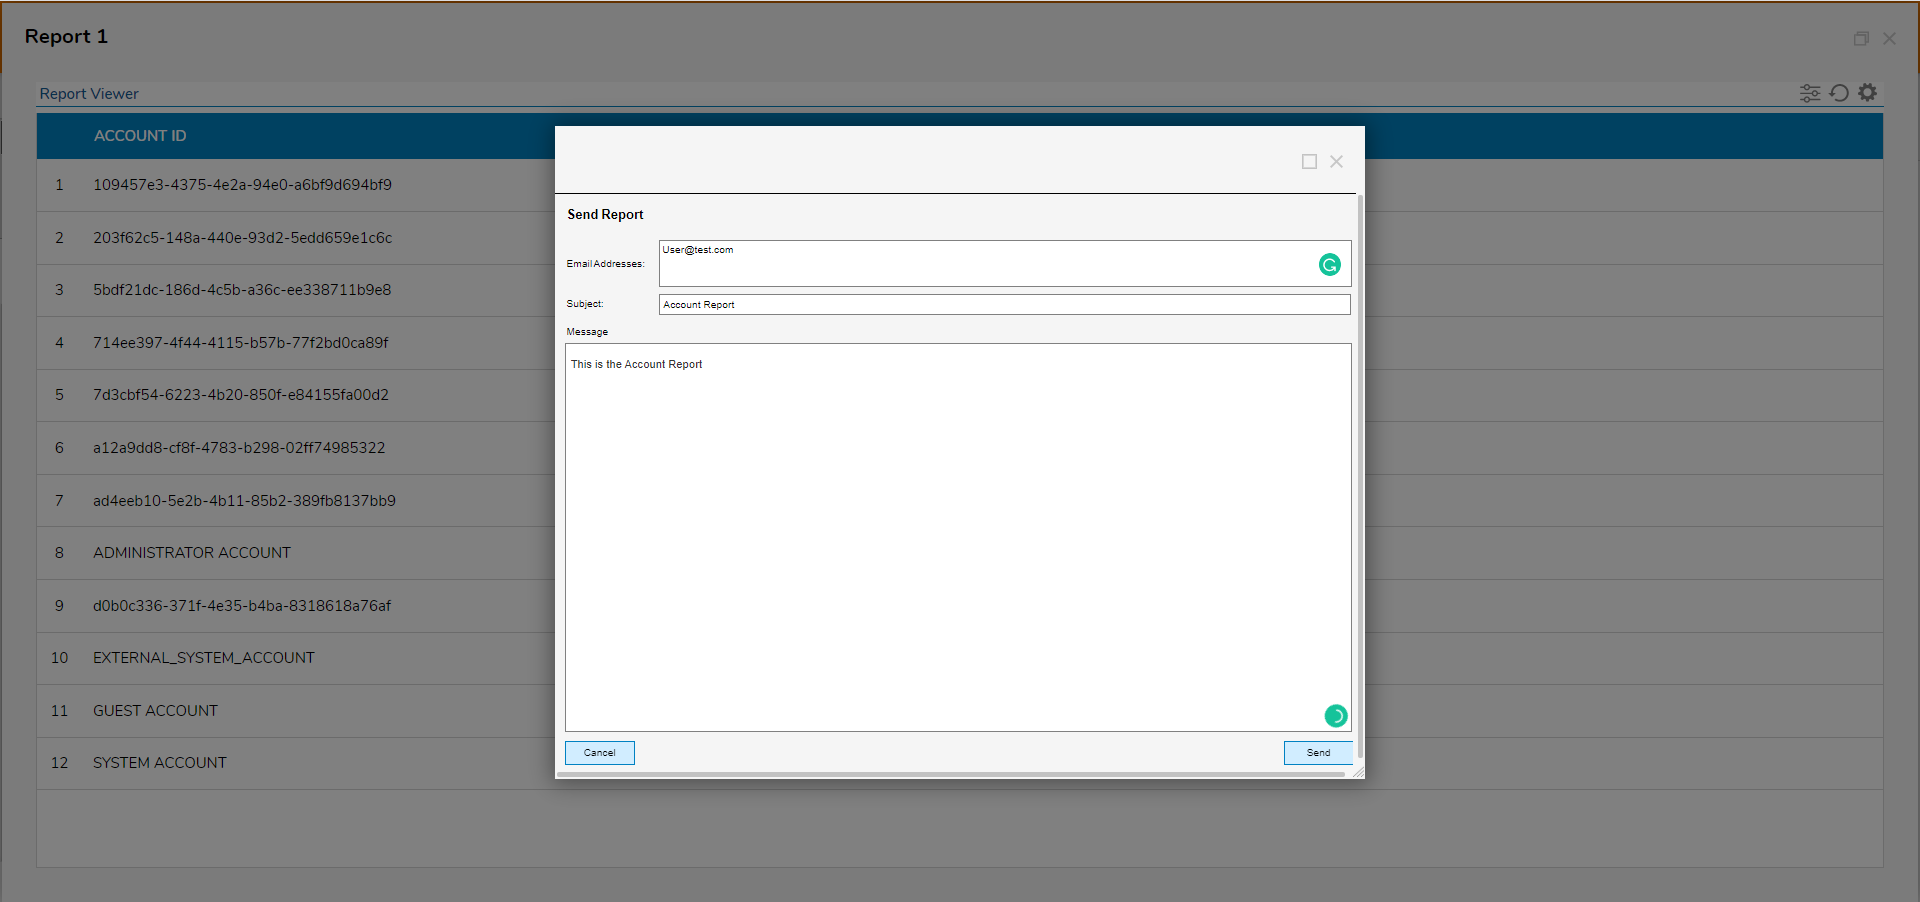
- Send Report Form shows. Fill out this Form and select Send. This Flow will send an Email with the Report attached as an Excel file.
- Extend Report Distribution options by creating a specific Flow. Navigate to System > Designers > Report Distribution Folder in the Portal. See the Email Distribution Flow that was just used.
- Any Flow that is created in this Folder will be presented as a Report Distribution type.
- Select Create Report Distribution Flow in the Global Action Panel.
.png)
- In the resulting window, Name the Flow and select CREATE to proceed to the Flow Designer.

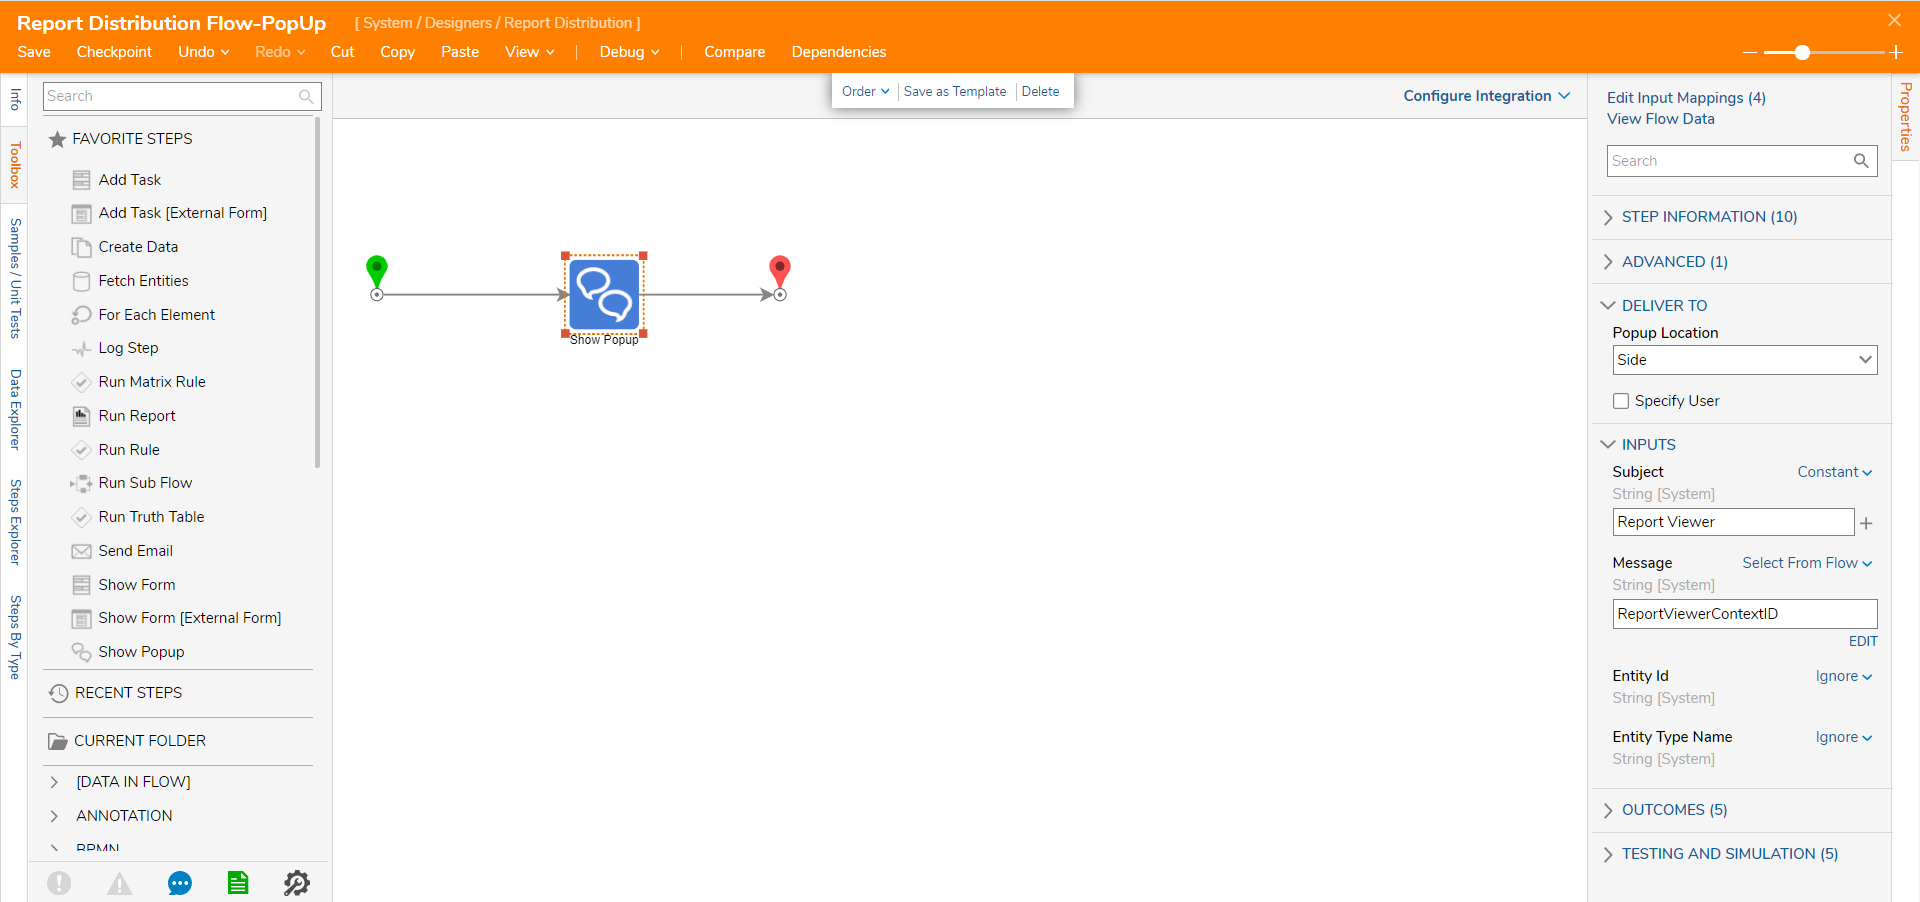
- In the Flow Designer, add a Show Popup step from the Favorite Steps category in the Toolbox.
- Under Inputs > Subject, select Constant for the mapping type and type "Report Viewer".
- Under Inputs > Message, Select Value of ReportViewerContextID. This value is presented in every Report Distribution type Flow and can get and manipulate Report data.
- Connect the Done outcome from the Show Popup step to the End step in the Flow. Save and close the Flow Designer.
- Return to the same report used earlier in this example and Run the Report.
- Select the gear icon to open the Report Actions, select the printer icon located in the upper right corner.
- The Download/Send Report dialog shows. Choose Report Distribution Flow-PopUp for the Distribution type. Select PROCEED.
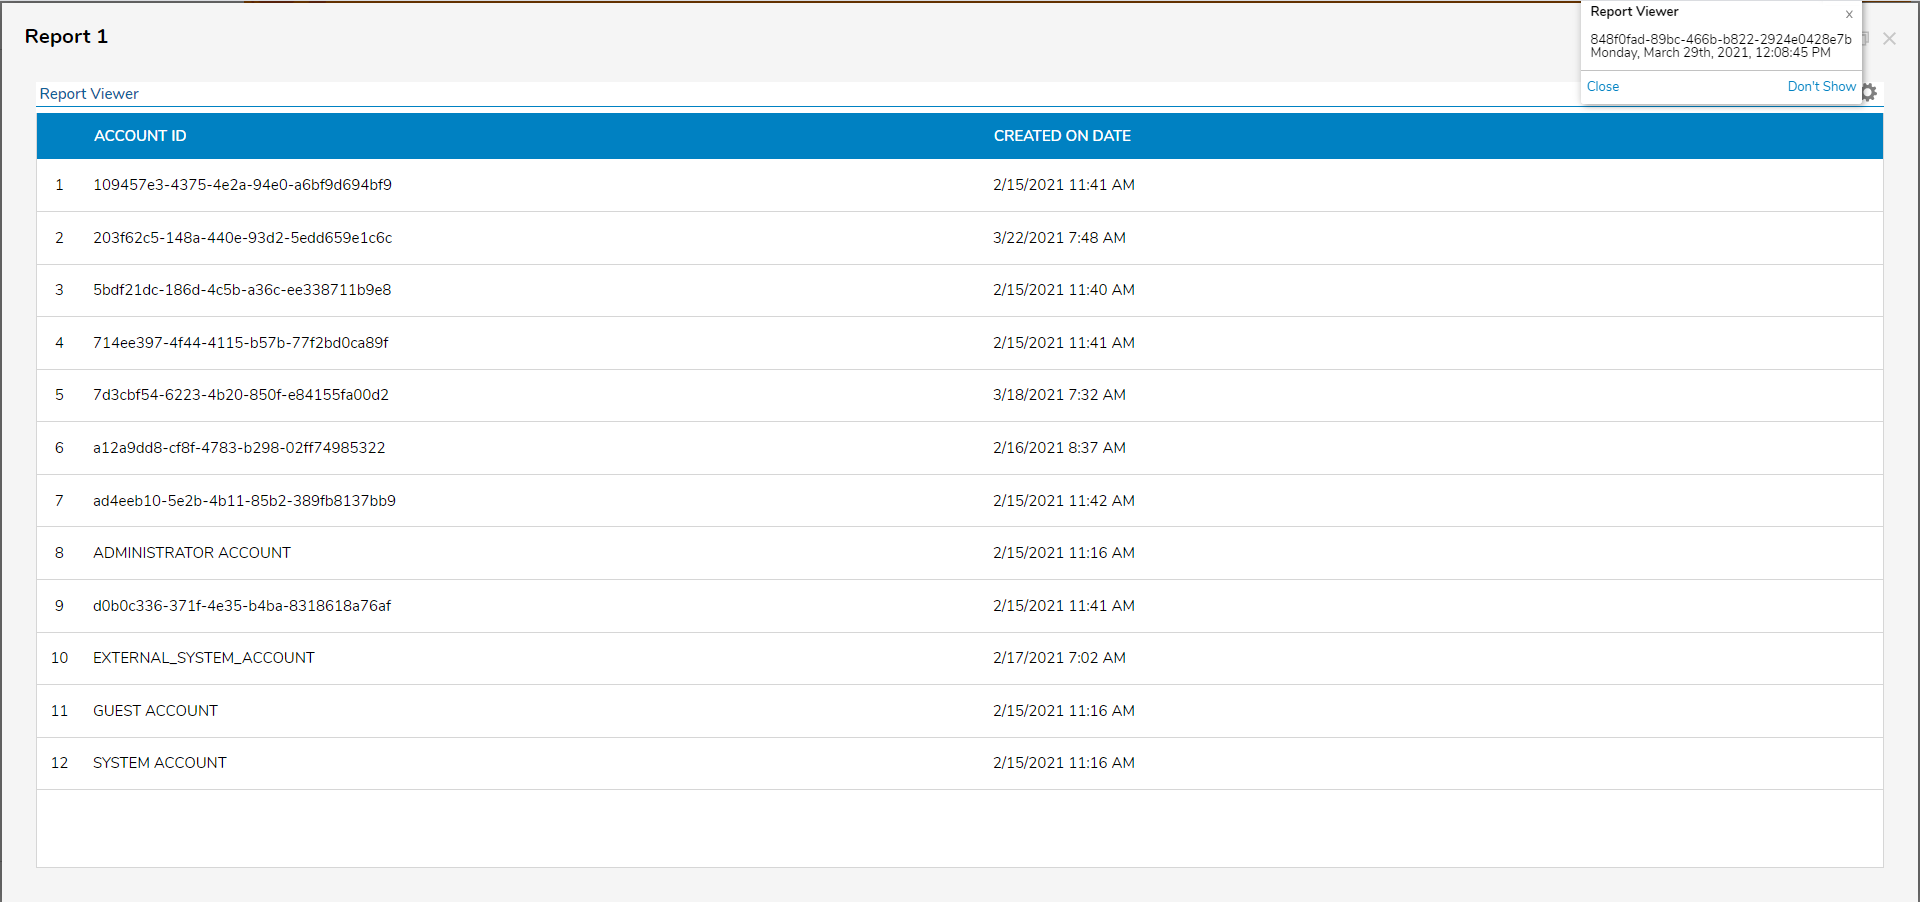
- The Report Distribution Flow shows the Pop Up with the Constant Subject and Report Viewer Context ID Value for this Report.


.png)


For further information on Reports, visit the Decisions Forum.
Was this article helpful?