Handling Email Response Replies
- 12 Mar 2024
- 3 Minutes to read
- Print
- DarkLight
Handling Email Response Replies
- Updated on 12 Mar 2024
- 3 Minutes to read
- Print
- DarkLight
Article Summary
Share feedback
Thanks for sharing your feedback!
Overview
Assigned Forms can process responses directly via Email through via user Email Response or hyperlink redirection. Doing so allows Assignments to be completed within the sent Email, without the need to navigate to the Decisions.
Configure Action Definitions
The following example demonstrates how to configure an Assigned Form to allow for completion via Email.
- Create or use an existing Flow.
- In this Flow, configure or add an existing assignment.
- Once the Assignment has been added, under EMAIL > Email Response Handling, ensure that Can Respond Via Email is enabled.
- Add Action Definitions to the Assignment either under Email > Email Response Handling > Email Responses in the Properties panel, or through Assignment Setup.
Providing Action Definitions for an Assignment will dictate the accepted response options a user can submit in an email. Below is an overview of each setting when adding an Action Definition.Email
Setting Description Can Respond Via Email Allows responses to be sent via email. Alternative Responses Configures inputs that will be used as acceptable responses for this task. Case Sensitive Determines if the responses must be case sensitive. Allow Files Determines if Files can be sent along with the response. Data
Setting Outcome Name The Outcome Name is used to set the name for the outcome path to the Assignment if a valid response is returned. Action Name The Action Name sets the action name on right clicking an Assignment to use its specified outcome. Allow Group Action If enabled, allows the action to be ran on multiple selected Assignments. Allow Single Action If enabled, allows the action to be ran as a right click action. Has Comment Option If enabled, allows comments to be added to an Assignment. User Dialog
Setting Dialog Title Sets the name for the "Mail to Link" response variable for the Assignment. Dialog Message The message that appears for the "Mail to Link" response variable. 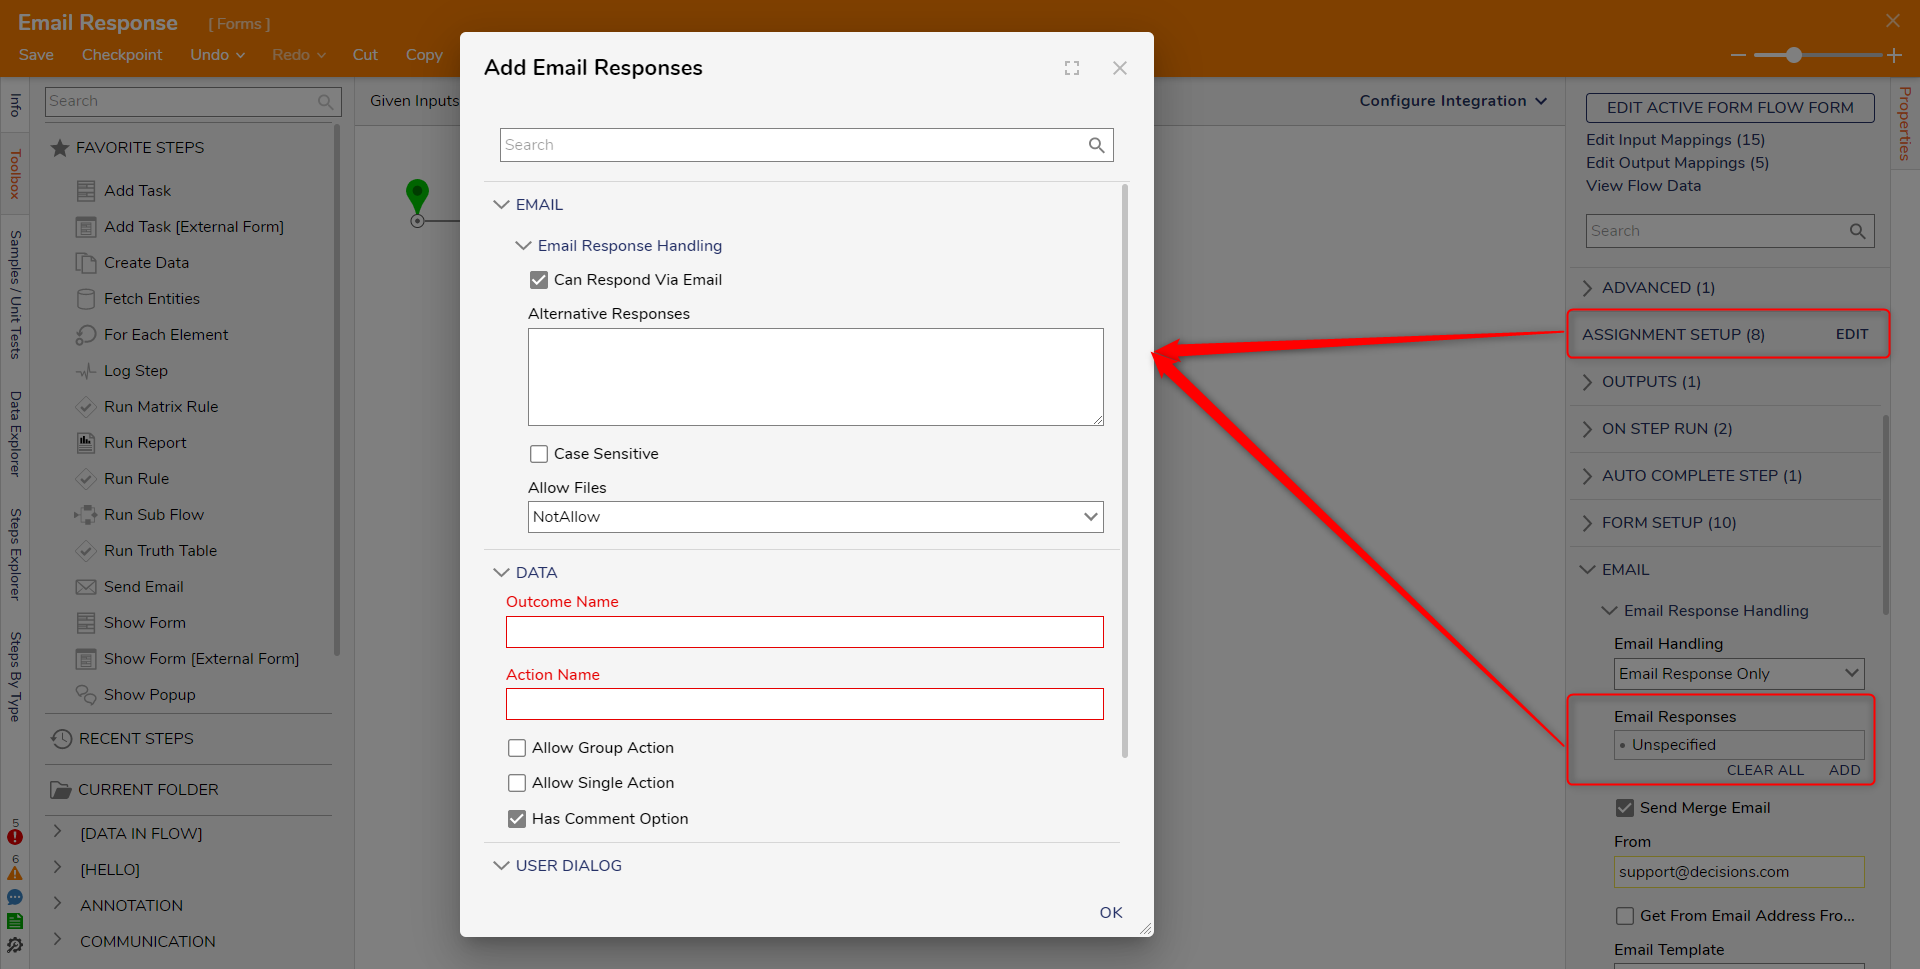
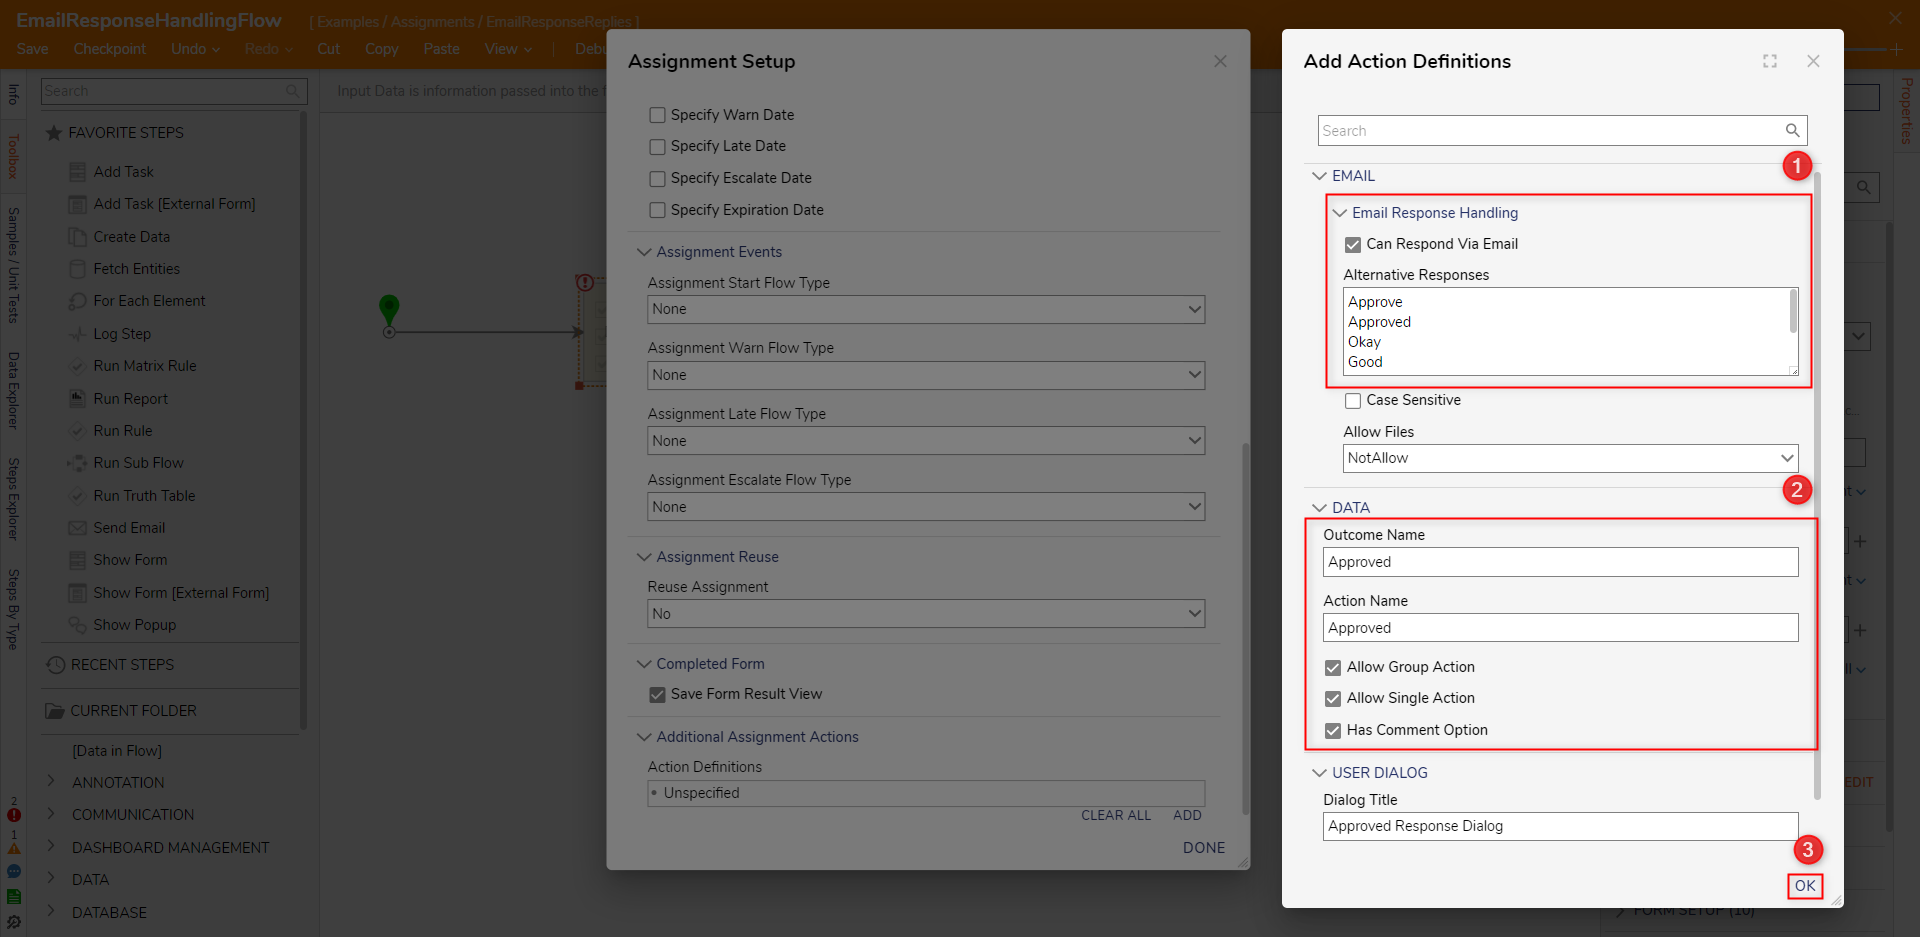
- Under Alternative Responses, provide the desired response options to indicate "Approval".
- Under DATA, provide the desired Outcome and Action Name values. Then, ensure that Allow Group Action, Allow Single Action, and Has Comment Option are enabled, and click OK.
- From the Assignment Setup window, click ADD once more and provide the desired settings for a "Denial" Action; ensure that Can Respond Via Email, Allow Group Action, Allow Single Action, and Has Comment Option are all enabled, then click OK.
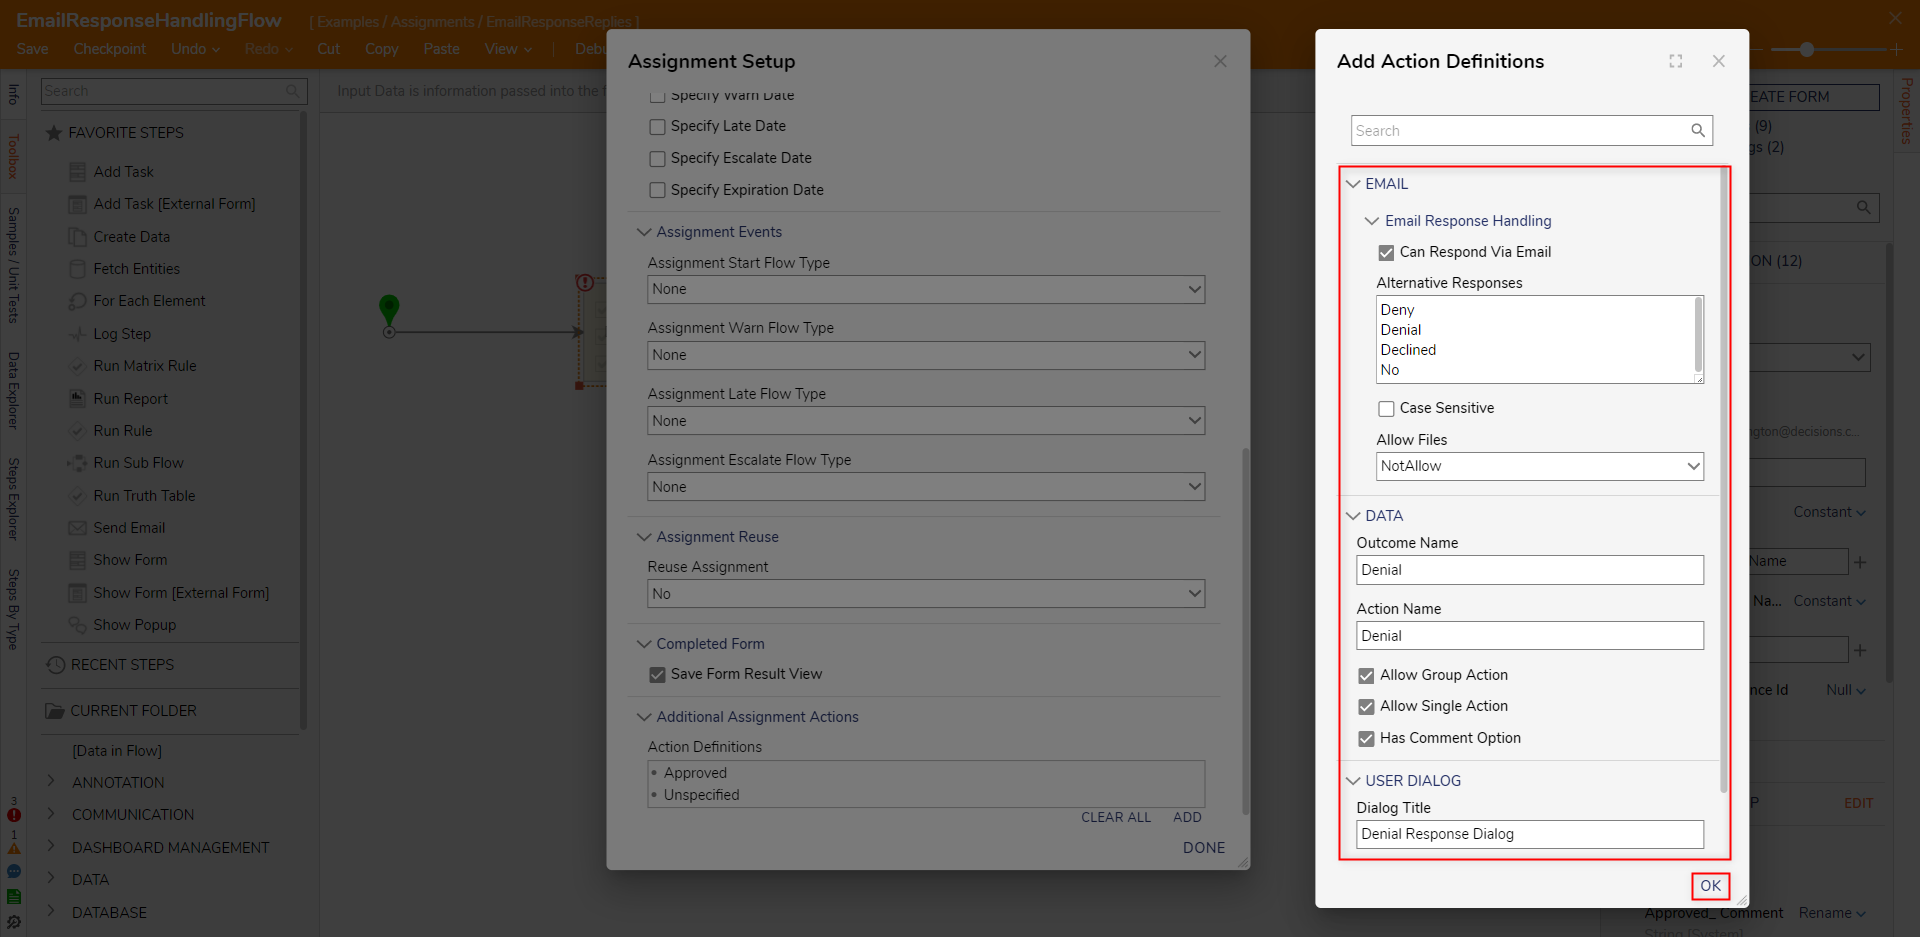
- Click DONE to save the Assignment Setup.


Configuring Email Handling
- Back in the Properties of the Assigned Form, under EMAIL > Email Response Handling. There are four options for Email Handling, listed below. For this example, select Email Response Only from the Email Handling dropdown.
Setting Description None This option will keep an email from being sent at all. Default This option will send emails in the default way that is set up in the platform. Email Response Only This option will send the full response the user configures within the Merge Text Editor. Links Only This option will send an email containing only the links the receiver will navigate to. 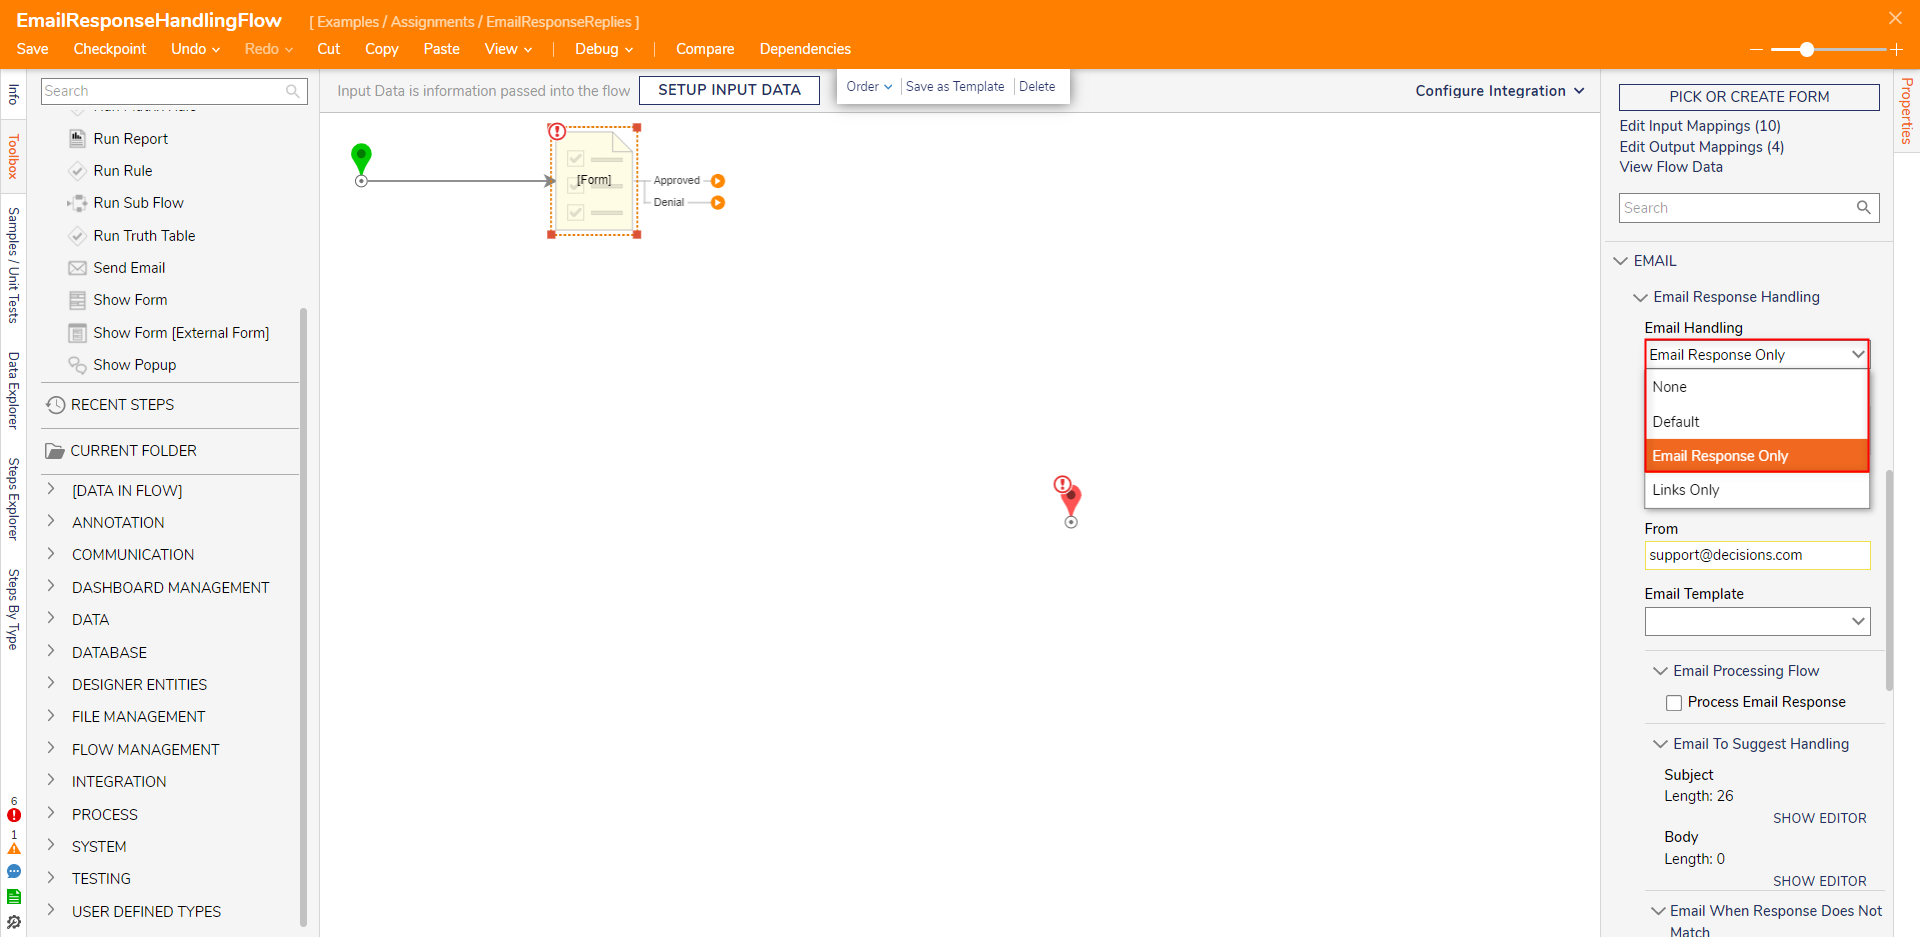
- Under Email To Suggest Handling > Body, select SHOW EDITOR. From the Merge Text Editor, configure the Body as demonstrated below, replacing each value found in the brackets with data added from the Folder Tree on the left. Then, click SAVE. Markup
To Approve this please click the link below:
[Mail to Link For Approved Response]


To Deny please click the link below:
[Mail to Link For Denial Response]

[InlineResponse]
[ResponseID]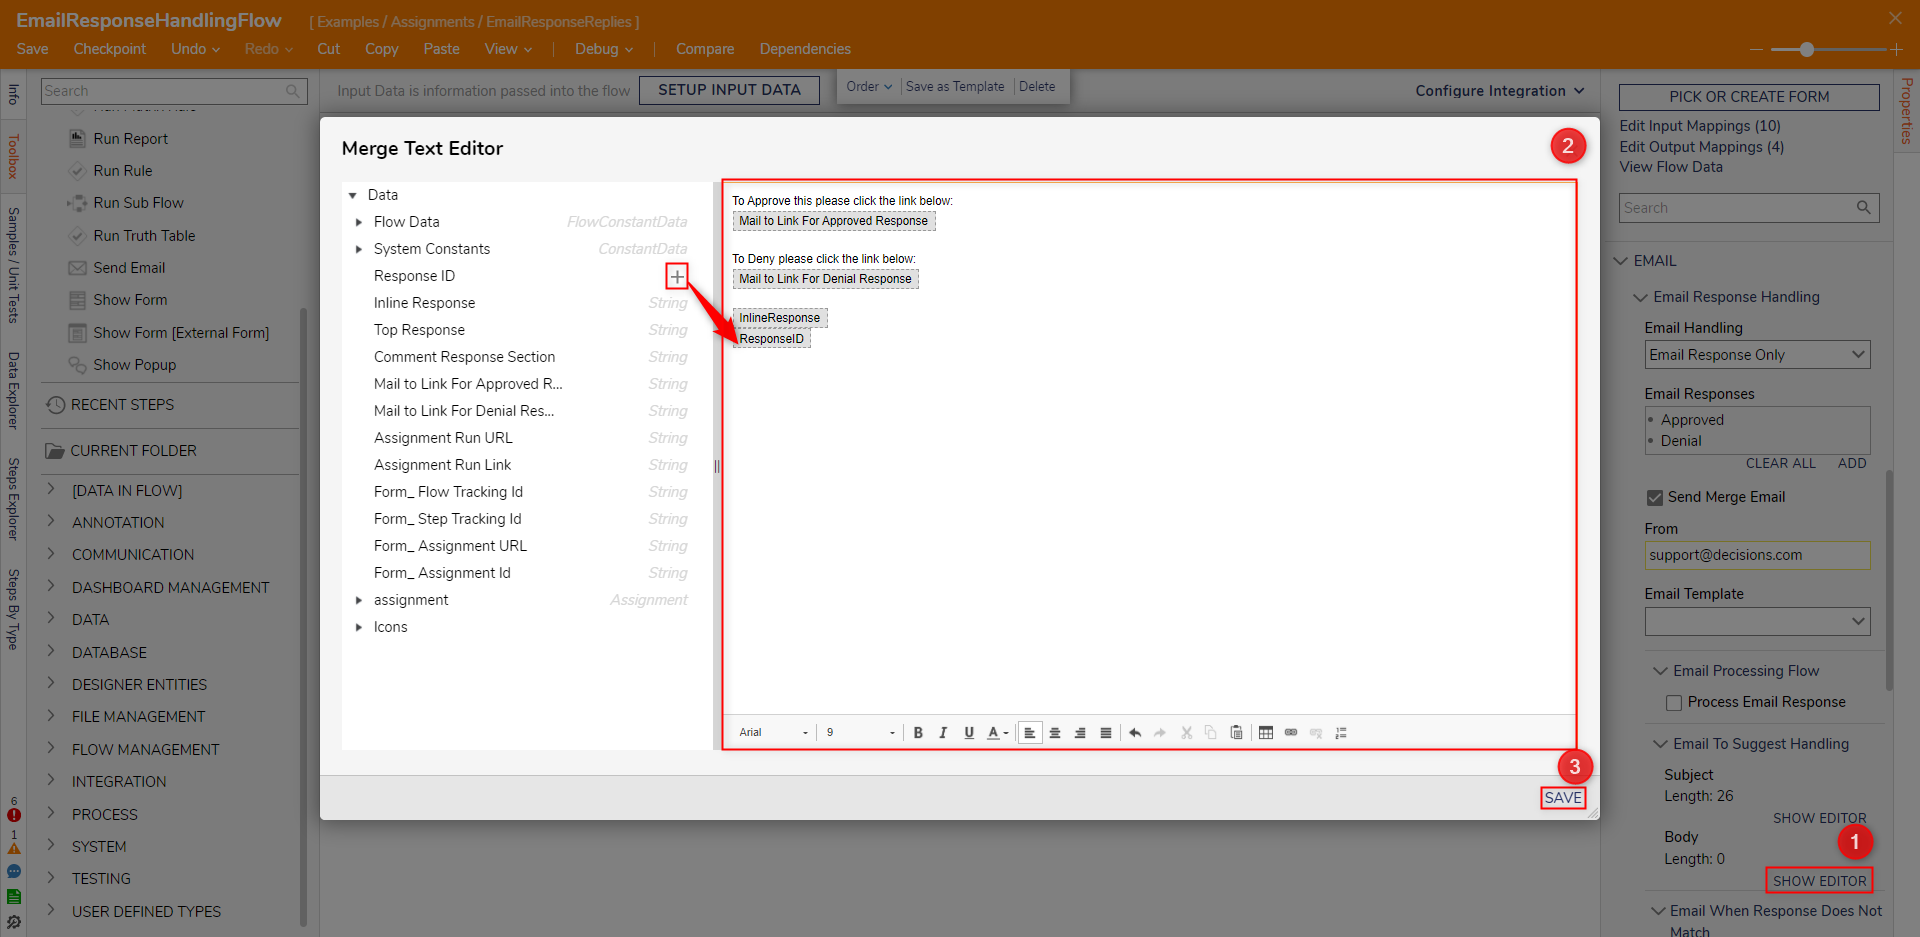
Back in the Properties tab of the Assigned Form, select Email When Response Does Not Match > Body. From the Merge Text Editor for the Does Not Match Body content, configure the Text as follows, then click SAVE.
Required IDThe ResponseID variable needs to be present for both the Email To Suggest Handling and Email When Response Does Not Match Body Text Editors. If this ID is left out, then the Assigned Form will throw an error.Please provide a valid response. [ResponseID]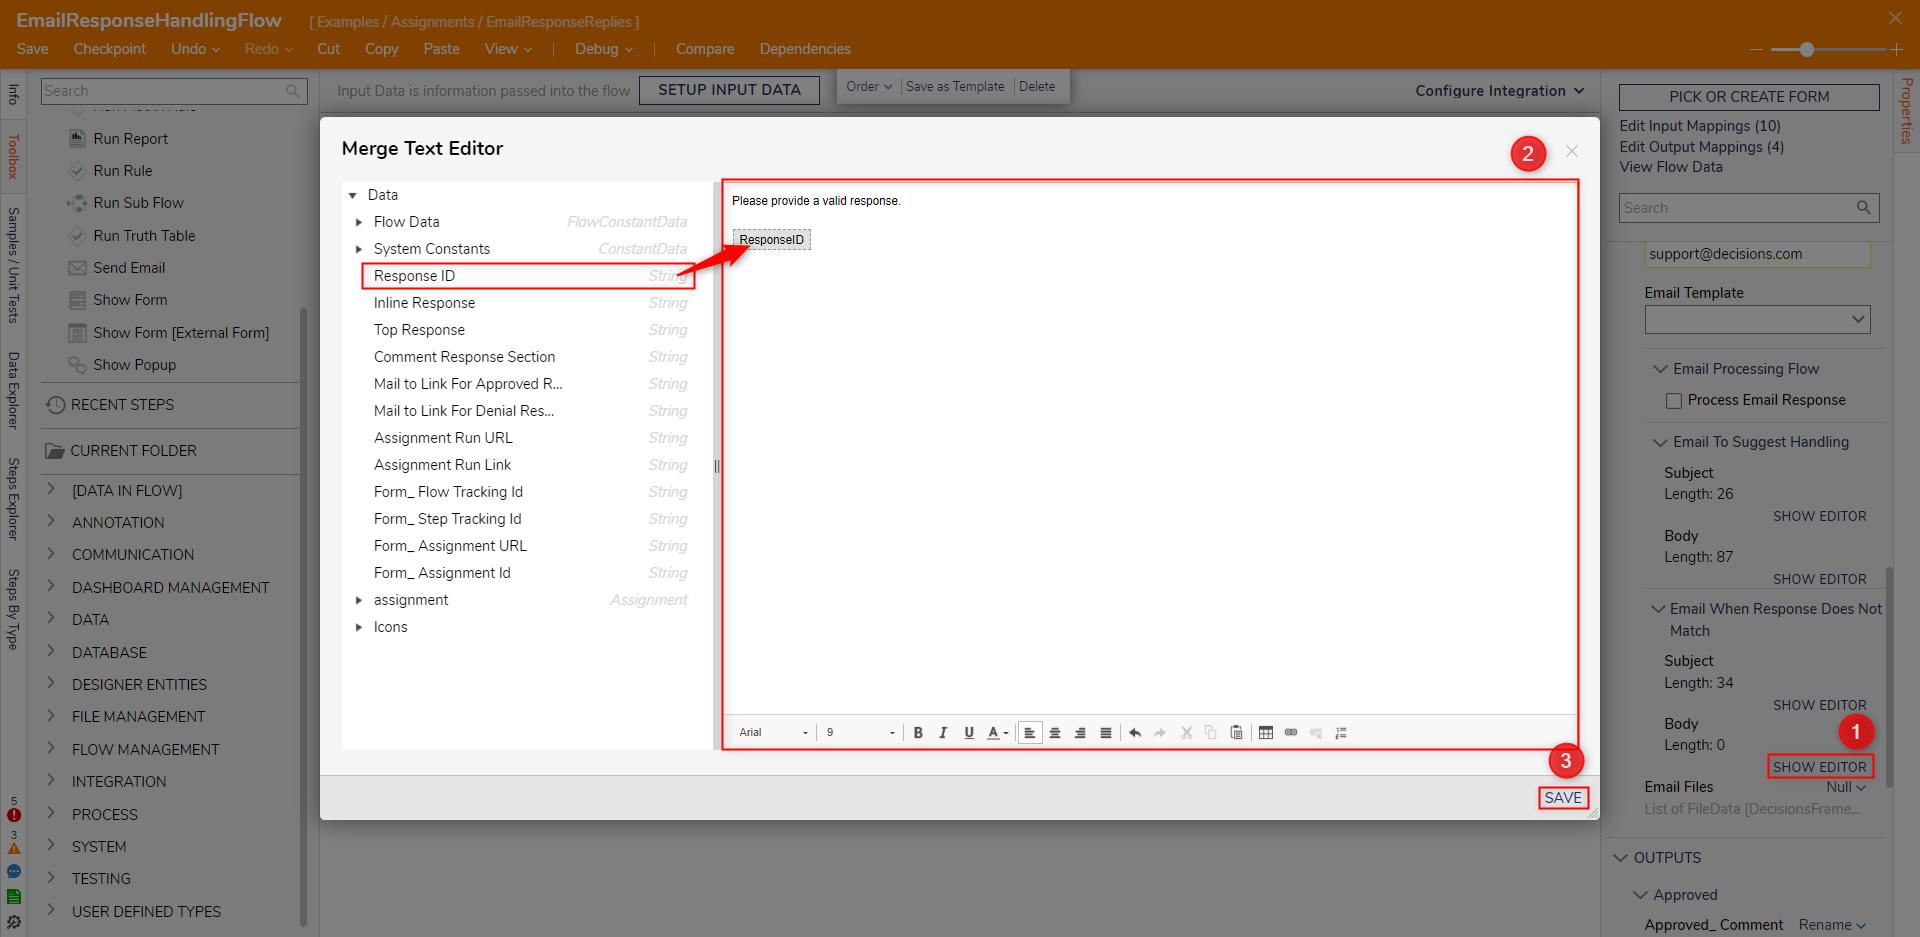
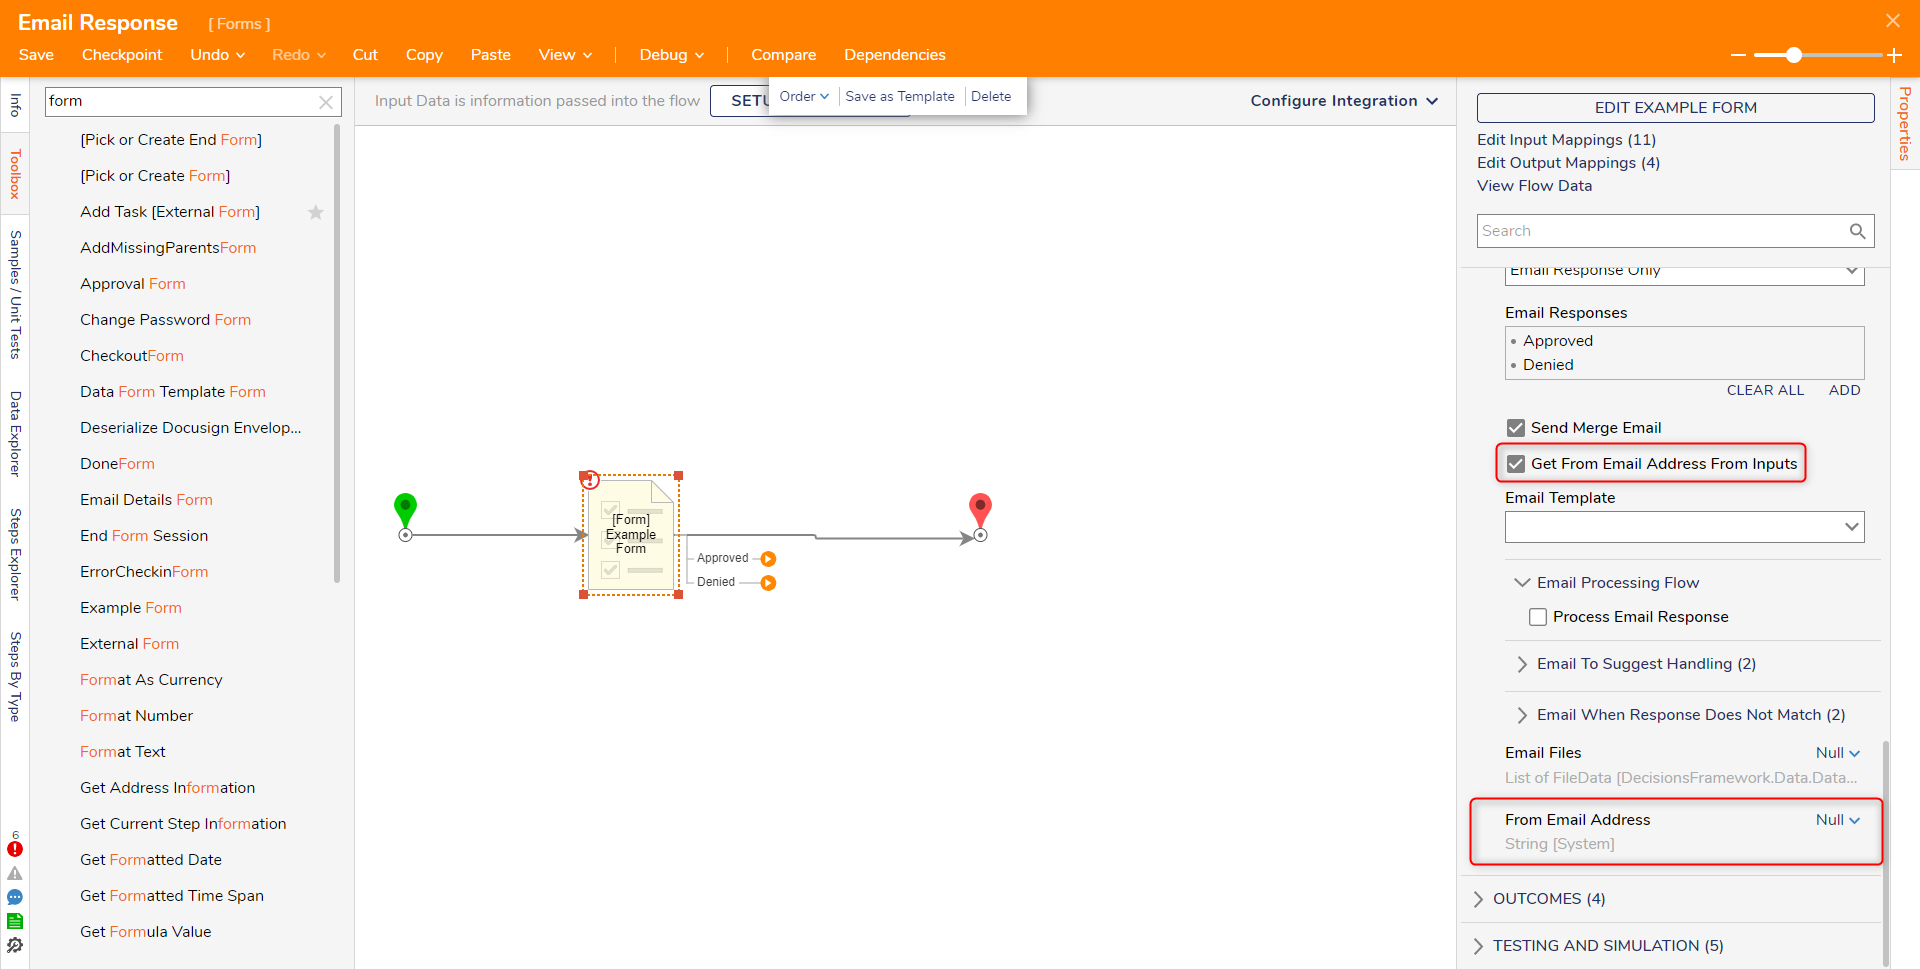
- Check Get From Email Address From Inputs and specify an email in the From Email Address field. This allows email addresses to be passed in as an input to the step, overriding the default sender address.
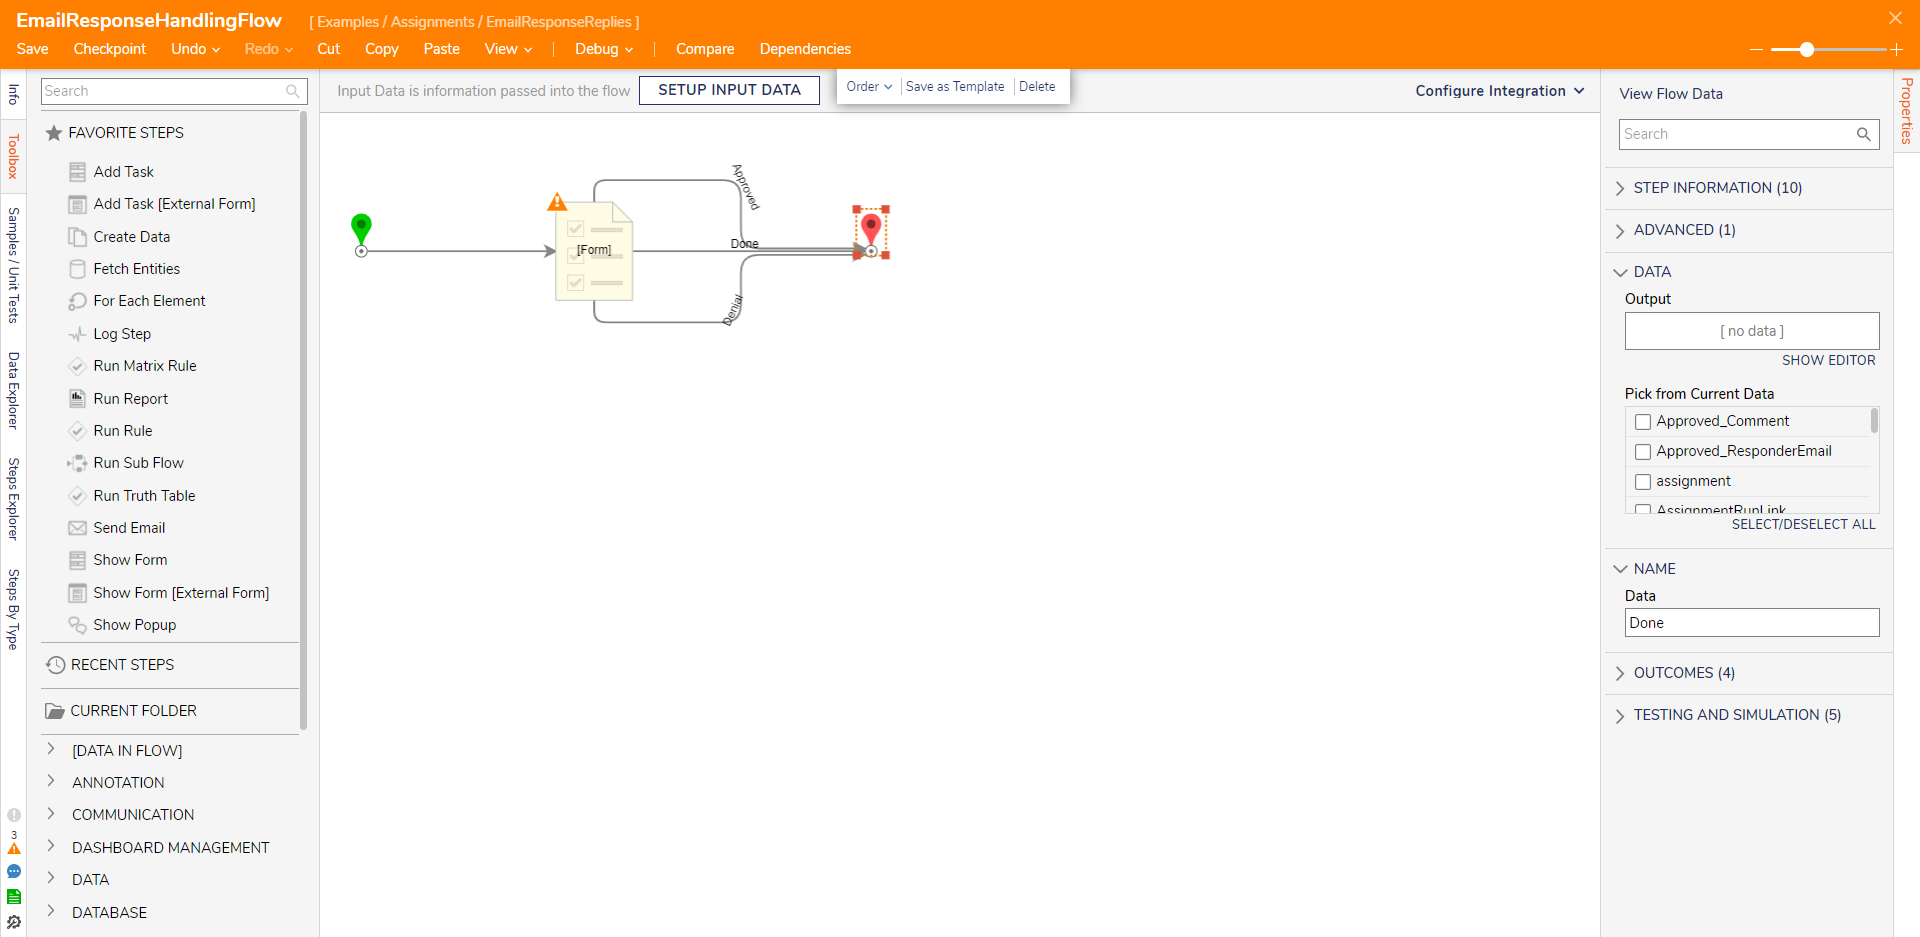
- Connect any available Outcome Paths to the End step. Then, save the Flow.


Process Email Response Flow
- After selecting an Email Handling selection for an Assignment, the Process Email Response checkbox appears within Properties > EMAIL > Email Response Handling > Email Processing Flow.
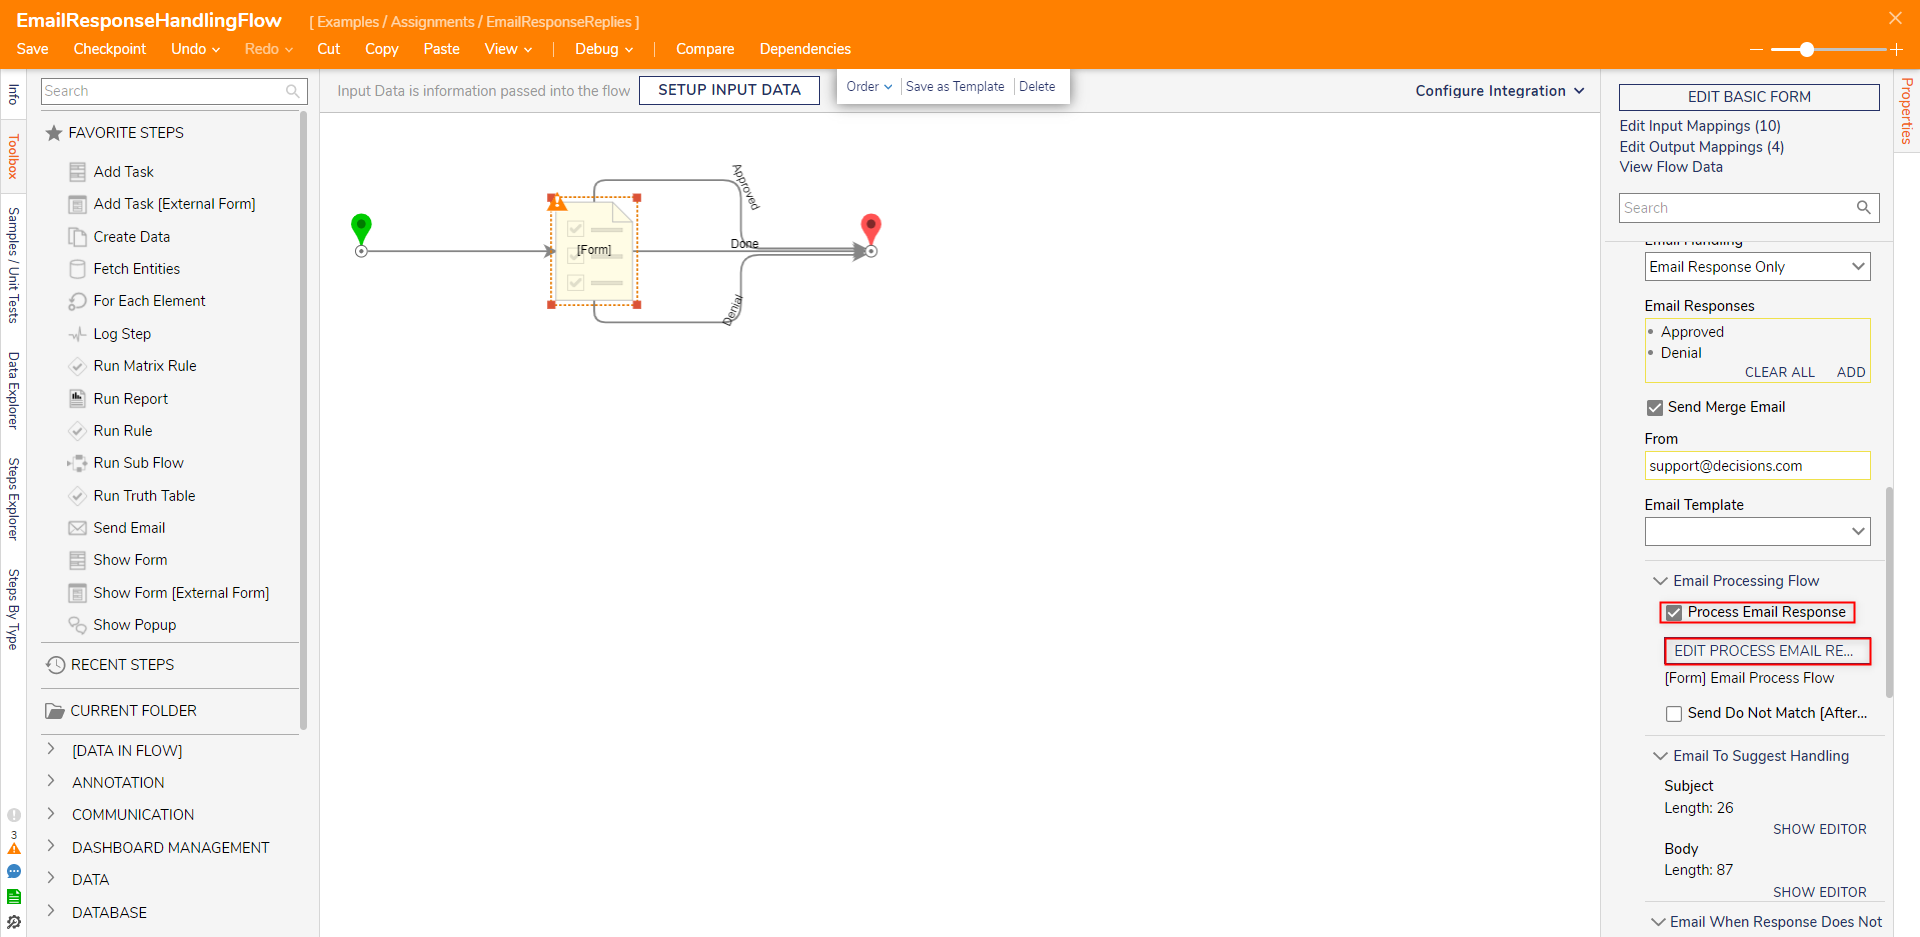
- After enabling the Property, select EDIT PROCESS EMAIL RESPONSE FLOW.
- This opens a Flow Designer. Administrators can define custom Email Handling for the Assignment instead of just completing the Assignment.
The custom Flow will run after its affiliated Scheduled Job runs; therefore, an Email Workflow Response Scheduled Job monitoring the Email Server is required for the Flow to run.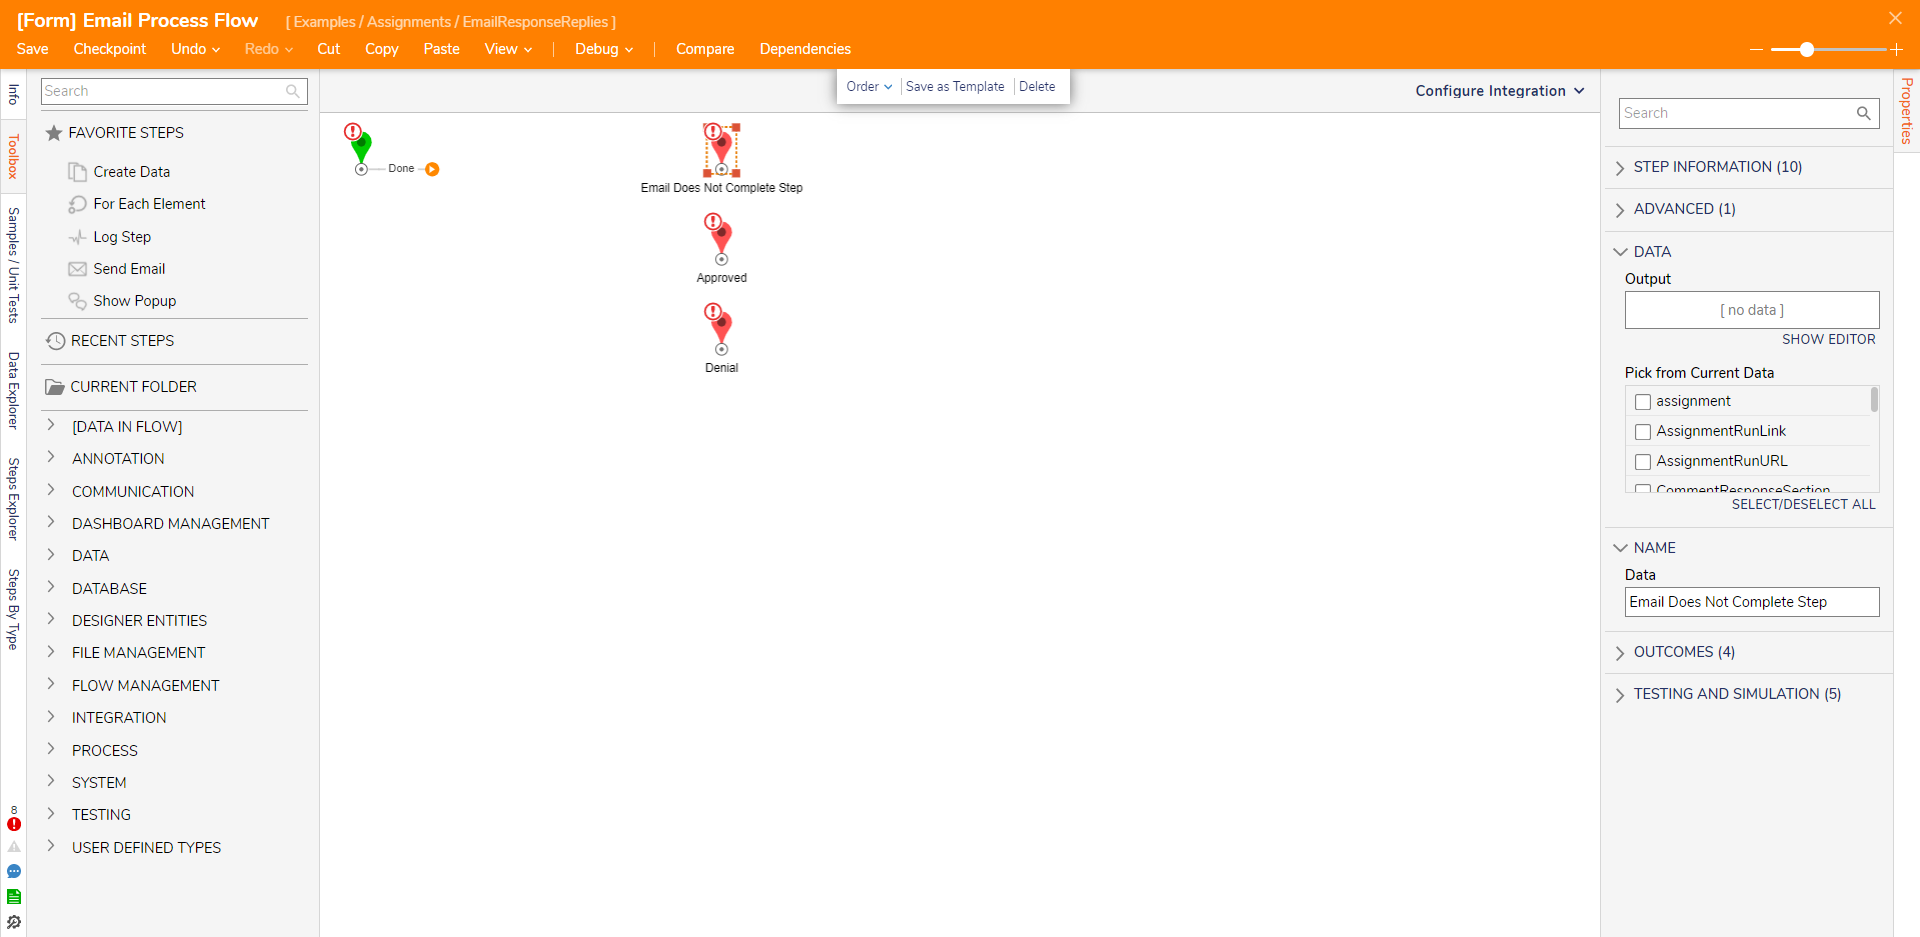


Debug
- Run or Debug the Flow.
- Navigate to the Assignee's Email Inbox and open the Emailed Form.
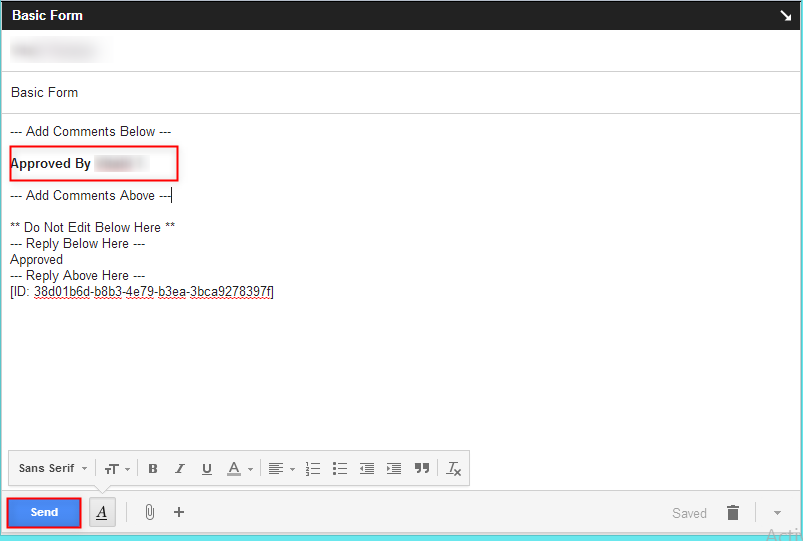
- From the Email, click either the Approval or Denial link.

- In the resulting Email Body, provide a Comment in the designated location. Then click Send.
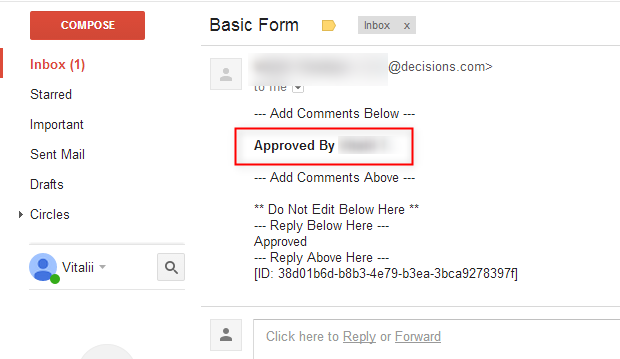
- Navigate to the Inbox of the Admin to verify that the Comments were properly received.


For further information on Forms, visit the Decisions Forum.
Was this article helpful?