The Process Stages feature allows designers to break down a process into clear, manageable stages. These stages are visually represented as a progress bar throughout the lifecycle of a case, giving participants full visibility into task progression and process completion.
This feature is especially useful for tracking multi-step processes, improving time management, and increasing user confidence in where they are within a workflow.
Key Benefits
Visual Clarity: Participants can immediately see the current stage and overall progress of a process.
Improved Task Management: Clear breakdowns help allocate time and resources efficiently.
Enhanced Productivity: Reduces the need for manual tracking or status clarification.
Use Cases
Displaying stage-based processes in HR onboarding, admissions, or approval chains.
Providing transparency to participants about what’s next in the workflow.
Supporting internal tracking in complex processes like procurement or multi-department reviews.
Configure Stages in the Modeler
Follow these steps to create stages for a process in the Process Modeler.
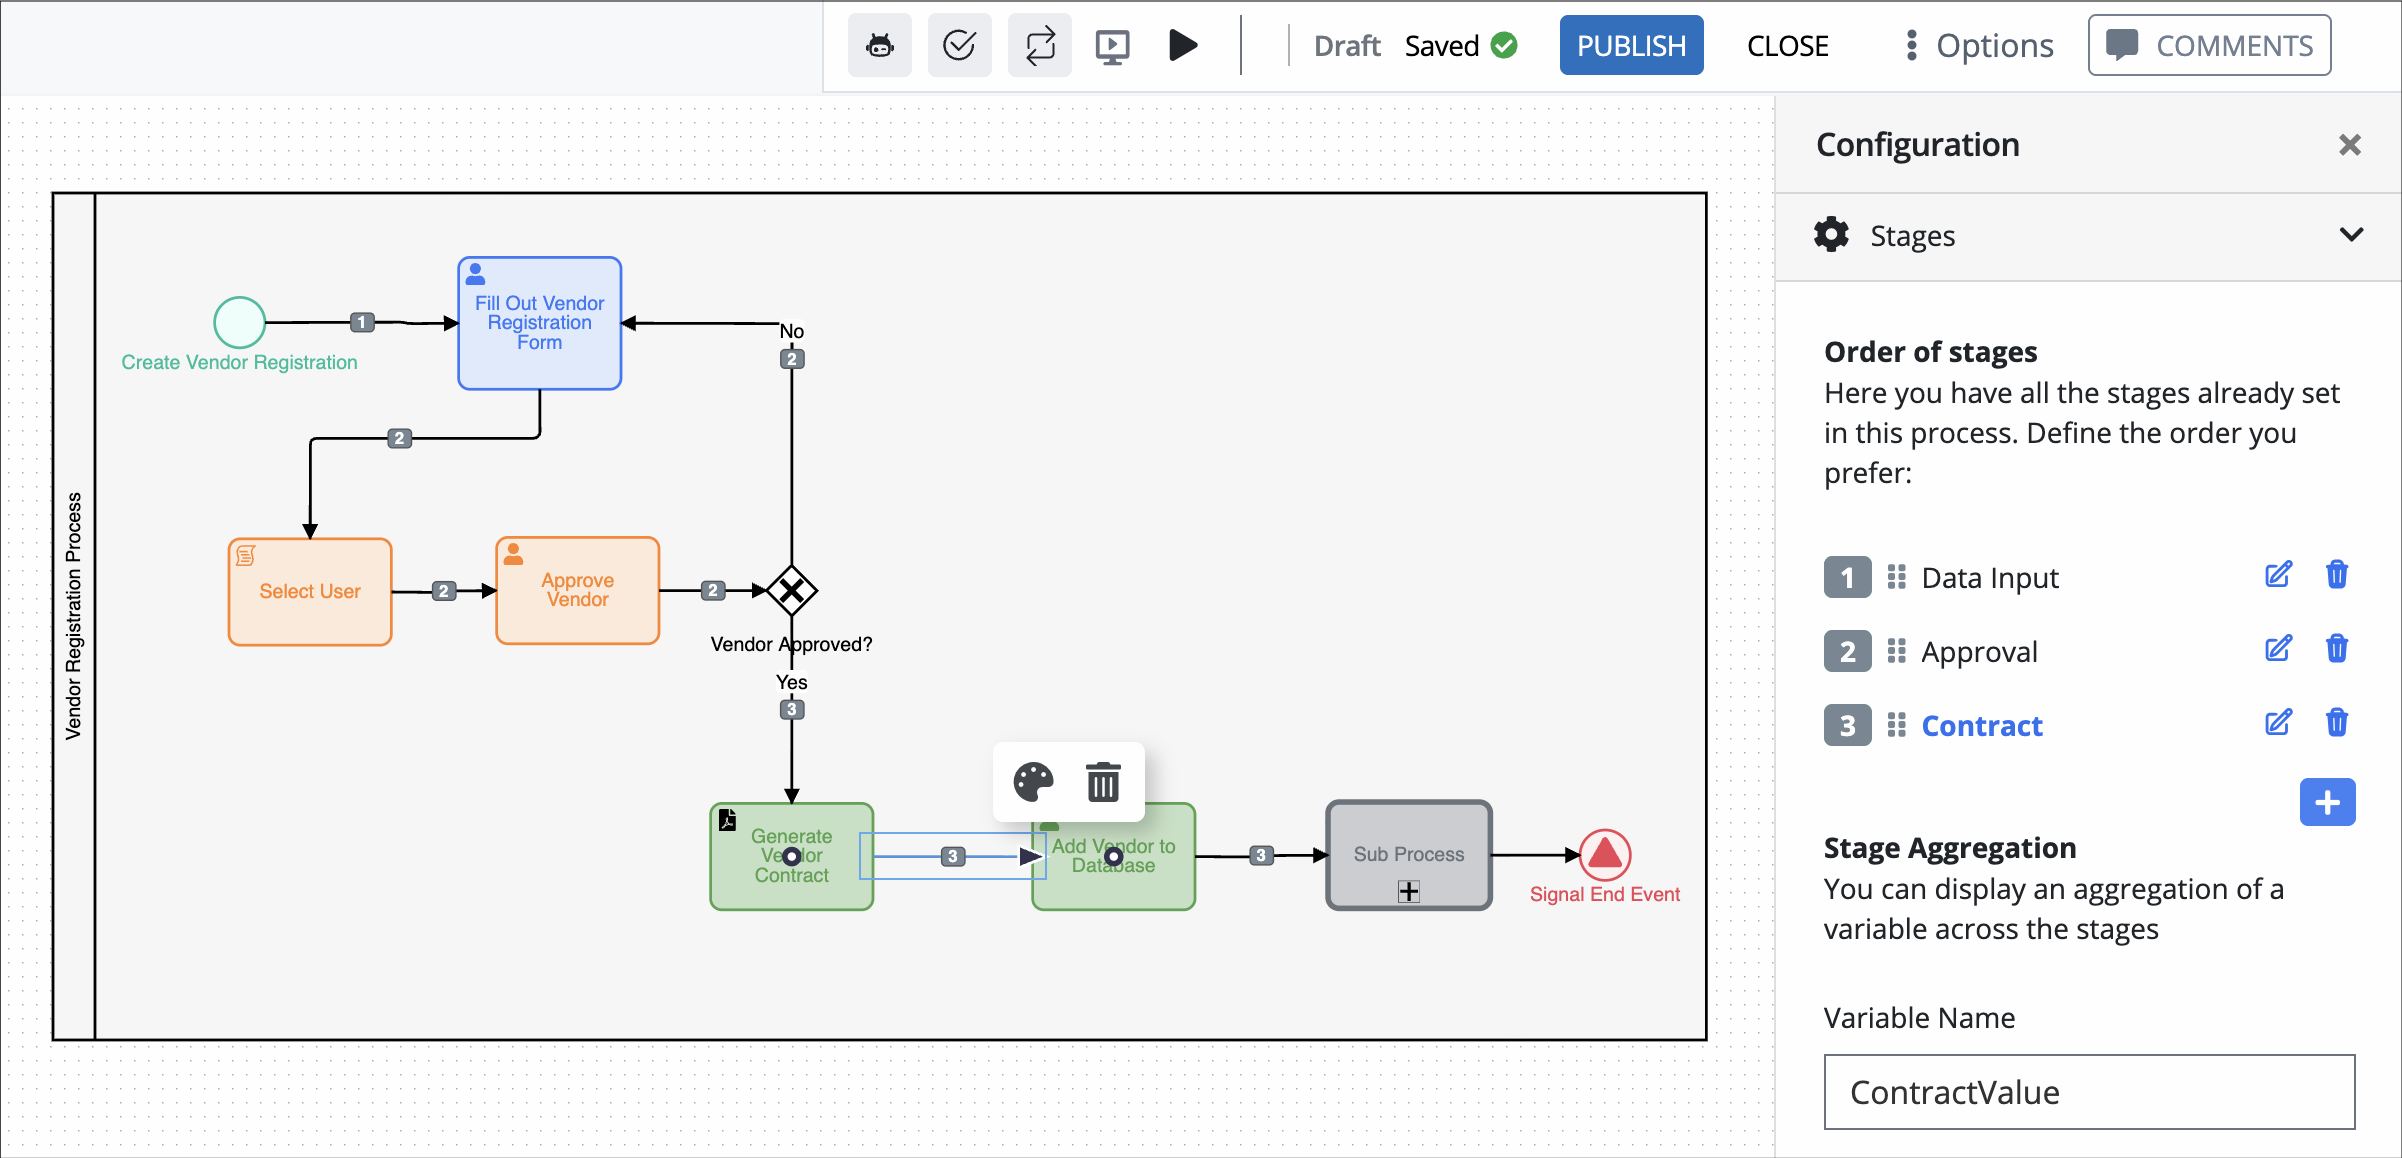
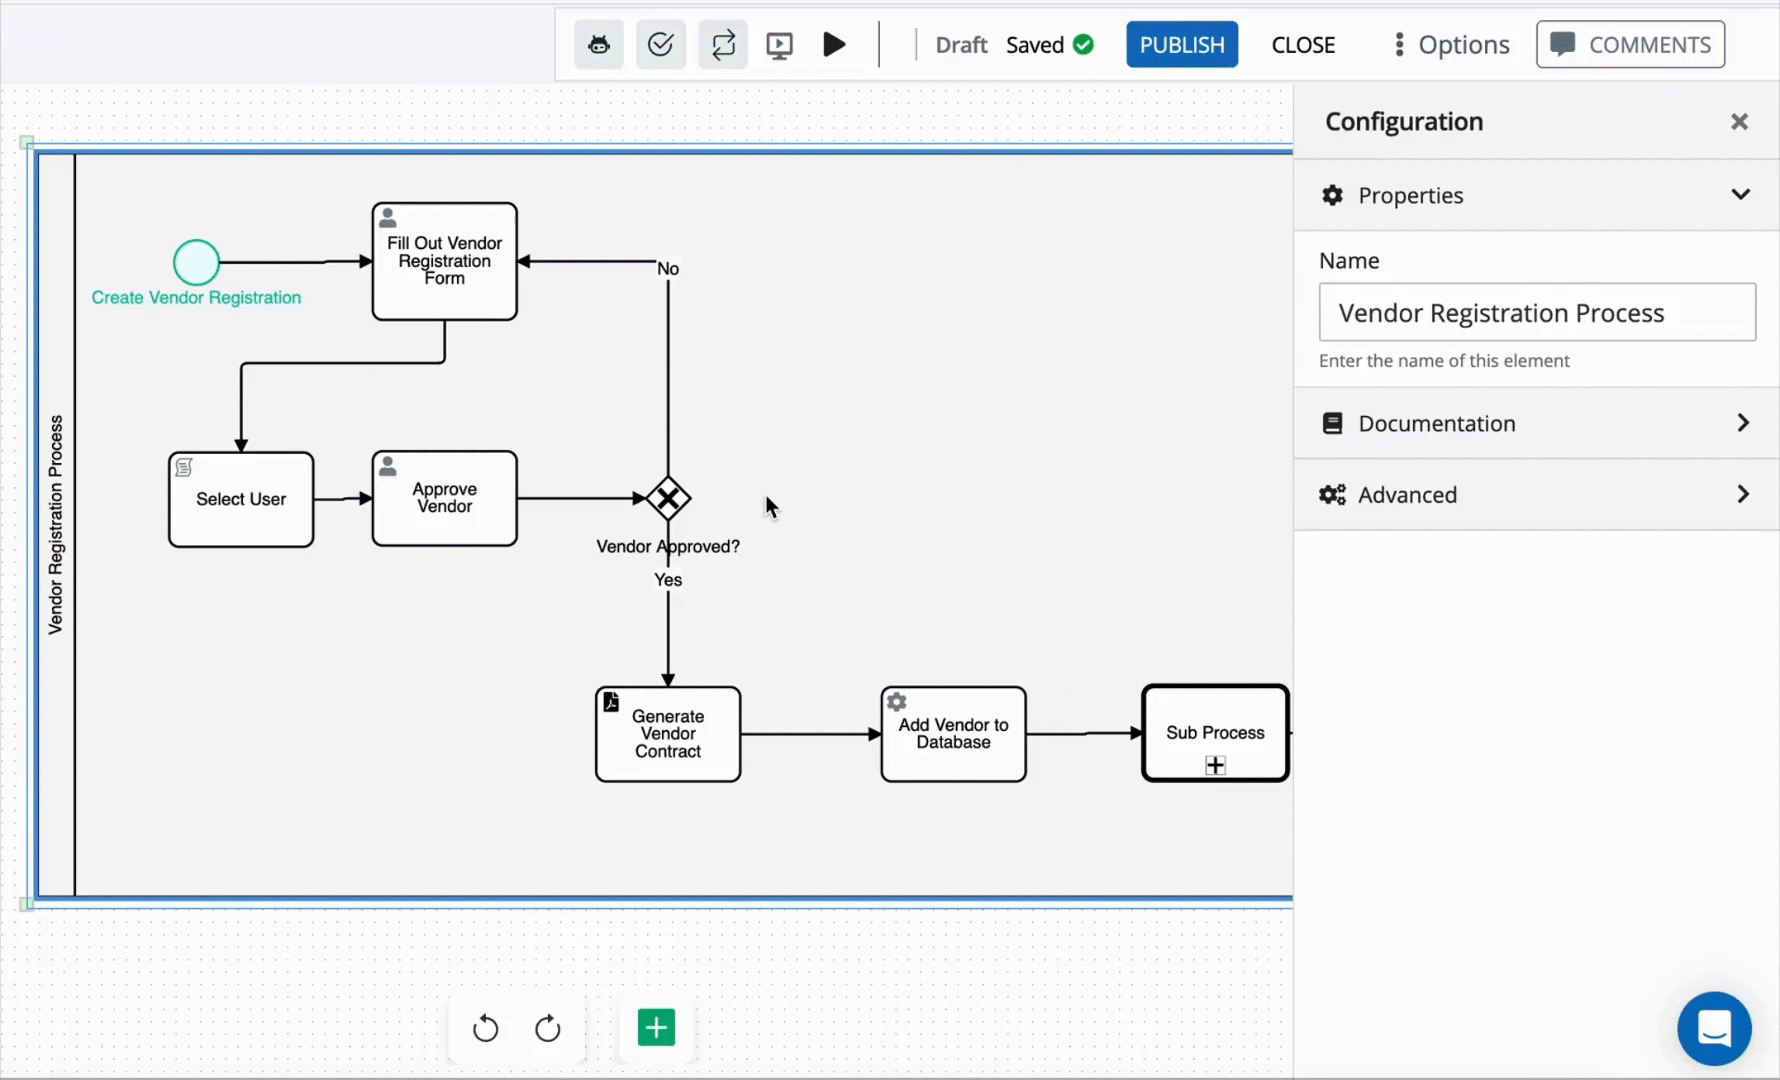
Click on a Sequence Flow object to select it.
Click the Show Configuration icon
 in the upper right of the Modeler.
Expand the Stages panel to view stages (if any) configured in the process.
Click
 to add a stage.
A default stage is created automatically if none are defined.
Only the parent process can hold and manage all configured stages.
Click the newly added stage name to add the selected sequence flow to this stage.
If a stage already exists, follow these steps to add a sequence flow to it.
Select the sequence flow object.
View the configuration menu, and expand the Stages panel.
Click on the stage name to add the sequence to it.
The name of the stage changes to blue to indicate that the sequence flow has been successfully added.
The sequence flow in the process also changes to reflect the stage number.
To remove a sequence flow from a stage, select the sequence flow and double-click the stage name from the Stages panel.
Guidelines for Process Stages
Following these guidelines helps ensure that users see a reliable and meaningful representation of progress throughout the lifecycle of a case:
Assign all sequence flows to a stage
If any sequence flows are left unassigned, the progress bar in the case list may not behave as expected, leading to gaps in stage tracking during case execution.Group sequence flows logically and consecutively within each stage
A stage should represent a continuous part of the process, with tasks and flows that occur together in sequence.
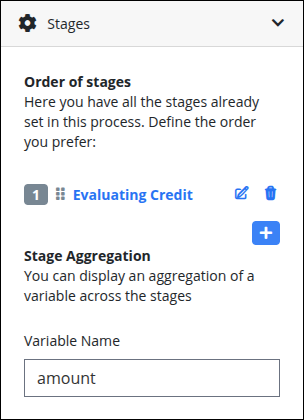
Stage Aggregation
The Stage Aggregation feature allows you to track and display the aggregated value of a process variable, such as a running total or sum, across all stages in a process. This is useful for monitoring key metrics (e.g., total amounts, costs, or time) as a case progresses through different stages.
For example, if your process collects amounts at various points (e.g., item costs, invoice totals), you can use this feature to display the cumulative value of the amount variable across all stages.
Configure Stage Aggregation
Follow these steps to configure variable aggregation across stages:
View the Stages panel for a sequence flow.
Under the Stage Aggregation section, locate the Variable Name field.
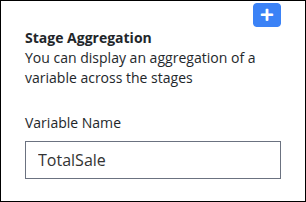
Enter the name of the process variable you want to aggregate. For example, type
TotalSaleto sum the values of theTotalSalevariable as the process moves through each stage.Variable names are case-sensitive and must match exactly as defined in your process.
An aggregated value of the variable will now be available during case execution.
Behavior During Case Execution
As the case moves through stages, ProcessMaker automatically calculates and updates the total value of the specified variable based on its presence and updates within each stage.
The aggregated value may be displayed in reports, dashboards, or custom UI components depending on your configuration.
View Stages in the Case List
When a process has stages configured, participants can easily track its progress through visual indicators in the Case list.
A Progress column displays a progress bar that reflects the number of completed stages relative to the total number of stages in the process.
A Stage column displays the name of the currently active stage.
These visual indicators improve transparency and help participants and administrators effectively monitor the flow of work.
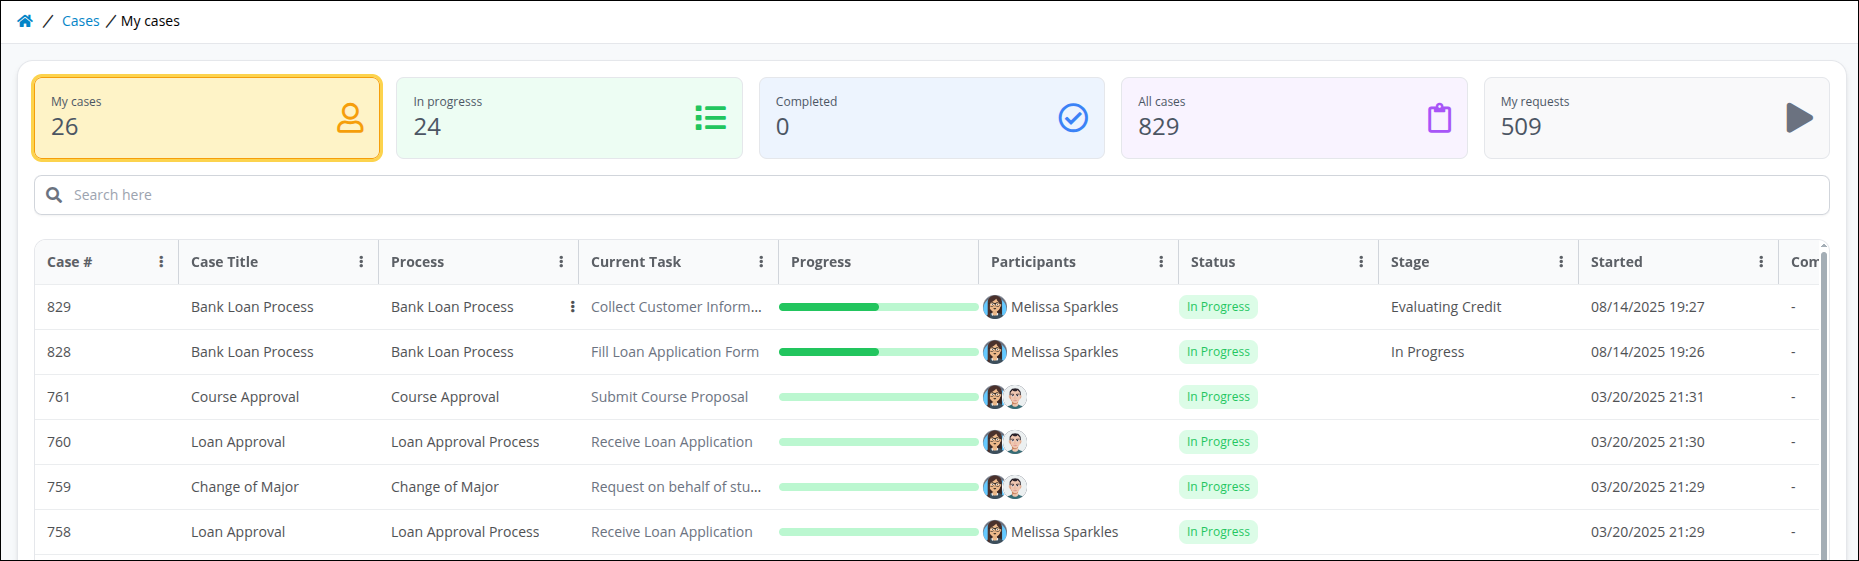
For processes with no defined stages:
The Progress column shows a halfway bar for in-progress cases and a full bar for completed cases.
The Stage column displays either In Progress or Completed, depending on the case status.
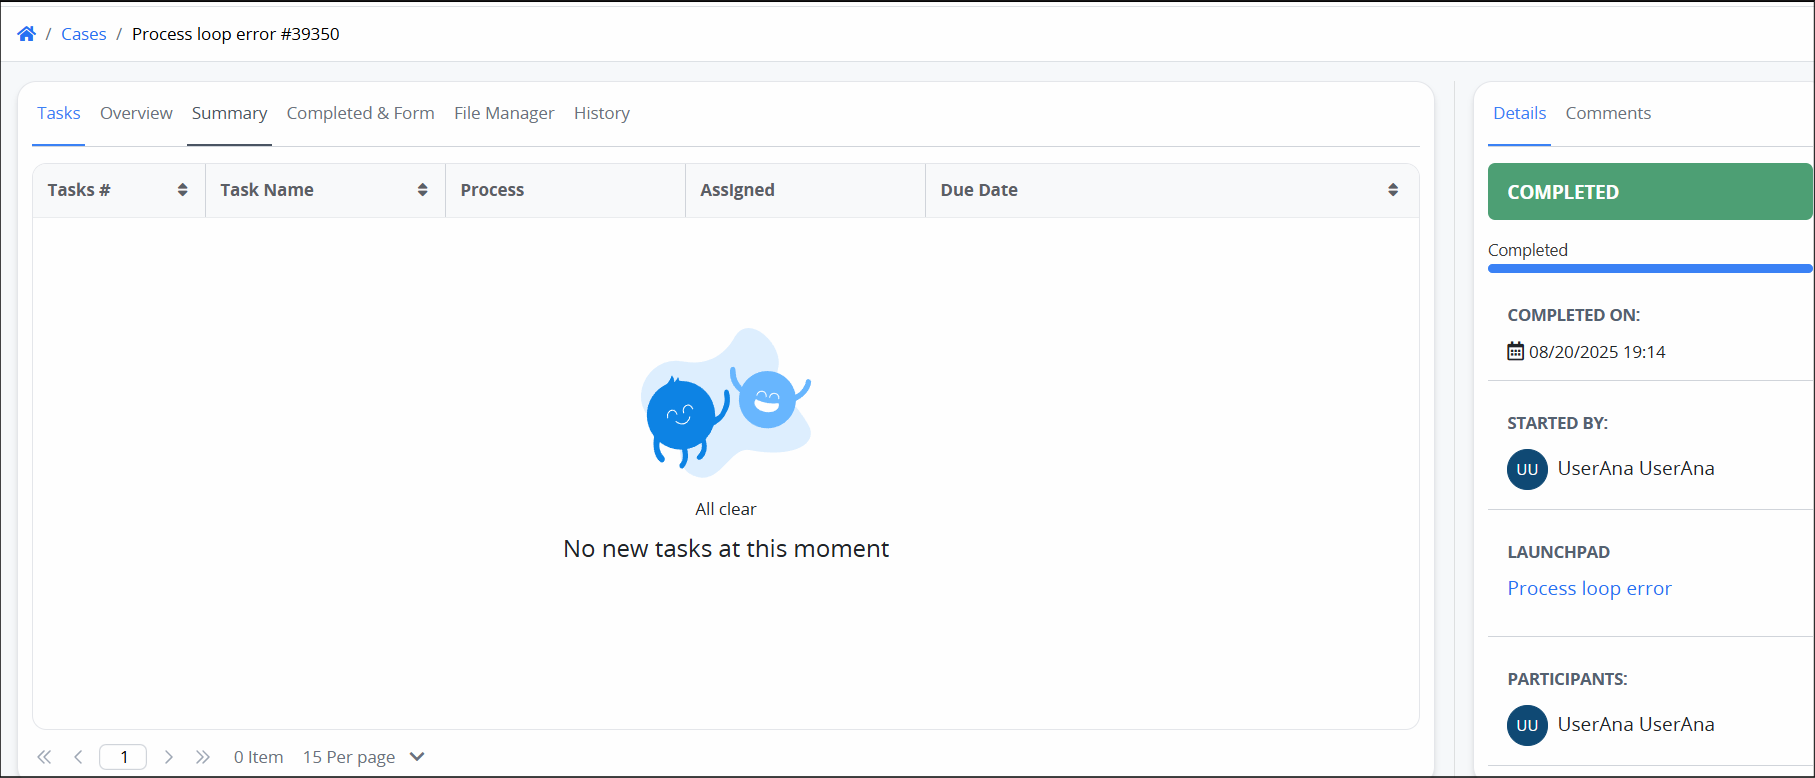
View Progress Bar in a Case
When working on a case, the case progress bar is shown in the Case details, giving real-time insight into process advancement.
Access Stages from Process Variables
Information about stages is also accessible from a Task’s JSON data model. Inside the Task > Data Tab, three new variables are available:
progress– shows the current progress percentagelast_stage_id– the ID of the current stagelast_stage_name– the name of the current stage
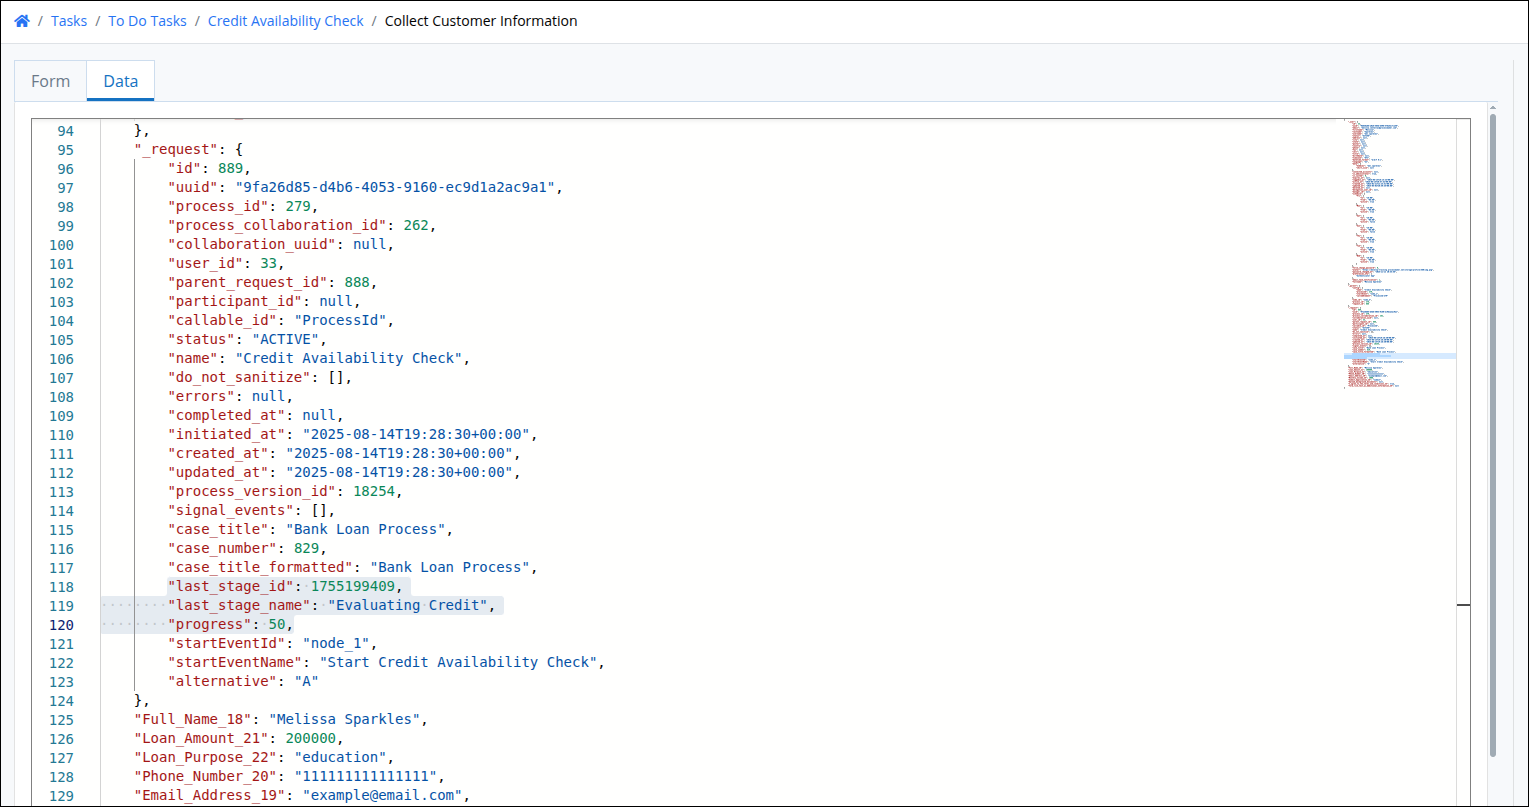
These can be used for creating conditional logic, reporting, or integration with other features like notifications or external dashboards.