Overview
The Flow Execution Extension Data Structure is primarily used to store data that goes through states in chronological order. This Data Structure uses Process Folders to track states, Assignments, and store files within them. These Process Folders will contain the data that will be created when a user runs a Flow that creates a record for this Data Structure. Process Folders are most commonly stored in Decisions within a Normal Folder, making them accessible in the Decisions Portal. The following article will demonstrate how to use the Create, Update, and Delete steps in a Flow using a Flow Execution Extension Data Structure.
Example
In this tutorial, a Flow Execution Extension was created with the following fields:
| FlowPerson | |
| Firstname | String |
| Lastname | String |
| DOB | Date time |
Flow Execution Extensions store data in Decisions, however, users will have to create a Normal Folder or Parent Folder to store the process data, as mentioned above. In this example, a Normal Folder [Flow Person Process Folder] was created.
Create
- To begin, in a Designer Folder, select CREATE FLOW from the Global Action Bar.
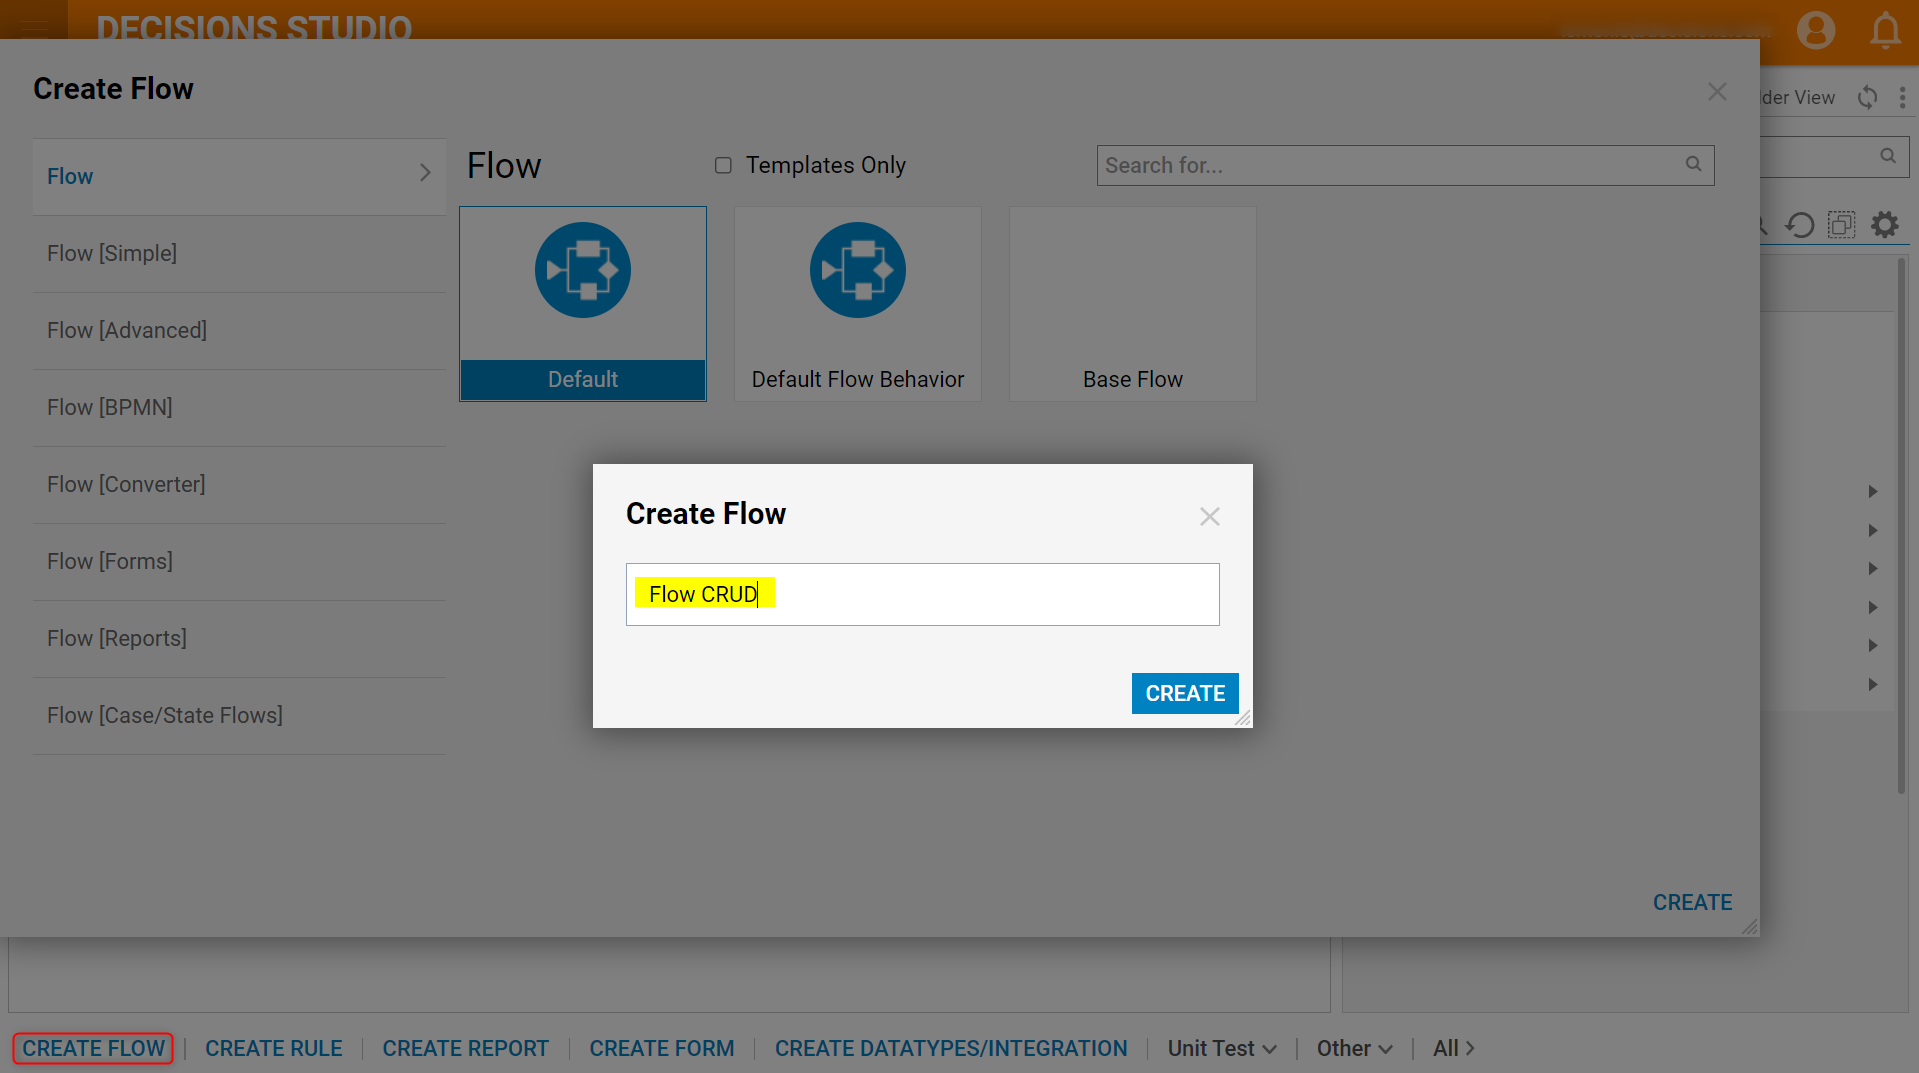
- In the resulting Create Flow dialog, select and name the default Flow [Flow CRUD].
- Click CREATE to enter the Flow Designer.
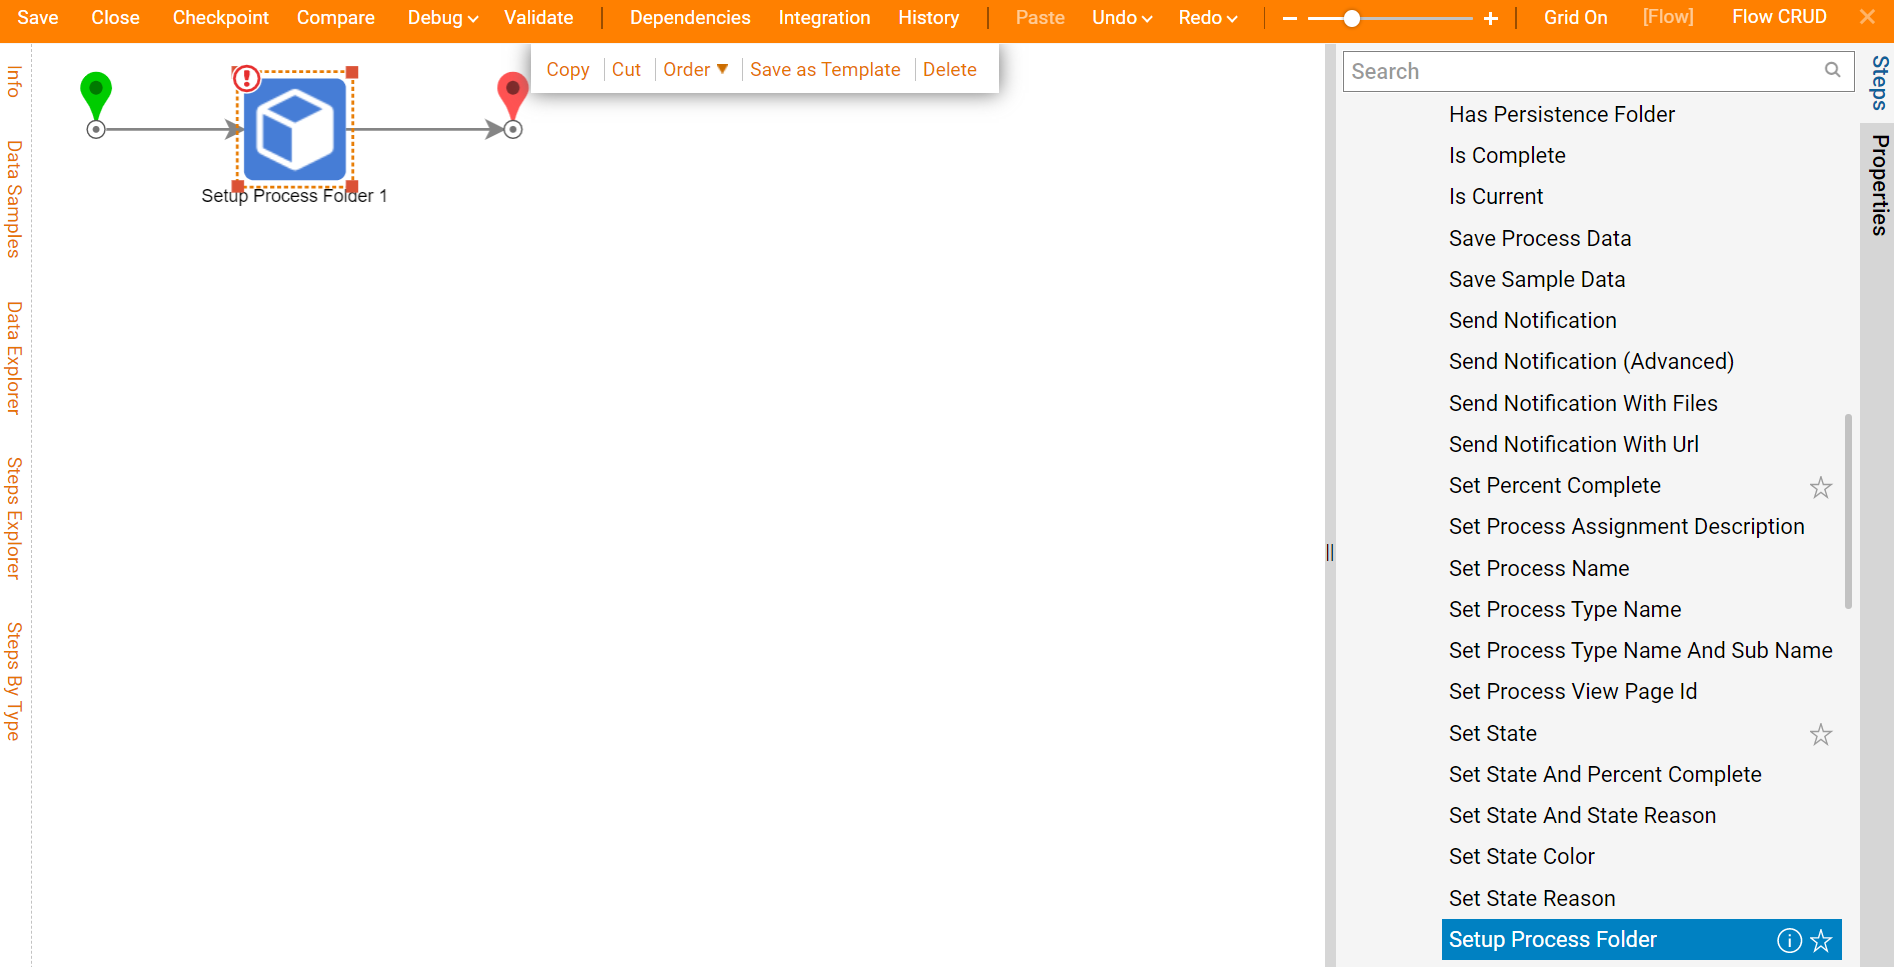
- In the Flow Designer, from the Steps > Flow Management > Data category, drag a Setup Process Folder step to the workspace and connect it to the Start and End steps. Flow Execution Extension Data Structures do not have a Create step like other Decisions Data Structures. In order to create a record in a Flow Execution Extension Data Structure, a Setup Process Folder step is necessary.
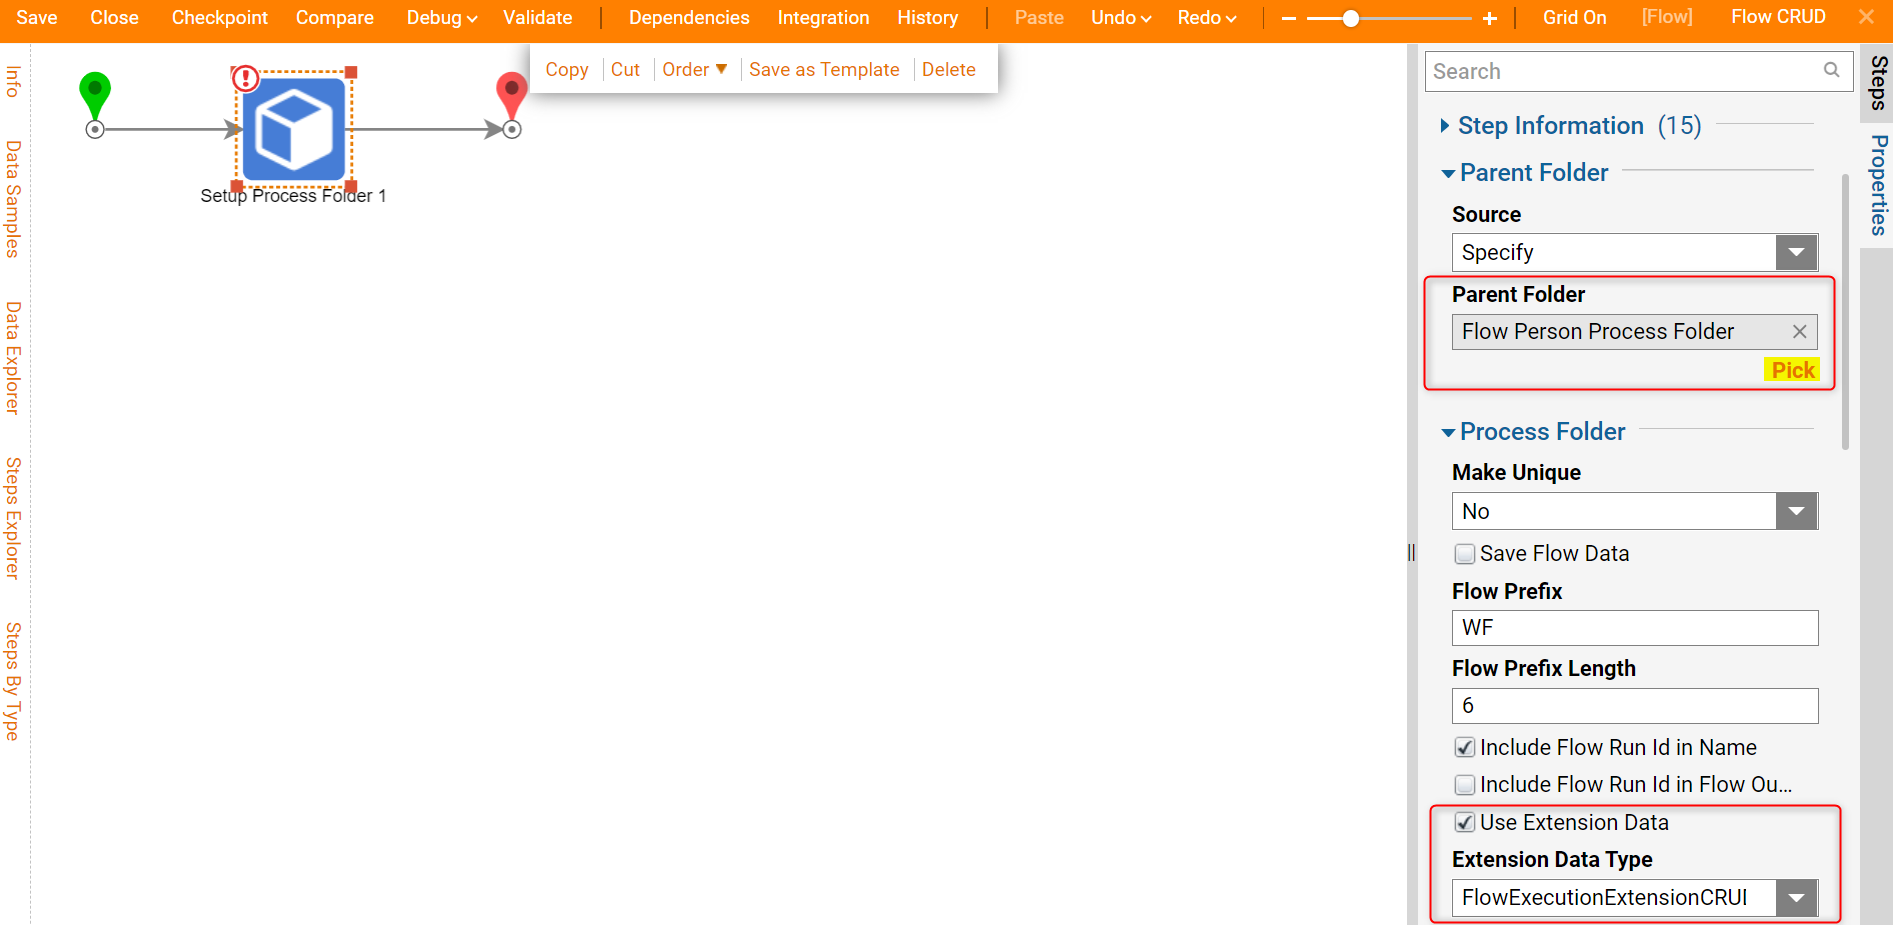
- In the Properties > Parent Folder > Parent Folder drop down list, PICK the Normal Folder [Flow Person Process Folder] created previously.
- Navigate to the Process Folder > Use Extension Data boolean, check the box, and select the previously created Flow Execution Extension [FlowPerson].
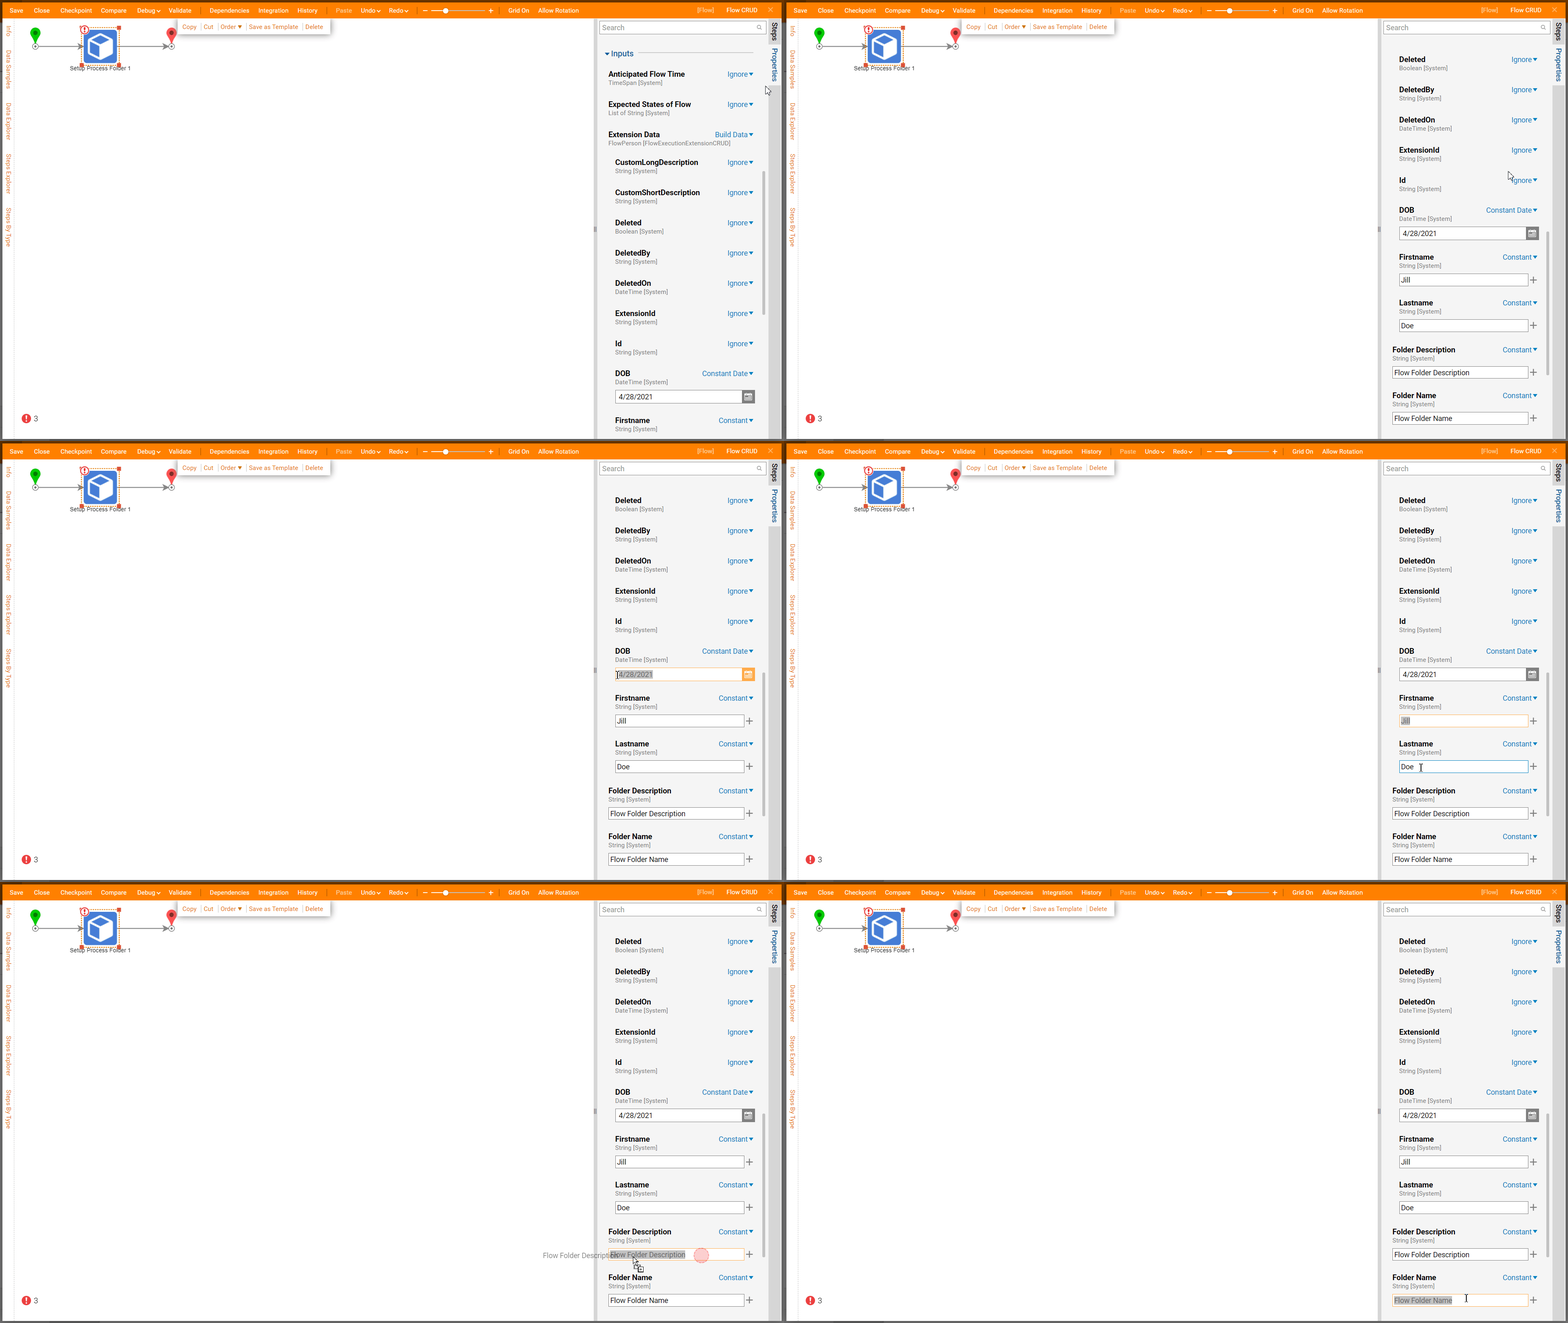
- In the Inputs > Extension Data field, change the input mapping to Build Data.
- Notice the appearance of new inputs, set Constant input mappings on FirstName, LastName, and DOB.In this example, the input values are as follows: FirstName: Jill, LastName: Doe, DOB: 4/28/2021.
- Navigate to Inputs > Folder Description and Folder Nameand change the input mapping to Constant.In this example, the input values are as follows: Folder Description: Flow Folder Description and Folder Name: Flow Folder Name.
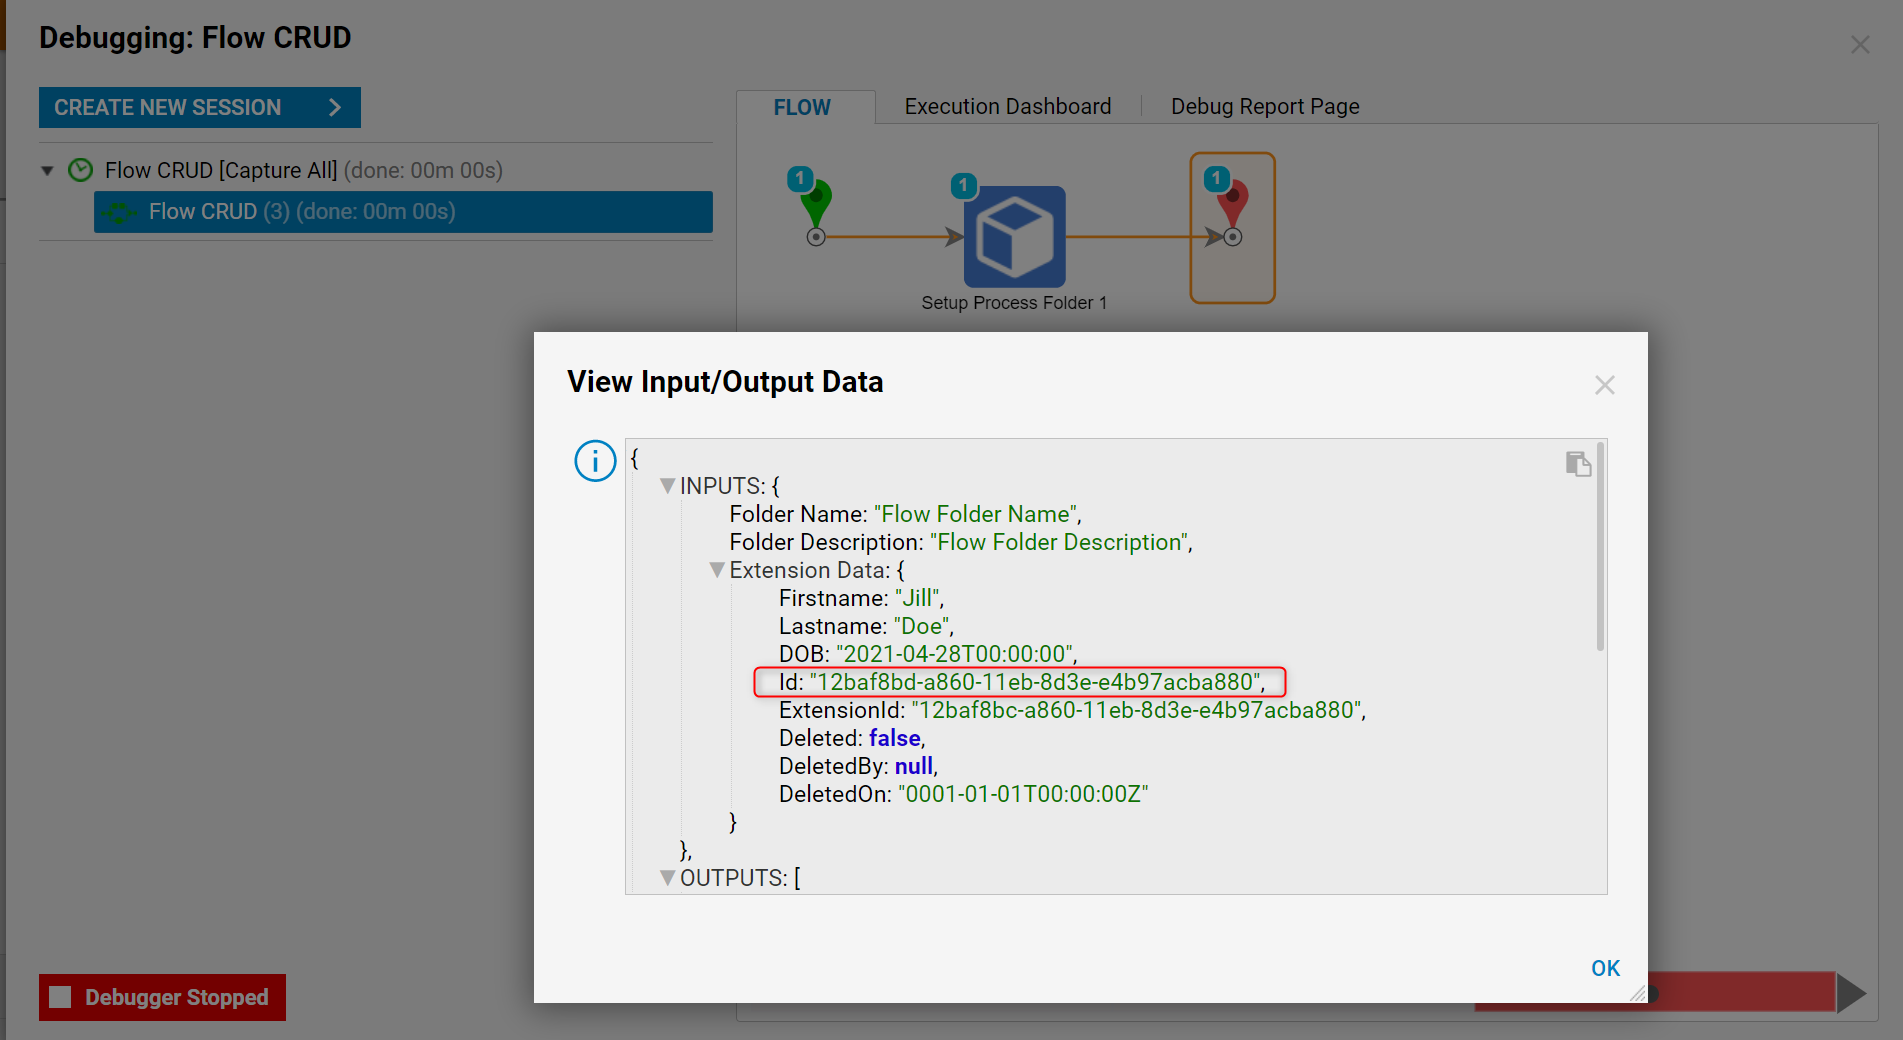
- Select Debug from the Top Action Panel; this will save the Flow and start the Debugger.Auto-ID GenerationNotice that the ID was automatically created when the Flow was run, even though its input value was set to Ignore.
Update
Flow Execution Extensions do not have an Edit or Selective Update step. To update an existing record, the entire object must be passed into a Flow for a proper save or update. In order to update the Data Structure, the Fetch By ID, Create Data, and Save steps are required.
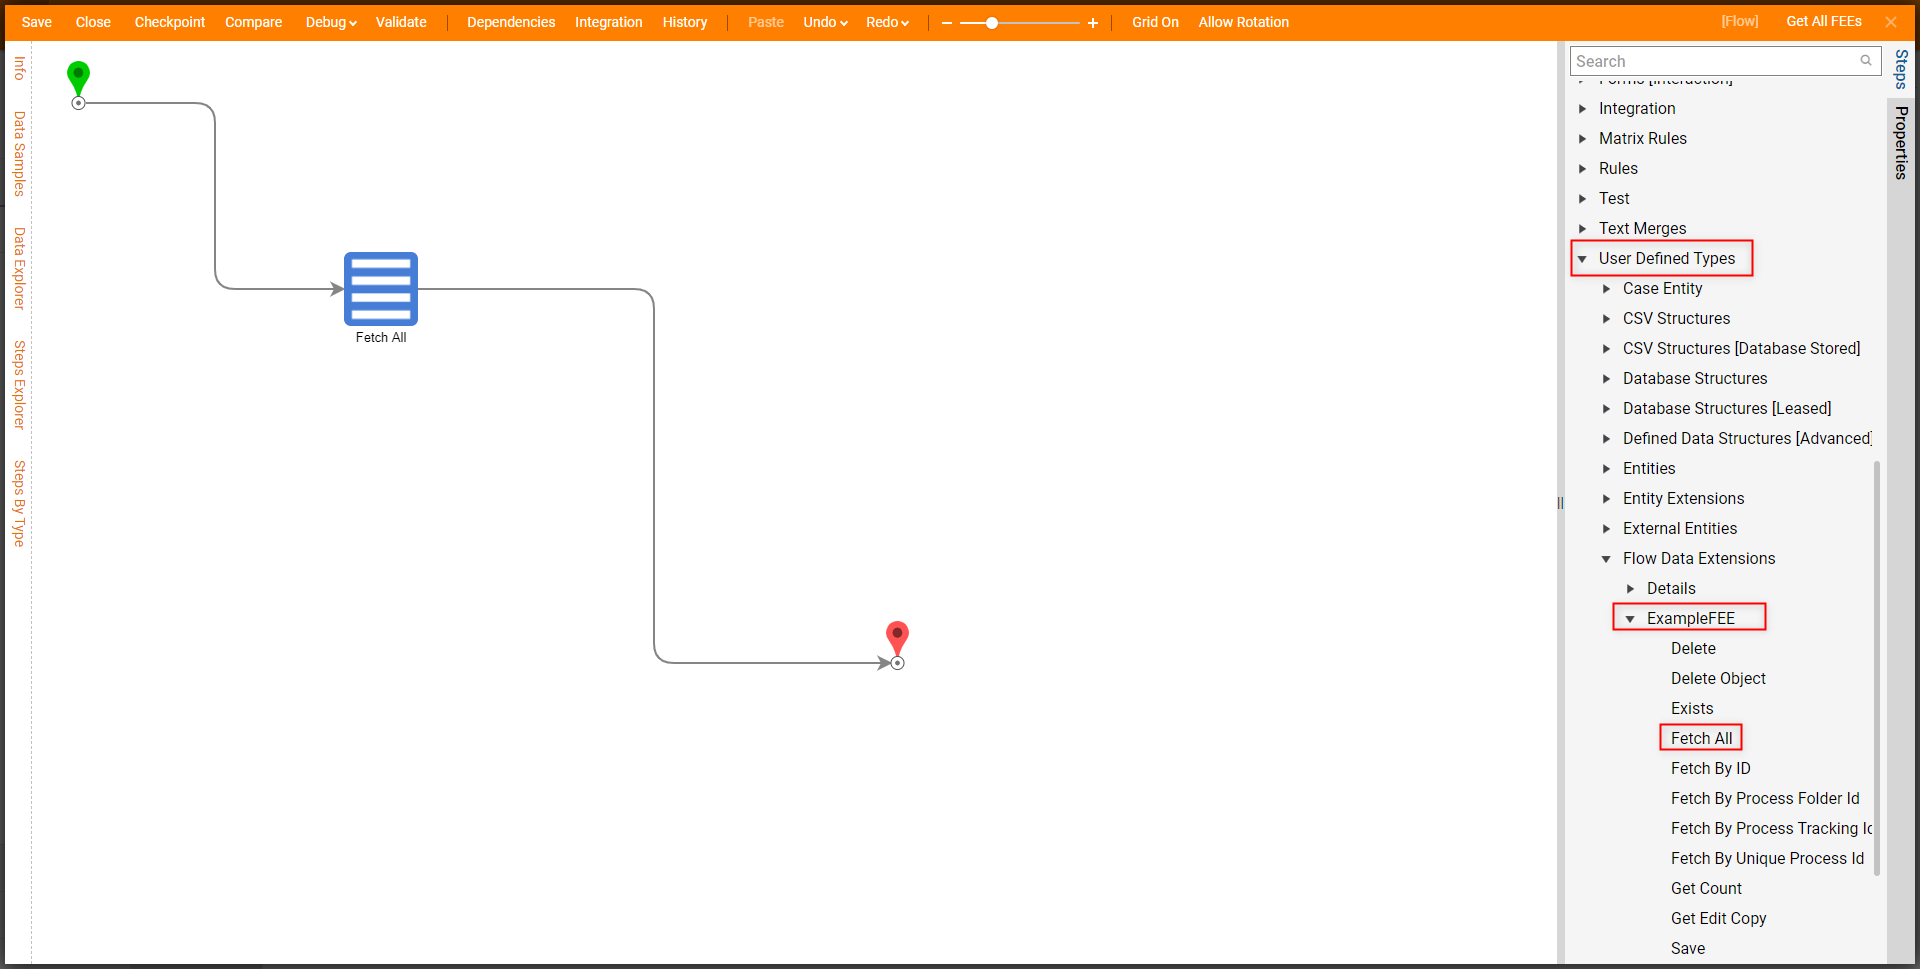
The Fetch By ID and Save steps cannot be searched for and are located in the Steps > User Defined Types > Flow Data Extensions > [NAME OF DATA STRUCTURE] category.
To properly Update a Flow Execution Extension:
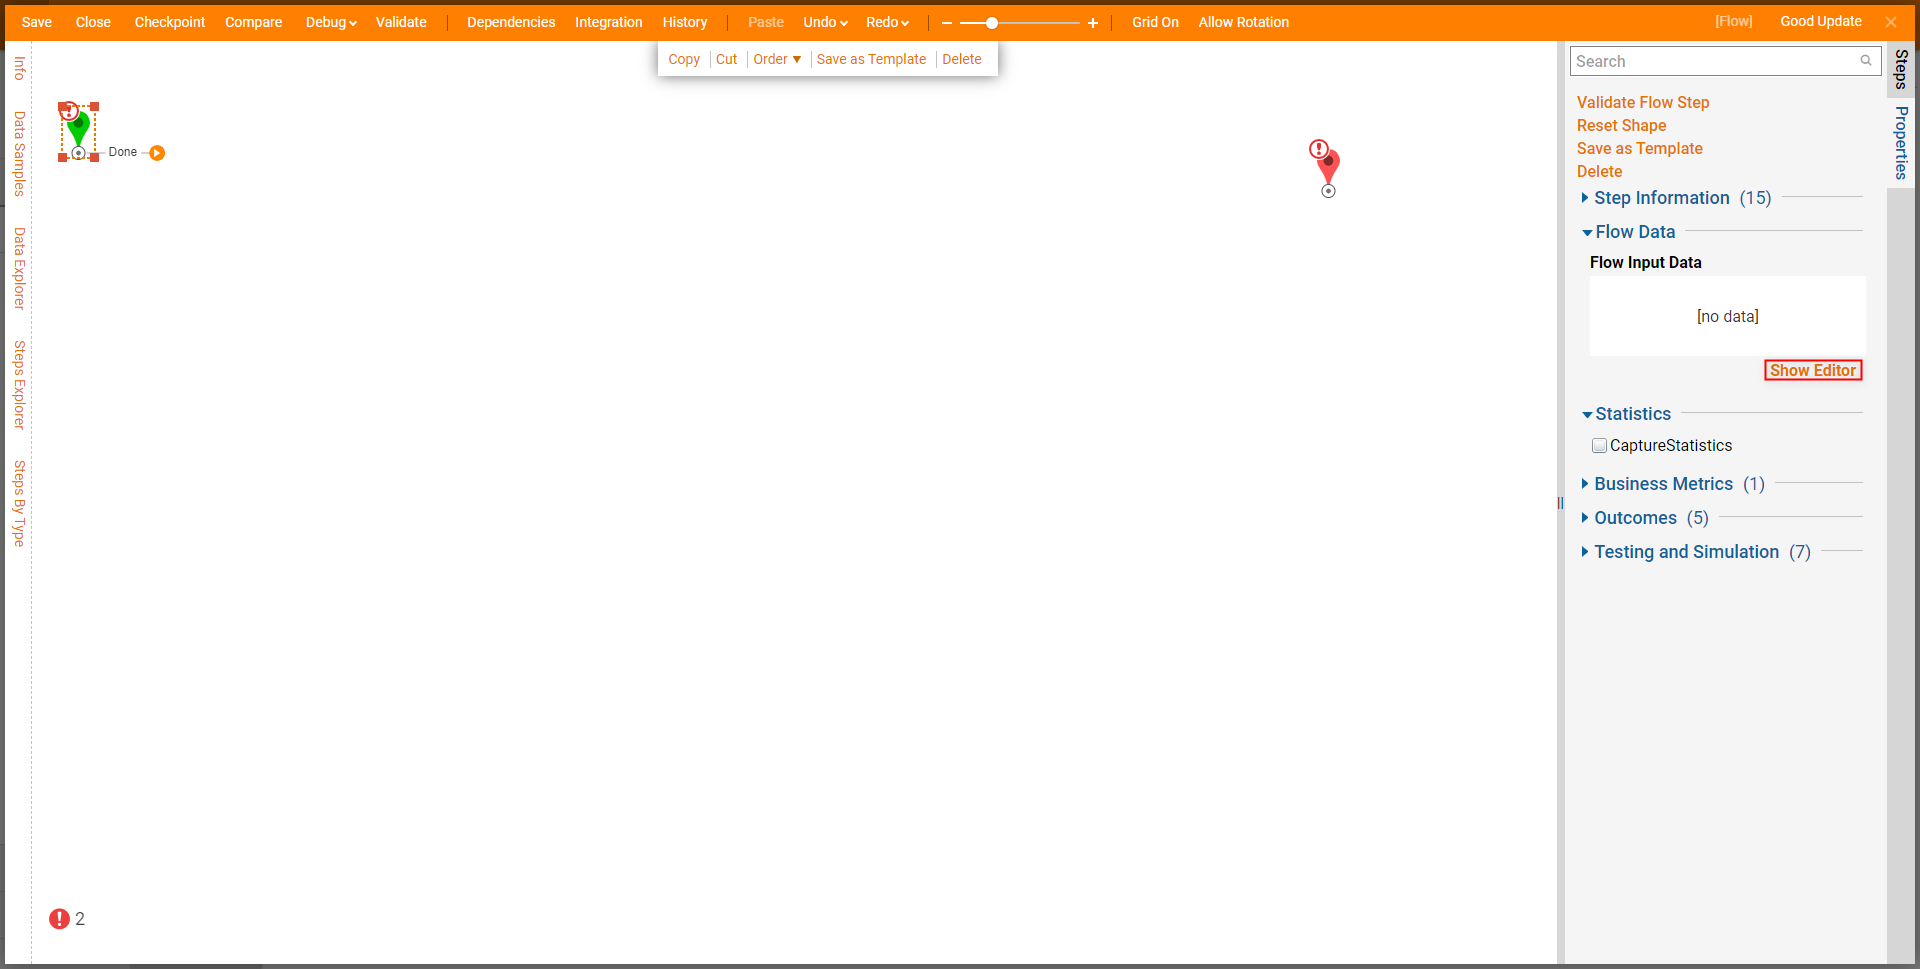
- From the Flow Designer, select the Start step; from the Properties tab, select Show Editor.
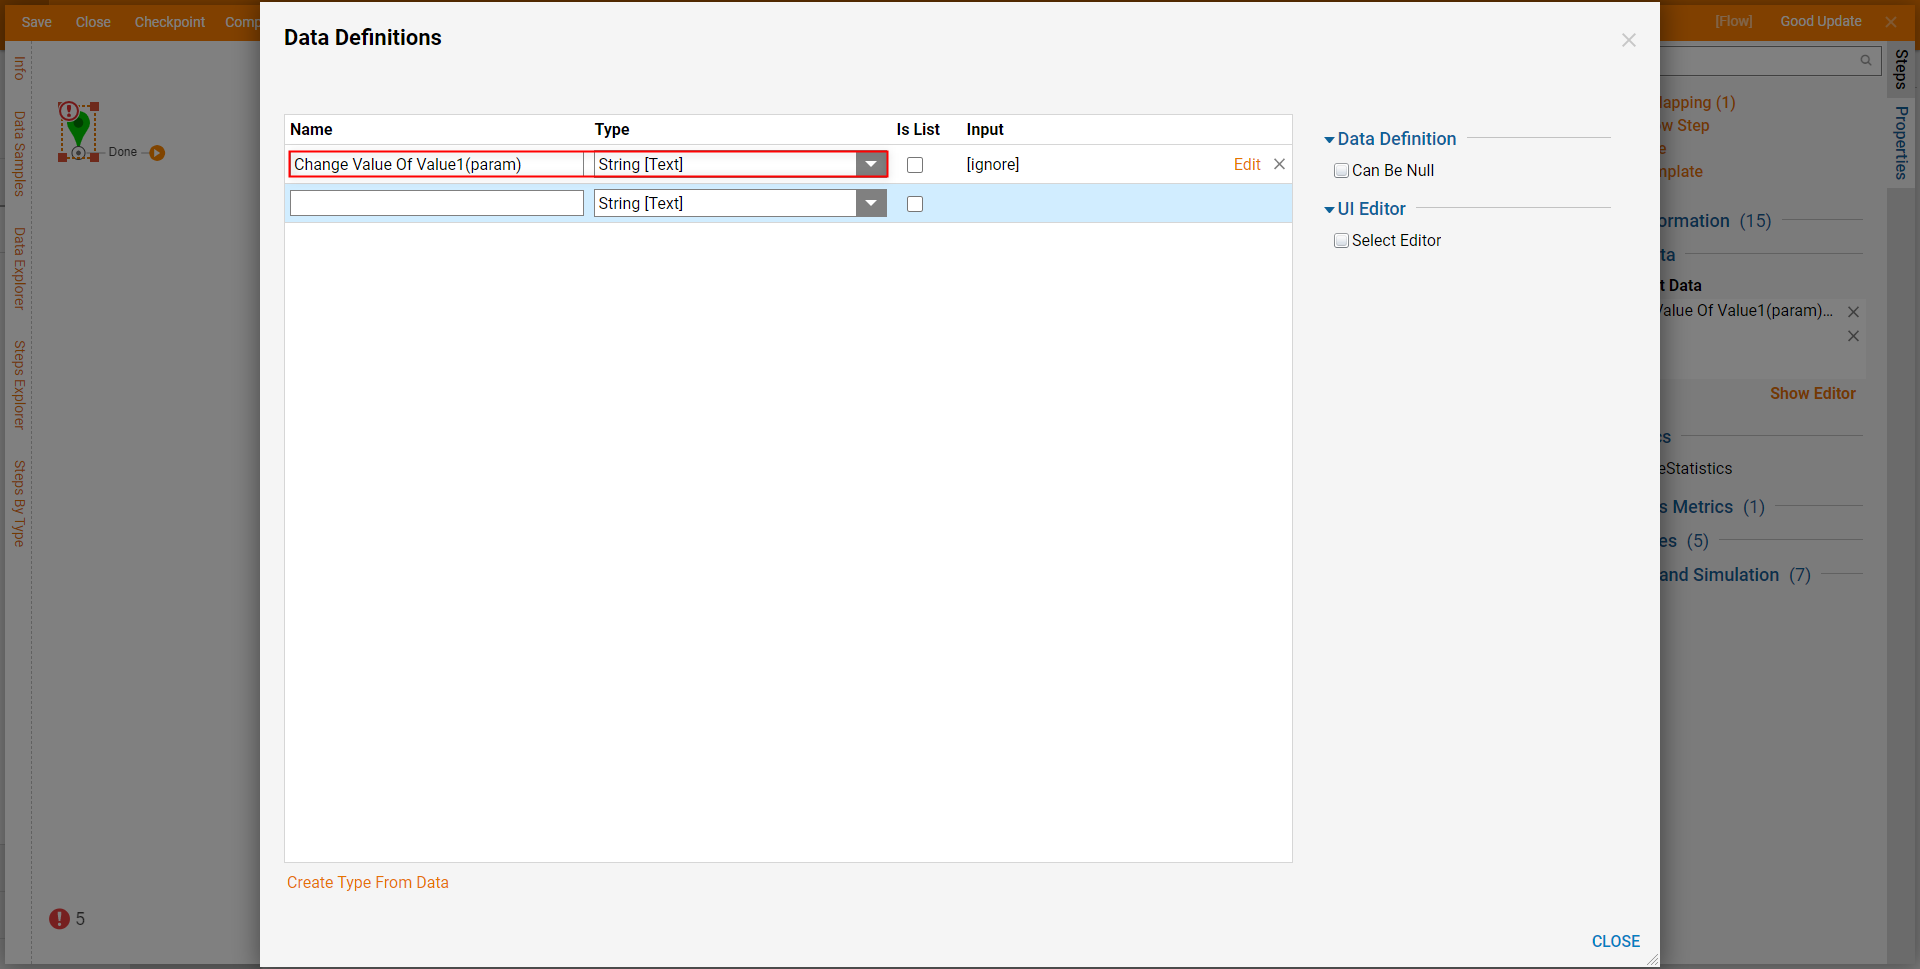
- From the Flow Inputs window, provide a Name and select String [Text] from the Type dropdown, then CLOSE the window. Note on Flow InputThe Flow Input will be used to define the updated value for the Flow Execution Extension.
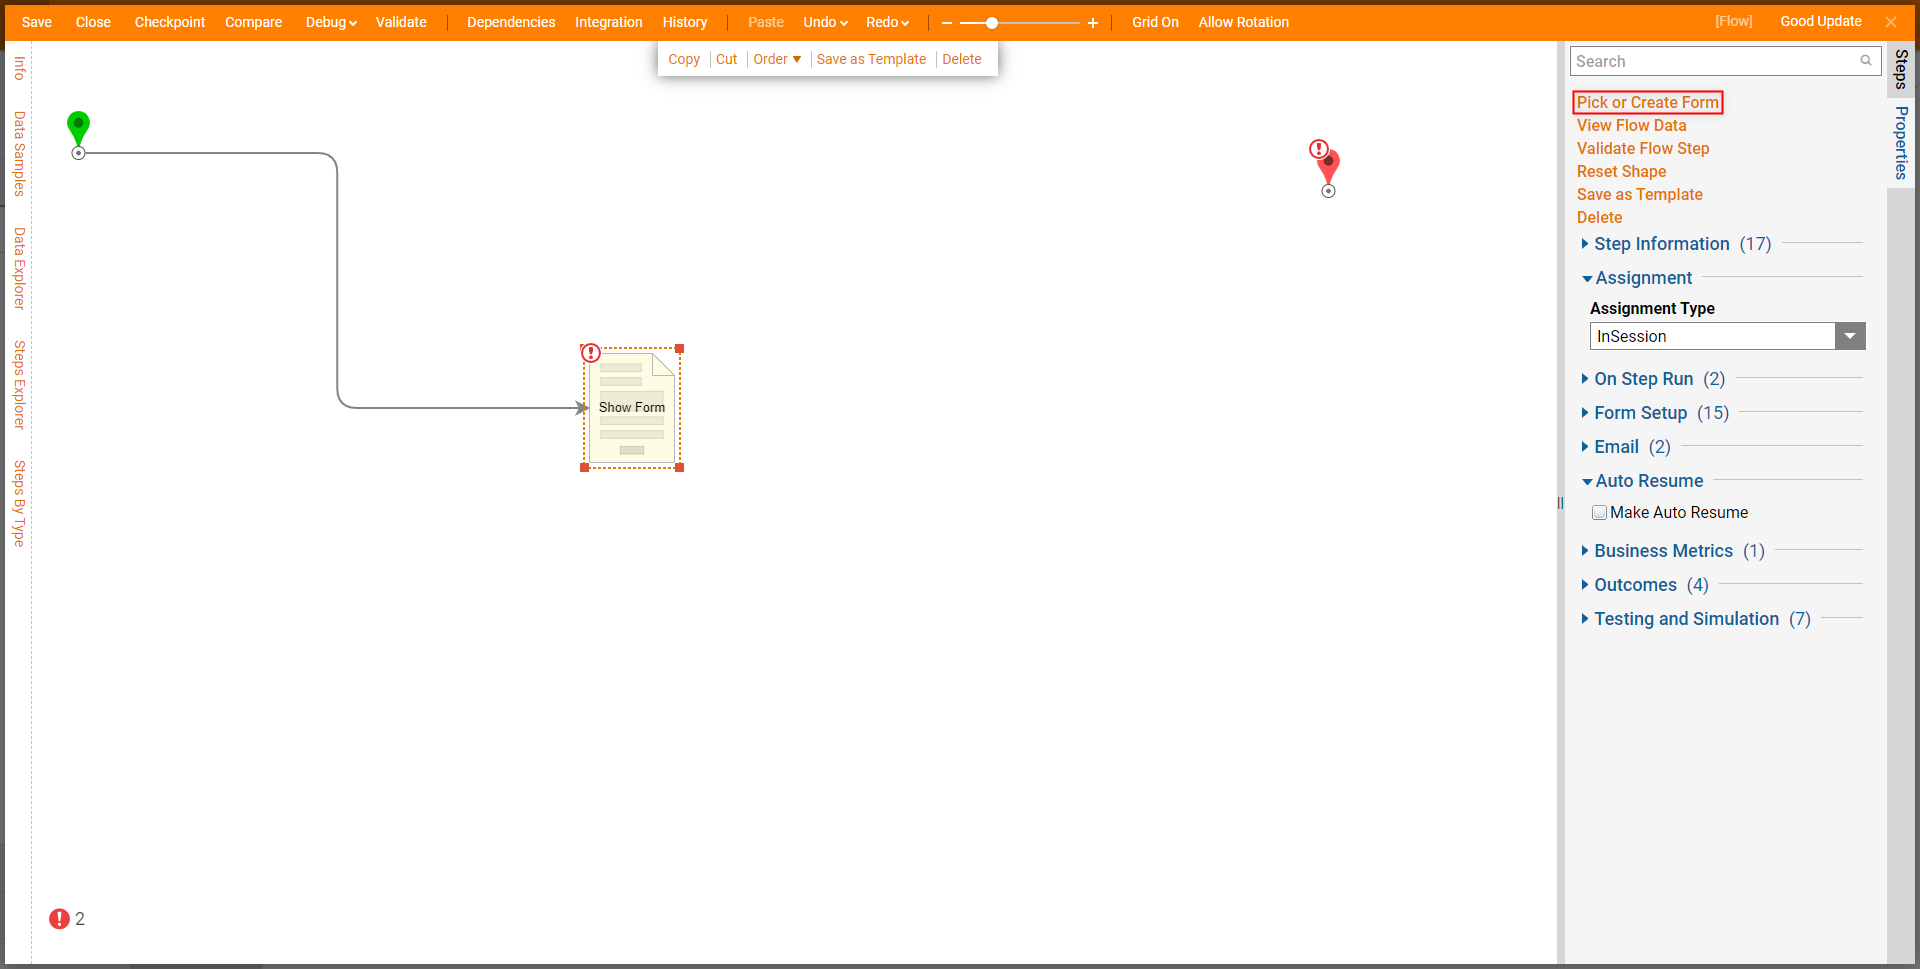
Attach a Show Form step from Steps > Favorite Steps to the Start step. From the Properties of the Form step, select Pick or Create Form, then CREATE a new Form.
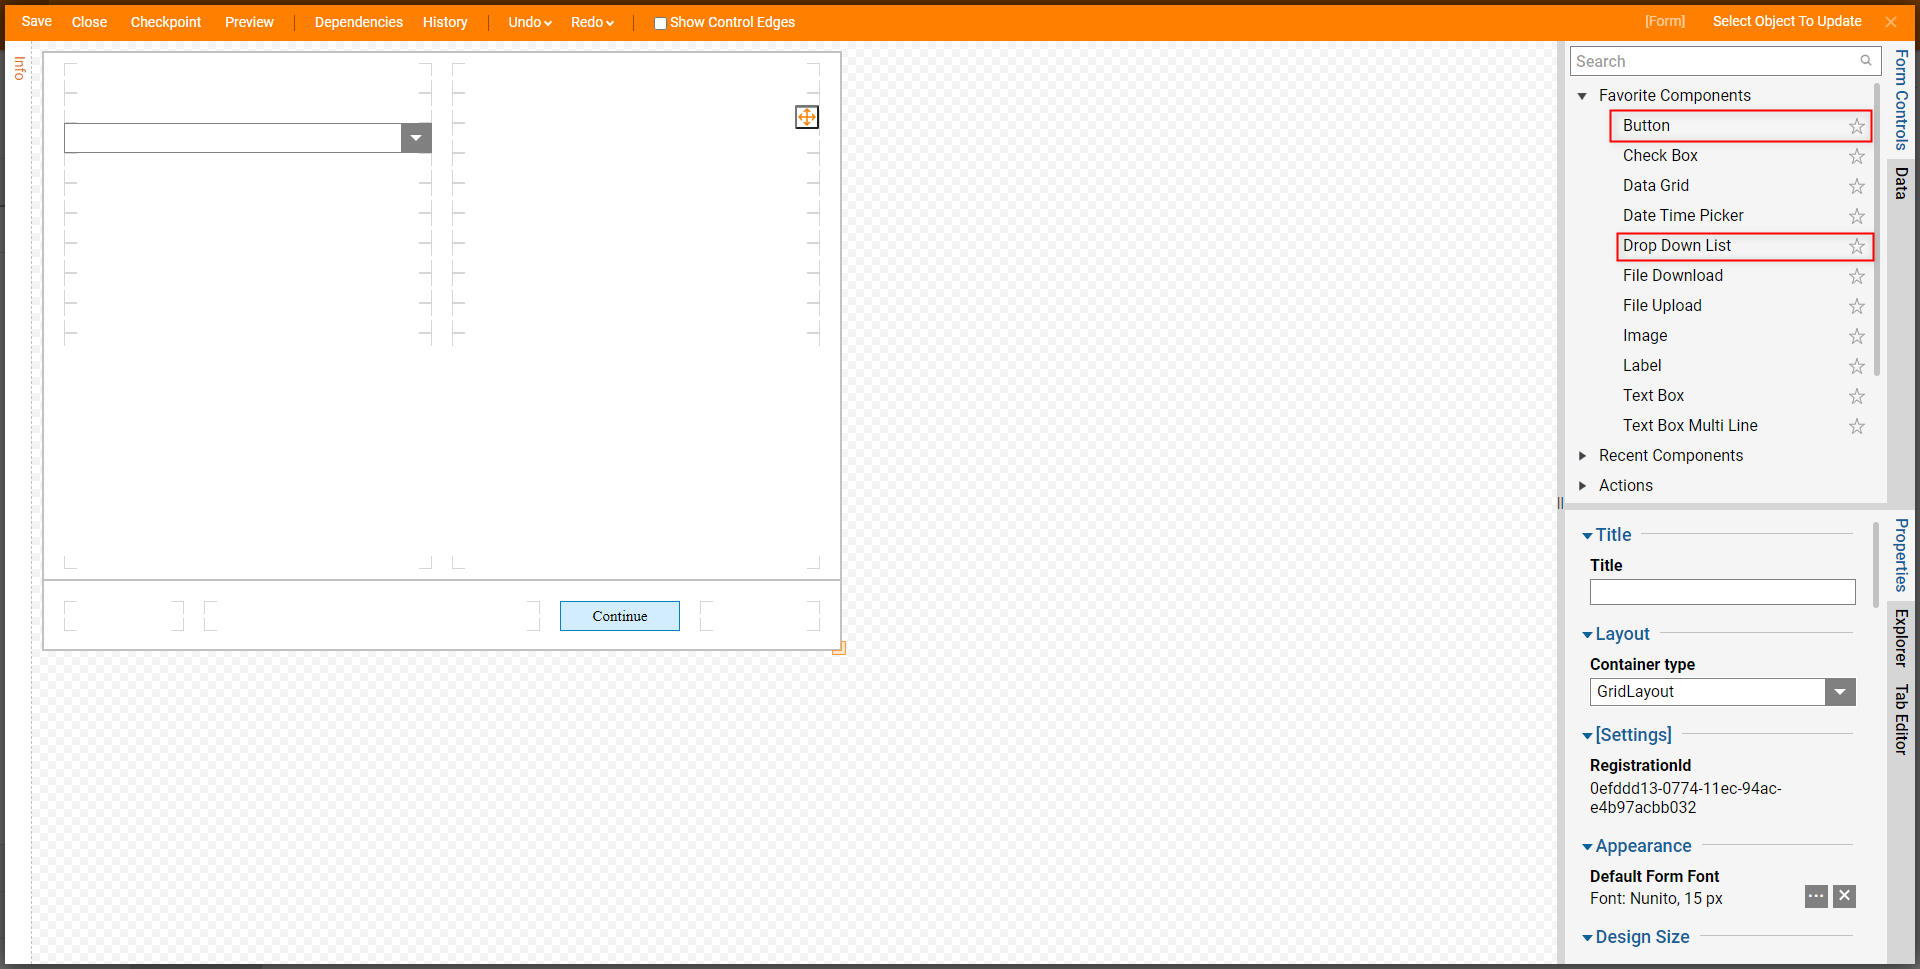
From the Form Designer, design a Form containing a Drop Down List component (from FAVORITES) and a Button Labeled "Continue". Navigate to the Drop Down List's Properties tab.
Under Input Data, select the Flow Execution Extension from the Type drop-down menu, then select ProcessFolderName under Display Field. Under List Input Source, select Flow, then Create a new Flow by click Create.
Additional Information on FormThis Form is used to select which Flow Execution Extension entry will be updated.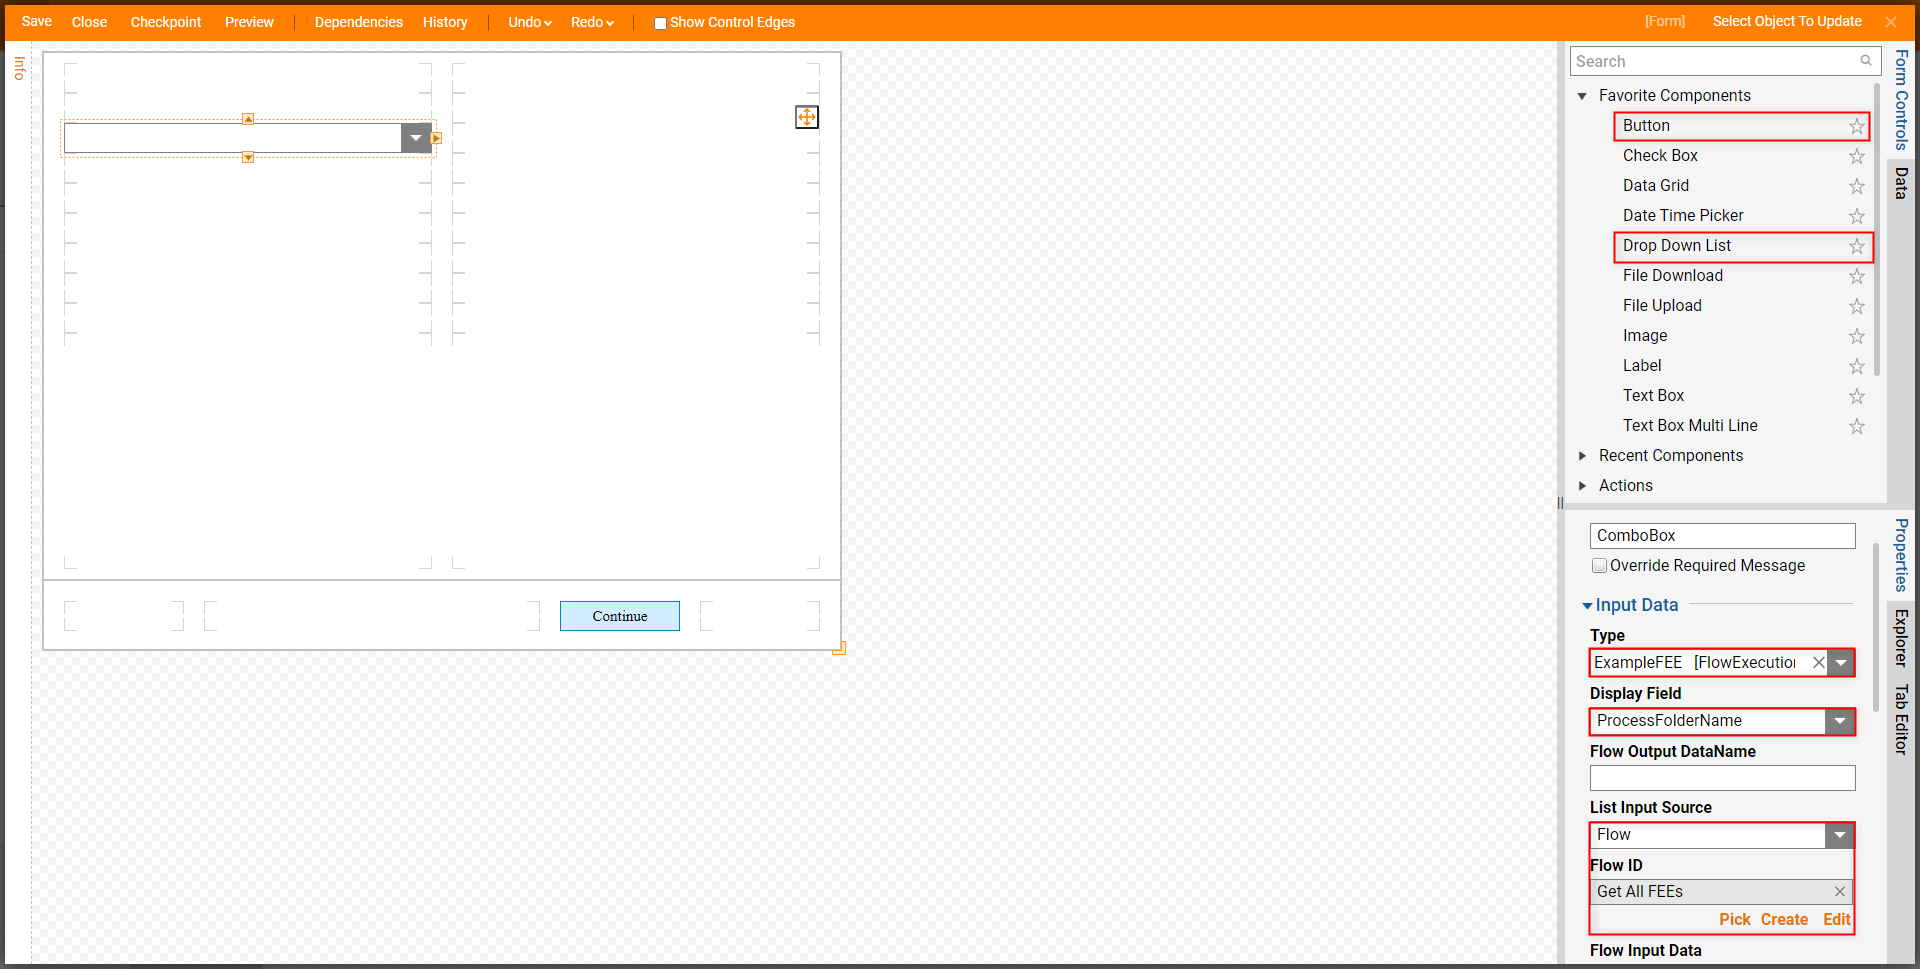
From the Flow Designer, attach a Fetch All step from Steps > User Defined Types > Flow Data Extensions > [NAME OF DATA STRUCTURE] to the Start and End steps. Then select the End step.
From the End step's Properties, under Pick from Current Data, check the box beside FetchAll_Output, then Save and Close the Flow.
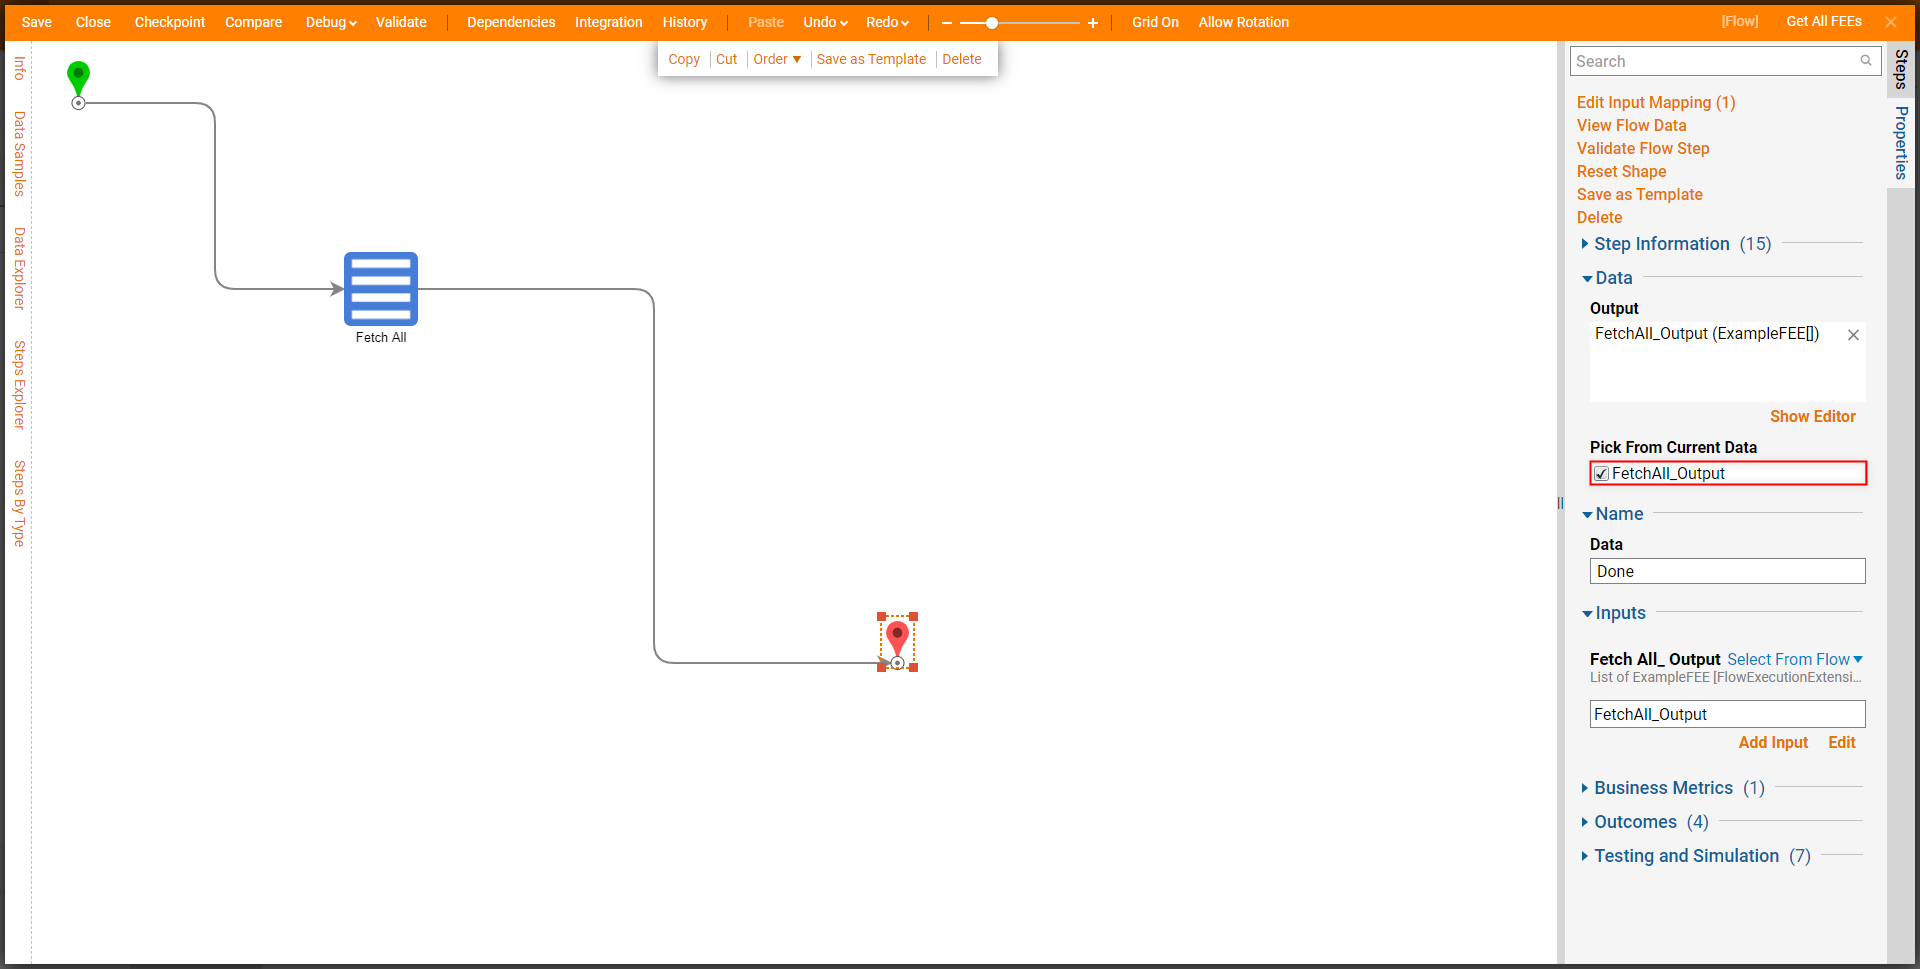
Save and Close the Form.
Attach an additional Show Form step to the Continue path, navigate to the newly added step's Properties, select Pick or Create Form, then CREATE another Form.
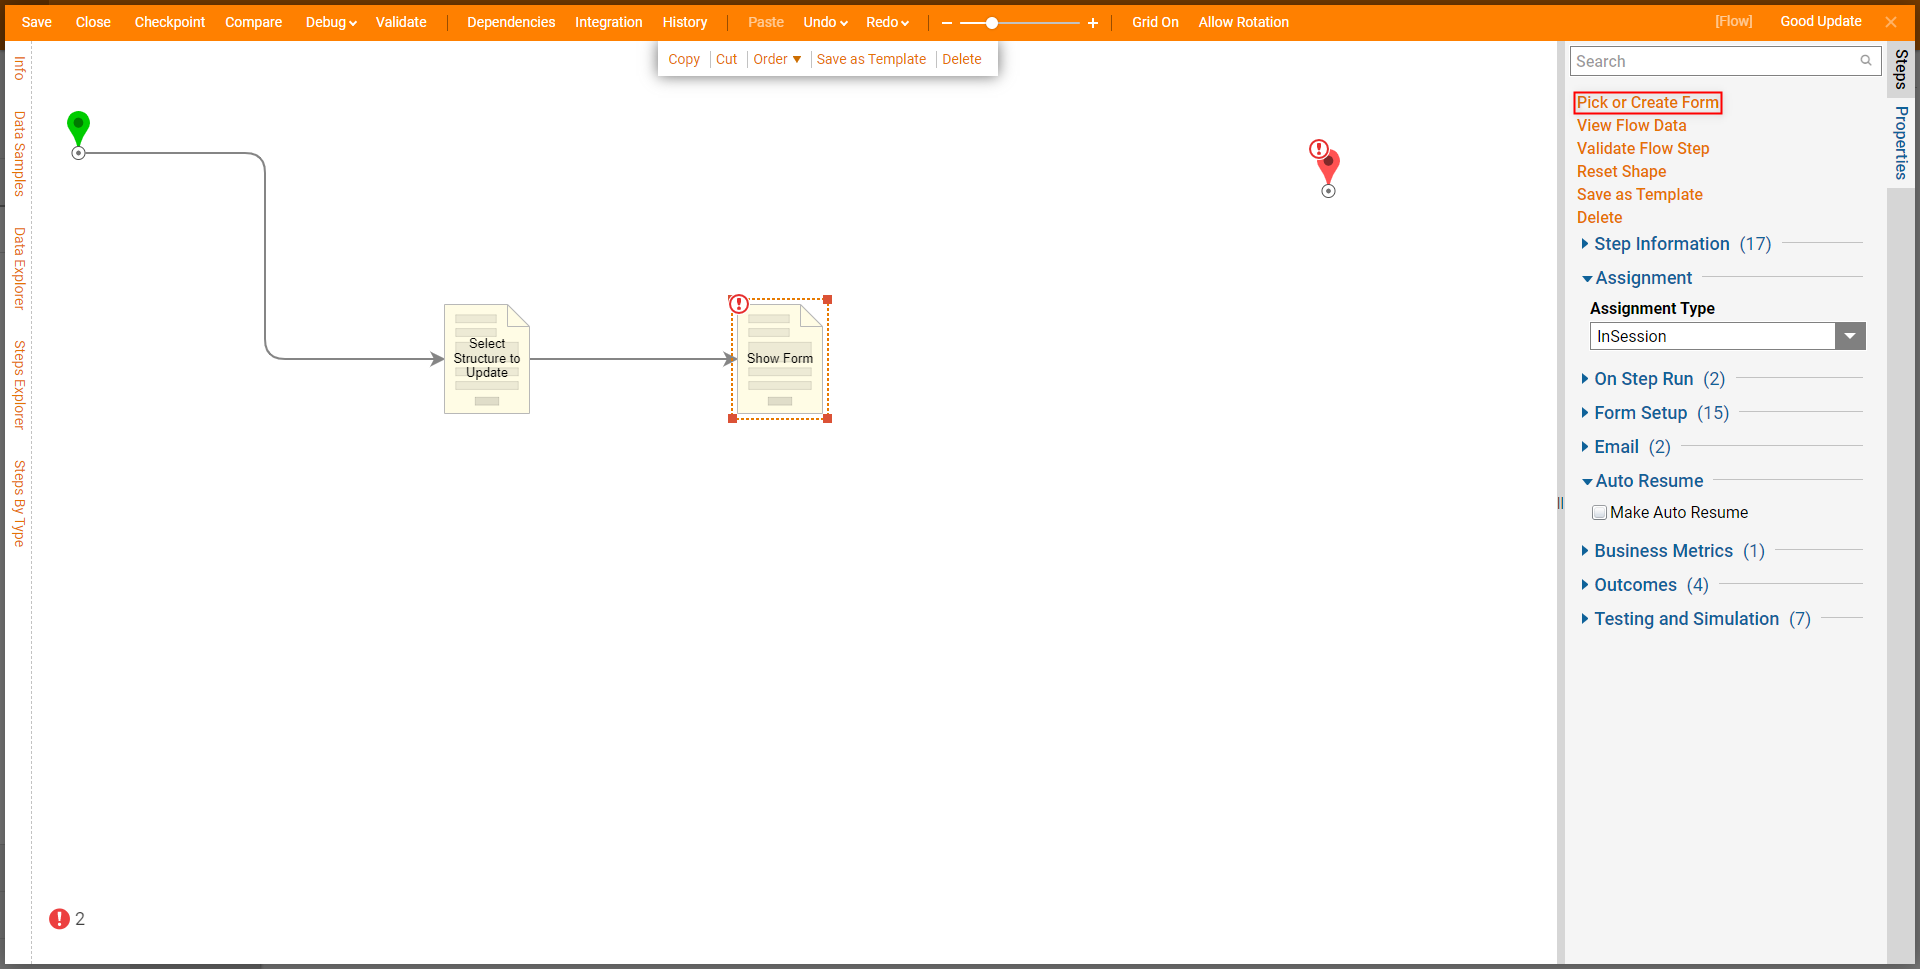
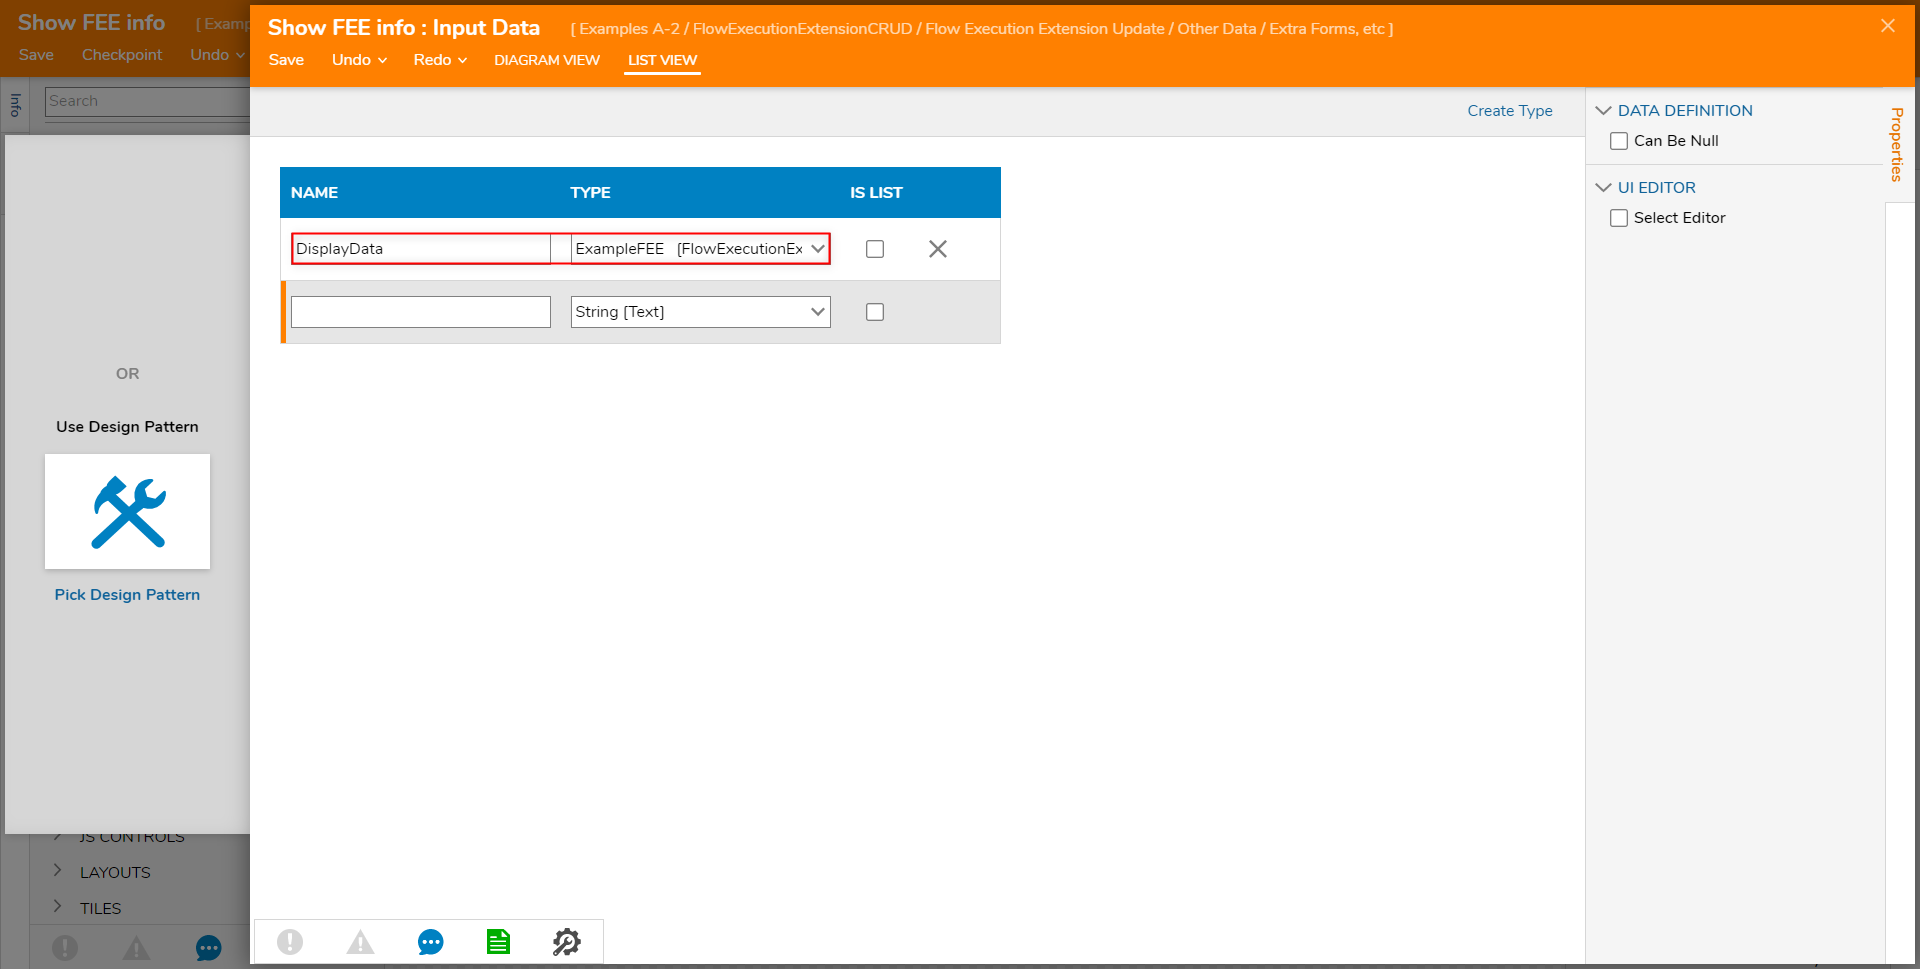
From the Form Designer, click the SETUP INPUT DATA button on the top Action bar, then click DEFINE. Provide a NAME for the Data, then select the Flow Execution Extension from the TYPE dropdown. Save the Input Data, then close the Data Definitions window.
After closing the Input Data window, navigate to the Data tab on the left. Expand the newly created Input Data and add a Label Of Data Value for each element of the Flow Execution Extension. Then, add a Button component (Labeled "Continue"); Save and Close the Form.
Additional Information on FormThis Form is used to display the Data for the selected Object from the previous Form.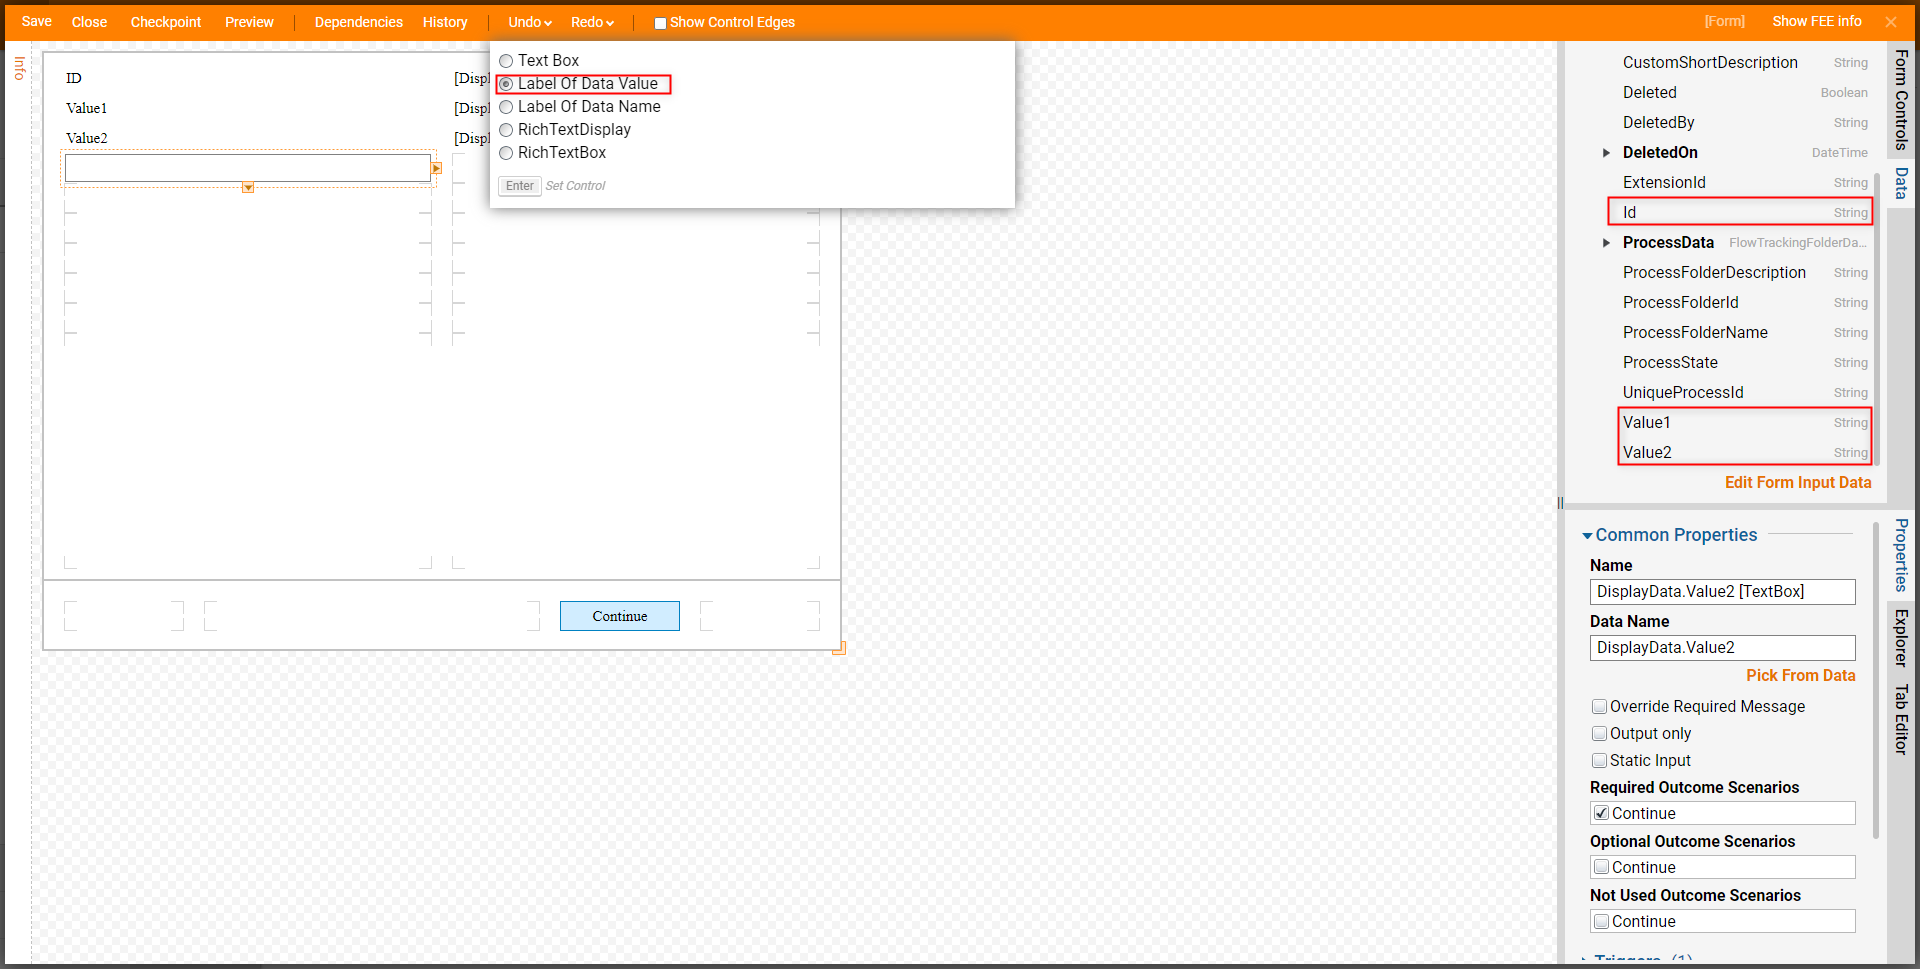
Back in the Flow Designer select the newly create Form to navigate to its Properties; Select From Flow map the selected Object to the Display Data for the Form's Inputs.
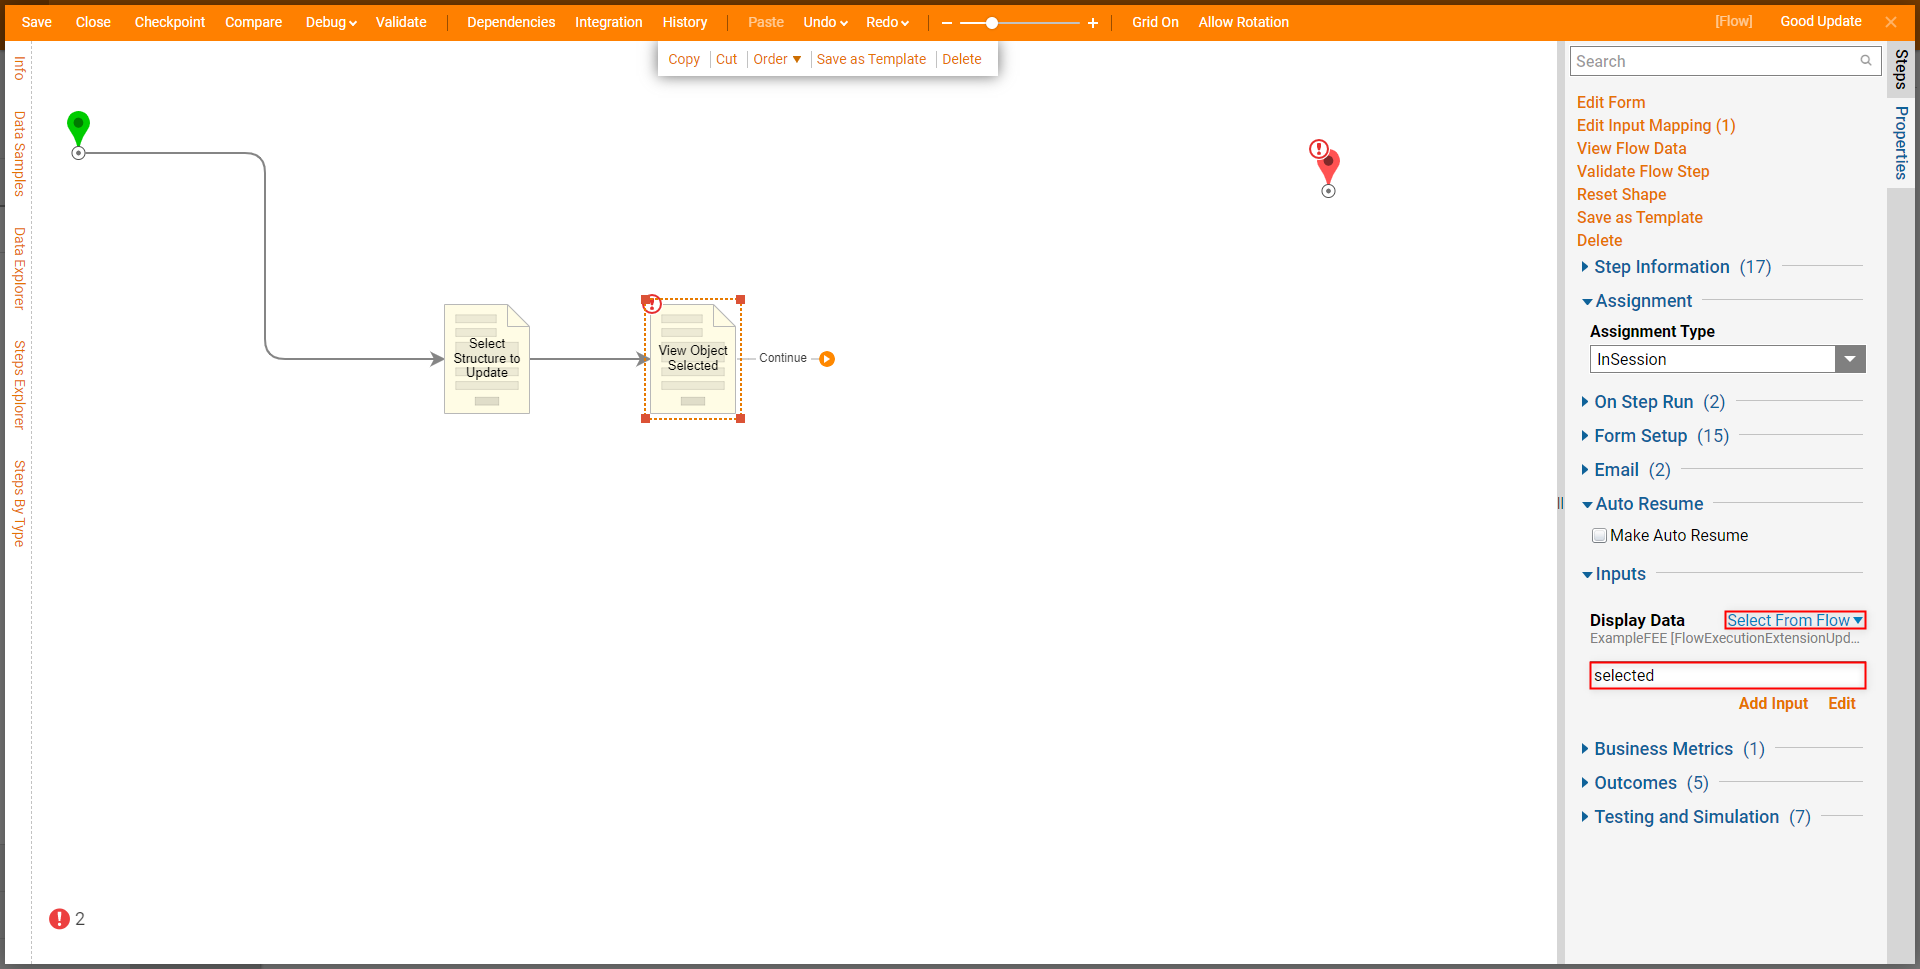
From the Favorite Steps category of the Steps tab, attach a Create Data step to the View Object Form. From the Properties of the Create Data step, select Show Editor.
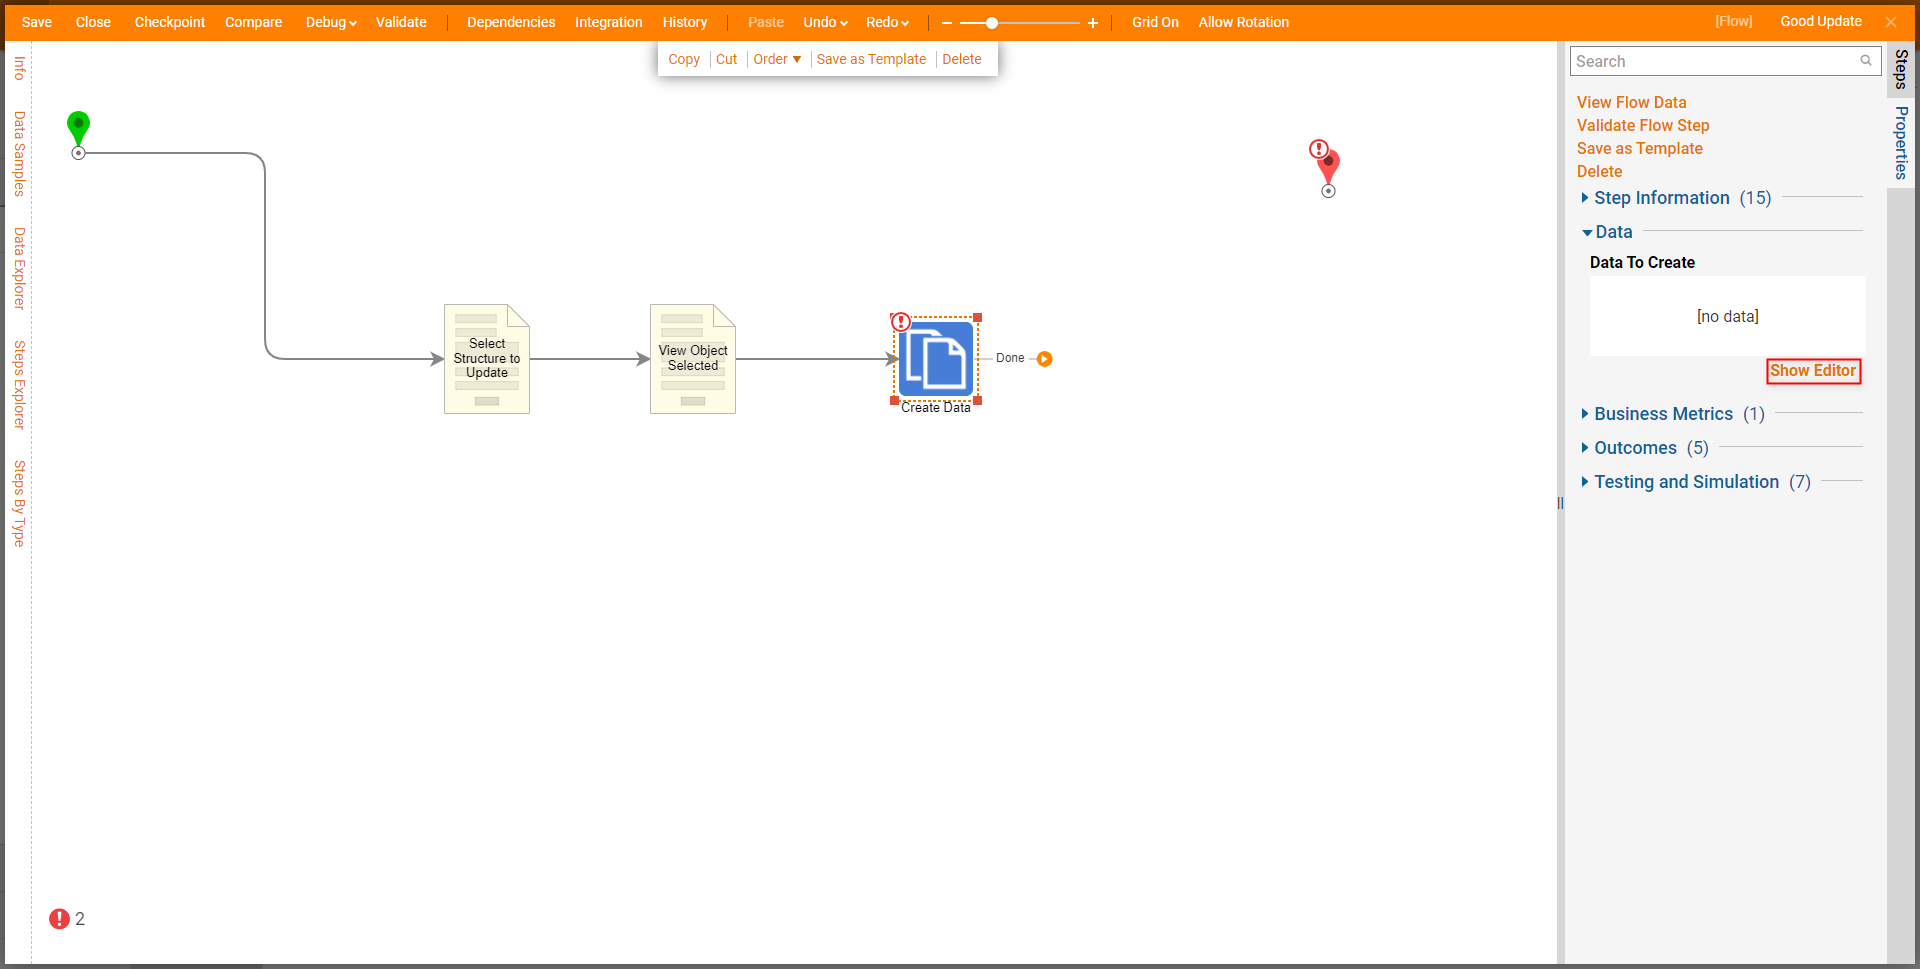
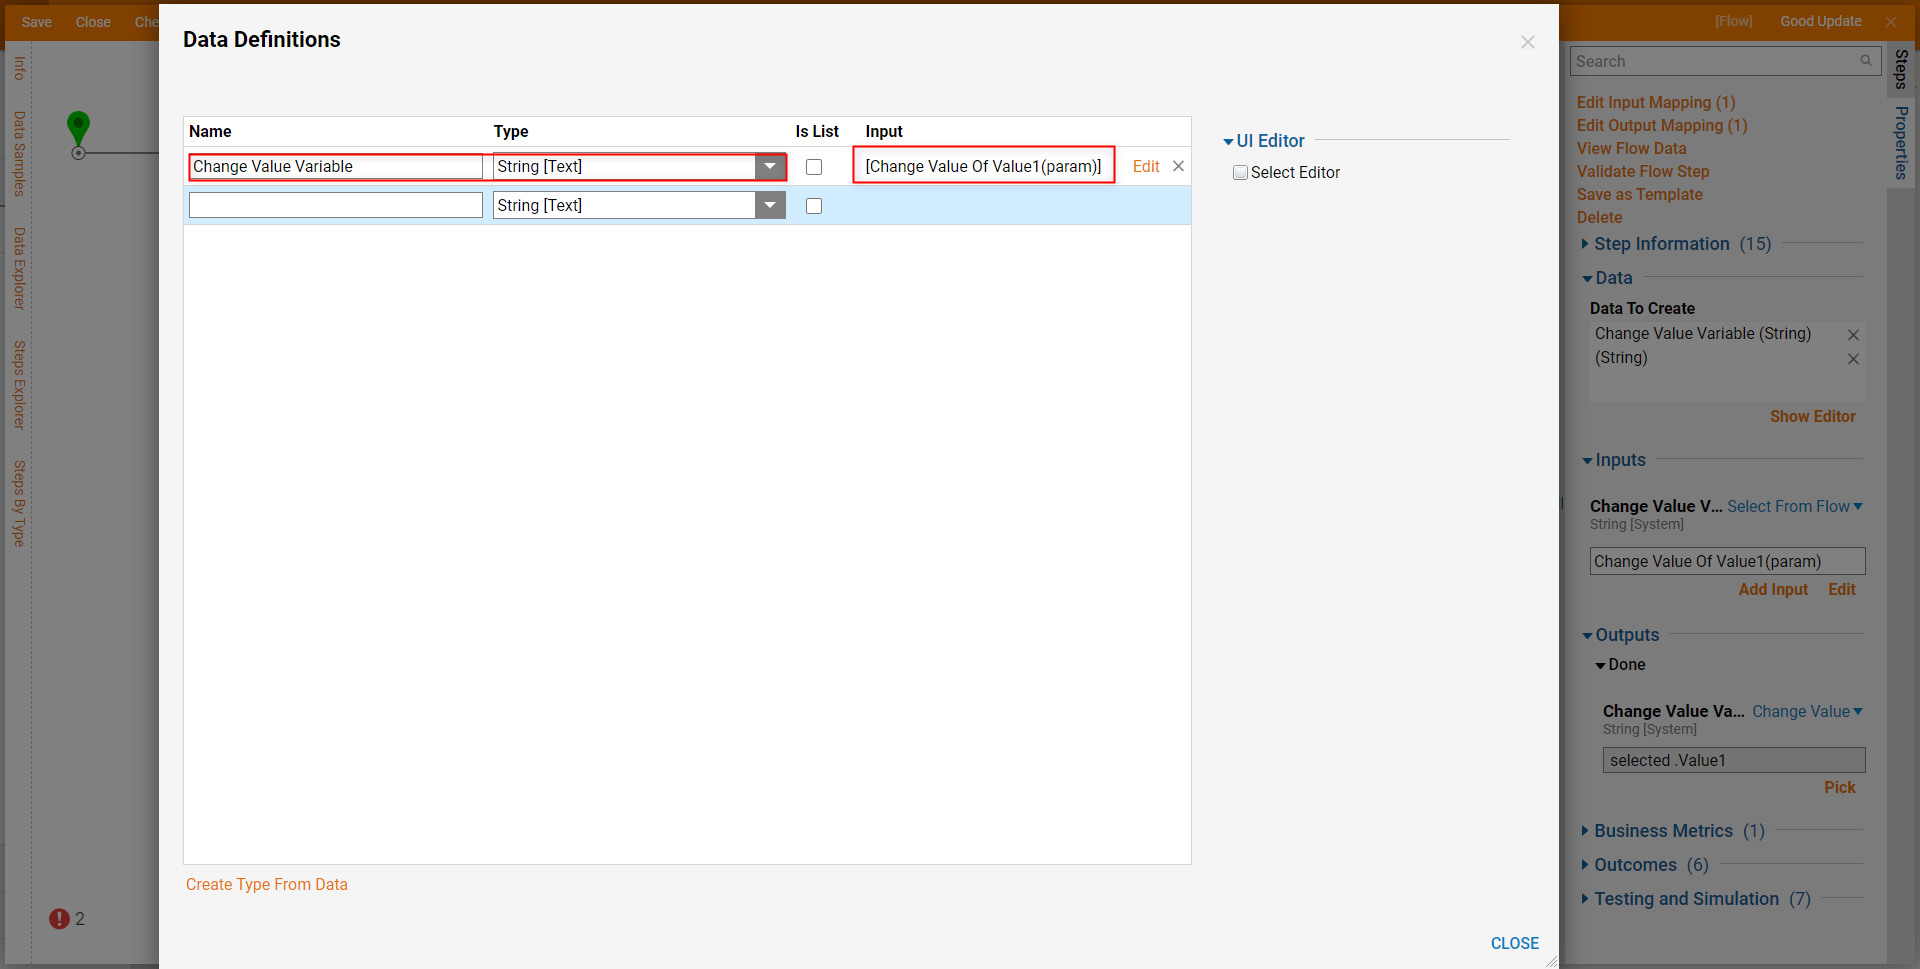
From the Data to Create window provide a Name and select String [Text] for Type; map the Input Data defined on the Start step to Input. Then Save and CLOSE the window.
From the Properties of the Create Data step, under Outputs > Done, set the mapping for the Output to Change Value, then PICK the corresponding Value that will be updated for the selected value (for this example selected .Value1).
.png)
Attach a Save step from Steps > User Defined Types > Flow Data Extensions > [NAME OF DATA STRUCTURE]. Map selected to Properties > Inputs > Value.
Additional Information on SaveThe Save step updates and saves the data provided by the Create Data step to the specified Flow Execution Extension.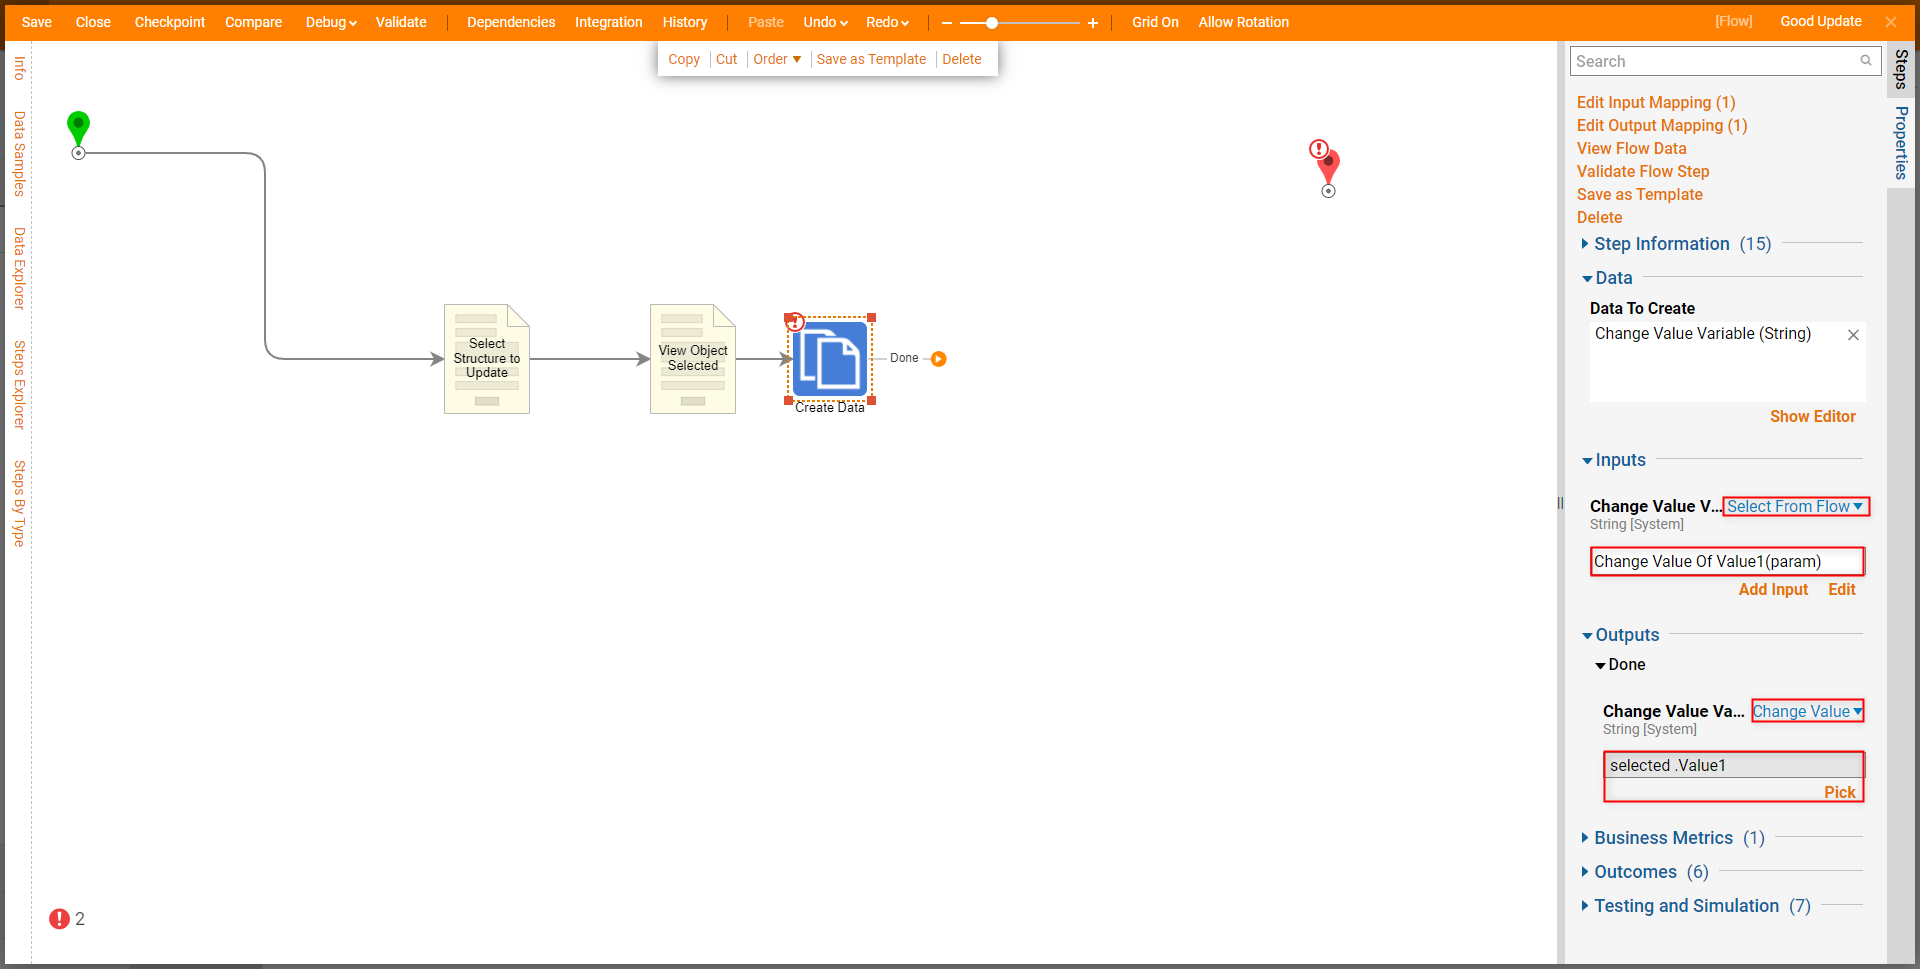
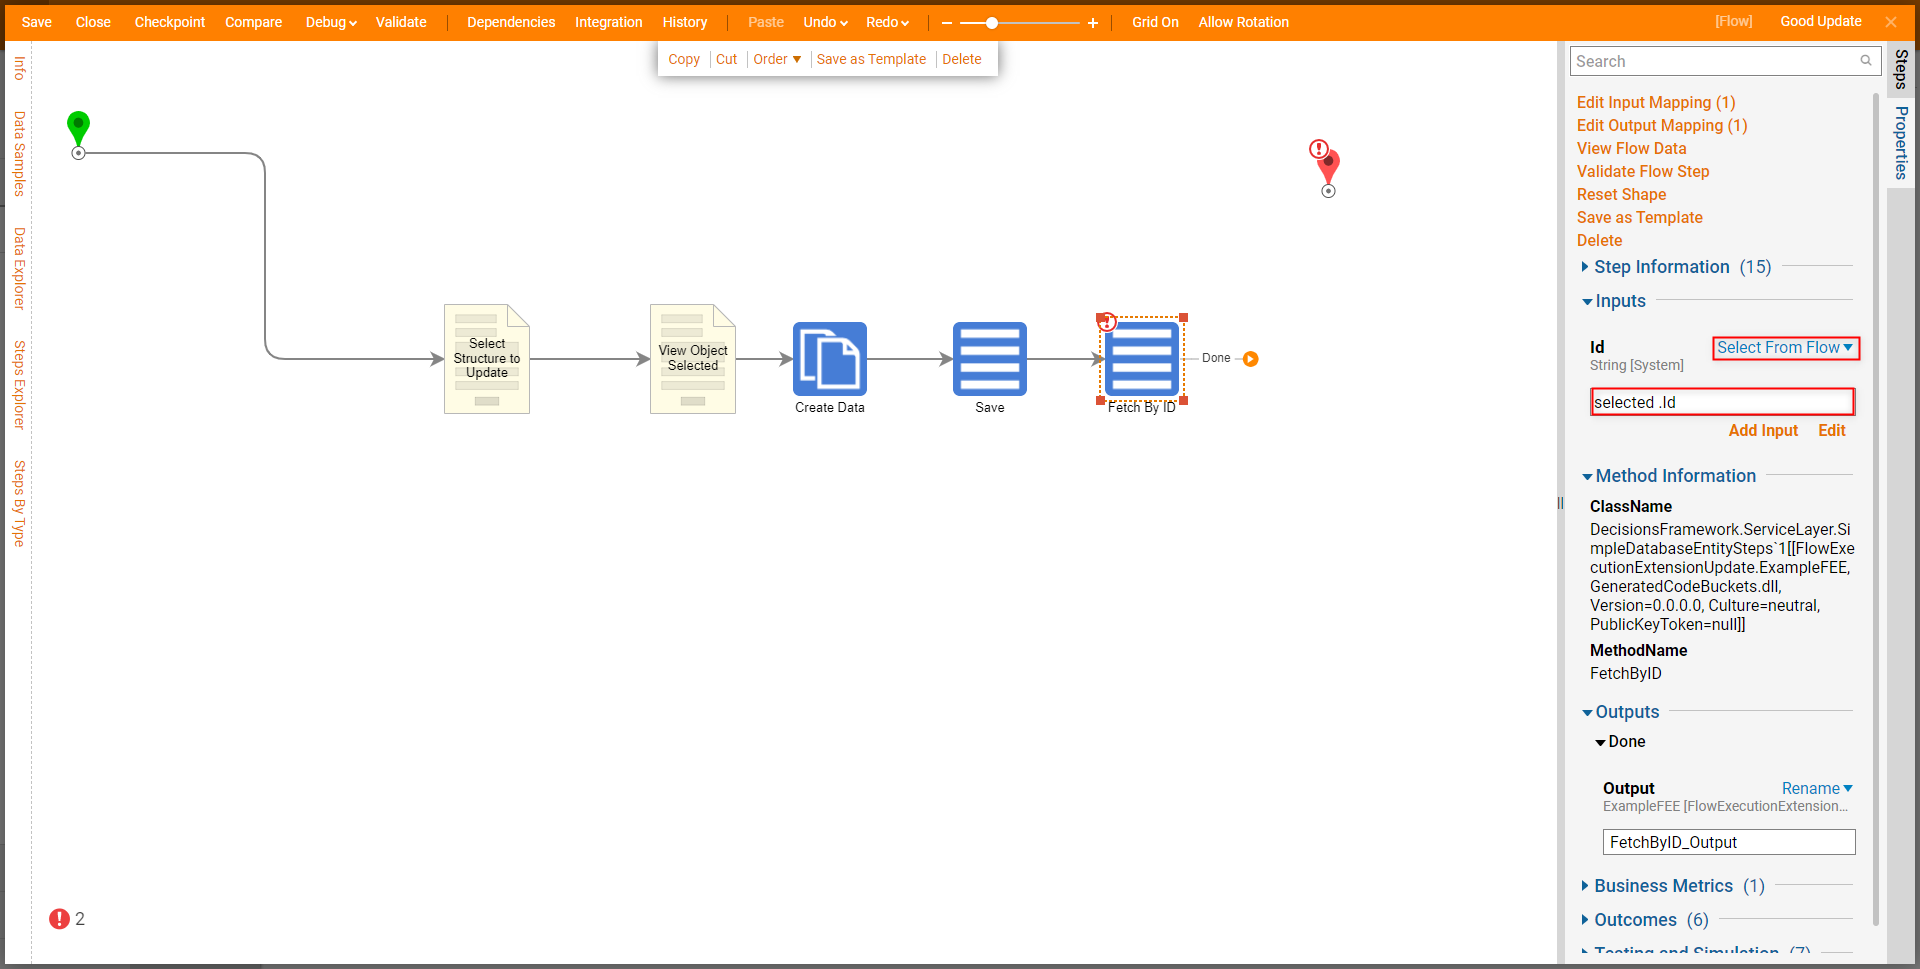
Under the same Flow Execution Extension category in User Defined Types > Flow Data Extensions, attach a Fetch By ID step to the Save step; Select From Flow map selected .Id to Properties > Inputs > Id.
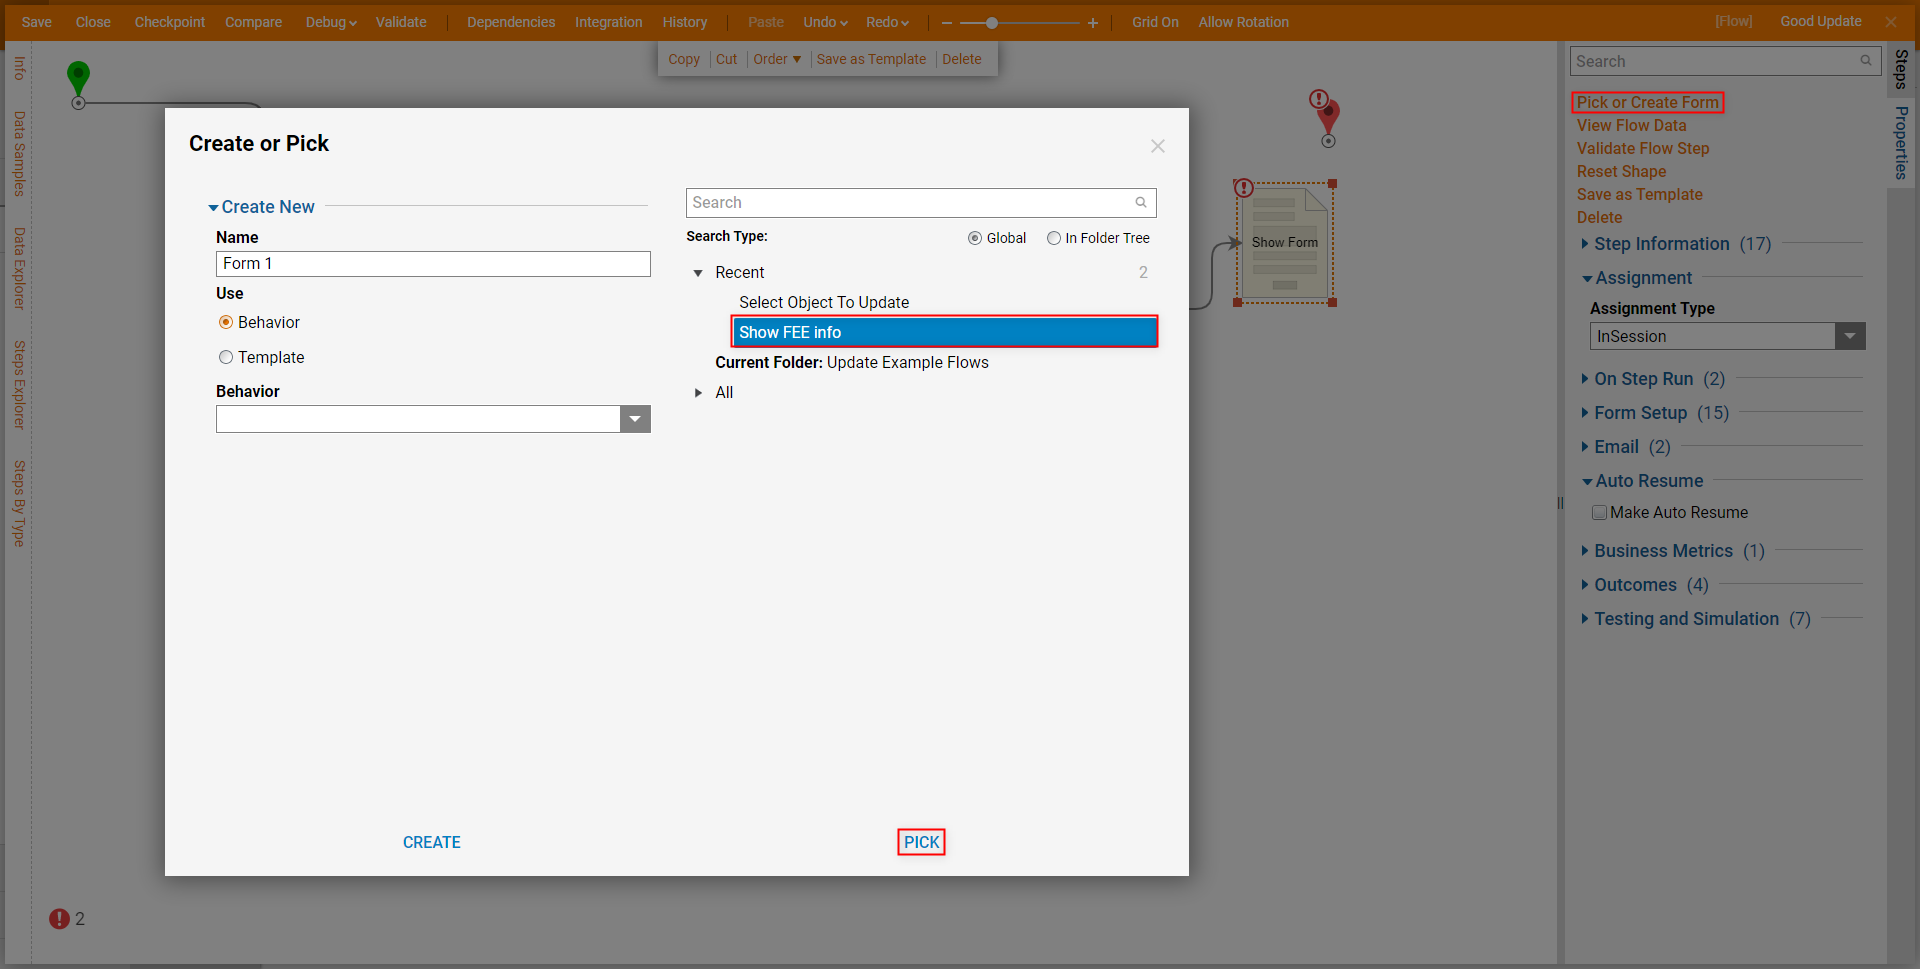
Attach a Show Form step to the Fetch By ID step, then from the Properties tab of the Show Form step, select Pick or Create Form, then PICK the Form that was previously used to display the selected Object's corresponding values.
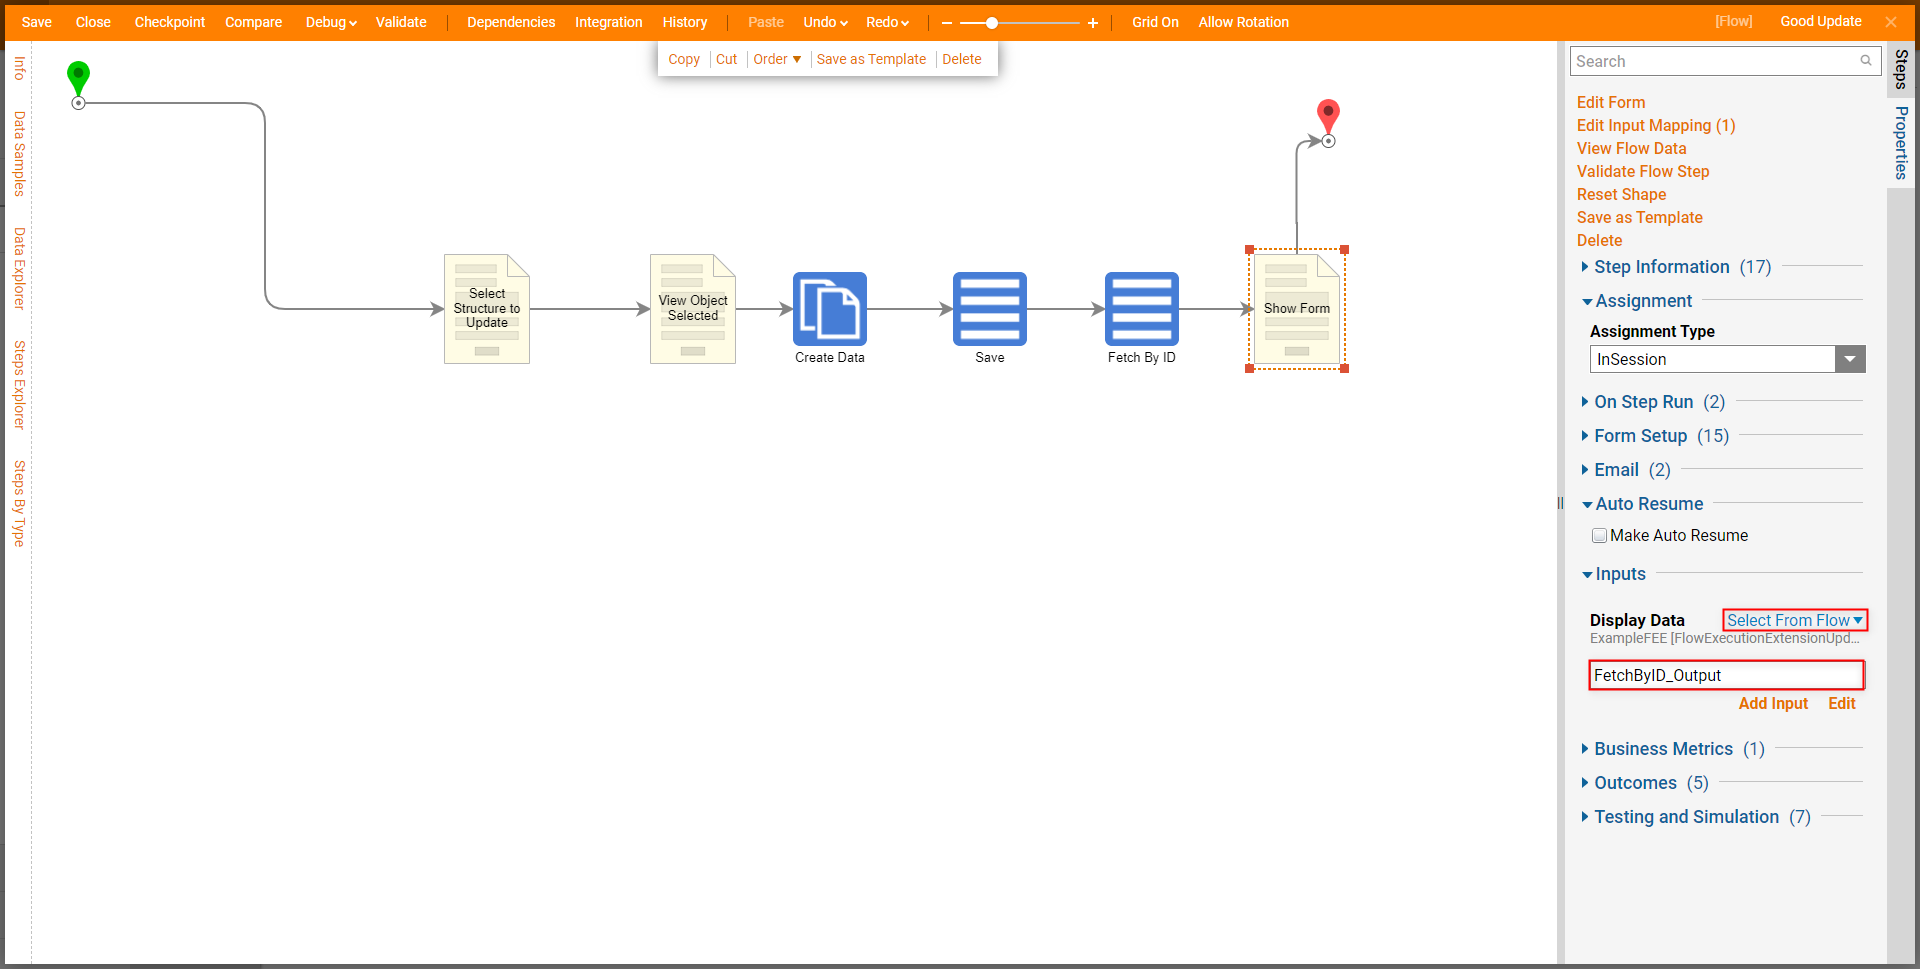
Connect the Continue path to End step. Then, from the Properties of the newly added Display Form, map FetchByID_Output to the Display Data Input.
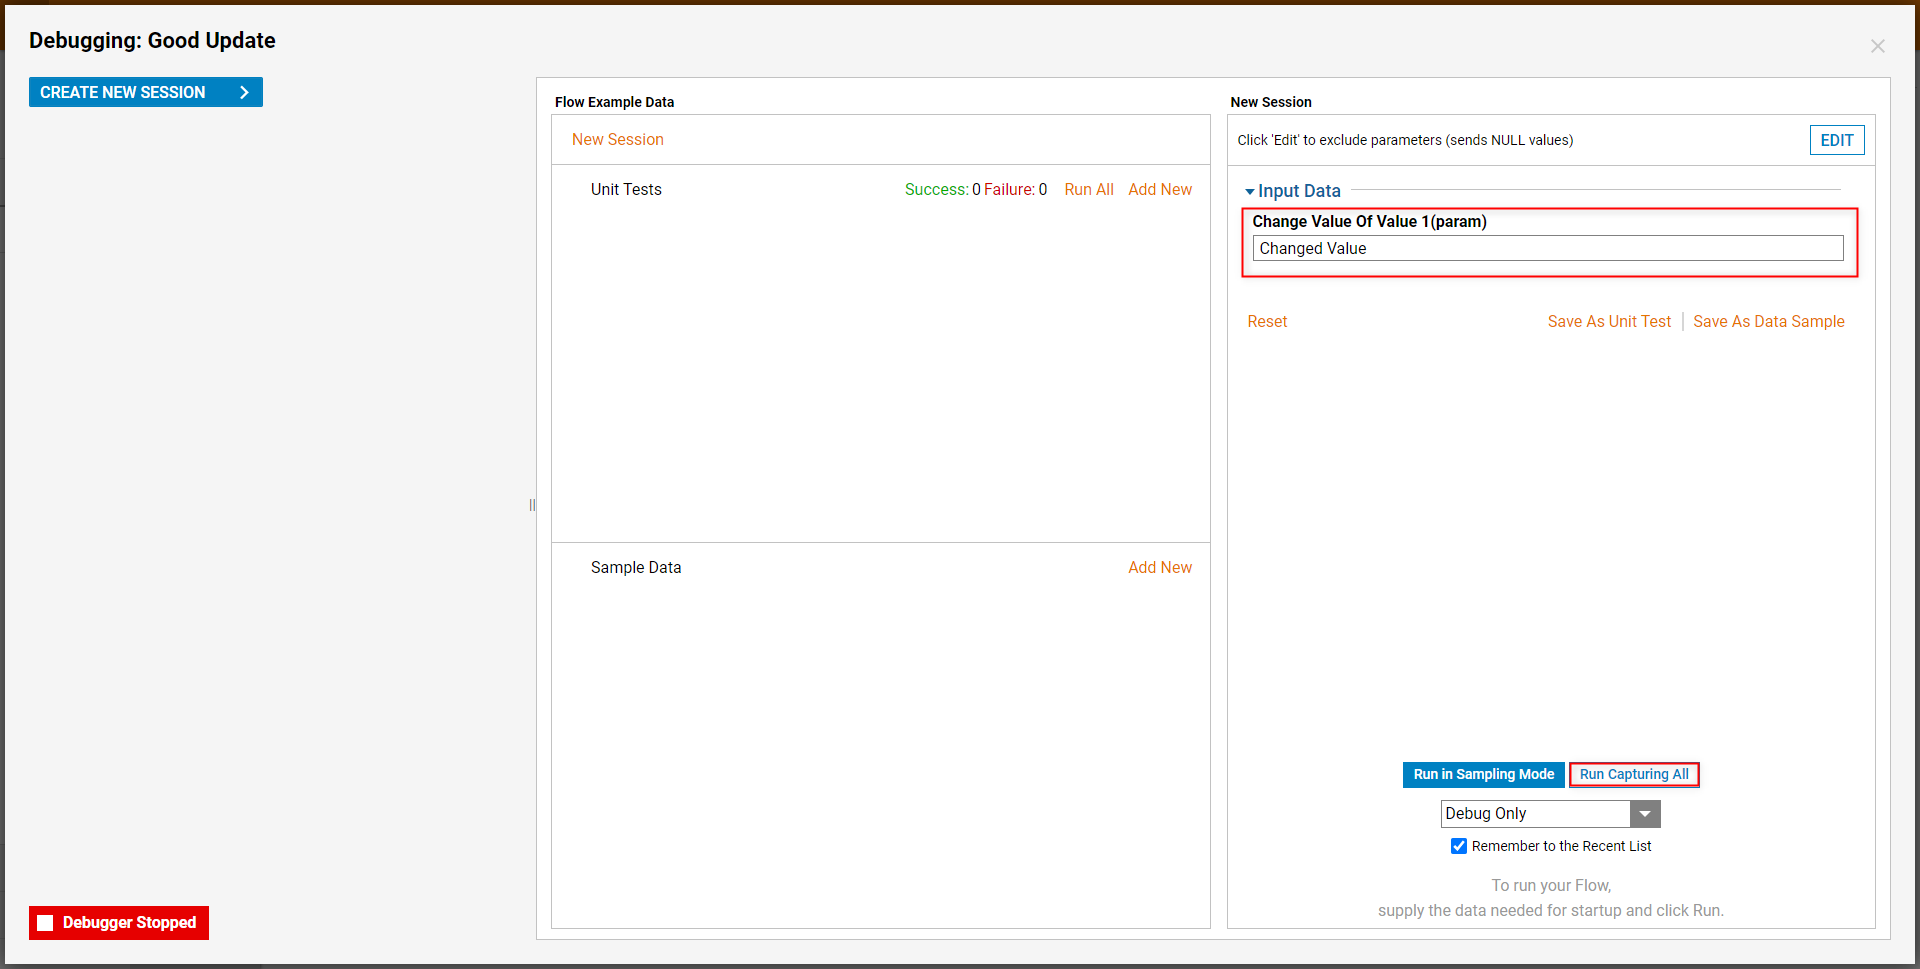
Save the Flow, then select the Debug link from the top Action bar.
From the Debugger, provide the desired Change Value for the Flow Execution Extension, then click Run Capturing All.
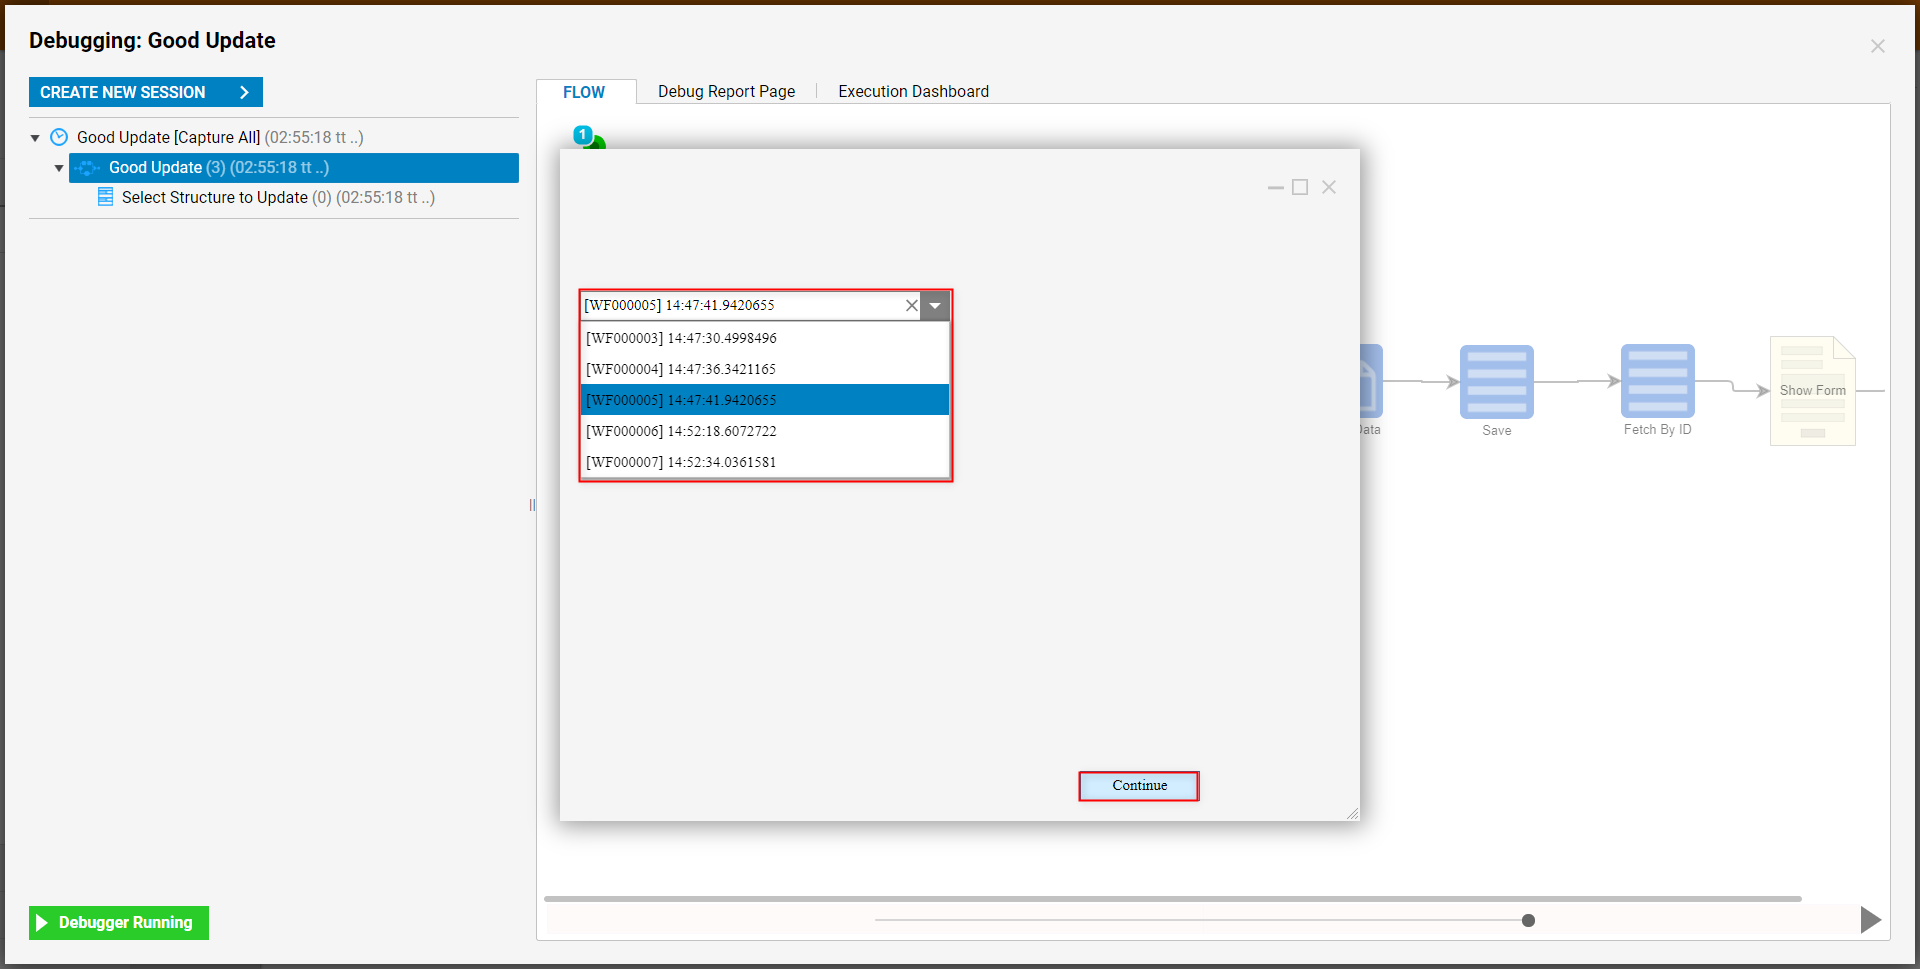
From the first Form, select the desired option from the dropdown, then click Continue.
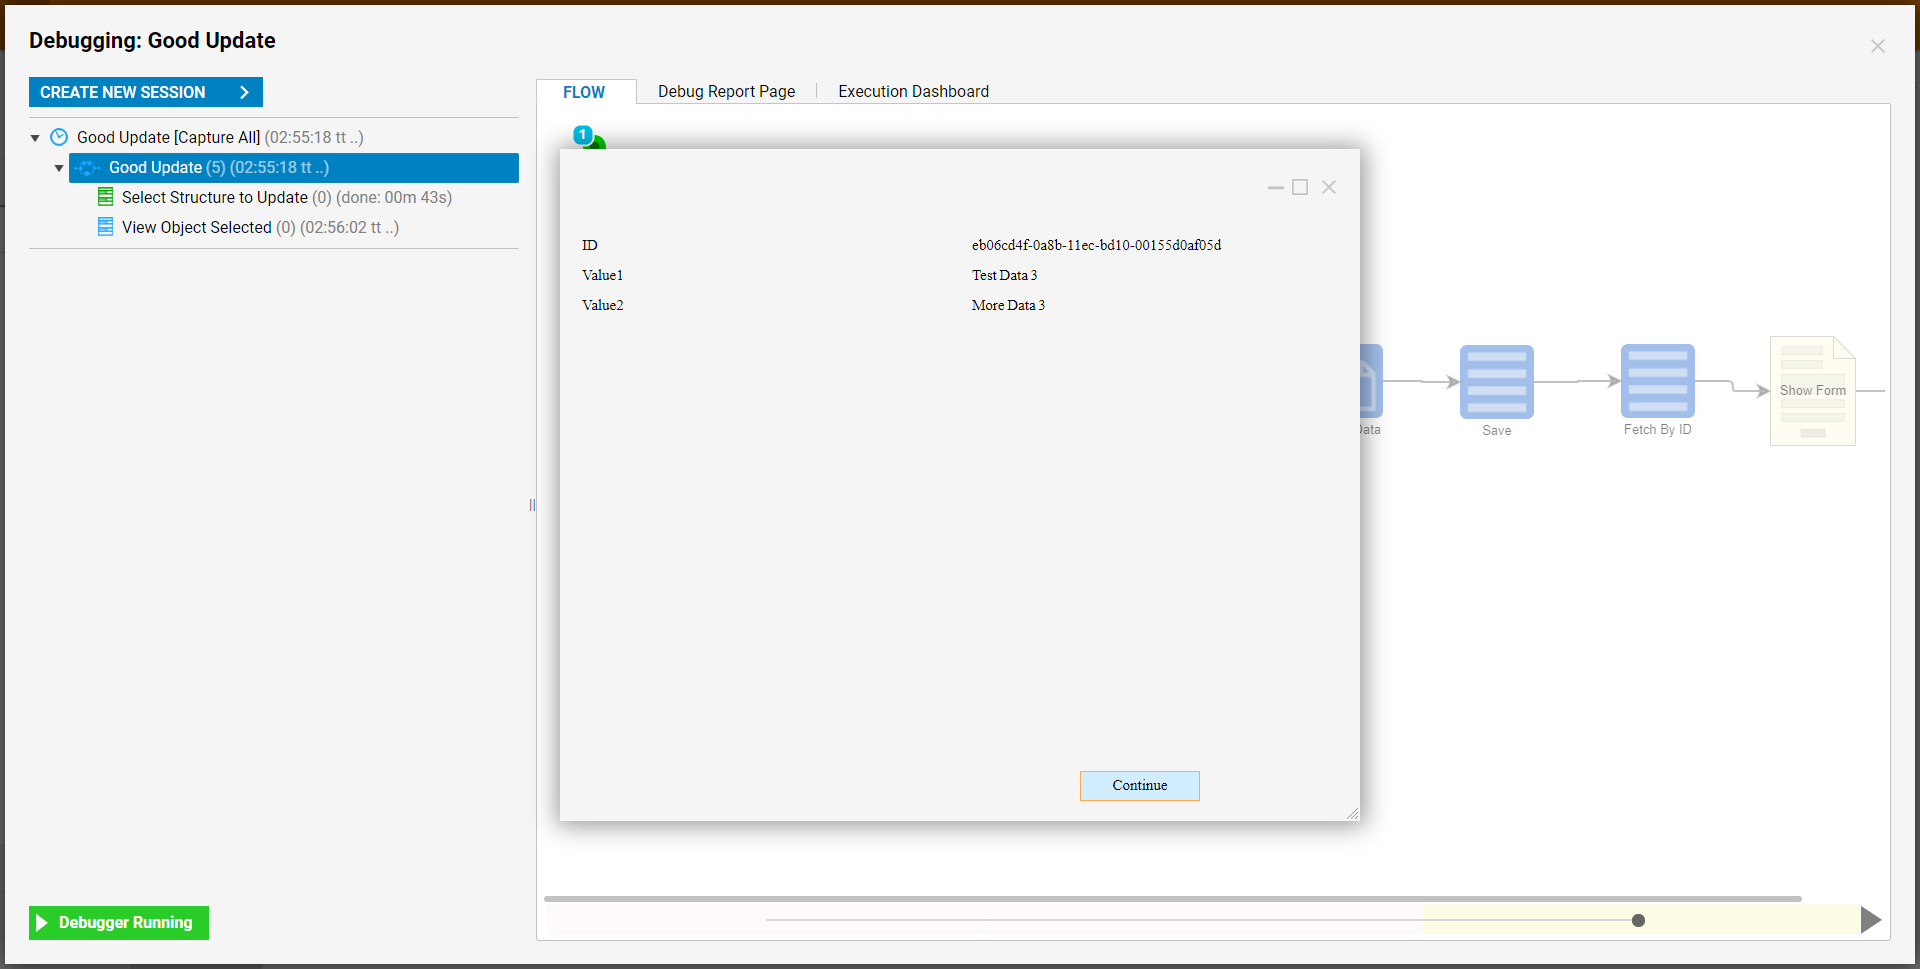
After observing the displayed Values on the second Form, click Continue.
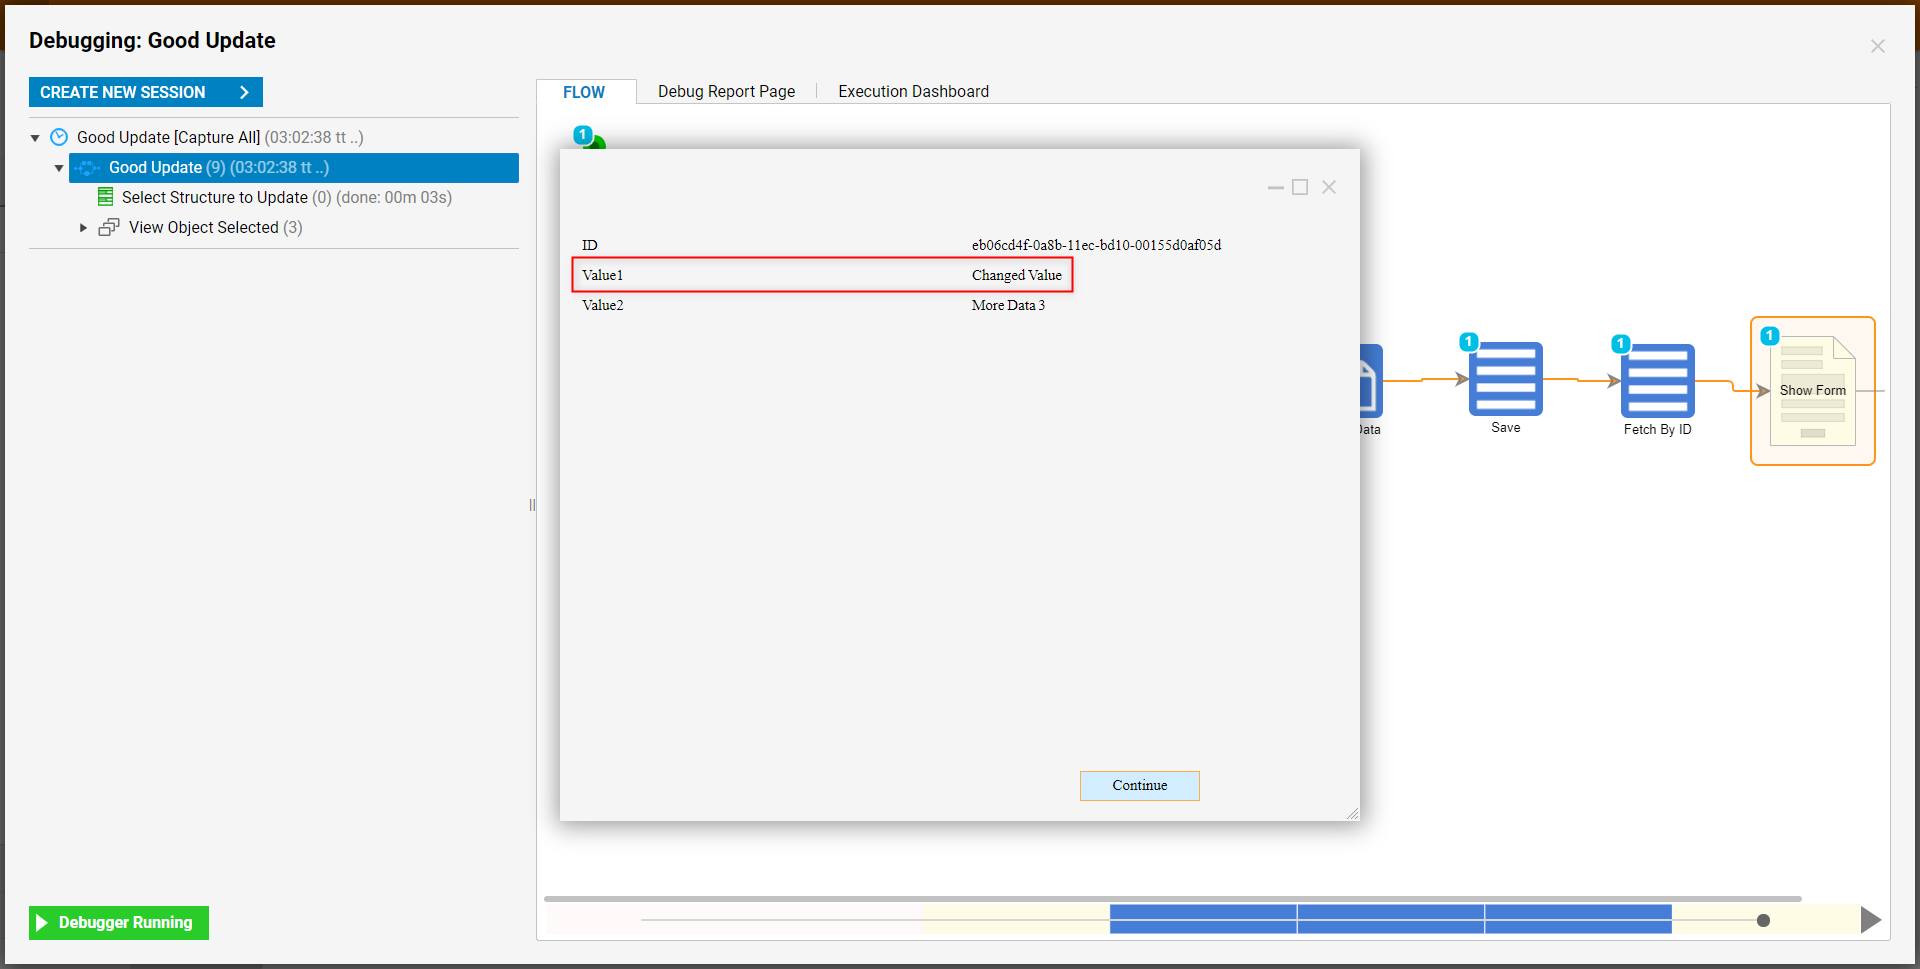
On the last Form, verify that the Change Value was properly applied to the selected Flow Execution Extension data, then close out of the Form.
Delete
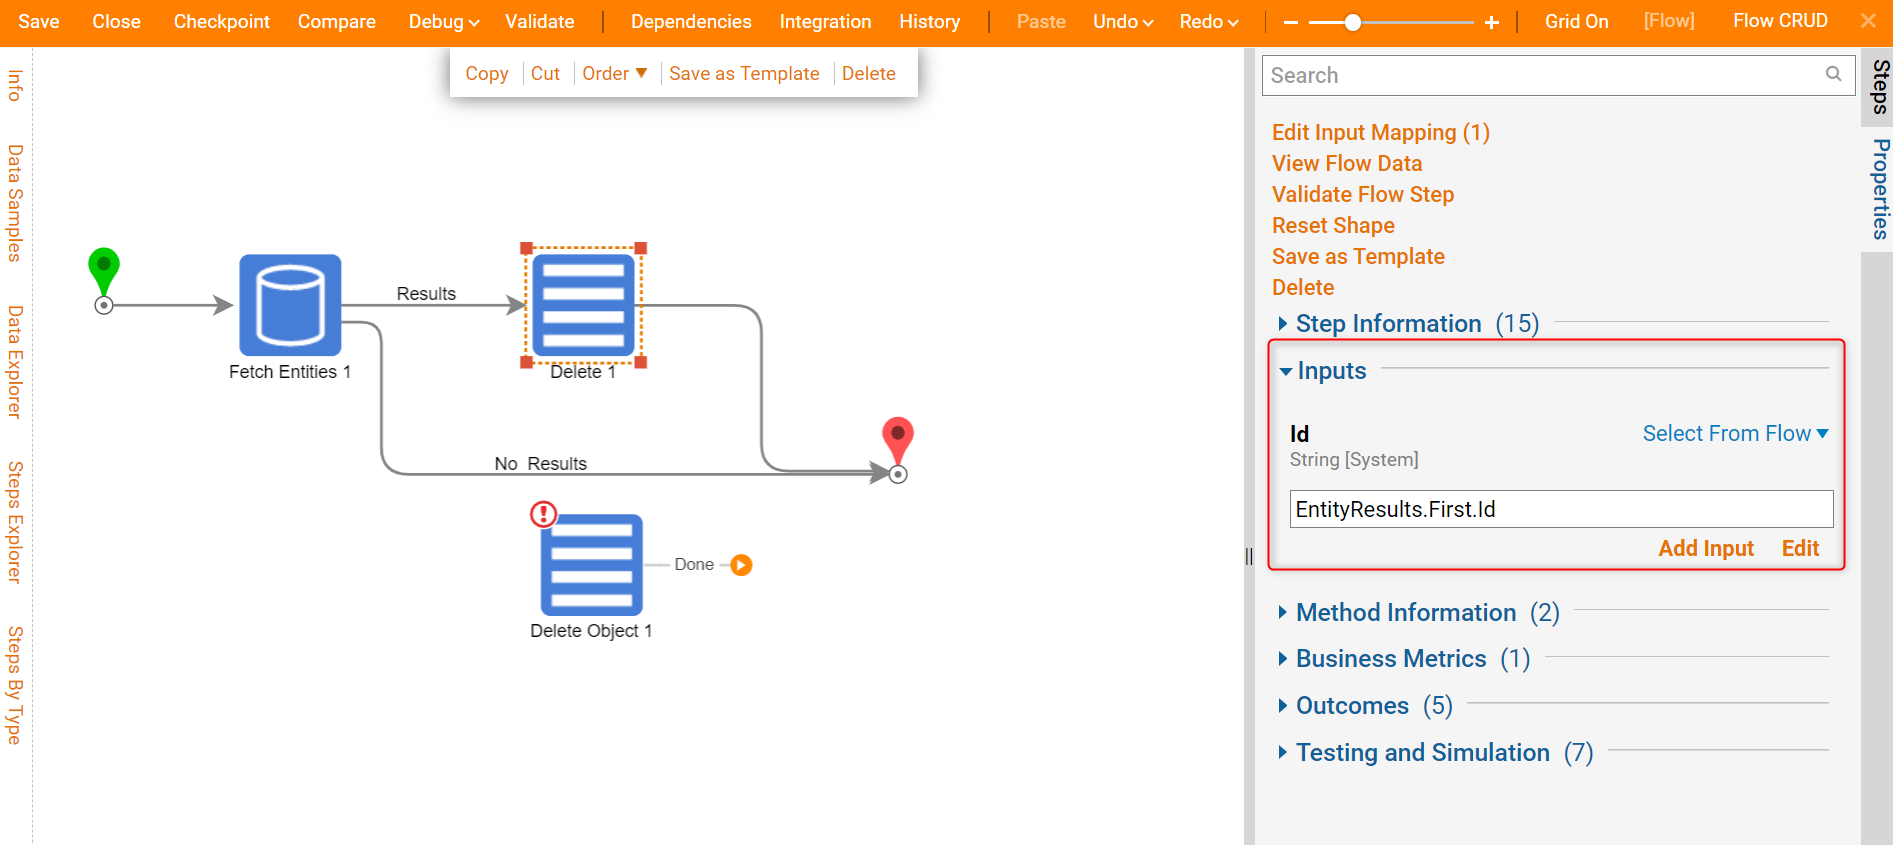
With a Flow Execution Extension Data Structure, the steps used to delete records are the Delete and Delete Object steps. These steps can be found in the Steps > User Defined Types > Flow Data Extensions > FlowPerson category. Both of the steps can be used to delete a record; the difference is merely the input the steps are expecting. The Delete Object step will delete a specific piece of the relevant record and the Delete step will delete the entire record. These steps work in conjunction with the Fetch Entities step to read the records.