Overview
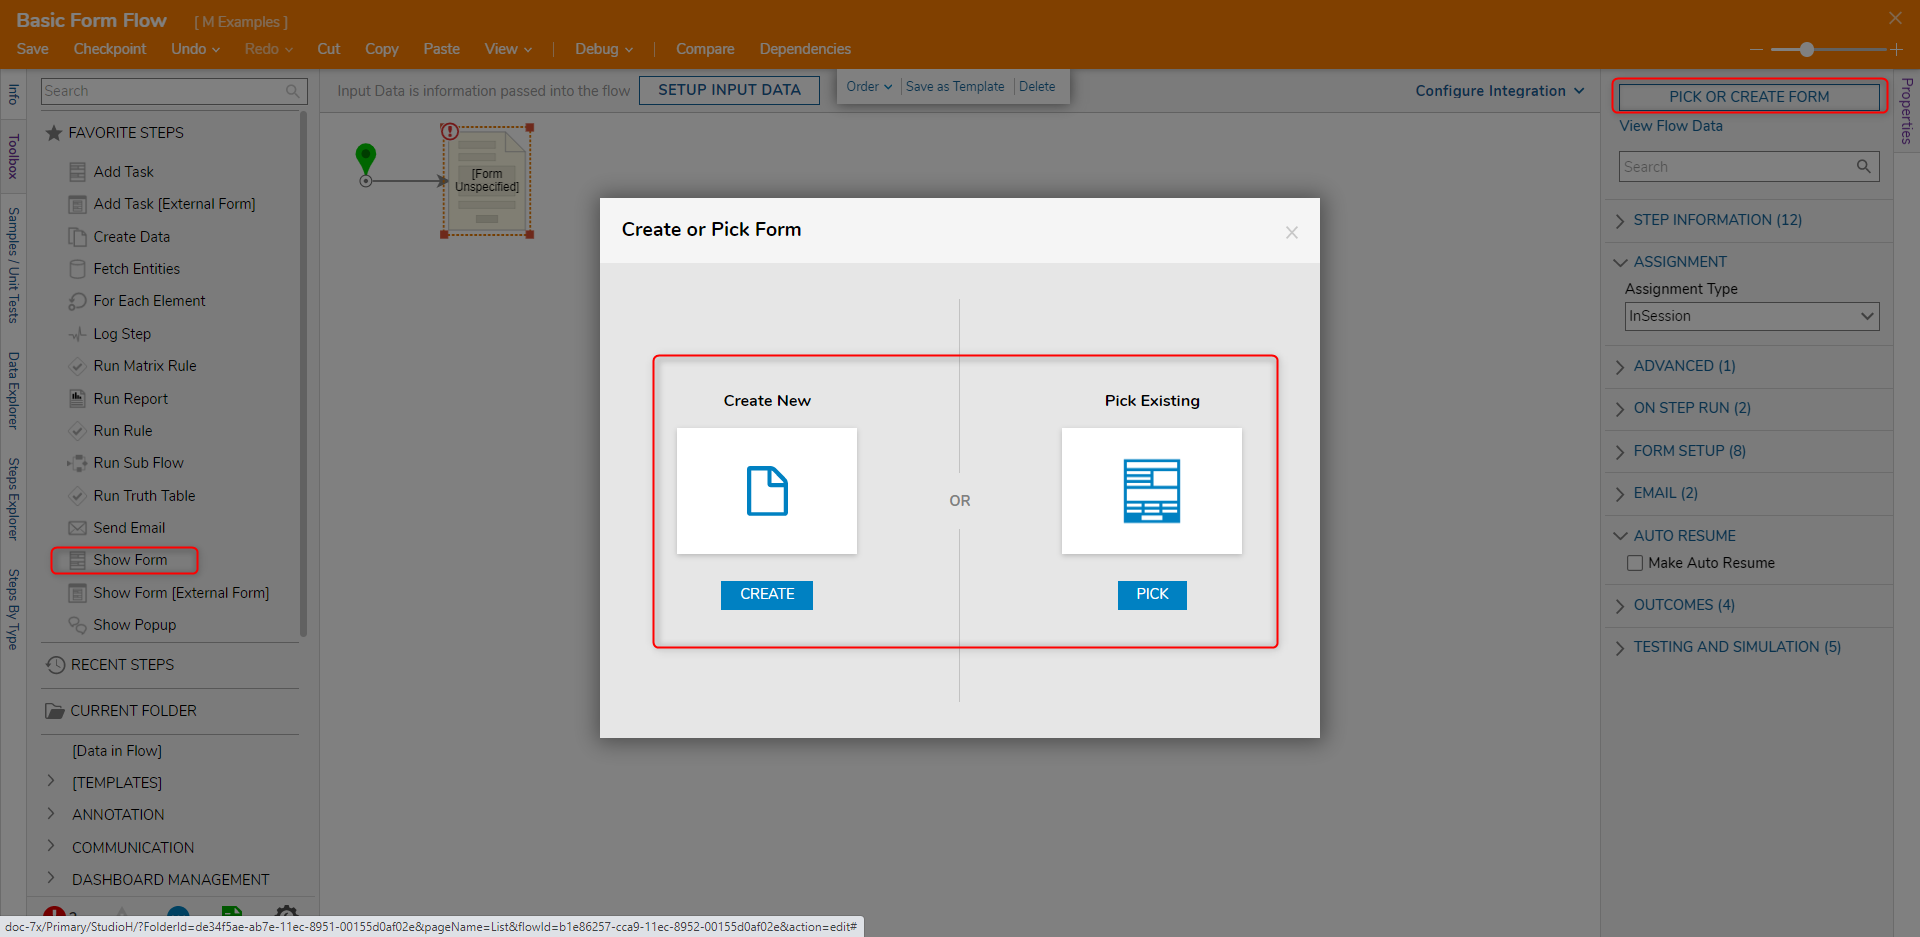
To have an end-user interact with a Form, it has to be created in a Flow. The Show Form step in the Flow Designer allows a user to create or pick an existing Form.
Creating a Form
- In an existing Flow, attach a Show Form step from the Toolbox panel to the Start step.
- On the Properties panel, click PICK OR CREATE A FORM. This will open the Create or Pick Form dialog window that allows a user to create a new Form via CREATE or select an existing Form via PICK.
- Click CREATE.
- The Create New window will display a list of Form types and templates to use. After selecting one of the options a Create dialog window will appear to allow the user to enter a name for the Form. Select Form, name the Form and click CREATE.
Form Type Description Form Creates a blank Form Approval Form [template] A Form containing two Buttons: Approve and Deny Mobile Form [template] A Form that creates a user interface designed for interaction from mobile devices
Mobile Form (iPhone) [template] A Form that creates a user interface designed for interaction from iPhone devices
Simple Form Form created with commonly used controls Section Form [template] A Form containing a HeaderContainer control that may be expanded once clicked on 4 Column Form [template] A Form containing 4 Columns upon creation 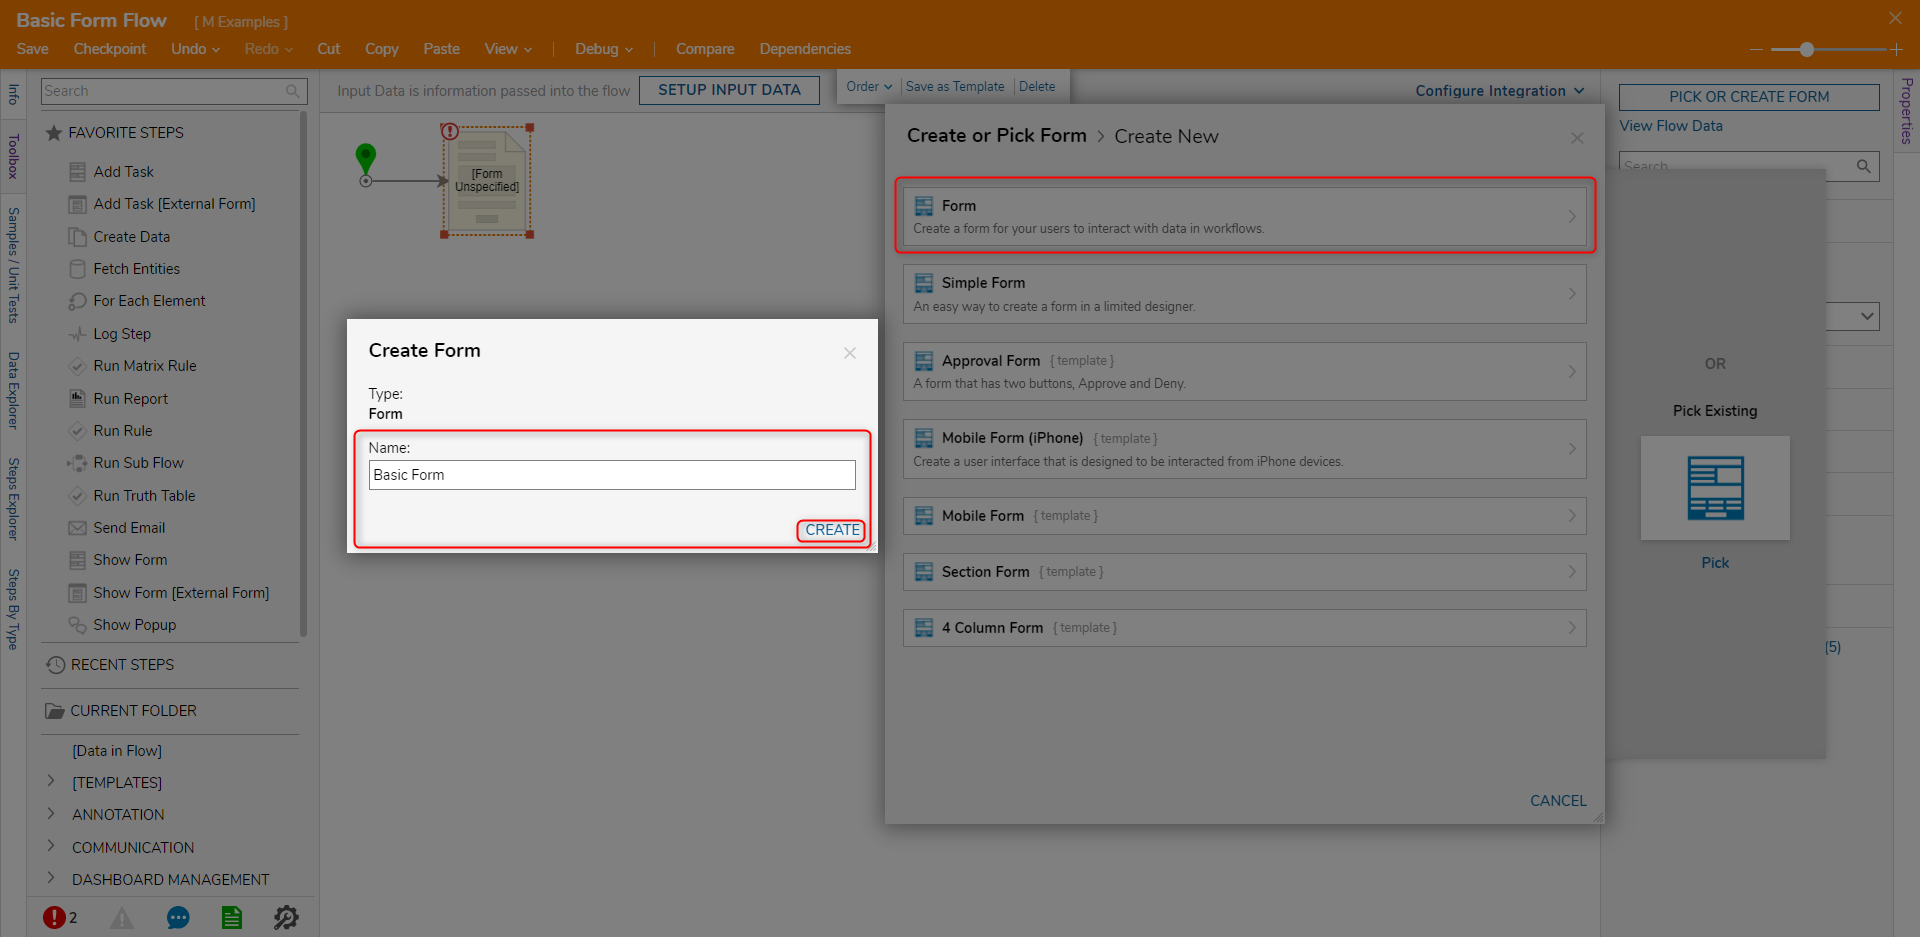
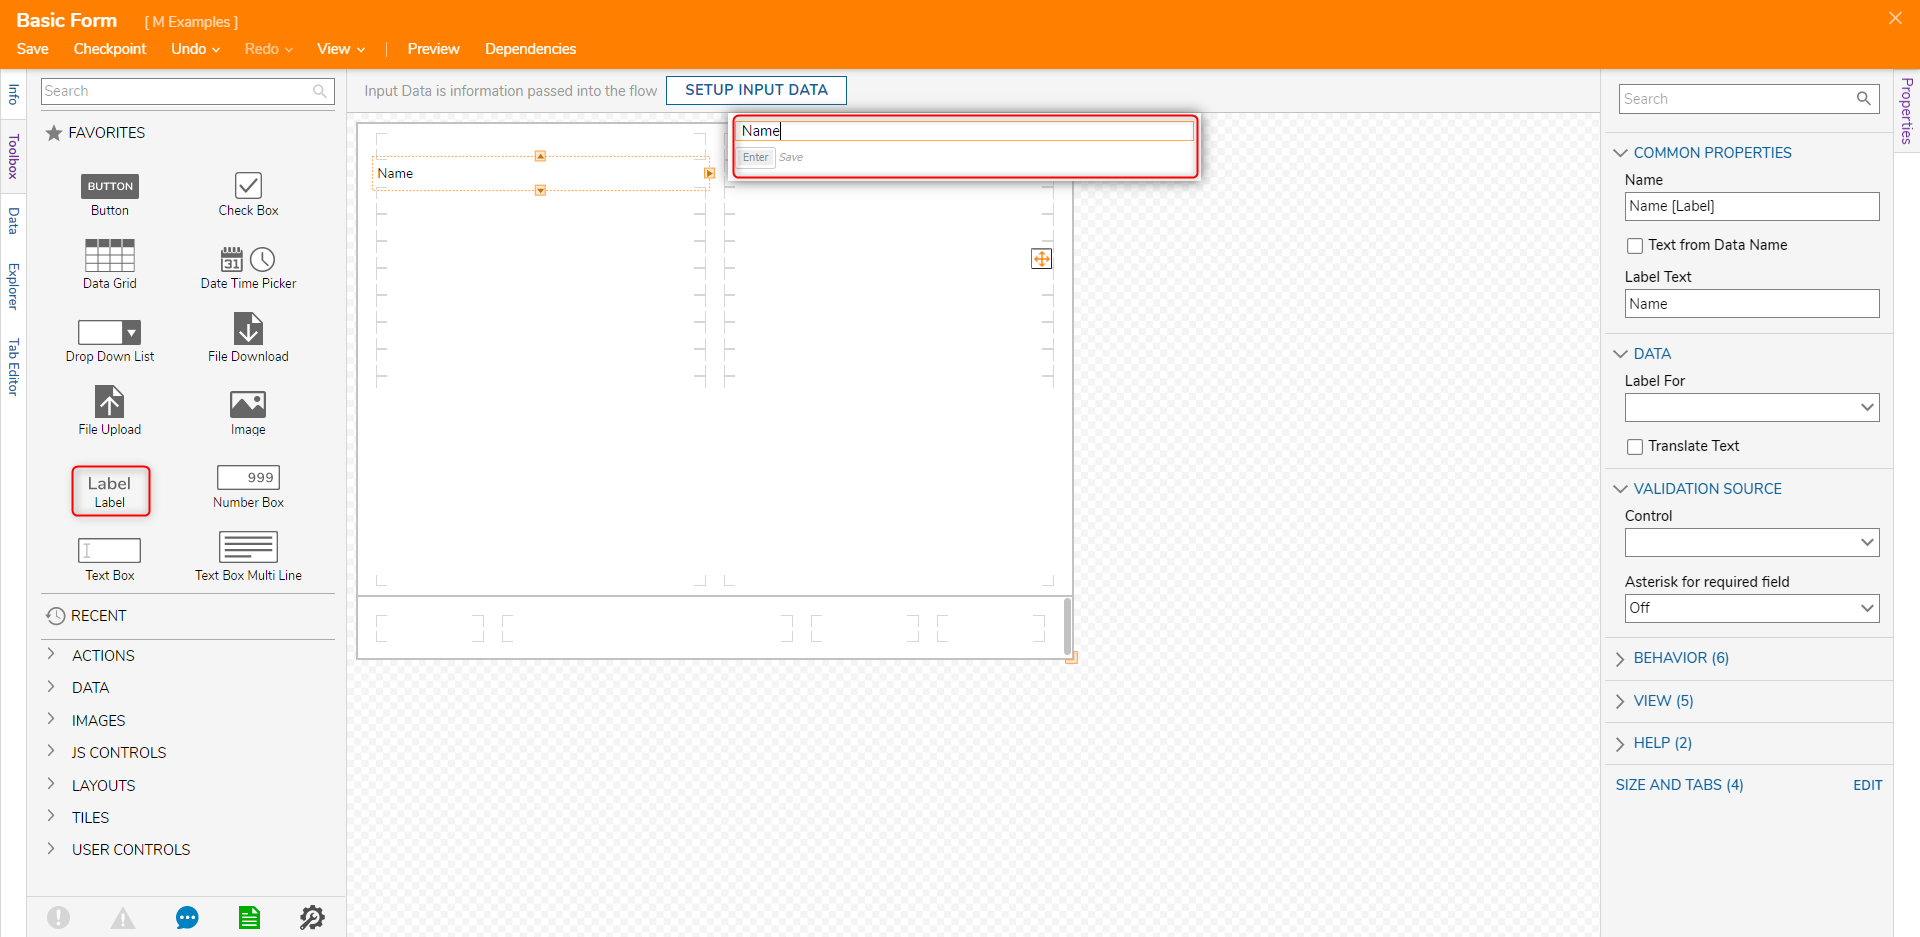
- In the Form Designer, the Toolbox panel contains all the Form Control that can be added to the Form workspace. Click and drag a Form control and place it on the Form.
- When adding a control to the Form workspace, enter a name for the control and click enter to set the name.
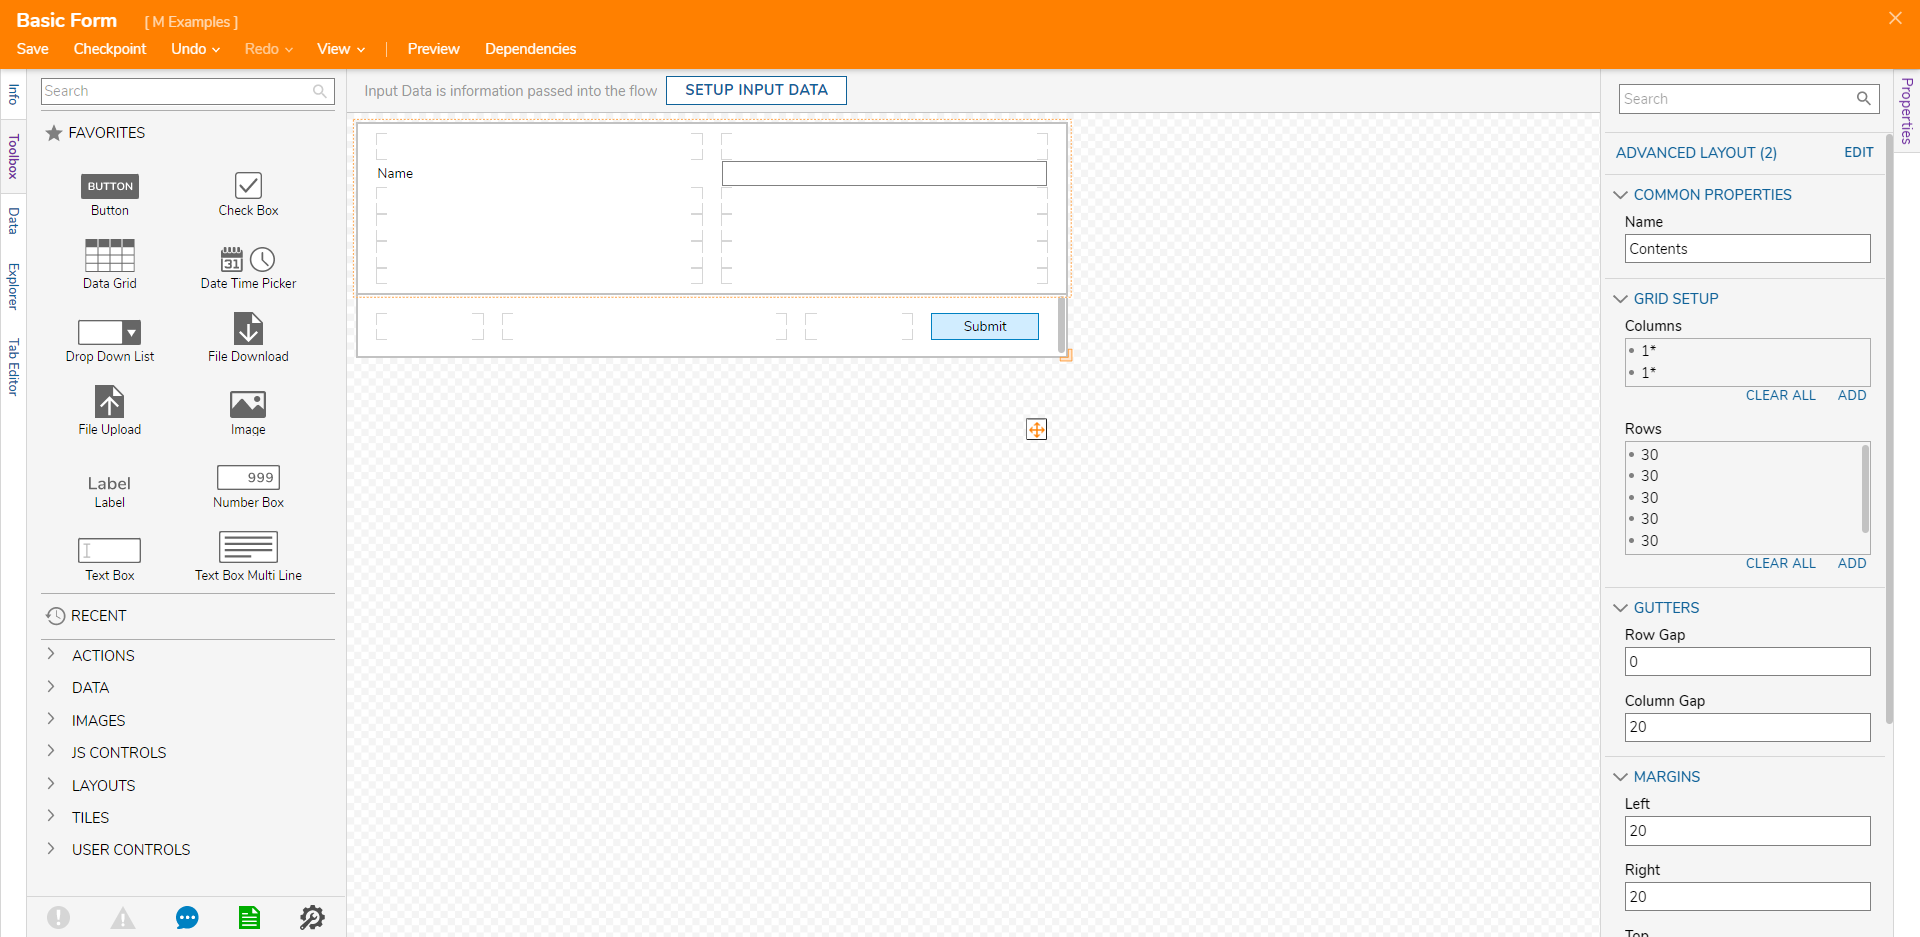
- The Form can also be resized and configured to display a different layout. The default layout for the Form is the GridLayout which can be modified by adding/removing columns and rows.
- Configure the Form with a Label, Text Box (name), and Button (Submit) control. Click Save and close the Form Designer.
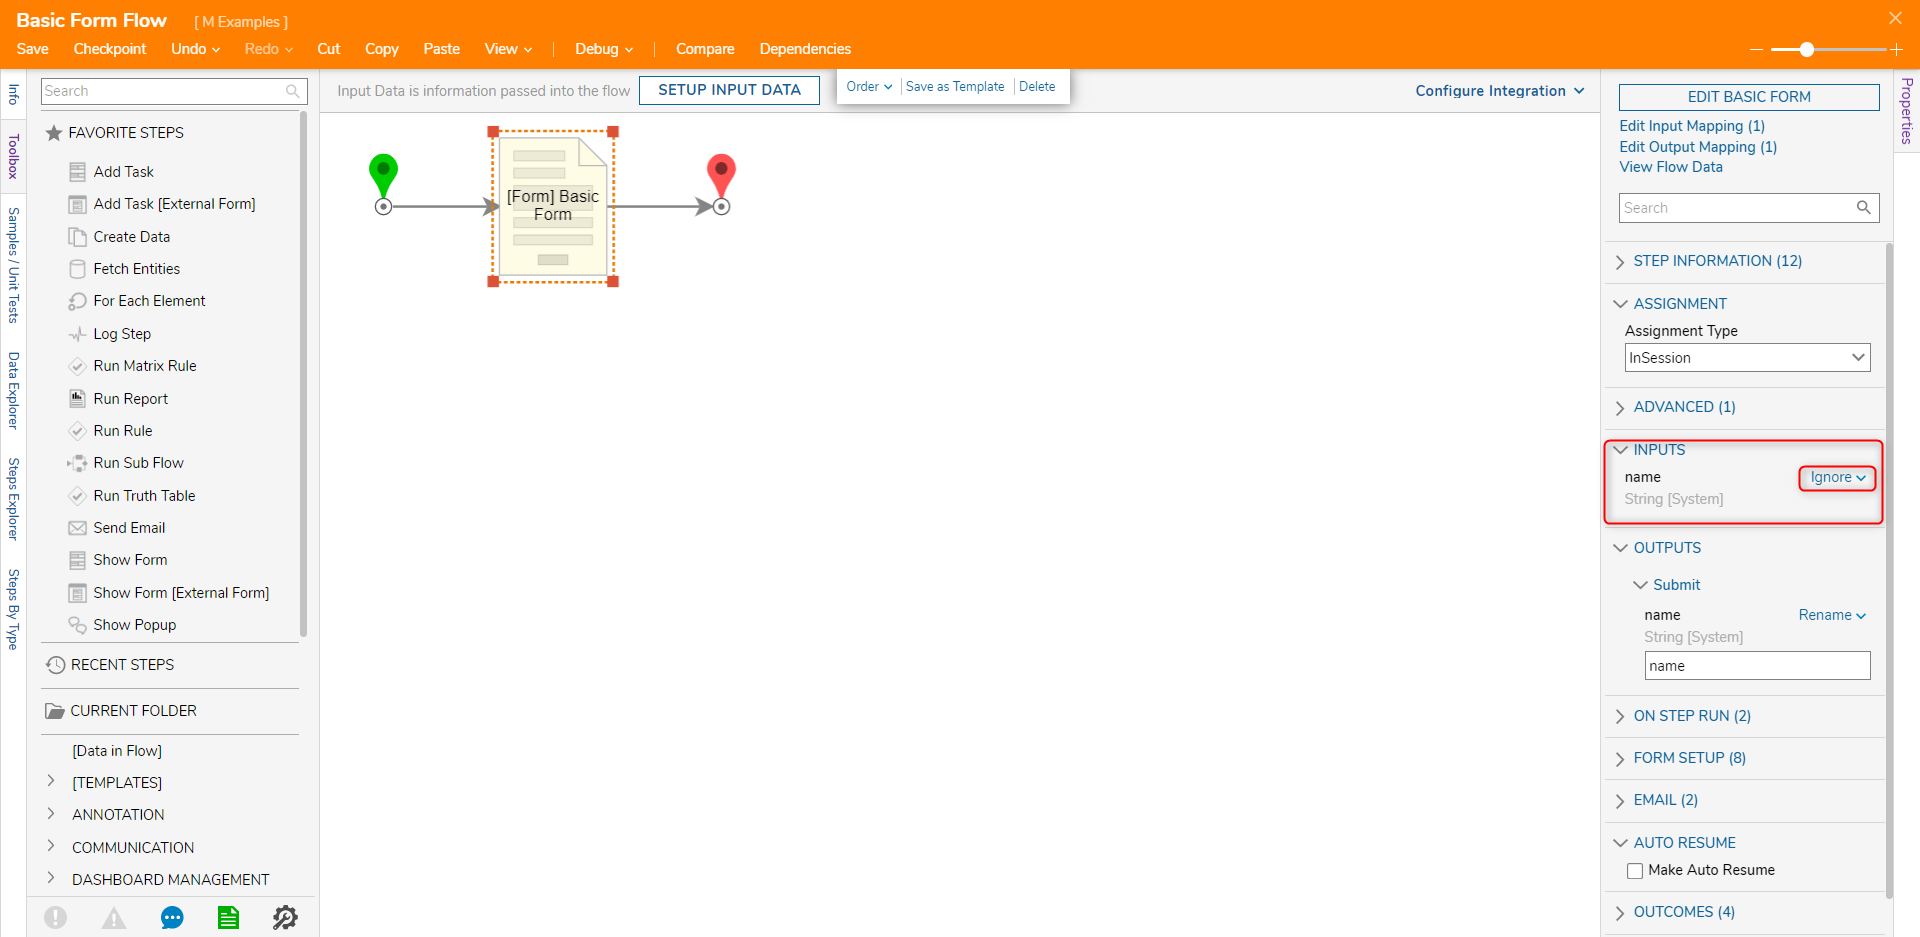
- In the Flow Designer, set the name input field to Ignore mapping and connect the Submit path to the End step. Click Save to save changes to the Flow.
Debug
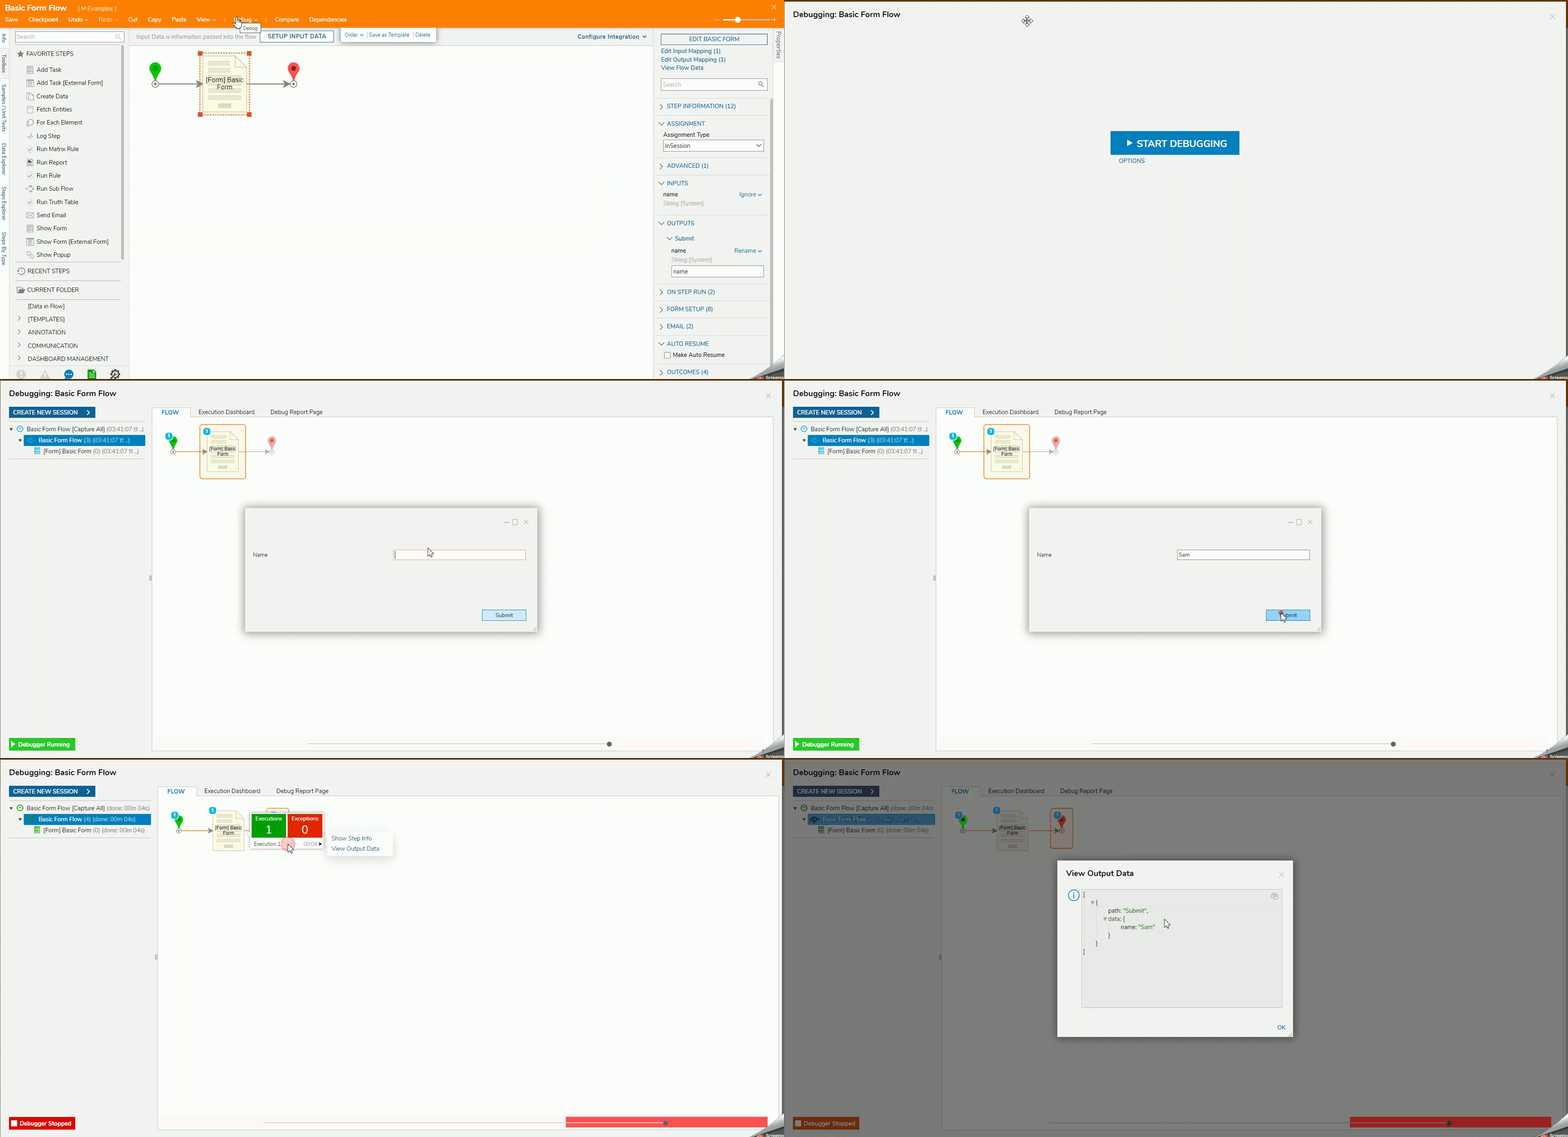
- On the top action bar, click Debug.
- Click START DEBUGGING.
- When the Form opens, enter a name in the Text Box and click Submit.
- After the debugger runs, select the step, click Execution 1, and select View Output Data to see the data passed in.
Extended Capabilities with Active Form Flows
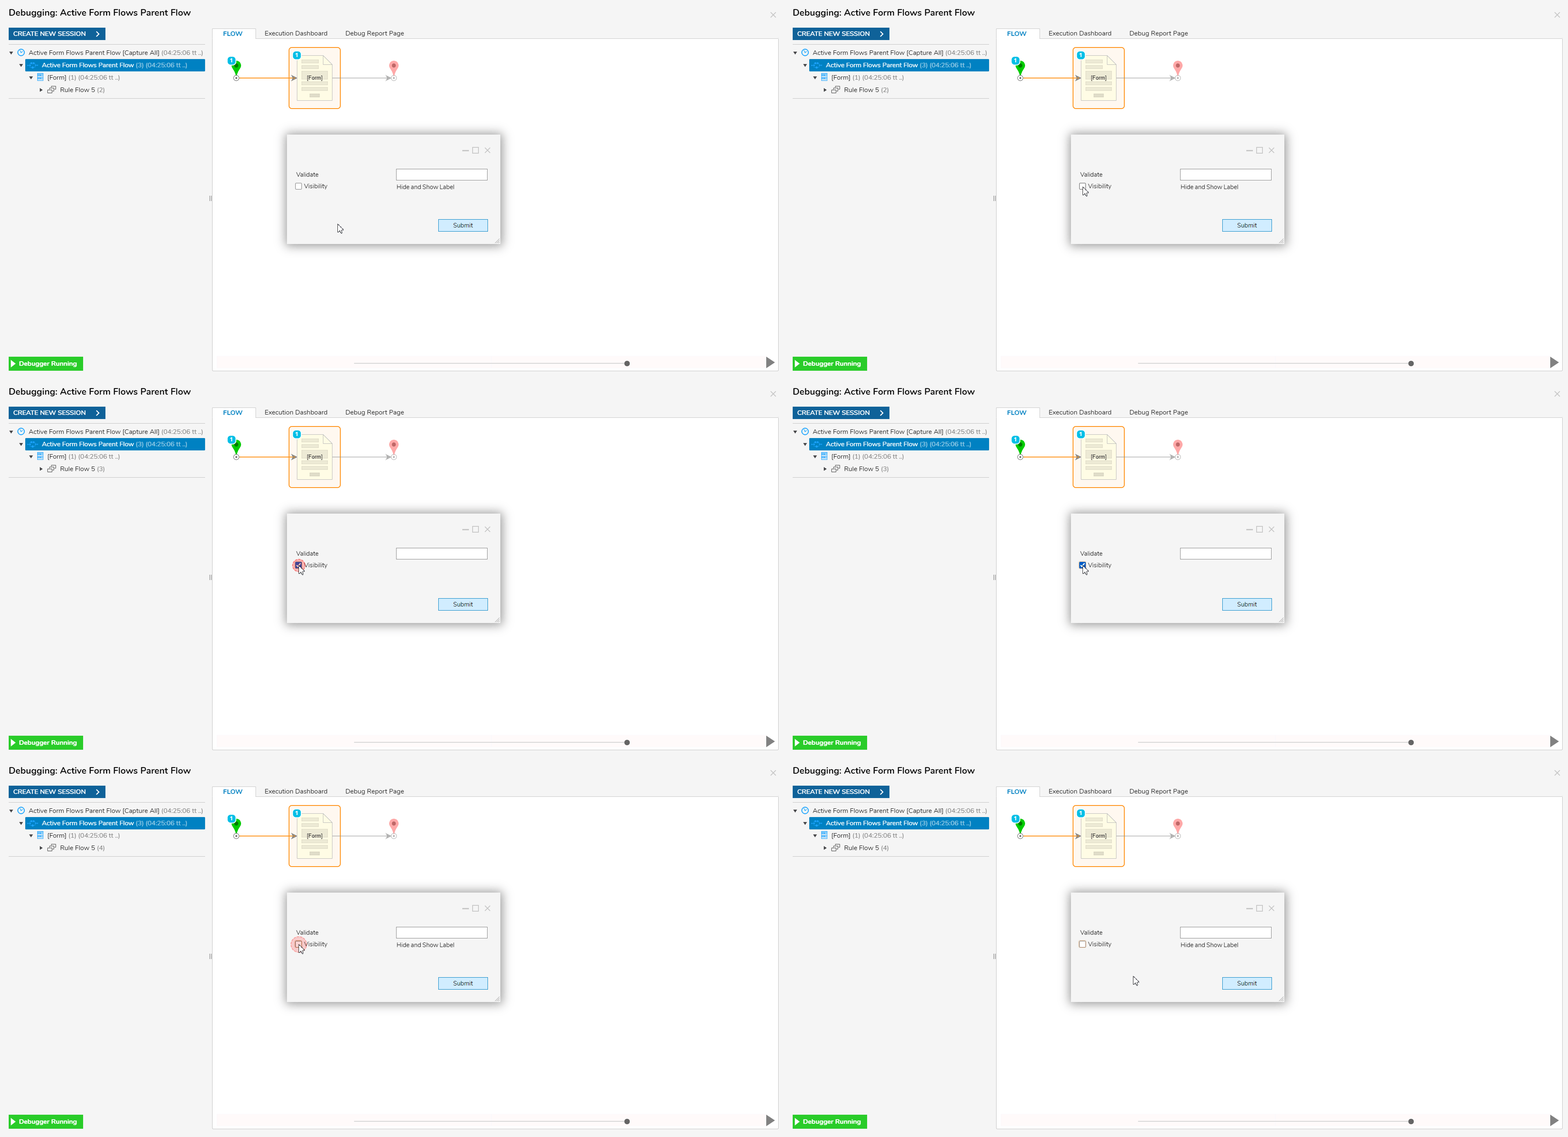
Active Form Flows logically govern how a Form behaves based on process input. These behaviors can include validating a user's input, hiding/showing controls, enabling/disabling controls, or setting values on controls.
For further information on Forms, visit the Decisions Forum.