Overview
Unit Testing early and often is a necessary development best-practice, especially ahead of deployments and upgrades.
Unlike typical back-end Unit-testing and Debugging done through Decisions' unit-tests for Flows and Rules, the following article reviews the basics of performing automated front-end testing for UI interactions, such as navigating the portal, navigating through Forms, simulating data-entry, etc.
Pre-Configured Resource
"Selenium Example.zip" (53MB) contains:
- Visual Studio Project using Selenium and NUnit packages
- methods from the Decisions.Core.UnitTests.Web library
Decisions Setup
- Download the preconfigured Selenium Example.zip file from above.
- Unzip the contents of the folder.
- Import “Decisions Project Export.zip” into Decisions.
Visual Studio Project Setup
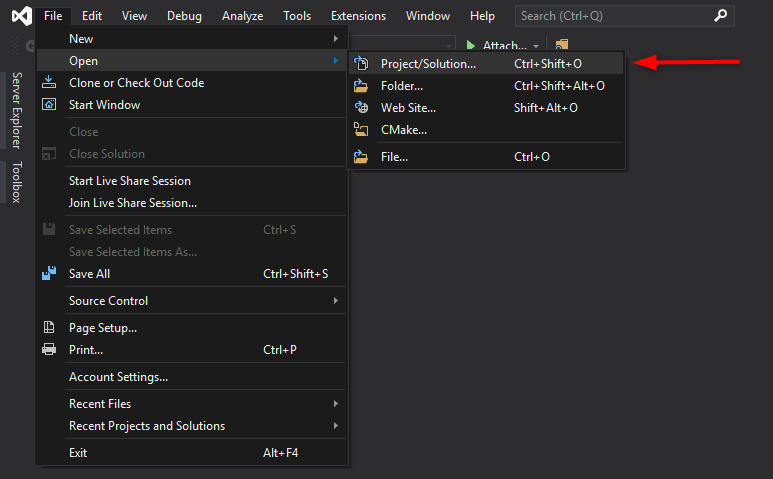
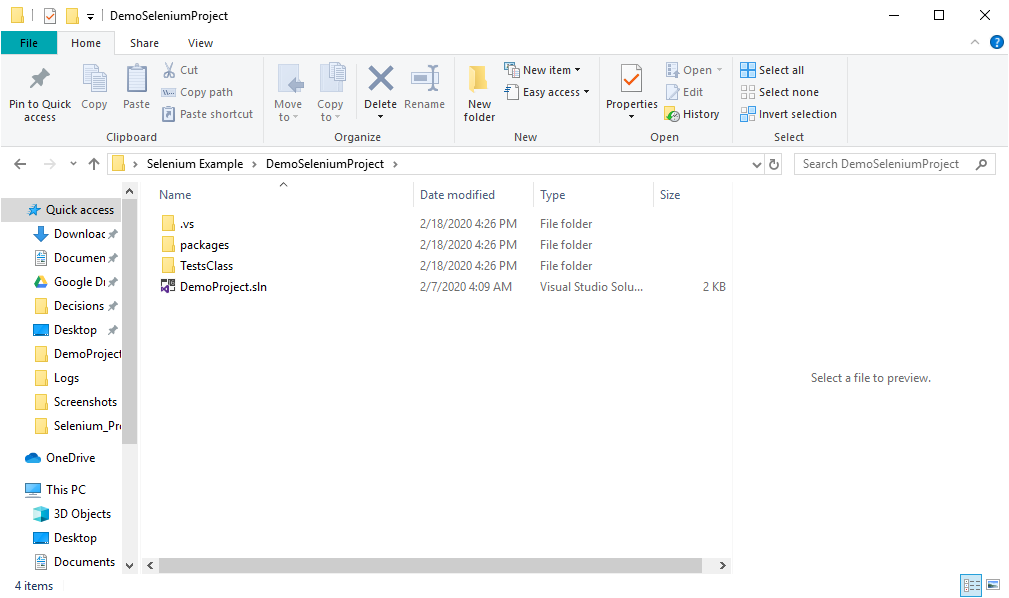
- Locate the DemoProject.sln within the DemoSeleniumProject subfolder of the Pre-Configured Resource file (Selenium Example.zip).
- Use VisualStudio to open DemoProject.sln.
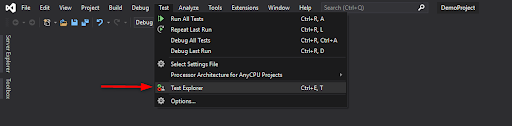
- Open the Test Explorer in Visual Studio.All test methods will be displayed in the Test Explorer.
- Click on the Run Test or Run All Tests button.
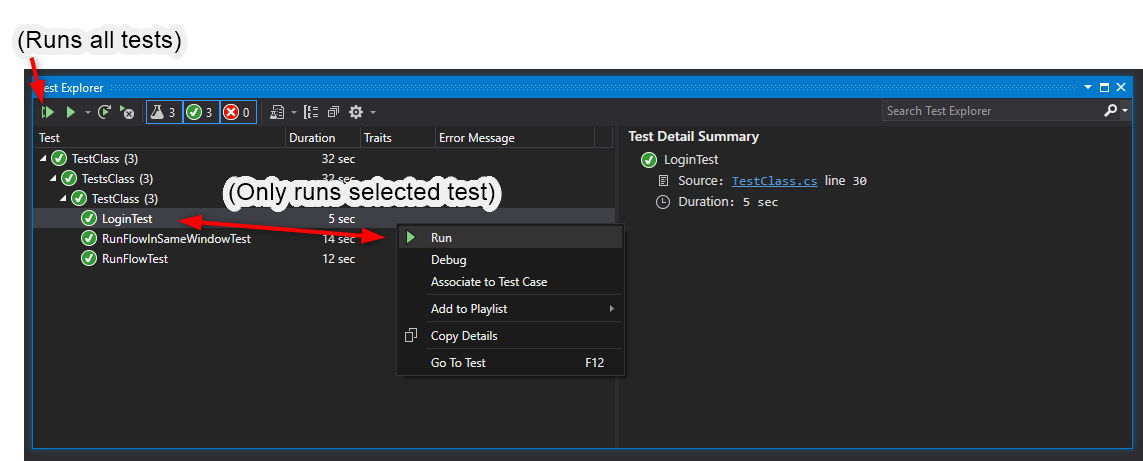 Test results will be displayed in the Test Explorer, with green check-marks or red X-marks depending on the results (as well as error messages and stack traces if applicable). The example Visual Studio project (“DemoProject.sln”) assumes the default admin account credentials are still in use.
Tests will run as the default user.
Writing New Tests
Visual Studio is installed with the following packages:
- NUnit
- NUnit3TestAdapter
- Selenium.WebDriver.ChromeDriver
- Decisions installed on the machine
The example Visual Studio project (“DemoProject.sln”) is pre-configured for the packages listed above; packages are also contained in the "Selenium Example.zip" file.
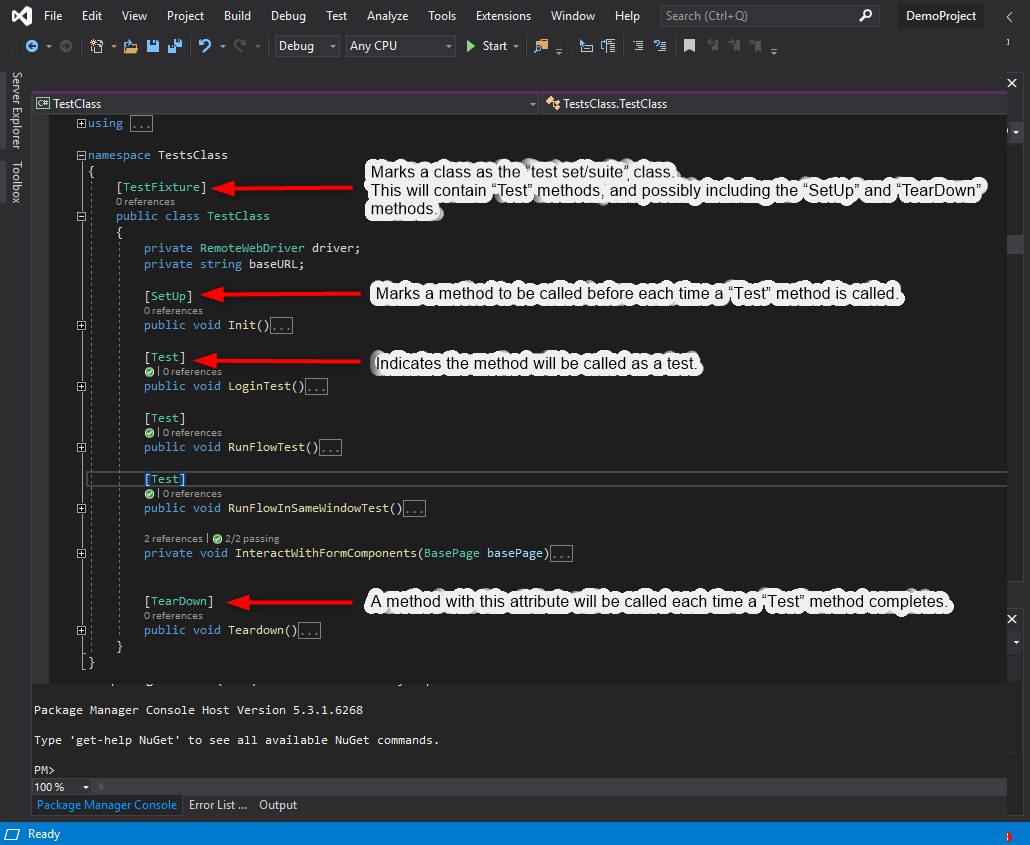
Notable Class and Method attributes for Writing Tests
| TestFixture | Marks a class as the “test set” class. This contains Test methods, and possibly may include the SetUp and TearDown methods. |
| SetUp | Marks a method to be called before each time a Test method is called. |
| Test | Indicates the method will be called as a Test. |
| TearDown | A method with this attribute will be called each time a Test method completes. |
Writing a New Test

To find a Textbox control on a Form, define an object with the class ‘SilverTextbox’ by passing a data-component-id argument to the “GetComponentByID” method, such as:

To define an object of a specific class, simply provide the data-component-id of the control to the appropriate method (“GetComponentByID”).
This is especially useful since each UI control has a unique data-component-id.
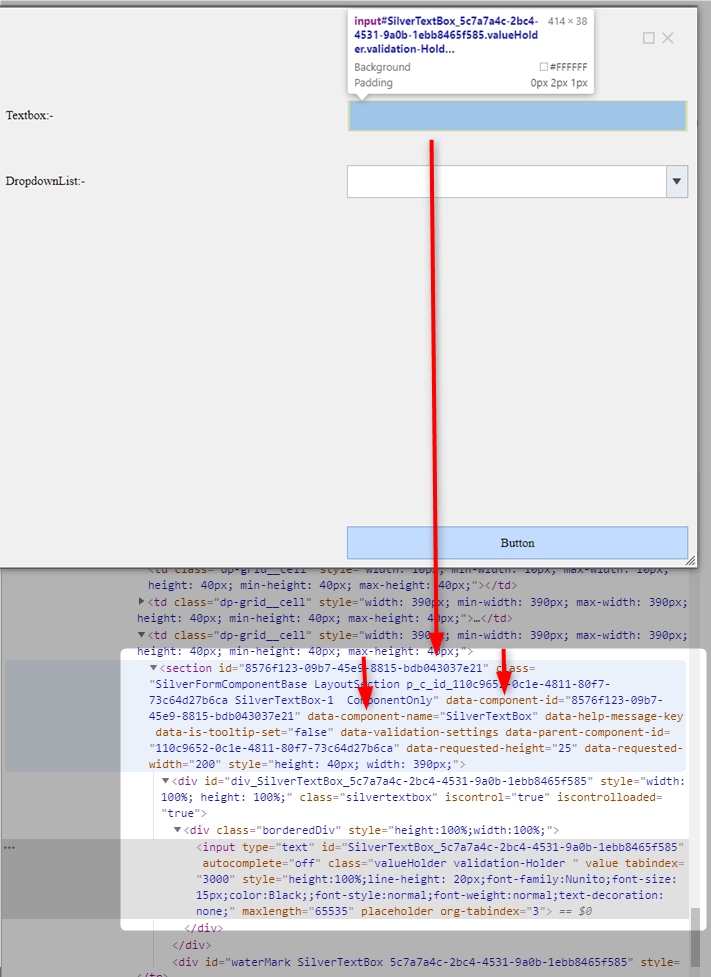
Finding the Data-component-id of a UI element
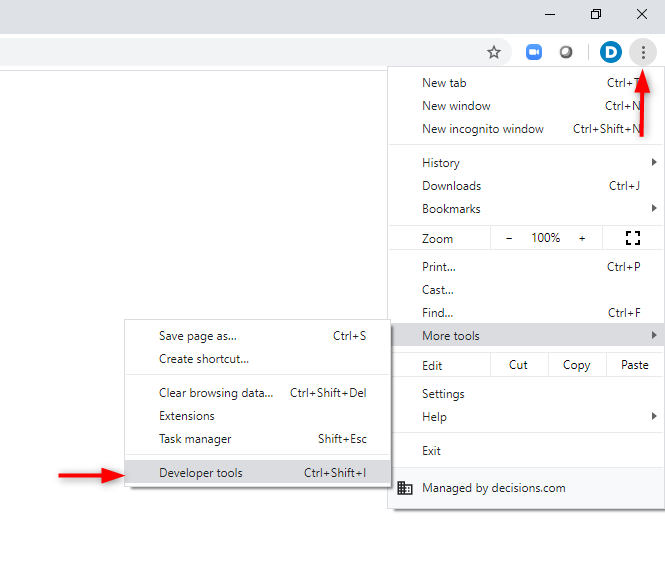
- Open Chrome Developer Tools by following one of the methods below.Chrome Developer Tools - Launch Options:
- Press F12 on the keyboard.
- Press CTRL + Shift + I
- Use Chrome browser menus
Click the far-left menu icon (shown below) to allow on-screen inspection of CSS elements.
Once enabled, clicking on any UI element will reveal relevant CSS for that element.
Locate and note the data-component-id and data-component-name needed to target the UI control/component that are using Decisions.Core.UnitTests.Web methods.