Overview
Process Folders are one of the core functions of maintaining audits trails for state-driven processes. They can keep track of a folder's state and any user comments within them. Users can add a comment to a newly created Process Folder in a Flow or retrieve a pre-existing Process Folder and add a comment to that record.
Adding a Comment
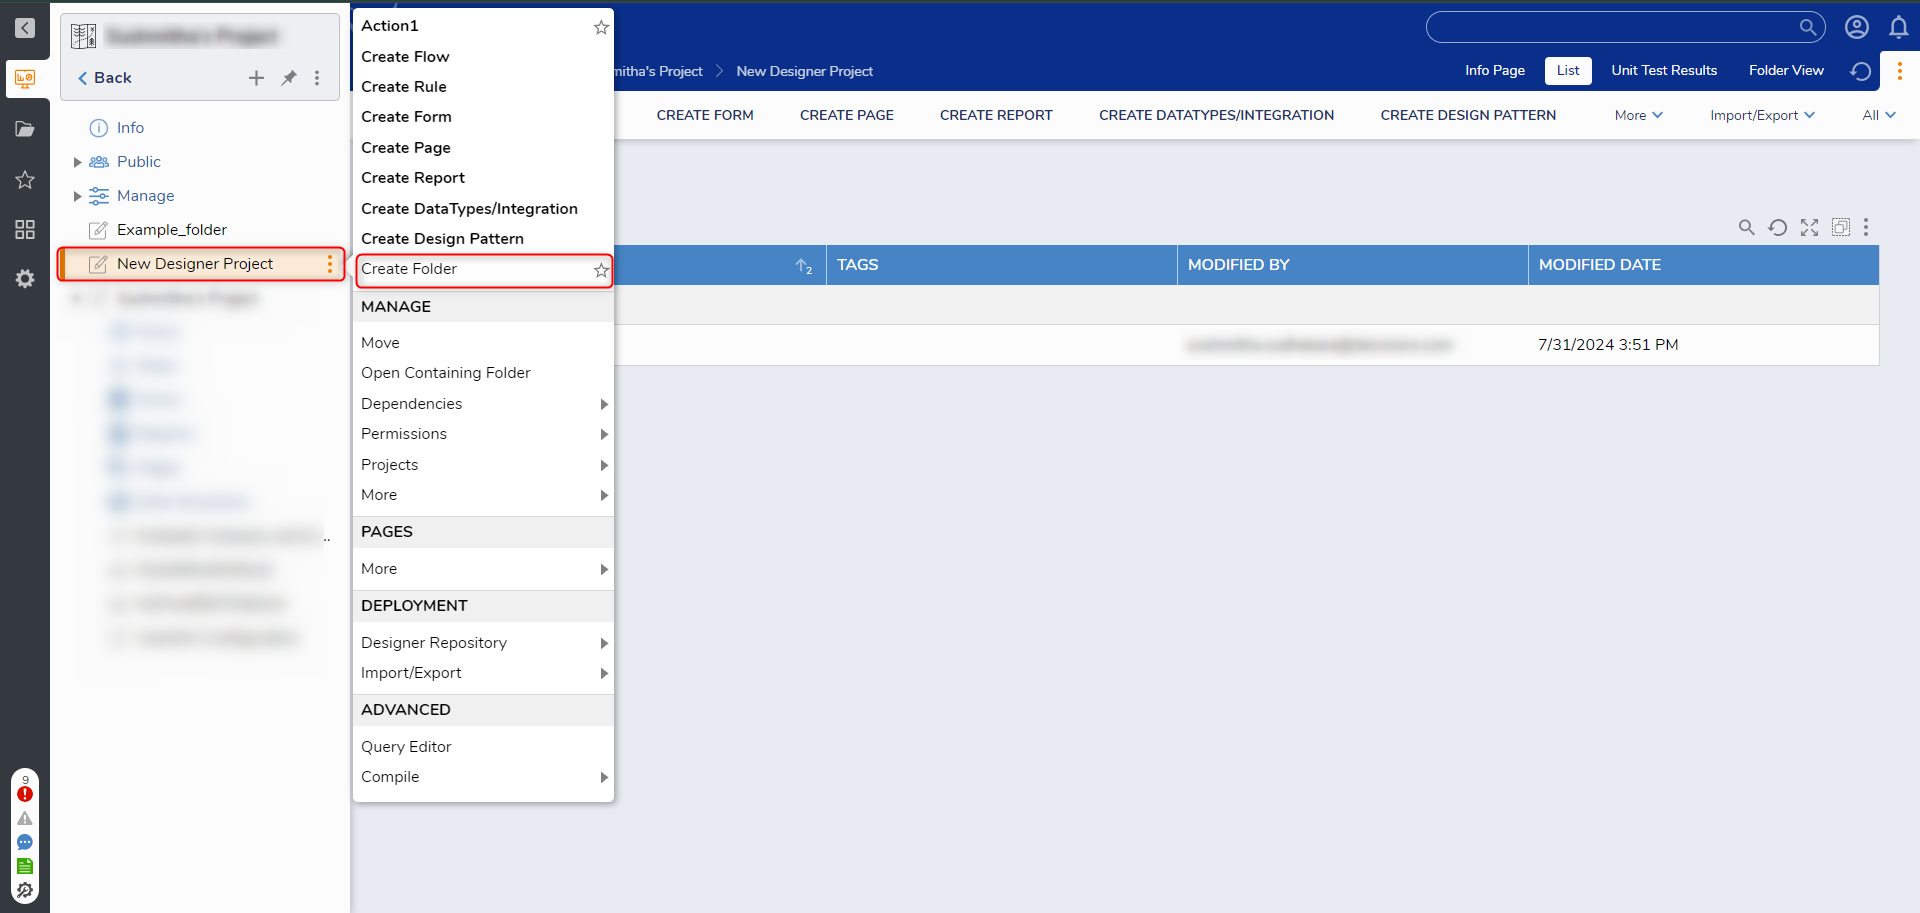
- Navigate to a Designer Project folder. Right-click the folder and select Create Folder. Click CREATE and name the new folder "Process Folder Data". Click CREATE.
- In the Designer Project folder, click CREATE FLOW. Select Flow, name the Flow, and click CREATE.
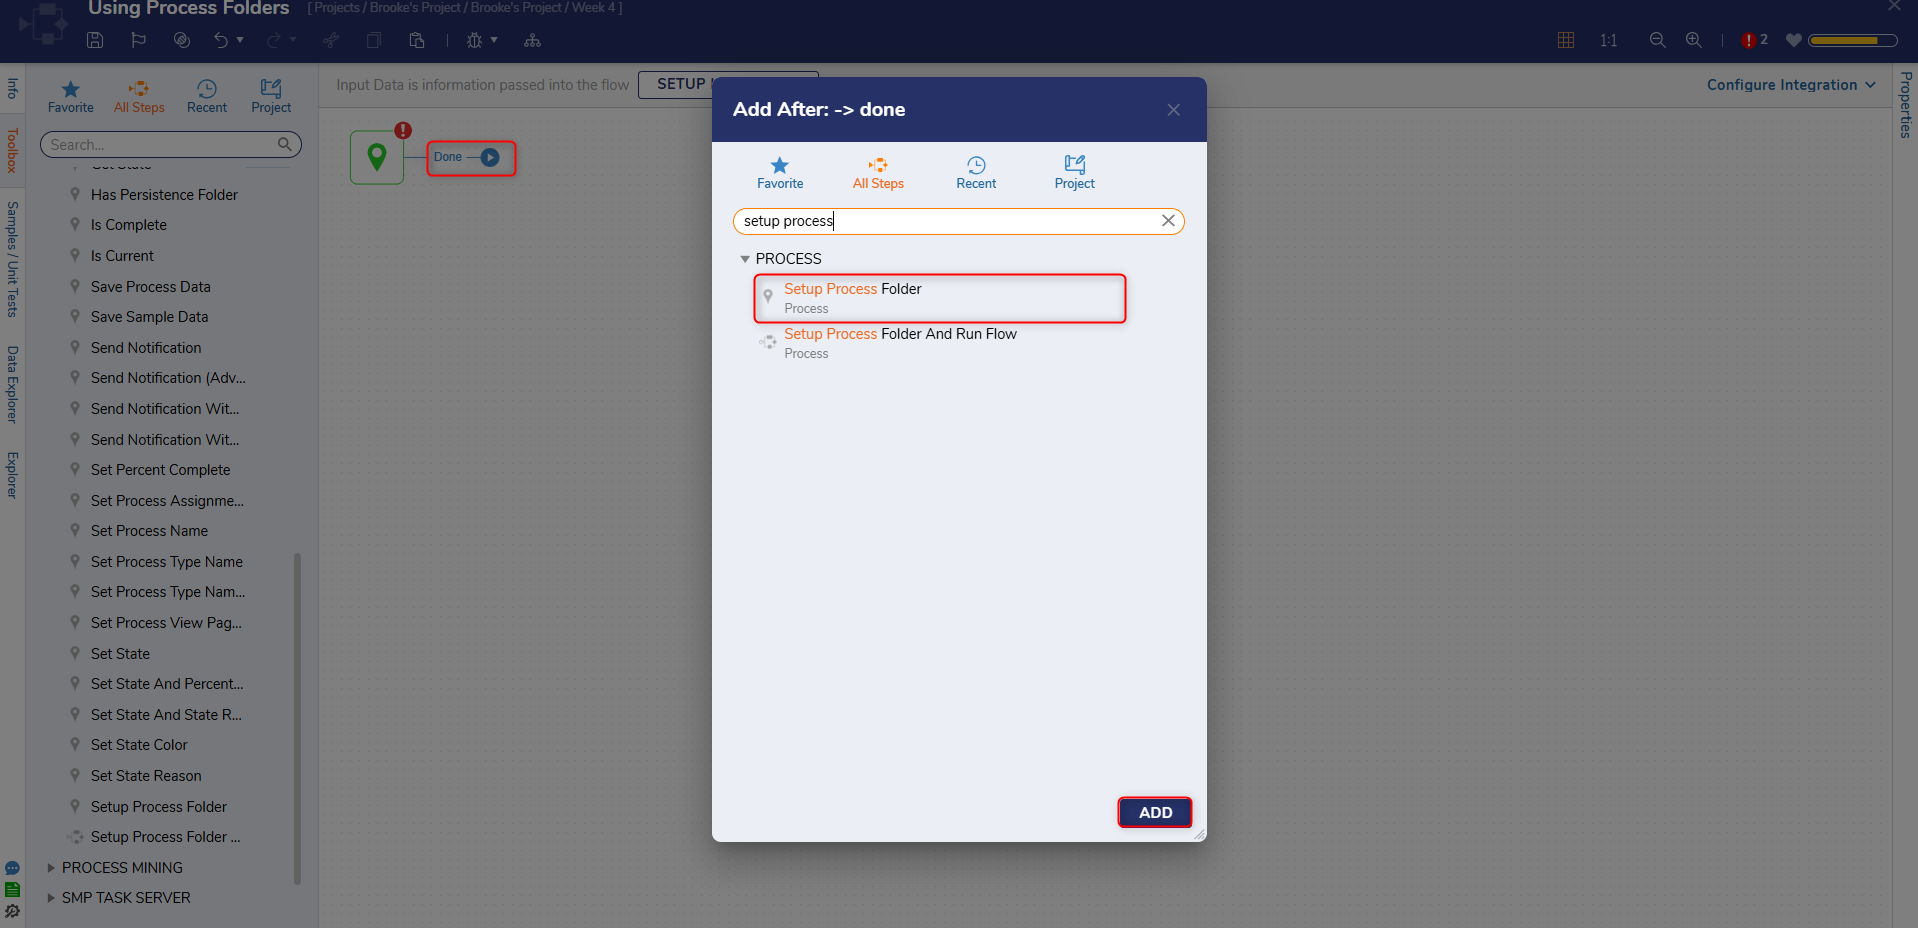
- In the Flow Designer, click the Done path on the Start step. Navigate to All Steps [Catalog[ > Process and select the Setup Process Folder step. Click ADD.
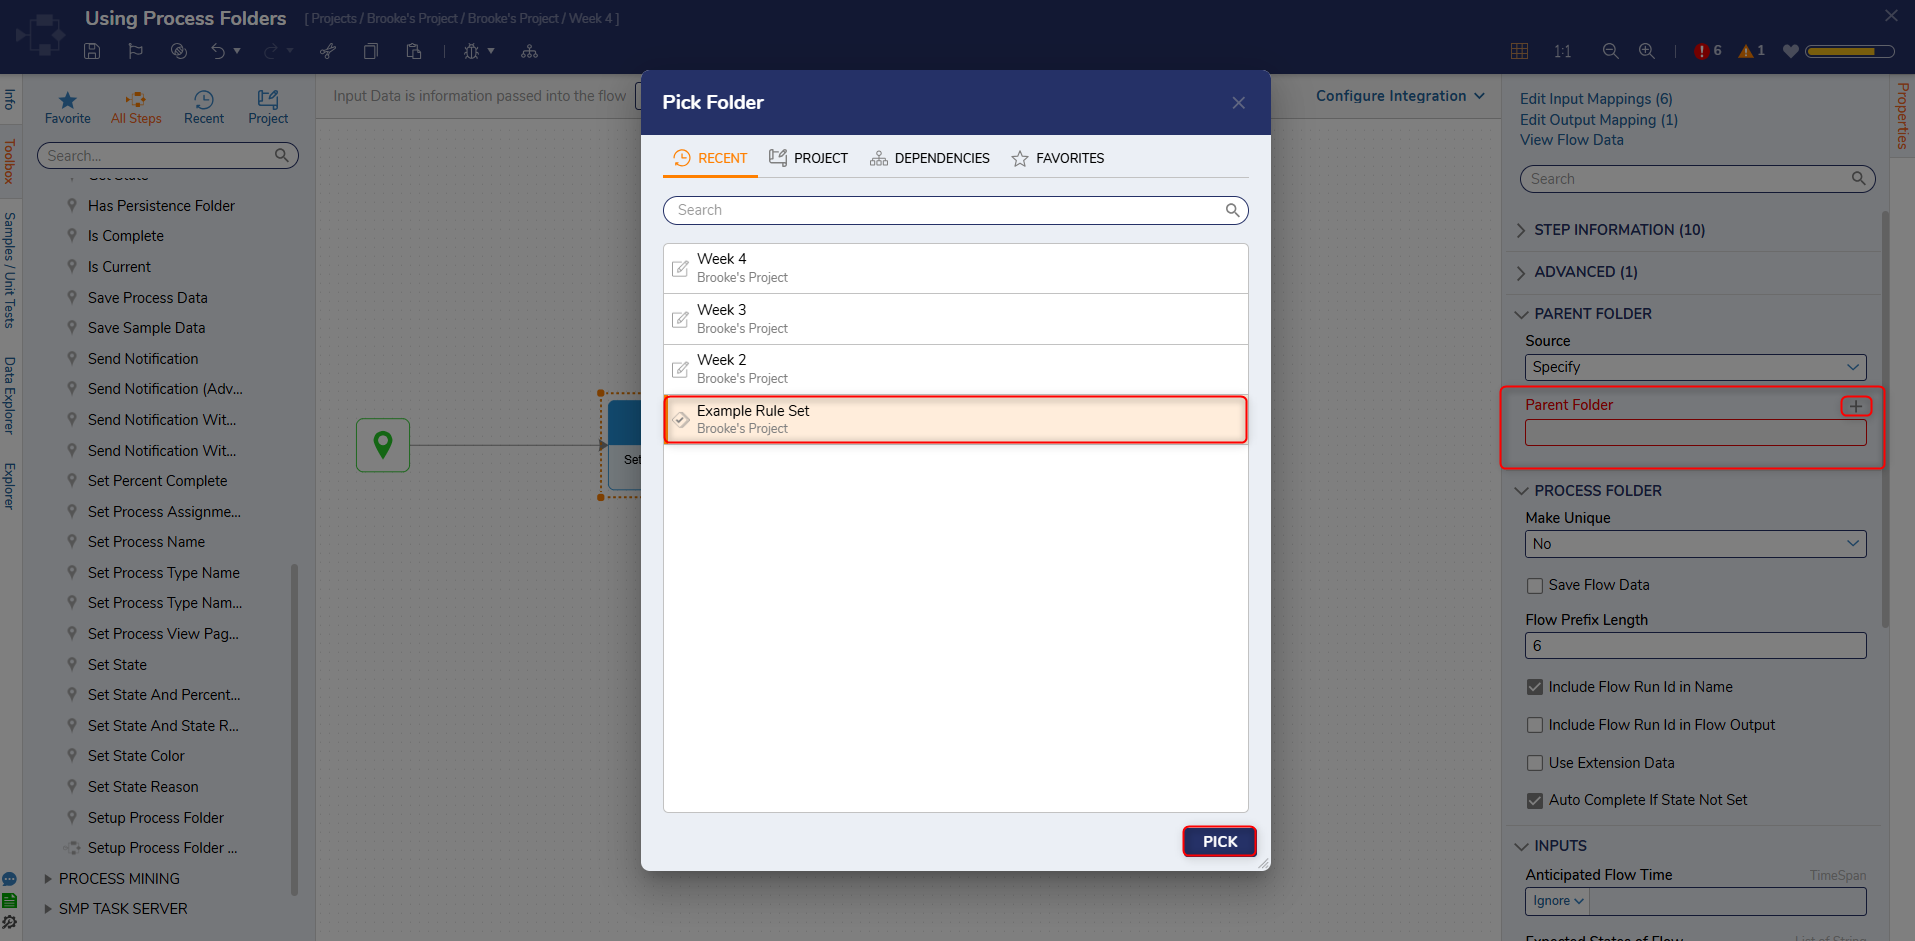
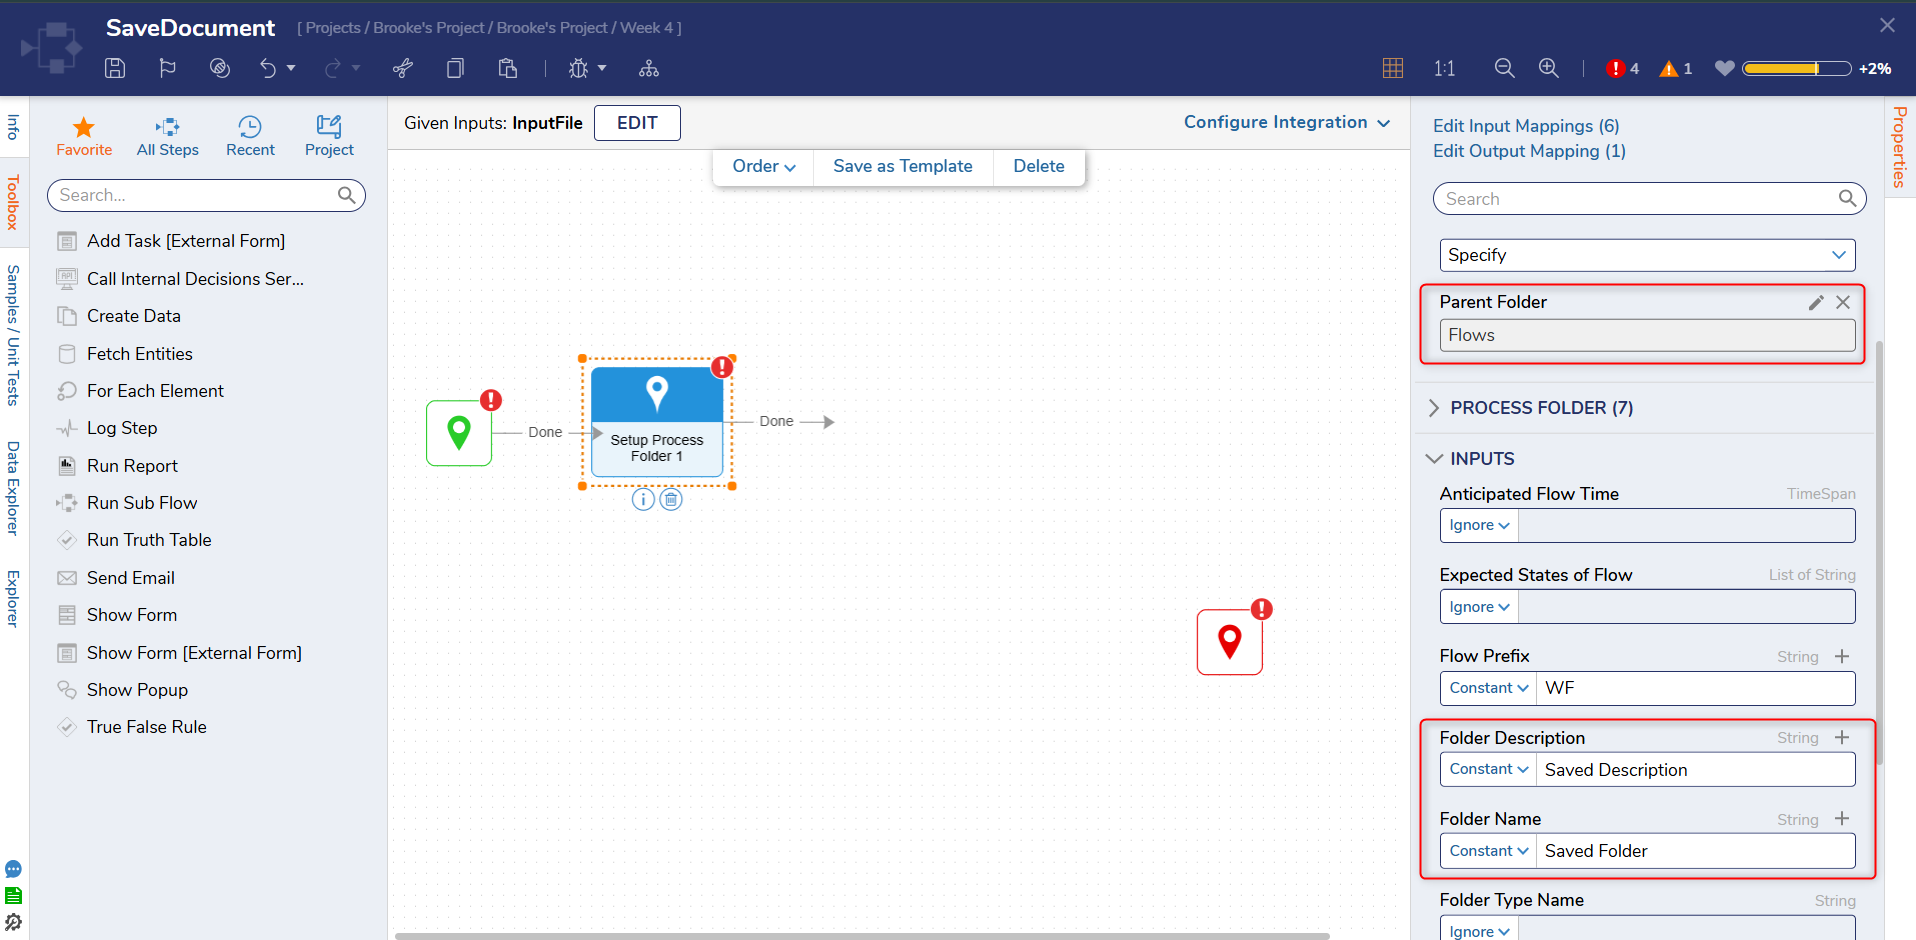
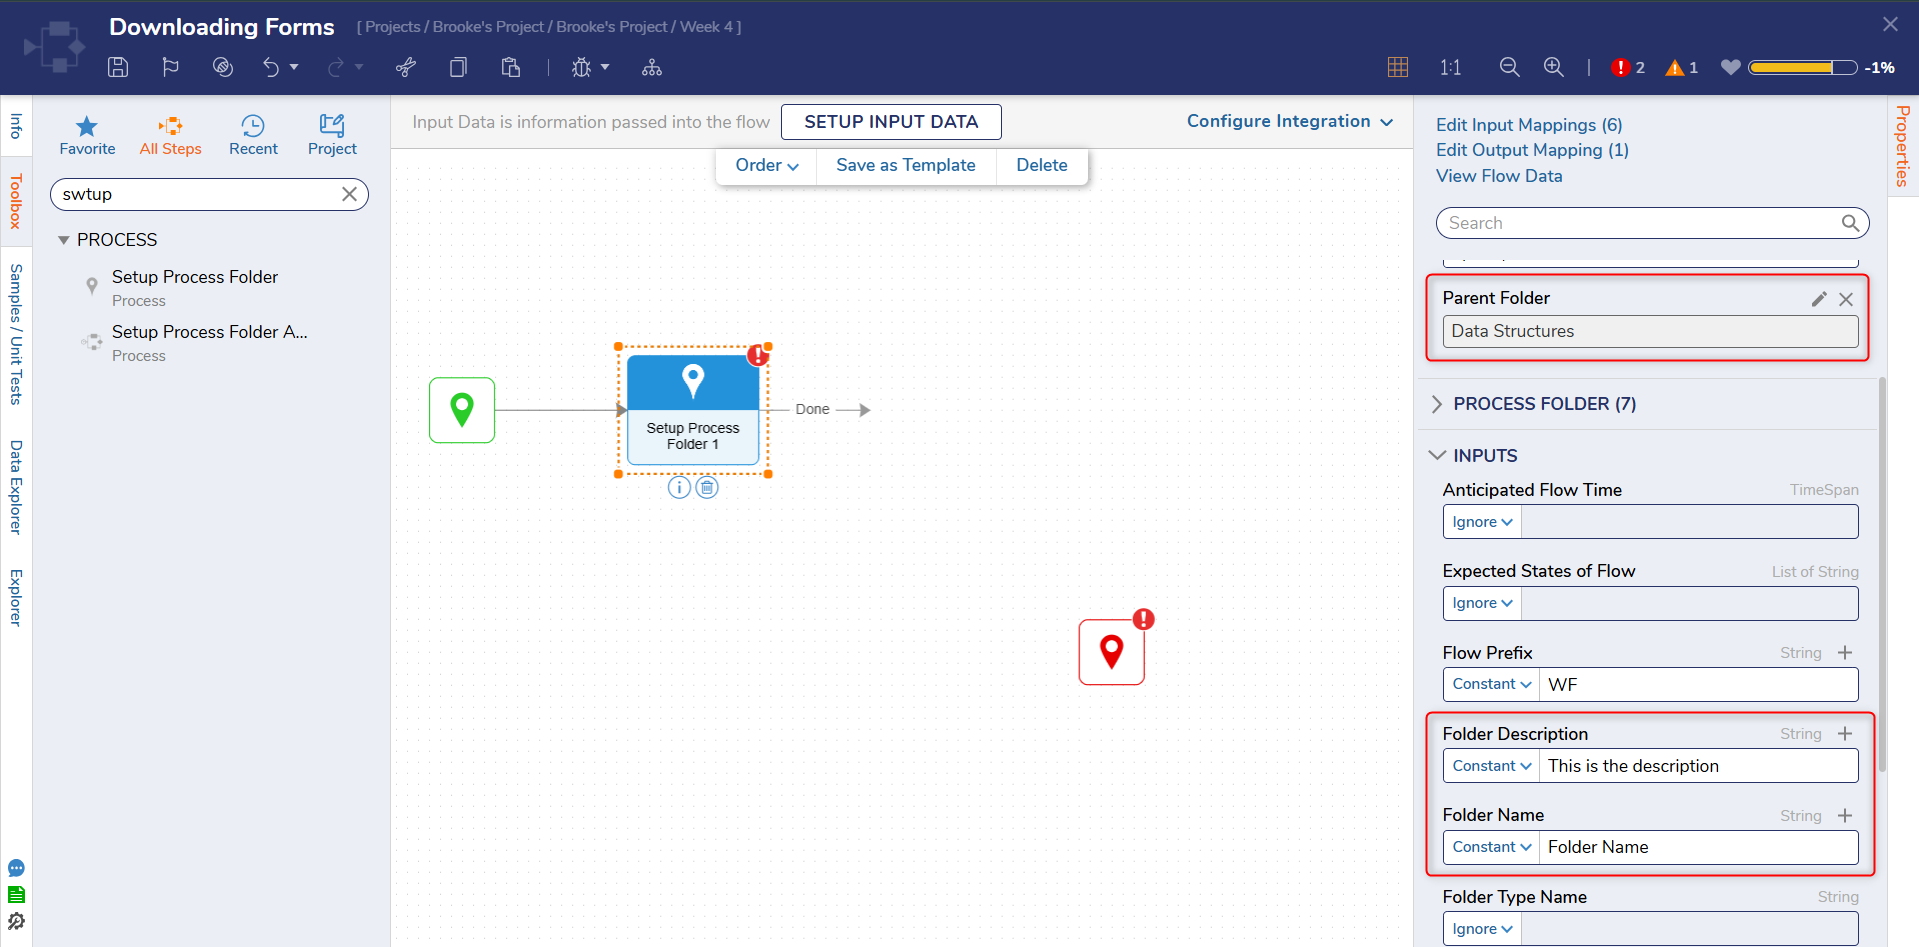
- On the Properties panel, click PICK under the Parent Folder field. Select Process Folder Data and click PICK.
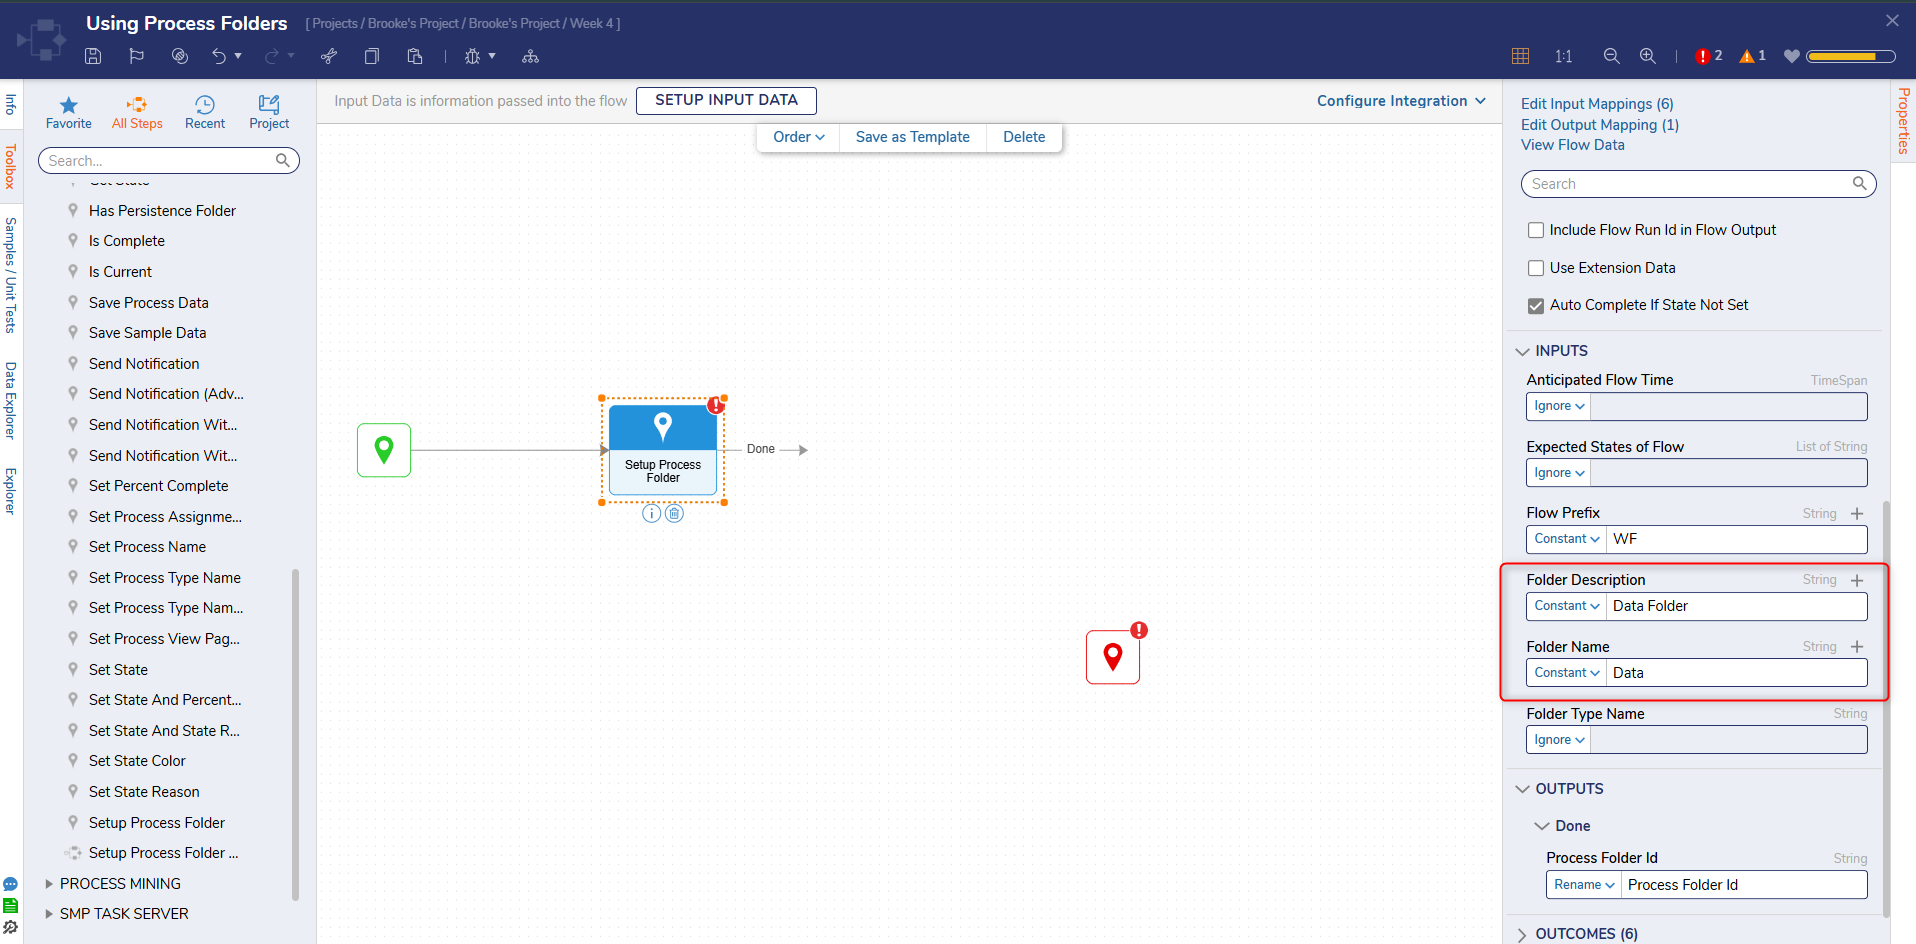
- On the Properties panel, enter Constant values for Folder Description and Folder Name.
- Click the Done path and navigate to All Steps [Catalog > Process. Select the Add Comment step and click ADD.This Add Comment step is meant to be used after the 'Setup Process Folder' step. The Add Comment step must be used in tandem with the 'Setup Process Folder' step.
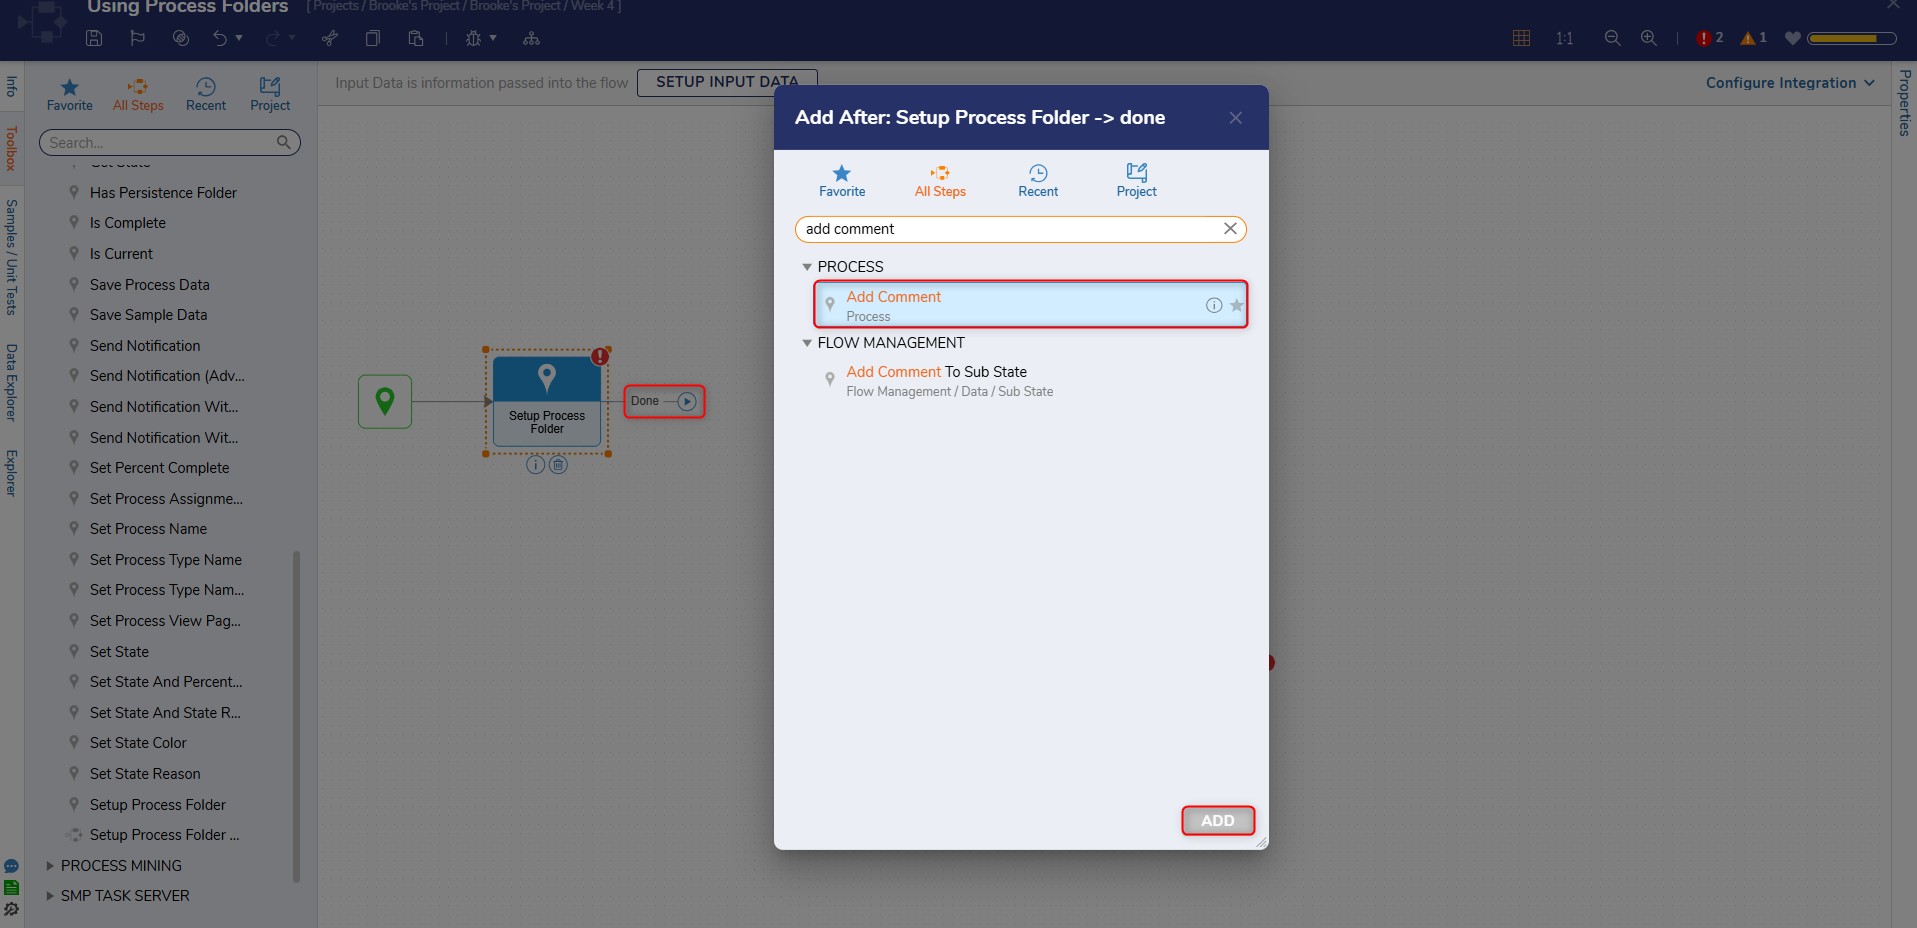
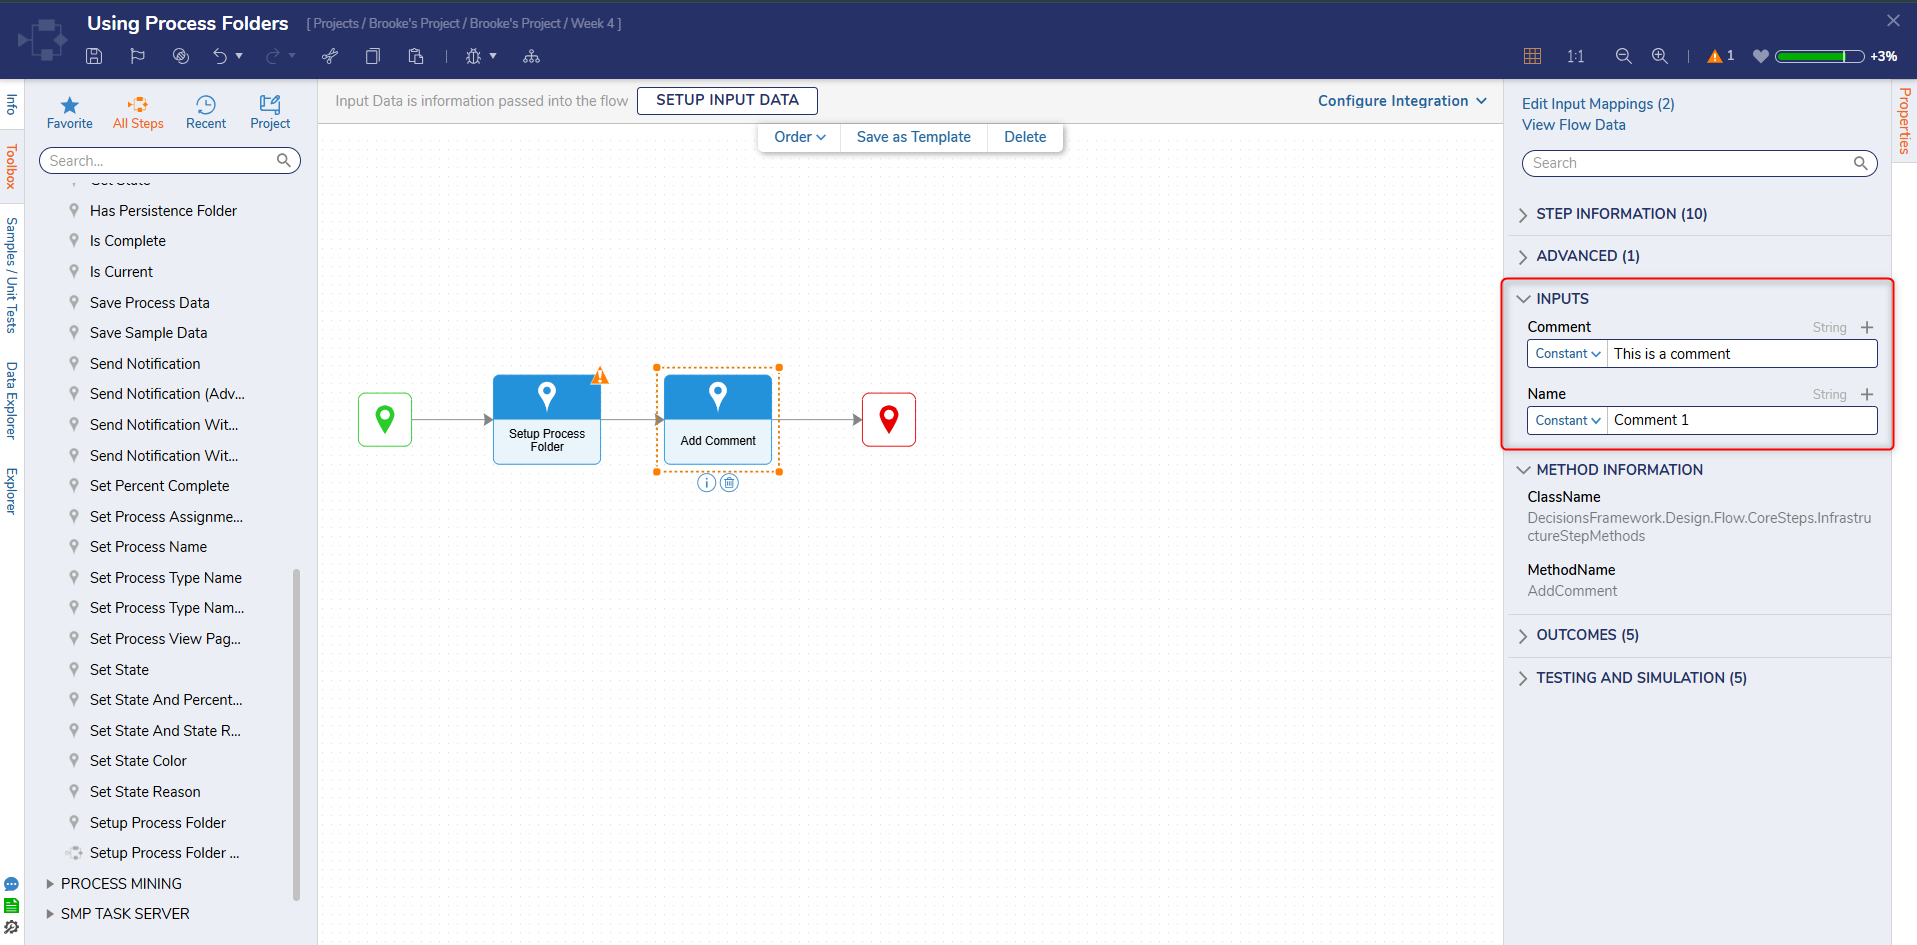
- On the Properties panel under the INPUTS category, enter "This is a comment" for the Comment field and "Comment 1" in the Name field. Connect the Done path to the End step.
- Click Save to save changes. Click Debug on the top action bar, then click START DEBUGGING to create a record in the Process Data Folder.
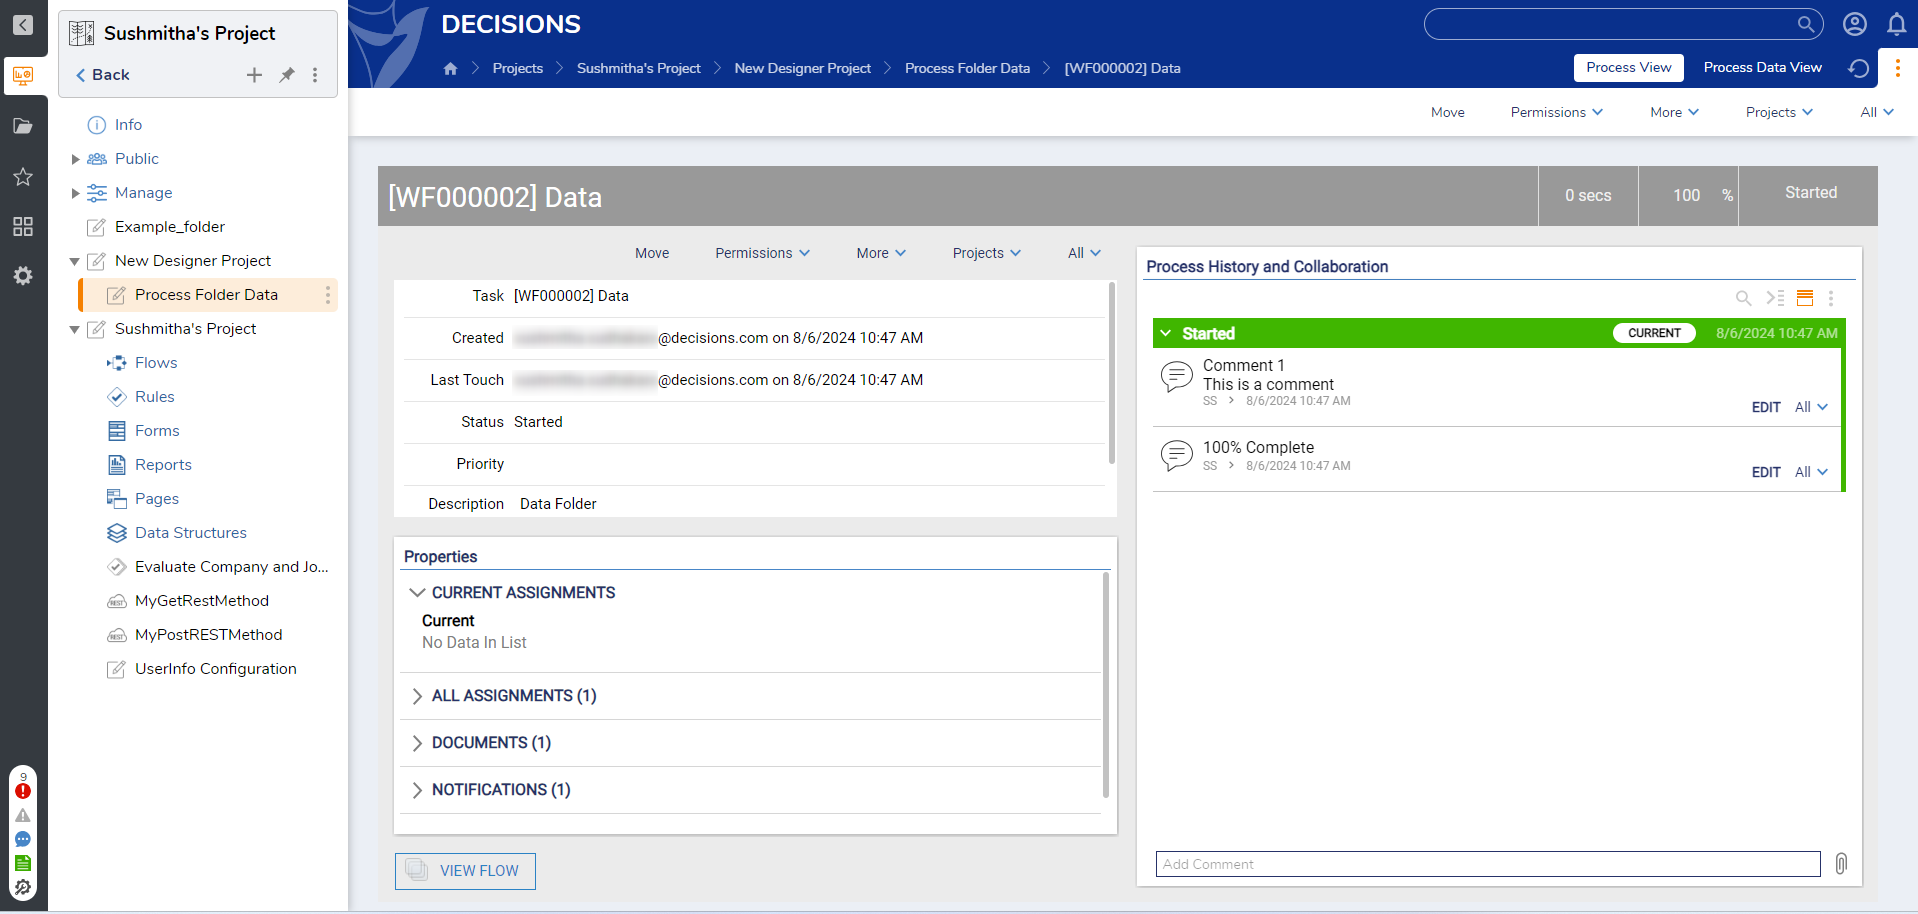
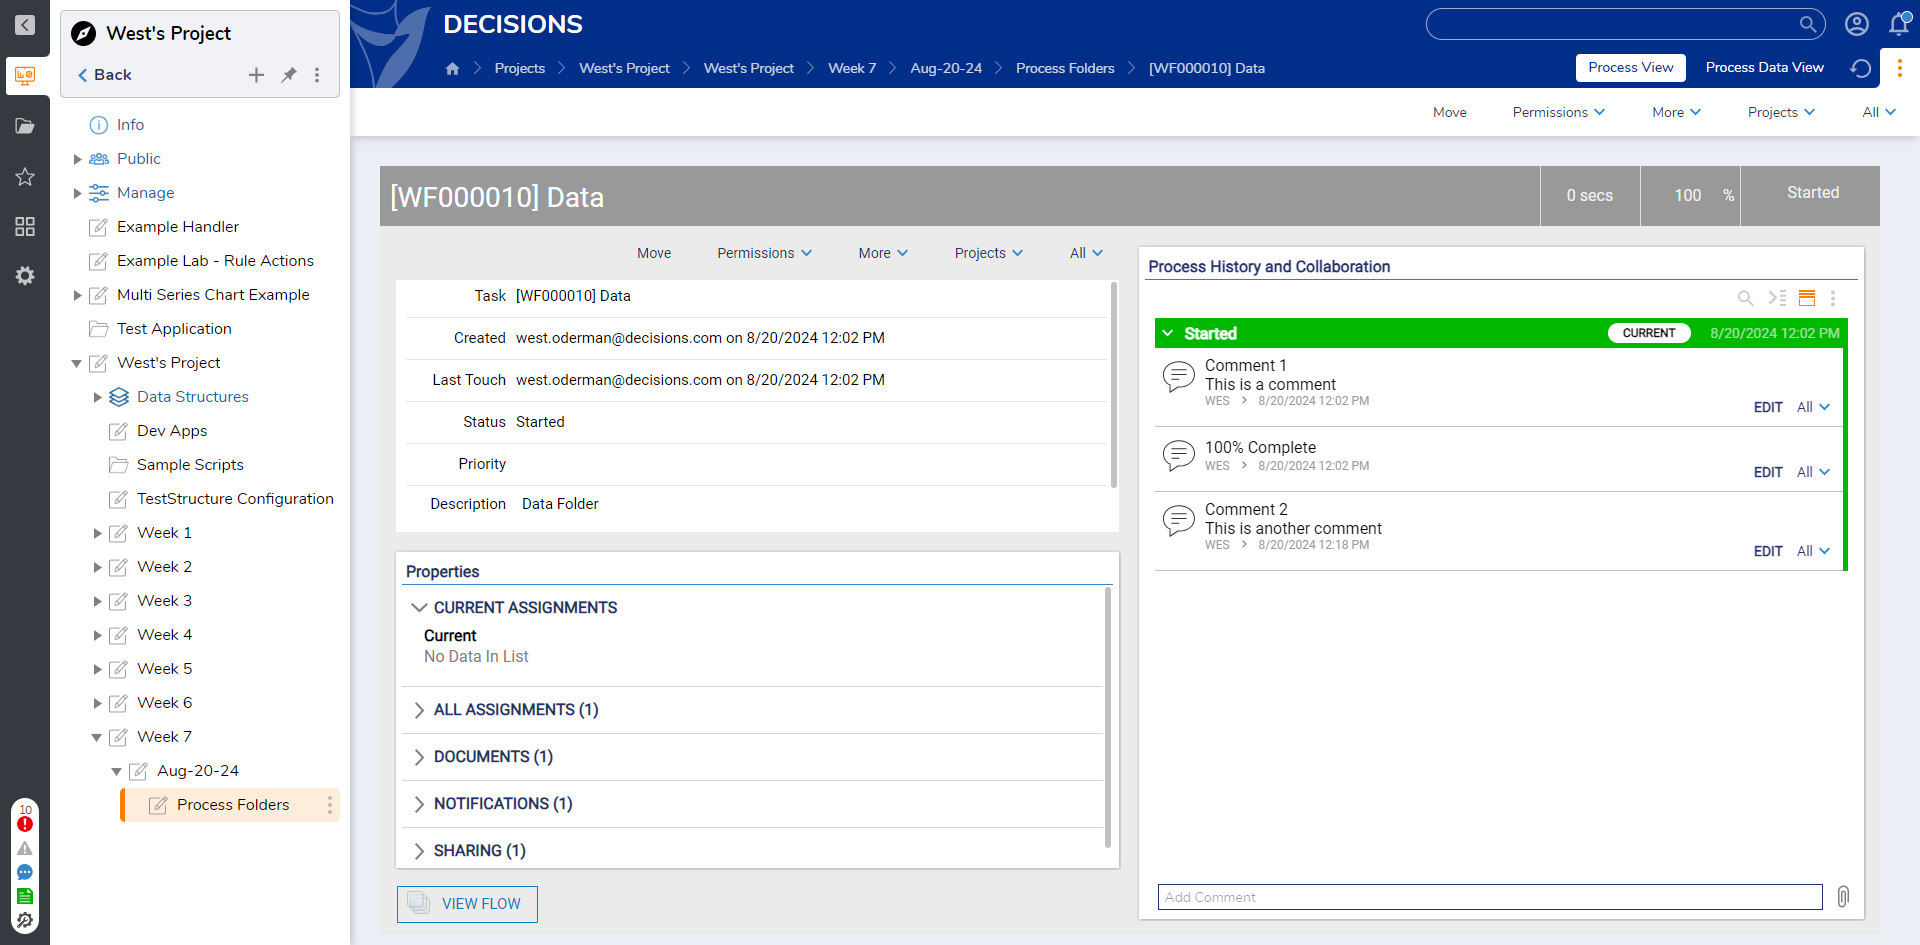
- Navigate to the Process Folder Data and click on the newly created Process Folder. The PROCESS VIEW page will display the created comment.
Adding a Comment via Internal Services
This example will use the Add Comment step from the Internal Services category to add another comment to the previously created Process Folder.
- In the Designer Project folder, click CREATE FLOW and create another Flow.
- Click the Done path of the Start step. Select the Fetch Entities step and click ADD.
- On the Properties panel, enter "folder" in the Type Name field under the ENTITY FETCH DEFINITION category and select Folder [DecisionsFramework...].
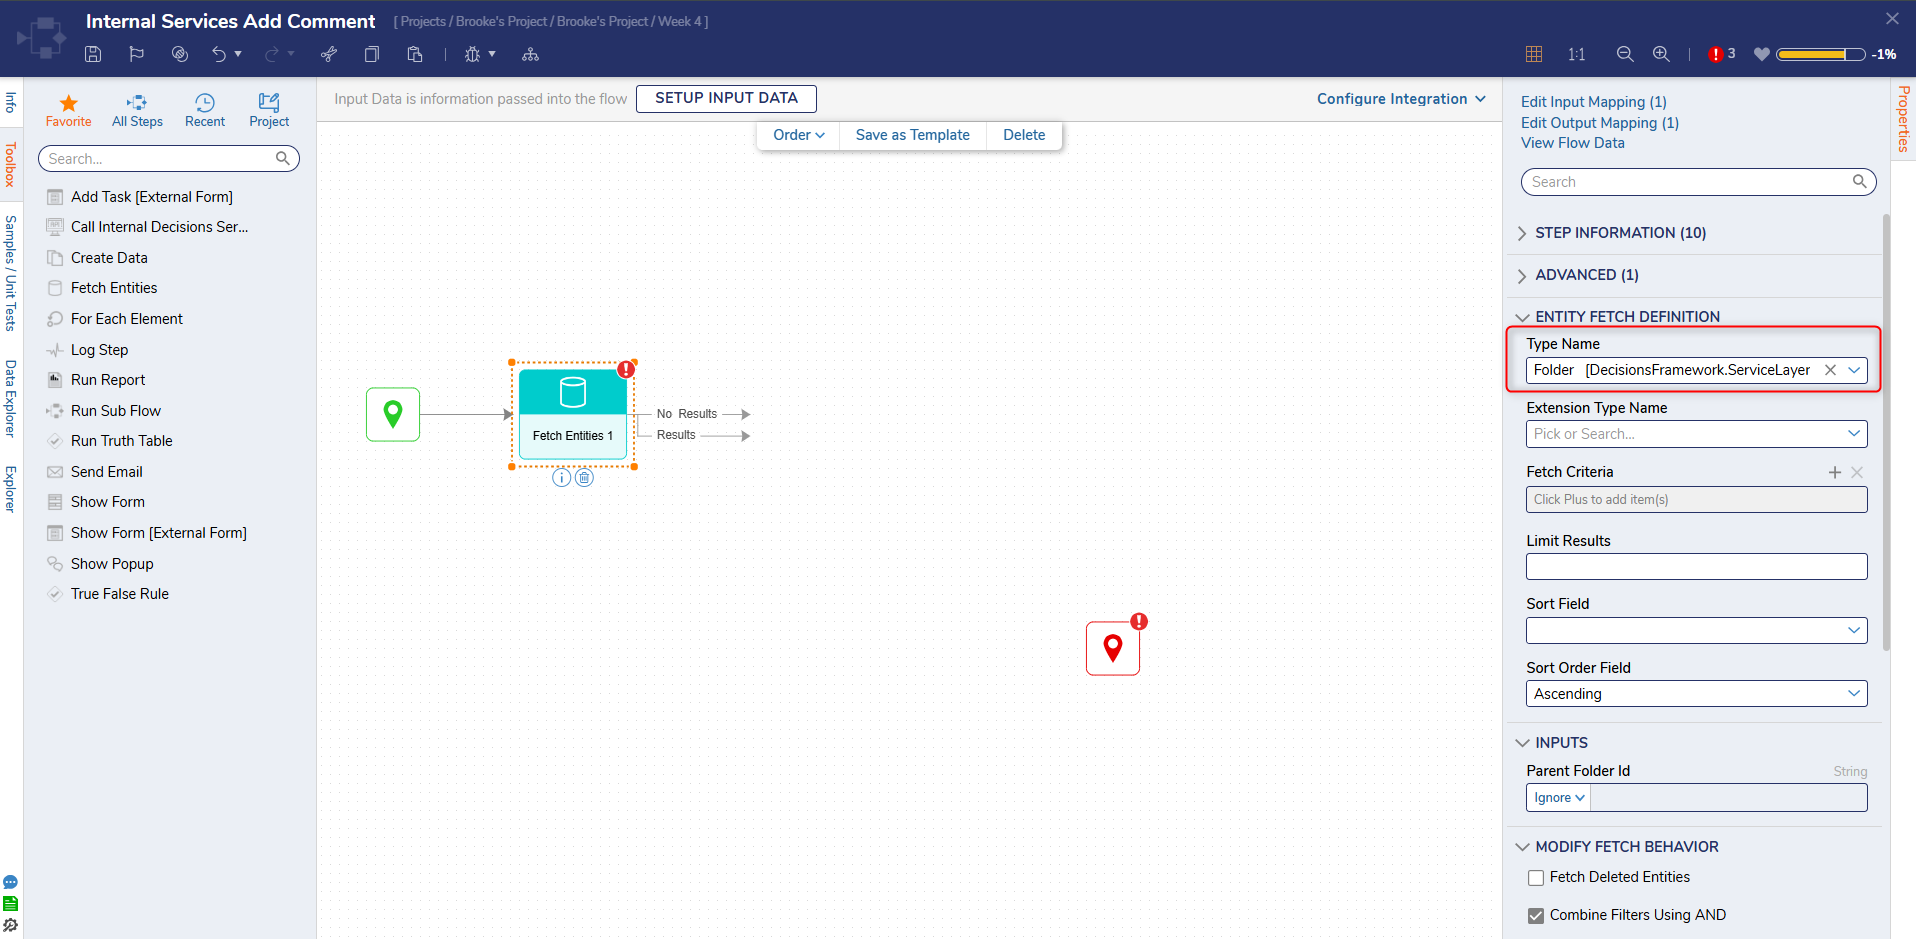
- Set the Parent Folder Id to a constant and pick the Process Folder Data folder.
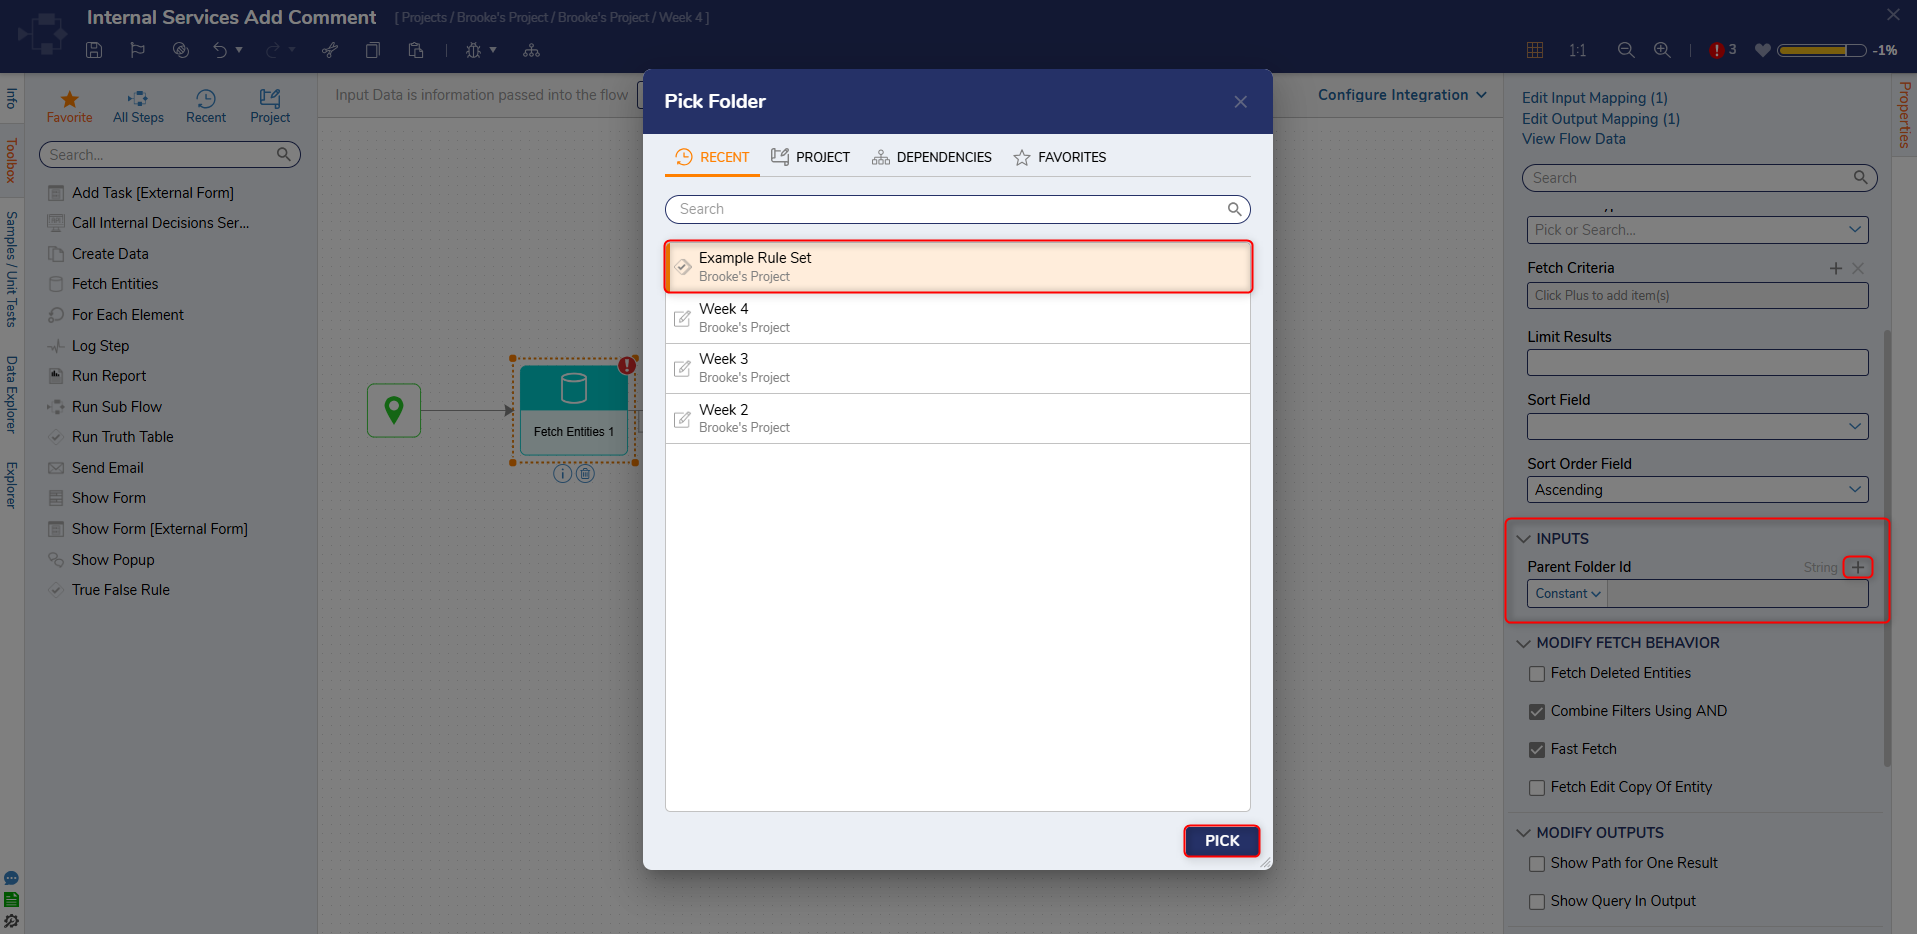
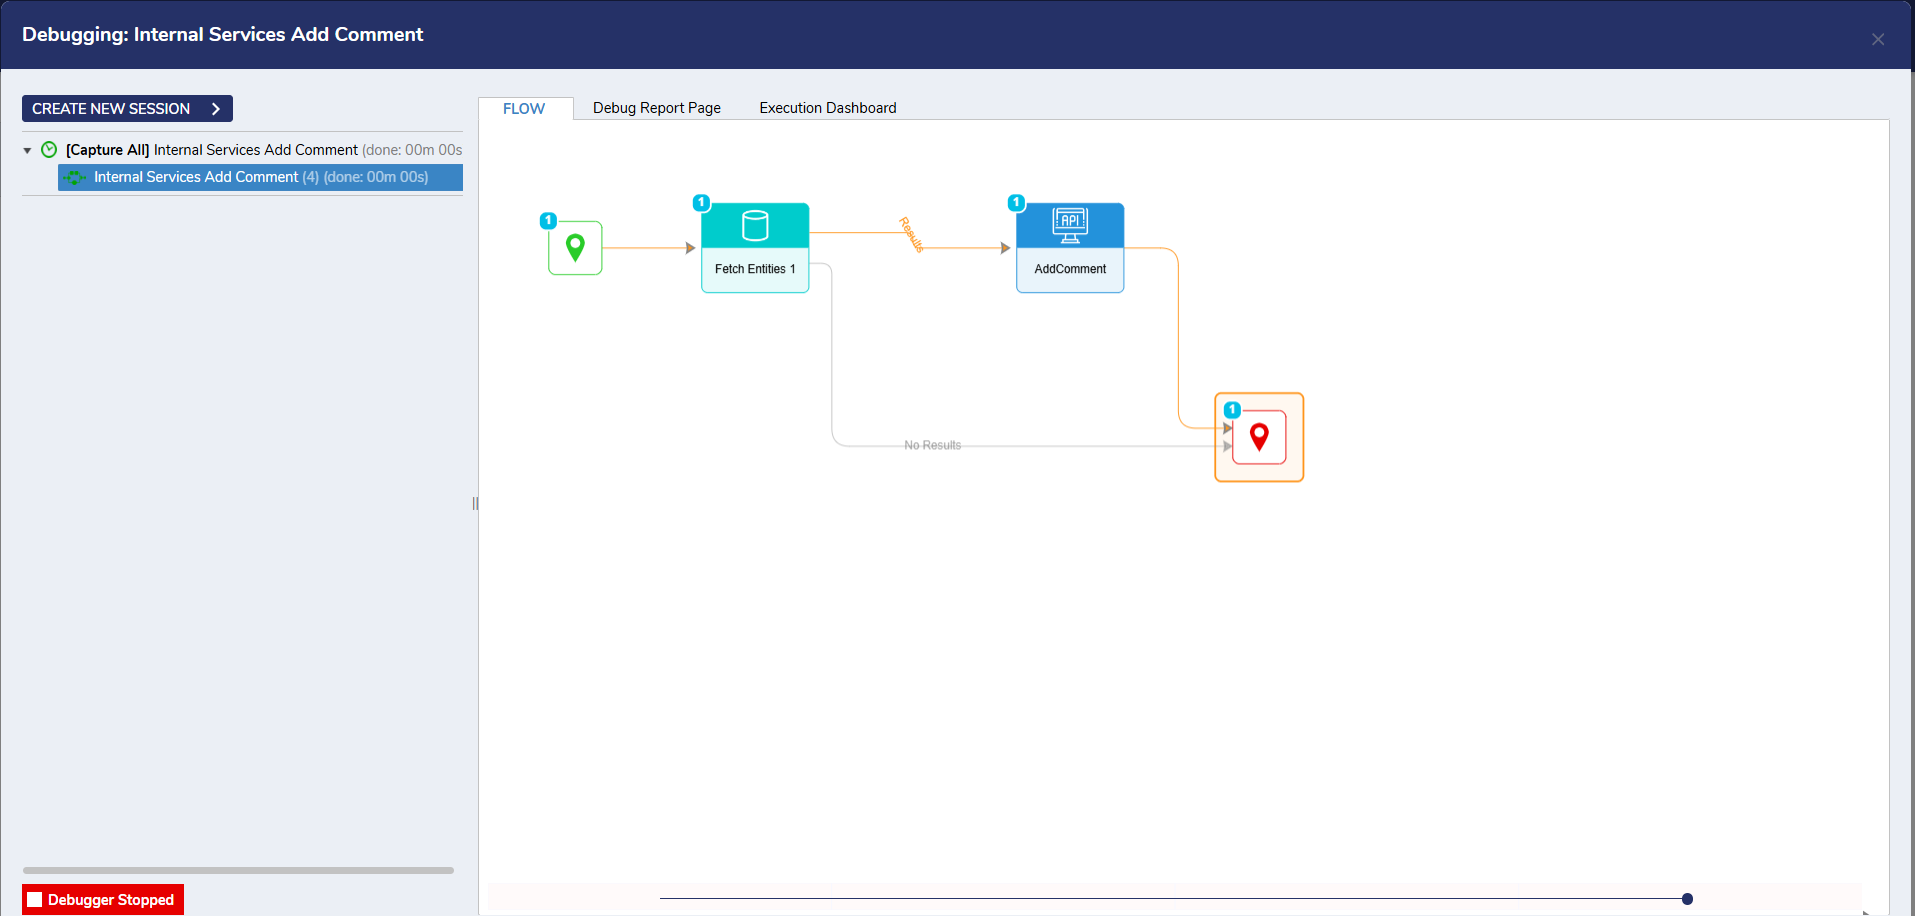
- Click the Results outcome path. Navigate to Integrations > All Integrations > Internal Services > Comment and select the AddComment step. Click ADD.
- Under the INPUTS category, click Unknown next to the entityid field and select Select From Flow. Click EntityResults, select First, and select Folder ID. Click DONE. For the comment field, set the mapping from Unknown to Build Data.

- Scroll down and configure the Comment Name and Comment Description fields with constant string values. The Comment Name is the Data member which stores the title of the comment. The Comment Description, stores the comment text. Declare constant string values for those inputs.

- Connect the Done path of the Add Comment step and the No Results path of the Fetch Entities step to the End step. Click Save to save changes.
- Debug the Flow to have the comment created and applied to the Process Folder.
- Navigate back to the Process Folder Data and click on the Process Folder.
- On the PROCESS VIEW page, the second comment can be found underneath the first comment.
Saving a Document to a Process Folder
Process Folders can also have documents stored within them. This example will demonstrate how to configure a Flow to store a document in a Process Folder.
- Right-click on the Designer Project and select Create Folder. Under Create Folder, click CREATE.
- In the Designer Project, click CREATE FLOW and select Flow. Name the Flow and click CREATE.
- In the Flow Designer, select the Start step. On the Properties panel under Flow Input Data, click SHOW EDITOR.
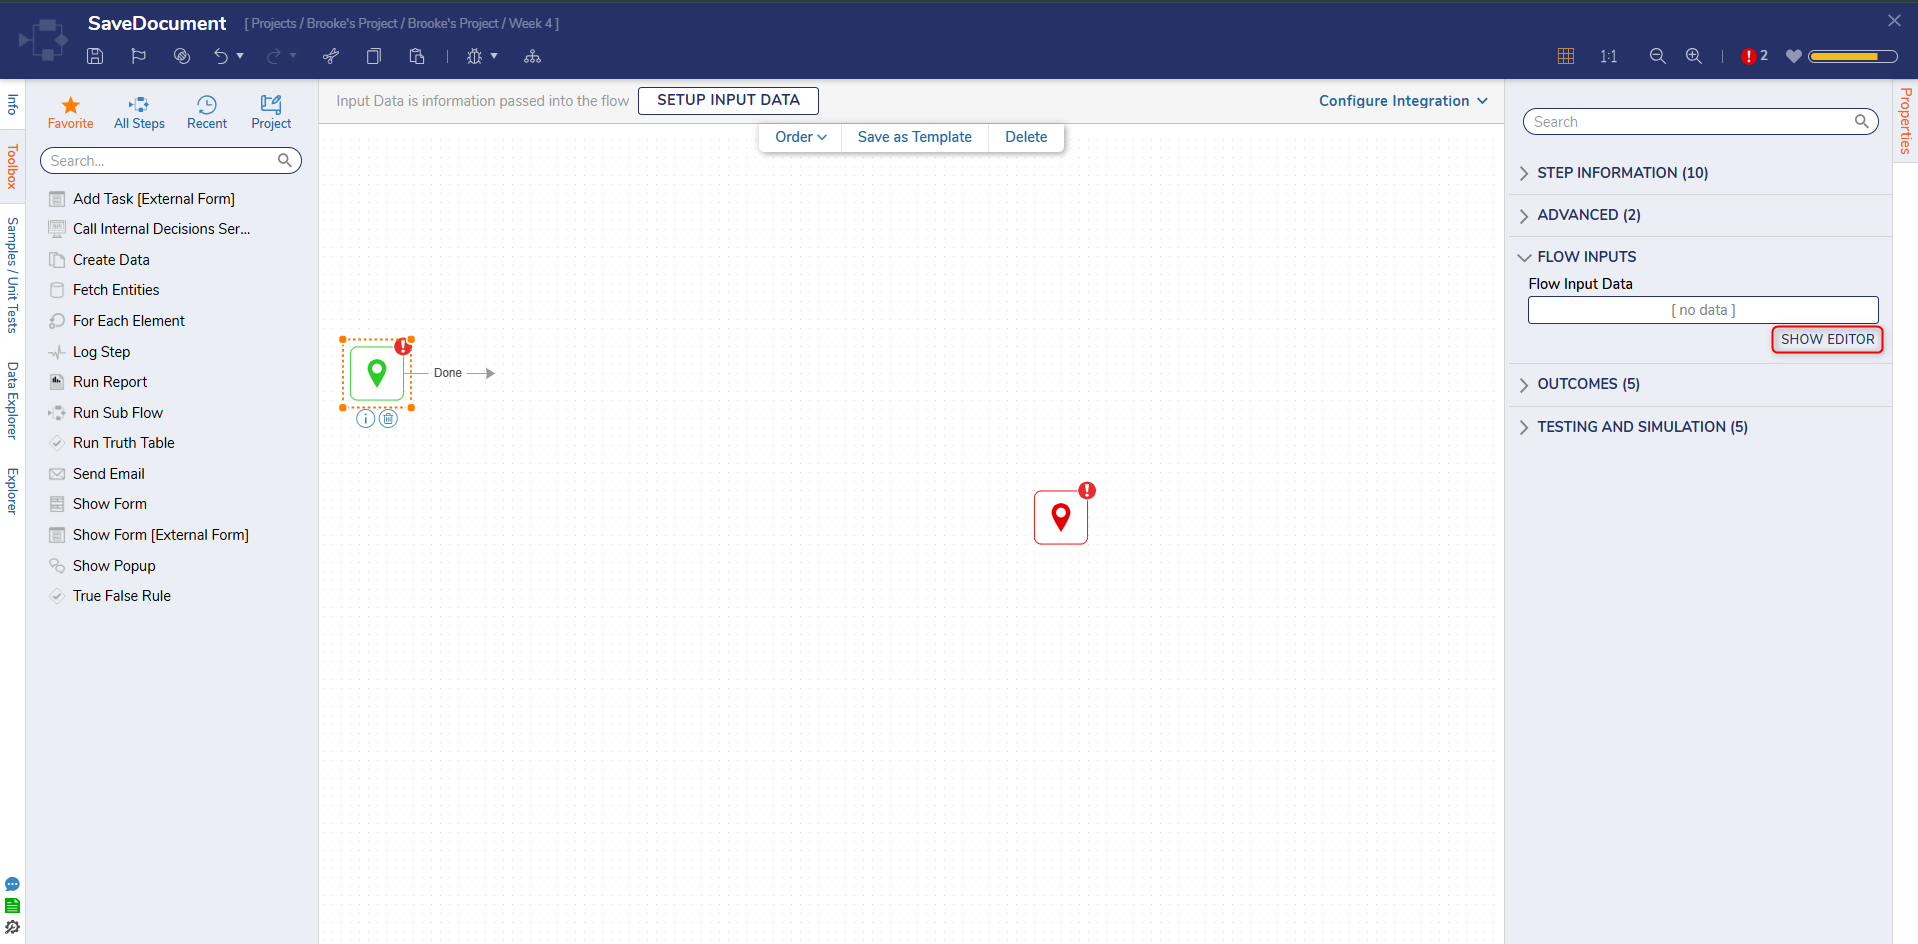
- Under NAME enter "Input File" and change the TYPE to FileDate. Click Save and close the window.

- Add the Setup Process Folder step to the Start step from the PROCESS category on the Toolbox panel.
- Set the Parent Folder to the created folder. Set the Folder Name to "Saved Folder" and the Folder Description to "Saved Description".
- Click the Done path. Navigate to All Steps [Catalog] > Process and select the Add File step. Click ADD.
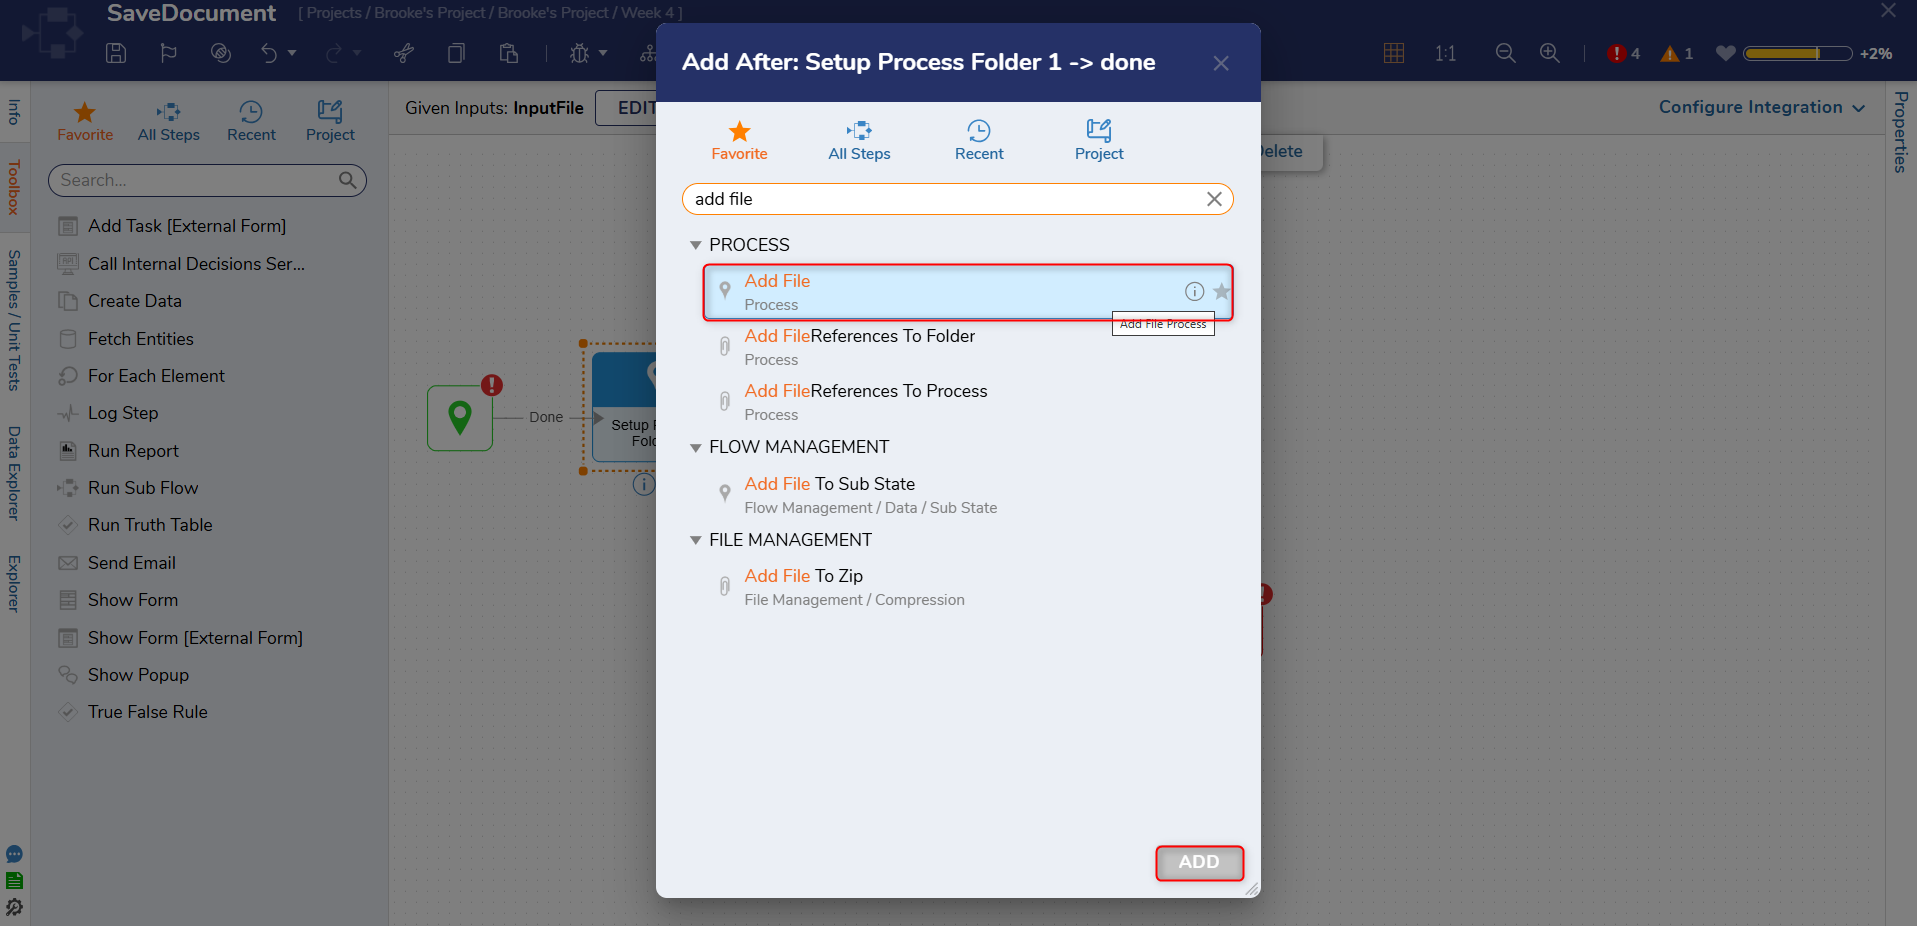
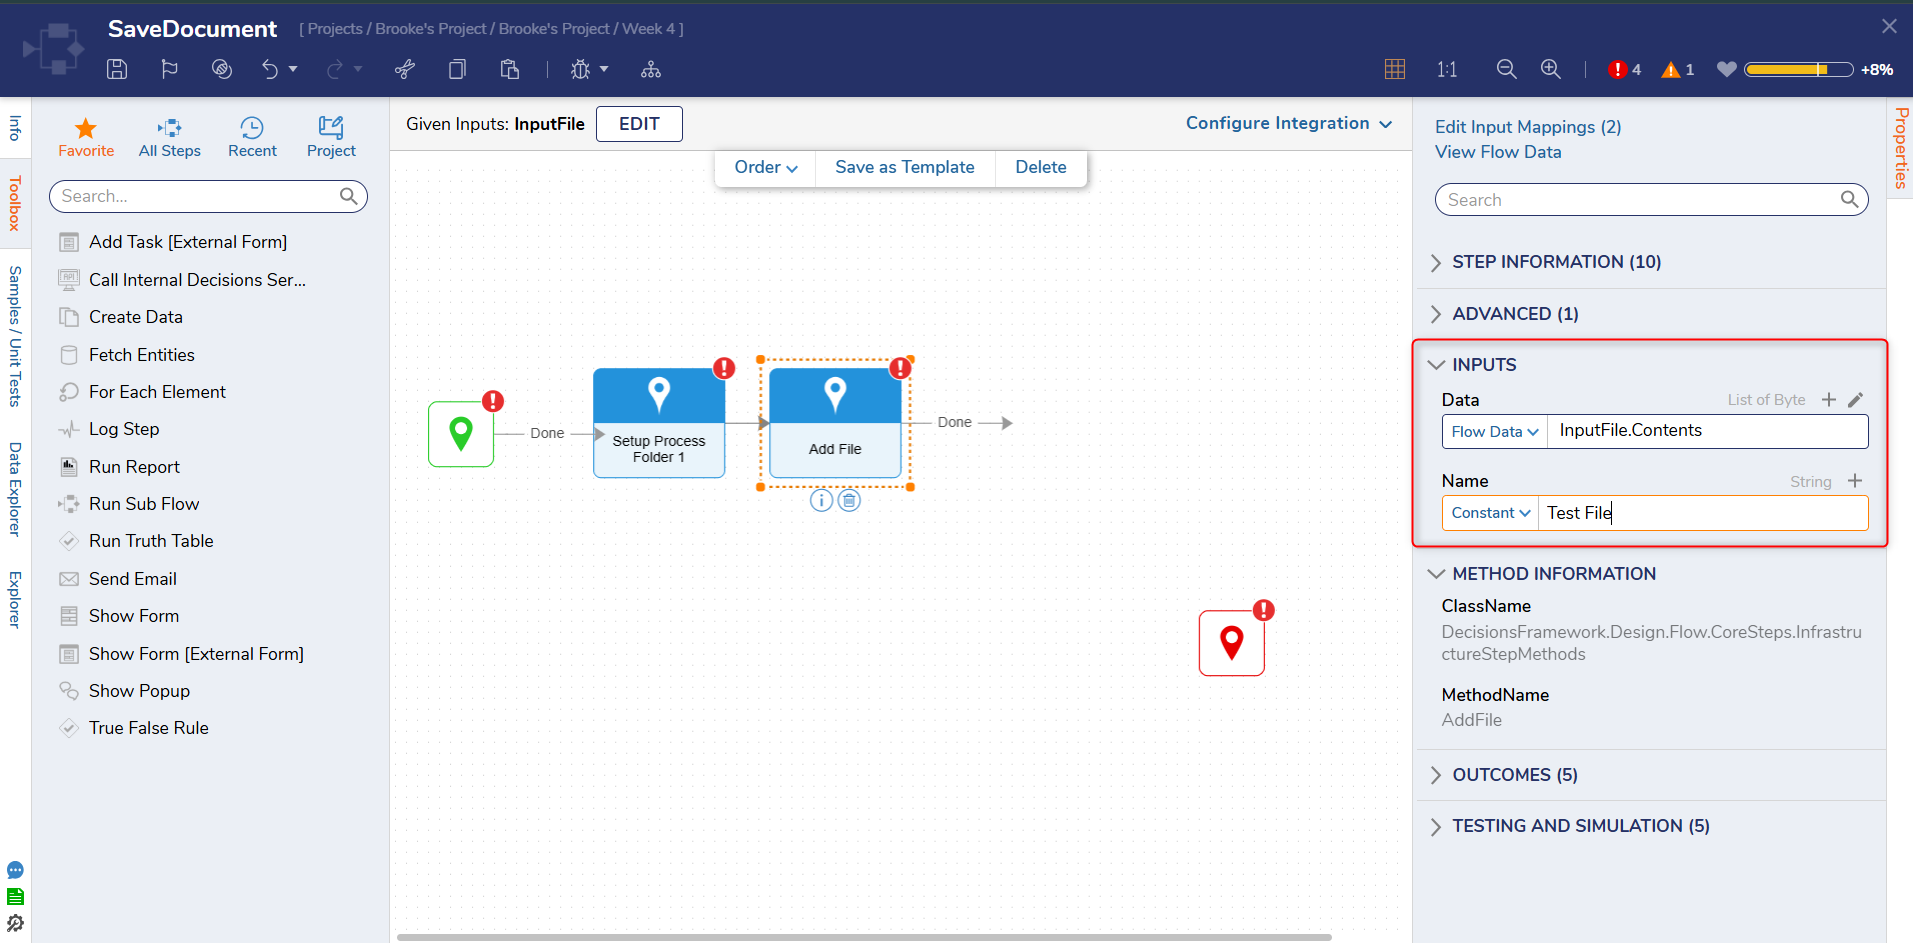
- Map InputFile.Contents to the Data input field. Enter "Test File" in the Name field.
- Connect the Done path to the end step. Click Save to save changes to the Flow.
- Debug the Flow to create the Process Folder and add a file.
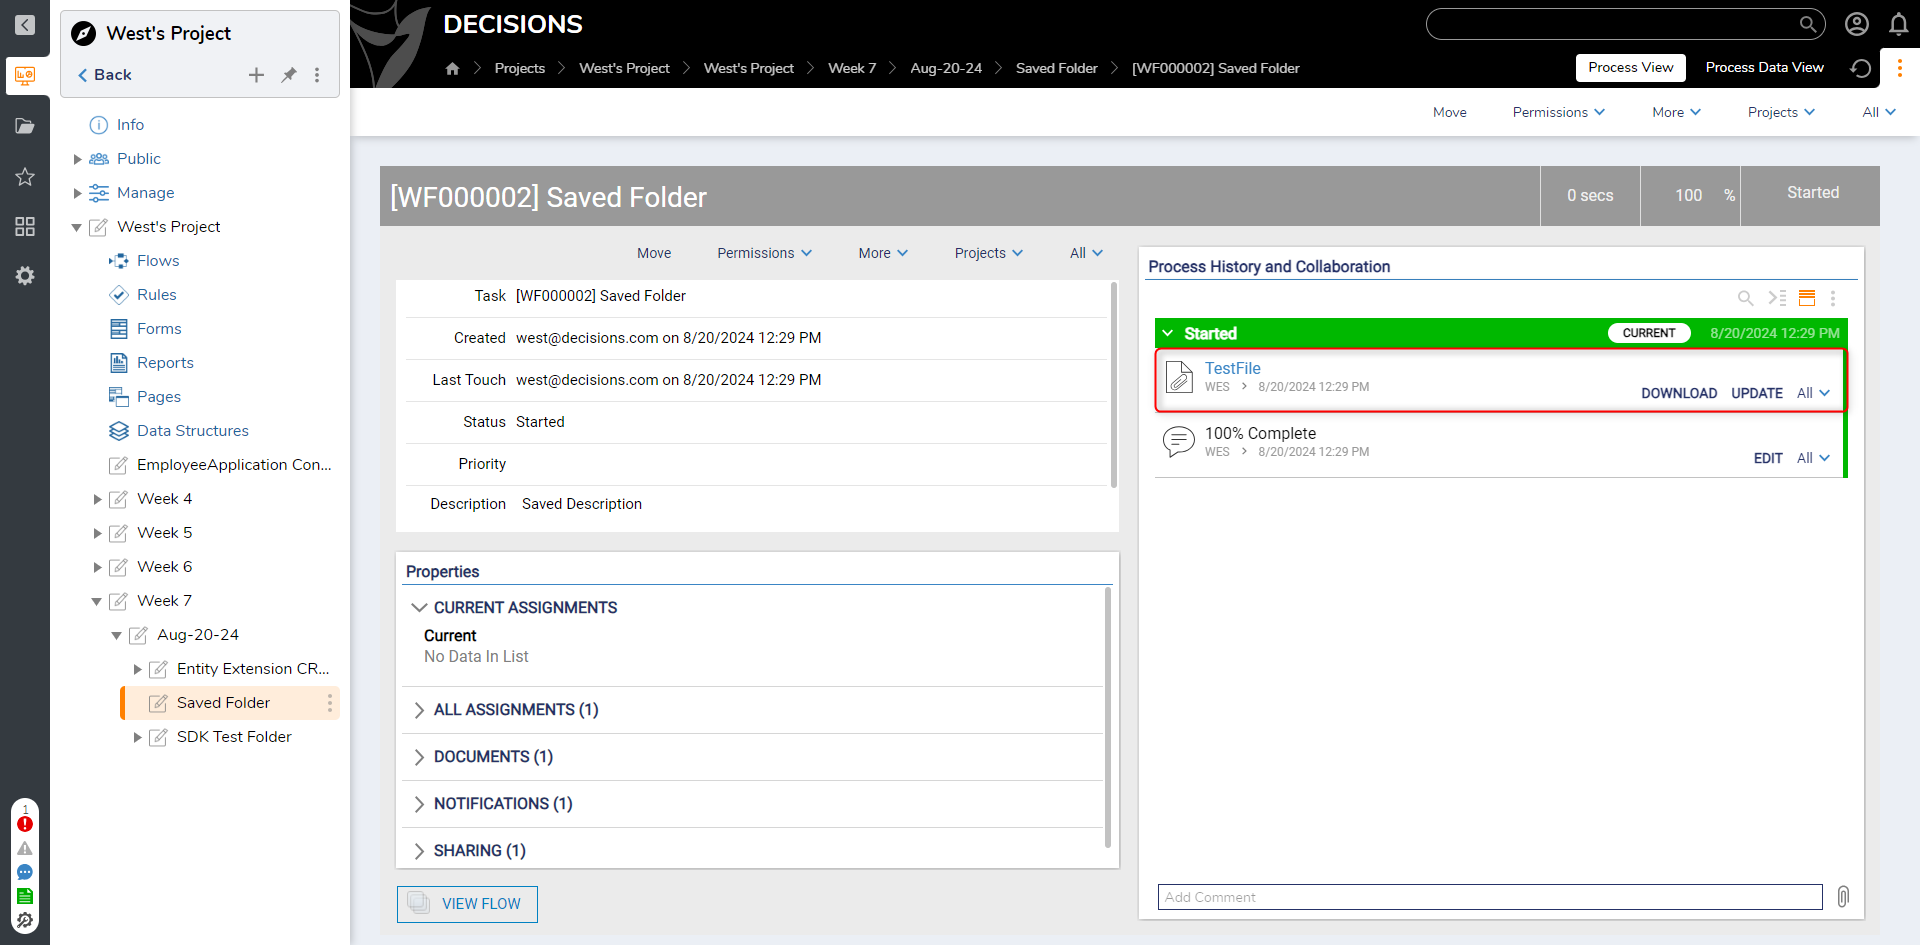
- Navigate to the Process Folder Data and select the folder. The file should be found in that folder on the Folder Activity Panel and in the Document Header. Depending on the file type there will be actions to Download, Update, and more for the file.
Setting a Process's State and Reason
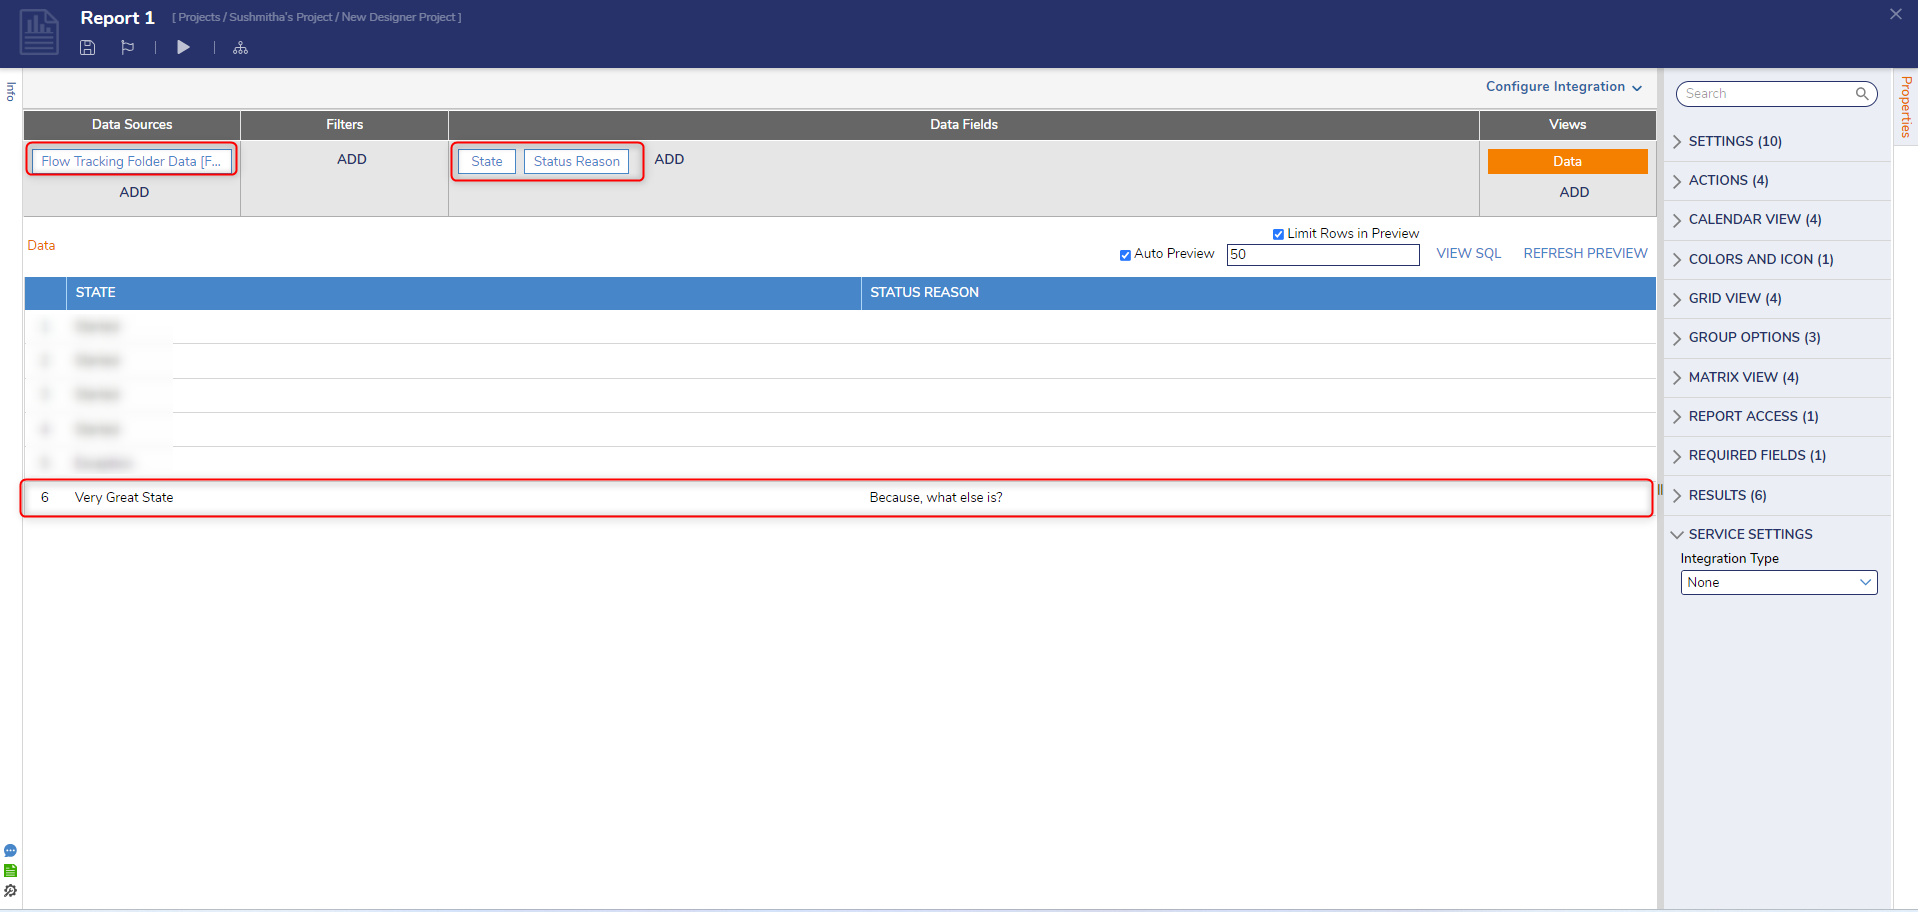
Process folders can be assigned a state and state reason by using the Set State Reason or the Set State And Reason step. It can be found in the Steps tab, under the Process category. This Flow step merely writes the user-defined reason string value in the Extension Data of the Process Folder. By default, it is not displayed on Process Folder when it is created. The reason value can be displayed in the Report Designer by displaying the 'State Reason' data member when reporting on the FlowTrackingFolderData data source.
To set a reason on a Process Folder, configure a Flow that contains a Setup Process Folder and a Set State and Reason after it.
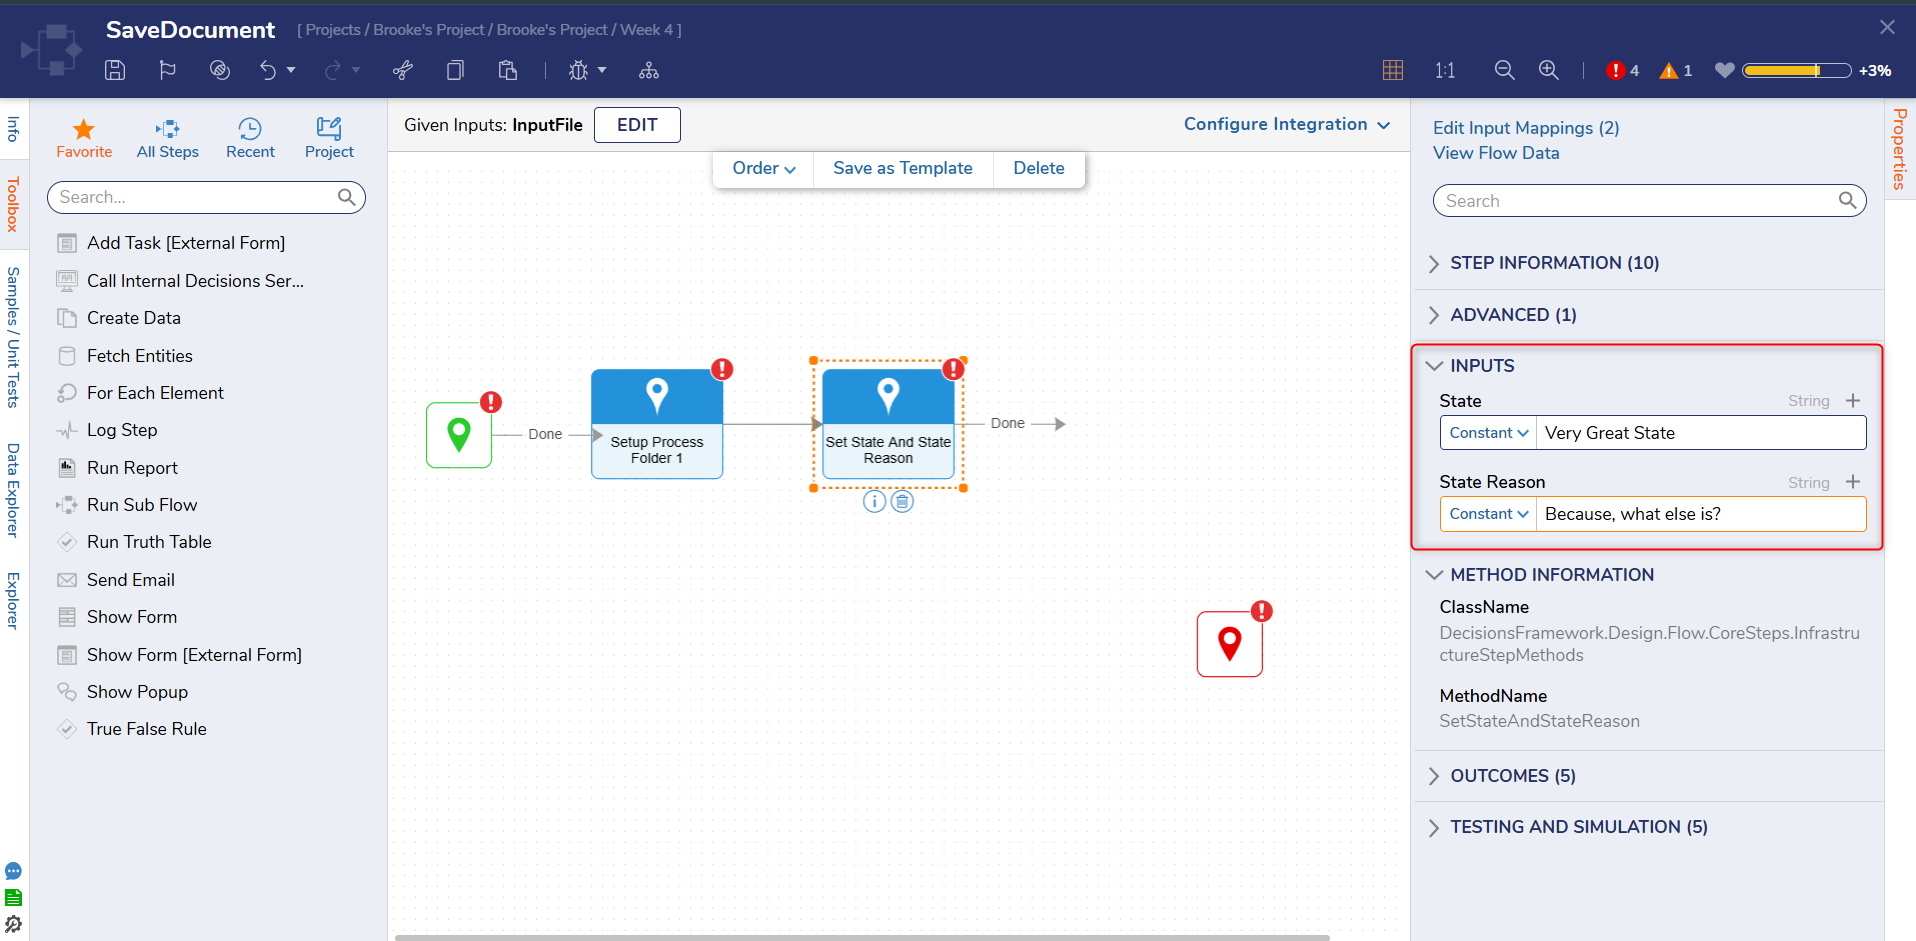
After configuring the Setup Process Folder step and debugging the Flow, a Process Folder will be created. It stores the Status Reason value in the FlowTrackingFolderData data source. This allows users to be able to report on it. To do this, create a Report that is sourced from FlowTrackingFolderData. Pick the Status Reason data field.
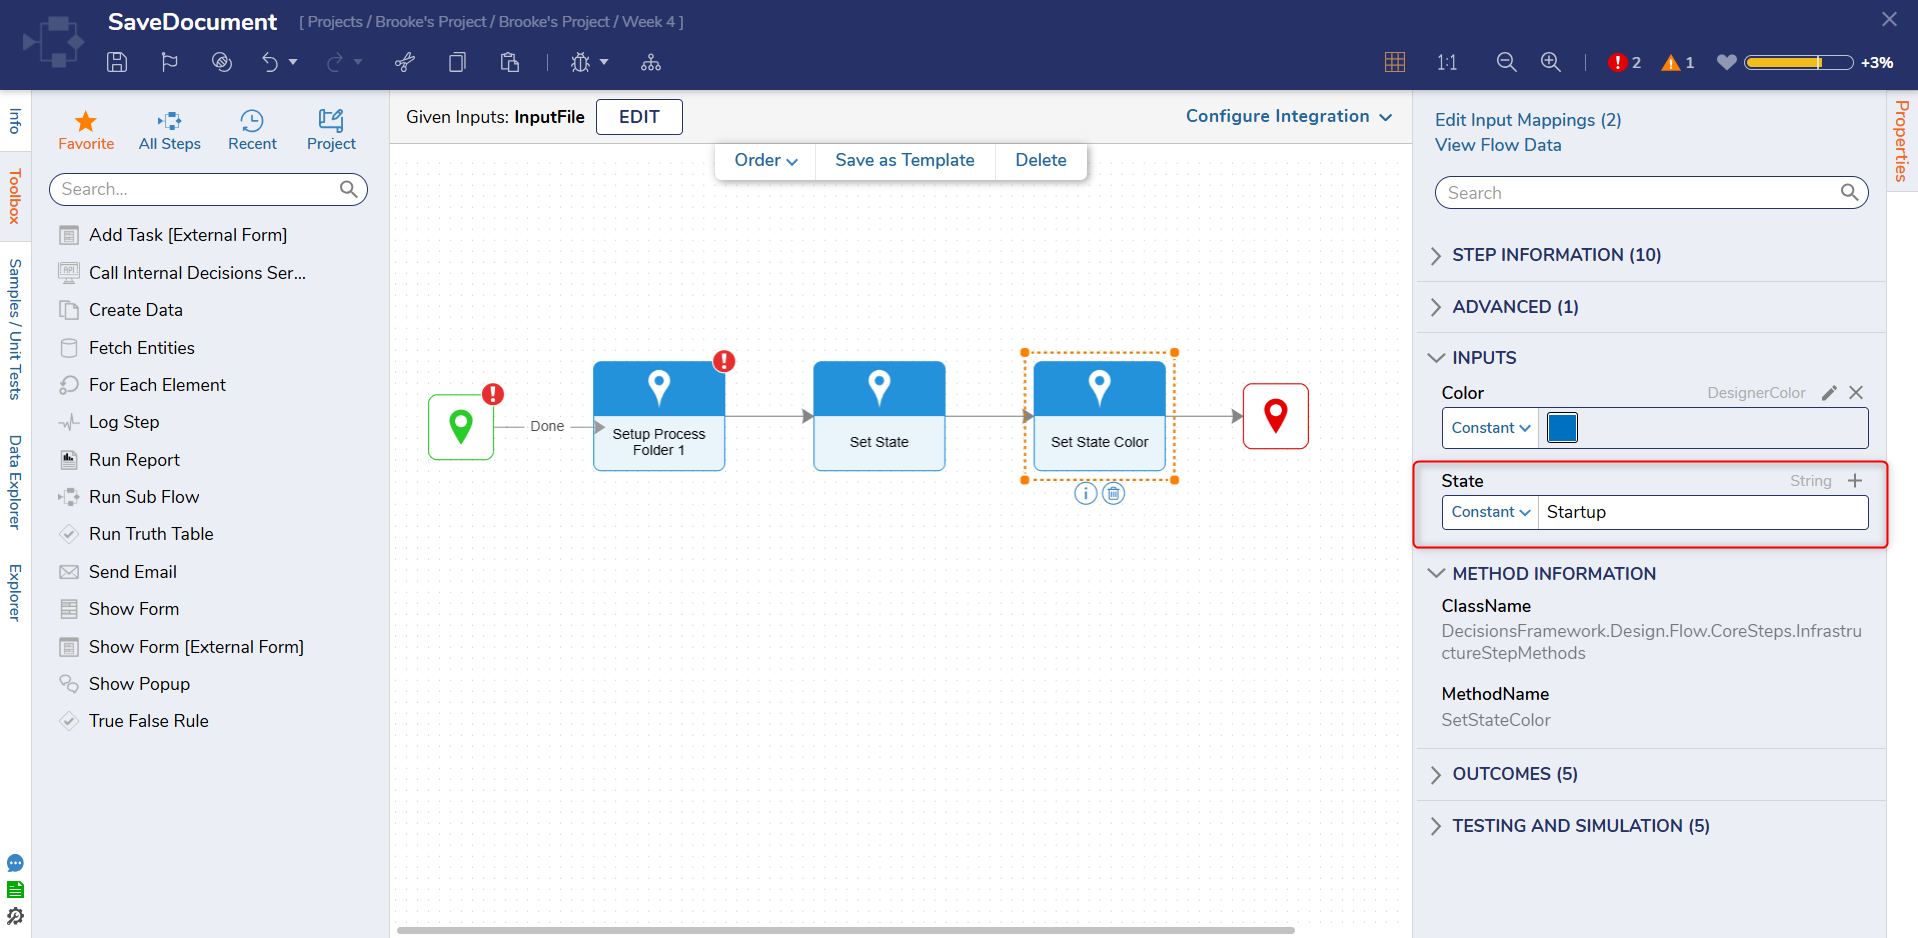
Set State Color
A folder states color can be changed by utilizing the Set State Color step. This changes the color of the state on the Process View Page's Folder Activity Panel. This step also needs to be used in tandem with the Setup Process Folder step.
- In a Designer Project, click CREATE FLOW and select Flow. Name the Flow and click CREATE.
- On the workspace navigate to the PROCESS category from the Toolbox panel. Add a Setup Process Folder step, a Set State step, and a Set State Color step to the workspace.
- Configure the Set State to a constant value and make a note of that value.
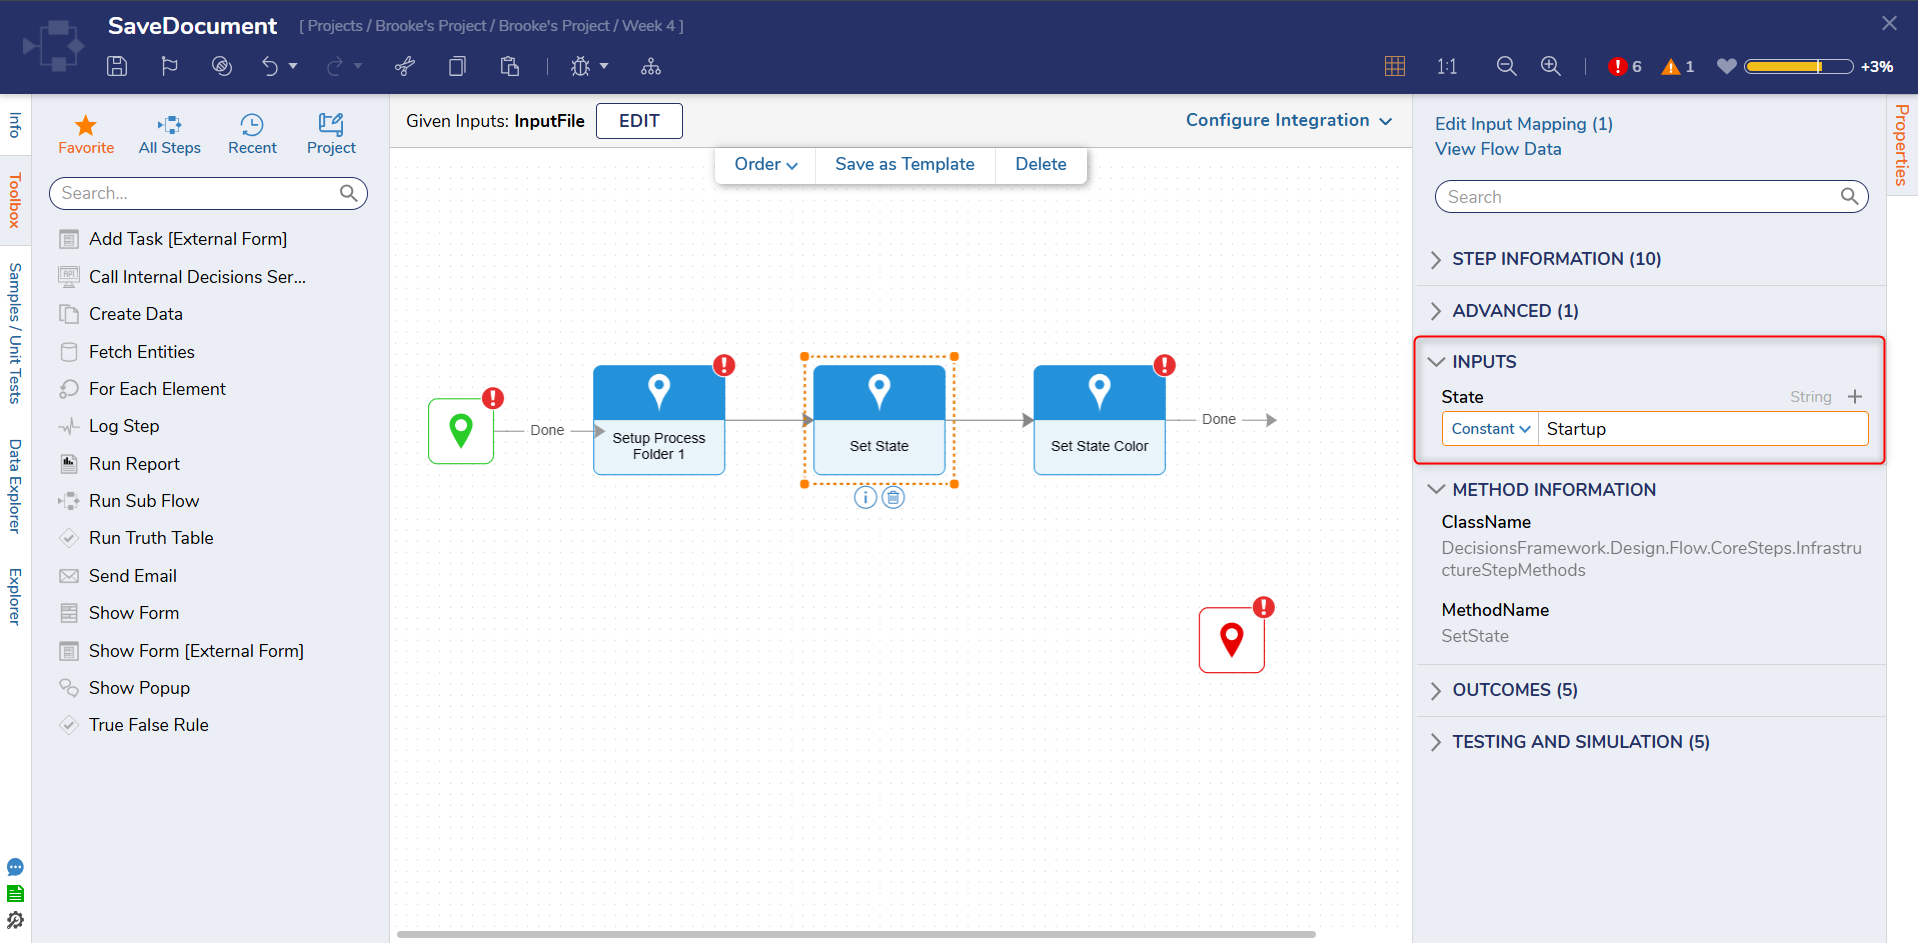
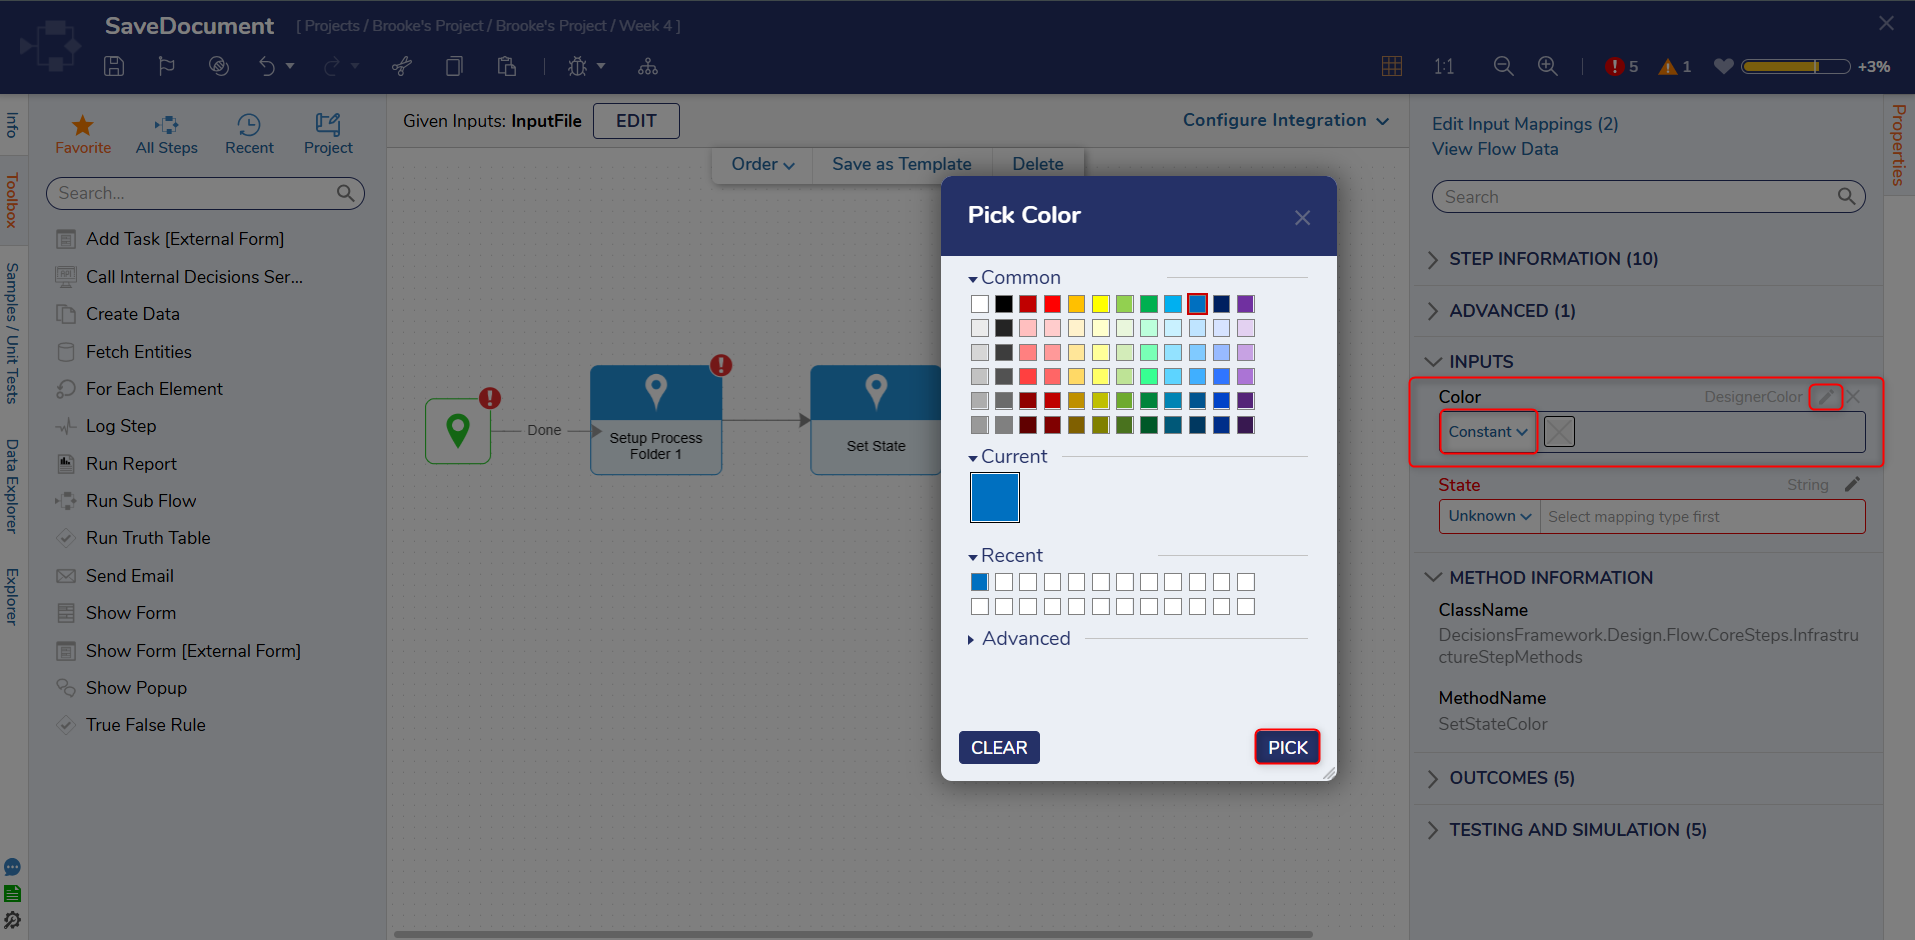
- On the Set State Color step map the Color input to Constant, select a color and click PICK.
- On the State input, set it to Constant and make sure it matches the state value configured on the Set State step.
- Debug the Flow to create a Process Folder and navigate to it.
Downloading a Completed Form From a Process Folder
- In a Designer Project, create a new Flow.
- In the Flow Designer, navigate to the Toolbox > PROCESS category and drag and connect a Setup Process Folder step to the Start step.
- In the Properties panel, locate Parent Folder and select PICK. Select the Folder [Process Folder Data].
- Navigate to the Folder Description and Folder Name fields and set the input mappings to Constant. Enter "This is the description" and "Folder Name."
- Add a Show Form step from the FAVORITE STEPS section and connect it to the Done path of the Setup Process Folder step.
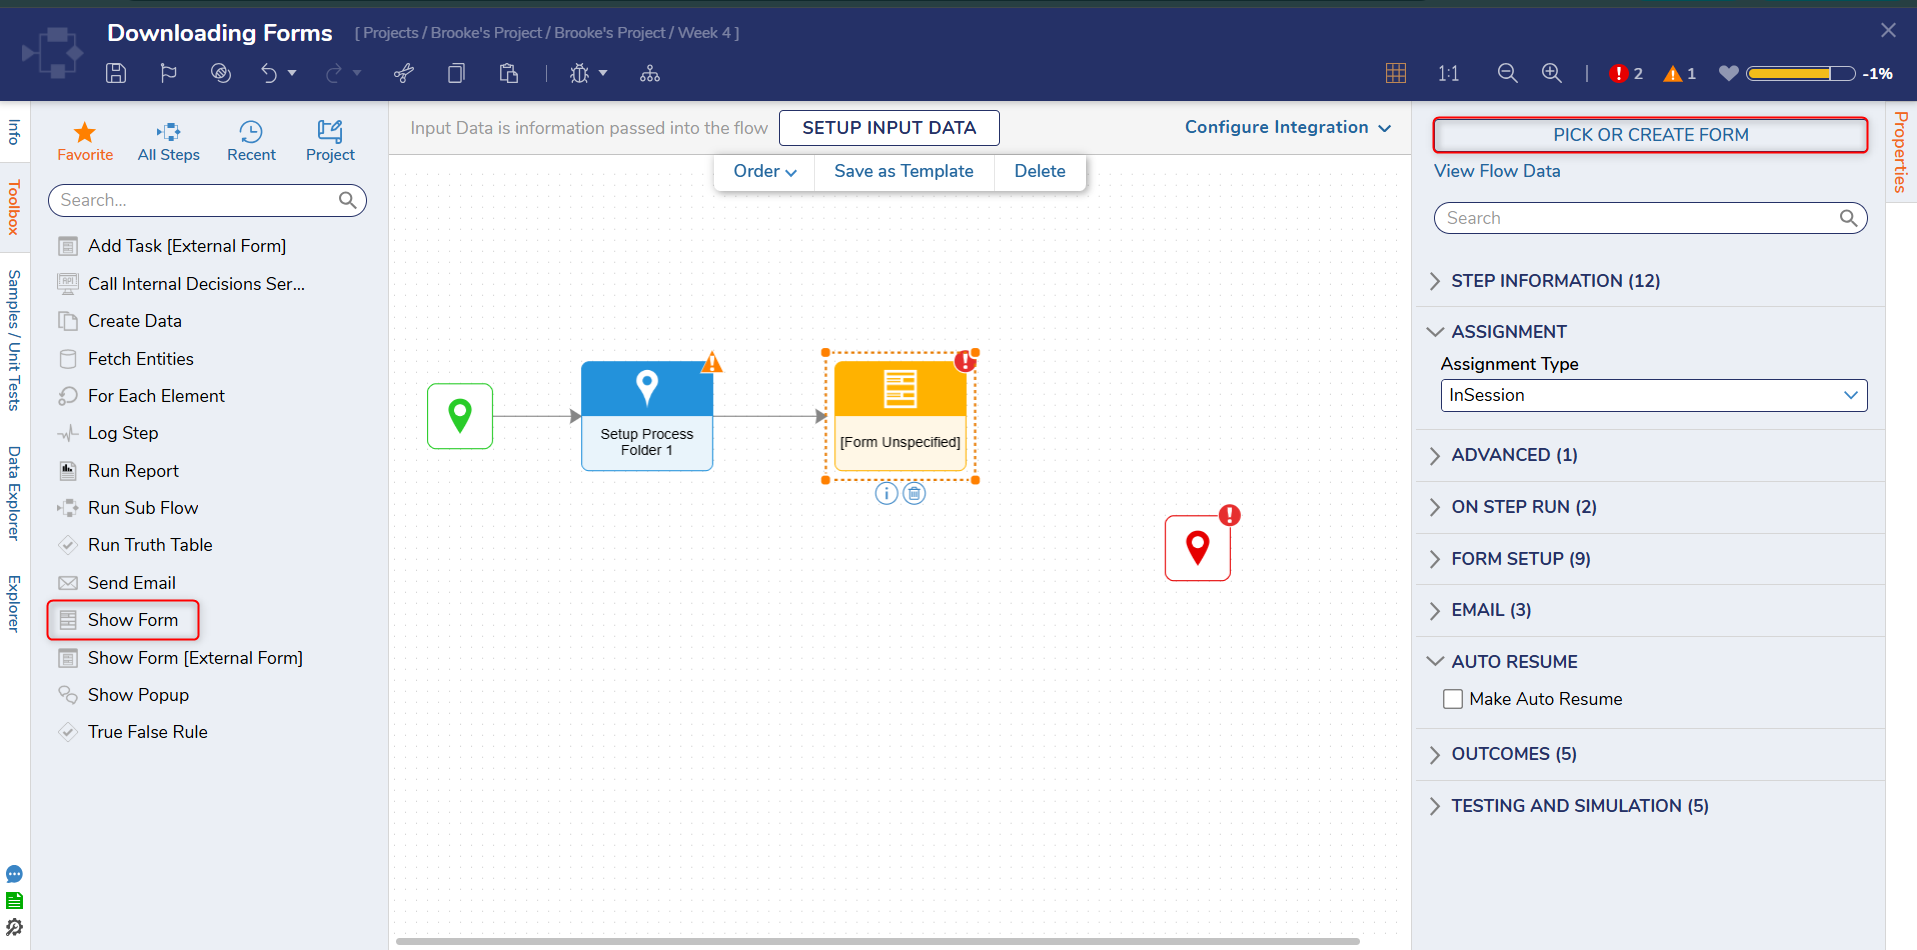
- In the Properties panel of the Show Form step, click PICK OR CREATE FORM. Click CREATE. In the Create New window, select Form, name it, and click CREATE.
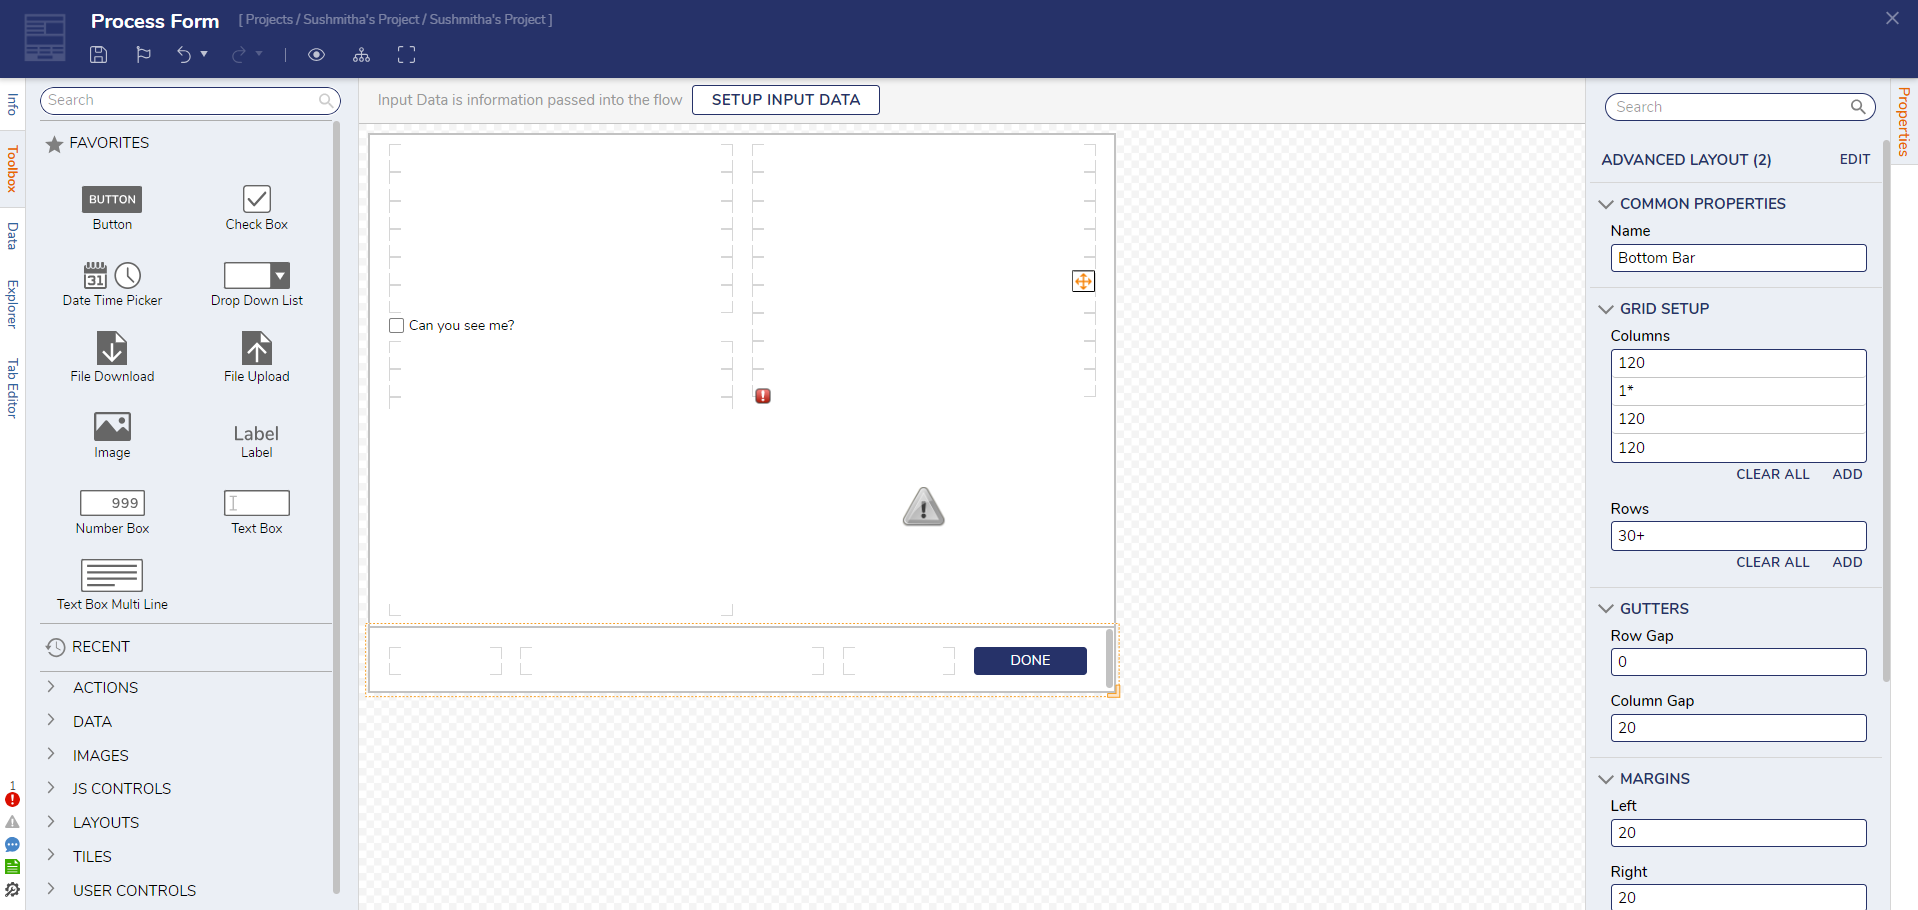
- In the Form Designer, add a Button (Done), a Check Box (Can You See Me?), and an Image component. Click Save and close the Form Designer.
- In the Flow Designer, set the Assignment Type to Assigned.
- Assign the Form and add an Assignment Name and assign a name for the action to be taken on the Assignment.
- Set the fields in INPUTS to Ignore.

- Connect the Done outcome of the Show Form step to the End step.
- Select Debug from the top action panel.
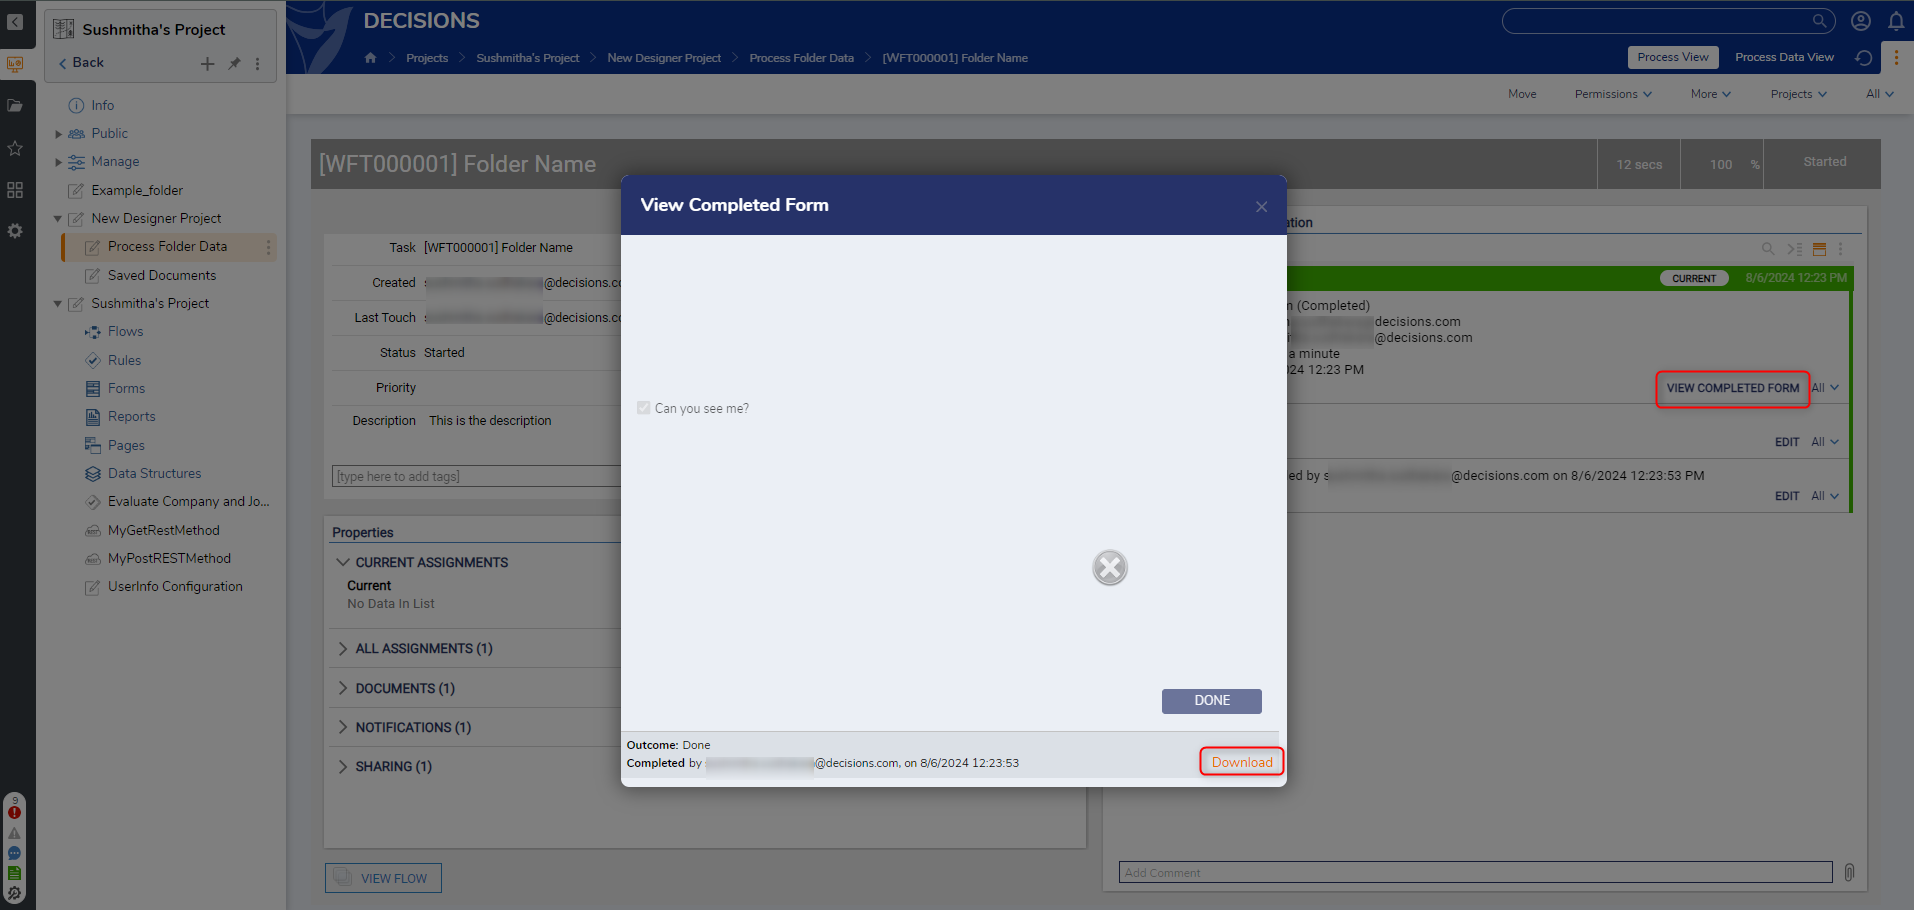
- Complete the Form after the debugger runs. Navigate to Process Folder Data and select the process data.
- On the PROCESS VIEW page, select VIEW COMPLETED FORM to see the Form.
- In the View Completed Form window, click Download.
Training Video:
Handling Comments