Overview
The Decisions platform supports the use of custom and predefined CSS class names on Form controls to enable granular control over visual styling. By applying CSS classes, designers can tailor the look and feel of individual controls (such as Buttons, Text Boxes, or Layouts) without editing inline styles.
This approach is especially helpful when:- Reusing consistent styling across multiple controls or Forms (e.g., a “primary button” style).
- Applying conditional styling using multiple class names (e.g., combining “btn-primary” and “btn-lg” for size and color).
- Maintaining separation of concerns, letting developers control design in a centralized CSS file while designers focus on layout.
Uploading Custom CSS File
Before applying custom classes to a Form or control, upload the desired CSS file to the project:
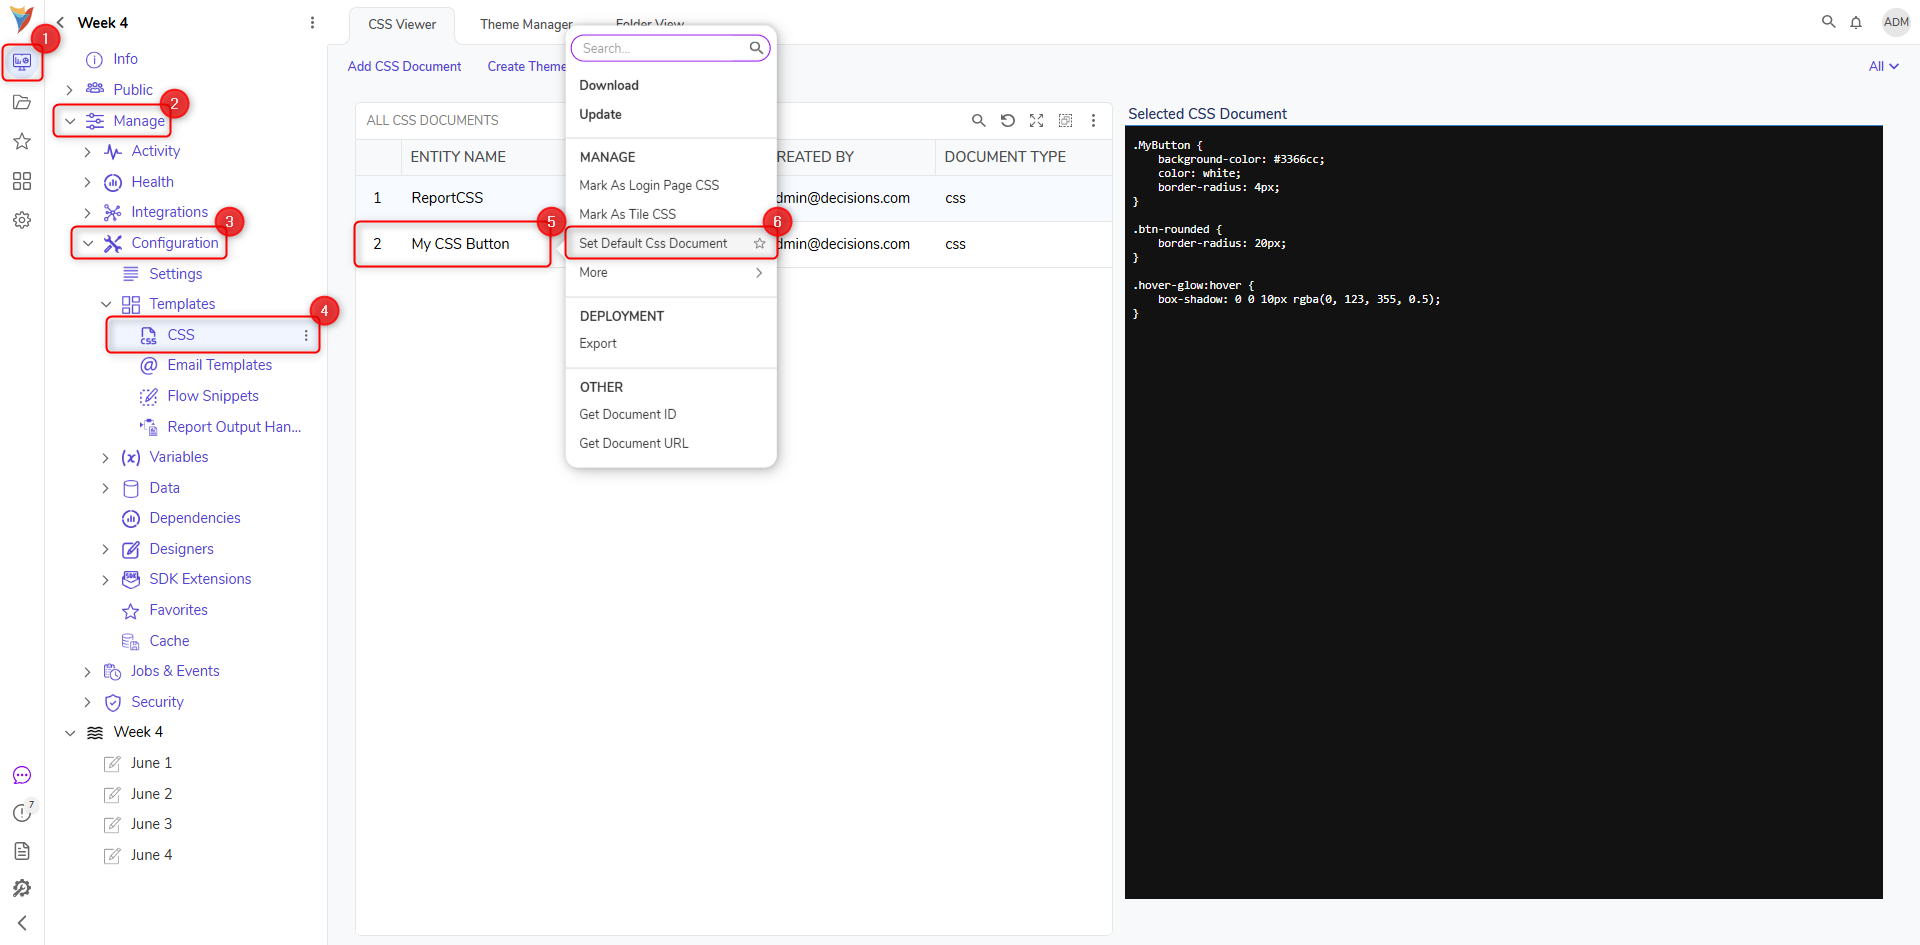
- Navigate to Manage > Configuration > Templates > CSS.
- Upload your CSS file (e.g., Button.css). This file should contain class definitions that will be referenced in the Form.
.MyButton {
  background-color: #3366cc;
  color: white;
  border-radius: 4px;
}

.btn-rounded {
  border-radius: 20px;
}

.hover-glow:hover {
  box-shadow: 0 0 10px rgba(0, 123, 255, 0.5);
}
Applying CSS to a Form
Once the CSS file is uploaded to the project:
- Open the Form Designer.
- In the Form Properties panel, go to the APPEARANCE section.
- In the Style Sheets List, select the uploaded CSS file (e.g., CSS Button).
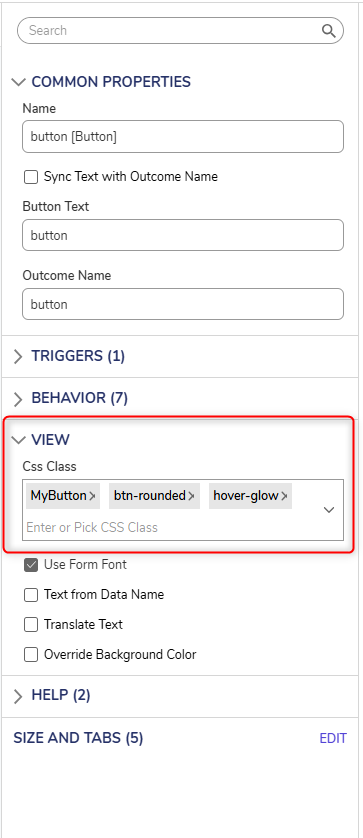
- Drag a Button control onto the Form.
- Select the Button and expand the VIEW category in the properties panel.
- In the CSS Class drop down, type or select one or more class names from the CSS file.Important Note on Availability in Projects
- For the Style Sheets list to appear in the Form Designer, the CSS file must be uploaded within the current Project. Only then can you select it from the checklist.
- If a CSS file exists only at the System level (e.g., added outside the Project or inherited from a legacy conversion), it may still apply to components where a class name is manually entered. However, it won’t appear in the Style Sheets picker, and you won’t be able to assign it visually from the Designer.
Setting a Default Form CSS
To ensure all Forms in a project reference the same base styles:
- Go to Manage > Configuration > Templates > CSS.
- Right-click the CSS file to make the default and choose Set Default CSS Document.
Once set, the selected CSS file will be auto-applied to all Forms created within that project. However, individual controls will not automatically inherit class names, you must still specify the desired classes on each control using the CSS Class field in their Properties panel.