Overview
Notifications can be added to Decisions for events that display to members of designated Groups through various methods, including Email, SMS, a Popup Message, and Twitter. The platform contains an extensive list of Default Notification Types, which are the actions that trigger the system to send a Notification, including Account Created, Site Published, and Group Deleted.
The following document demonstrates how to set up Notifications for such Portal Events by creating an Account Created Notification. When the system or a User creates an Account, the Notification displays a Popup message to Users in the Administrators Group. Starting in v9 and above, notifications are Project-level and are only visible within the Project.
Example
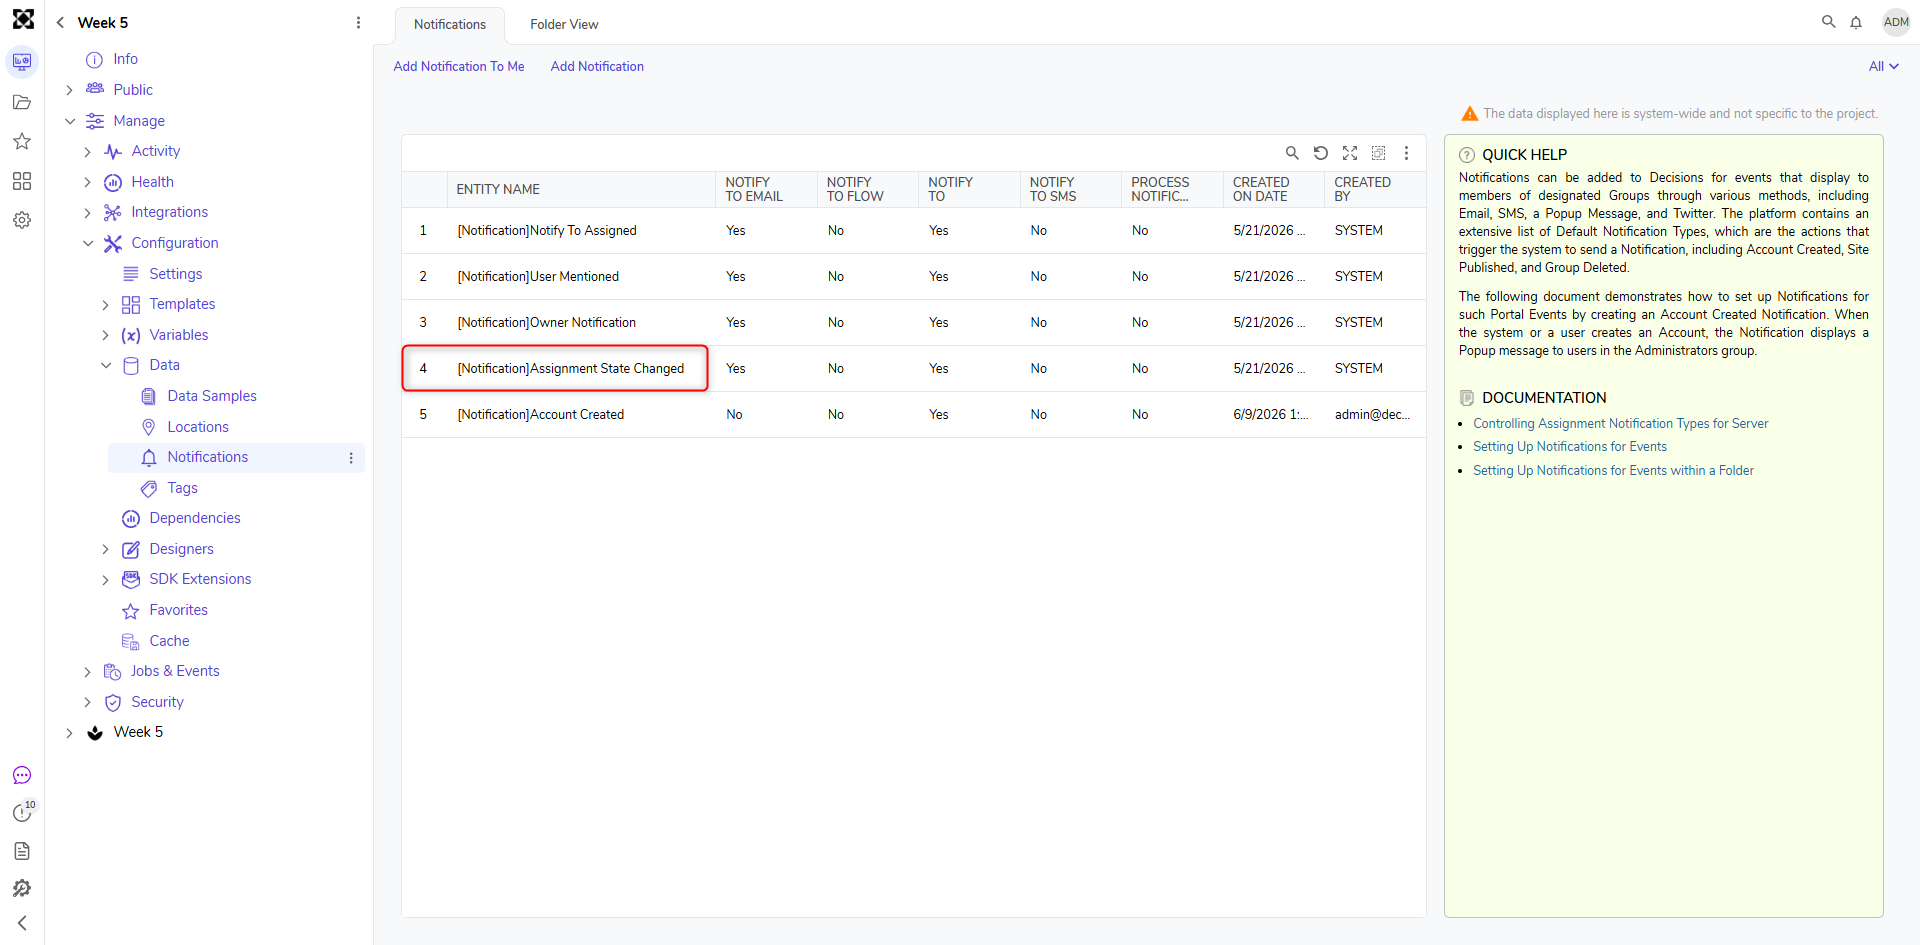
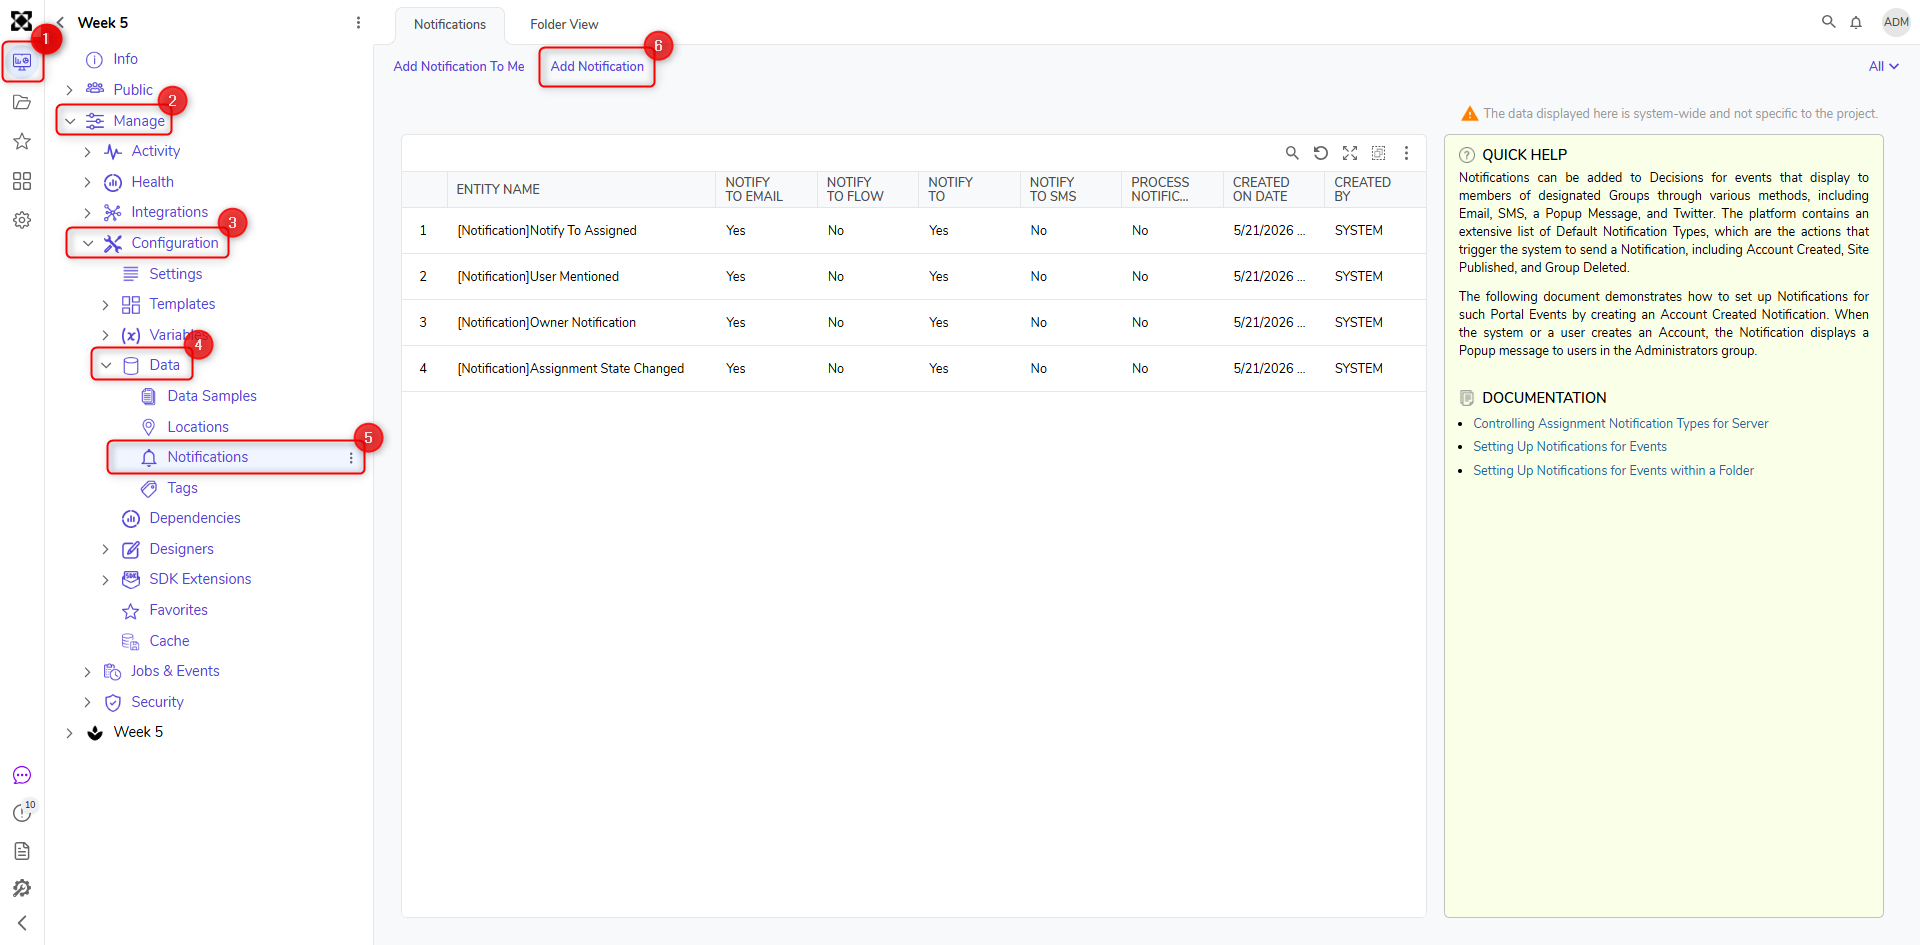
- Navigate to Projects > Desired Project > Manage > Configuration > Data > Notifications.
- Click ADD Notification on the top Action bar.
- Select Account Created from the Notification Type drop-down menu from the Add Notification window. The Notification Type is the event that triggers the system to send the notification, including events related to Accounts, Folders, Documents, Tasks, Assignments, Groups, Pages, and more.
- Click the plus button under the Notification to Type section and select Notify to Group.
- Under the Add Notification to Type panel, click the plus button and select Administrators. Then, click PICK and OK. Additionally, Users have the option to configure a Notification to:
- Notify To Account
- Notify To Assigned
- Notify To Group
- Notify To Commentor
- Notify To FolderPermission
- Notify to CreatedBy
- Notify To AssignmentRole
- Notify To Folder Shared
- Under Notification Modes, check the checkbox for PopUp. Other Notification Modes include Email, Flow, and SMS.
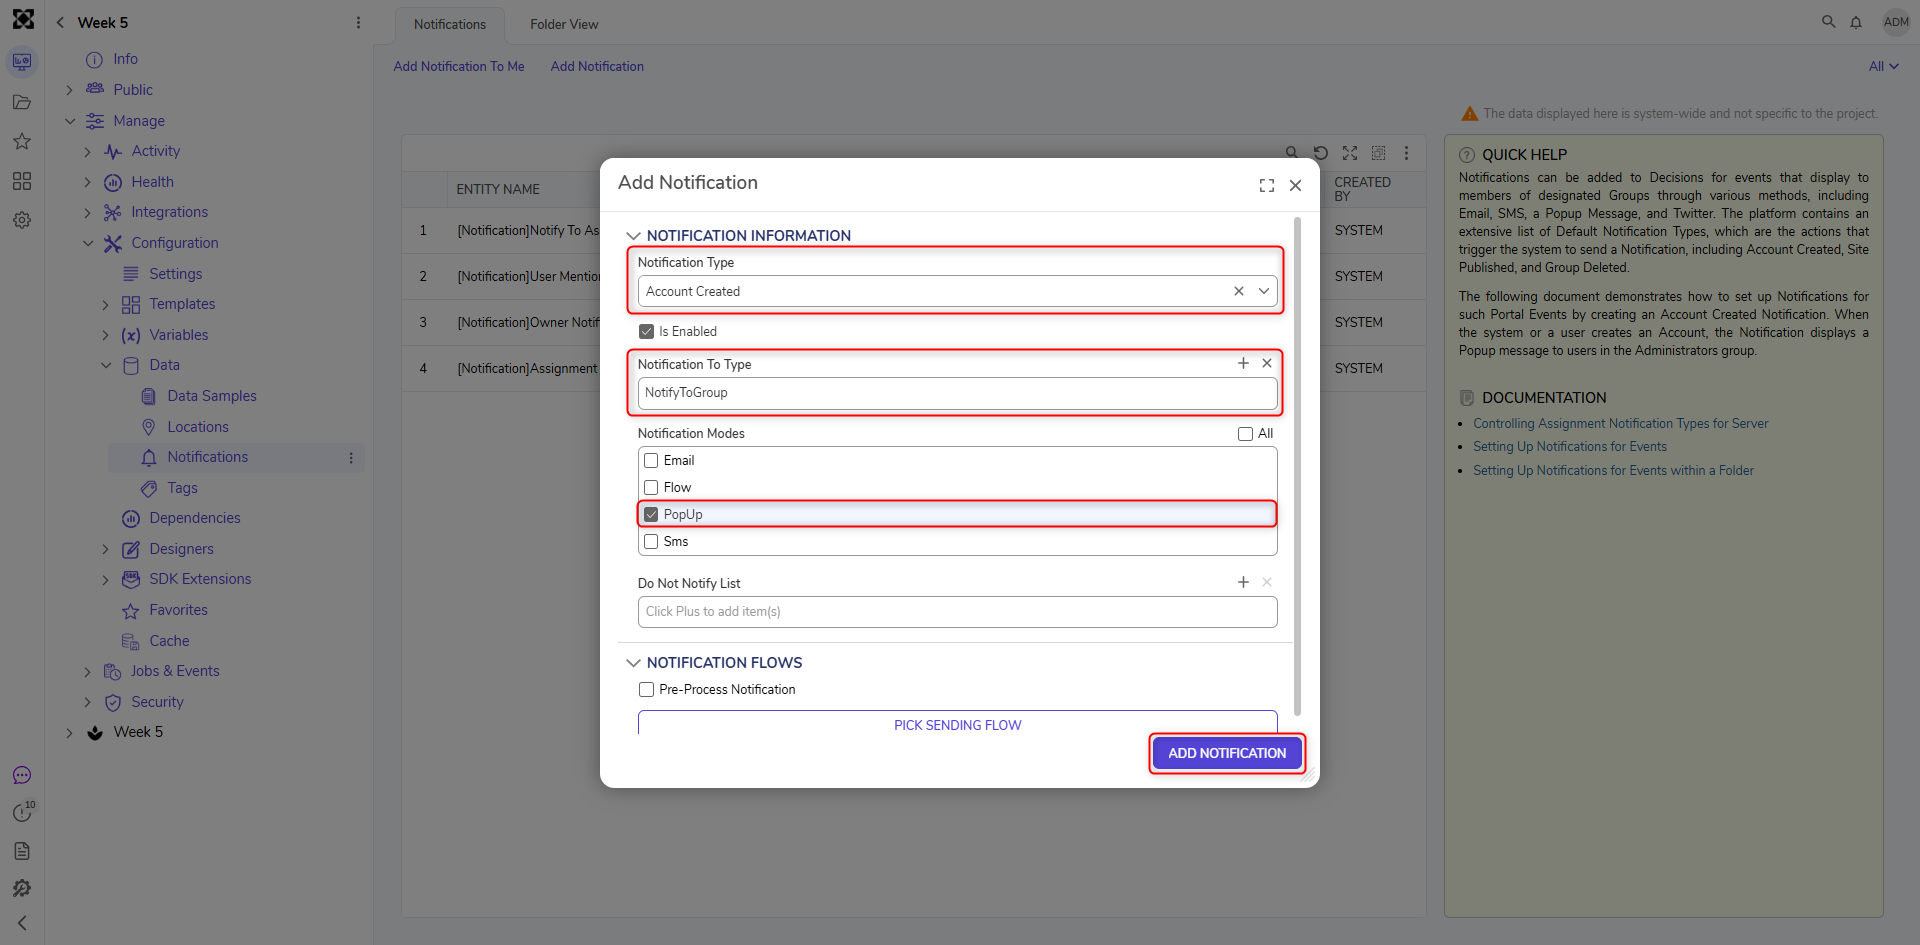
- Click ADD NOTIFICATION. The newly created Notification will display in the Default Notifications List and trigger upon creating a new Account.