Overview
Designer Elements within a Project are customizable in several different ways. Items within a Project can be moved to other Projects, copied to other Projects, and adjusted depending on which Accounts or Groups have access to those elements. This allows the user to tailor the Project to their exact needs.
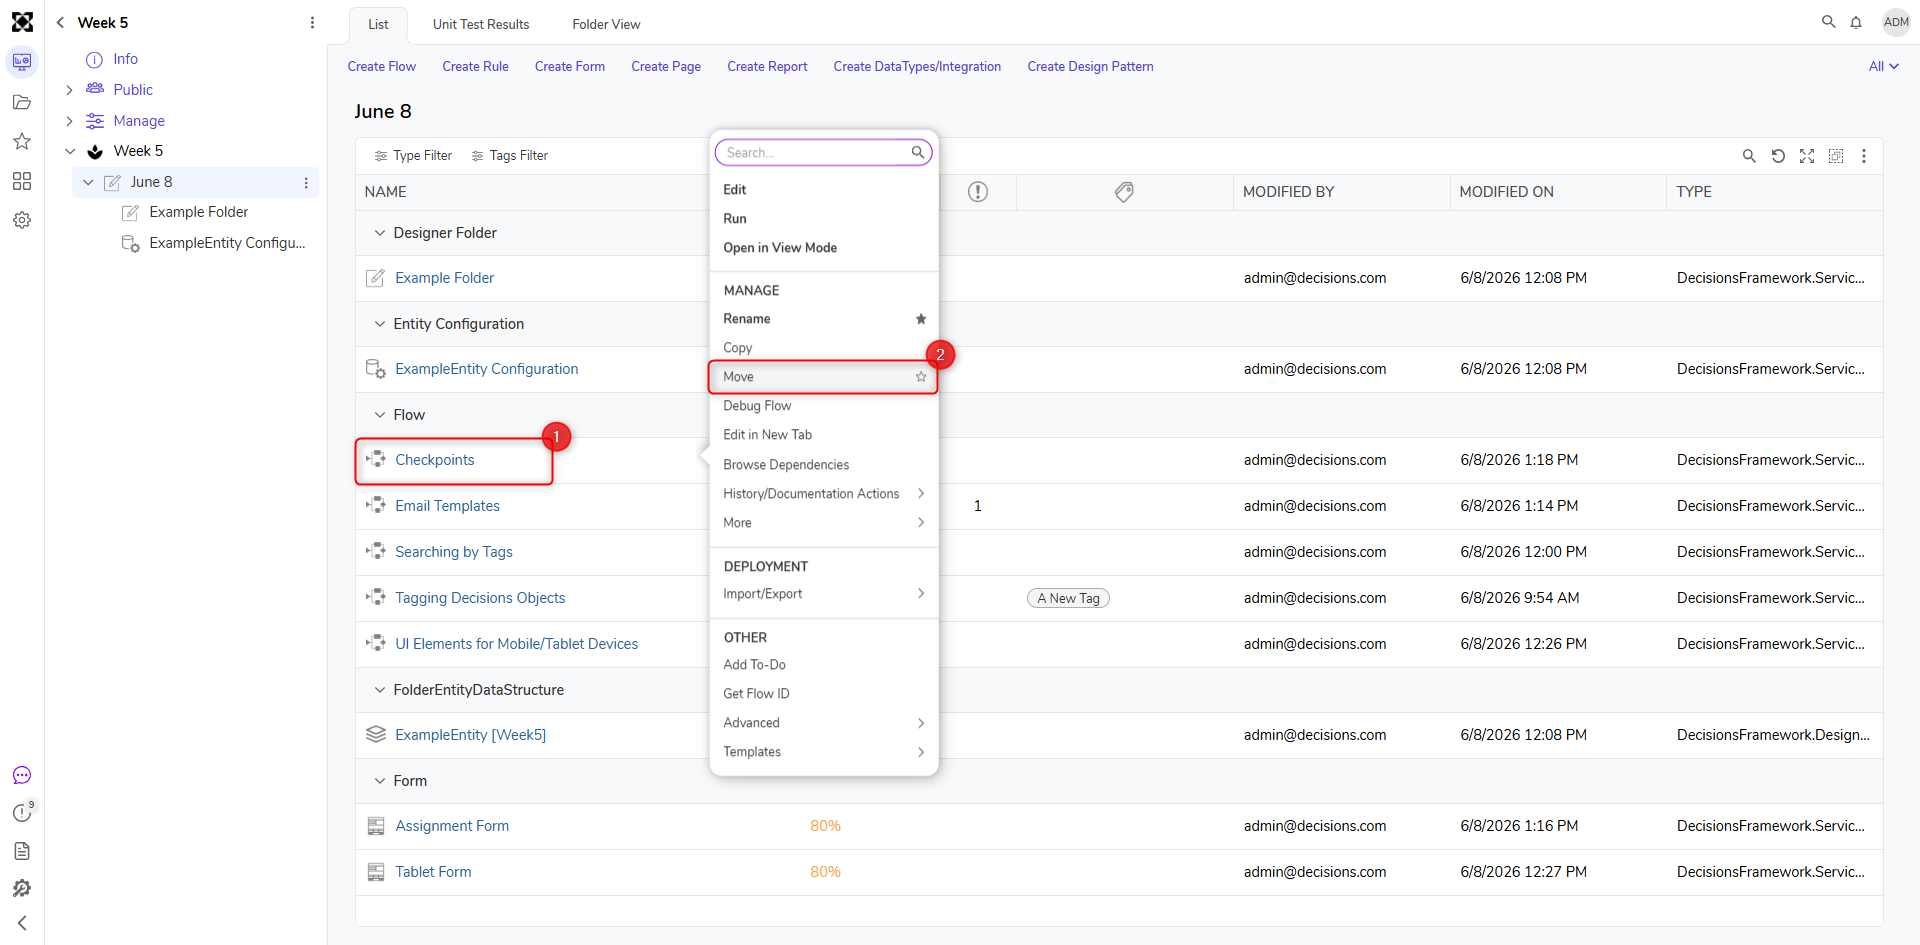
Moving Items
- Select individual or multiple items and select Move.
- The Move dialog will provide a list of existing projects to choose as the destination for the selected items. Choose a folder and select MOVE.
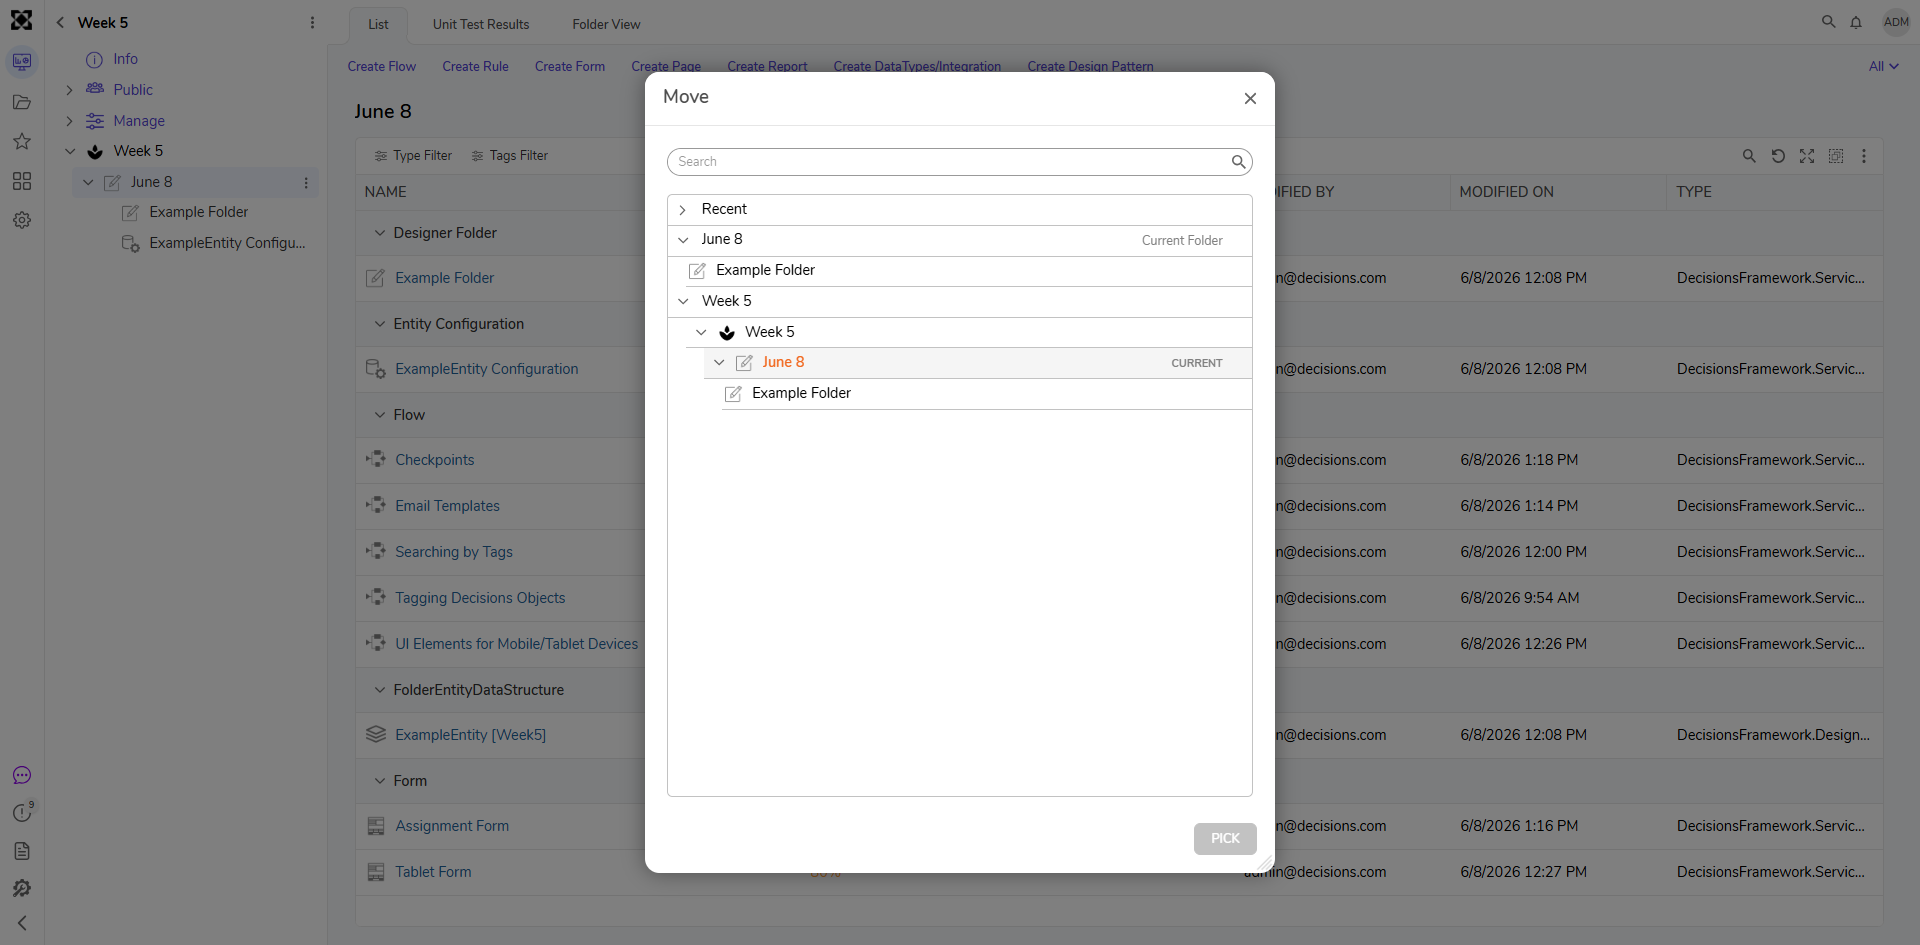
- The moved items will appear within the chosen folder and be removed from their original location.
- User will ne notified of any potential conflicts or dependencies during the move process should they arise.
Copying Items
- Select individual or multiple items and expand More > Copy Designer Folder.
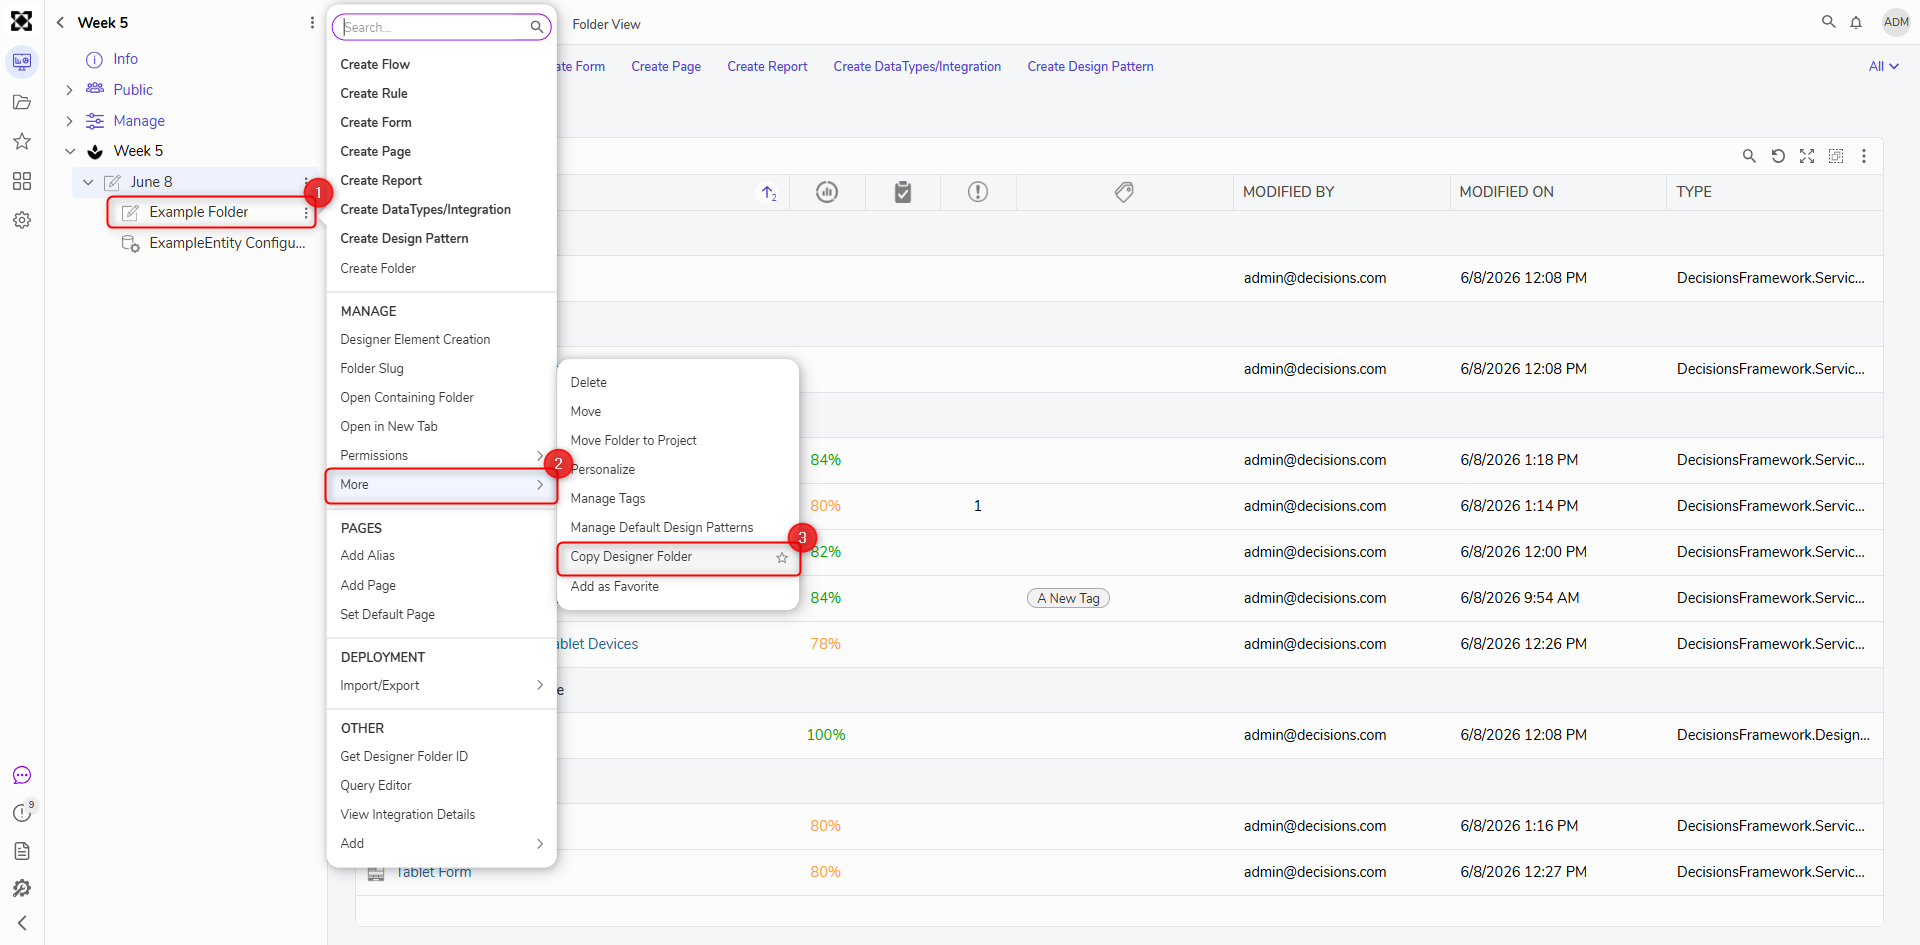
- The Copy Designer Folder dialog will provide a list of existing Projects to choose as the destination for the selected items. Choose a Project, input the Name, and select COPY.
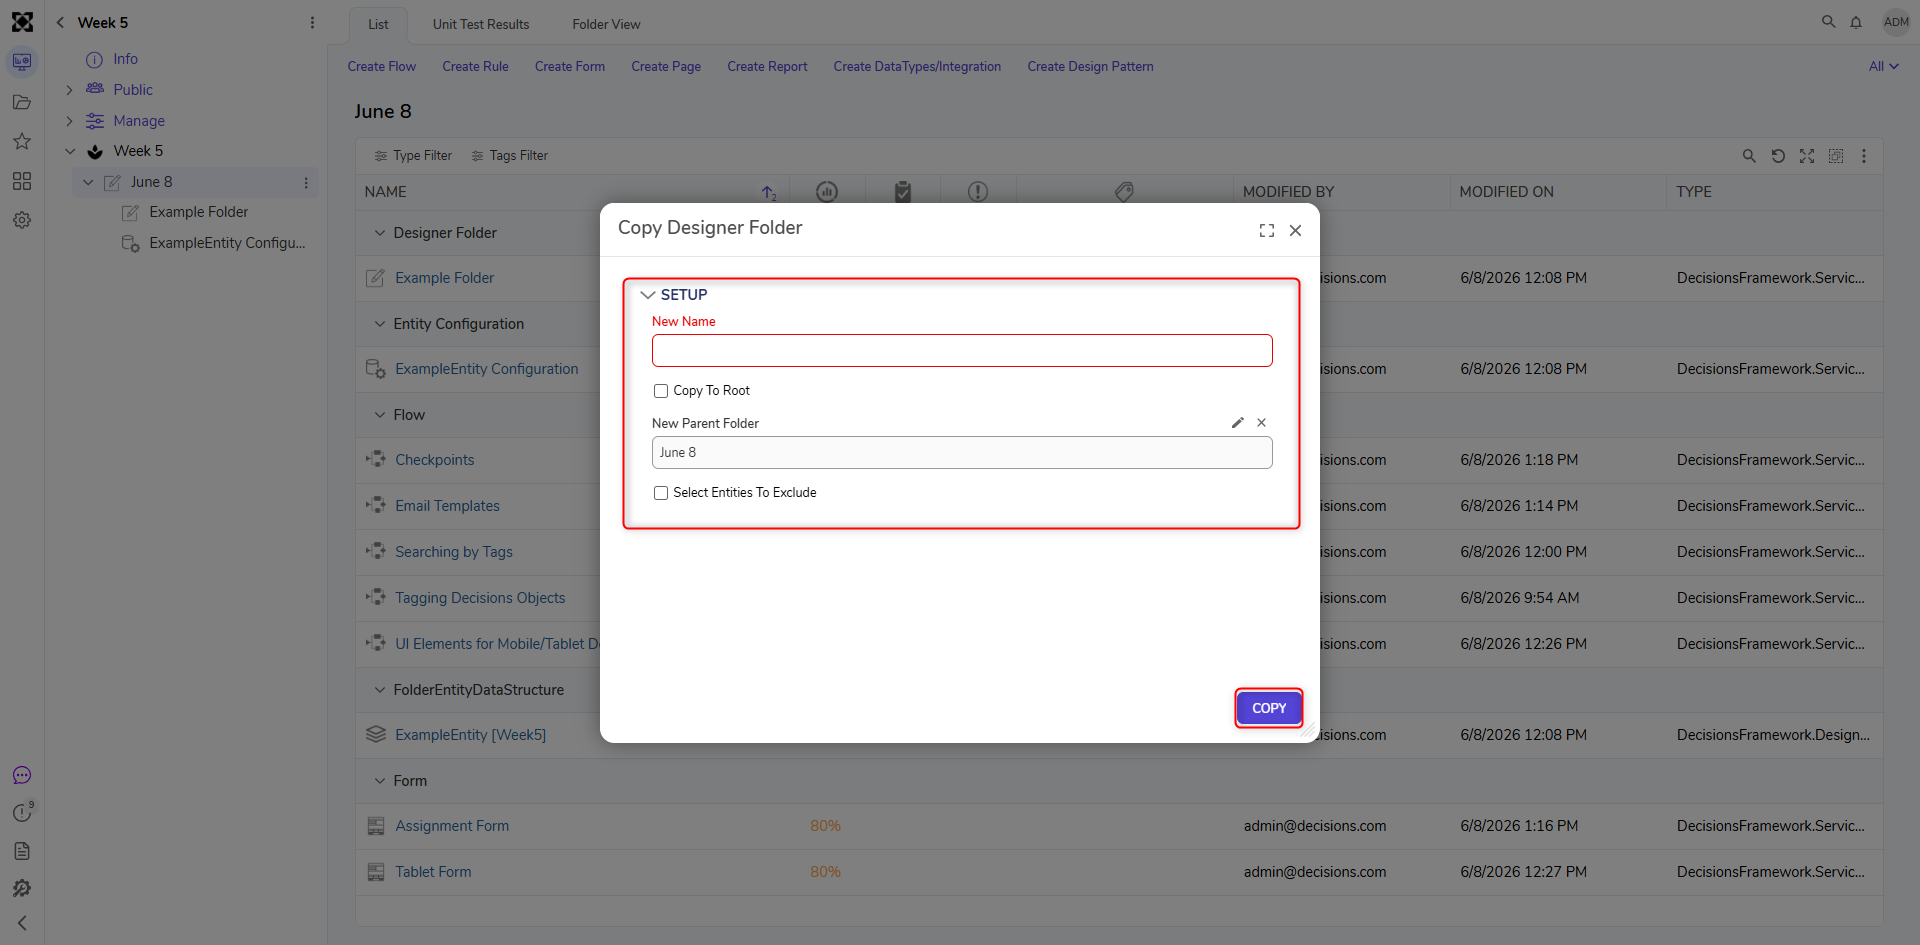
- The copied item(s) will then appear within the chosen Project while leaving the original items intact.
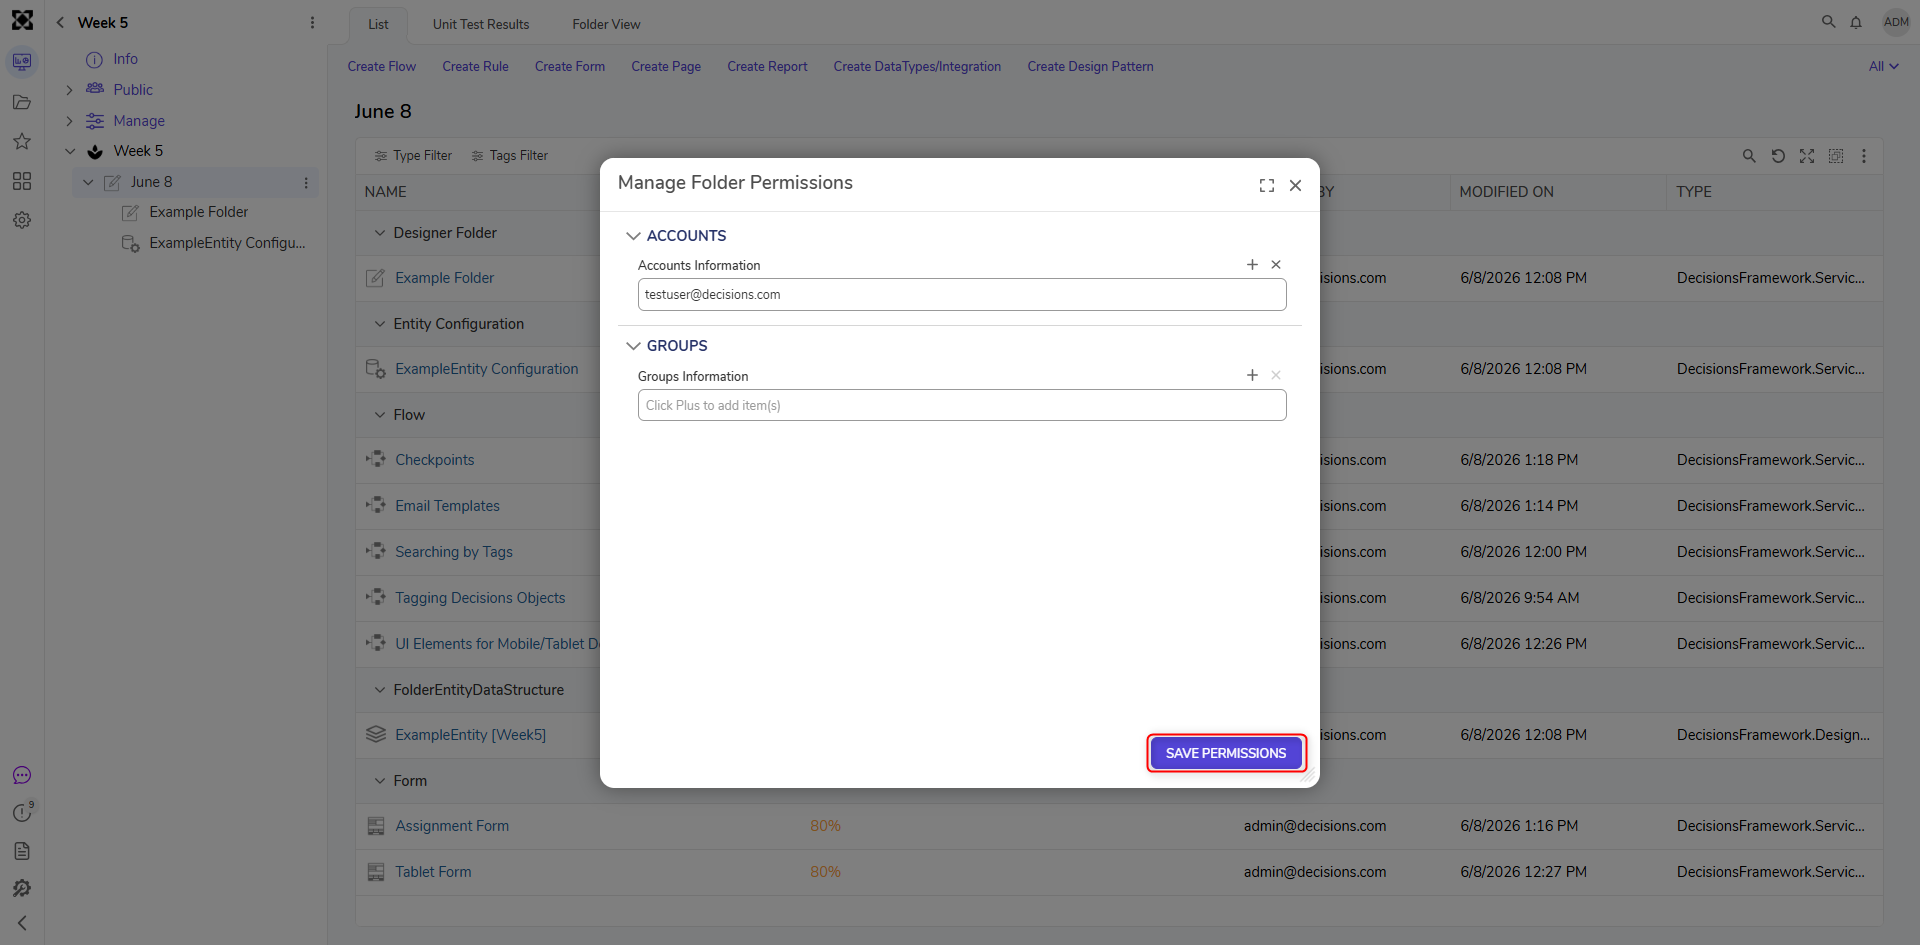
Permissions/Visibility
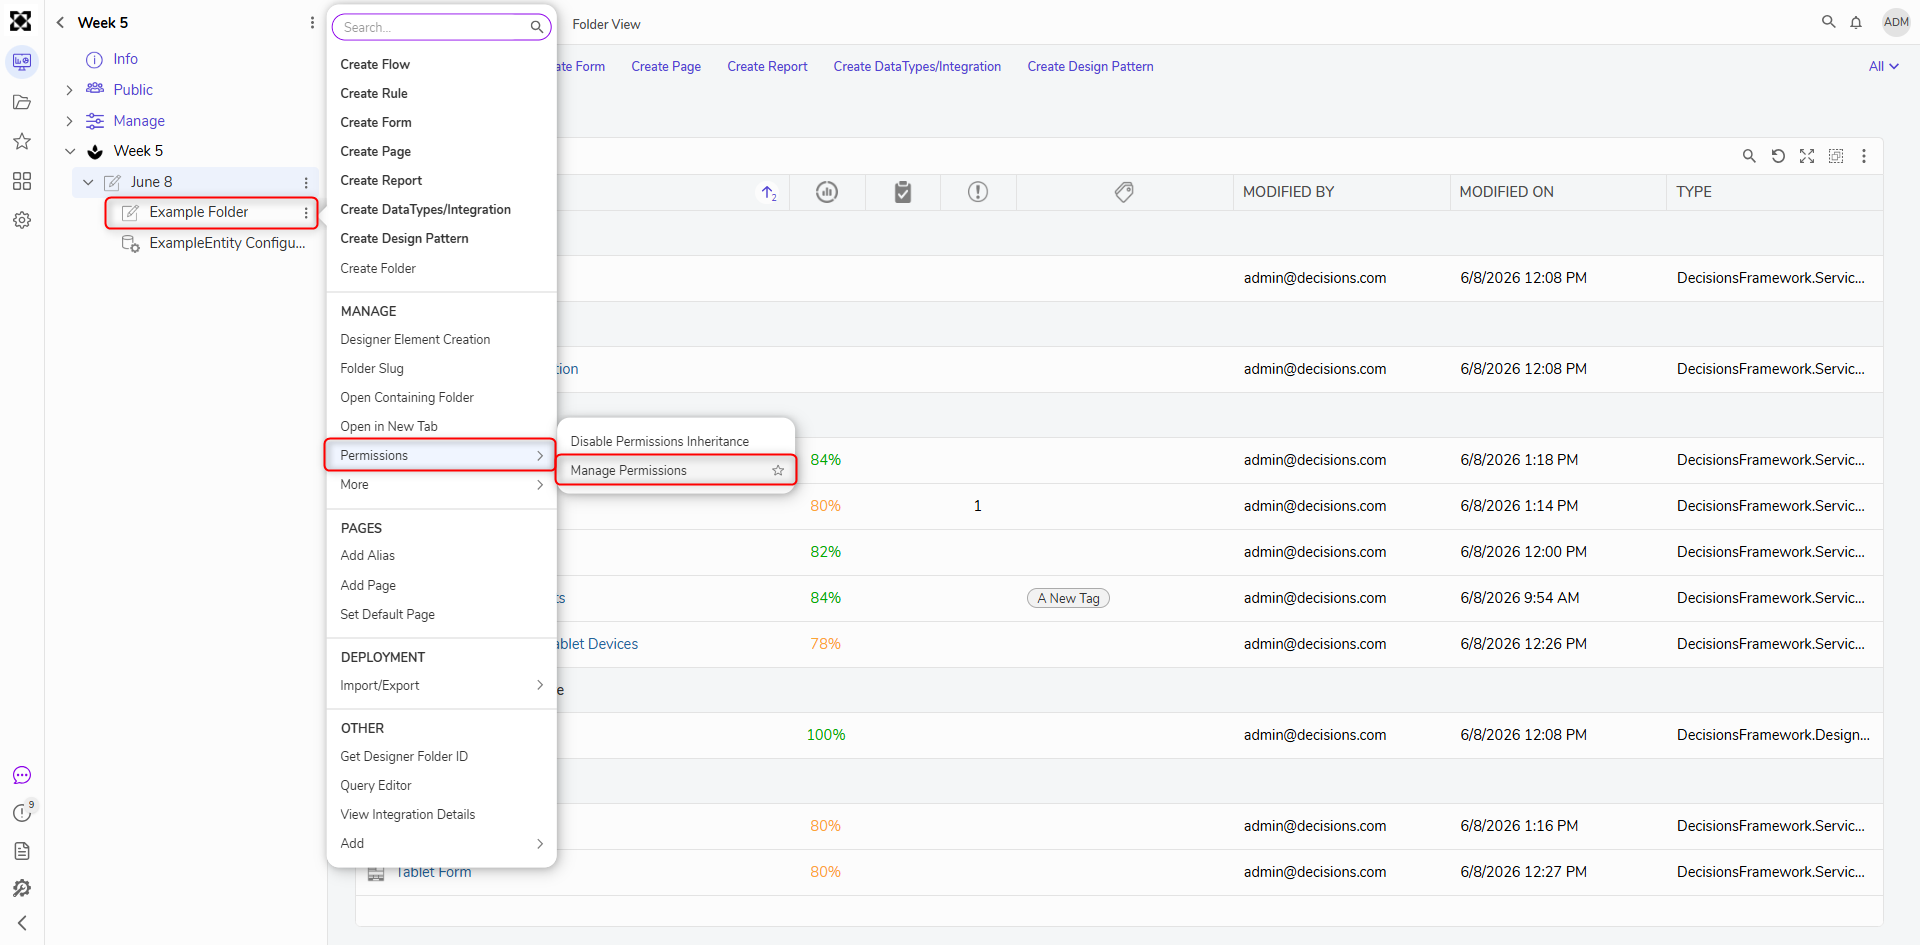
- To set permissions and visibility to items within the Project, select the desired item(s) and expand Permissions > Manage Permissions.
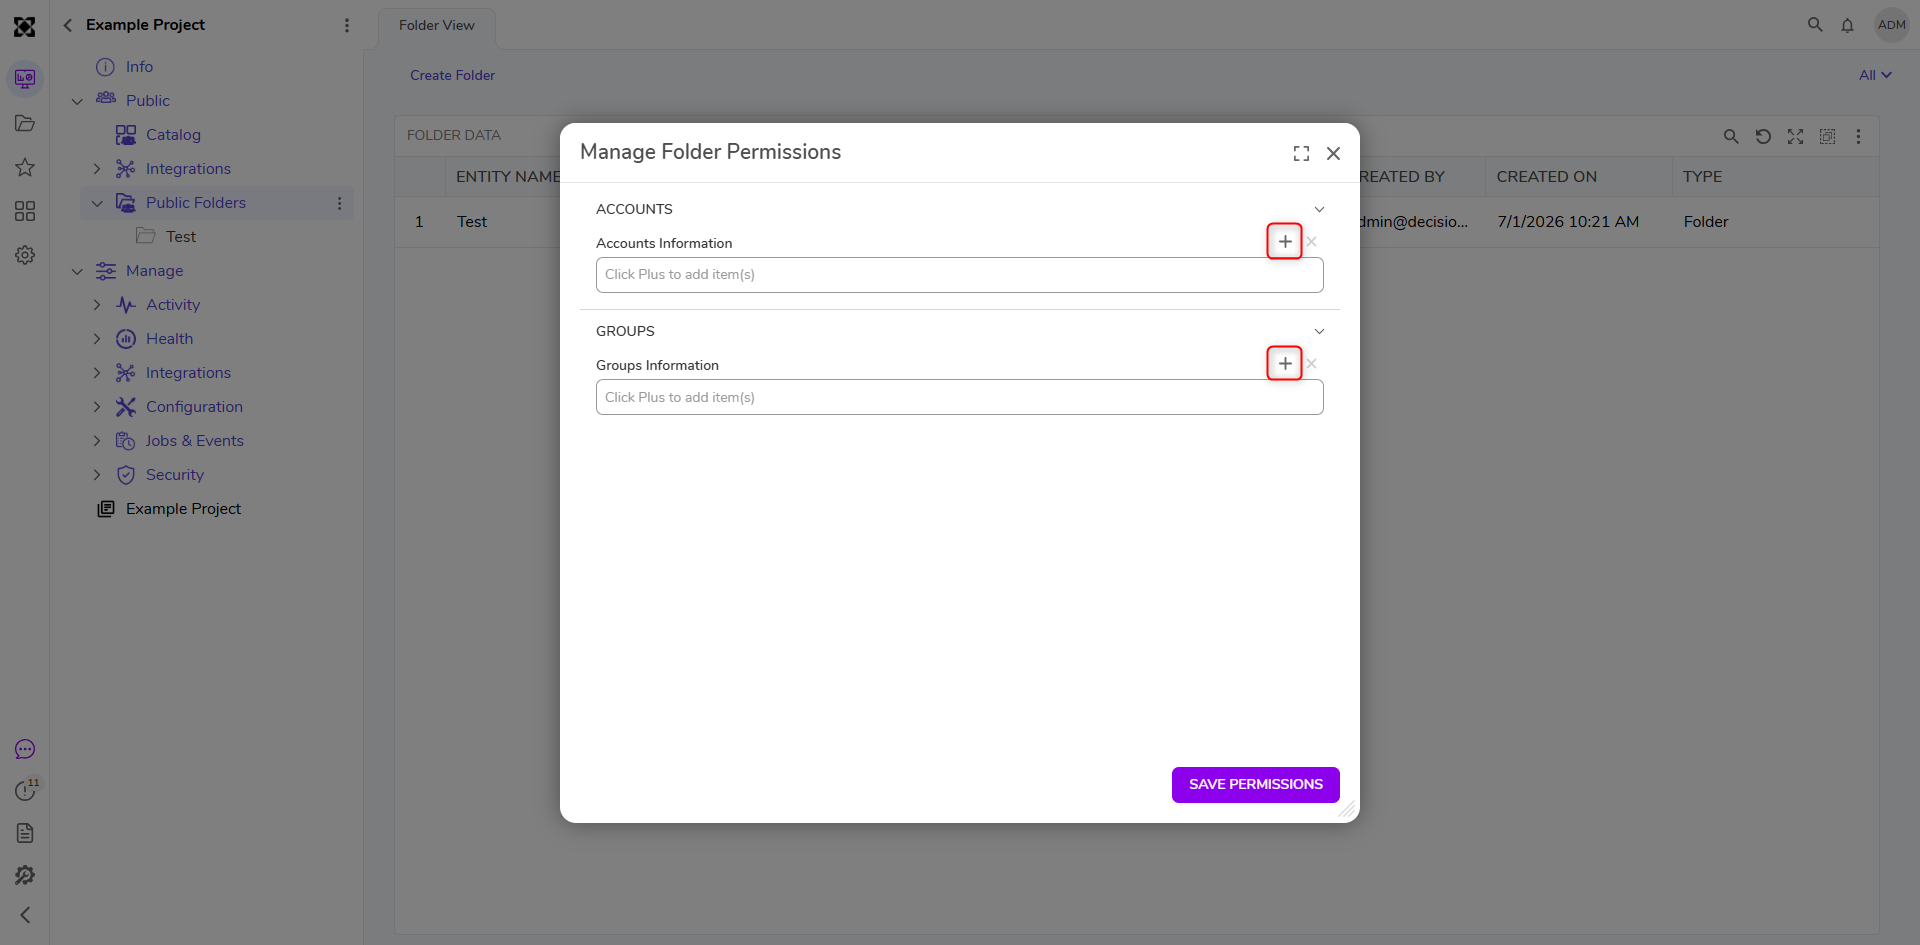
- The Manage Folder Permissions dialog will give the user the option to add either an Account or a Group to the selected item(s) by clicking + next to the desired option.
- The Add Accounts/Groups Information dialog will allow the user to select the desired Account or Group and Permissions. Once done, select OK.
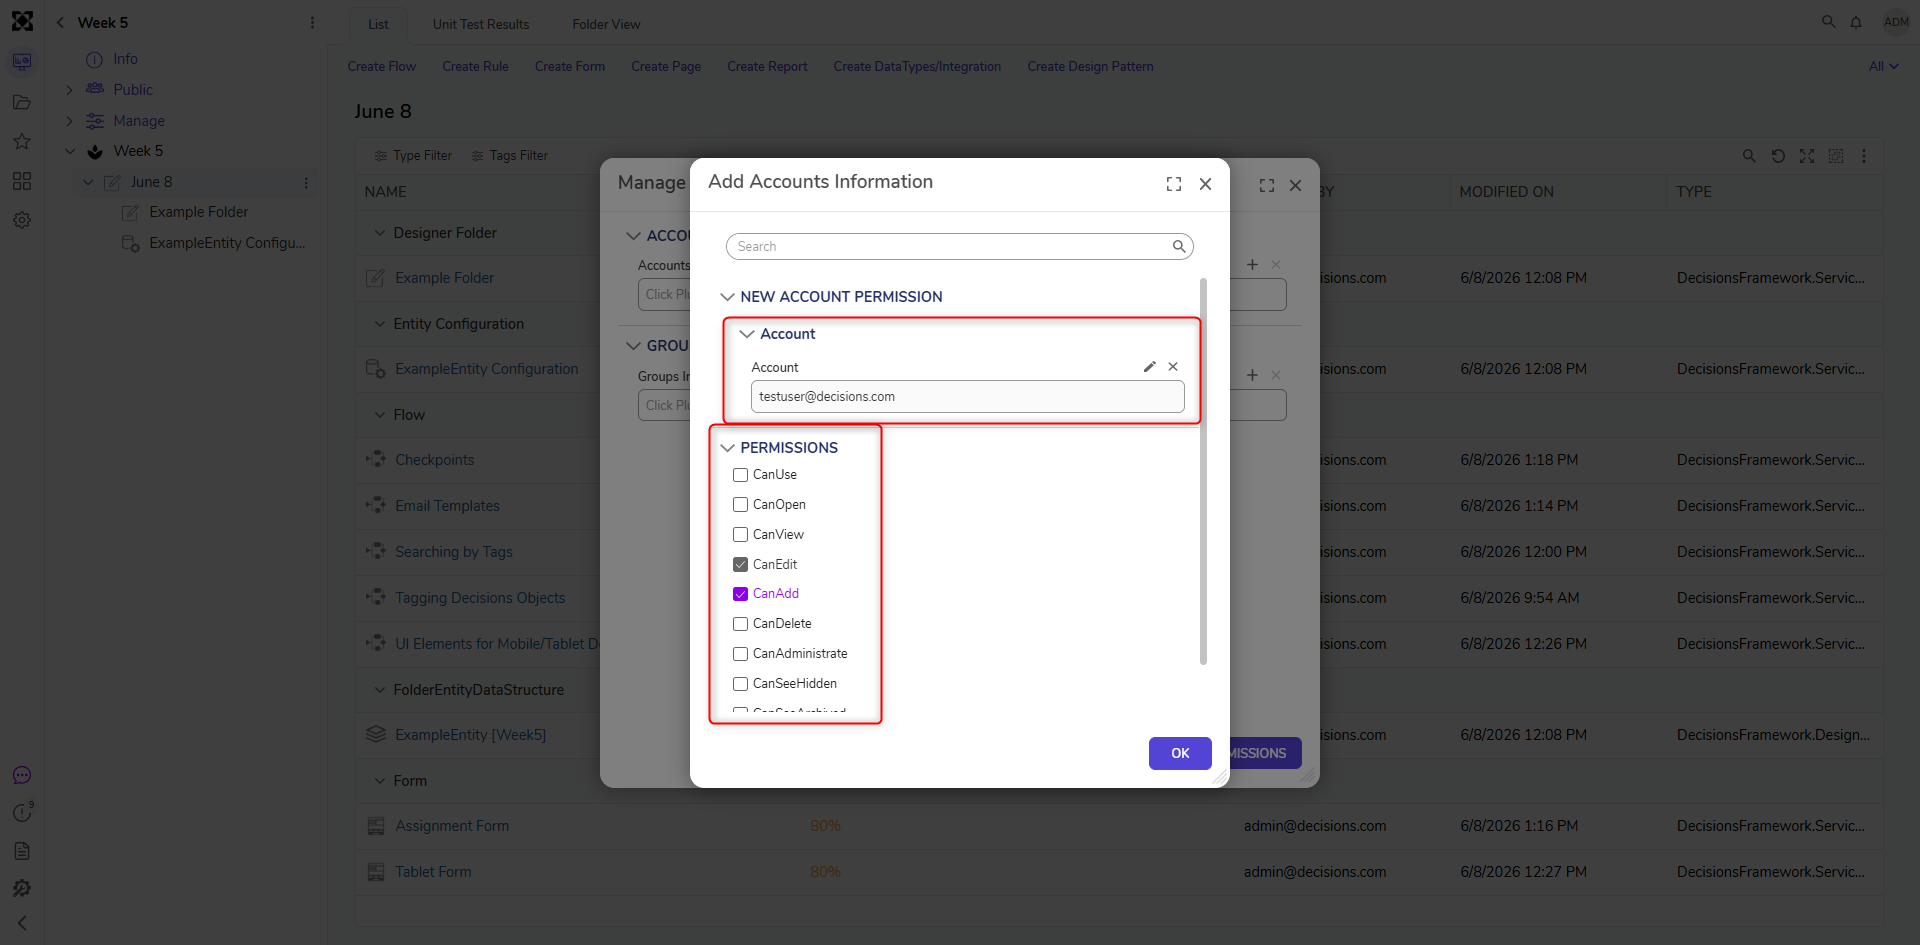
- Once the desired Account or Group has been set up, click SAVE PERMISSIONS.