Overview
This document demonstrates how to connect Decisions to Azure SQL using Azure Service Principal. To learn more about Azure Service Principal, refer to Microsoft’s Documentation.
Prerequisites
- An active Azure Account.
- Azure SQL server
- Database in SQL server. Refer to Decisions Installation Requirements for the minimum DB levels to be used.
Note:
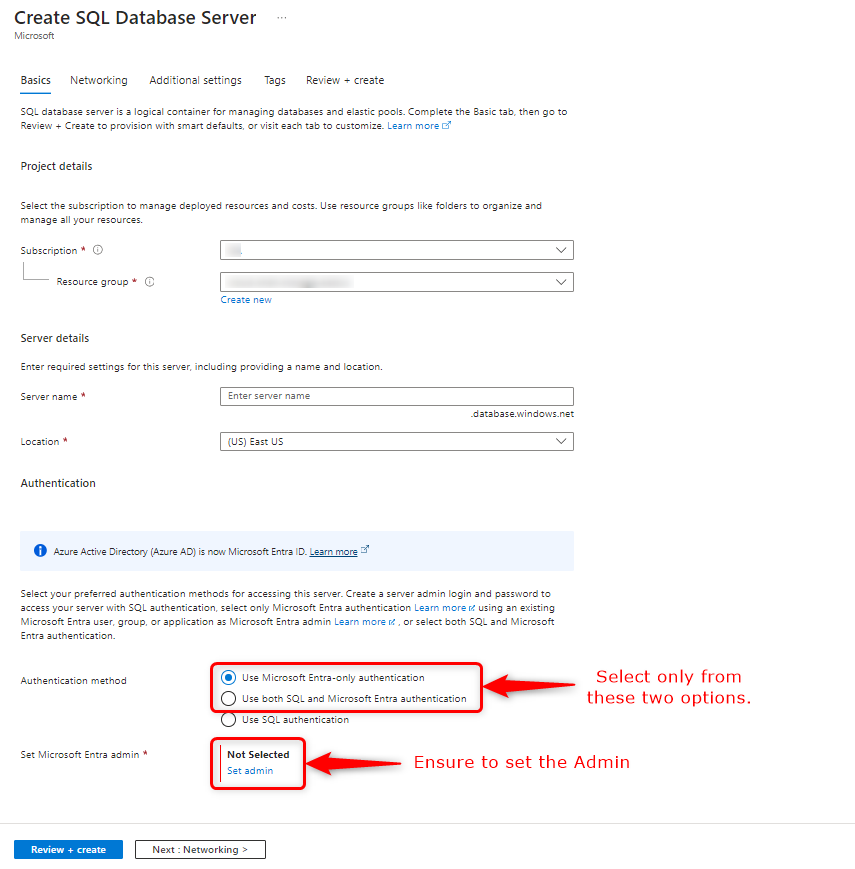
- Ensure that you do not select the "Use SQL authentication" method while creating the SQL Server.
- Ensure that the admin is set while creating the SQL server.
App Registrations in Azure
- Open the Microsoft Entra ID (Formerly known as Azure Active Directory).
- Navigate to Left Panel > Manage > App registrations.
- Create a new registration and configure the registration as per the requirement. Refer to Application registration.
- Generate a Client secret for the app registration. To generate the client secret, refer to Service principal authentication.
- Copy the following App registration details for the next step,
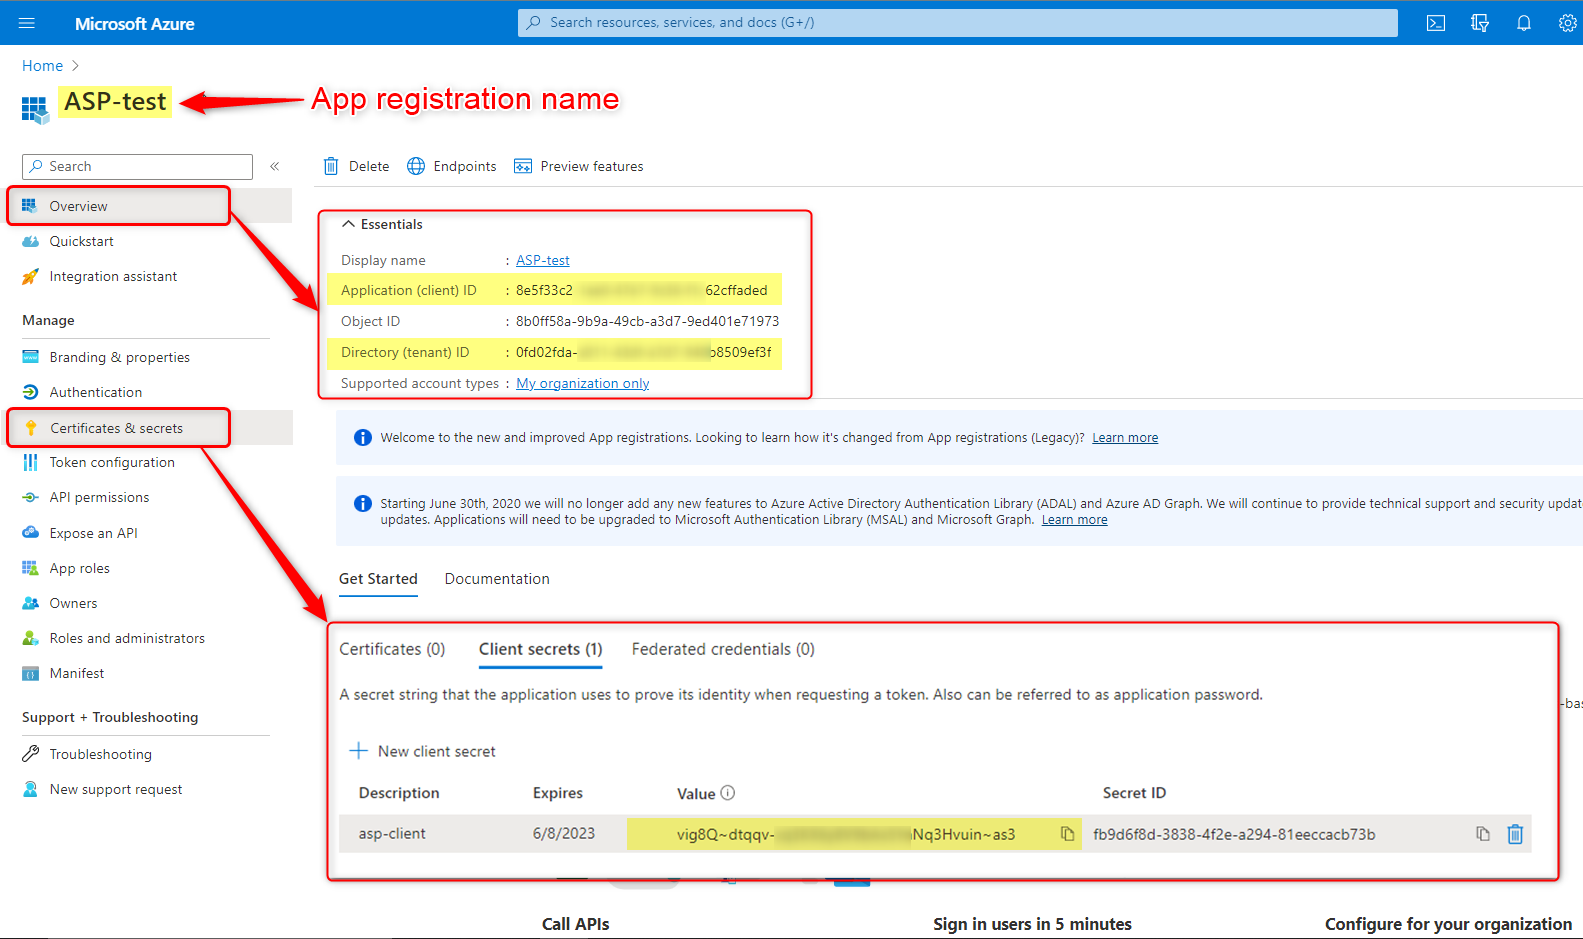
- App registration Name
- Application (client) ID
- Directory (tenant) ID
- App. Client Secrets Value.
- Copy the DB server and DB name for the next step.
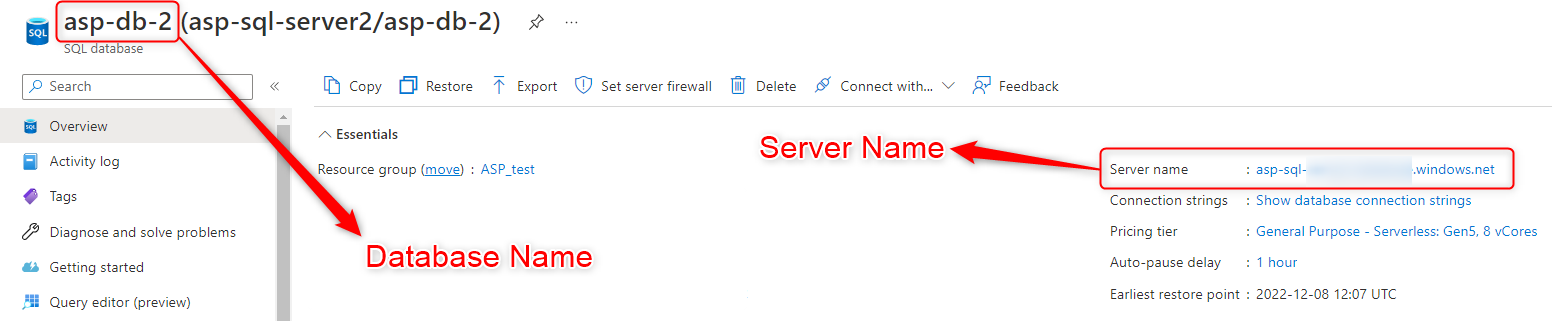
- Database Name
- Server Name
Configurations in SQL Database
- Go to SQL server > SQL database.
- Navigate to the left panel > Query Editor (preview). A login window appears.
- Login through the Microsoft Entra authentication (formerly known as Active Directory authentication).Note:If you get an error to connect Query Editor, click on the "allowlist IP…" link generated under the error.
- Edit
your_app_registration_nameand run the following Query in the SQL database.
CREATE USER "your_app_registration_name" FROM EXTERNAL PROVIDER GO
EXEC sp_addrolemember 'db_owner', "your_app_registration_name" GO
GRANT ALTER ANY USER TO "your_app_registration_name" GO
Installing Decisions Using Azure Service Principal
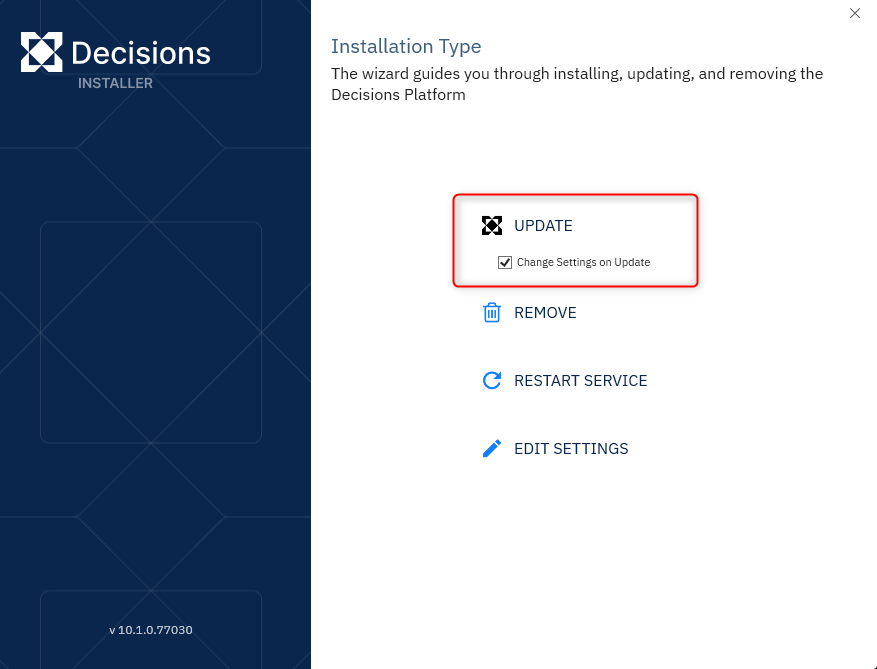
- Open the Decisions installer, Enable "Change Settings on Update," and click on Update.
- Configure the settings till you land on the Database Setup screen.
- Select Azure SQL and under Connection Settings, select Using Azure Service Principal option.
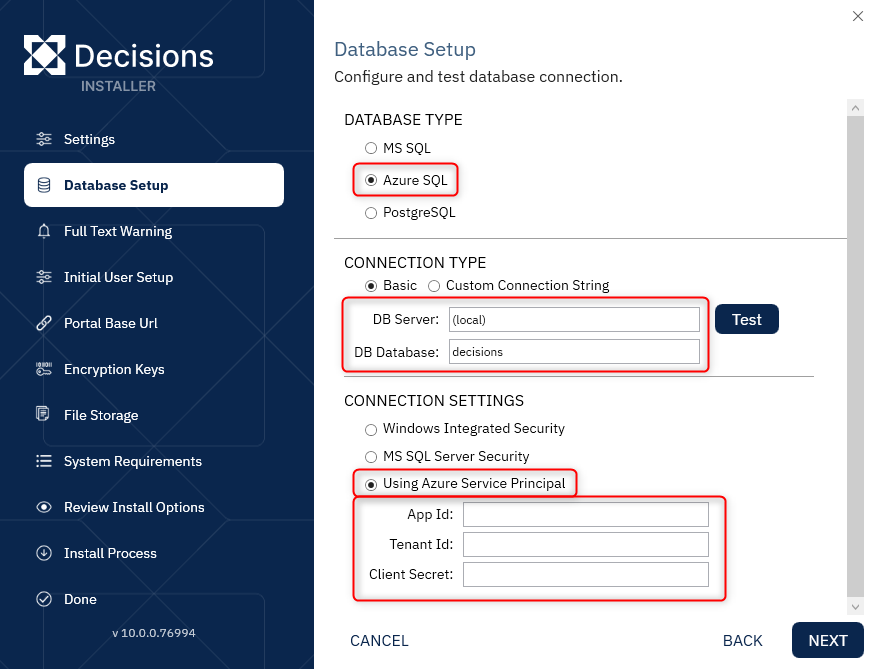
- Enter all the credentials that were copied earlier. Hit Test to check the connection.
- Once the test is successful, continue with the Installation process.
External Database Integration using Azure Service Principal
To learn about External Database Integration in Decisions. Refer to the article External Database Integration.
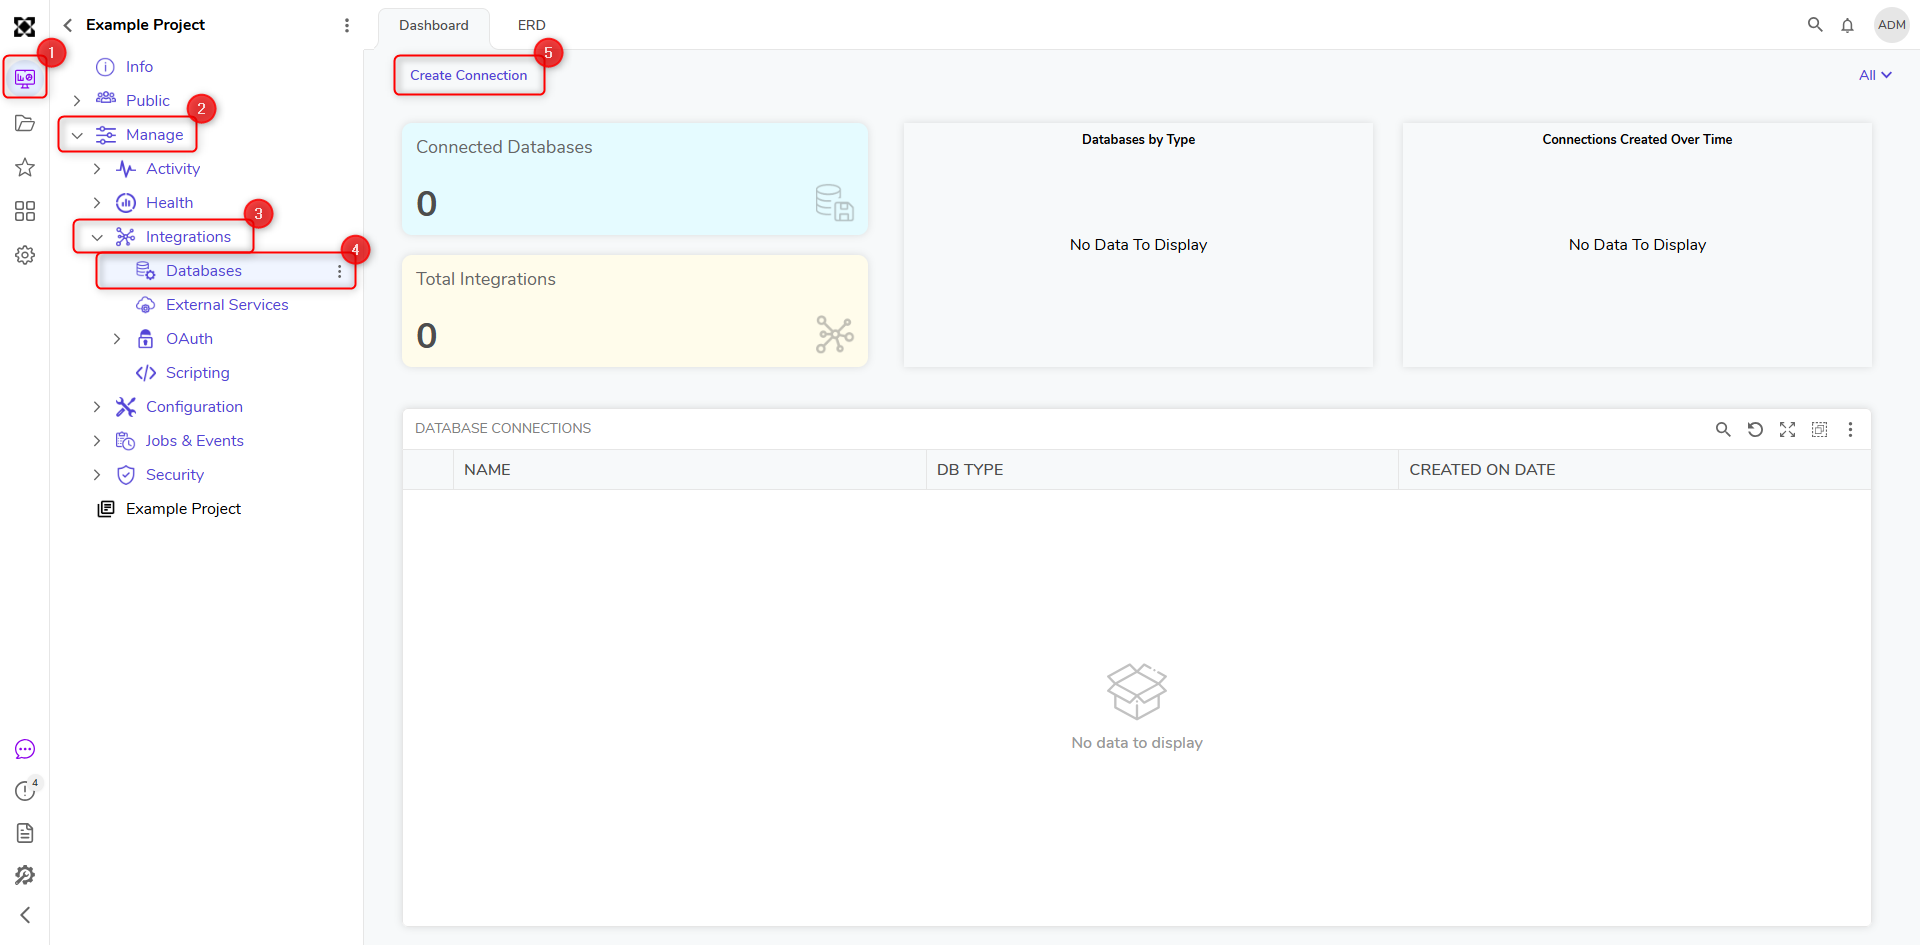
- In Decisions Studio, navigate to System > Integrations > Databases and click CREATE CONNECTION.
- Give a Connection Name.
- Select Database Type as AZURE. Authentication Type as Using Azure Service Principal and enter all the credentials that were copied earlier.
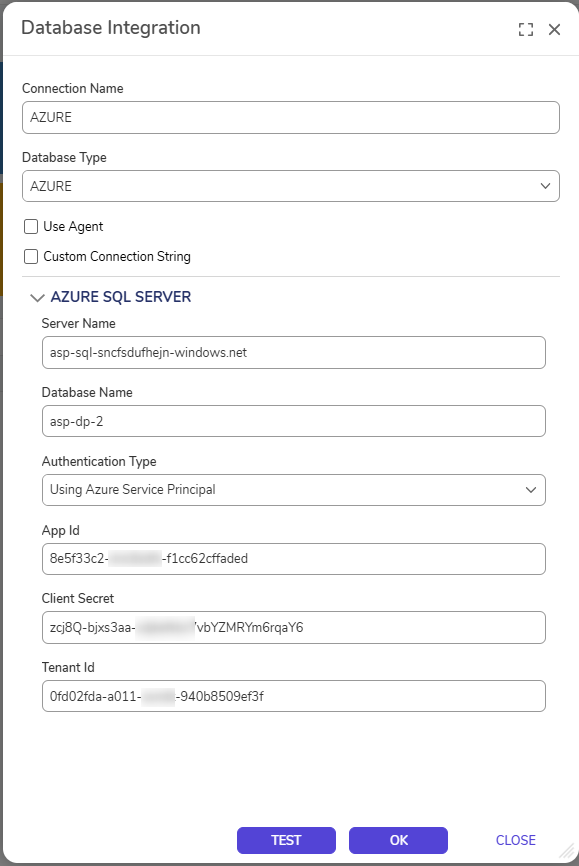
- Hit TEST to check the connection. After a successful connection, CLOSE the Window.
- The integration will be added with the given Connection Name to the Folder Data in Decisions.