Overview
The HubSpot Module allows users to access and update their HubSpot data using steps in a Flow that hides the complexities of working with the HubSpot API directly. The HubSpot Module will need to be installed, and security parameters will need to be configured to authorize Decisions to access HubSpot data.
Prerequisites
The following is required before proceeding with proper use of the HubSpot Module:
- A preexisting HubSpot Account.
- Set up and access to a HubSpot Application.
- Proper installation and setup of the HubSpot Module in Decisions.
- Create a project dependency.
Considerations
Setting Up a HubSpot Application
Access to HubSpot data is administered by a HubSpot Application.
- Log in to a HubSpot Developer Account and click the Apps menu option to view applications that have been set up.
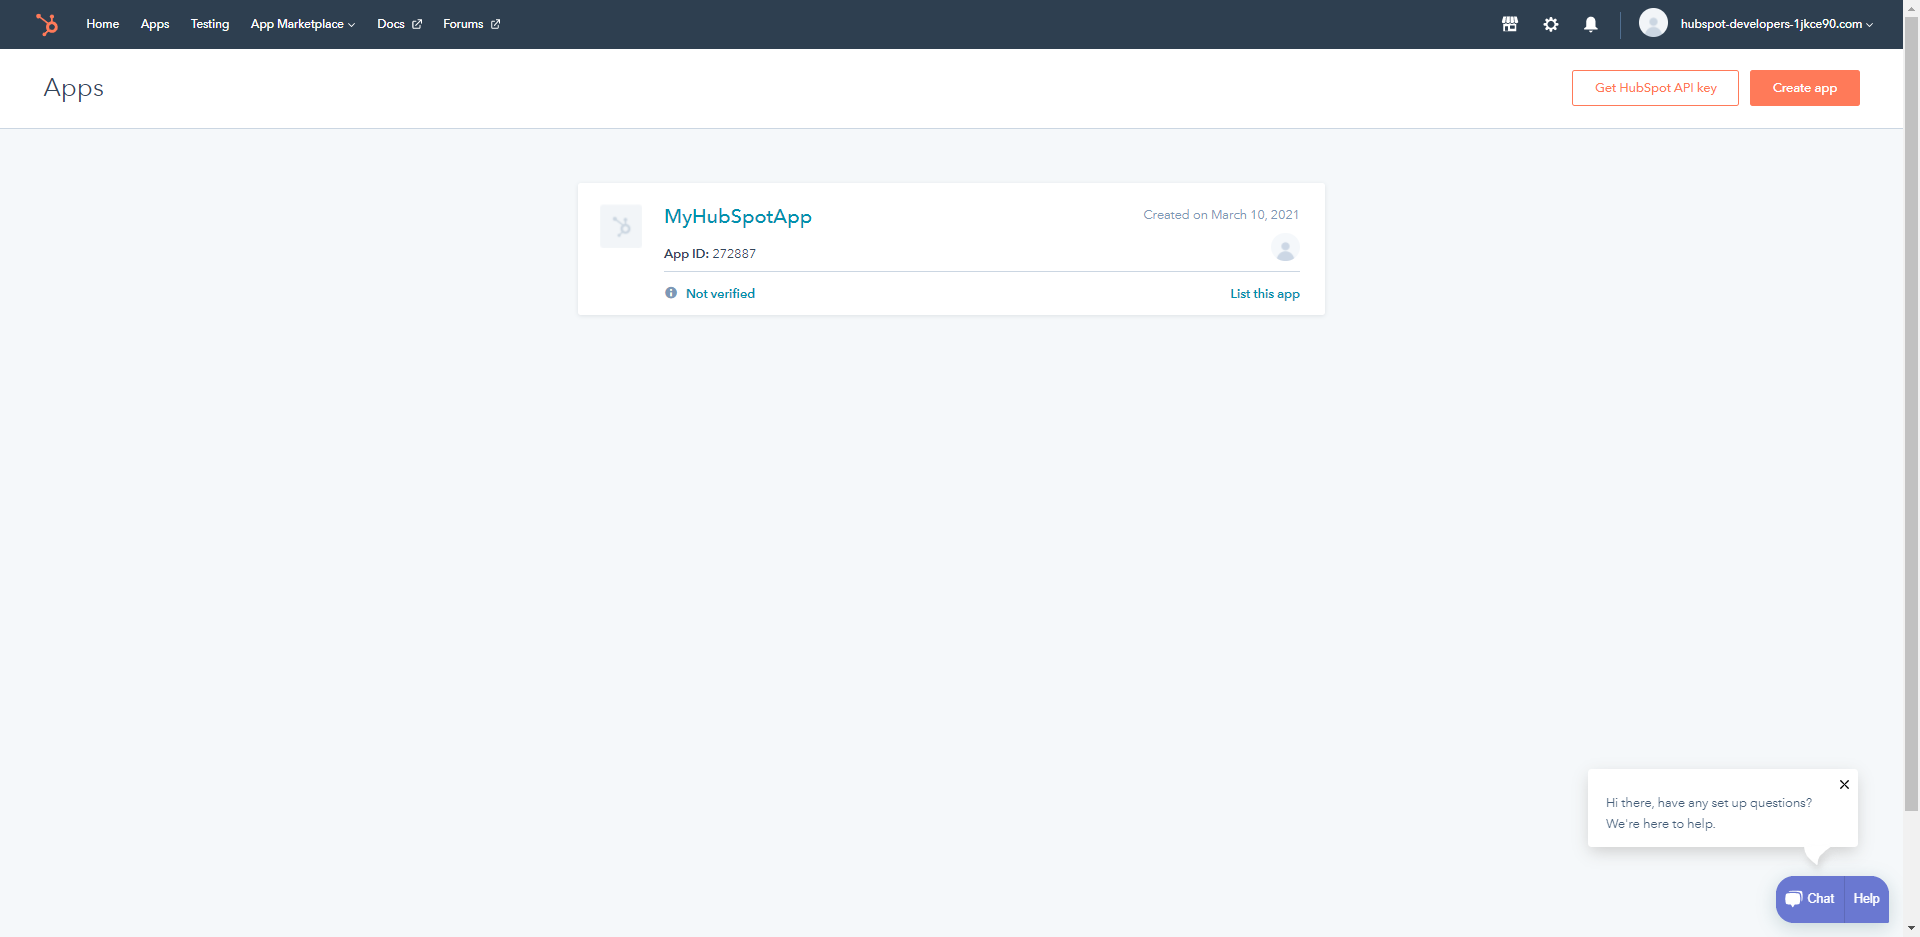
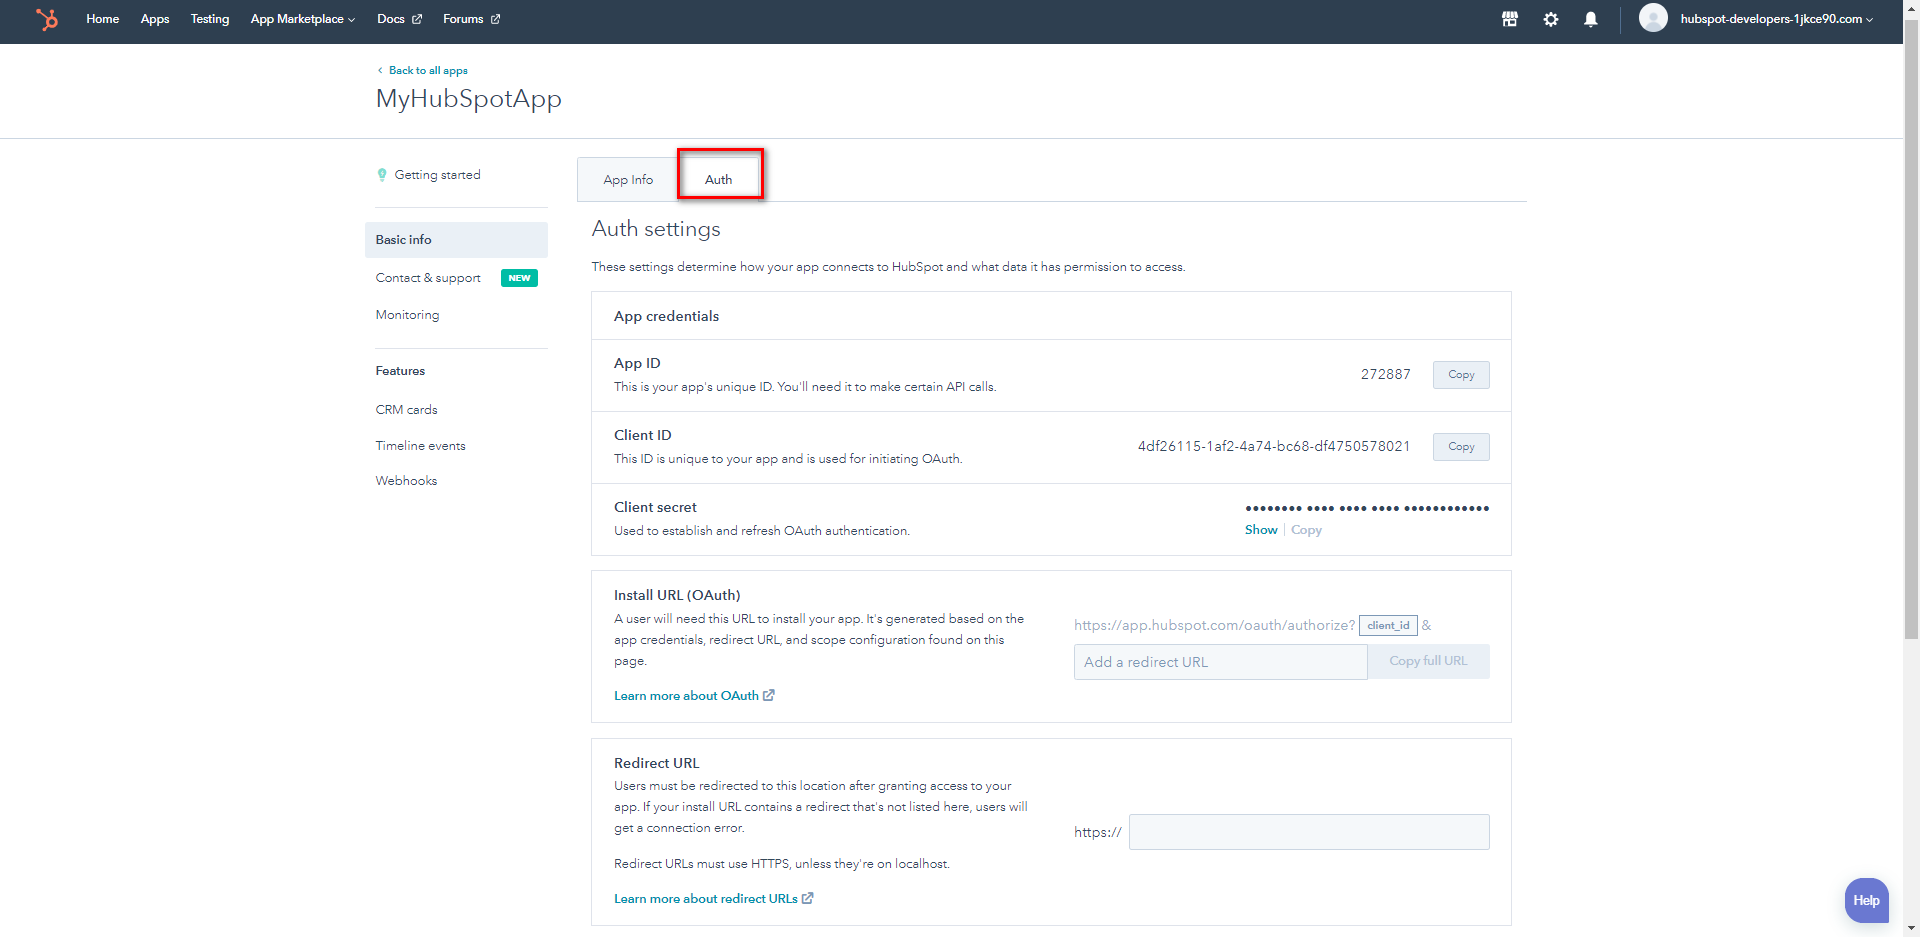
- Create an application or select an existing one. Click the Auth tab on the application page.
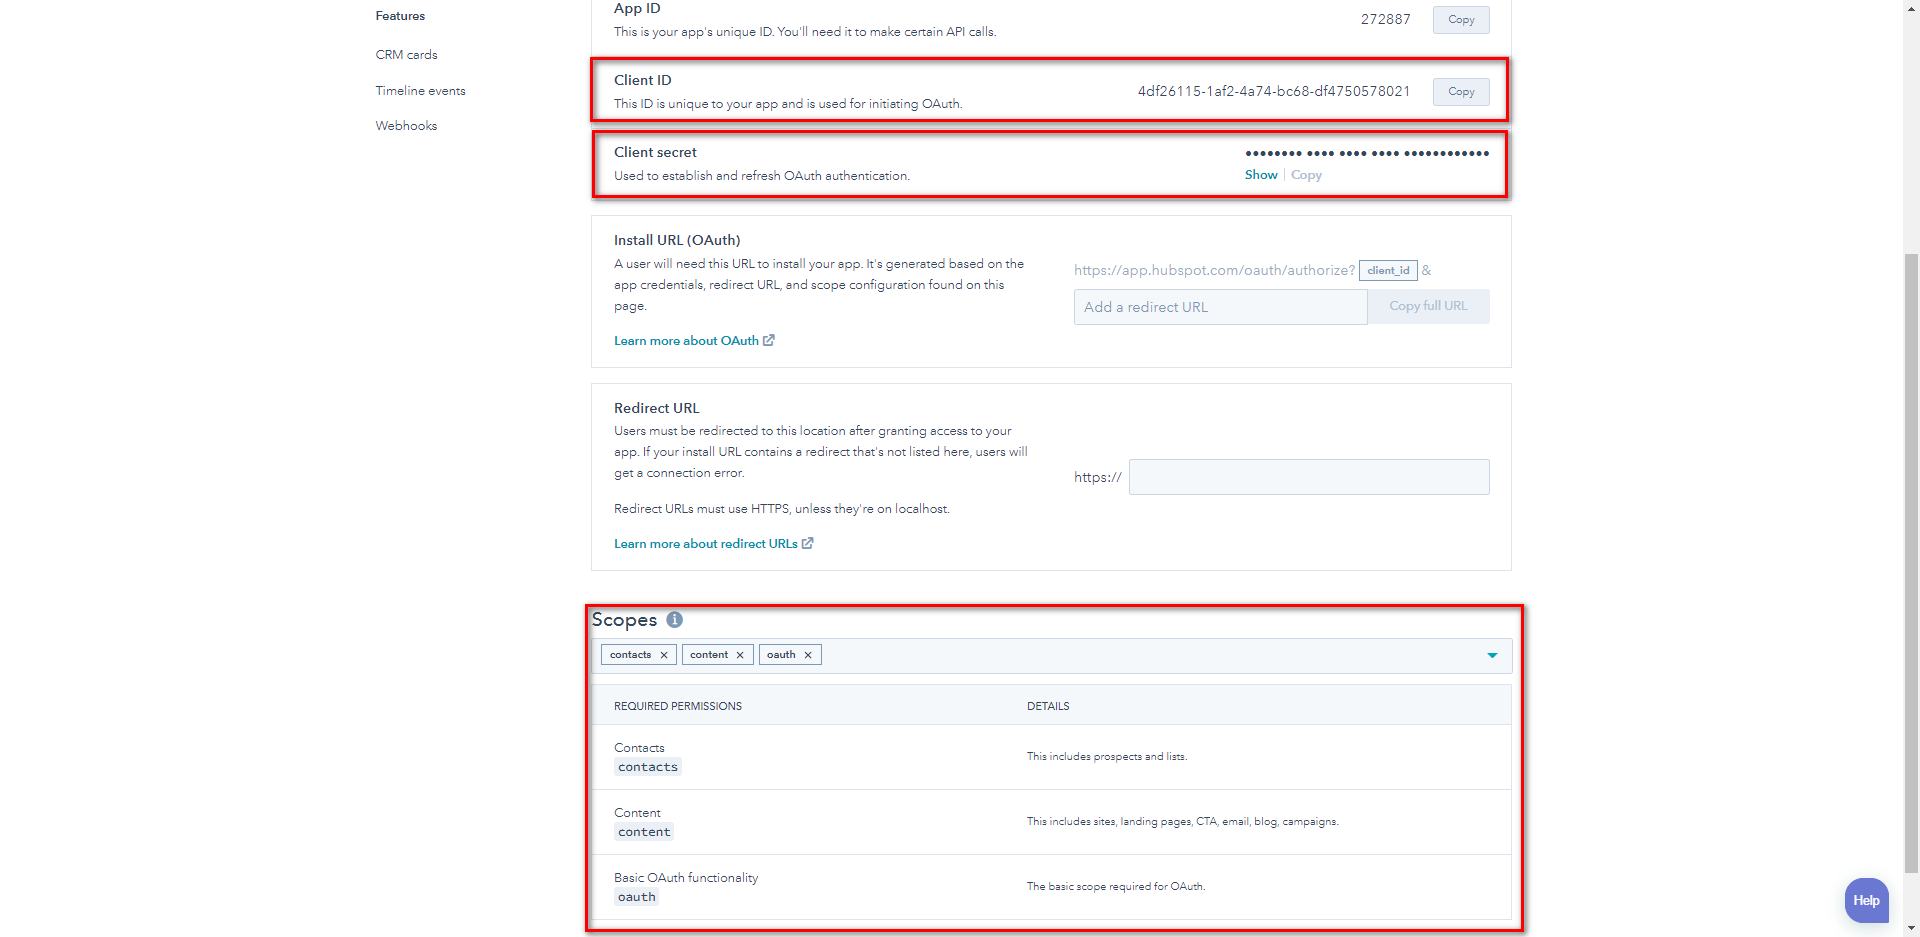
- Navigate to the Scopes section and click the checkboxes for Contacts, Content, and Basic OAuth functionality. Next, make note of the Client ID and Client secret to use later in Decisions.
Setting Up a HubSpot Provider
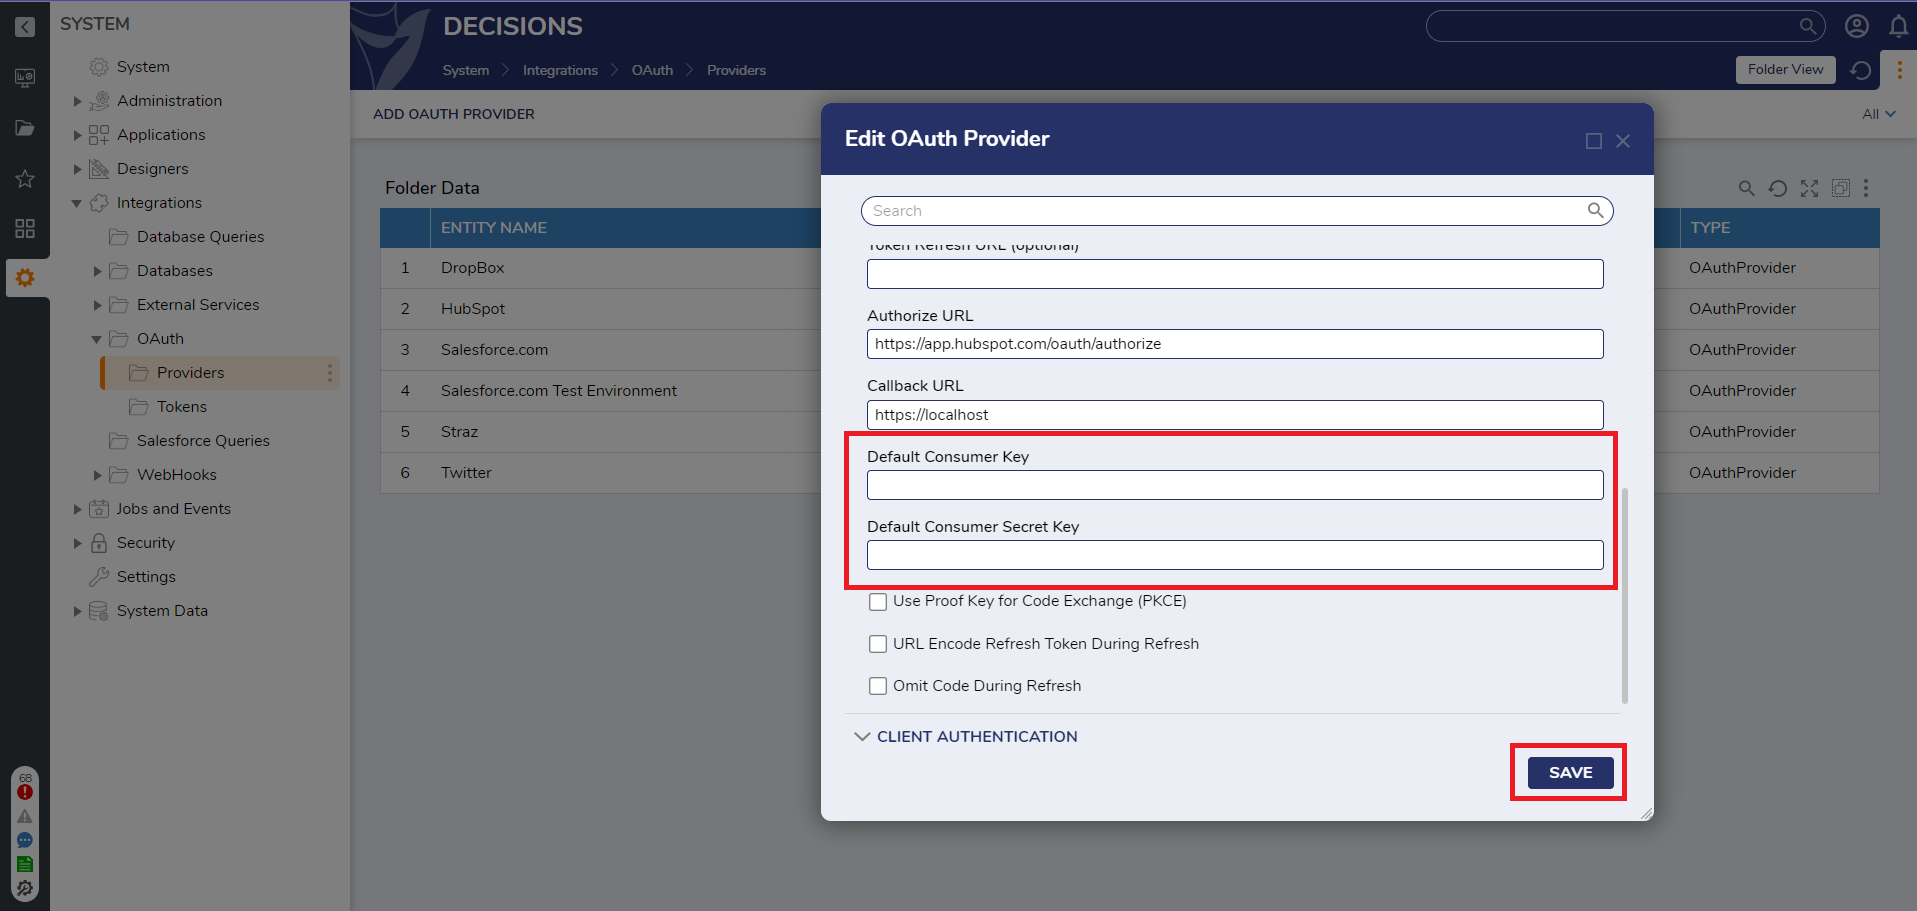
- Log in as an Admin in Decisions and navigate to System > Integrations > OAuth > Providers. Right-click on HubSpot and select Edit Provider Settings.

- In the Edit OAuth Provider dialog window, paste the Client ID into the Default Consumer Key field and the Client Secret into the Default Consumer Secret Key field. Then, click SAVE.
Accessing a HubSpot Application
Using any of the pre-built HubSpot steps requires an OAuth Token. OAuth is a standard mechanism for providing security to communicate with a Web Service. In Decisions, users must establish an OAuth Token, which represents a user who will be used to run the REST API and interact with the data in HubSpot.
There are two types of Tokens for interacting with HubSpot:
- Authorization Token - This Token requires communication between Decisions and HubSpot, with a user signing into the HubSpot page to retrieve a Token to store in Decisions. Once an Authorization Token has been set up, it should not expire.
- Access Token - This Token is created using the Authorization Token, but will expire periodically and needs to be refreshed. This can be done automatically in Flows by using Flow steps.
Creating an Authorization Token
- Navigate to System > Integrations > OAuth > Tokens. Then, click CREATE TOKEN.
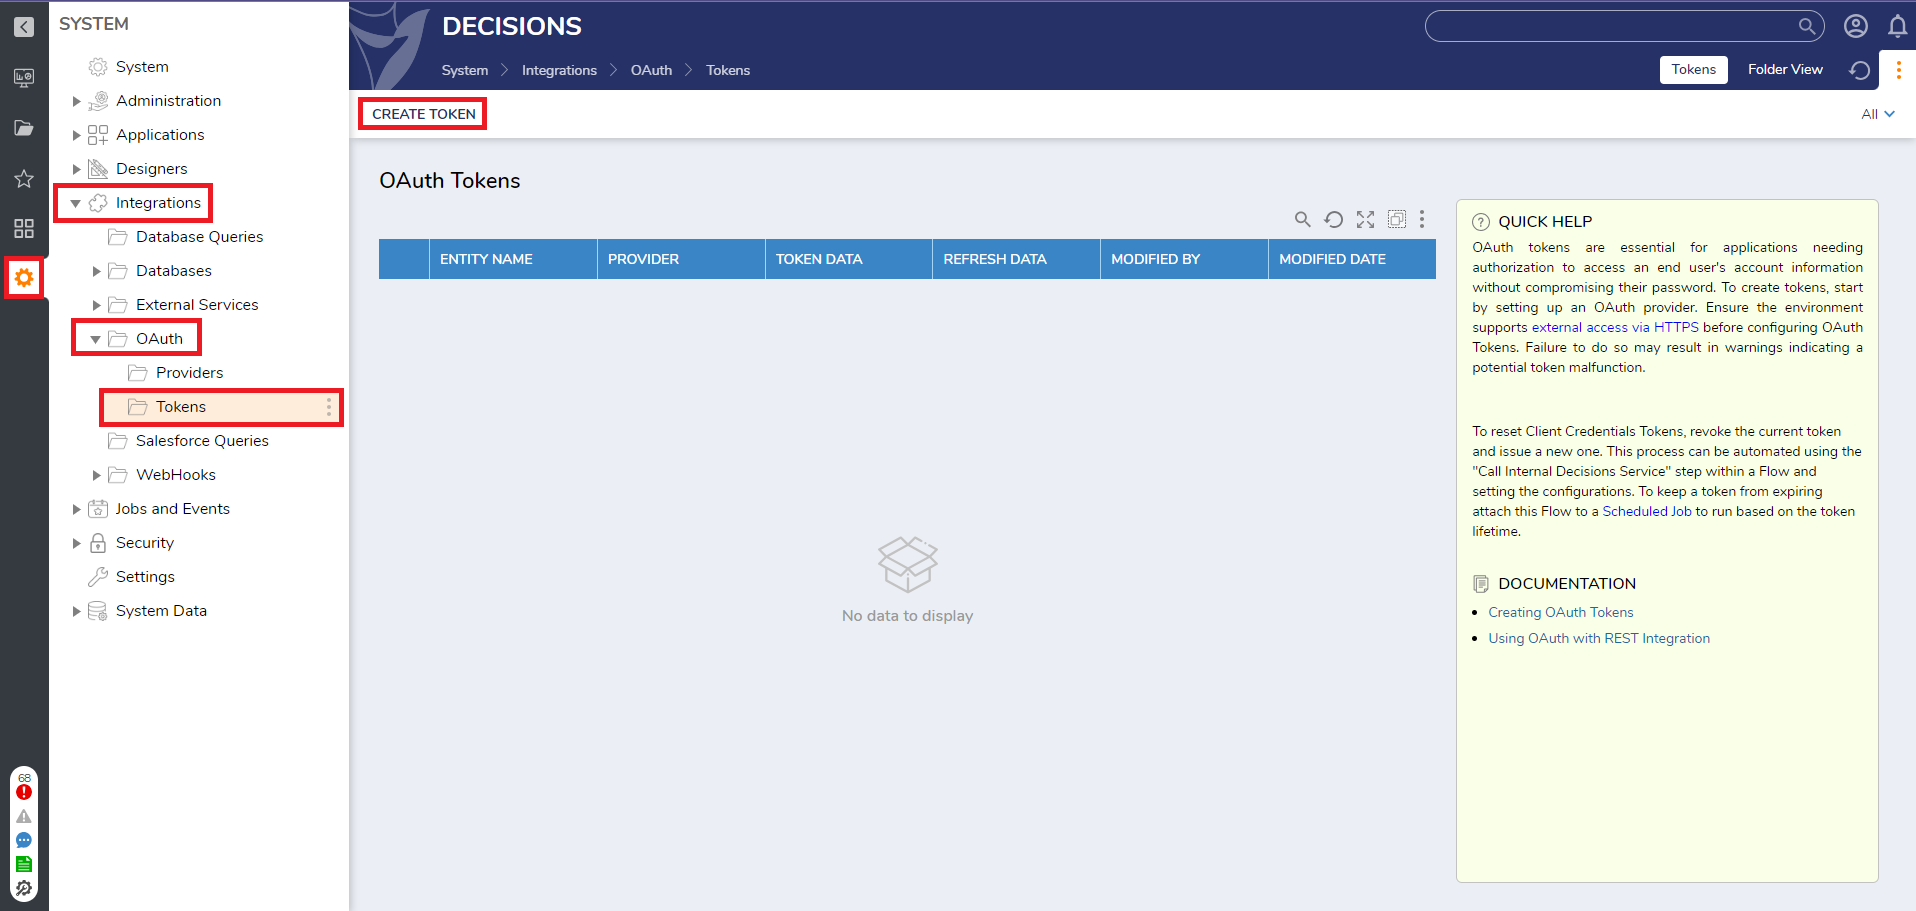 CREATE TOKEN will prompt the user with a warning if their BaseURLToPortal is not configured to an externally addressable IP or FQDN. This will NOT prevent the creation of a Token, but will have a manual step due to HubSpot not being able to redirect traffic back to the Decisions installation. If this warning displays, it can safely be ignored.
 - When the Create and Store OAuth Credentials window appears, enter a name in the Token Name field. Select the Providers dropdown list and select HubSpot. Then, click Request Token.
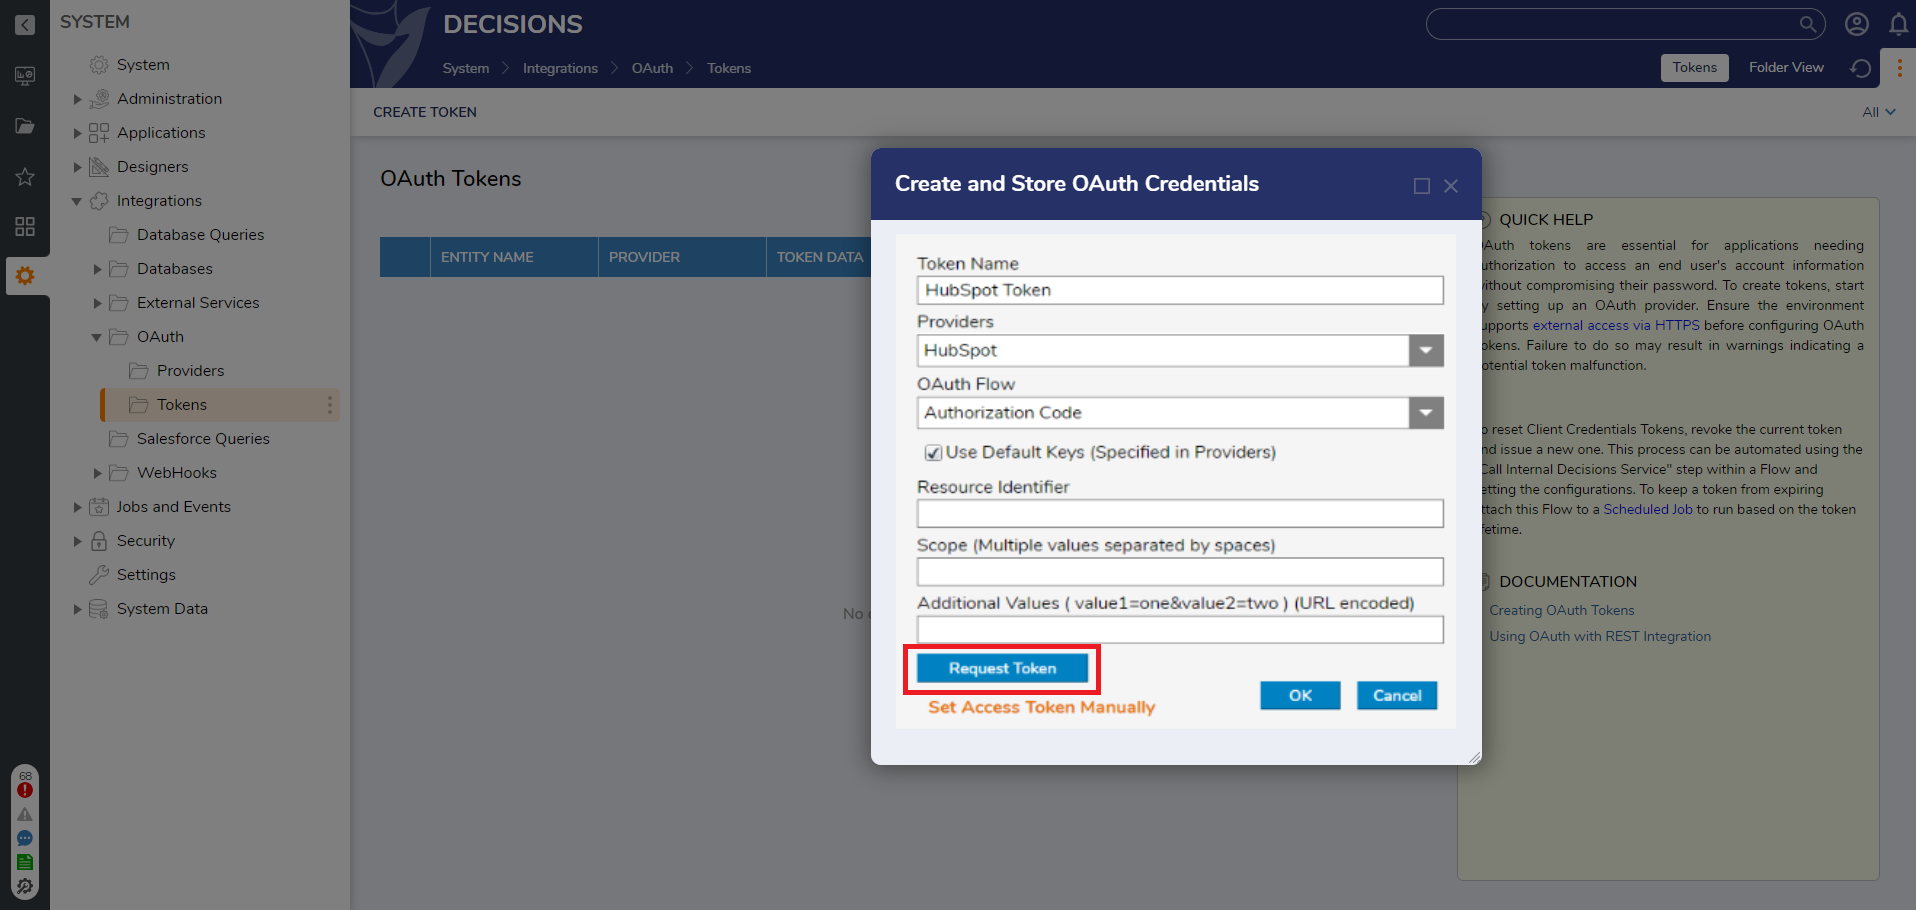
- Once the Request Token is clicked, a pop-up window from app.hubspot.com will appear.
.png) Popup blocking applications and add-ons may prevent the Request Token action from working correctly. If this occurs, please disable those features and try to request a Token again.
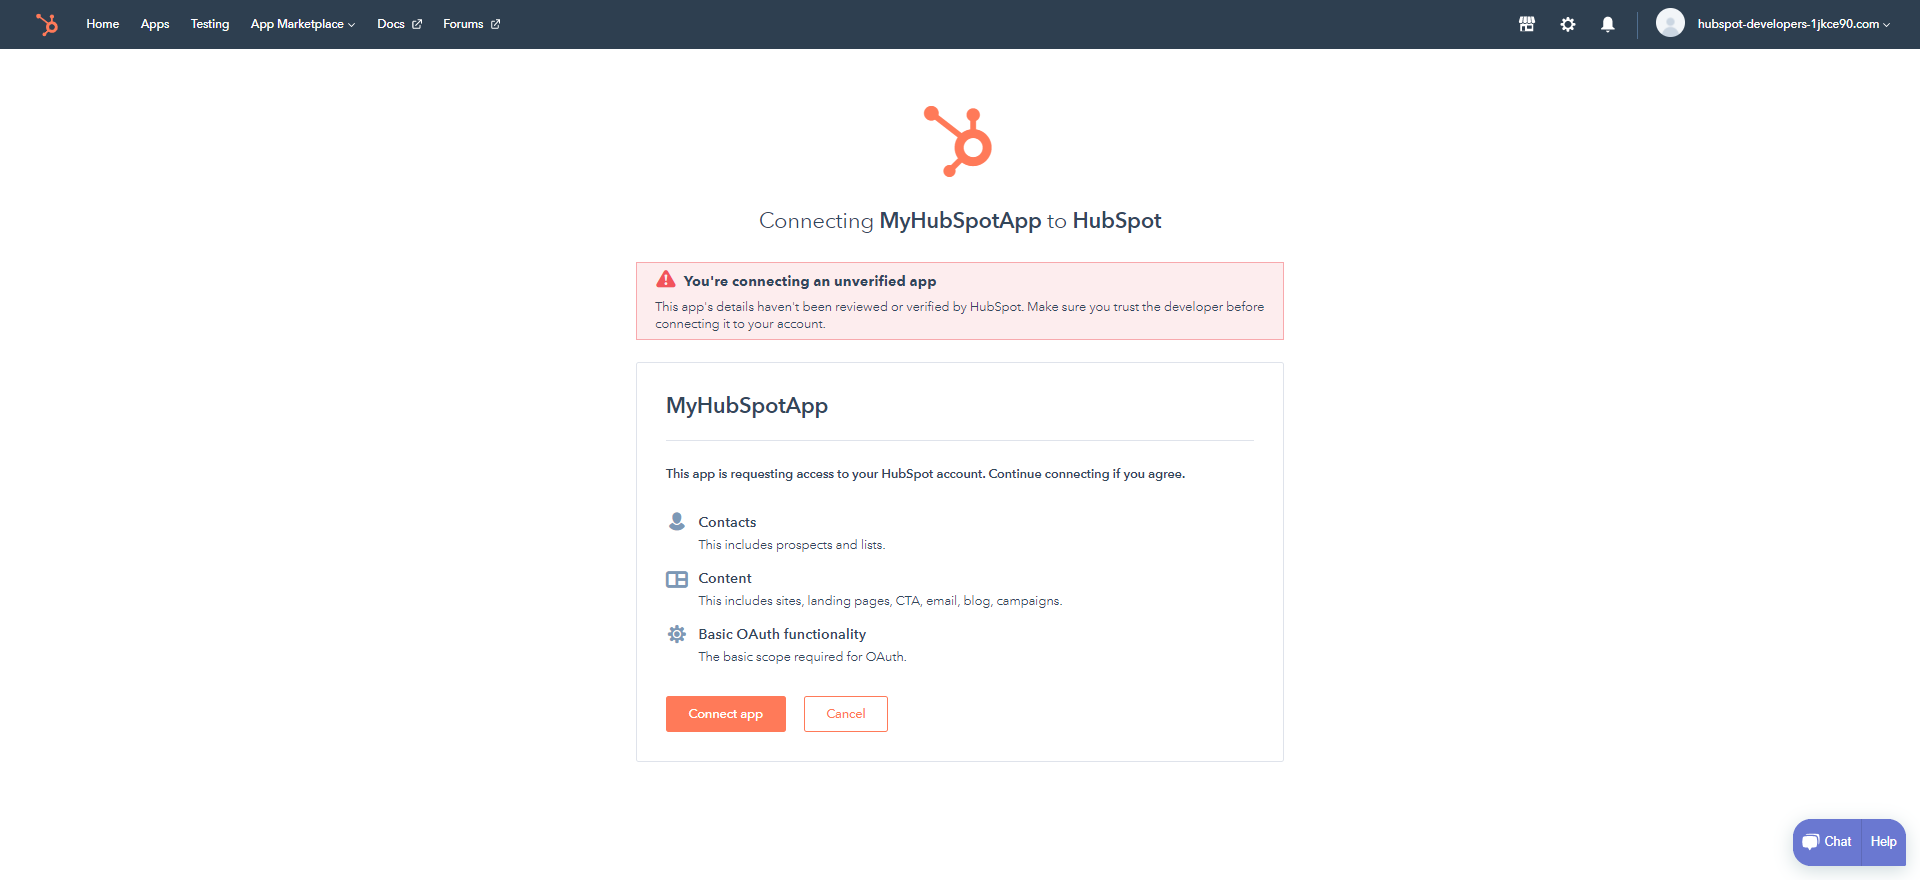
Popup blocking applications and add-ons may prevent the Request Token action from working correctly. If this occurs, please disable those features and try to request a Token again. - From the pop-up window, select the account associated with the Client ID that was copied into the HubSpot Provider. After selecting the account, there will be a message stating that there is a necessary parameter is missing.
- To provide the needed parameter, open a browser tab and paste the URL from the pop-up window. Then, add "&scope=contacts%20content" to the end of the web address. Then, click Connect App.The web address should appear as "https://app.hubspot.com/oauth/14575563/authorize?client_id=xxxxxxxx-xxxx-xxxx-xxxx-xxxxxxxxxxxx&redirect_uri=https%3A%2F%2Flocalhost&scope=contacts%20content
- A separate tab will open to a page that does not exist on the web server. The address will read "https://localhost/?code=xxxxxxxx-xxxx-xxxx-xxxx-xxxxxxxxxxxx". Select and copy this address.
- On the Create and Store OAuth Credentials window, click Set Access Token Manually. In the Authorize URL text box, enter the copied address and click Save Manual Settings.
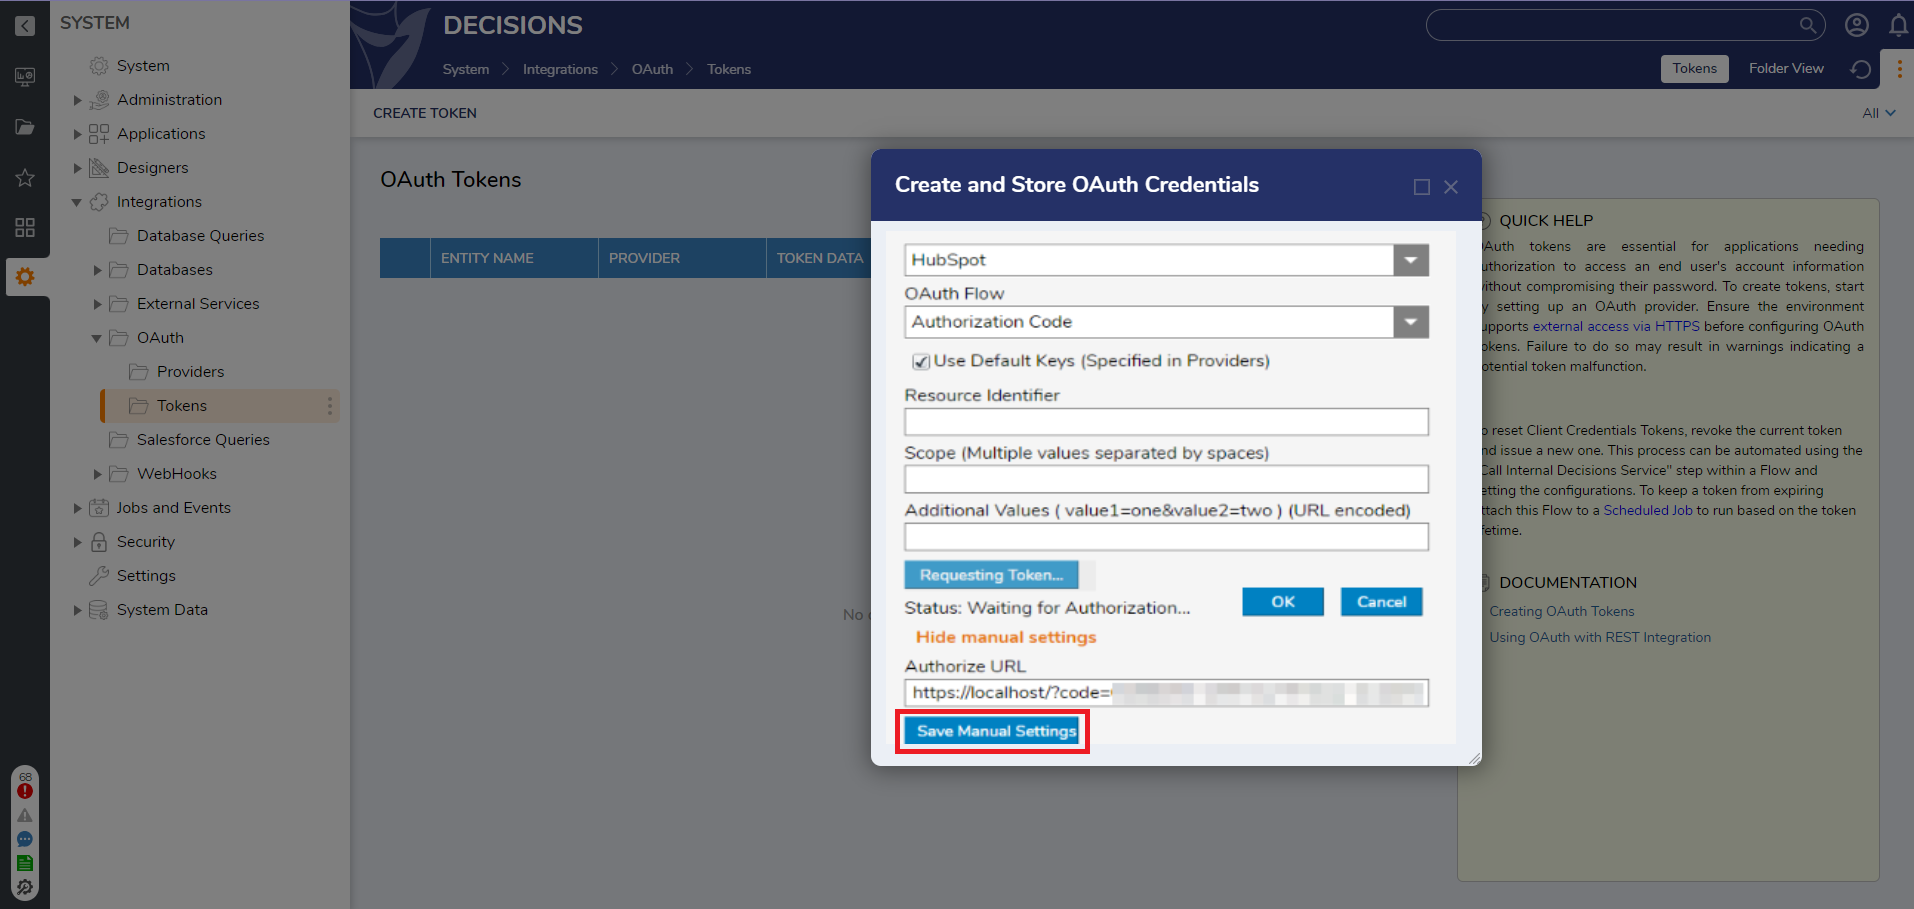
- Click OK to save changes and close the Credentials window.