Overview
Progress Bar components allow users to track the amount of work done or where a project is in terms of completion. Like many other Form components, the Progress Bar's numerical value may be mapped statically or dynamically in additional Flow steps.
The following example demonstrates adding and configuring a Progress Bar on a Form in Decisions.
Additional Progress Tracking Method
To track Form progress without numerical values, see Adding a Timeline to a Series of Forms.
Example
To add a Progress Bar to an employment application Form that is mid-way through the process:
- From the Decisions Studio, select CREATE FLOW from the Global Action Bar, then CREATE a new Flow.
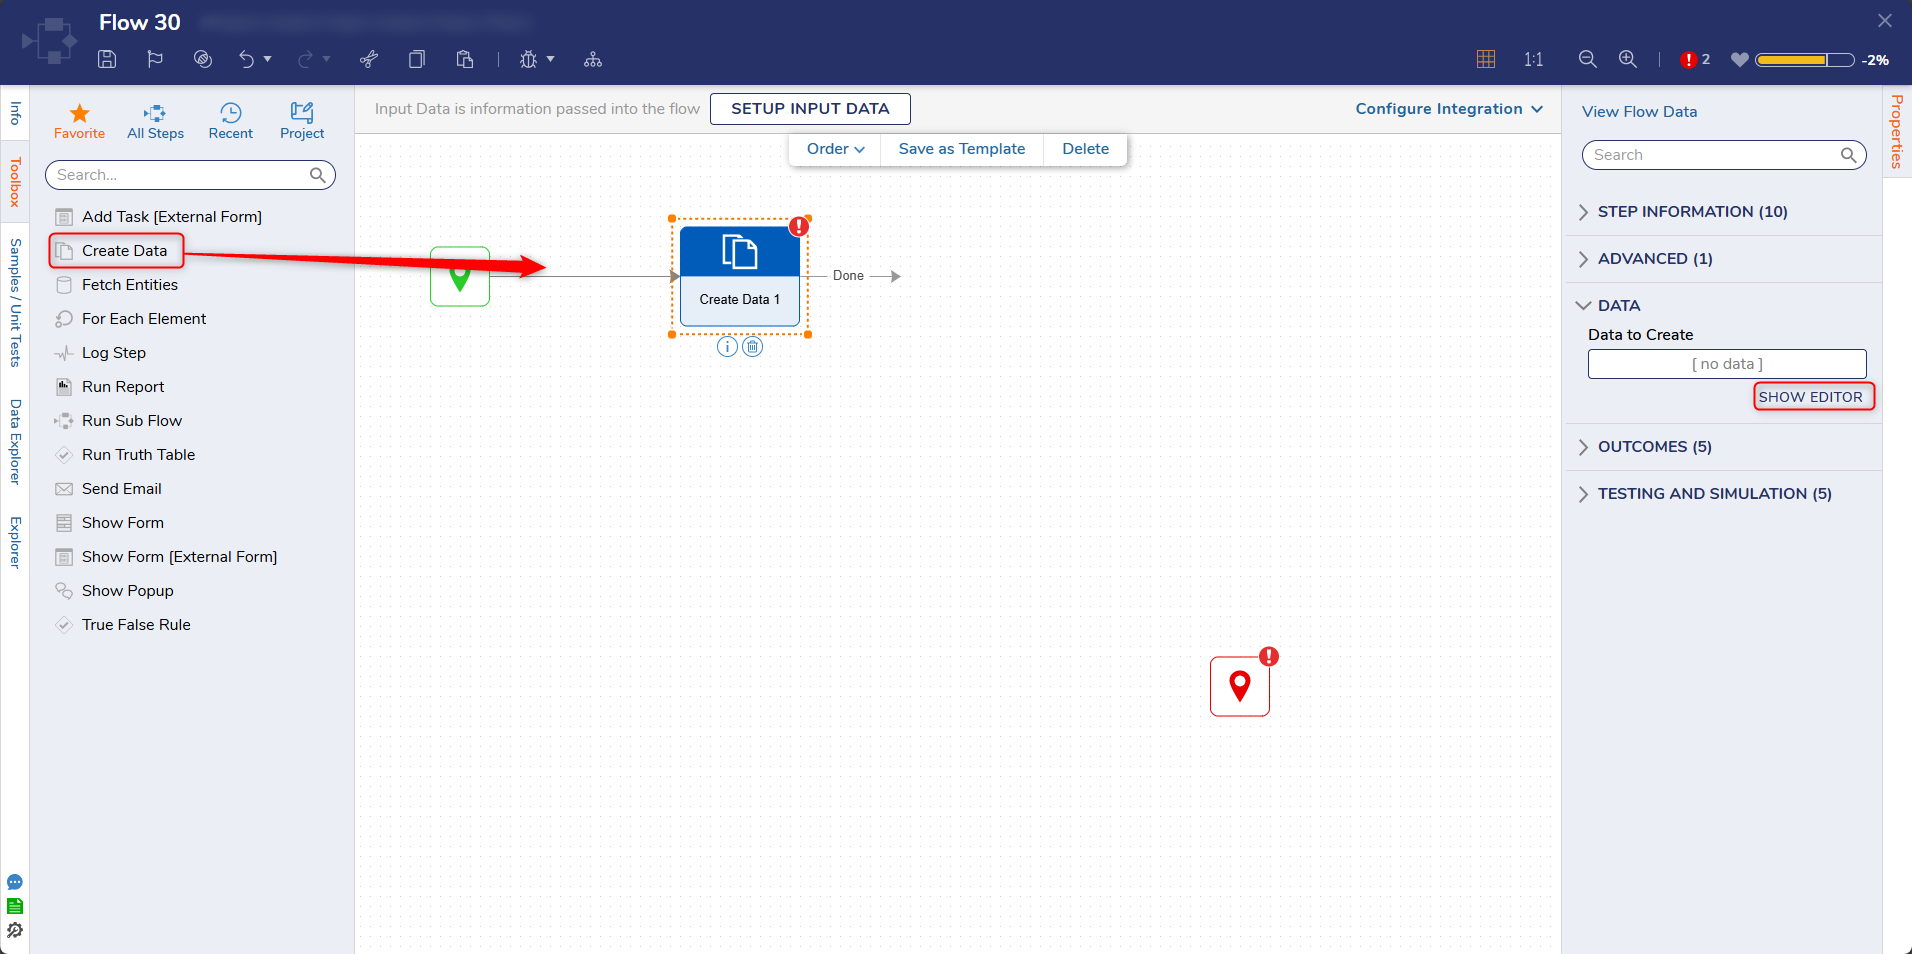
- From the Flow Designer, attach a Create Data step from the FAVORITE STEPS category of the Toolbox tab.
- From the Properties tab of the newly added step, select SHOW EDITOR.
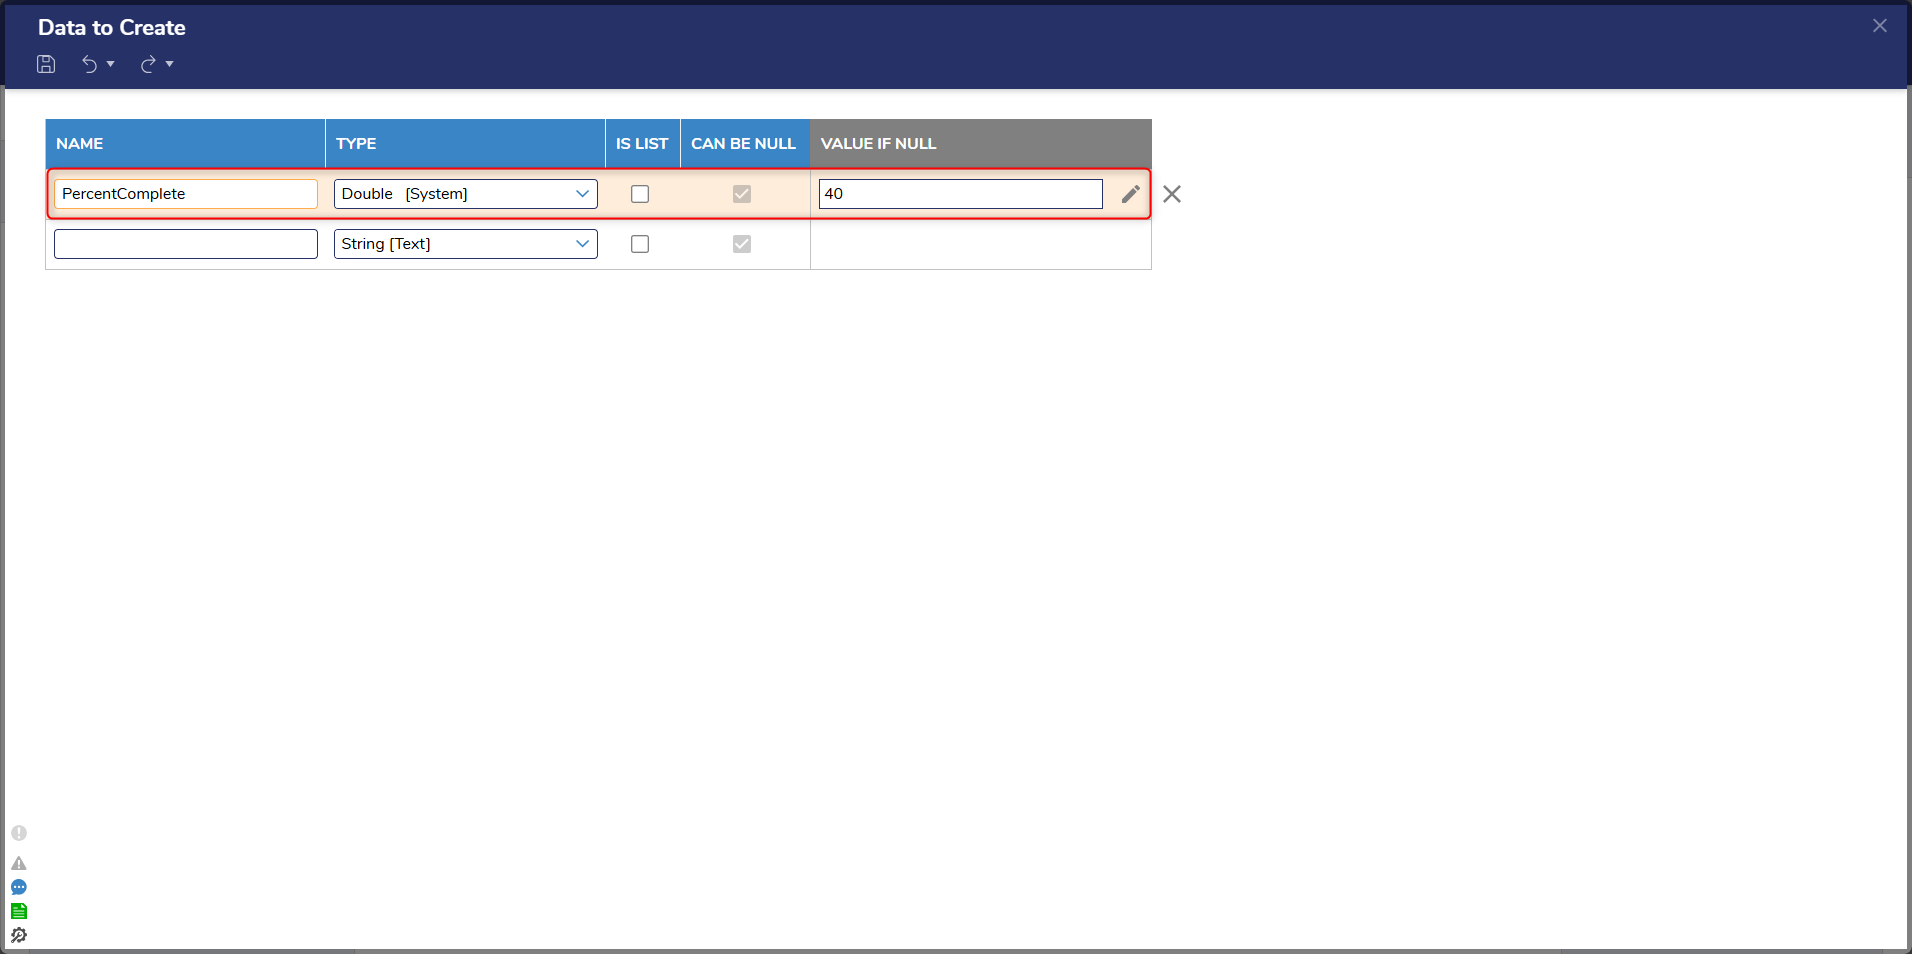
- From the Data to Create window, provide a NAME, and select Double from the TYPE drop-down. Constant map the level of completion (in this case, "40"), then Save and close the window.
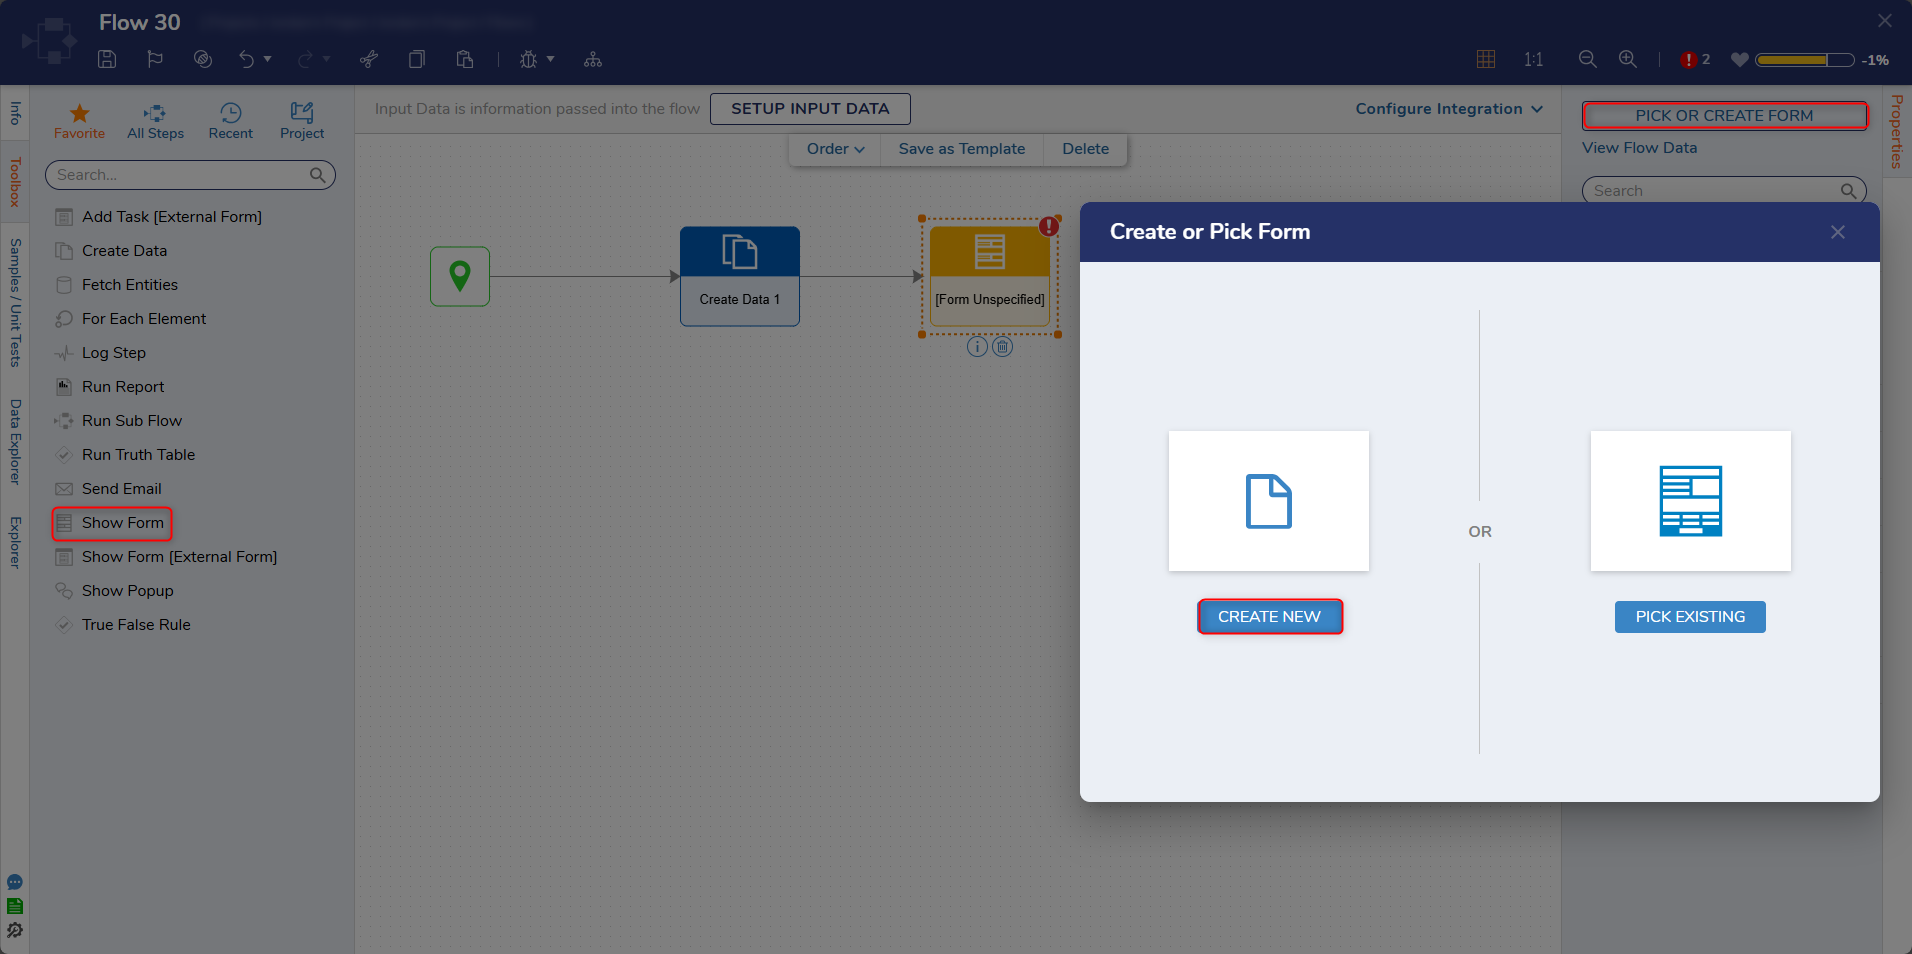
- Attach a Show Form step to the Create Data step; select PICK OR CREATE FORM from the Properties tab, then CREATE a new Form.
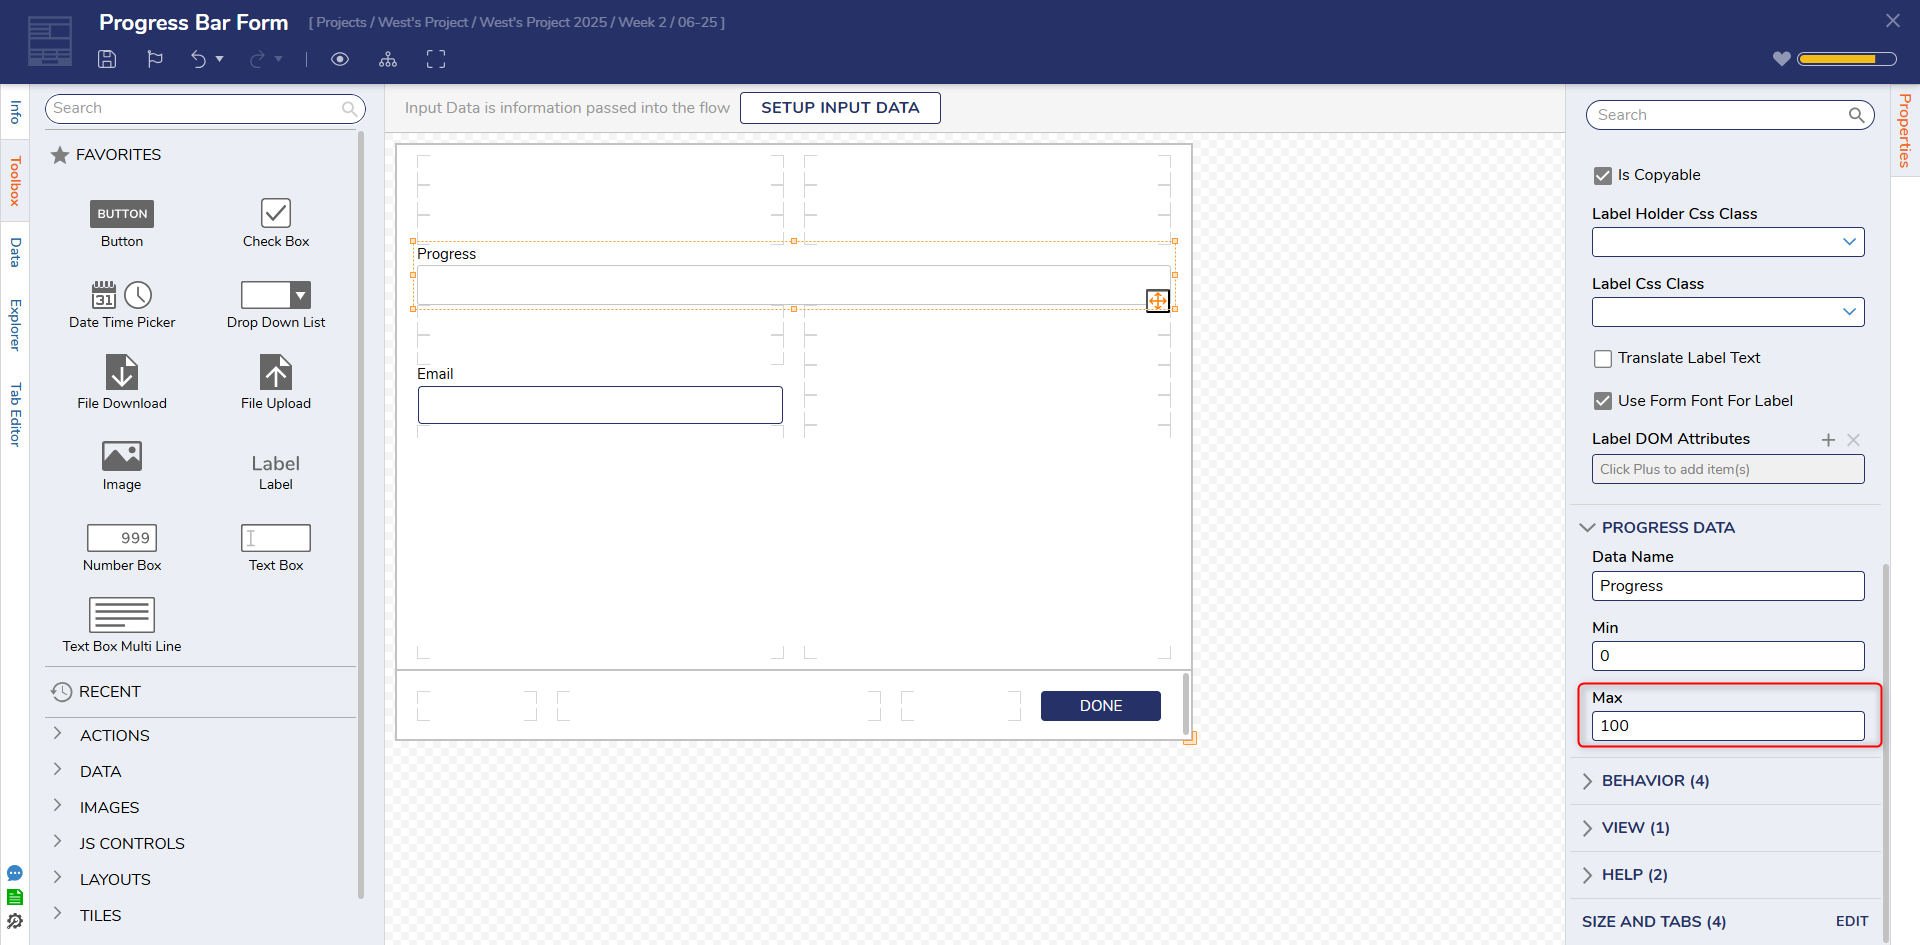
- Design the Form by providing a Text Box labeled "Email Address", a Button labeled "Submit", and a Progress Bar component. From the Properties tab of the Progress Bar, change the Max value to "100". Then Save and close the Form.
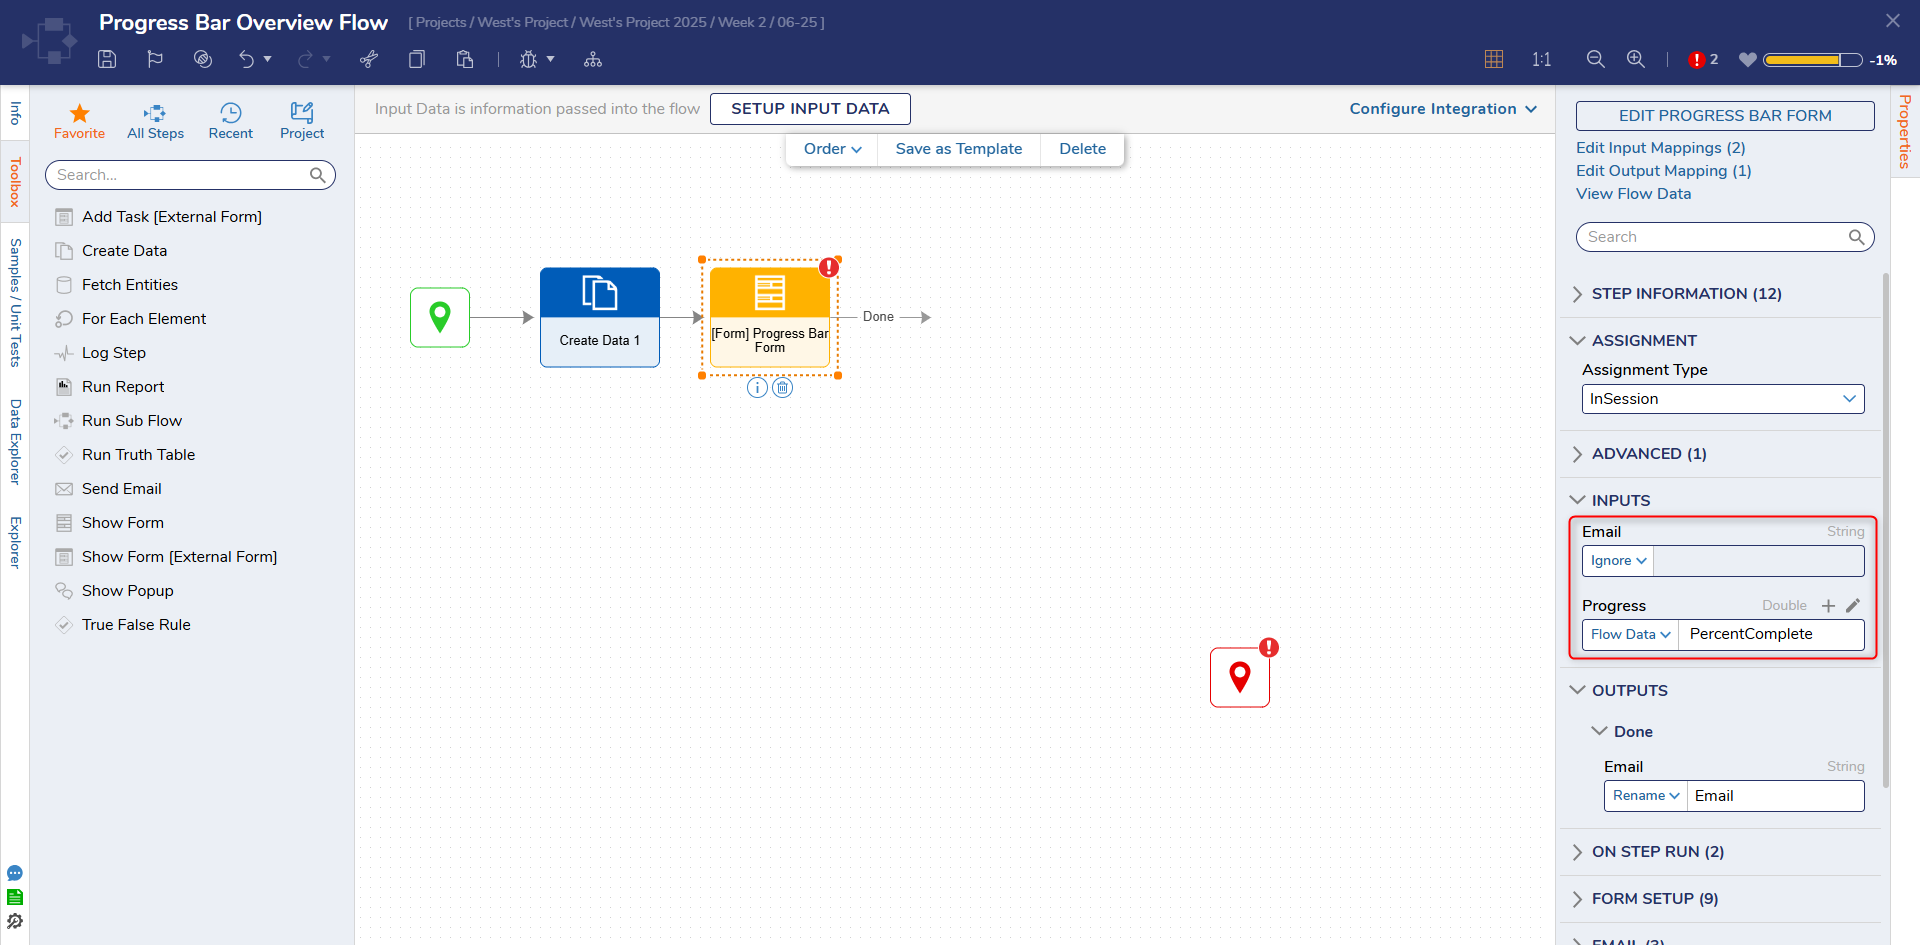
- From the Flow Designer, select the Show Form step's Properties, and map the OUTPUT from the Create Data step to the Progress Bar's INPUT. Then, set the Email Address Text Box to Ignore.
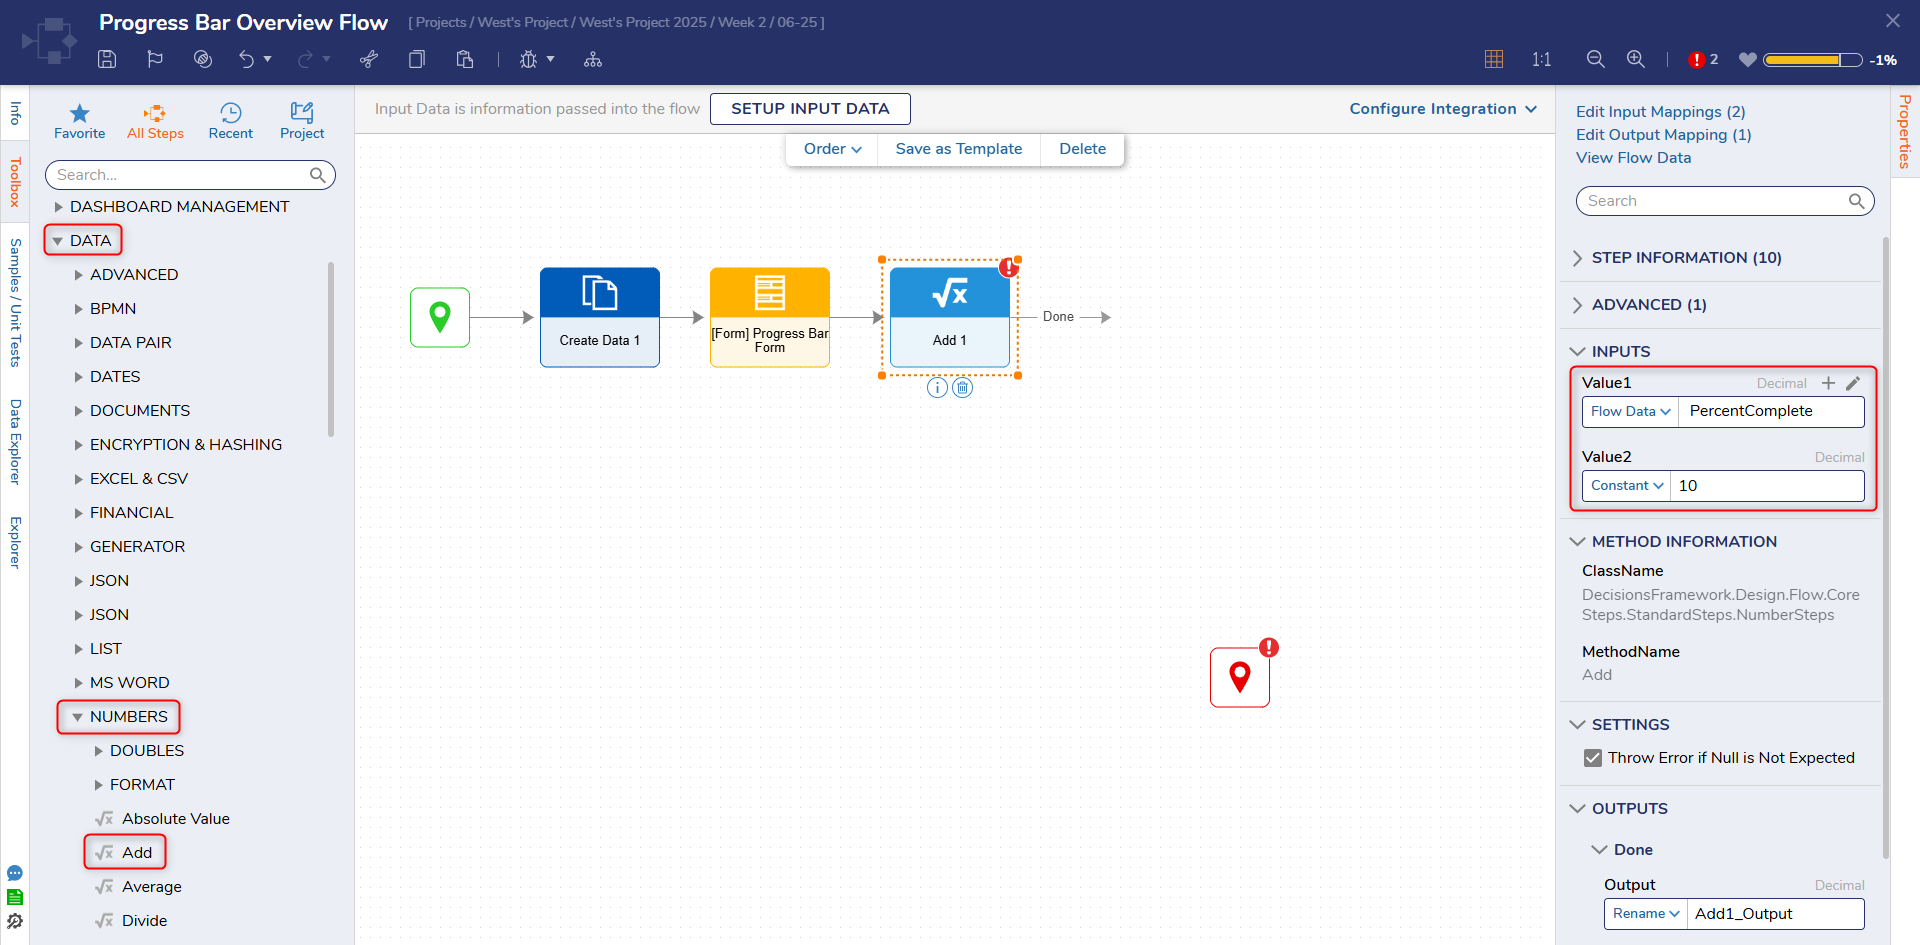
- From Toolbox > DATA > NUMBERS, attach an Add step to the Submit path of the Form step. Map the Create Data step's Output to Value1, then Constant map "10" to Value2.
- Attach an additional Show Form step to the Done path of the Add step, select PICK OR CREATE FORM, then CREATE another Form.
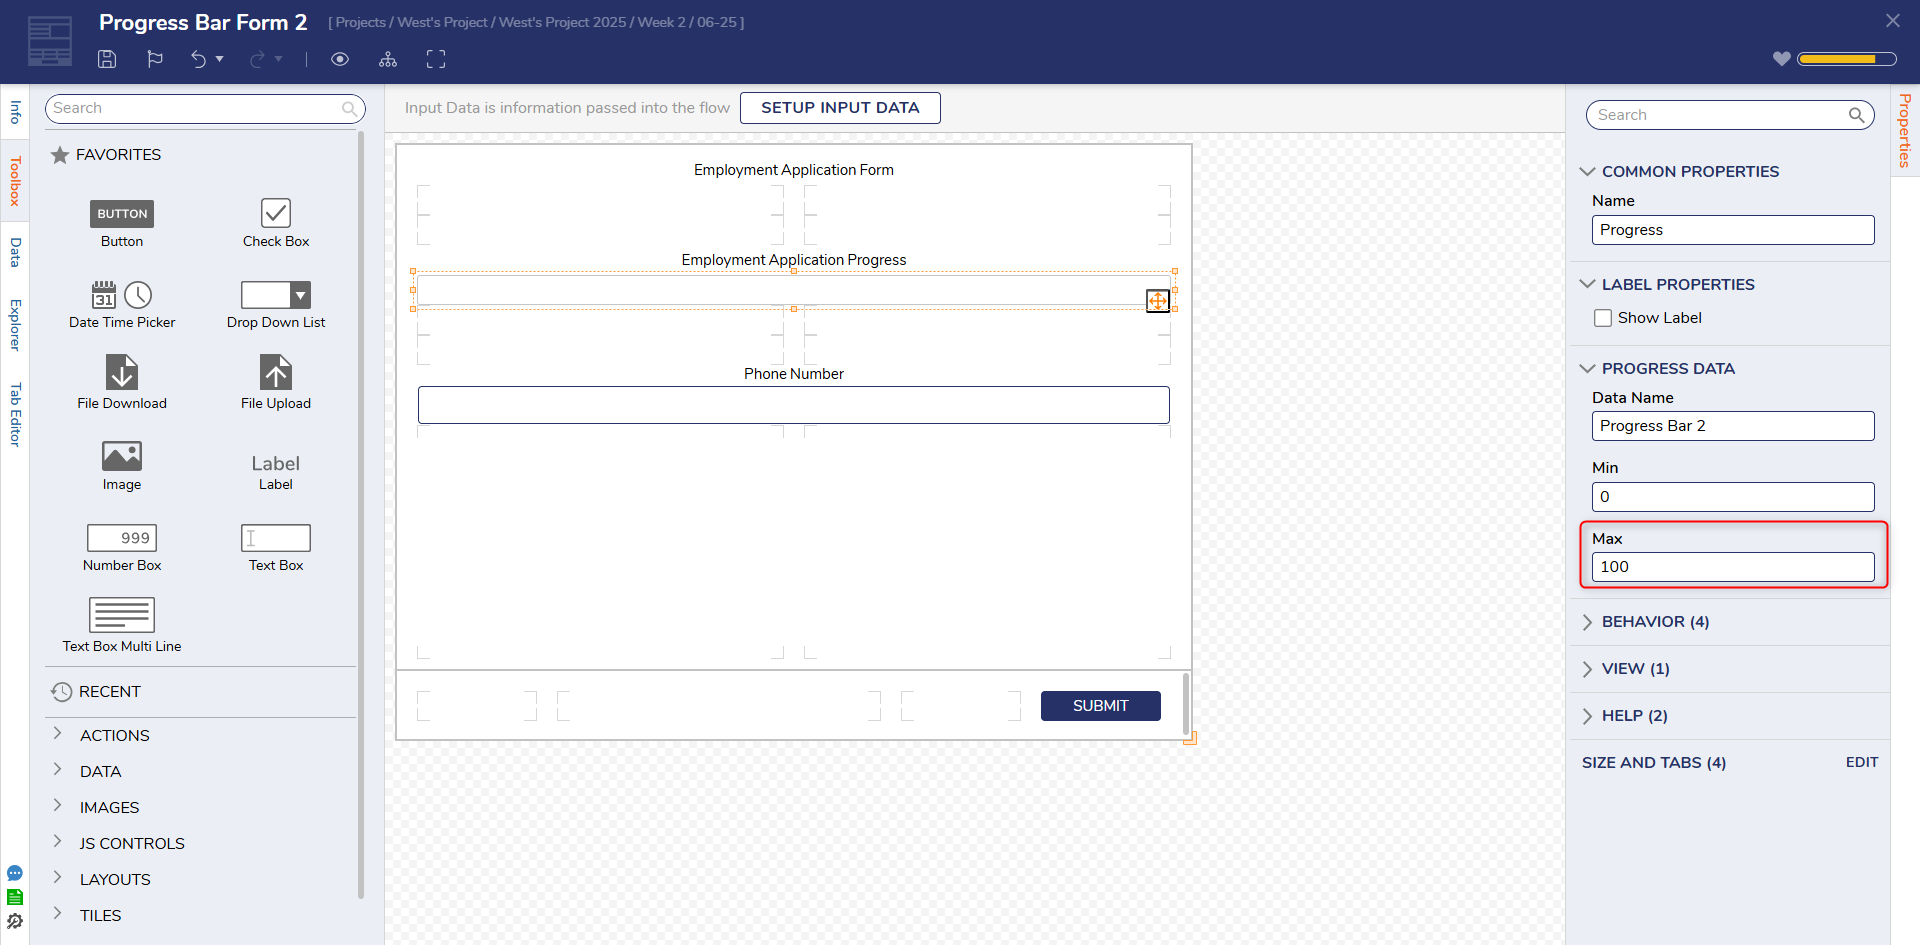
- Design this Form similar to the first by providing a Submit Button, a Progress Bar with the Max set to 100, and another Text Box. Label the Text Box "Phone Number", then Save and close the Form.
- Back in the Flow Designer, connect Submit to the End step. Then, select the newly configured Form and map Add_Output to the Progress Bar; set Phone Number to Ignore.
- Save the Flow, then if desired, close via X.

Debug
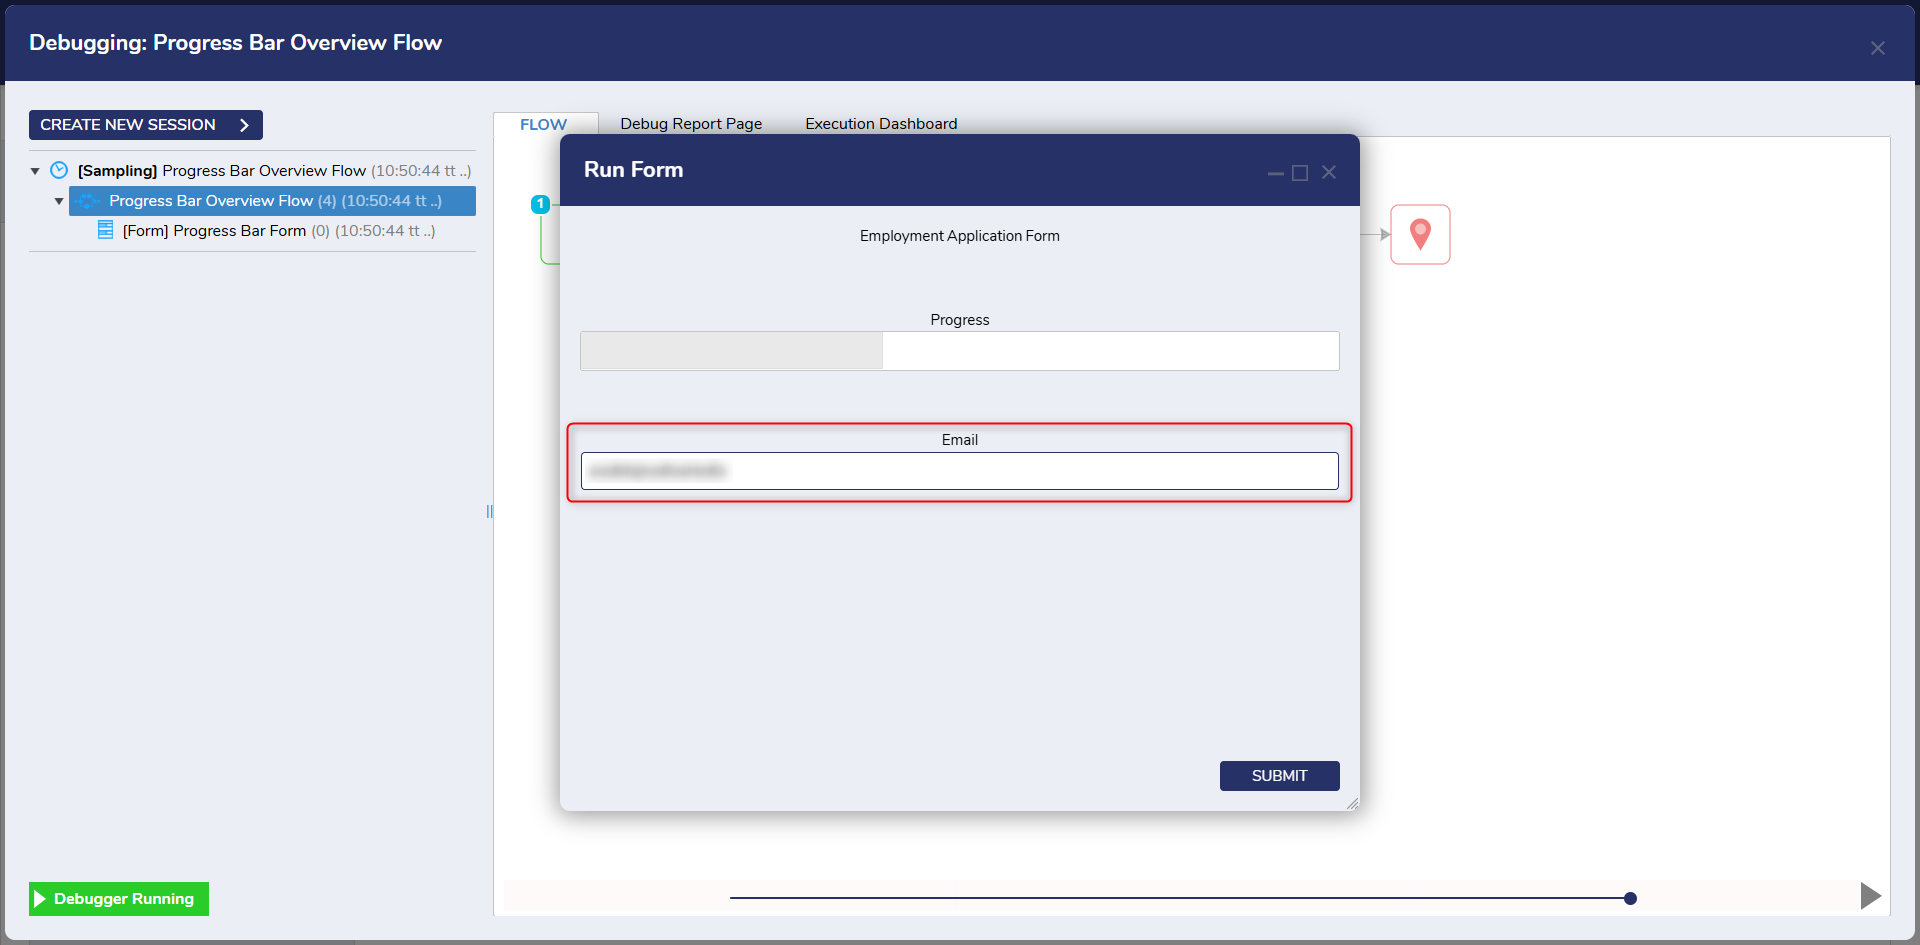
- From the Flow Designer, select the Debug link from the top Action bar. Then click START DEBUGGING.
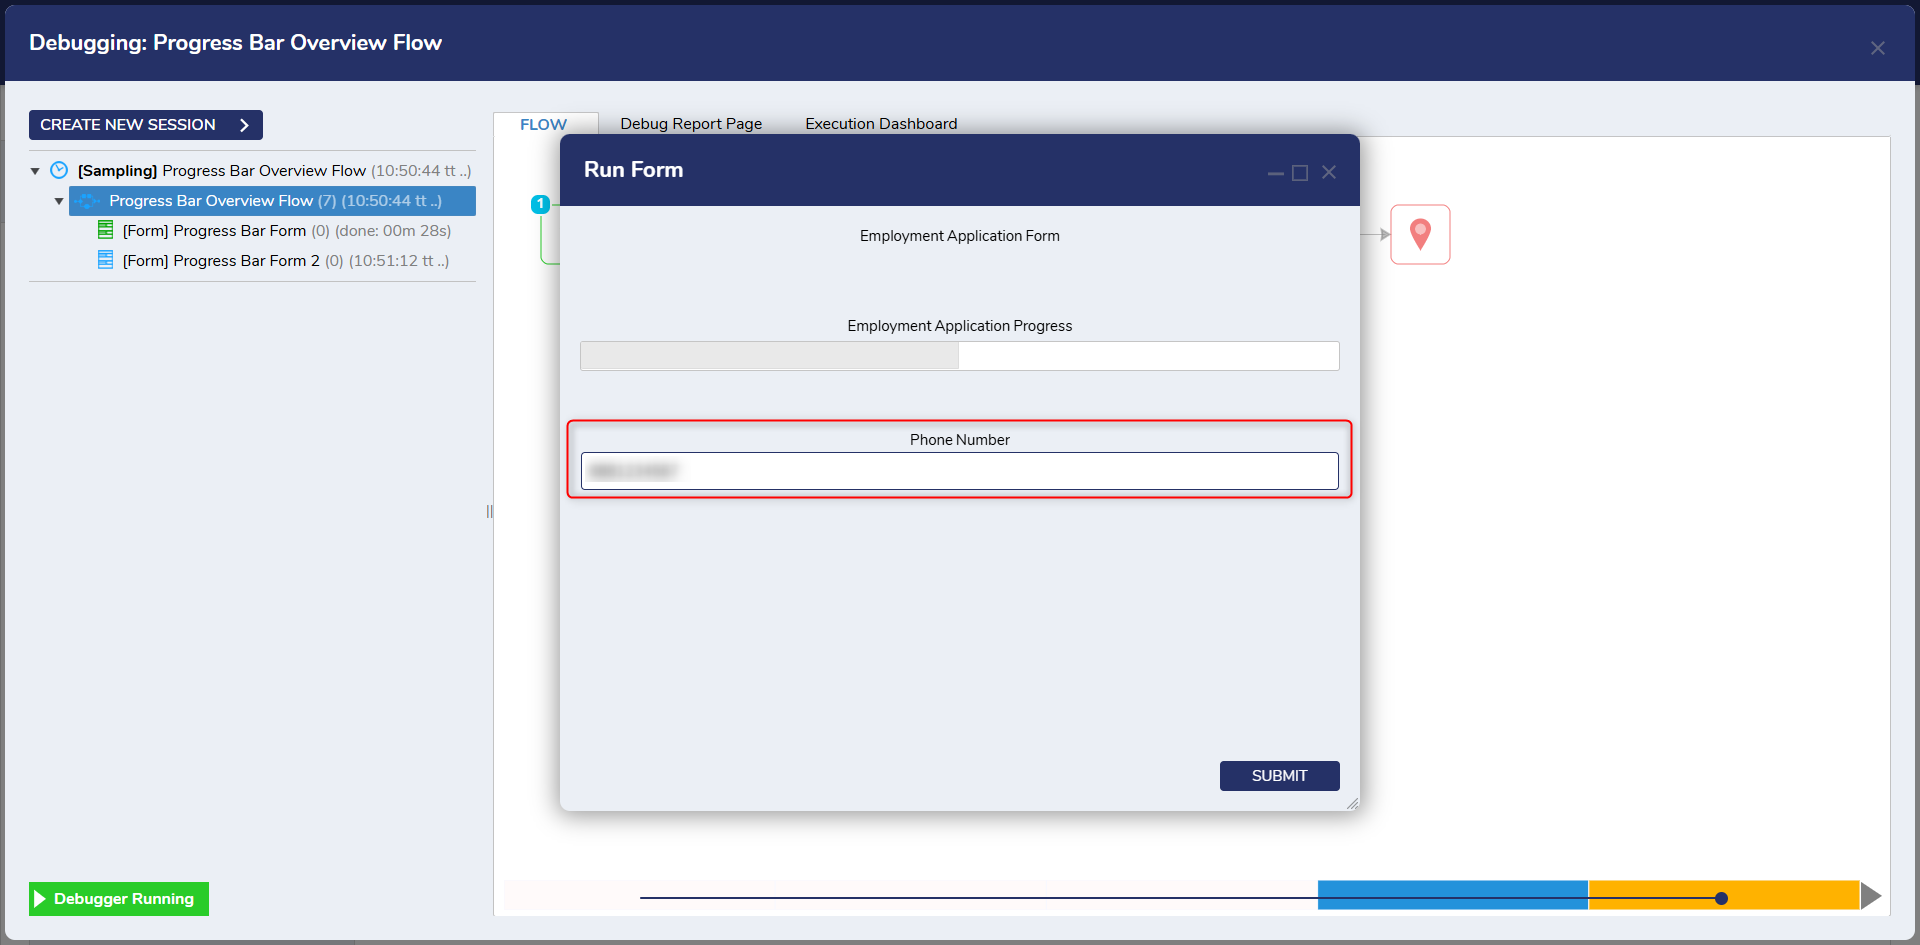
- Fill out the first Form, then click the Submit Button.
- Proceed with filling out the second Form, click Submit to submit the Input, and close the Form.