Overview
A Named Session allows for a specific user account to pass in when executing a Flow via REST, without exposing the user account information. To relay the data properly, a Session ID is automatically applied to the generated URL when the Named Session is selected.
Named Sessions do not expire; if expiration is needed, a JSON Web Tokens can be configured instead.
What changed from V8 to V9?
Version 8 | Version 9 |
|---|---|
Named Sessions were configured at the System level and were visible across the platform. | Named Sessions are now Project-level and are visible only within the Project. |
Creating a Named Session
This example will demonstrate how to create a Named Session and generate the appropriate REST URL from the Flow.
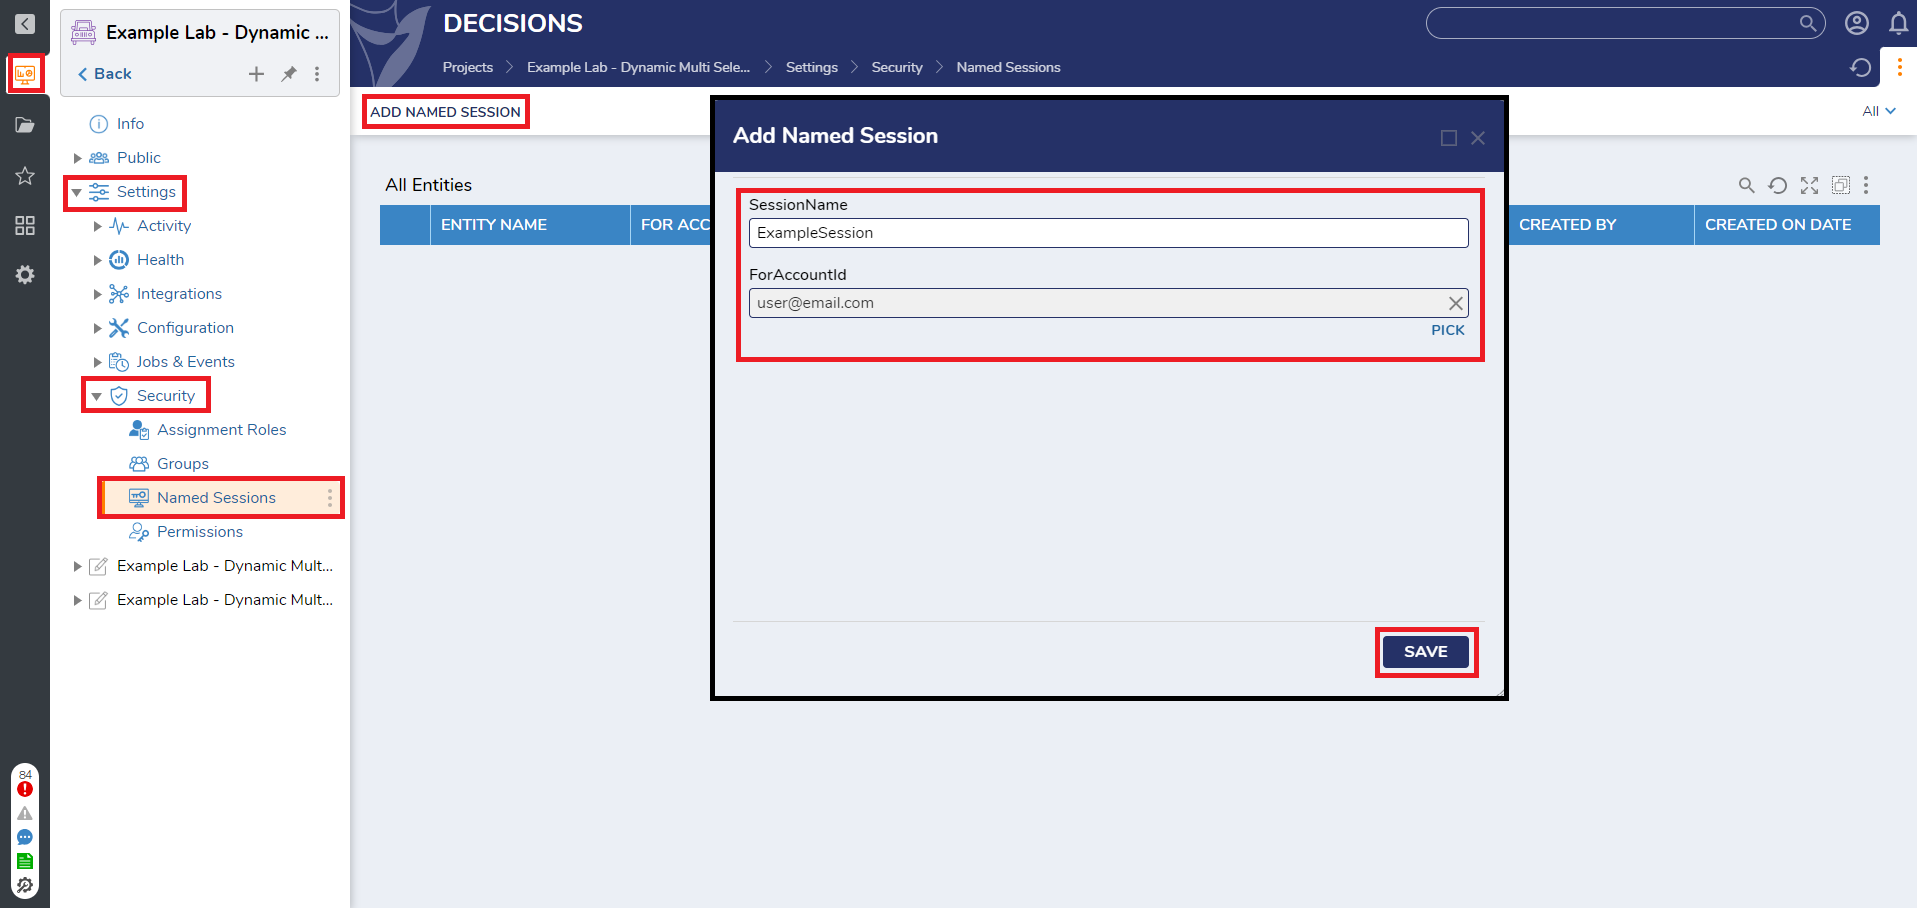
- In the desired Designer Folder, navigate to Settings > Security > Named Sessions and select ADD NAMED SESSION from the Global Action Bar.
- When the window appears, enter a name for the session. Use the PICK button under ForAccountId to select the user account it applies to.
- Select SAVE once complete and refresh the FOLDER VIEW to confirm the Named Session appears.
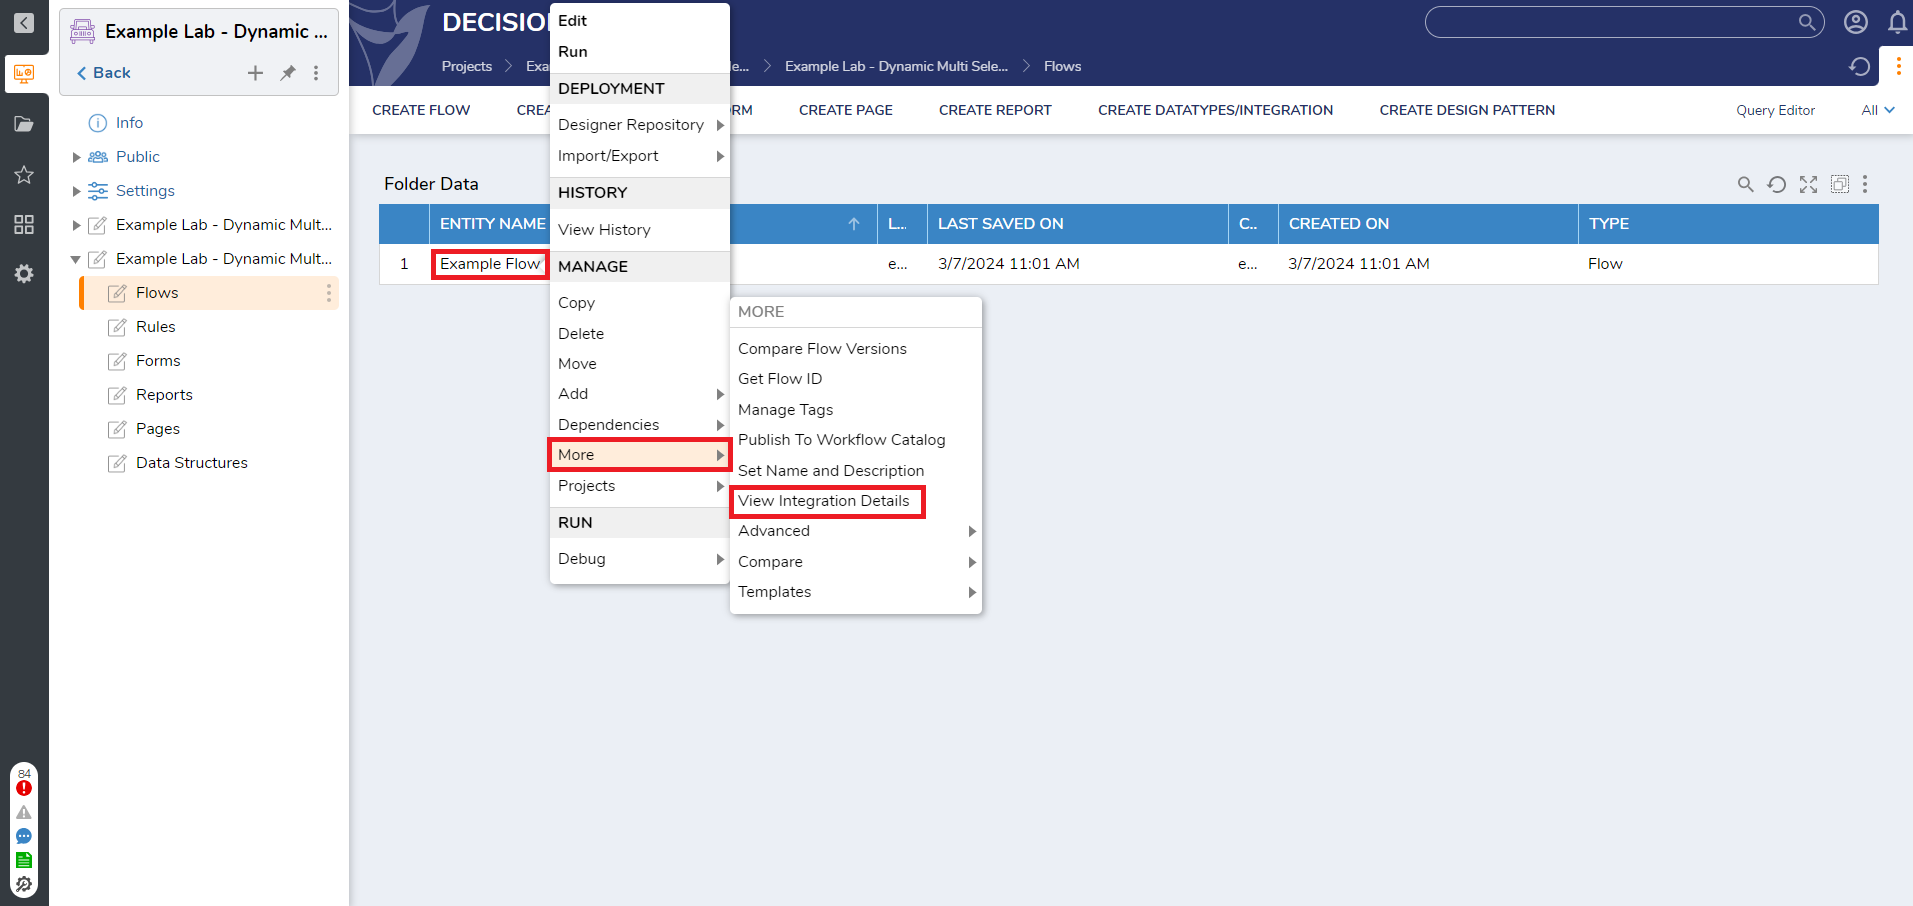
- Now that the Named Session is configured, it can be selected on the INTEGRATION DETAILS page for a Designer Element, such as a Flow or Form.
- Right-click the Element's name and in the Action Menu, navigate to More > View Integration Details.
- In the View Integration Details window, use the drop-down list for Authentication Type and choose the name of the Named Session.
- Upon the selection, all service API URLs will appear for the corresponding integration type (typically GET or POST by default).Clear Session URL ExtensionAdd &clearsession=true to the end of the URL to ensure that each time the user exits the browser after completing the Named Session Flow/Form, the session is cleared. This will allow another user to run the same Flow/Form on the same machine with a different Named Session.
Testing the Named Session
Once a named session has been configured, the named session can be tested using the Test section from the Integrations Details page of a Designer Element. To access the page, the Designer Element, such as a Flow, will need to be configured as an API Service. Once this has been configured:
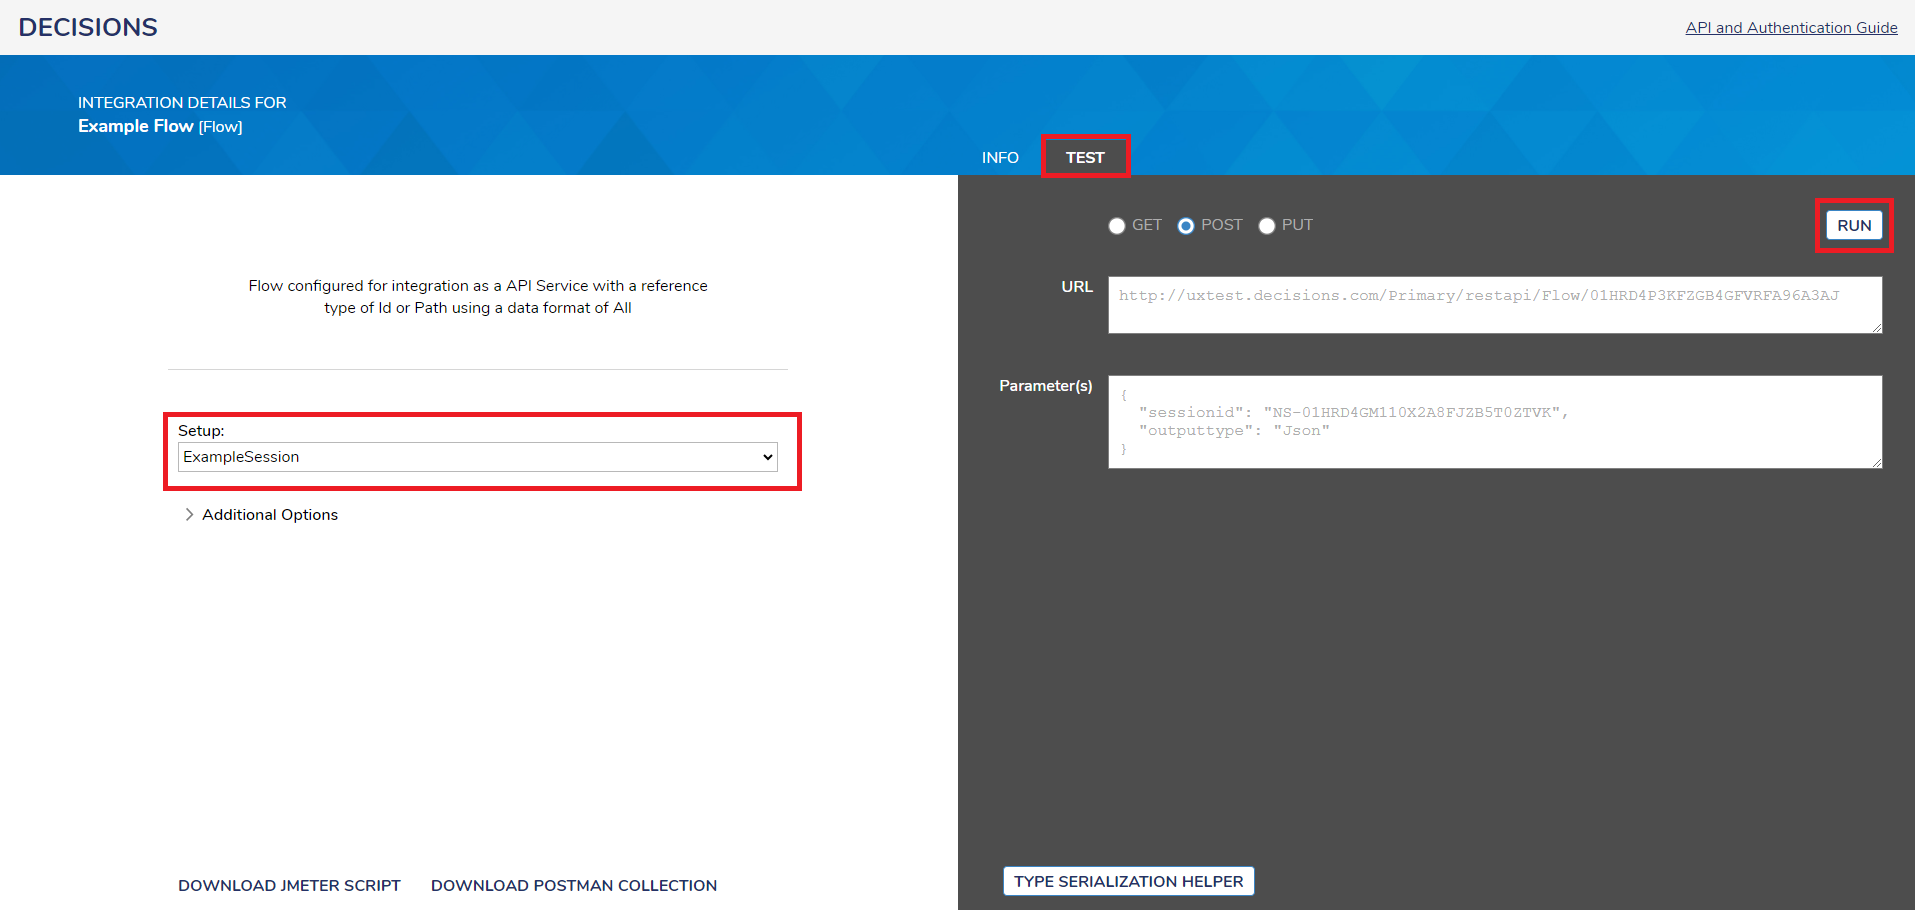
- From the Setup drop down menu, select the named session
- Select the TEST page, a URL will be selectable as a Get or Post call. Select either option then select the Run button.
- The Flow will be executed using the named session for authentication.
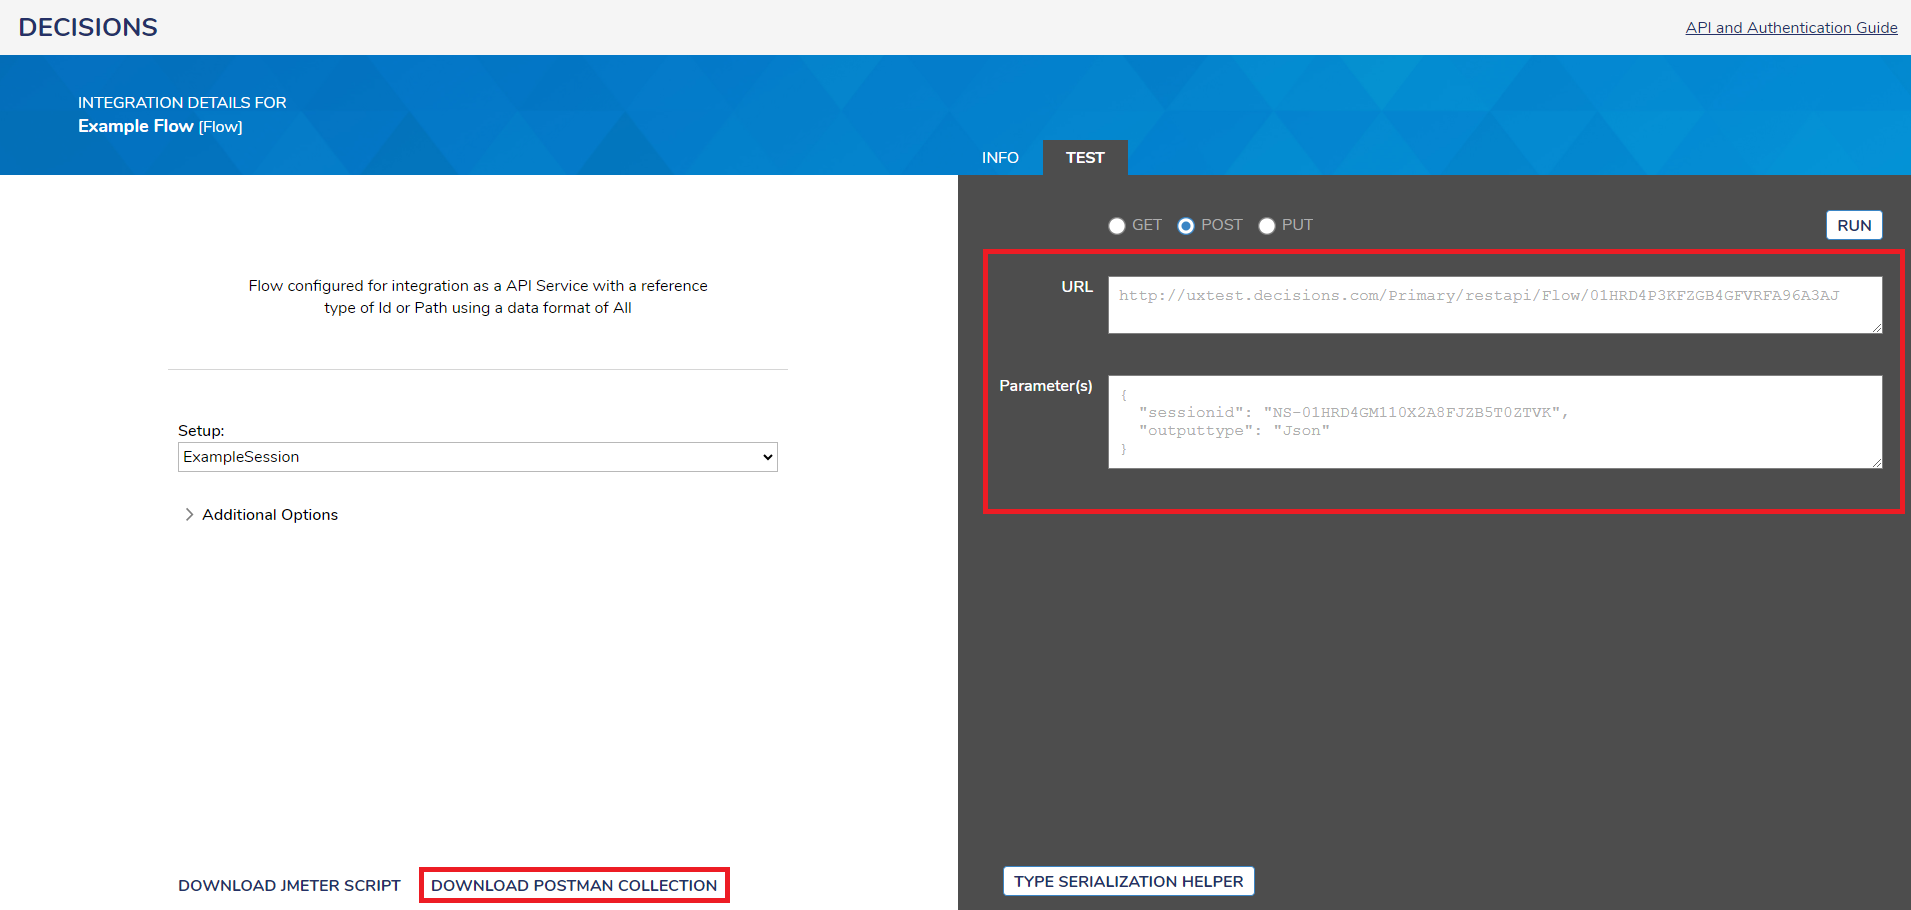
In addition, the generated URL can be used in other applications such as Postman to validate the results. The URL can be copied and used as a Get/Post request, depending on the requirements.
For Postman, a collection can be generated and imported for testing using the DOWNLOAD POSTMAN COLLECTION button. The request generated from this method will be a POST call.