Upgrading a v8 Multi-Tenancy
- 26 Dec 2023
- 2 Minutes to read
- Print
- DarkLight
Upgrading a v8 Multi-Tenancy
- Updated on 26 Dec 2023
- 2 Minutes to read
- Print
- DarkLight
Article Summary
Share feedback
Thanks for sharing your feedback!
Upgrading a v6 Multi-Tenancy?
The following document deals with upgrading v8 Multi-Tenant installations. If upgrading from v6, see Multi-Tenancy: Upgrading a v6 Environment to v8.
As Multi-Tenant environments contain multiple Tenants, the process of upgrading a v8 Multi-Tenancy differs quite a bit from upgrading other installation types.
This method is further affected by how the Multi-Tenancy was established, be it via a manual Non-Provisioned setup or via the Provisioning UI.
The following demonstrates the different methods for updating a v8 Multi-Tenancy.
Prerequisites
- Preinstalled v8 Control Instance
- At least one connected v8 Tenant Instance
Before Upgrade
- Verify in System > Hosting that the Tenant Instance is not actively running by ensuring that the IS ACTIVE value displays as False.
If the Tenant Instance is running, shut it down from the cmd prompt by pressing 'Ctrl+C'.
Alternately, Stop the service for the Tenant Instance(s) via Windows Service.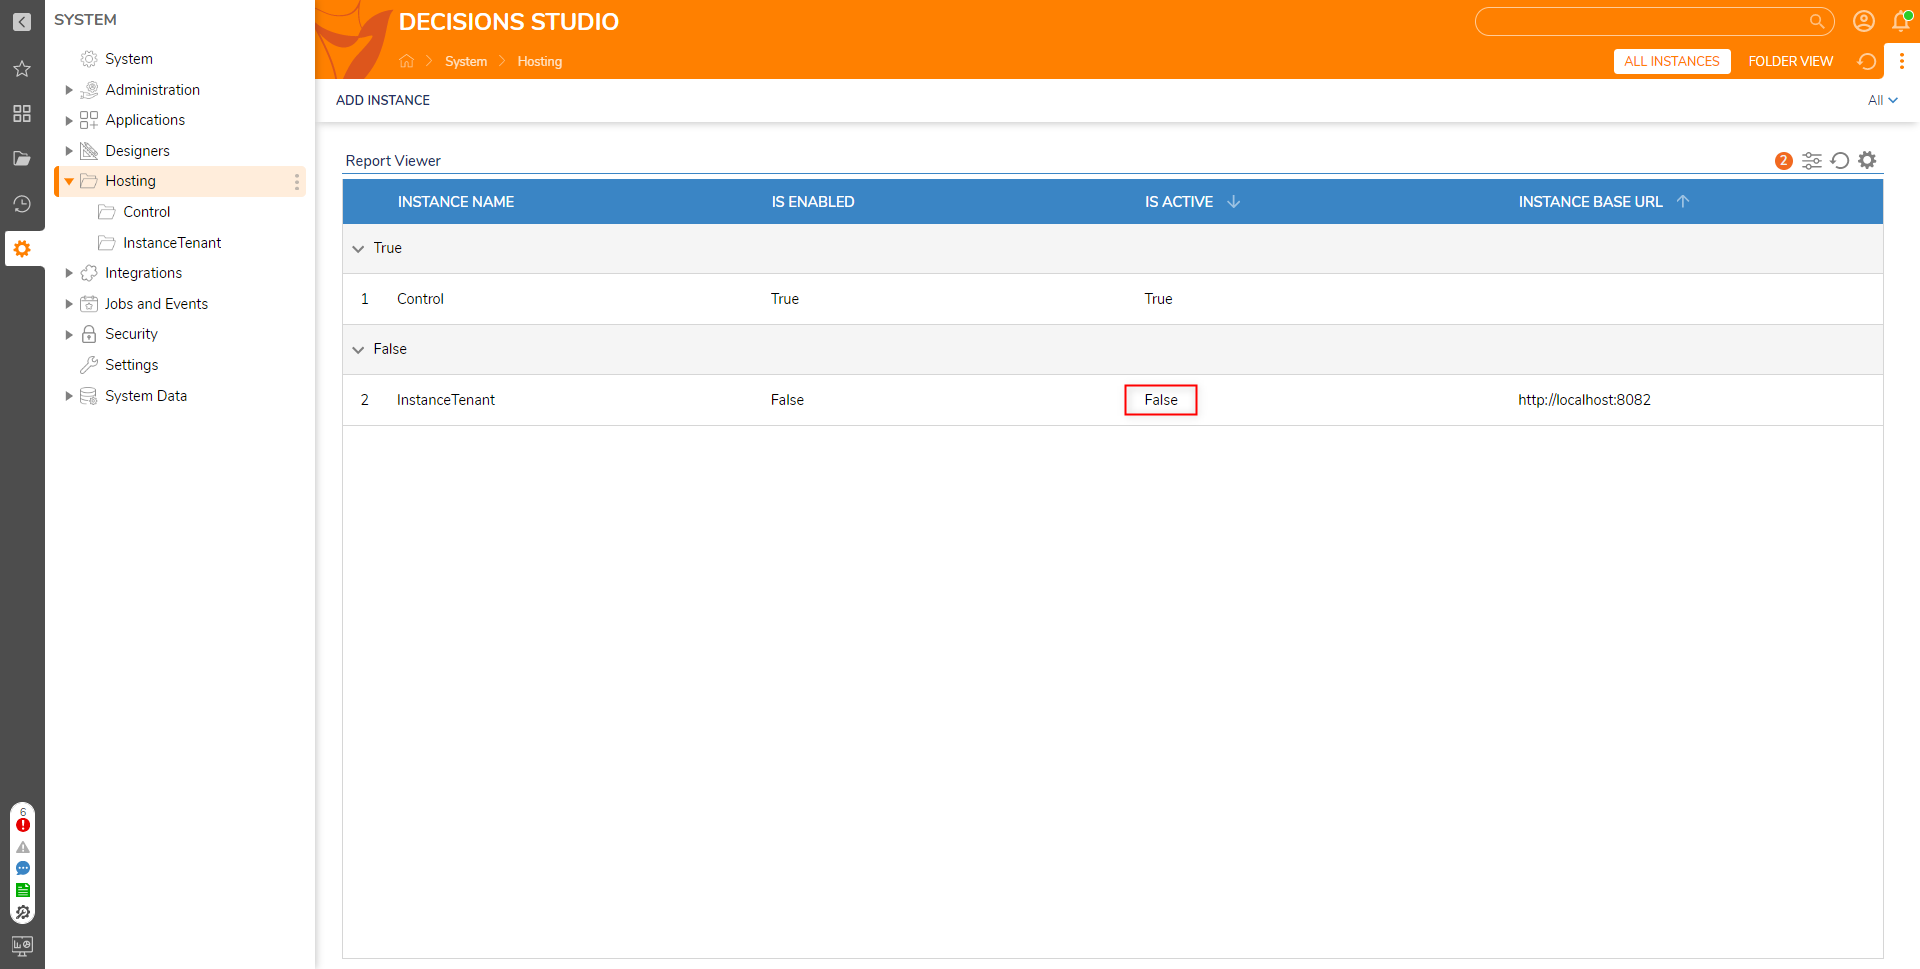
.png)
- Proceed to the Hosting option that was previous used, either Provisioned or Non-Provisioned.

.png)
Non-Provisioned v8 MT
- From the Control Instance in the local file system, download the desired update version from Decisions Releases.
Then, from the specific version's page, click BROWSE FILES.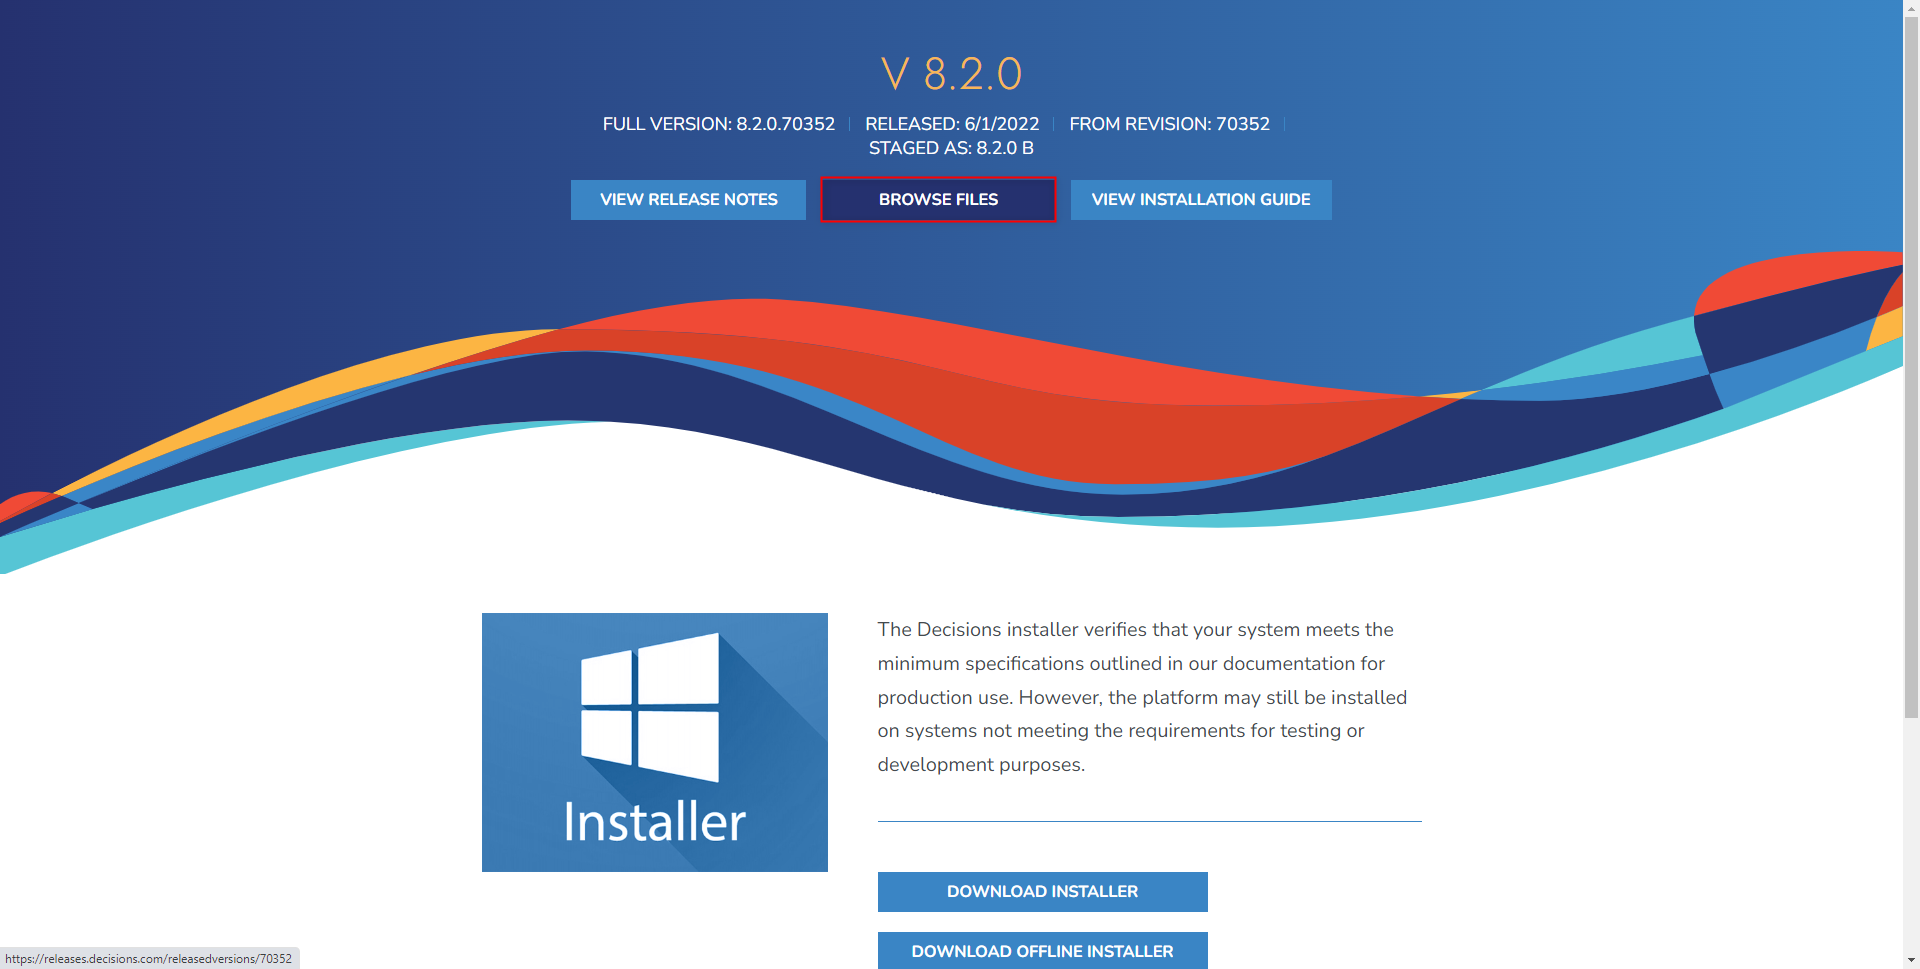
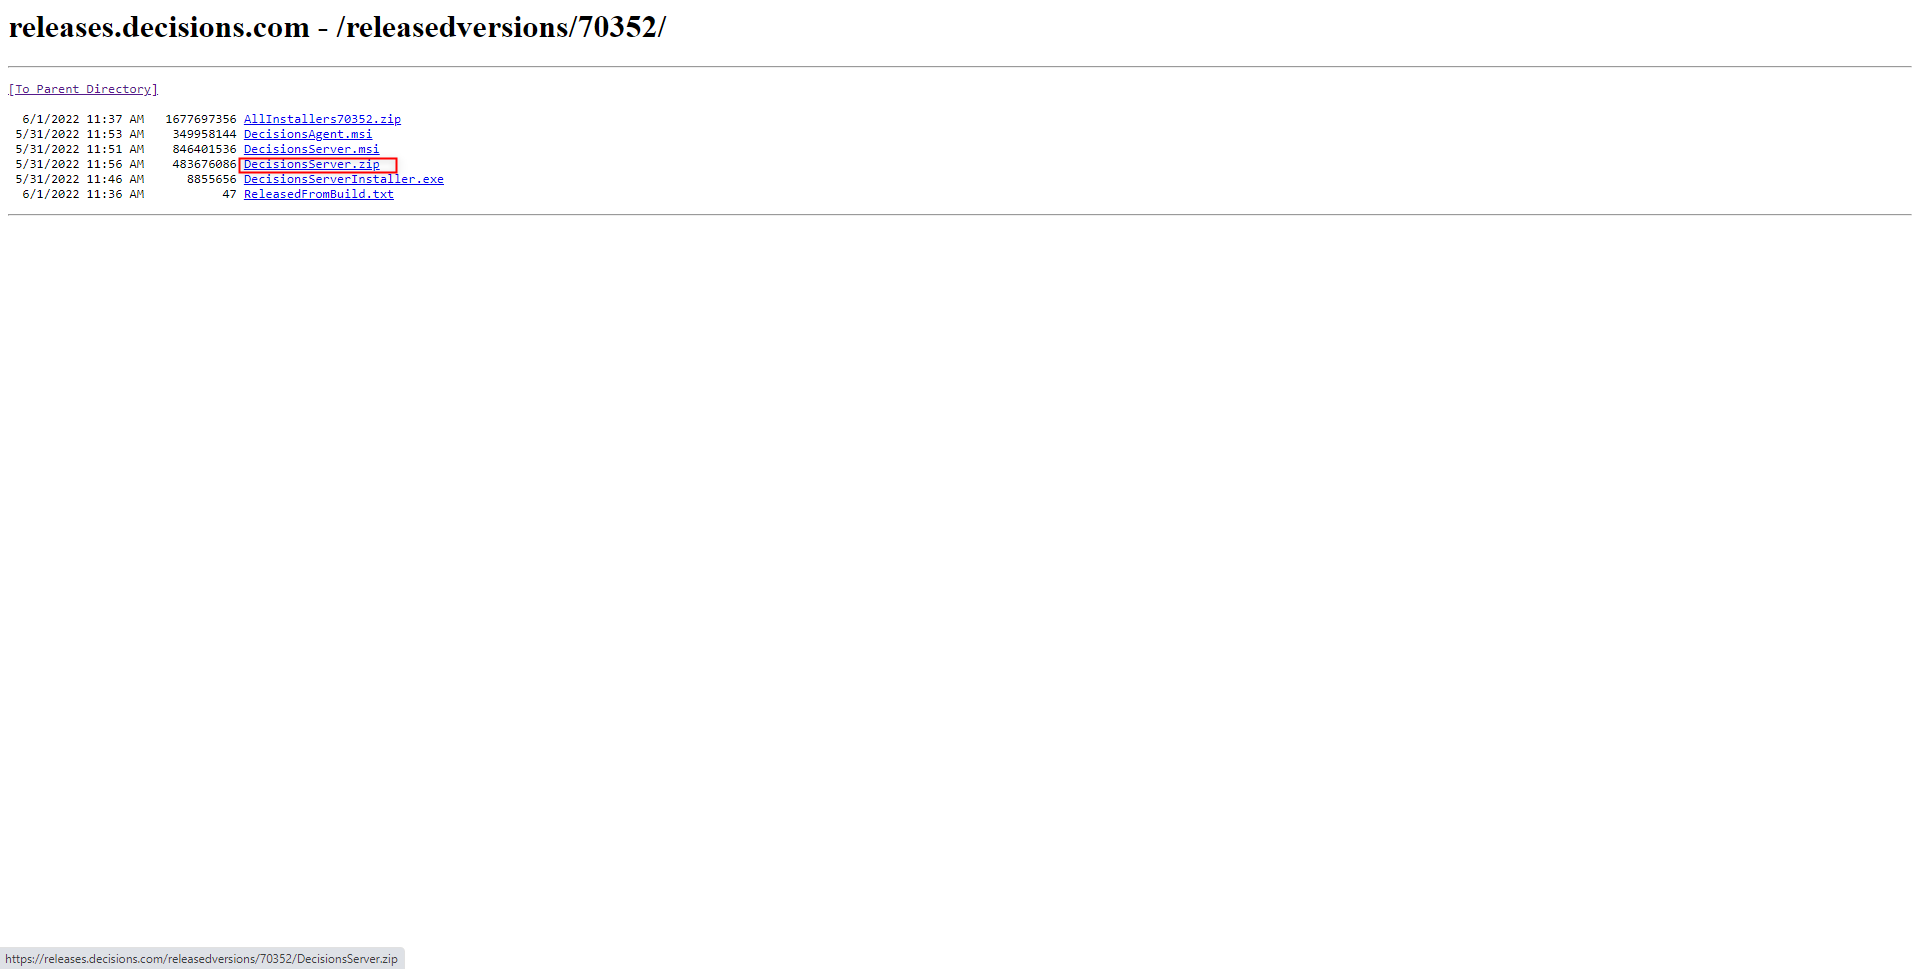
- From the resulting page, download the Tenant .zip file (DecisionsServer.zip).
- From the Control, run DecisionsServerInstaller.exe.
From the Decisions Installer, click UPDATE and proceed through the upgrade process; this concludes the Control Instance update.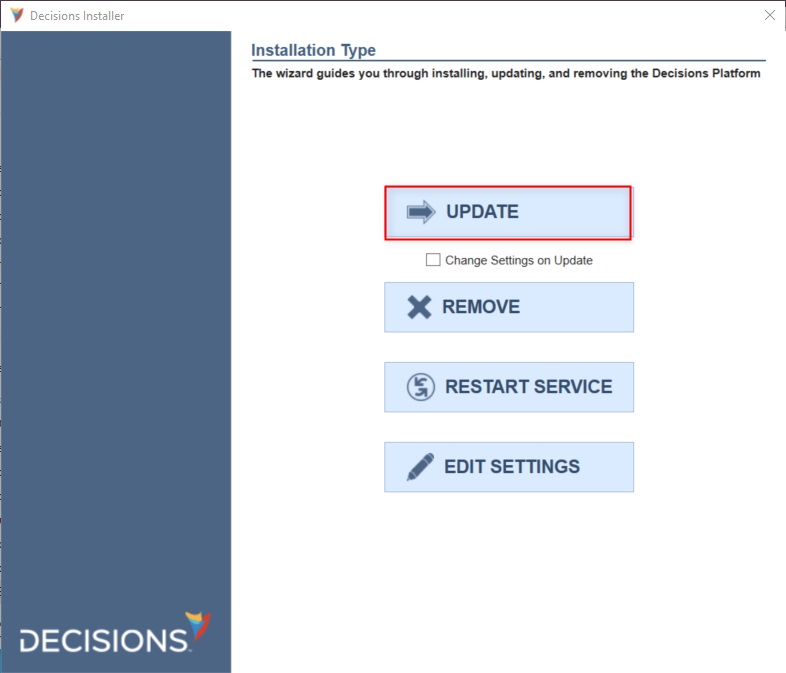
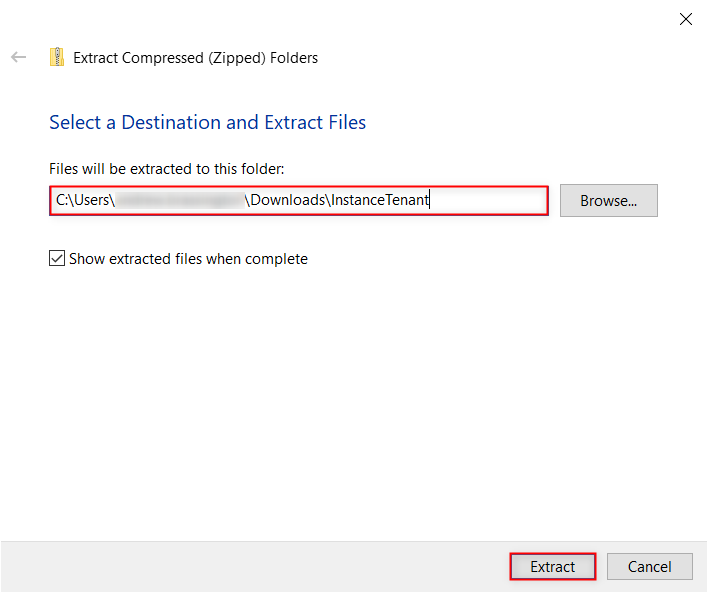
- Extract the contents of the .zip file, and Rename the folder to match the Tenant Instance.
- Navigate to C:\Program Files\Decisions\Decisions Server\Instances\[Tenant Instance Name], copy Settings.xml into the extracted .zip file, and when prompted, select Replace the file in the destination.

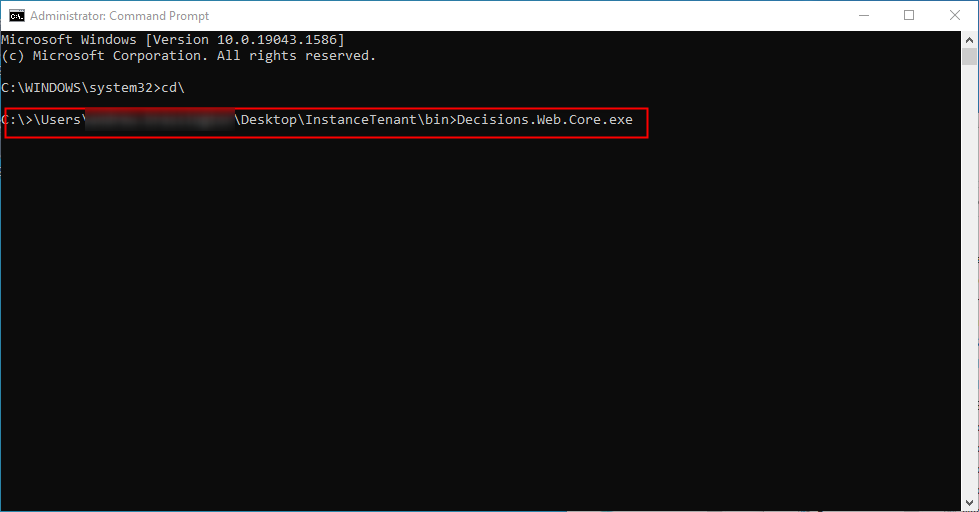
- Run a Command Prompt as an administrator and run Decisions.Web.Core.exe from the extracted Tenant folder to update the Tenant Instance.


Provisioned v8 MT
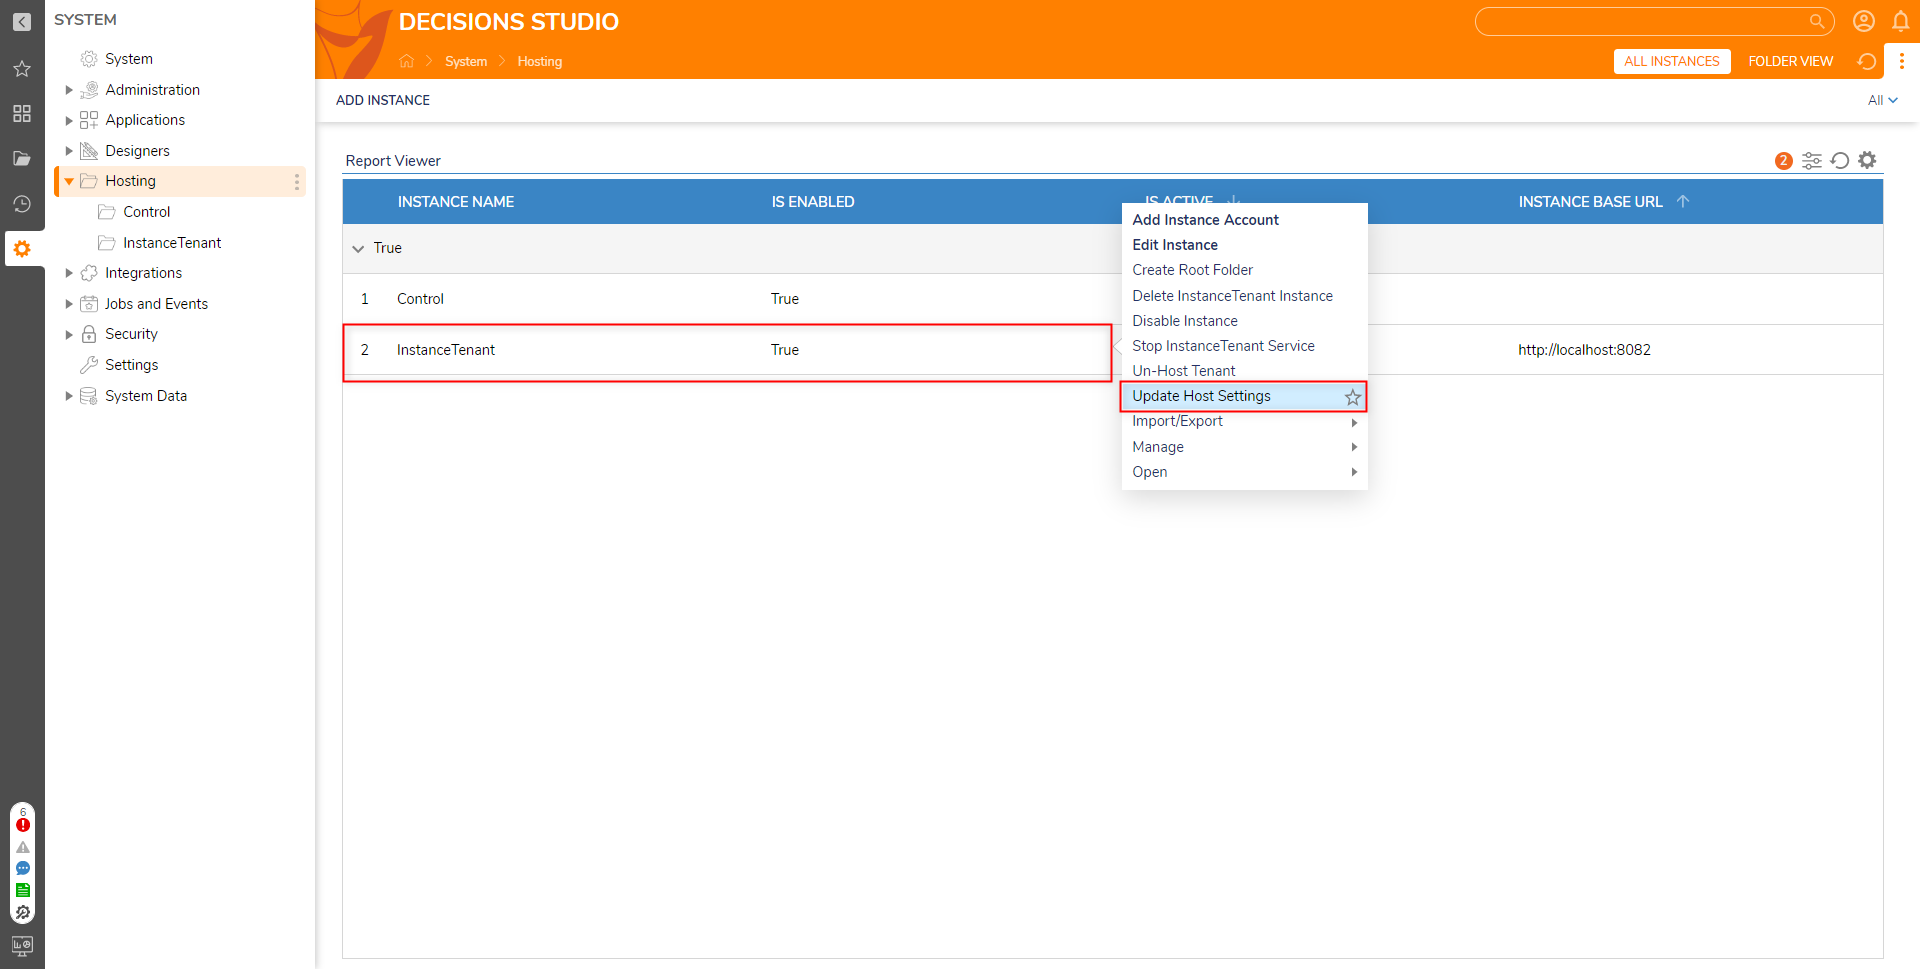
- From the Control Instance, navigate to System > Hosting. Then, right-click the Tenant Instance and select Update Host Settings.
- From the resulting window, copy the Database Connection String, Http Port, and Instance Base URL into a text editor. This ensures that the updated Tenant uses the same database and Port number.
Make additional note of the Database Type, then exit the window.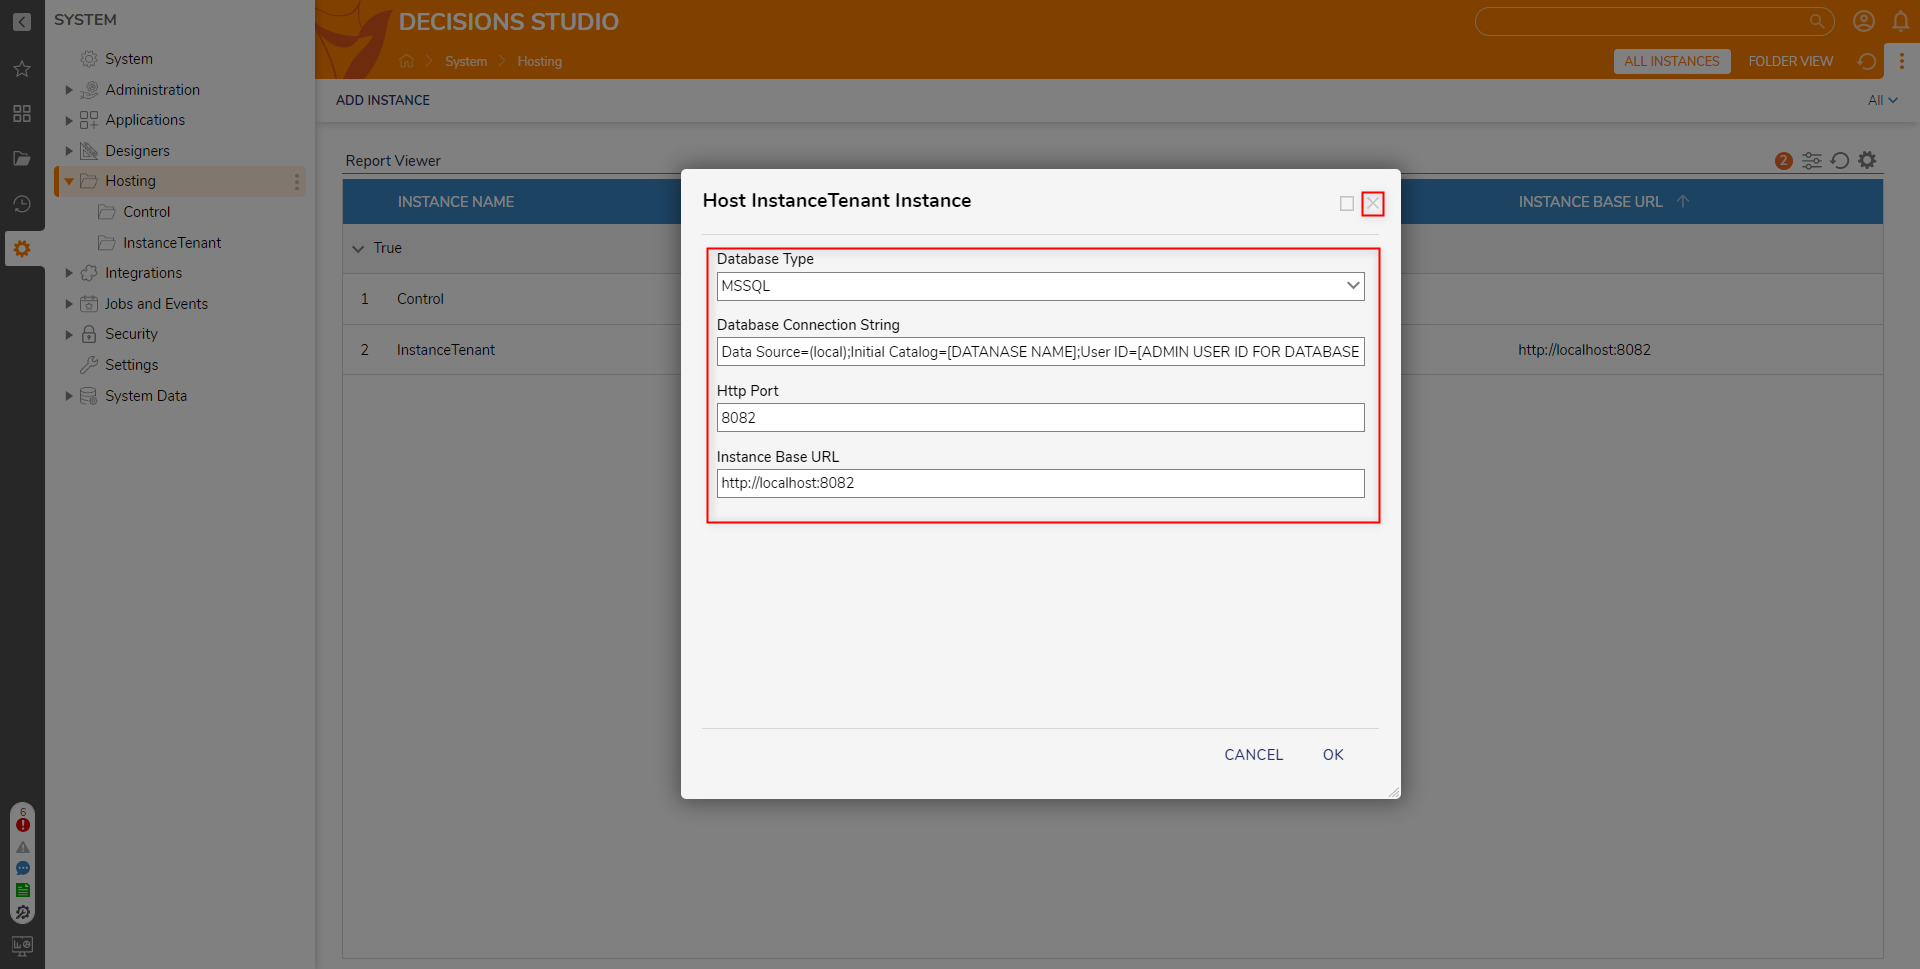
- Download and run the desired upgrade version of DecisionsServerInstaller.exe from Decisions Releases on the Control Instance.
This concludes the update process for the Control Instance. - Navigate back to the Hosting Folder, right-click the Tenant Instance and select Host Instance Locally.
In the resulting window, provide the previously copied settings for the Tenant, then click OK. This concludes the update process for the Tenant Instance.
The Tenant Instance will appear under C:\Program Files\Decisions\Decisions Server\Instances. The update progress can be tracked by periodically reopening progress.txt in the Decisions Server folder.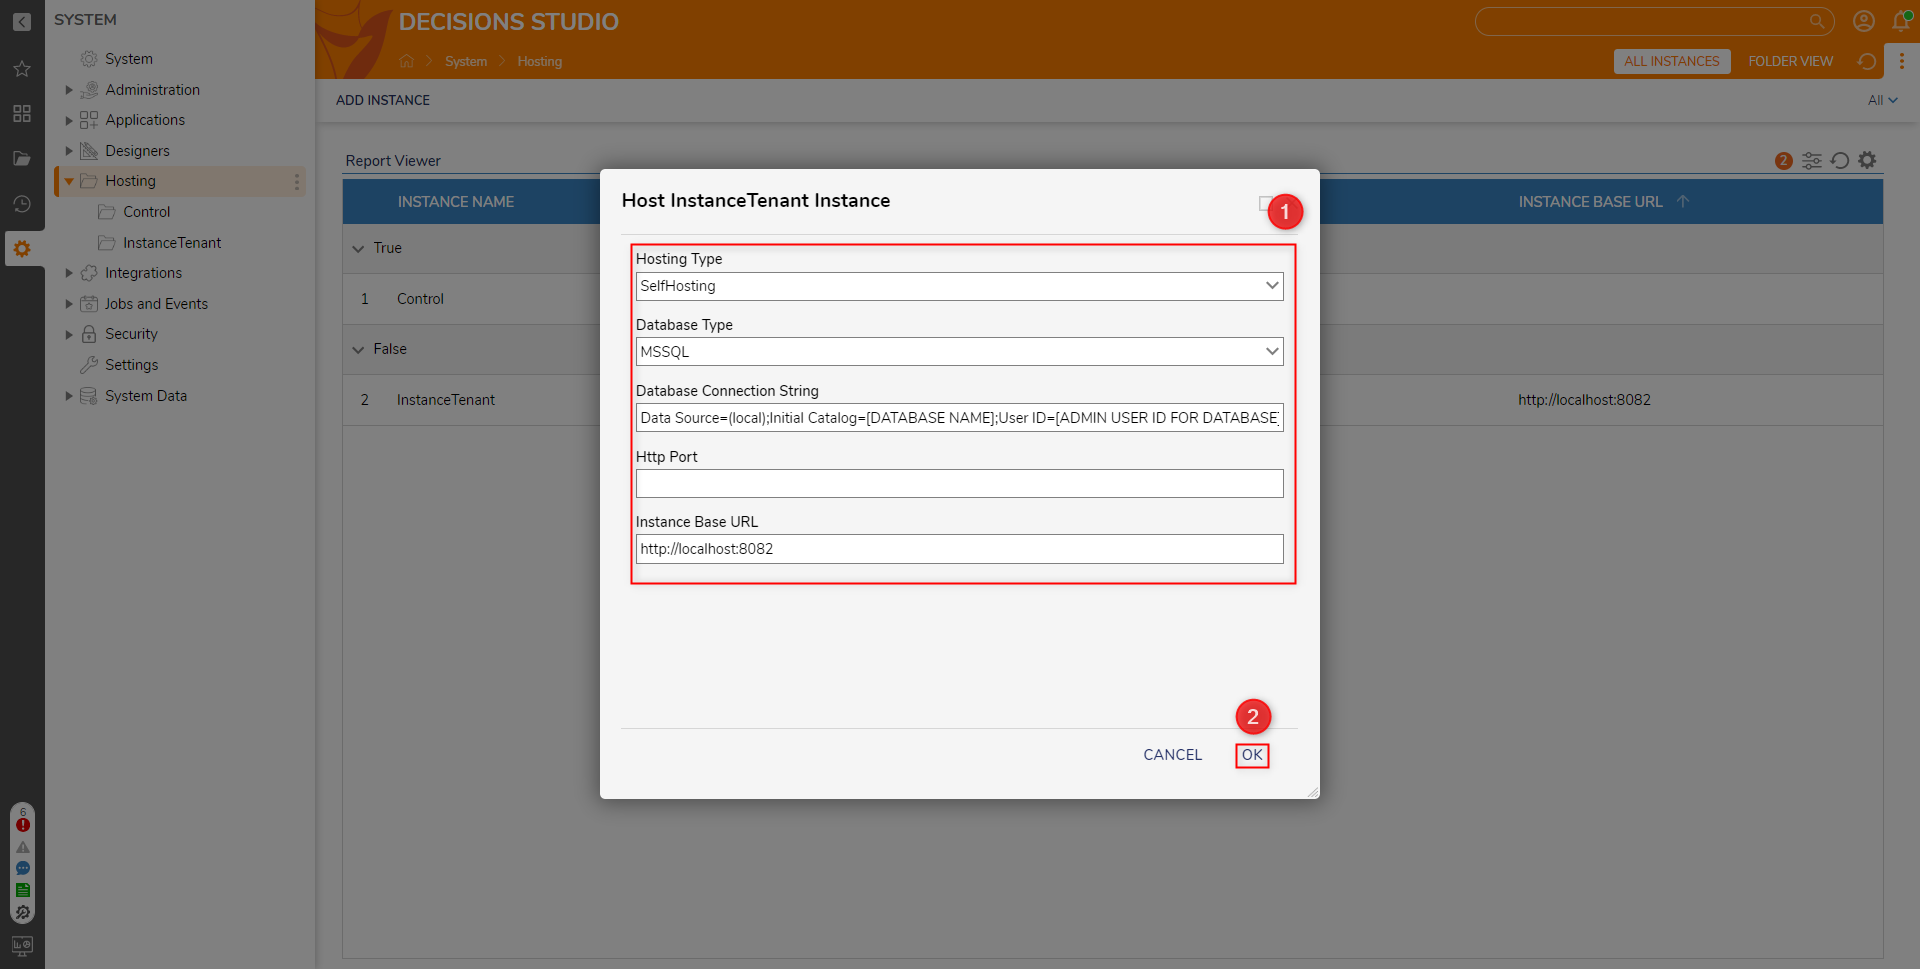


For further information on Multi-Tenancy, visit the Decisions Forum.
Was this article helpful?